• 🏆 Texturing Contest #33 is OPEN! Contestants must re-texture a SD unit model found in-game (Warcraft 3 Classic), recreating the unit into a peaceful NPC version. 🔗Click here to enter!
  • It's time for the first HD Modeling Contest of 2024. Join the theme discussion for Hive's HD Modeling Contest #6! Click here to post your idea!

Second Human Book of Arkain (Patch 1.29.2 or newer!)

This bundle is marked as director's cut. It exceeds all expectations and excels in every regard.
arkain_2020_x200-png.369838

! No longer updated !
Check out the
True Story of Arkain for updates !


full


A Campaign Series made by Shar Dundred

! Requires Version 1.29.2 or newer !
You are not allowed to publish any edited version of any Arkain map! This includes but is not limited to Reforged edits!


Story

Betrayed, invaded, defeated.... The Humans of the Empire suffered greatly in their fight against the Demons. They have now lost another kingdom in the war against the Demons and the inner conflicts are just about to start. Only a strong hand and leadership can lead them to victory against these odds.
Command the cruel General Gardon Bloodclaw and unite the estranged factions of the Empire by any means necessary. Withstand your enemies, both inside and outside, and face the horrifying Demons.
The question is... how far are you willing to go for absolute victory? Will you have to sacrifice your humanity in order to achieve victory? Only time will tell.


Campaign Series Info

The Legends of Arkain is a campaign series which takes place on the world Arkain.
The races of Arkain fight against the demon invaders, who try once again to enslave every being on Arkain. The Humans, the Orcs and the Undead will have to make a stand against them... or face complete annihilation or enslavement by the Demons.
This campaign series will consist of actually three different series. There will be a Human, an Orc and an Undead campaign series. They will all run in the same timeline but will present three different stories and outcomes. When they are all finished, it's completely up to you, who wins this conflict.
Those, who win the war, will write the history.

You like the campaign?
Click here to see the progress of the series!

Click here for the First Human Book!
Click here for the First Orc Book!
Click here for the First Undead Book!


Click here for the Second Orc Book!
Click here for the Second Undead Book!

Let's Play made by @Jayborino!
Features

- Three different storylines/campaign series
Take control of one of the three factions, the proud Humans of the Empire, the plundering and strong Orc Clans or the mysterious Undead Nexus and their endless army of the dead, and face the demonic invasion as well as other struggles that await you.
- New units
Command units, you already know, as well as completely new units with new upgrades and abilities.
- Decide the fate of Arkain
At some points of the campaigns, you'll have the opportunity to decide things, that affect the storyline, characters and sometimes even the chapters you play or how you have to play them. By doing or, well, not doing certain side quests, you can also affect the campaign.
- Three difficulties
You can play the campaign in either easy, normal or hard difficulty, just like in the original WC3 campaigns. It will impact on the AI difficulty and scripting as well as other minor changes.
In easy version, for example, the AI won't rebuilt lost buildings.

- Full Jass AI
In this campaign series, every single AI is written in Jass instead of being created with the AI editor. This makes the AI more intelligent.
- Universal hotkeys
All abilities, units and buildings use QWER hotkeys.
- Race Mechanics
Every available race has its own unique race mechanic to improve gameplay - and, in some cases, to add new ways influencing the story.

Characters

full
General Gardon Bloodclaw
General Gardon is the most ruthless and merciless general in the Empire. He is known for using every available weapon against his enemies without showing any pardon. His background is a mystery. He simply appeared out of nowhere and became general. He proved very fast, that he got that position for a good reason, destroying the enemies of the Empire with fast, merciless effectiveness. He is the commander of the Ironfist, an elite force of the Empire, which often carries out top secret missions for the Emperor himself. According to rumors, Gardon himself enjoys the favor of the Emperor - much to the frustration of many higher-ranking Imperials. Yet none would dare make a move against him, as in the past, such attempts ended in disaster.
The fact that Gardon was forced to retreat because the inner conflicts of the Imperials had weakened them too much, infuriated him a great deal and he longs for a chance to take revenge on the traitors.

full
Admiral Merlon Seabright
Both in the Imperial and Royal Fleets, Admiral Merlon Seabright is a living legend. It is said that he was the captain of the ship that killed the Terror of Feraldir, a gigantic, demonic sea monster that had terrorized ships for thousands of years. Merlon dislikes staying on the shore for longer than absolutely necessary, for the sea is his true home. He is said to have been a critic and even an enemy of Gardon Bloodclaw until the two of them were assigned to a special mission. After that mission, Merlon remained silent about Gardon and even proclaimed to assist Gardon whenever he was needed.
Today, he is Gardon's most loyal ally who is not part of the Ironfist.

full
Larine the Exile
Larine used to be the personal guard and a good friend of the elven queen. However, she began criticizing the fact that the Elves were hiding in their woods instead of fighting side-by-side with the Imperials and Dwarves. She blamed the Queen for the fact that the Elves were despised by many of the Humans who had been forced by their surperiors to defend them. She left the Elven Kingdom and was later exiled. She went to the court of King Dorten of Kerrel and started working for him, gaining his respect. Trained in both archery and nature magic, she is ready to fulfill her surperior's every command.

full
Lady Cora Redfist
Following her father's wishes reluctantly, Cora joined the Imperial Army instead of continuing her studies in the Imperial Academy. Having proven herself as a valuable asset of the army, she was given the offer of joining the Imperial Navy. She had always loved the sea and knowing that the Imperial Navy would enable her to progress further in her studies of water magic, Cora accepted the offer and became a member of the navy, later serving as the liaison officer between the Imperial Navy and the Golden Guard.
Over time, she developed a certain dislike for Renald van Durce, the general of the Golden Guard, considering him arrogant beyond measure.

full
Lord Brian the Fallen
Long ago, before the Empire had set sail over the sea, Lord Brian was a high-ranking member of the Emperor's court. People were afraid of the lord in dark armor who was said to study the forbidden dark arts of Shadow Magic. One day, he and his family disappeared without any trace of their whereabouts. Since he didn't return after many years, people started to believe he had died. However, in truth, he had discovered ancient secrets and power. Whatever happened to him, it made him immortal and gave him unknown power and knowledge. It remains a mystery what he has done over the past centuries.

full
High Lord Inquisitor Renald van Durce
Being one of seven younger brothers of the former emperor and therefore one of the uncles of the current Emperor, Renald could have lived a peaceful life of luxury in the Imperial palace. However, he loathed his other brethren for letting the luxury make them become lazy and corrupt. Becoming a great warrior-priest and leader, he himself led the final assault that removed all Demons from the continent of the Empire. Renald had always been arrogant, but his success made it even worse. However, his loyalty towards the Emperor is almost limitless and only the Emperor himself can command van Durce. Whenever he and his Golden Guard are sent on a mission, the Emperor sends his finest, most loyal and most arrogant soldiers.
His full title is:
High Lord of the Imperial Court, Lord Inquisitor of the Order of the Righteous, Lord Consultant of the Emperor, General of the Golden Guard.

Click here to learn more about the other characters!


full

171388-albums8729-picture107345.jpg


171388-albums8729-picture107346.jpg


171388-albums8729-picture107347.jpg


171388-albums8729-picture107348.jpg


full

full


Initial Release

General:
- After finding out what caused the game to crash in the current iteration of 1.30, I fixed the Angelic unit, selecting it should no longer cause any crashes (Don't worry, I have fixed this with a 1.29 iteration, you do not have to update to the latest patch and I still advise against doing that, but those of you who already patched should be better off now)
- Increased the durability of Lord Brian the Fallen
- Armor of the Holy Bastion now also increases the hit points by 500 in addition to its 15 armor bonus
- Fixed Spears of Pain icon

Chapter Twelve:
- Added Resistant Skin for the Purificator in both A and B

Chapter Thirteen:
- Increased hit points of Krogar the Conqueror by 500

General:
- Replaced Krogar's Stampede with The Horde, summoning a group of permanent Moghtar warriors
- Praxeus gained the Memory of the Past ability
- Plating no longer increases armor and reflects damage, instead it now reduces all inflicted damage
- Lord of the Shadows no longer splits Brian, instead it allows him to summon up to four permanent Shadow Creatures from corpses
- The amount of trainable Black Dragons is no longer limited to 2, go train more, go nuts
- Replaced Horgar's Barrier ability with Lightning Rune, summoning a rune that attacks enemies
- Changed the model for the Healing Rune
- Horgar and Zarin have both received Spell Resistance
- Changed Gardon's title from Butcher to Warmonger
- Gardon and Praxeus now both have a new permanent item

Chapter Seven:
- Changed a few epilogue lines for the Undead if Larine becomes queen

Chapter Eleven A and B:
- Slightly edited and fixed some dialogues
- Added new dialogues

Chapter Eleven A:
- Fixed the issue with Zarin's portrait not appearing when speaking

Chapter Eleven B:
- Added more enemy Black Dragons and Black Drakes to make sniping the enemy bases with Destructors less efficient

Chapter Twelve A and B:
- Removed the lines coming from the three liches in the intro cinematic

Chapter Fourteen A:
- Salana and Larine may both now call on the Elven Forces (Salana may even call upon a certain hero if she is still alive)

Prelude:
- Adjusted the lines at the beginning of the map regarding the choice system from the First Human Book

General:
- Fixed the description of the Old Amulet

Chapter Nine:
- Praxeus should now start with his proper item, the Old Amulet, rather than the Ring of the Exile

General:
- Fixed the tooltip of Lightning Rune
- Vail's leadership bonus now correctly states that the increase is permanent
- The campaign no longer uses the latest melee patch due to several balance changes messing up things, a few unit changes still apply to the campaign however
- New icon for the Bowman
- Increased the hit points of Knights to 840
- Some grammar fixes
- Dark Secrets now displays the duration
- Fixed the hotkey for Lord of the Shadows

Prelude:
- Fixed the issue with the prelude finishing too early

Interlude Two:
- Fixed the skipping issues related to this cinematic

Chapter Nine:
- The hotkey for sending Marin lumber has been removed

Chapter Thirteen:
- Fixed the tooltip for Korgar's ultimate

Chapter Fourteen A:
- The hint now tells you that Salana/Larine can also summon a wave of allies

Chapter Fourteen B:
- The Old Amulet item should no longer lie on the ground

General:
- New upgrade "Skull Shield" available from Chapter Seven on

Chapter Eight:
- Replaced most units of the Order of the Flame with new, Order-specific ones

Chapter Five:
- Replaced the hero in the yellow base with a weaker hero to decrease difficulty

General:
- Upkeep reworked: Low Upkeep now gives you 8 instead of 7 gold and High Upkeep now gives you 6 instead of 4 gold

Chapter Seven:
- The items you get from Larine if you chose Salana are now the ones from Chapter Six instead of Chapter Five

Chapter Twelve:
- Replaced the building models used by the Dominion to better showcase their new organisation
- Changed the names of some edited buildings

Chapter Thirteen:
- New model for Orie Redfist
- New model for Red Mages

Chapter Fourteen A:
- Replaced the building models used by the Ironfist to better showcase their new organisation
- Replaced the models used by Peasants and Militia
- Changed the names of some edited buildings

General:
- Most maps now have their own unique loading screen made by @Rhapsodie

General:
- Shieldbearer Changes:
* Decreased the damage dealt by Shieldbearers by 3
* Decreased hit points from 1500 to 1100
* Increased food cost from 4 to 5
- Reduced the movement speed of Warmechs in air form
- Increased the food cost of Black Dragons from 8 to 10
- All workers now start with Repair activated automatically
- New model & icon for Sir Praxeus "The Holy Bastion" Braelon
- New icon for the Order of the Holy Bastion leadership bonus

General:
- Several tweaks and fixes (including changes that fix some bugs caused by newer Blizzard patches)
- Changed & Replaced several unit types and hero models to fit their kingdom/faction
- New models for Thanok & Claire (courtesy of @deepstrasz)
- New model for Shieldbearers (courtesy of @HerrDave)

Chapter Eight:
- Replaced Brutes with Firestarters

General:
- New model for Duke Redfist (courtesy of @Rhapsodie)

General:
- New model for Sir Jay Bubblerino (courtesy of @deepstrasz )

Chapter Eleven:
- Fixed the loading screen of Chapter Eleven

General:
- Fixed the food cost for Black Dragons (was 8, should have been 10)
- Fixed the button positions of Dragonhawk Riders and their Cloud upgrade


Models & Skins:
Blizzard Entertainment
67chrome
epsilon
Wandering Soul
infrenus
Tauer
AndrewOverload519
Mephestrial
Dojo
PrMosquito
Hawkwing
Em!
dickxunder
acagnip
Uncle Fester
Frankster
Mc !
IamMclovin
AhhFreshWeeD
Sin'dorei300
Elenai
Kuhneghetz
CloudWolf
alreadyused
Dark Hunter1357
Dmitry Rommel
Kitabatake
Shar Dundred
RazorClawX
Uljimasa Hojo
eXciTe
Sellenisko
frostwolf
-Grendel
Skipper
Deolrin
gookywooky
Callahan
BlinkBoy
Hueter
Coinblin
supertoinkz
SuPa-
Tarrasque
Power
Afronight_76
chr2
olofmoleman
imforfun
Deolrin
Pyramidhe@d
HerrDave
Meteor_demon
kangyun
Kael Theron
PROXY
JetFangInferno
JesusHipster
Makoodzaka
Rizz_Boomer
Arowanna
Rhapsodie
deepstrasz


Icons:
Blizzard Entertainment
Uncle Fester
CloudWolf
xylign
SkriK
CRAZYRUSSIAN
Darkfang
GreyArchon
67chrome
Fjury
PrMosquito
INSEKT
Muoteck
dickxunder
Frankster
CloudWolf
Kuhneghetz
Elenai
Heinvers
Shar Dundred
Uljimasa Hojo
SinisterX
Darkfang
Hemske
Palaslayer
NFWar
Hellx-Magnus
Justicebringer
Sin'dorei300
sigelang
Mr.Goblin
Mythic
antihero
Sellenisko
-ToasT
jigrael
Just_Spectating
APproject
Pins
Eagle XI
kangyun
-Grendel
BLazeKraze
Mc !
Kael Theron
Stanakin
JollyD
The_Silent
-Berz-
chr2
olofmoleman
San
Scias
Akolyt0r
Peekay
Edge45
ChevronSeven
4eNNightmare
Arowanna


Music:
Bastian Kieslinger - Tears of the Mire (used in Interlude Four)

Campaign Preview Screen:
Heinvers

Campaign Logo:
Mythic

Loading Screens:
Rhapsodie

Campaign Chief Development Tester and Grammar Genius:
Kasrkin

Additional Testing:
Championfighter25

Terrain Improvement:
Imperator (Prologue, Chapter Four, Nine, Eleven, Twelve)
Heinvers (Chapter Three & Chapter Eight)


Everything else made by:
Shar Dundred

First Supporters:
Theoden of KoMe
Chen
youness
Kasrkin
kakuzu
BandolXD
Heinvers
Imperator
Veritas 117
PlankingWolf


Please contact me via PM if I forgot to give you credit for your resource!


To Blizzard Entertainment for this great game.
To Turnro whose great campaigns inspired me to revive this old project.
To Jayborino for his enjoyable let's play projects of the Arkain series!
To all who supported this project!
To all who reported bugs and gave/give constructive feedback both during and after the development!
And very many special thanks to Kasrkin, who supported the creation of this project in many, even countless ways!


Feel free to post your suggestions, opinions and questions!
Please report any bugs!

Keywords:
Arkain, Legends, Legends of Arkain, LoA, campaign, series, Gardon
Contents

Legends of Arkain Second Human Book (Campaign)

Reviews
2016-04-10 Rufus: Rufus ReviewMap ScoreGameplay:25 / 30Aesthetics:20 / 20Total:45 / 50 Rating Chart 45-505/5 Highly Recommended35-444/5 Recommended25-343/5 Useful15-242/5 Lacking0-141/5 Unacceptable Gameplay That was one damn good first...
StoPCampinGn00b
Restricted under author request / work in progress rule.

Pick your favorite character


  • Total voters
    288
Level 7
Joined
Aug 5, 2018
Messages
62
@Shar Dundred I think I have spotted a bug in chapter 7 related to items transfer from mission to mission.

I chose Salana as queen, so Larine items are put on the ground at the beginning of chapter 7. So far so good, except those are the items Larine had at the end of chapter 5, not chapter 6 (I double-checked my saves).
 
Level 3
Joined
Feb 20, 2019
Messages
22
I like and enjoy this campaign, but there are a few glaring issues (mostly with the difficulty cure) that prevent it from being a perfect 5 for me.
 
Level 7
Joined
Aug 5, 2018
Messages
62
I have continued with chapter 7 and following by editing the campaign files to give myself the items I should have gotten if not for the bug.

Here are my strategies for chapters 5 and 6

This chapter is the theatre of an absolutely massive battle.

In the ruins of the capital of Toran, the very city conquered from traitors and undead in chapter 4, Gardon's forces are under attack by all the forces allied to Retka !

A part of the city has already been lost.

The forces allied to Gardon occupy the south-east corner of the map.

They are divided in 3 bases, that you have to control simultaneously during the mission (all are restricted to 60 food so the total you can control is 180). First is Gardon leading the Ironfist. Second is Cora leading some golden guard troops under her command. Third is Larine leading soldiers from the royal army of Kerrel.

There are also ironfist units guarding the south-west part of the map. They will get attacked during the missions, and any dead will not be replaced (they do not have a base), so if you take too much time the enemy will entirely eliminate them and attack through here. Some other ironfist units guard the road to the trebuchets in the middle of the map.

In the north-east corner of the map lies Retka's base (red), while in the center in the north is the base of the Kajon Marauders (green) led by Scarlett Retka.

But the most immediate concern is the big cyan base immediately north of your three starting base. It is dangerously close, and dangerously big.

The beginning of this mission is very brutal. There are many, many things to do as fast and as accurately as possible, and even in "slow" (I highly recommend this in hard) it is hard to keep up.

In my playthrough, I first just spent a few minutes to evaluate the situation. After all, had Gardon 0.5s to decide what strategy to use ? It is only after having decided on a plan that I restarted and played it out.

I reviewed the units available for each base and the upgrade, to decide on the army composition.

With three bases, the best strategy in my opinion is to have specialization. The different units have different strengths, and when there are several equivalents available, one is usually better.

For all three bases, I researched all techs giving bonuses to one of the units I planned to use, and the usual lumber and building boosts. Each also had a few new workers trained for wood collection.

For Cora's golden guard, I choose the academical knowledge leadership boni (because I didn't want Cora to be corrupted by shadow magic) but I didn't actually use it. I trained only executors (which are probably the strongest melee unit available) and crossbowmen. Fights are often crowded, and being able to attack at range is very useful. I did few crossbowmen at the beginning and more later on, I think I should have done more from the beginning. I put them in a control group with Cora.

For Larine, I choose the natural medicine leadership boni. The elves of the ironforge are good units which can replace crossbowmen, but this choice impacts the story in a way I didn't want. This medicine boni buffs the heal of the royal army chaplains, hence I trained many of them to do the healing job. They are frail, so I had (and you will have) to replace them often, but they are overall very useful. There is another nice unit that the royal army has : the greywolves. Their HP, attack and armor are lackluster, but they have devotion aura which is very useful as it helps many allied units to survive. You don't want many greywolves, as besides one the other are not very useful, but two or three so that one death doesn't make the aura disappear is a good idea.

The royal army base will be the target of some aerial attacks during the mission, having several towers in its western part and/or bowmen can be useful.

For the Ironfist, a hint says that their units may appear weaker but that they are not because of the "dark warrior" regeneration bonus and the regeneration aura of the overseers. I beg to differ. In my opinion, they are terrible. Regeneration is useless outside of battles because chaplains do the job much better and faster ; and during battle the effect is simply too weak to help the survivability. The reduced HP, attack and/or armor are not worth this regeneration bonus.

The direwolves are still good, but as I trained executors with Cora already, I felt this wasn't a great choice. Instead, I went with Brian's leadership bonus which boosts the attack rate of several ironfist units. The unique unit of the ironfist which is outright better than the equivalent in the two other bases is the darksteel golem, but while I trained a number of them during the mission, I feel they were not very useful as they are poor in battle against units and this is a use case which is more common than destroying buildings. Two or three overseers for their aura are acceptable.

I mentioned the food limit being 60. No upkeep goes up to 40, then low upkeep up to 50, before high upkeep kicks in. With the upkeep rework, higher upkeeps level are workable. But I suggest to stay in no or low upkeep as often as possible, because not being able to replace your losses because of a lack of gold (something which I avoided though the margin was sometimes thin) will spell your doom, and too many units are very hard to control effectively so they don't bring as much benefit as they should.

One of the first things I did after the start was moving my units into control groups and moving them all towards the northern entrance of the three bases. I launched upgrades for the towers and while researches were completing I trained additional units.

I had to repel some attacks, and then I went onto attacking the cyan base. This battle was a total bloodbath. I had huge losses all along (including heroes dying) and had to constantly train replacements.

I had to fight not only the defenders of the cyan base but attack waves from other groups serving Retka.

I made generous use of the heroes spells ; Brian's ability to reduce attack of a group of enemy units is fantastic if you target well, and his ultimate with permanent shadow creatures from corpses is also great. Larine's heal is impractical to micro effectively but is useful, as is her lightning bird and her mirror ultimate. Gardon's active abilities are of limited use (besides resummoning Zed), but his aura ultimate is essential. Keeping Gardon close to the fight is very important to boost your units damage.

Otherwise, Cora is a beast. Her cold aura help a good deal to not lose units, and her flood ultimate, like in mission 3, is awesome. As long as you can heal her, having her close to the center of the battle using it cause devastating damage. Her blizzard can also deal great damage if you can target an area full of enemies units only, and her lightning (as Brian's stun) is good to deal faster with the annoying enemy heroes.

The hardest part was to breakthrough the initial defences. Once the towers and the few unit production buildings immediately north of the entrance were destroyed, I could progressively regroup. I kept on attacking aggressively to make sure that the cyan base couldn't rebuild an army. After a long and bloody fight, I had destroyed the eastern part of that base.

Meanwhile, the golden guard templars had arrived under the order of Van Durce, openly allying with Retka to destroy Gardon ! Their arrival is another reason why waiting for the destruction of the cyan base is a bad idea, you don't want to deal with too many enemies at once.

After more fighting, I could destroy the western part of the cyan base and I began to prepare for an extension to the outer walls of the ruined Toran's capital city.

I sent several ironfist workers to build a town hall near the eastern cyan gold mine, while trying to build towers to the north to guard the entrance.

It is very hard to guard properly, and over the course of the game, this base got destroyed thrice (the last time because my armies were busy elsewhere).

I also sent workers to repair the trebuchets to the north-east (through the portal). The attacks these trebuchets do on enemy attacking units is poor because splash damage also affect your units, but putting them in a control group you can target the annoying catapults to help the towers to survive.

A big advantage of the trebuchets is that they give a huge vision area, notifying of attacks from the red base early enough to anticipate.

I also recommend targetting and destroying the visible purple farms, which are sending weak but annoying pyrru militia units.

It is possible to build a few towers south of the trebuchets, I did so and recommend doing so. During the times my advanced outpost was destroyed, a few enemies soldiers sneaked to try and attack my trebuchets and the towers took care of them

I tried to build a Cora golden guard outpost next to the western cyan gold mine but I couldn't defend it properly. I however managed some time later to build several additional unit production buildings in the former cyan base, to cut down on travel time when training new units.

I sent workers to the middle trebuchets, but while I used those once repaired to destroy some purple farms and benefited from the vision bonus they gave, their damage wasn't that useful and I didn't guard them, leading to an enemy attack destroying it.

At some point, satisfied with big enough armies and having repelled some attacks, I attacked the western grey Pyrru army base. It has an annoying hero, but if timed right the attack should completely overwhelm the defenders. Once they are taken care of and you have killed the peasants and destroyed the castle, you can return to defence if needed, though I destroyed the whole base in one go (at the price of having my eastern outpost ravaged before I could send soldiers).

It also happened several times that, as my units were busy fighting at one spot, enemy units attacked through another road and targeted directly my main three bases. The rally point for newly formed units was in the middle of the entrance of these bases, so I usually always had some units there preventing me from being overrun and saving enough time to allow one of my unit groups to come help.

Once the grey base has been destroyed, the mission is more or less over.

Repelling attacks will still require a lot of fight, but by now the technique to use is well known and visibility of the arrival of enemy groups prevent being surprised. At this point, I could also finally give the royal army and Cora's golden guard a secondary gold mine.

I used Brian and his group of soldiers to clean up enemy units guarding the western trebuchets. Those, once repaired, can directly attack the golden guard crusaders and destroy most of their buildings (by default the trebuchets dumbly target units, so don't hesitate to take control and make them destroy buildings). They will also reveal a glyph of fortification, in the same spot as in mission 4, but I didn't even bother with it, as it is too late into the mission to really be useful.

An element facilitating massively the destruction of the enemy bases is the destructors obtained after eliminating the grey base. You get 3, and you can train a few mores (those from the ironfist are more powerful). They are overpowered flying siege engine, and they are absolutely worth their 12 food cost. With my heroes and regular troop assuring defence against the regular attacks, my destructors finished off some purple farms still around on the map, then dealt with Retka's base. You can attack the towers and the buildings from outside of the hill, then when soldiers come to retaliate retreat. They are forced by the hill cliff to do a long round trip, and at the moment they are far enough you can get the destructors in again to destroy more towers and buildings.

After some more of this hit-and-run tactic, the enemy castle should fall and the unit production building be destroyed one by one. Then it's a matter of killing the units supporting Retka, before defeating the scum himself. I sent my regular armies to finally take him out, but this is not required, destructors can take him on.

After this, Scarlett surrendered and I sent my destructors in her base to eliminate some pyrru army soldiers guarding a trebuchet. I then sent workers who were tasked with repairing the destructors.

The final base to destroy, that of the golden guard crusaders, was rather easy to deal with. The trebuchets had destroyed most of it, then I attacked with my whole army while my destructors attacked buildings.

Before entirely finishing the mission, I bought a lot of fire orbs for my heroes to use in the next missions, and did some light item redistribution

At the helm of King Gardon's vanguard, Merlon and Larine lead the way into the elven lands !

First of all, I must say I did two tries for this mission. In the first try I got into a losing position and quitted. In the second try, I never had to reload an earlier save to fix mistakes.

The initial strategy is always the same : research all useful upgrades as fast as possible, train several peasants to collect more woods.

For the leadership bonus, I used the medicine bonus which boosted the heal of the banishers but truthfully Merlon's HP bonus for buildings and ships is much better, especially for the ships. I was just frustrated that the towers were so weak even with it in my failed attempt.

The base is divided into two parts : a western part with castle and buildings to train units (including harbours) and an eastern part with a gold mine, a lumber mill, a blacksmith.

Both will be attacked throughout the mission, but your units will lose time moving from one to the other. Often, anticipating the next attack will be crucial to gain time.

The northern entrance of the eastern base is horribly cramped. There is little space for units and almost none for towers. Towering it is useless, just have the bare minimum to gain time in case your units are not already there.

For the western entrance, there is enough space and some towers are useful.

More importantly, I trained some frigates, because the golden guard base on the island will send destructors and pegasi and you want to be able to deal with them. It's there that Merlon's leadership bonus is useful, as the frigates are quite frail.

I trained some executors to fight and banishers to heal, but the enemy attacks are rough and if you keep defending you will probably crumble.

There is one trick to use.

The most terrifyingly powerful unit in the world of Arkain is not some demon or undead lord, no, it is the terror ship.

That blue elven base is annoying, isn't it ? Get two or three terrors in the middle of the river which can be found to the north of your base and is located between the blue elven base and the golden guard base. Also take a few frigates to assure the protection of the terror (aerial units may try to attack your terrors).

Now, you also need to have arcane towers. I built them in the back of my camp where they could be safe from attacks. I put them into a control group, and then when possible in a second one. 24 arcane towers are enough to ensure that there is almost always one of them with reveal ready, but you don't need to have that much to begin the operation.

Reveal a spot in the elven base, zone attack with the terrors onto some buildings and watch destruction unfold. The terrors don't need vision to attack a zone,but it's better to be able to know where to target.

Quickly destroy the castle, and kill any peasant trying to rebuild one, then proceed to make a bloody pulp of all these fools ready to die for Renova and to annihilate all their buildings.

From now on, defending your base is much easier.

Be aware that while the terrors can help to attack enemy units, their friendly fire can be very annoying. Always have them attacking some zone and only target enemy units manually (great for catapults and priests behind the enemy melee units), to avoid having your own units killed.

Time to take care of the island golden guard base.

The tidal towers on the cascade island are easy to destroy with the terrors, I did so earlier in the game, if not done yet it's the time.

Next, with your frigates in the front to cover, go towards the enemy base. Use reveal to show the location of their harbours, and destroy them all. They are not rebuilt, and thus all the enemy ships you sink are so definitely.

Next (and you may need to replace/repair your fleet if it has been heavily damaged in the fights allowing to destroy the harbours) unleash destruction on the center of the enemy base. Eliminate the buildings able to produce aerial units (your frigates may have to defend you against an attack attempt) then annihilate everything else. The land units are very weak to the fire of terrors, so luring them to try and attack your ships is a good way to completely clean the base.

After that, find some time to send Larine or Merlon retrieve the powerful item that lies in the center of that base.

At this point, I decided to go and extend my lines. I built a town hall to get gold from the mine in the destroyed blue elven base, pushed forward my western point of defense to the river (with supporting towers) while my eastern one was next to the bridge leading to the golden guard camp.

I had some difficulty properly setting up these defenses, getting the peasants of my extension killed twice, but in the end I managed to solidify my positions. I could easily afford to stay at max low upkeep at this stage, which made it easier in fight.

My terrors had a lot of job to do :
1) I destroyed remaining golden guard ships on the western part of the map. I also destroyed a golden guard harbour in the center who had spawned some ships even after the destruction of the island base
2) I annihilated the three overpowered undead barge. The ability to attack them from very far with the help of reveal made their insanely high HP, attack and armor stats meaningless.
3) From the point where these barges stood, I could target the entirety of the teal undead base. I gladly reduced Krom the Immortal to bone powder and annihilated the rest of that base.
4) I annihilated the main golden guard base west of the river.

The enemy could do nothing as the terrors spread doom.

That done, I moved on and with my full army attacked the dark elves base. Some regular banisher healing helped against losing units, and after a thunderstorm most enemy units were taken care of. It was just a matter of destroying buildings.

Then I returned and built a new base in the spot of the destroyed golden guard base. I did a first attack with my army to take care of some unit production building north of it that my terror couldn't destroy, before towering and preparing my troops.

I went to the North-East to complete the sidequest. The first enemy units were not too hard to deal with, but the main fight was a disaster. The stargazers starfalling my army dealt insane damage and though they are weak, I lost almost all my units (my banishers were behind and could retreat).

Nonetheless, a second attack definitely got rid of the diamond's defenders.

All that was left was to take care of the purple base of Lord Teran. It is well defended, but a full food army attack can deal with it. I had two destructors who were very useful in taking out the cannon towers.

Before finishing the mission, I gave all best sharable items of Merlon to Larine, so that they are available in chapter 7. Please note that if you have chosen the leadership boni leading to Salana as queen (rather than Larine), the item transfer is currently bugged (it gives what Larine had in mission 5, not 6). I went around by manually editing chapter 7 to add the correct items, but otherwise it is better to wait for a bugfix or work around this by not having Larine with good items at the end of chapter 6. [EDIT: This is fixed in recent versions]

@Shar Dundred The banisher keyboard shortcut for heal wave (E) doesn't seem to work at all for me. This is quite annoying as heal wave use is already micro-heavy.

Also, the text of the interlude following chapter 6 is inconsistent.
It says elves wouldn't accept an exile as queen even when Gardon chose Larine.
 
Last edited:
Level 7
Joined
Aug 5, 2018
Messages
62
Let's continue on. Chapter 7 is quite long, so I'm writing about only one chapter. I'll do 8, 9 and 10 next time.

Long live the queen !

In the interlude before this mission, you may get the choice between keeping Cora or Scarlett, if you had her captured in chapter 5 and if you had not chosen "whispers in the dark" (if you did, Cora will kill Scarlett while sucking out her powers). I went with Cora.

Obliterating hundreds of undeads in chapter 6 with the terror ships paid off : the scared undead proposed an alliance to Gardon. :D

More seriously, you begin the mission in that old base from book 1 chapter 5, but this time you have undead allies to the East. They will sometimes deal with a few attackers, sometimes send an attack wave, and from time to time Saphira Whisperwind will give you a Frost Wyrm.

As is usually the case with allies in W3 campaigns, their attacks are rather weak, but can still be useful to relieve the pressure on you, or to synchronize with to overwhelm enemy defenders.

You get 3 heroes to play with - Gardon, Brian and the one you chose to replace Renova as elven queen, either Larine or Salana.

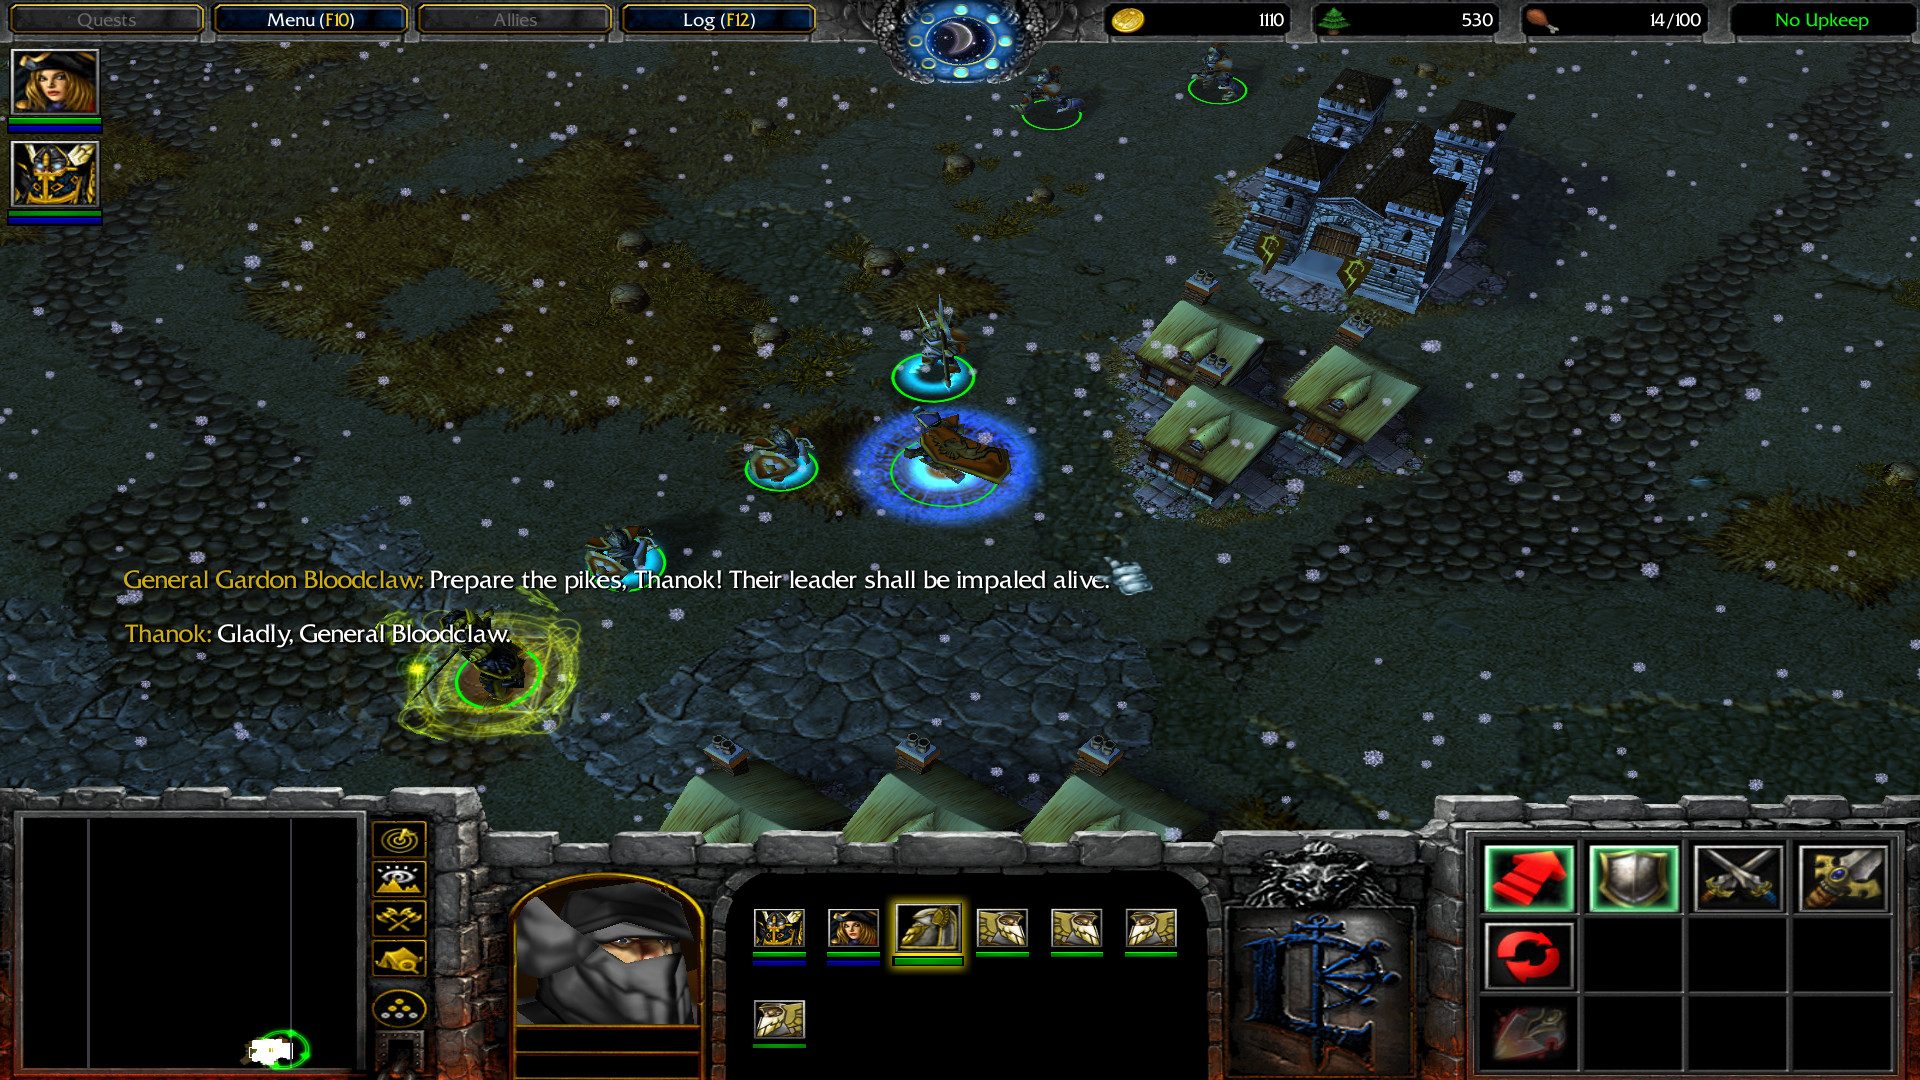
A hint tells you soon into the game that the knights of Come will kome... mmm. The knights of Kome will come if you destroy the western elven base. This is essential.

I reloaded a save once because the first time I was too passive and thus made things more complicated for myself. Acting swiftly is paramount.

At the start, I made the usual things : regroup weak units in appropriate control group, send (many) more workers to collect wood, start upgrades, chose a leadership bonus.

I went with the direwolves, because other melee units available at the beginning at terrible. Later in the mission though, they are overshadowed by the knights of Kome (they don't join you as a separate allie, they are directly under your control and you can train more).

I built a few towers around to defend, but unlike chapter 5 of book 1, just trying to set up a strong defense is not a great strategy.

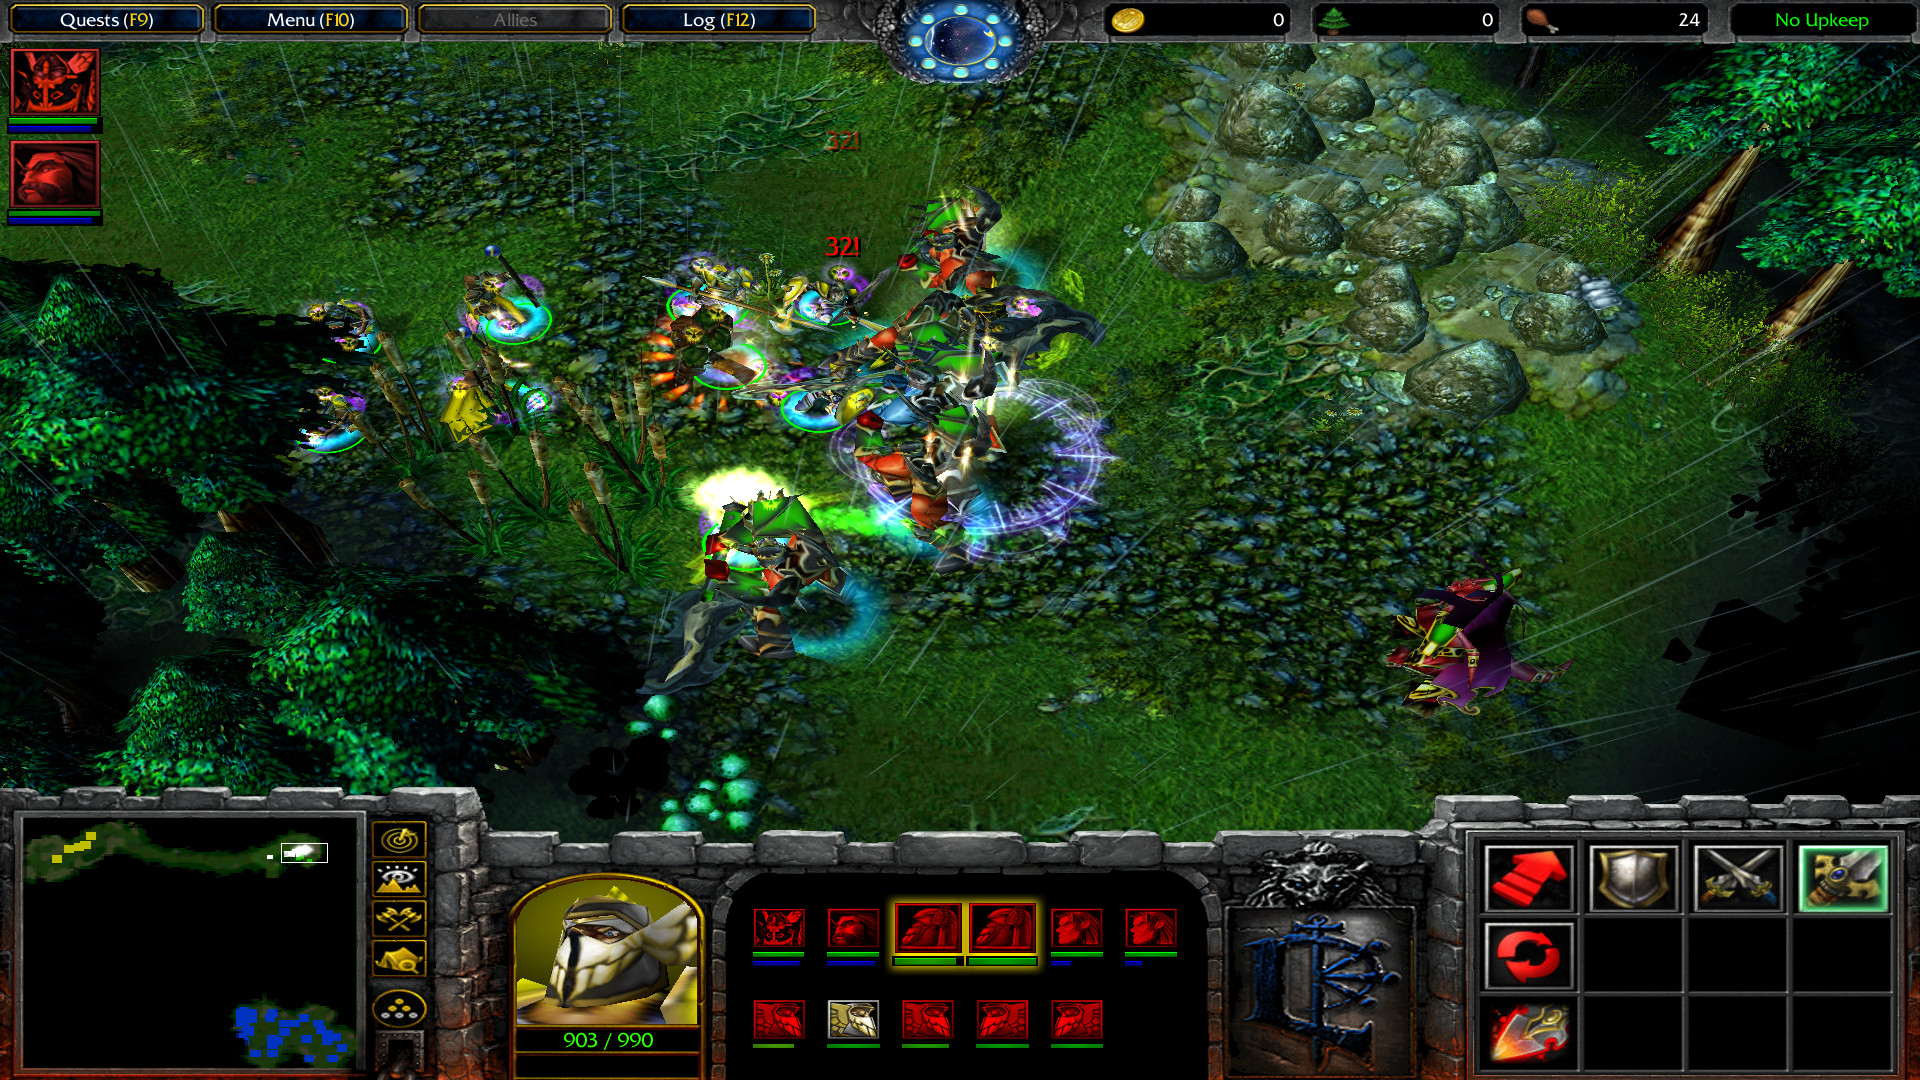
You receives attacks from several enemy bases : golden guard, red guard, cyan elves from the west with a starfall hero, and pink Riana monstrosities. With 3 heroes and a few units I could repel them without too much trouble. I trained some banishers to heal my units with heal wave between (and sometimes during) battle.

A good strategy is to build up a full-food army quickly and to go along the undead when they attack the cyan base. It will be overwhelmed (especially if you can Starfall it with Salana) and once the castle is destroyed you get Cora, knights of Kome and a bunch of weak golden guards units, plus peasants to build your own extension there.

However, while I tried this before my reload, I messed up afterwards and on my successful try actually used a different strategy.

The eastern yellow golden guard base, headed by Captain Ironside, will switch side after some time in the game. This side switching will always happen, and that's why a pure defensive strategy is a waste.

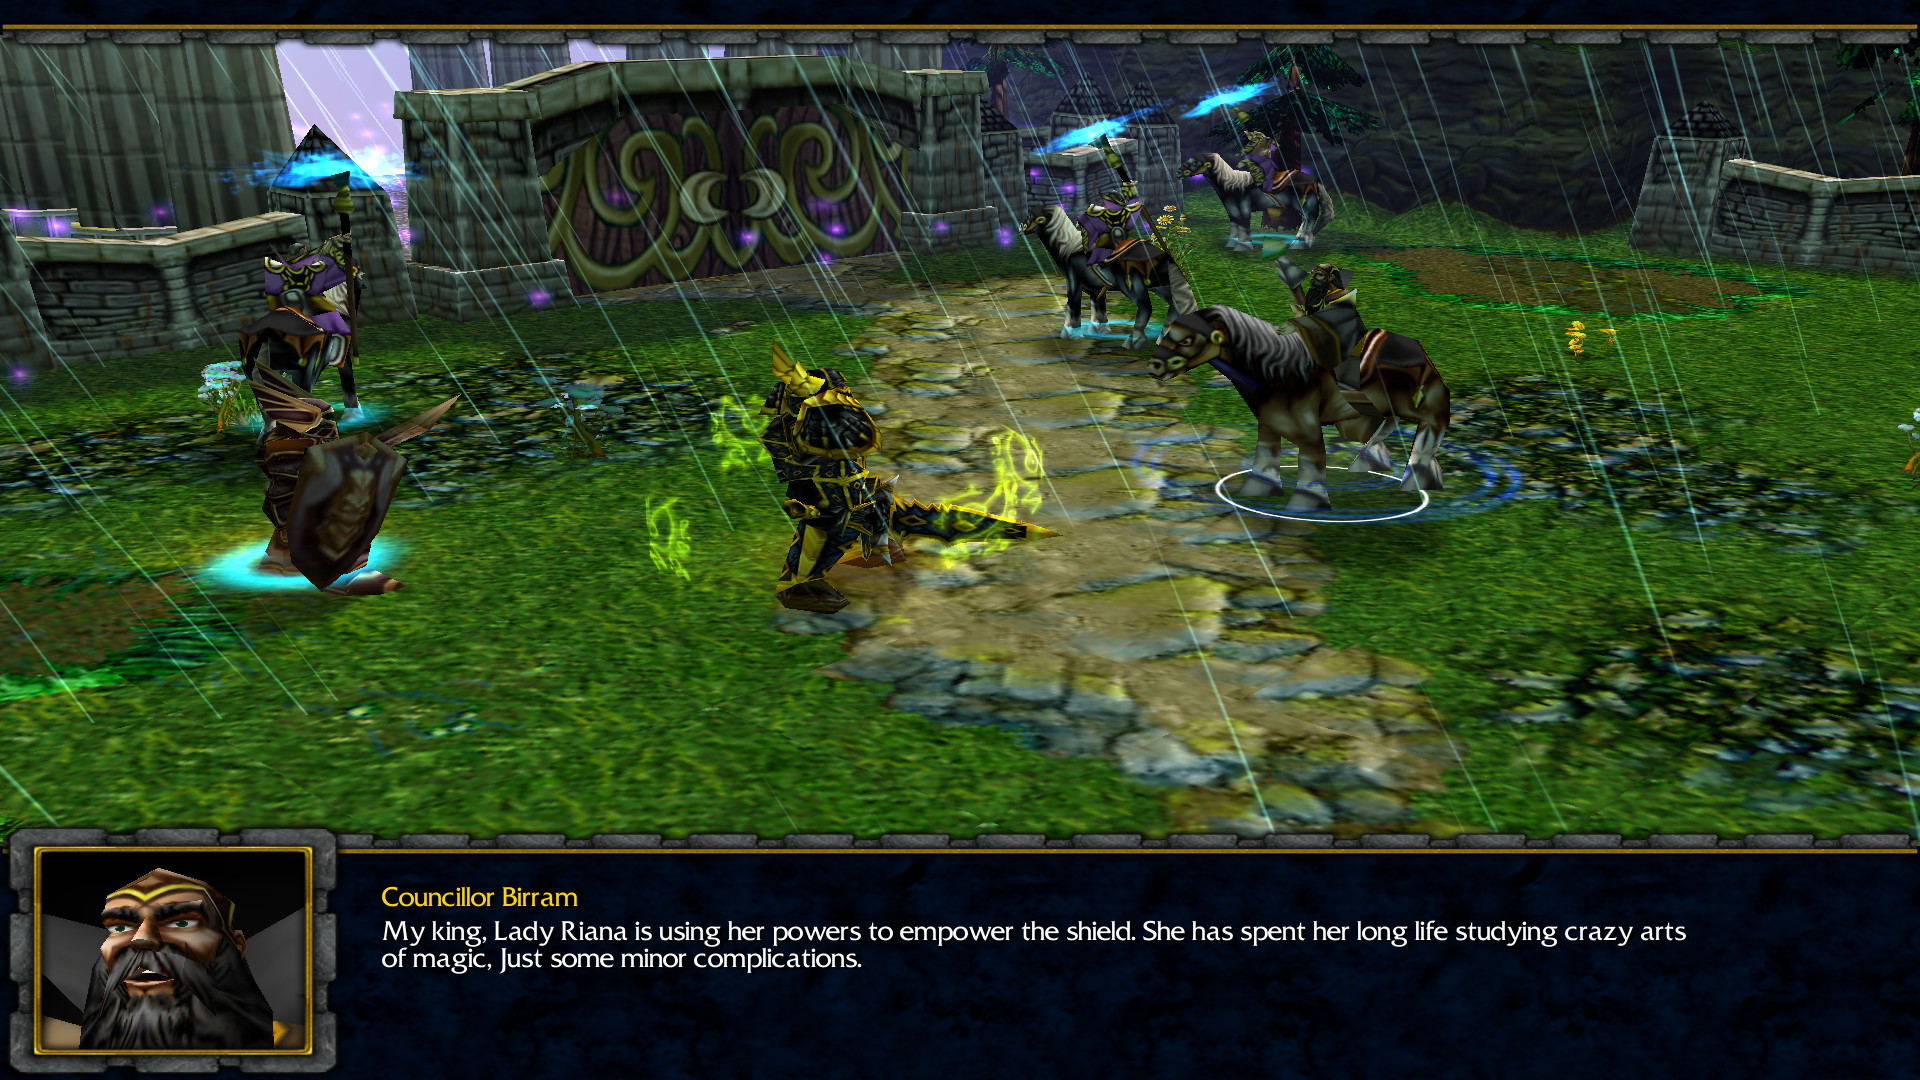
With the red guard to the north and the western golden guard base of Pureheart, this new allied base is very vulnerable, and it requires your active support to stay alive.

The road towards it is polluted by assassins of the queen, ranged units which are invisible until they attack.

Later during the mission, I used the Frost Wyrms sent by Saphira to destroy the towers guardings their halls and then destroy the halls where those pests are trained (which are located north of the river, south-west of the western golden guard base). A few dragonhawk rider also help to speed it up.

But when Ironside revolted, I was still far from having done this and had to clear them. Anticipating the revolt can be useful.

When arriving towards Ironside's base, I had Salana with me and wanted to send her towards Lera the huntress, which I had spared in book 1. When Lera see Salana, she switches side too.

Indeed, the army of Ironside quickly go to attack Lera's eastern red guard base and can hugely damage it while getting killed and having less strength to defend to the west.

I got lucky and Lera was almost at the entrance of the two golden guard bases so she switched sides very soon.

However, if you had not saved Lera, or have Larine as a queen, the general strategies still apply. A few months back, I completed this mission when upkeep was more damaging to income and with Lera dead and thus never switching side.

With my troops, I eliminated the destructors which dealt too much damage to Ironside's base, then pulled back.

The plan is to get your heroes as permanent defender of Ironside's base, and to have a few peasants of your own in it to build some unit training buildings. However, I still had to deal with the cyan base.

Lera was under my control as she switched sides, and she's a really overpowered hero.

Destroying the cyan base was thus made easier (I had to retrain many units which had died in the first attempt to help Ironside, however).

Once Cora joined, I made a group with her, Salana and Lera and sent them directly to Ironside's base. I destroyed more buildings of the cyan base, began to build my own, and sent knights of Kome along with Gardon and Brian towards Ironside too.

The extension to the west is really safe (I never got attacked there, though I built a few towers by habit), so it is basically a free gold income source. Once they finished off all buildings, the weaker units got sent to die in battle too.

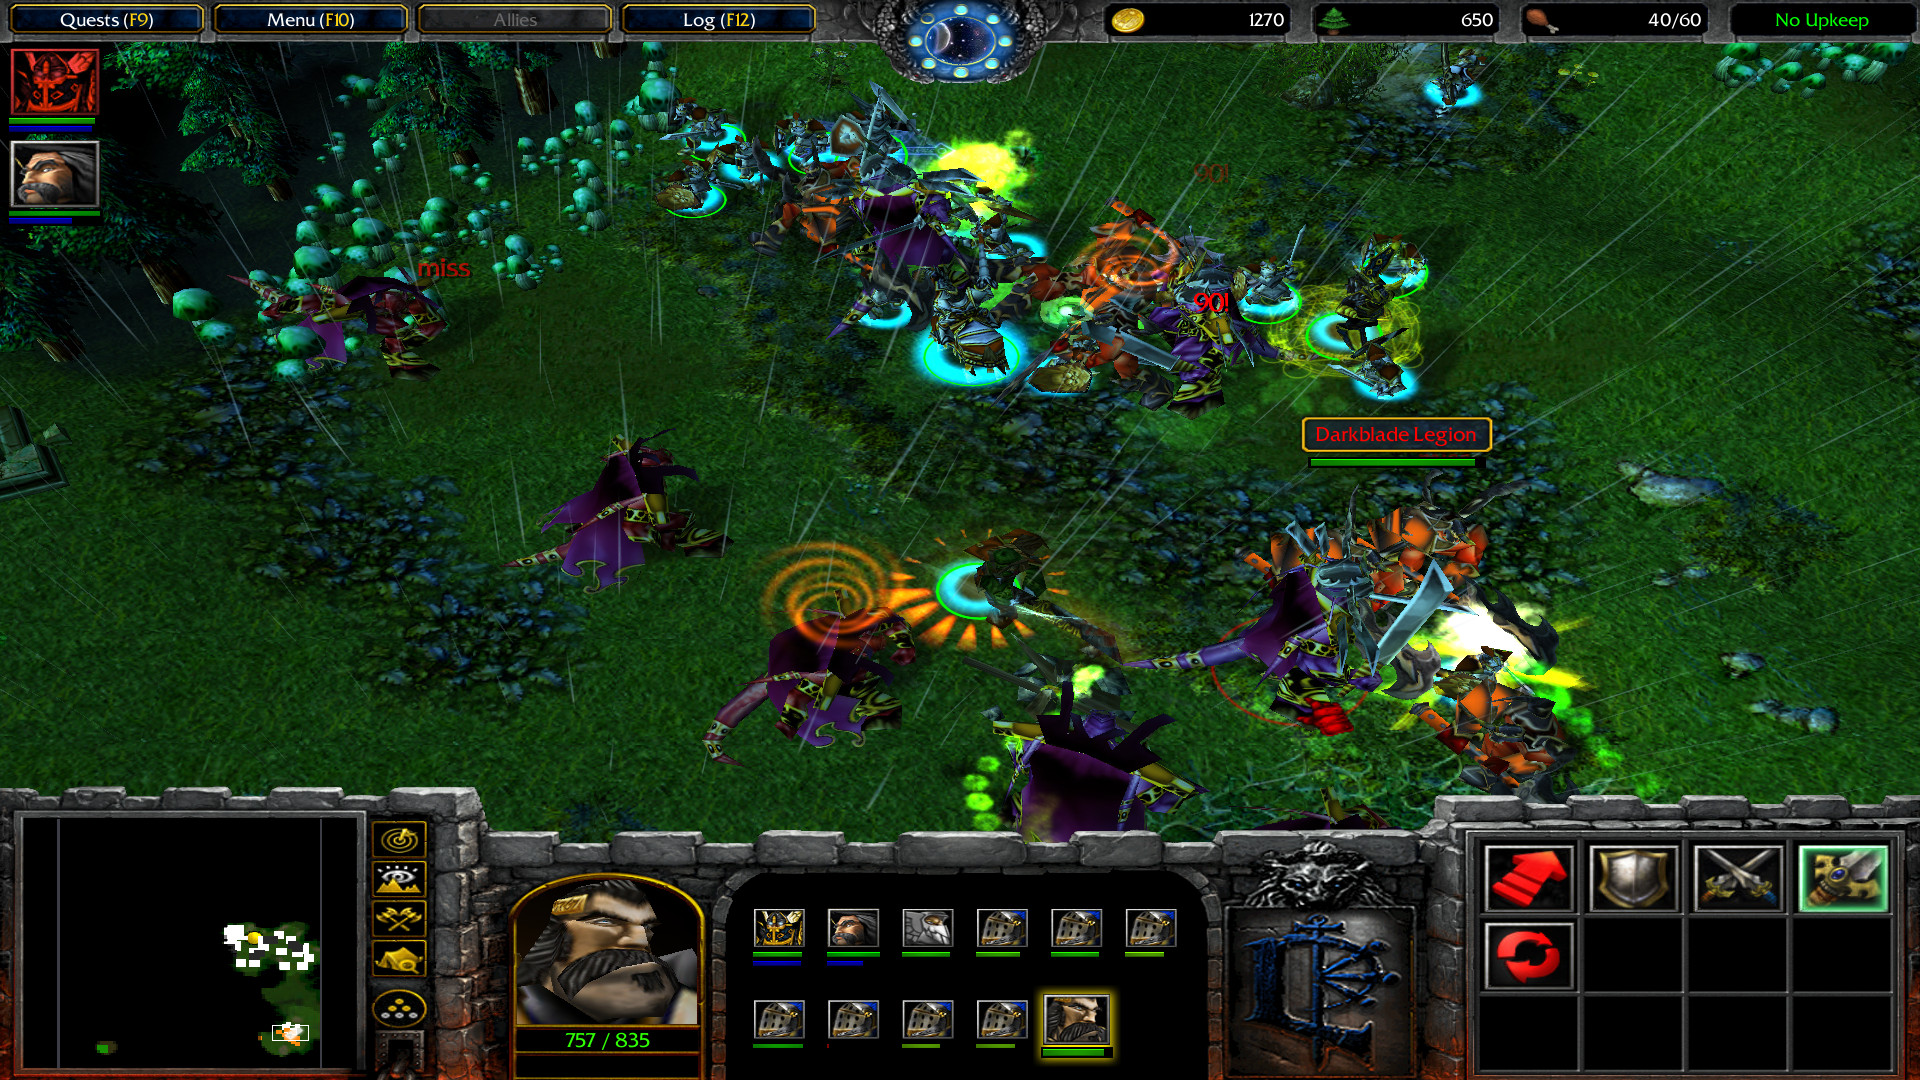
As I was dealing with the cyan base, things went dire for the new allies : after having done a suicide attack against Riana, the renegade red guard had not enough troops to withstand the counter-attack. Ironside's base was doing a little better, but it was a matter of time before it would have crumbled without my help.

The group of the 3 girl heroes went as fast as possible to the renegarde red guard base. All three have a OP "deal damage to all enemies in a big zone" ultimate, so I tried to cycle them. Add in their lightning abilities which deal good damage, and with decent micro they can obliterate big armies.

Almost all the renegade red guard got destroyed in my game, but with their castle saved their workers slowly rebuilt things afterwards. The AI seems to get dumber after this however, and was more useful as a defensive buffer than as an attacking asset.

Meanwhile, Gardon, Brian and other units defended Ironside's base.

I slowed down pace to take out all the training halls of the bastards assassin and to build barracks and an arcane sanctum in Ironside's base. Having a few banishers at hand proved very useful, because both of my groups received a lot of damage (in the girls group, Lera is incredibly bulky, but the same can't be said of Salana or Cora).

The next step was to eliminate Pureheart's base.

I didn't try to get some fancy unit compositions, having 5 heroes is already micromanagement hells and fancy unit compositions would have only compounded the issue. I simply went with mass knights of Kome plus many banishers to heal everybody.

To not abandon the renegade red guard base during the attack, I actually had some towers there, plus barracks and arcane sanctums which were my unit production hub.

When you attack Pureheart's base, the red guard and Riana will send reinforcements.

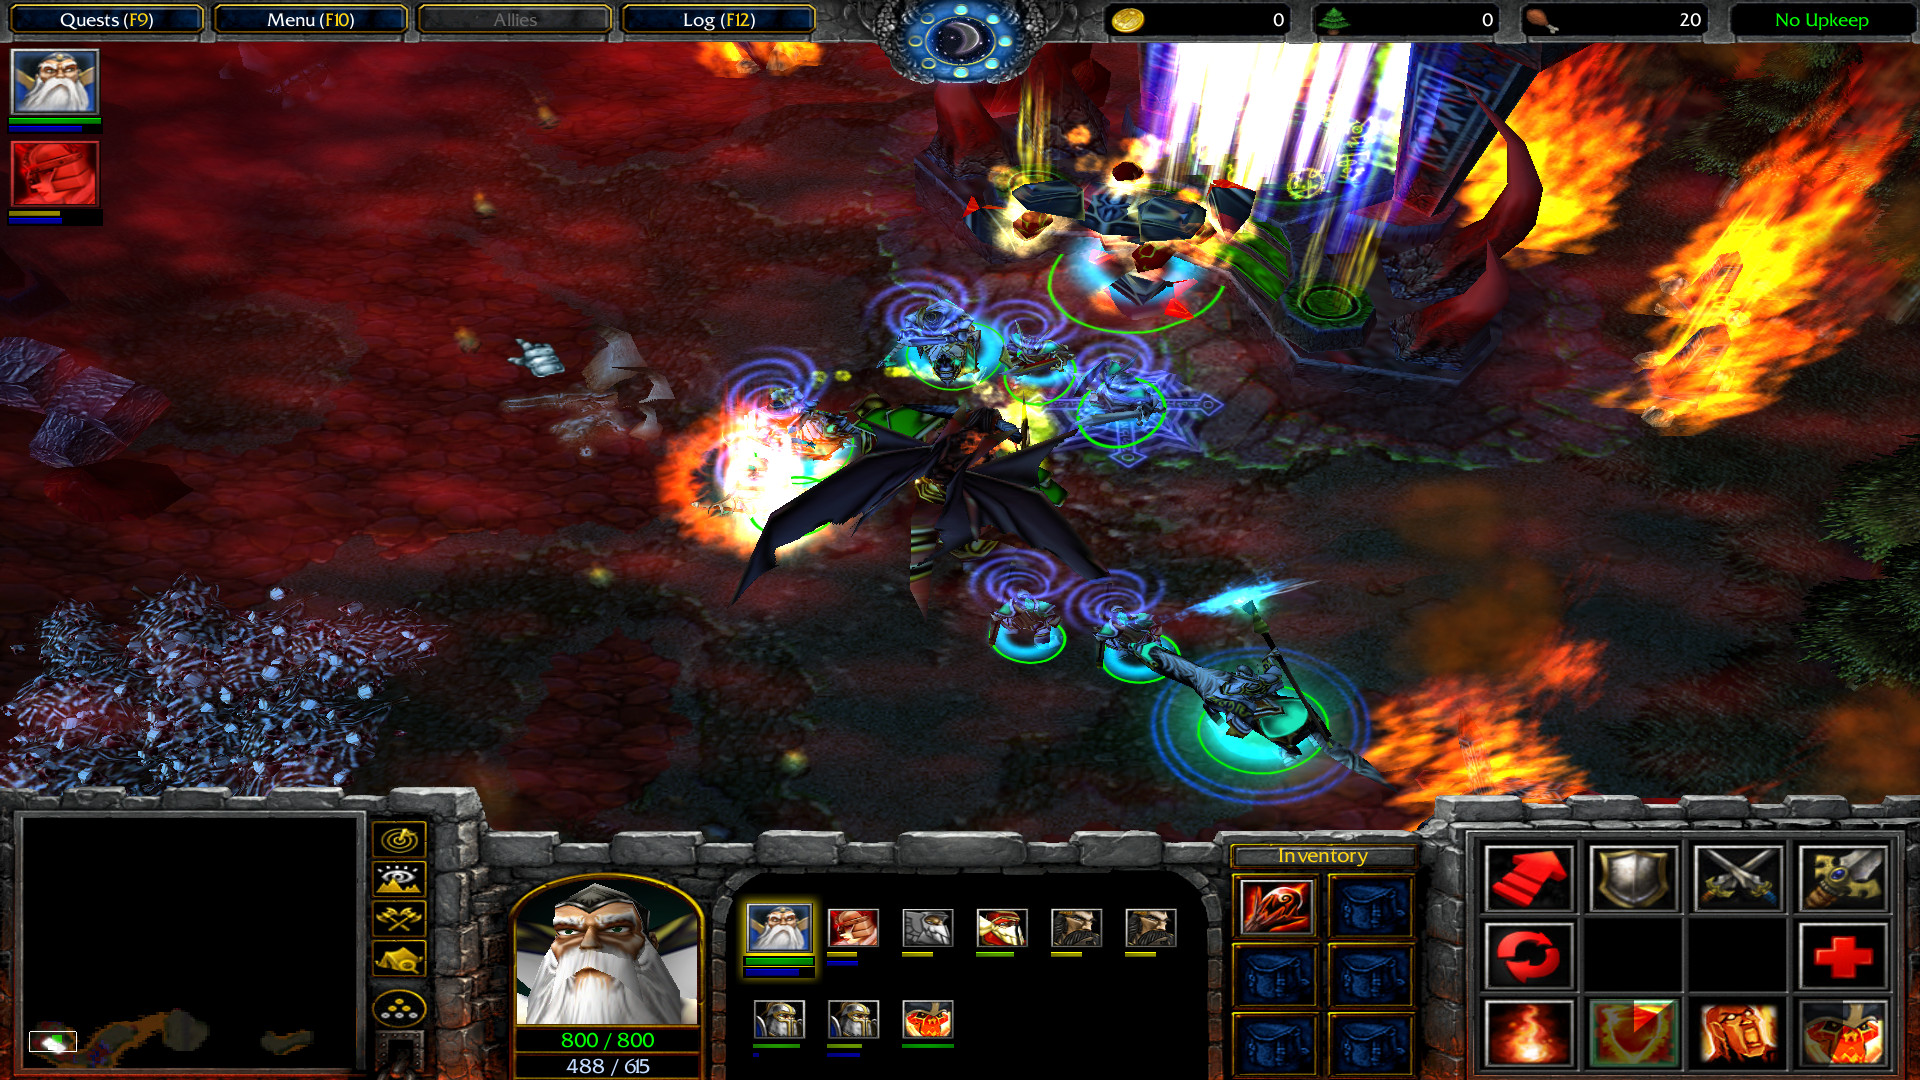
However, between Gardon's War Aura making all of your units dealing very strong damage and some starfall/flood, I managed to deal enormous damage. I had to constantly click between the heal wave icon and some of my wounded units (the keyboard shortcut didn't work) but despite this annoyance, It helped a lot to keep my units alive longer and destroy a lot.

I had to pull back once nonetheless, as I had lost several units, other were wounded, and more critically Riana's chosen were starting to destroy my buildings next to the renegade red guard.

Once the attack got repulsed, the deads got replaced and everybody got healed, I attacked again.

As about half of the enemy base had already been destroyed the first time, and Pureheart troops were weaker, there was no major issue.

At this stage, taking out the final red guard base and then Riana's pink base is a formality, even without Lera.

Before finishing the chapter though, there are a few things to do. First, you can get a tome of agility and a tome of force in spots once occupied by forest trolls and now guarded by queens assassins, in the forest east of your main base. The agility tome should go to Salana, the force one to Gardon or Brian.

Second, you can buy orbs of corruption in the base of your undead allies (I actually only thought of it and applied it in chapter 11-A, but it's better to do it right now). Orbs of fire are terrible, orbs of corruption are awesome. The -5 armor they inflict on attacked units is easily worth +15 or +20 damages in the later stages of the campaign. (Admittedly you could do this earlier in the mission, but it requires time to go there which you don't have much)

Third, you want to make sure that Salana/Larine has a lot of good items, and no weak one. The goal is to get all the best items of the campaign for your heroes towards the end, and if you don't give them to her now, you risk having to throw away some items better than what she will have. In case of doubt, you could give her two orbs of corruption, with one to redistribute to another hero later.

Once the mad sorceress Riana has been put down, you can enjoy the outro cutscene.
 
Level 7
Joined
Aug 5, 2018
Messages
62
Now chapters 8 to 10, closing up chapters which I had not discussed previously.

After many chapters of tough base managements, some relief : a mission where you just have to use units to kill enemies.

Nonetheless, Shar managed to make this quite challenging, and you'll need a lot of caution to avoid losing units.

You get two heroes Vail and Harmos. Harmos is back from book 1, finally liberated from his prison, and is the same old himself : rain of fire, incinerate as a passive damage booster, a very neat golem of fire ultimate. Banish has been replaced by fire shield, which grants a friendly unit a very powerful version of immolate. However, the fire shield requires significant micro, so I barely used it.

Vail, which we are told is part of the guard of Prince Toraes, is leading a group of soldiers from the royal army of Kerrel. She has very high base stats, partly due to here stat-boosting ultimate. Besides a familial amulet, she has a life stone regenerating her health and which should be kept instead of consumed. Her command aura is a great passive ability, while she has plenty of mana for immolate and for holy light.

Holy light is the key ability, as quick healing of friendly units is of paramount importance. It should be spammed all along the mission whenever it is ready and a friendly unit has noticeably lost HPs.

After levels up, I concentrated on boosting the abilities I got the more benefit from for each hero. I went with level 3 holy light despite command aura being tempting.

There are several tomes scattered across the mission. Harmos has low HP, so a pure HP boost should go to him (there is one +50 HP tome to be found), but otherwise tomes of force, agility and knowledge are better used on Vail. Tomes of intelligence would be better on Harmos, as the damage boost is worth more than expending Vail's already huge manapool, but I don't remember one to be found.

Now when it comes to units, you get a few good units and a few poor units. The good units are the greywolf and the knights, who are solid enough they can fight along Vail and survive so she can heal them with Holy Light. The greywolf is weaker than the knight in HP and damages, but his devotion aura is precious. The poor units are the 4 others you get, two melee one and two bowmen. They are frail and unless babysitting them constantly you'll quickly lose one of them. They can be used to finish off enemies faster and reduce damage taken, but it's often better to pull back, heal everybody with Vail, and attack again.

To the east of the starting point, you can find a hidden HP potion (I gave it to Vail, Harmos can be healed by Vail directly), and farther off, some powerful demons. They're very annoying to deal with, as the infernal machines have ranged attacks and can quickly kill one of your regular units, which should be avoided. Their ability to summon infernals is also very annoying. I had to do some hit and run to eliminate the first infernal and weaken the machines. Once you've eliminated one of the two demonic juggernauts, Vail heal become sufficient to avoid losses and it can be finished off quicker. They give very good tomes, so I highly recommend eliminating them despite the trouble.

On the road towards the second entrance of the Fire Order fortress, you'll encounter a bunch of demons. Most are easy kills if you go cautiously, and the demon gate is not a big issue. But after this there is one extremely annoying pitlord. Before trying to kill him, eliminate all the lesser demons (doomguards) which are near him. To do so, the best way is to lure them so you don't have to fight the pitlord at the same time. The pitlord's ultimate is an invocation of 4 infernals, which is very annoying. Don't hesitate to run to safety whenever required. Waiting for Vail to completely heal is useful, as she can't use holy light on herself.

Once all the lesser units have been eliminated, and once you're sure the demon hero has not his ultimate ready (a few weakening hit and runs can be useful) send your main forces onto him, healing as much as possible. If Vail is weakened, you can pull her back, order her to not move so she doesn't run to take damage, while being close to give her aura and heal allies. Harmos incinerate is very useful because the damage bonus keep getting higher as you attack more. A Fire shield or two are also welcome. Pull back units which have too few HPs and which may not be healed in time. This insufferable pitlord will die.

Then you can enter the fortress. There are a bunch of demons to kill and a very welcome healing fountain. I often went back to it later to heal Vail faster. To the north-west you can find demons guarding a precious item, to the north there is an optional room with Progaderas the smoking and a ton of fire golems and other fire creature.

Charging ahead against Progaderas is pure suicide, you need to take advantage of the choke point that the door to the room constitute to not be overwhelmed and to, over several attacks, kill all the supporting units. Once Progaderas is alone, and only then, you can directly try to kill him. After his death (but can he die ?), he leaves an item on the ground. Look for it, because with the flames it's easy to miss.

The mission continue by going east of the life fountain, with a bunch of demons to kill, including one demonlord annoyed that Vail and Harmos are stirring trouble (really ?). Going north leads to the next part of the mission, but you should first go east, to find in a room after several fights two permanent allied fire golem, which will be useful, and the hammer of Salomar the Healer, which was leader of the paladins before his death. This artifact is powerful, you don't want to miss it.

Next going north, there is a cutscene, towards the end of which you have to chose between siding with the firemages or the fire spirit. The cutscene is full of hints as to what is the correct side.

The battle which follows is tricky. You can afford to lose a few units, but never let Harmos or Vail be critically wounded. Also, it's much better if you can keep the greywolf and some knights alive. You can use the spells of your new allies to deal some stuns, too.

After heal, regroup and repeat.

Some battles later, the mission will be won, but there is one last detail : you'll get control again of Vail sooner than of Harmos. For best item distribution towards the end of the campaign, Harmos should have 5 good items that you won't want to replace by better ones later on. However, this will make Vail weaker in mission 11-A. If you spared Lerrig, this is a lesser concern as he will assist you.

"Lords of the Golden Guard"... That's right, you're in control of the golden bastard for this mission !

Remember Genethas ? That bastard traitor who served demon in exchange of becoming the chief of demon salves, and whose treason caused the loss of the kingdom of Lor ? Time to destroy this scum !

There are 2 main enemies during this mission. First, the demon slaves and the demons, which attack from a big base behind a river on the east of the map. It has several demon gates and two castles, so it technically acts as two demon slave bases sharing name and color, plus demon mini-bases. Second, the orcs, which have two twinned base in the south of the map.

As for allies, there are useless golden guard units in the fortress to the west (they stay there and do nothing), and an advanced golden guard base to the North-East.

The base you get is rather nice, with two castles and two gold mines, plus many unit production buildings and some towers as a last defence.

As usual, I immediately started with more workers for wood. This is especially critical in this mission because Lord Marin will send you destructors once you send him 10.000 of wood. As they don't count towards food limit, you can spam the peasants to get the destructors quickly.

I also started upgrades. For the leadership bonus, you have the choice between the one from Van Durce giving +200HP to a range of units, and the one from Praxeus giving +200HP, and additional armor and damage to paladins.

Without hesitation I went with the Paladin buff. Paladins are the dream unit : they're bulky, they have decent damage, and they can heal with holy light. Usually, an executor or a knight at 4 food would require some support from frail healing units, making its effective food cost higher. The paladin doesn't need this, the 6-food cost comes with no string attached and no worry of having your healers quickly dying. The upgrade boosting their holy light from 200 HP heal to 400 HP heal is essential.

Most other units are not worth consideration. The only two worth a look in my opinion are the lieutenant, which has a nice aura, and the angelic. The lieutenant has poor damage and bulk compared to paladins, and if you put him in the same control group as paladins he will get first, blocking quick holy light access, which is a no go. But you can put one or two along with Praxeus who can heal them. Paladins should be in a control group with only paladins. As for the Angelic, they mostly team up well with paladins : their ranged attack help to deal with the occasional aerial units (though the vast majority of enemy attackers are not), they can also deal damage from behind a wall of paladins and add effectiveness in crowded battle. They can be healed by the paladins, while their auto-cast spell increase damage from friendly units. Holy Smite with its stun+damage is also useful to dispose of some annoying enemy units like heroes.

A word on heroes : Van Durce is extremely bulky. His starfall-like ultimate is very nice, while his passive devotion aura and self-armor boost are good to take. His +30 self-damage ability is okay. The first thing to do with him is to buy him a fire orb and to send him to the vanguard golden guard base. This allied base will have to deal with black dragon attacks, and without your active support, it will be destroyed. Van Durce can sometimes be pulled back to help defeat enemies in the chokepoint leading to your base, but until you get the destructors from Marin, his support is essential.

As for Praxeus, his Holy Light is almost useless in practice because your paladins can do this almost as good. However, his command aura is awesome (and should be the priority to boost with level up). Barrier is a nice spell, use it frequently to make your paladins even more bulky and almost unkillable as you use them to heal each other with holy light. The resurrection ultimate is very powerful.

During the first stage of the mission, staying at the no upkeep limit of 80 food to get more gold can be worth it, but I could soon afford to be at max upkeep. At this stage, with 6 arcane sanctum, you can potentially have 6 of your paladins dying, start the training of 6 others, and resurrect the 6 first with Praxeus, going well over the food limit.

The enemy attack waves are very strong, especially when Genethas comes along a horde of black and white knights. A few towers as a ranged support and as a delayer in case things turn bad are useful too. I highly recommend staying on the defensive until you get the destructors, the enemy can deal too much damage too quickly if you lose your army in an offensive.

Once the 10.000 woods are there, you get 4 destructors and 2 prides of humanity, for only a partial food cost (I think the destructors are food-free but not the prides of humanity).

I sent those to the vanguard golden guard base, and could pull back Van Durce to permanently defend the main base. I also sent a bunch of peasants there. They were tasked to build a bunch of towers to add support against attack from demon slaves and black dragons, and to repair destructors between attacks.

Attacking Genethas base from the north, you can snipe the 3 northern demon gates one after another, in several attacks.

Then, I did the same attacking from the south. With the demon gates destroyed, once all the already spawned demons are killed, no more will join attack on your main base.

In between those missions, destructors are great defenders against attacks by black dragons.

There are a few demonlords hiding in the woods north and south of your base. Some of my peasants had already been killed by them in the north, while in the south the path to them still had many more trees. They have a +300HP gem of health and a +250 mana amulet as drops once you kill them, which are a nice buff for Praxeus and should be retrieved before the end of the mission.

I must mention that in some occasions, the demon slaves concentrated their attacks on the vanguard golden guard base, which was mildly annoying as this base could hardly defend itself and active support was required to repulse those.

At this stage, the mission only tasks us with eliminating the demon slaves, but I wanted to eliminate those stupid orcs. Once the perfect opportunity arised (healed destructors and units, attack waves recently repelled) I sent my army towards the base of the orcs. I left almost no units with my towers to defend against demon slaves.

The destructors fled over the woods west of the orc twinned bases, so as to attack their buildings from behind. Meanwhile my main army followed the path to the orcish base. There are several goblin mines which seriously damaged my paladins, I had to stop and heal them. Then I launched the main attack. Praxeus used barrier, a well placed Van Durce started using his ultimates while paladins attacked all they could backed by Angelics behind them. As the enemy units started to come in to repulse my attacks, I sent my destructors eastwards with the task of destroying the orc fortress and killing any orc peon.

As I had to deal with two enemy bases at once, the fight was tough, but healing paladins repeatedly and then when some died doing a round of resurrection made them survive awesomely.

I lost a destructor in the battle before pulling them back to the vanguard golden guard base (a black dragon attack had begun), but the green west base was already broken.

The demon slaves attacking my main base started doing heavy damages, killing my few units there and rasing towers. I had to pull my paladins and Van Durce back, while I kept the angelics and Praxeus to kill newly trained units and slowly damage buildings. When my paladins arrived to defend my main base, I had already lost several towers between my two main castles. I had actually bought some teleport scroll to be able to go back to defense faster but didn't make use of it.

After a bloody fight, the enemy attacks was repulsed and I quickly went on rebuilding my defenses? I sent my paladins back to the orc base to finish them off, Van Durce staying to offer a better resistance against the next attack by the demon slaves.

Once the orc bases were destroyed for good, the mission became quite simple. I could build new bases to get gold, and later on the attack on the brown demon slaves base was straightforward : first, I eliminated all the demonic towers at the enemy base entrance with destructors. Next, while the vanguard units distracted them, my destructors began destroying towers towards the south castle, with the goal of destroying it and killing all its peasants. After another round, I supported this with an attack of my paladins, heroes and angelics on the main enemy base entrance.

The defense of the demon slaves crumbled and Genethas was put down.

Praxeus and two paladins are here to support Zarin and his dwarf, whose base is completely surrounded by 5 bases of kobolds and fire golems, and an orc base to the north.

If you try to simply defend the main base you get at start, this mission will seem like hell. It is simply unfeasible to stay on the defensive for long without being overwhelmed.

But, building up on my previous knowledge of this mission, I could complete it without any major difficulty nor save reload.

You have two potential leadership bonuses : one which allow shieldbreakers and choosen of hammerfalls, good dwarven units, and one which boost the paladins.

Without any hesitation, I went with the paladin boost. All you want is paladins, more paladins, and more paladins. There is not a single aerial unit in this mission so the paladins have zero weakness. No matter how nice any dwarf unit can seem compared to regular W3 human melee units, they have a dwarved efficiency compared to paladins.

The dwarven heroes, be it the generic king of the mountain or the runepriest (the healing rune can be very nice, I sometimes use lightning chain too ; I never used the attacking rune and didn't get what the ultimate was supposed to do exactly) are useful, however.

At the start, I started doing researches to boost paladins further and sent some additional workers to get wood. I grouped my units in a few control groups : the heroes, the paladins, and everything else.

The first attack came from the north by the orcs, then I had to defend against a few other attacks from other directions. I didn't even bother trying to repair or rebuild the defensive towers which got damaged or destroyed during those attacks, they were just there to create delay and there was no point wasting resources in new ones.

I trained new paladins as soon as resources could afford it, as they really become scary when there is enough of them in a group that you can constantly spam heal without mana or spell reload being a limitation.

A few minutes later, a bunch of golden guard units arrived as a reinforcement. My upgrades had already been done, and this base had done its purpose.

The reinforcement arrival coincided with strong attacks from enemies. I didn't think long : I took all my army, increased by the reinforcements, towards the north-west, with the miners (the dwarven workers) following.

The red kobold base to the north-west is the weakest of all the enemy ones and was roflstomped by the 130+ food combined human and dwarven army.

As the miners began to build a new town hall next to the gold mine, and some other buildings like farms, I reorganized my army, as the control groups didn't integrate the reinforcements properly.

Quickly after, while the main base was finished off, I attacked the blue kobold base to the south. It offered more resistance, but wasn't a match for my army.

By the time I eliminated it, orcs started attacking my new base, but I could pull back quickly enough to avoid a disaster.

At this stage, with 2 out of 6 enemy bases out and a much saner defensive location (only one possible attack path instead of 5), the mission is a matter of patience and accuracy.

Defending with my paladins without losing any units was easy.

Attacking was trickier, because two of the fire servants base sent frequent attack waves.

The key was to be ready to forsake the extension.

As long as I kept a few miners and a reserve of gold, losing some buildings wasn't a worry. Hence, during my attack of a third enemy base in the south-west, I didn't bother pulling back the long way to my base, I simply finished the job, and built a new town hall there with some miners. Soon after, I could send miner anew to reclaim control of my extension.

The 4th kobold base was annoying to deal with, because it could retrain units at an incredibly high rate. But while my paladins and heroes occupied them from the front, I simply used my misc. units groups (which also contained two paladins) attacked from the back with the task of destroying unit production buildings. They got to fight some units too, but the key was that once two or three units building were destroyed, my main attacking force could kill enemies faster than they were retrained, and I could finish the base off.

I once again got the town hall in my north-western base destroyed, but I didn't care.

No long after, I attacked the orc base. It has many annoying towers and while the black fire servants had already done some damage to the entrance, destroying the whole base was another task, especially when the aforementioned fire servants went to attack it and then saw my units and attacked them.

The rocketeer of the goblin-orcs deal insane damage but they are extremely frail, eliminating them is a priority.

I lost most of my non-paladins units there, only managing to keep alive two chosen of hammerfal. My paladins were mostly in the orange, but heal could still keep them alive.

Once this base was out, remained only one enemy base, the strongest with its fire golems.

Attacking it by the southern road is a poor idea. There are just too much of these golems, and they are retrained too quickly. But I didn't even try.

I put my heroes and a bunch of paladins in the zone where the enemy attack waves arrived. Occupying that ground limited the number of enemies who could teleport at once, so it was really easy to kill them one after another.

Meanwhile, I built town halls to exploit all of the free gold mines of the map, and began preparations for the big attack.

I had a lot of workers in the north-east to collect wood, because the wood/mushroom path leads to the north of the black base.

I built several arcane sanctum for paladin training, and also workshops. My idea was to train siege units for better destruction of enemy barracks, but this was a poor idea. One paladin is more useful than two siege units which get destroyed in a blink by fire golems.

I also built an enormous amount of towers near the teleport zone, mostly cannon towers. At this point I moved my heroes and paladins which were there to the south, to be able to attack through the south road when the time would come. The high density of cannon towers caused some friendly-fire issues, but with a group of dedicated miners to manage it and repair, and unlimited resources, this was ok.

On the north-east, I had a group of paladins and a groupe of siege units. Full paladins would have been better.

I also retrieved an item from the lizards in the north-center of the map, and filled empty slots of my heroes with fire orbs.

At the moment you have cut enough trees/shrooms to get into the black base from the north, Progaderas (yes, it's him the fire god of the kobold vermins !) will take all his units through the teleporter for a massive attack. Which makes the end of the mission very easy : I attacked from both south and north and while I had to fight newly trained fire golems, taking out the barracks one after another was a matter of patience.

The attacking force of Progaderas got destroyed by the splash damage of cannon towers, only himself surviving and teleporting back to his base later. I purposefully delayed destroying the last barracks in order to "kill" him once again.

Once the last barracks is reduced to dust, the chapter ends on a win, and we're on to the outro cutscene and then a fateful interlude with Gardon and Van Durce.
 
Level 3
Joined
Feb 20, 2019
Messages
22
The orcs being present in mission 9 doesn't make any sense.

Like, if the cannon was under-defended then a smash and grab might make sense, but not when the entire Golden Guard is dug in right next to the freaking thing.
 
Level 2
Joined
Apr 8, 2019
Messages
6
Yesterday I finished playinig this campaign. Why so late? I live in Russia and get information about non-russian projects only after they've been translated. Your campaigns were translated only last year (and there were the first books only). So I couldn't write here when you upload it.

Firstly I wanna speak little bit about the first books. It was interesting experience, I'm very happy, that I found this campaings.

Now about The Second Human book. It's greate. I will not speak about quallity and your mistakes, it's too late for this in any case. I will speak about emotional level which is really high. You know that's the first campaign which almost made me cry (it was after interlude "Last Talk"). Relationships between Gardon and van Durce are godlike. I've never seen so touching and sad story in Warcraft campaigns. You are very cool storyteller. Thaks for your job.

This weekend I'll start The Second Orc Book.
 

deepstrasz

Map Reviewer
Level 69
Joined
Jun 4, 2009
Messages
18,848
Yesterday I finished playinig this campaign. Why so late? I live in Russia and get information about non-russian projects only after they've been translated. Your campaigns were translated only last year (and there were the first books only). So I couldn't write here when you upload it.
This site has been existing for years now. I'm glad you found it since it looks like you know English. Did the translators not mention the author and the site his campaigns came from until now?
I will not speak about quallity and your mistakes, it's too late for this in any case.
Any technical feedback would be useful and appreciated by map makers. They can update their work even after uploading it here.
 
Level 1
Joined
Sep 24, 2017
Messages
5
even the chapter 13 or the one where aedale killed his father left me emotional why do you create this kind of campaigns! i want to scream in an empty place right now!
 
Level 1
Joined
Apr 26, 2019
Messages
1
Can u make it so that the in the Last Stand the Iron fist start building a base if they r saved from the initial attacks...
 

Shar Dundred

Community Moderator
Level 72
Joined
May 6, 2009
Messages
5,872
Version 1.50 - The Rise of the Shadow released!
Chapter Seven:
- The items you get from Larine if you chose Salana are now the ones from Chapter Six instead of Chapter Five

Chapter Twelve:
- Replaced the building models used by the Dominion to better showcase their new organisation
- Changed the names of some edited buildings

Chapter Thirteen:
- New model for Orie Redfist
- New model for Red Mages

Chapter Fourteen A:
- Replaced the building models used by the Ironfist to better showcase their new organisation
- Replaced the models used by Peasants and Militia
- Changed the names of some edited buildings
 
Last edited:
A great campaign , the single thing I've seen is a bit the balance.
Elites aren't worth at all 7 food compared to executors or any 4 food unit even with a bone buff
Poison is not as weak as it looks :p
Elite spamming is also once too viable for a particular chapter it appears, which creates this mass food rule.
 
Level 2
Joined
Mar 9, 2017
Messages
5
I remember when you said elites would never be trainable but you buckled chapter 4 was god awful without them D:
 
Level 2
Joined
Mar 9, 2017
Messages
5
I know this isn`t the right campagin but the Orc tech buildings on the chapter you have 3 bases are all over the place even throughout the campagin you`re either missing or are in awful palces :(
 
Level 7
Joined
Aug 5, 2018
Messages
62
While the free (no food) elites you are given in some chapters are nice (though taking care of not losing them can be frustrating), I've never found effective in any single mission to train elites, there are always better choices (I outlined mines in my previous posts laying out strategies for all missions). 7 executors are much better than 4 elites.
 
Level 12
Joined
Mar 4, 2014
Messages
204
~Just finished this beauty of a campaign and what can i say?! IT WAS THE BEST CAMPAIGN that i've ever played in my life!:grin:

~All the stories from the first books merged so well with each other and gave birth to in my opinion a masterpiece of a story that can rival even the original war3 campaigns with Arthas and Illidan! Trully amazing, like i cannot praise the story enough, its soo good!

~Every single map felt like an entire small campaign/movie with super hard and EPIC fights which require real strategy ,a lot of hard work and plenty of tries to achive victory and because of that the joy of finishing even 1 of them greatly stimulated my brain with huge packs of dopamine!:gg:

~I finished the entire thing(on hard mode) in like 2 days because the story/fights/characteres were so addictive and i just couldn't stop playing!

~I have almost no negative things to say about this masterpiece other than the old usual A.I(allies) could be better in some missions and some of the missios might have been a bit too hard(the dwarf mission in the tunnels, took me like 20 tries untill i barely managed to finish it, in my opinion the hardest mission in the whole campaign was that one, no doubt in my mind).

~2 things i loved about this campaign and made me enjoy it to the fullest(beside many other things) were:

-the huge variety of different unit/building/and hero skins,a lot of map makers just use the same old and overused skins for every hero and unit, But not this one! I was shocked to see so many new faces everywhere and that made the whole experience much better(especially the overall story). My favorite skins are of course Gordon (aka the protagonist of the story), Vail's skin(she was my fav hero to play with as well) and the demon queen succubus woman, forgot her name.(my fav skin from the entire war3 history :wink:)
-and of course talking about units, damn man, all those new and awesome units/weapons of mass distructions that you implemented are just insane and trully out of this world, from crazy super futuristic air ships and insane long range war machines to massive nuclear bomb like power cannons that can obliterate whole armies in 3 seconds and many more, i really liked all the elite/improved units from every race as well like the elites(from iron fist) , paladins(from the golden guard), those invisible shades creatures( had a lot of fun playing arround with those one :D) and many more!

~With all the beautiful written stories and world building missions/conversations i would have loved to have a map of the entire World of Arkain(maybe as a loading screen or something) that would greatly benefit the story giving the player a better sense of his surroundings and making him more engaged with the world/people of arkain.

~That's it for this review, now im gonna set my eyes on the next chapter the orc second book :D Thank you for creating such a great campaign(this is one of the reasons why WAR3 is the best game of all time, because of people like you, the map makers and devs that keep it alive through custom games and custom campaigns! cheers!:goblin_yeah:
 
Level 1
Joined
Jun 21, 2019
Messages
1
I just made an account to do this: I tried finding if someone had the issue but 62 pages of comments is a bit much. My game keeps crashing on mission 3 when I get to the back of the orange base. Where the lumber mill is just north of the ark. Im kind of at a loss for what exactly is causing it.

I went in again with cheats just to get there quickly, note I did get there originally without cheats. I had I see dead people to see if something is over there but nothing of note is there. The lumber mill is attacked and poof crash. Going to test not destroying the lumber mill.

I can confirm destroying the lumbermill in the top right of oranges base causes the crash. Hopefully anyone else who gets this problem can see this and just avoid the mill :p
 
Last edited:

SIN

SIN

Level 1
Joined
Jun 12, 2016
Messages
1
The best campaign in which I played in his life: 100% interesting story of the original campaign Warcraft 3 and a cut above the Curse of the forsaken. No game of thrones is needed with such a plot!:D:)
 

Shar Dundred

Community Moderator
Level 72
Joined
May 6, 2009
Messages
5,872
Version 1.61 released!
Special thanks to my lad @Arowanna for creating a new, absolutely fantastic skin for Sir Praxeus!
praxeusnew-jpg.328382


General:
- Shieldbearer Changes:
* Decreased the damage dealt by Shieldbearers by 3
* Decreased hit points from 1500 to 1100
* Increased food cost from 4 to 5
- Reduced the movement speed of Warmechs in air form
- Increased the food cost of Black Dragons from 8 to 10
- All workers now start with Repair activated automatically
- New model & icon for Sir Praxeus "The Holy Bastion" Braelon
- New icon for the Order of the Holy Bastion leadership bonus
 

Attachments

  • PraxeusNEW.jpg
    PraxeusNEW.jpg
    10.2 KB · Views: 1,660
Level 20
Joined
Dec 19, 2013
Messages
1,084
One question.Does the nerf to shieldbearers also translates to the orc book,i mean do we as the player get the nerfed shieldbearer?If that's the case than the shieldbearers should be renamed to Paperbearers with those hits we are far better going with Clan brutes rather than shieldbearers and also the Red dragons who are the biggest cheesers of the orc book remain untouched...
 

Shar Dundred

Community Moderator
Level 72
Joined
May 6, 2009
Messages
5,872
Click
Take a close look at the changelog.
Also, saying that the Shieldbearers are now less useful than Clan Brutes is incorrect, the unit
is still very strong due to its abilities.
Instead it is no longer overpowered, the dragons have been made less OP as wellby the way,
but this is not the right place to discuss that.
Let's move to the Second Orc Book or the forum if you feel like further discussing these changes.
 

2R.

2R.

Level 1
Joined
Jul 24, 2019
Messages
2
Do I have to download the custom models? I can't see or select some custom units and heroes. I have this problem in the others books too.
 
Last edited:
Level 2
Joined
Jul 11, 2015
Messages
27
I might have missed something, but when I load Chapter 3-Rebellion, Larine the Exile is not present, only Cora and Gardon are after the previous cinematic told me I would have all 3 to work with. However, I can still use Larine's Boni for some reason even though she isn't present. I'm not sure what's up with this??
 
Level 2
Joined
Jul 11, 2015
Messages
27
Then who is this third Boni from?
upload_2019-7-31_18-54-20.png
 

Attachments

  • upload_2019-7-31_18-51-59.png
    upload_2019-7-31_18-51-59.png
    2.5 MB · Views: 58
  • upload_2019-7-31_18-53-53.png
    upload_2019-7-31_18-53-53.png
    7.1 MB · Views: 49
Level 8
Joined
Jul 28, 2019
Messages
64
I just created an account to fully follow this project.

This campaign starts in a bit confusing way, first arrives Var Durce suddenly and ends up imprisoning all previous heroes... for some reason, despite not absorbing the fragment as much as the eye, Aedale possesses demonic magic and talks to Lisara (How did that happen?), I won't give any more spoiler... although I would like to know if all boni alter the game... such as if in chapter 1 if I choose Merlon's boni, the story will be different from gardon's boni... or it just happens with the boni of Cora... I'd like someone to clarify that for me.

P.S:I forgive my bad English, it is that my original language is Spanish and I write through a translator :vw_sad:
 
Level 12
Joined
Mar 25, 2019
Messages
129
I just created an account to fully follow this project.

This campaign starts in a bit confusing way, first arrives Var Durce suddenly and ends up imprisoning all previous heroes... for some reason, despite not absorbing the fragment as much as the eye, Aedale possesses demonic magic and talks to Lisara (How did that happen?), I won't give any more spoiler... although I would like to know if all boni alter the game... such as if in chapter 1 if I choose Merlon's boni, the story will be different from gardon's boni... or it just happens with the boni of Cora... I'd like someone to clarify that for me.

P.S:I forgive my bad English, it is that my original language is Spanish and I write through a translator :vw_sad:

Hi, you play the first human book? you need to play the first one, but the choice of the humanity barely alter the opening because "according to the plan" , the story continue but with some differences

about the boni If i remember well only the second boni of cora and larine affect the story

P.S: My native language is spanish too :D
 
Level 2
Joined
Jan 16, 2019
Messages
2
Hi, you play the first human book? you need to play the first one, but the choice of the humanity barely alter the opening because "according to the plan" , the story continue but with some differences

That´s truth. Besides the other books, that help a lot more to understand and appreciate this great saga.

P.S: Nice to see more spanish speakers, i was starting to feel alone here XD
 
I just created an account to fully follow this project.

This campaign starts in a bit confusing way, first arrives Var Durce suddenly and ends up imprisoning all previous heroes... for some reason, despite not absorbing the fragment as much as the eye, Aedale possesses demonic magic and talks to Lisara (How did that happen?), I won't give any more spoiler... although I would like to know if all boni alter the game... such as if in chapter 1 if I choose Merlon's boni, the story will be different from gardon's boni... or it just happens with the boni of Cora... I'd like someone to clarify that for me.

P.S:I forgive my bad English, it is that my original language is Spanish and I write through a translator :vw_sad:

Boni with effect to the storyline:
1. Whisper of the Dark: Cora will defect to undead at the end of the story.
2. Elves of Ironfist: Larine is soft locked as your Queen for the elves. Salana will bleed to death.
Others have zero effect on the storyline as far as I remember.
 
Level 2
Joined
Sep 19, 2018
Messages
8
I just made an account to do this: I tried finding if someone had the issue but 62 pages of comments is a bit much. My game keeps crashing on mission 3 when I get to the back of the orange base. Where the lumber mill is just north of the ark. Im kind of at a loss for what exactly is causing it.

I went in again with cheats just to get there quickly, note I did get there originally without cheats. I had I see dead people to see if something is over there but nothing of note is there. The lumber mill is attacked and poof crash. Going to test not destroying the lumber mill.

I can confirm destroying the lumbermill in the top right of oranges base causes the crash. Hopefully anyone else who gets this problem can see this and just avoid the mill :p

I've had this too, I think it's something wrong with the AI trying to rebuild it but for whatever reason can't and crashes the game.

Either way thanks for the help. :peasant-thumbs-up:
 
Level 1
Joined
Aug 27, 2019
Messages
4
Hello guys, maybe you can help me...

I just made the account- first of all the books are really awesome, enjoy playing them a lot. Thanks for the great work !

I played the second human book but after Mission 8 it just stopped- I gotta add that i did not play them in the correct order. So i started the whole campaign again from the beginning, made the choices and still couldn't play chapter 9. Can anyone help me?

Thank in advance :)
 
Level 1
Joined
May 13, 2019
Messages
7
Cheats in this campaign are not disabled, but they aren't supported. If you cheat and encounter any bugs because of that, I won't fix that. There are no known major issues so far, this is just an ordinary announcement.
Hi i want to ask you when i click on first mision i mean where i must choose the ways how i finished first book it doesnt load and it gives FATAL ERROR exception:0xC0000005 (access_Violaion) at 00:23:025240EC The instruction at 0x025240EC referenced memory at 0x00000014 the memory could not be "written" Press Ok to terminate the application PLEASE HELP ME FIX THIS i really want o play this campaign help me please
 
Top