• 🏆 Texturing Contest #33 is OPEN! Contestants must re-texture a SD unit model found in-game (Warcraft 3 Classic), recreating the unit into a peaceful NPC version. 🔗Click here to enter!
  • It's time for the first HD Modeling Contest of 2024. Join the theme discussion for Hive's HD Modeling Contest #6! Click here to post your idea!

Second Orc Book of Arkain (Patch 1.29.2 or newer!)

This bundle is marked as director's cut. It exceeds all expectations and excels in every regard.
arkain_2020_x200-png.369838

! No longer updated !
Check out the
True Story of Arkain for updates!


full


A Campaign Series made by Shar Dundred

! Requires Version 1.29.2 or newer !
You are not allowed to publish any edited version of any Arkain map! This includes but is not limited to Reforged edits!


Story
While the Orcs had managed to break through the lines of their Imperial enemies, it quickly became clear that their invasion was doomed from the very beginning. The Demons used their attack to further their own invasion and not only smashed through the Human defenders but also through the clans. Now they on the run. A new strategy must be found. Allies must be found.
Command the powerful Orcs and form alliances with those who would ally with your kind in order to become more powerful than any Orc army of the past. Use your new forces to withstand the armies of your enemies and destroy them to survive this war and to find a place for your people to live.
Will you be able to unite all those different factions? Will you be able to maintain peace among your own ranks while fighting your enemies or will you fight not only against the enemies of your kind but also against your own? Only time will tell.


Campaign Series Info

The Legends of Arkain is a campaign series which takes place on the world Arkain.
The races of Arkain fight against the demon invaders, who try once again to enslave every being on Arkain. The Humans, the Orcs and the Undead will have to make a stand against them... or face complete annihilation or enslavement by the Demons.
This campaign series will consist of actually three different series. There will be a Human, an Orc and an Undead campaign series. They will all run in the same timeline but will present three different stories and outcomes. When they are all finished, it's completely up to you, who wins this conflict.
Those, who win the war, will write the history.

You like the campaign?
Click here to see the progress of the series!

Click here for the First Human Book!
Click here for the First Orc Book!
Click here for the First Undead Book!


Click here for the Second Human Book!
Click here for the Second Undead Book!

Let's Play made by @Jayborino!
Features
- Three different storylines/campaign series
Take control of one of the three factions, the proud Humans of the Empire, the plundering and strong Orc Clans or the mysterious Undead Nexus and their endless army of the dead, and face the demonic invasion as well as other struggles that await you.
- New units
Command units, you already know, as well as completely new units with new upgrades and abilities.
- Decide the fate of Arkain
At some points of the campaigns, you'll have the opportunity to decide things, that affect the storyline, characters and sometimes even the chapters you play or how you have to play them. By doing or, well, not doing certain side quests, you can also affect the campaign.
- Three difficulties
You can play the campaign in either easy, normal or hard difficulty, just like in the original WC3 campaigns. It will impact on the AI difficulty and scripting as well as other minor changes.
In easy version, for example, the AI won't rebuilt lost buildings.

- Full Jass AI
In this campaign series, every single AI is written in Jass instead of being created with the AI editor. This makes the AI more intelligent.
- Universal hotkeys
All abilities, units and buildings use QWER hotkeys.
- Race Mechanics
Every available race has its own unique race mechanic to improve gameplay - and, in some cases, to add new ways influencing the story.

Characters

full
Rangul
Growing up as a usual member of the Deathbreeze Clan, Rangul's abilities and his dedication to his race along with his strength made him rise up the ranks of the clan quite fast until he became the first and most trusted lieutenant of the chieftain. Rangul sees his race on its way to utter extinction and dreams of a realm for his people. A strong realm that would prosper and serve as staging ground for many invasions. Dedicating his life to create this realm himself, he planned to not only be the successor of the chieftain but to also unite all other clans under his command, sending them against the Kingdoms of the Humans. Their lands would be taken over and used by the Orcs who would then become more than simple marauders and pillagers.
However, his plan has one major hole: The Demons and their constant attacks. While Rangul thinks that his people could be powerful enough to defeat some demonic army, he has yet to come up with any ideas on how his people should wage war on the Kingdoms on the one side and defend against the Demons on the other.

full
Amari
The chieftain of the Cliffhunter Clan, Amari, was born as the daughter of Rangul. While women in the Orc society were forced to stay at home and take care of it and the children while the males were fighting, Amari wanted to prove to her father, whom she knew was more tolerant towards new ideas - him adopting a human girl was perfect proof for his. She secretly gathered a few other members of the Deathbreeze Clan and went on a mission to gain his trust. However, she was betrayed and forced into exile - like all Orc women who were unwilling to "stay home". The fate of an exiled female was often death. However, Amari did not want to accept that fate. She sneaked her way through to the Kingdoms where she met other exiles and together they founded the Cliffhunter Clan - a clan consisting of all Orc women who had been exiled by their clains. Therefore the Cliffhunter Clan is considered an exile clan by the other Orc clans - and therefore hardly even considered a real orc clan.
Amari and her followers raided the Kingdoms for a long time, with Amari being smart enough to keep her clan moving instead of settling anywhere to avoid being detected by the armies of the Kingdoms. Since the foundation of their clan, the number of exiled Orc women has increased dramatically, showing that there are many women who want to fight. Amari promised to herself that, one day, she would make the other Orc clans accept her clan and reform the society of her people regarding females.

full
Sasrogarn
Sasrogarn is Rangul's eldest son and a strong spellcaster - like his father. He is Rangul's left hand and one of the few Orcs who already know of his plans and supports him. Sasrogarn shares the dream of his father and has sworn that he'd carry on his dream in case his father dies. But he doesn't share the patience of his father and approves of taking a more direct and aggressive approach. This seeming eagerness for war has not quieted the whispers that the son of Rangul is a weakling and coward, however.

full
Grofzag
Being the son of Ephrog, Rangul's closest advisor and ally, Grofzag grew up together with Sasrogarn, the two being friends ever since their birth, being even born on the same day.
Unlike his childhood friend, Grofzag has always been a strong and respected member of the Deathbreeze Clan. When he was still considered a child, he ripped out the back of a wolf that was trying to eat him and used it, to punch its rider, a member of an enemy clan, to death. Grofzag staying at his friend's side is often considered the only reason why Sasrogarn is even still alive, for he saved Sasrogarn's life in battle several times, providing the strength and brains his friend lacked.
While proving that he possessed the brutal strength of most Orcs, Grofzag is considered far less simple-minded than most others, including his close friend Sasrogarn - the friendship being the one thing whispered to be the only mistake he has ever made, so far. He also is one of the few members of his clan who respects the human Vanessa.

171388-albums8729-picture106278.jpg
Vanessa
Vanessa grew up as the daughter of a lesser noble in the Human Kingdoms. When she was five years old, the mansion of her father was raided by the Deathbreeze Clan. Due to the absence of her father, they managed to defeat the guards and take everything they could find. Somehow, the girl wasn't terrified by the strange creatures and didn't hide. She was found by the Orcs and their leader, the young Rangul, decided to take her with him instead of killing her. She grew up among the Orcs and was even accepted as a member of the clan - at least by the chieftain and half of the clan. Many dislike her for still being a Human instead of an Orc. Still, she dedicates her life towards Rangul and the Deathbreeze Clan.

full
Commander Daric
The mercenary commander Daric spent many years in service of the Empire, putting down revolts and uprisings in many regions both in the Empire and the Kingdoms. For his service and his ingenious tactics and strategies, he had been rewarded with lands between the Kingdoms of Salria and Rengar. However, Daric refused to take any noble title and instead had decided to continue using his title as a mercenary commander, focusing on taking down the enemies of the Empire.
It is said that Sir Lerrig Goldheart has hired Daric to make up for Lerrig's own rather lacking strategic skills. While Daric himself considers Lerrig a poor tactician, the experienced mercenary acts professional and respectful and is the one keeping Lerrig's men in line - though now many soldiers began to say that things would go much better if Daric was in command instead of Lerrig.

Click here to learn more about the other characters!


full

full

full

full

full

full

full

full

full

full


Initial Release

General:
- Scrolls of Healing now require a Fortress instead of a Black Citadel, making them purchasable now

General:
- Fixed Zarok
- Pechan no longer costs food in his Robo Goblin form
- Fixed Air Form ability tooltip of Warmechs

Chapter One:
- Fixed Korjaha's dialogue

Chapter Nine:
- Fixed tooltip for Red Drakes and Red Dragons

Chapter Ten:
- Fixed New Units message

Chapter Thirteen:
- Fixed description typo

Chapter Fourteen:
- Fixed description of the main quest

Epilogue:
- Fixed a special effect not appearing at the end of the cinematic

General:
- Renamed Orc Frigates to Destroyers
- Fixed the message for completing one part of a quest with multiple quest requirements in all chapters
- Reduced the movement speeds of Warmechs in air form
- Duke Redfist is now wearing the Scepter of Healing

Chapter Four:
- Fixed the hotkey of Rock Golems

Chapter Thirteen:
- Grofzag now starts the chapter with the Hammer of Kome and keeps it for the following chapters

General:
- War Mills now use the BETA model & icon of the Orc Lumbermill
- Rock Golems now require a Spirit Lodge instead of War Mill

Chapter Six:
- Replaced the building models used by the Darkmind Clan buildings to fit both the weather and their "renegade" status
- Added slightly more snow terrain

Chapter Thirteen:
- New model for Orie Redfist
- Replaced the building models used by the Dominion to better showcase their new organisation
- Changed the names of some edited buildings
- Cannon Towers are no longer available
- Orc Watch Towers have been upgraded:
* Higher gold cost
* Weaker version of the Cannon Tower attack against ground units in addition to the attack against air units
- Pig Farms have been replaced by Burrows for Clockworkers
- Spirit Lounge is no longer available but also not needed as all caster upgrades are already researched

Chapter Fourteen:
- Replaced the building models used by the Dominion to better showcase their new organisation
- Changed the names of some edited buildings
- Cannon Towers are no longer available
- Orc Watch Towers have been upgraded:
* Higher gold cost
* Weaker version of the Cannon Tower attack against ground units in addition to the attack against air units
- Pig Farms have been replaced by Burrows for Clockworkers
- Spirit Lounge is no longer available but also not needed as all caster upgrades are already researched

Chapter Fifteen:
- Replaced the building models used by the Dominion to better showcase their new organisation
- Changed the names of some edited buildings
- Cannon Towers are no longer available
- Orc Watch Towers have been upgraded:
* Higher gold cost
* Weaker version of the Cannon Tower attack against ground units in addition to the attack against air units
- Pig Farms have been replaced by Burrows for Clockworkers
- Spirit Lounge is no longer available but also not needed as all caster upgrades are already researched

Epilogue:
- Slight dialogue adjustments (including a scene at the end where Aridon uses the REAL name of the Master of Shadows)

General:
- Reduced repair cost of Goblin Merchants
- Pechan now has a unique item, allowing him to place Goblin Landmines (endless charges but with cooldown)
- All versions of Finger of Death and Finger of Pain can no longer target units and buildings allied to the caster

Chapter Twelve:
- Pechan now has some land mines to protect his base

Secret Chapter:
- The enemy bases now make use of several land mines to bolster their defenses
- Vanessa's Gem of Health has been replaced with a Gem of True Seeing
- Increased the hit points & mana of Vanessa by 300 each
- Increased the maximum & starting hit points & mana of Zelech & Fox by 300 each
- Replaced the building models used by the Dominion to better showcase their new organisation
- Changed the names of some edited buildings
- Replaced all Cannon Towers with Orc Watch Towers
- Orc Watch Towers have been upgraded
- Several units of the Dominion have been replaced with more powerful units
- Sand Dragons now start with their upgrade researched
- Several dialogue changes

General:
- Increased the hit points of Axethrowers from 420 to 500
- Added Redfist banners to every chapter featuring the Redfist

Chapter Four:
- Removed the northern (LB) and southern (Purple) entrances to the Grey base
- Changed the ownership of some units to avoud Grey sending out defense forces to attack the player
- The base of the Royal Army on the other side of the river no longer gets attacked by Demons (neither does the player if the Royals are killed)
- Small terrain adjustments to make some choke points less effective for the AI
- Stronger defense for Grey
- Players now share vision with the Demon waves

Chapter Six:
- The last enemy base will no longer replenish any units in the fortress apart from the Elites directly protecting it
- Replaced a few items carried by enemy heroes
- Players now share vision with the spiders
- The Darkmind Clan will now spawn AI controlled reinforcements in regular intervals to support your offensive
- Slightly moved Aedale's buildings at the entrance of the fortress away from it

Chapter Eight:
- Minor changes to some tiles in the starting area
- The Deathbreeze Clan will now spawn AI controlled reinforcements in regular intervals to support your offensive
- Increased the amount of starting units
- Increased food limit by 10
- Fixed the lack of level, abilities and items of the dwarven hero

General:
- Shieldbearer Changes:
* Decreased the damage dealt by Shieldbearers by 3
* Decreased hit points from 1500 to 1100
* Decreased food cost from 6 to 5
- Increased the food cost of Red Dragons and Sand Dragons from 8 to 10
- All workers now start with Repair activated automatically
- Increased the intervals between the attacks to make it less likely for several attacks to occur at the same time
- Minor model adjustments

Chapter Five:
- Grammar fix in the quest log

Chapter Six:
- Choosing Blen now results in all Towers & Burrows of the Orcs getting destroyed to make tower spam less likely to hurt yourself
- Corrected the name of Captain Gregor
- The Captains Gregor & Elias who have been with Blen since the first mission of the First Human Book now stay if you choose Blen over Rath
- The flames in the ending cinematic now are also properly displayed if Blen is chosen
- Human towers will now shoot their enemies correctly after the cinematic if Blen is chosen (the rest of the bases will remain passive)
- Some (by far not all!) of the defensive forces now belong to the base next to them, meaning that some of the defensive troops will be reinforced by nearby bases
- Replaced some units around Harmos' base with units of the Order of the Flame

Chapter Seven:
- Fixed the message regarding the new units
- Slightly increased the number of units for the Stonelord Dwarves and the Salrian Army
- The Redfist is no longer displayed in the score screen

Chapter Eight:
- Fixed the Knights of Salria not being able to train Paladins
- Adjusted the attack times of the enemy bases to slightly decrease difficulty
- Increased the strength of the attacks coming from the Knights of Salria
- Decreased the time in the ending cinematic until Zairmak uses Finger of Death
- Flammedus' Centaurs are now controlled by an AI
- Doubled the amount of resources gained for completing the optional quest in Chapter Seven
- Cliffhunter Clan starts with Centaur Hooves already researched
- The Deathbreeze Clan (Player) has been replaced with Ravaging Fire Clan to make colors more distinct
- The Ravaging Fire Clan starts with Burning Oil already researched
- The Ravaging Fire Clan starts with Golem Power already researched
- The Cliffhunter Clan no longer has access to any Orc units (apart from female ones)
- The Ravaging Fire Clan no longer has access to any female Orc units or any race allied to the Orcs apart from Golems (and Bearmen if recruited)
- Moved Magic Vault to a new position between the two bases of the player
- Both the Ravaging Fire Clan and the Cliffhunter Clan are back at a maximum of 100 supply instead of 80
- Replaced the Merciless accompanying Thorn with a new unit type
- Increased the hit points of Commander Thorn by 1500
- Cassius now also trains Mercenary units

Chapter Nine:
- Fixed the message regarding the new units
- The Ogre Legion now joins the fight against the Moghtar once the avalanche has been caused by higher powers and will also train more units to join in
- Improved the graphical effect of the avalanche
- Sand Dragons & Sand Drakes in this chapter no longer cost any food

Chapter Ten:
- Doubled the interval between the summoning of new Fire Golems after the initial summons
- Slightly increased the time for the first group of Fire Golems to be spawned
- Decreased the number of summoned Fire Golems
- Increased the intervals between the attacks to make it less likely for several attacks to occur at the same time

Chapter Thirteen:
- Added some defensive units

General:
- New model & icon for Sir Praxeus "The Holy Bastion" Braelon

General:
- Fixed Batrider model for newer versions of the game

Chapter Thirteen:
- Increased the gold in the inital goldmine
- Added a second goldmine to the player base
- Tweaked AI attacks
- Seperated the bases of the player and his allies by trees to avoid the AI walking through the player to attack the allies
- Increased the lumber per tree from 50 to 300
- The Redfist Elite, a faction of the Bloodstone Dwarves & the Redfist (not the Redfist Vanguard) remain passive until certain conditions are met
- Tweaked the target change for the allied AI

Chapter Fourteen:
- Tweaked AI attacks

General:
- Final (hopefully) fix of the Batrider model for newer versions of the game
- Several AI tweaks

General:
- Several tweaks and fixes (including changes that fix some bugs caused by newer Blizzard patches)
- Changed & Replaced several unit types and hero models to fit their kingdom/faction
- New model for Shieldbearers (courtesy of @HerrDave)

Chapter Six:
- Replaced Brutes with Firestarters
- Added Force Walls to Greymoore's base to avoid the player from rushing to trigger the choice too early (the Force Walls stay until all other Castles inside are destroyed)
- Added a Sentry Ward to the second gold mine
- Added a Fountain of Health on the first level of the castle

General:
- New model for Duke Redfist (courtesy of @Rhapsodie)

Chapter Twelve:
- Bonelords now have the "Ancient Bone Armor" which reduces all non-Hero damage by 50%

General:
- Several grammar improvements

Chapter Four:
- Renamed the Imperial Army to Wolf Regiment
- Changed the color of the Wolf Regiment to Coal
- Changed the class of Elaine the Beasttamer from Ranger to Mercenary Ranger

Chapter Eight:
- Fixed ghost Flammedus in the ending cutscene
- Changed the class of Elaine the Beasttamer from Ranger to Mercenary Ranger

Chapter Twelve:
- Expanded many ingame dialogues, especially the Bonelords' (a little foreplay to the Bonelords Expansion that will be part of the True Story of Arkain)
- Renamed the Bonelord's factions from Rohir Nexus to Scarec Nexus
- Changed the color of the Scarec Nexus to Snow

Chapter Fourteen:
- Minor building movements


Models & Skins:
Blizzard Entertainment
67chrome
epsilon
Wandering Soul
infrenus
Tauer
AndrewOverload519
Mephestrial
Dojo
PrMosquito
Hawkwing
Em!
dickxunder
acagnip
Uncle Fester
Frankster
Mc !
IamMclovin
AhhFreshWeeD
Sin'dorei300
Elenai
Kuhneghetz
CloudWolf
alreadyused
Dark Hunter1357
Dmitry Rommel
Kitabatake
Shar Dundred
RazorClawX
Uljimasa Hojo
eXciTe
Sellenisko
frostwolf
-Grendel
Skipper
Deolrin
gookywooky
Callahan
BlinkBoy
Hueter
Coinblin
supertoinkz
SuPa-
Tarrasque
Power
Afronight_76
chr2
olofmoleman
imforfun
Deolrin
Pyramidhe@d
HerrDave
Meteor_demon
kangyun
Kael Theron
PROXY
JetFangInferno
JesusHipster
Makoodzaka
Rizz_Boomer
Arowanna
deepstrasz


Icons:
Blizzard Entertainment
Uncle Fester
CloudWolf
xylign
SkriK
CRAZYRUSSIAN
Darkfang
GreyArchon
67chrome
Fjury
PrMosquito
INSEKT
Muoteck
dickxunder
Frankster
CloudWolf
Kuhneghetz
Elenai
Heinvers
Shar Dundred
Uljimasa Hojo
SinisterX
Darkfang
Hemske
Palaslayer
NFWar
Hellx-Magnus
Justicebringer
Sin'dorei300
sigelang
Mr.Goblin
Mythic
antihero
Sellenisko
-ToasT
jigrael
Just_Spectating
APproject
Pins
Eagle XI
kangyun
-Grendel
BLazeKraze
Mc !
Kael Theron
Stanakin
JollyD
The_Silent
-Berz-
chr2
olofmoleman
San
Scias
Akolyt0r
Peekay
Edge45
ChevronSeven
4eNNightmare
Arowanna


Campaign Preview Screen:
Heinvers

Campaign Logo:
Mythic

Campaign Chief Development Tester and Grammar Genius:
Kasrkin

Additional Testing:
Championfighter25
LISBOAH


Everything else made by:
Shar Dundred

First Supporters:
Theoden of KoMe
Chen
youness
Kasrkin
kakuzu
BandolXD
Heinvers
Imperator
Veritas 117
PlankingWolf


Please contact me via PM if I forgot to give you credit for your resource!


To Blizzard Entertainment for this great game.
To Turnro whose great campaigns inspired me to revive this old project.
To Jayborino for his enjoyable let's play projects of the Arkain series!
To all who supported this project!
To all who reported bugs and gave/give constructive feedback both during and after the development!
And very many special thanks to Kasrkin, who supported the creation of this project in many, even countless ways!


Feel free to post your suggestions, opinions and questions!
Please report any bugs!

Keywords:
Arkain, Legends, Legends of Arkain, LoA, campaign, series, Gardon
Contents

Legends of Arkain Second Orc Book (Campaign)

Reviews
Daffa
One of the Hosted Projects. In addition, I have personally played the demo versions and they are well-made. Unless a major bug is reported in this particular version, I don't see why holding out approval status for this map given the sheer amount of...

Pick your favorite characters


  • Total voters
    135
Level 2
Joined
Dec 31, 2018
Messages
26
Well , it was one of best campaigns that i played and should be recommended but still think there is a gap in the story of this book .
first of all Rath vs Glenn i choose Glenn but also still think why did this choice exist even i mean we know that at the human arkain second book that Rath was angry mad and hunting human to revenge for the people who betrayed and killed Glenn but not to mention that in the arkain in the mission before last one where we fight as human against undead and orc and demons rath was there and was talking about this too soif we talk about two separate events Rath and Glenn should never meet each other .
second : at the it made me surprised that there can be plot twist in the story as adrion didn't make his plans work as he was preparing .
third : at the war between human and the tribal i wanted to know why didn't we see that in human one like if gordon allied in secret that should be mentioned on the human book even if we talk about separate events we should see the events in this in the sides of human and orc in the two books even if it will be in different ways .
thank you for reading and hope you can see it as question not complain as i give this camp 10/10 for all the efforts and the plot on the other sides of story and also for the massive hard work for all these missions you really made anther legendary arkain thank you for you hard work again keep it up for the undead second book.
 
Level 29
Joined
Mar 28, 2015
Messages
2,678
Alright, I finnaly had time to play the new version of this campaign

General
-Brockta's item's description says 'burrying' instead of 'burying'
-The positions of some upgrades might need to be reviewed because I noticed that some switched positions
-A pity we never have access to Sand Dragons as a recruitable unit. Yeah, they have practically the same function as Red Dragons, but still...
-The Gnoll King is the only major Dominion leader we never get to play with as a Hero. This seems like a waste, just saying. While this could also be applied to the Bearman chieftain and while it would be interesting playing with him as well, the bearmen are an optional race and don't play an importat role in the story, while the Gnolls do.

Chapter Twelve
-I don't think it makes much sense we having access to the Envenomed Arrows for Gnoll Assassins before the Gnolls arrive
-Even after Logan orders his soldiers to forget the Dominion and focus on the Undead, his team is still considered hostile to us and they keep attacking us even when their base is being overwhelmed.

Chapter Fifteen:
-At this point of the campaign, I think all upgrades should already be researched. Having to spend resources for upgrades while we face the Demon Legions seems kind of a waste of both resources and time.
-I don't know if this is on purpose, but the only Demon Hero that the AI ressurects is Kersidar, while the two Pit Lords never return
-Our ally AI has this strategy: they send their armies attack around the same time the demons send waves and get slaughtered. All except Oneye that uses his Windwalk to hide right before dying. However, rather than retreating in order to recover, he stays close to the demons and occasionaly attack them but have have to use Windwalk right after attacking once, but most of the time this doesn't work and he gets killed without dealing any significant damage.
 
Last edited:

Shar Dundred

Community Moderator
Level 72
Joined
May 6, 2009
Messages
5,862
Version 1.22 released!
General:
- Increased the hit points of Axethrowers from 420 to 500
- Added Redfist banners to every chapter featuring the Redfist

Chapter Four:
- Removed the northern (LB) and southern (Purple) entrances to the Grey base
- Changed the ownership of some units to avoud Grey sending out defense forces to attack the player
- The base of the Royal Army on the other side of the river no longer gets attacked by Demons (neither does the player if the Royals are killed)
- Small terrain adjustments to make some choke points less effective for the AI
- Stronger defense for Grey
- Players now share vision with the Demon waves

Chapter Six:
- The last enemy base will no longer replenish any units in the fortress apart from the Elites directly protecting it
- Replaced a few items carried by enemy heroes
- Players now share vision with the spiders
- The Darkmind Clan will now spawn AI controlled reinforcements in regular intervals to support your offensive
- Slightly moved Aedale's buildings at the entrance of the fortress away from it

Chapter Eight:
- Minor changes to some tiles in the starting area
- The Deathbreeze Clan will now spawn AI controlled reinforcements in regular intervals to support your offensive
- Increased the amount of starting units
- Increased food limit by 10
- Fixed the lack of level, abilities and items of the dwarven hero


Special thanks to @Azazzello [XGM] for his Stromgarde banner which turned out to be THE perfect banner
for the Redfist!
full
 
Level 4
Joined
May 30, 2019
Messages
9
In the red day , I have played on normal and the enemy AI sends attack waves too often to leave the base to attack any bases and my allies are not even attacking. Flamedus base almost died , much weaker than the bottom one.
After like 20 minutes , got attacked by 5 factions combined (around 400 - 300 food) and lost
 
Last edited:

LickMyEyeBall

L

LickMyEyeBall

- The base of the Royal Army on the other side of the river no longer gets attacked by Demons (neither does the player if the Royals are killed)

Could someone explain this bit? I'm a bit lost.
 
Level 21
Joined
Dec 20, 2015
Messages
328
Could someone explain this bit? I'm a bit lost.

Sounds like there will no longer be any demons attacking blue. This likely means Blue stays mostly passive through the mission; maybe their base reinforces the outer defenses of the other "lanes". Unsure if attacking blue causes the other two human factions to attack you now or not, but I assume not.

This primarily means two things:
  1. The hidden timer for the map is effectively removed as demons will never end up attacking your base unless you purposefully destroy the other top and bottom human bases.
  2. It turns blue's base more into a possible expansion for the player, assuming you can pull it off and are willing to take the human negativity points narratively.

I like how completing the bonus objectives or leaving them is a truly challenging decision on this one.
 
Level 3
Joined
Dec 25, 2017
Messages
43
Sounds like there will no longer be any demons attacking blue. This likely means Blue stays mostly passive through the mission; maybe their base reinforces the outer defenses of the other "lanes". Unsure if attacking blue causes the other two human factions to attack you now or not, but I assume not.

This primarily means two things:
  1. The hidden timer for the map is effectively removed as demons will never end up attacking your base unless you purposefully destroy the other top and bottom human bases.
  2. It turns blue's base more into a possible expansion for the player, assuming you can pull it off and are willing to take the human negativity points narratively.

I like how completing the bonus objectives or leaving them is a truly challenging decision on this one.
actually,for the initial gold mine is only 30000,not 60000,
it force you to obtain the gold mine of the blue base,for maintaining 80 food army and keep refilling the tower spam of the middle base,
accumulating the gold for a continuous 100 food army to attack purple which with elites and ares knights inside.
 
Level 1
Joined
Jun 5, 2019
Messages
2
Sooo, gotta give some feedback after playing through the first few missions. I haven't played through all of it yet, there are a few missions giving me some severe troubles, but I still want to give my opinion. Overall, this campaign does somewhat seem like a step back from the previous ones, difficulty-wise. Now, of course I know the Arkain series tends to be rather hard, but this one takes the cake I think. Writing, models, etc. of course are all good, no complaint there, but some design decisions are...questionable in my opinion. But let's start from the top

Mission 1: Not too much to say about this, it's a fun little micro-mission. Ironically, the optional paladin is a harder fight than the troll leader.

Mission 2: Another micro one, and this one steps up the difficulty. It's paramount you save as many units from the two big battles as you can, and without, you're simply not going to be able to finish this one. Using One-Eyes attack-slowing poison, and spreading it as much as possible seems to also be rather important. Another good one, all in all.

Mission 3: First macro-map, starting rather slow compared to the rest of the missions I've played so far. Taking the left imperial base asap is rather important, as it eliminates one angle of attack and is a safe expansion. After that, I just ate myself counter-clockwise through the humans bases. Your ally isn't doing much, but I don't think they're meant to, apart from being a meatshield against blue. Purple can actually get overwhelmed, so you may have to help them out from time to time.
With all the bases you're taking if you're destroying every human base you can afford to simply flood the enemy with troops at some point, and after that, the mission is pretty straight-forward. A fun mission, all in all.

Mission 4: Oh boy...I know I am by no means a pro-player, but I like to think I'm decent enough, but this one is too hard to be enjoyable in any way shape or form. This is a brutal spike in difficulty, and saying that there is no longer a hidden timer with the recent update is strictly false. I attempted this mission in two different versions, once pre-1.22 with 3 demon waves, and with 1.22 where the blue base is a possible expansion, but, well...
Playing this, it might as well be a pure hold-out mission. There is very, very little downtime between the enemy attacks(always grey->teal->purple->pause), you can't move out of your base before a cycle finishes, before the next enemy jumps in and attacks you, and those attacks have it in them. Splitting your forces doesn't seem like a viable solution, since all targets you could attack safe for the blue barracks are too well defended for half an army to do any damage, and the enemy attacks are strong enough to be able to actually wipe out the half you leave at home to defend. Most likely, you'll be on one base for the longest time, which means you can not drown the enemy in bodies like in the last mission.
I was never able to actually take the eastern blue base and hold it. When demons still attacked there, you would have to split your army to defend it while building up turrets(and splitting your army is a bad idea), but even after there are no more waves coming from that entrance, I wasn't able to actually take it. Blue rebuilds very aggressivly, even if down to one barracks, and the time you need to wipe that base out simply isn't there before grey come in with another cycle. Now, I haven't tried building an ungodly amount of turrets to defend my main base, and maybe that is the holy grail, but it doesn't seem like it. The numerous catapults, shockwave hero and starfall ranger, and the fact that the entire imperial frontline has Defend(and elites no less) makes them seem to be able to simply smash through any amount of turrets faster than you can afford them.
The red and cyan, together with their demon waves might as well not exist. They rebuild very aggressivly, meaning anything but a HQ+complete worker-wipe is non-damage, and the demon waves are not enough of a threat for them fast enough to make poking at them actually viable. What is more, with how quickly the enemy attacks, you don't have enough time to properly destroy any of the bases(including blue) before grey will come knocking again, and you want to wipe those attacks out as fast as possible, unless you enjoy 2v1s
I tried rushing the blue reinforcment points to allow the demons slightly more pushing power, I tried rushing purple with a full foodcap worth of troops, I tried taking out blue and expand there, none of these seemed to work. Purple does have a good amount of base defenses, you're not given enough time to take care of blue and it's damnable chokepoint bridge, and the demons have the power of a paper towel. Maybe I'm missing something obvious for this mission, but after smashing my head against a wall for several hours, I turned on godmode and skipped this one. I never played it when it didn't have a fountain in your base, but I don't think I want to experience that.
P.S.: Shamans seem completely wasted in this mission - they don't have bloodlust, and there isn't enough to purge to make them a worthwile consideration. And Chain Lightning is much easier to use AOE than Lightning Shield

Mission 5: Surprisingly forgiving with its runes and the two fountains, it's practically relaxing after mission 4. The final stretch seems rather easy though, with the almost unsupported pitlord dropping you a rune of restoration after getting bullied by your single-target-killer duo, and the 5 enemies after that are just as unimpressive.

Mission 6: Oh boy, another one, and this time for all the wrong reasons, although 1.22 turned this mission from a frustration-fest into a very enjoable onslaught. My main gripe with this before 1.22 were the two chokepints leading to the fortress' second level, and the 4 vindicators+paladin the AI would endlessly rebuild there. This resulted in me never actually being able to push into the central Kasrkin base after the chokepoints, since after being slowed down so much, there would always be an attack coming from Hamos or the top right Kasrkin, and with the agressive rebuilding, they would fairly easily overwhelm a full foodcap of yours. 1.22 fixes that(although the chokepoints are still there, they don't choke much anymore), and the AI waves will distract the enemy long enough for you to do actual damage. The AI in general seems to rebuild much less agressivly in this mission, which is also a plus, when consdering that otherwise, it seems to try and attack you even if it has nothing but a barracks and a few farms. With how much gold you're getting at some point, it becomes fairly easy to once more drown the enemy in bodies, especially without a chokepoint holding you up as it did before. Picking between Rath and Blen seems like an interesting choice, even though I am not far enough into the campaign yet to see the consequences.

Mission 7: This is a tough, but very much beatable one. The enemy can become overwhelming, especially considering with how large the map is, and how far apart their possible attack angles, but after a good hour-and-a-half, I beat this one.

Mission 8: Aw, here we go again. Hard for all the wrong reasons. You have 240 food worth of supply. You also have three seperate factions for some reason, which does nothing but inconvenience you.At least when that happened in the Human Book 2, all the factions had some differences. The only thing that is different here it seems is that Flammedus can't build shredders, and that's it. So now you have to micromanage three seperate bases with their own layouts, heroes, upgrades, and structures. Having 5 level 6+ heroes seems powerful at first, but then you realize that the enemy has (almost) 2 per base, and they're all level 9, with a few bubble-paladins and one more with 20+ armor thrown in for good measure. To make matter worse, there map is very chokepoint-y, because that's fun with 240 food. You have to attack from one angle, defend another one while actually using abilties so the enemy doesn't overwhelm you, and whoops, they stacked two atatcks on top of one another, a starfall happened, and now they're in your base. Did I mention chokepoints? They make it so you can't interrupt Starfall half the time, because you can't get in range of the ranger. The wolf-regiment base seems like an almost impossible nut to crack, and with how frequently attacks come from that direction, I'm not sure how you even can attack it while also properly defending your own base. This was another one I skipped with godmode

Mission 9: Another fun one, for a change. The damond of summoning is worth its weight in gold for you to push out while being able to leave Rangul at home to make sure you stay defended. Grey and Purple always seem to attack at the same time, but they don't come with heroes, so it's just a massivle blob of grunts and a few casters. The mission does become kind of trivial once you get red dragons and realize that the have no cap(wonder how long that's gonna stay...), so you can just faceroll everything with twelve of them, but a bit of a power fantasy soothes the soul after certain other missions
P.S.: If one of your dragon roosts becomes destroyed, the counter for your quest objective goes down. Made me panic for a moment when I killed the last roost and saw (6 out of 7), but it still works fine.

Mission 10: This one I haven't finished yet, but it doesn't seem as bad as others, I simply haven't gotten to it yet. It's an interesting premise, but the fact that fire golems will constantly spawn around the map does appear rather frustrating, considering they will always waltz at your base to give it a smack. It's not like the Redfist is weak enough so that you can easily split your army...

Whew, wall of text. That's it for now at least
 
Level 10
Joined
May 10, 2018
Messages
120
actually,for the initial gold mine is only 30000,not 60000,
it force you to obtain the gold mine of the blue base,for maintaining 80 food army and keep refilling the tower spam of the middle base,
accumulating the gold for a continuous 100 food army to attack purple which with elites and ares knights inside.

Not really, it takes some effort, but blitzing the LB base with Golems/Necrolyes/Demolishers good enough to cripple it so you can mine it is possible.
And if you don't want to... well, stay in Light Upkeep while pilling up money, establish some production buildings where the southern Royal Army base was stationned, and once the bank is large enough, rush Purple, while trusting towers and the likes to delay Gray. And in general, try to attack after the wave coming from the base you're about to assault is destroyed and try to bait its force out of the main entrance's chokepoint. It's bloody and nasty, but doable.
 
Level 2
Joined
Jan 2, 2015
Messages
14
Great campaign so far! Mission 4 is the hardest mission I've ever played, in any custom campaign (Including Tomoraider's & Tunro's campaign on hard!) This is my strategy for it, on hard difficulty:

Army composition, Golems, warlocks and some towers. Here is why:
-Warlocks: Fireball stun and damage is insignificant. Unholy frenzy is good on golems. Get about 4 of these.
-Golem: Good tank and great damage! They have heavy armor, so magic damage is their only weakness. Luckily, there is a lack of magic damage in this chapter. Get as many as you can of these.
-Tower: Weak against vindicators and elites because of the defend ability, great against everything else!
-Grunt: Good tank and good damage, but is strictly weaker than golems.
-Catapult: Great damage against buildings and units, but the problem is they have 425 hp, and get focused down too fast, so they don't last long in combat.
-Axethrower: This clown-looking unit serves only one purpose, and that's to make you laugh at how useless it is. The majority of the enemy damage types are melee, and half of them have the defend ability, causing this unit to die too fast and barely inflict any damage.
-Shaman: No use for purge. Lighting shield may be good against enemies, but this strategy relies on mass melee units, which means lighting shield will hurt our units too.
-Necrolytes: Raise dead is useless because the enemy ignores the skeletons and goes straight for your non-summoned units (In normal difficulty, enemies didn't ignore the skeletons). At max mana, can cast chain lighting twice, but the damage is not significant in comparison to mass golems. Combat lasts about 1-2 minute(s), in that time, golems will do more damage than chain lighting. Dies quickly to catapults and archers, so their 'tankiness' is weak. Also, damage against buildings is terrible compared to golems.

First off, put the game on the slowest difficulty. If you think this is cheating, then continue off with normal speed. Here is how the combat strategy will work:
Whenever you're in combat, any time you see a golem with less than half hp, run them to the healing fountain. This is why having slow speed is good, as you can react faster to save your golems. In combat, get Grofzag right in the middle and use howl of terror. Hurl boulder when you see starfall come down. Put a point into Command Aura. Zairmak should use sleep and soul burn in the following priority: priests> knights > vindicators. Don't bother casting it on elites, as it doesn't last long. Put points into the sleep skill. Also, right before engaging the enemy, warlocks should cast unholy frenzy on all units, including heroes. Keep warlocks away from the combat, don't let them fight, else they'll get killed. Only bring them back in to cast unholy frenzy when it runs out. I like to put warlocks in control group 3, and the rest of the units in 1 and 2. Priests will cast dispel to get rid of unholy frenzy, so use soulburn and sleep to shut them up. Also, if you only attack move with your golems, you'll notice that they path block each other because they stop too early to attack the enemy. What you want to do is move forward enough with your golems so they're right in the middle of the enemy units. This will ensure every golem is attacking, maximizing dps.

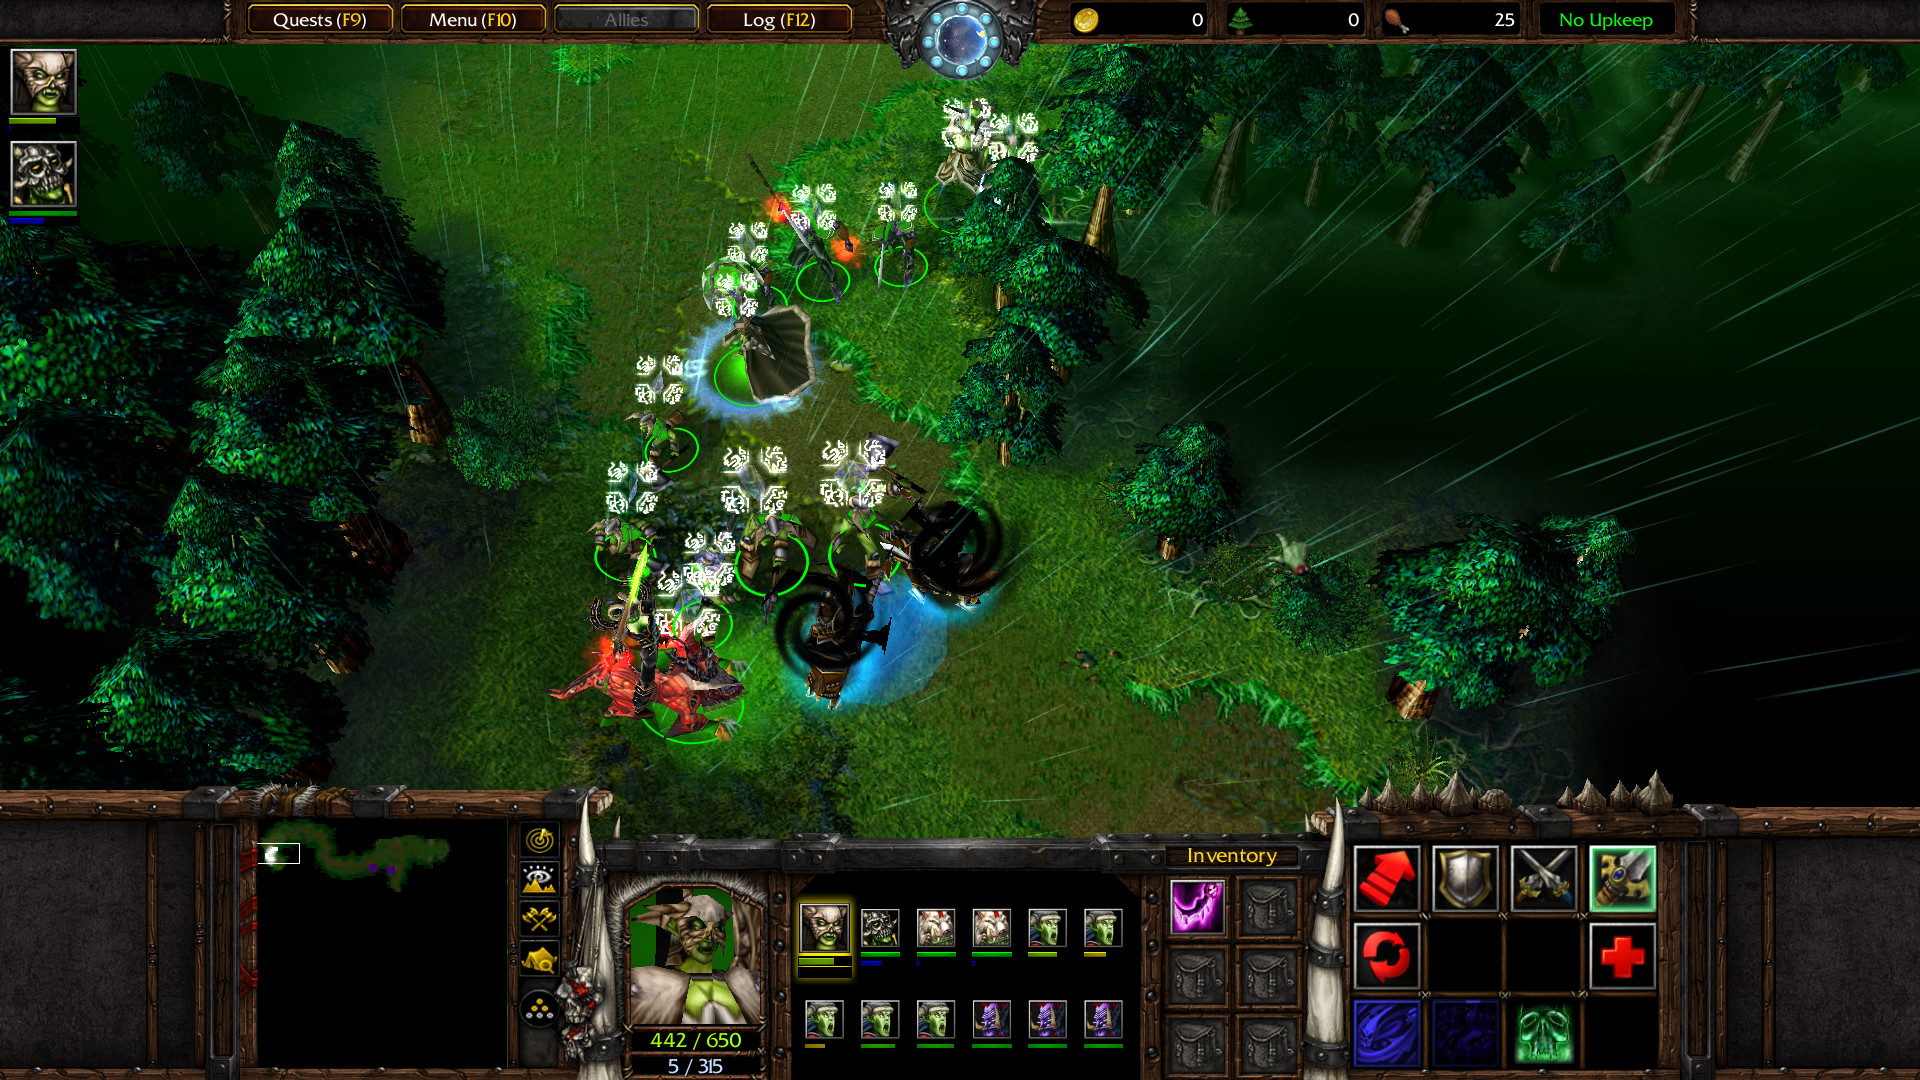
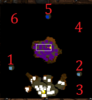
Now, the mission starts. Immediately make 7 peasants for lumber harvesting, research the melee weapon and shield upgrades, and que up 4 warlocks and golems, until you have 50 food. Help your ally defend on the west side. After that, immediately run south west of your base, where the blue knights are. Get Grofzag to come close to one of the knights to lure 4 of them out of the tower range. Kill these 4. There will be 6 more knights left, so lure those out the same way, fight them outside of the tower range. Now, unholy frenzy the golems and focus down the blue barracks, taking care not to lose any golems. Finish off the towers and the remaining blue units. By this time, one of the enemies will be heading to your base, so run back to defend it. While your units are running back, get about 4 peons and start building towers right outside the ramp leading to the purple base as shown:


upload_2019-6-7_1-56-1.png


You also want to make 6 burrows and 2 barracks near these towers. I like to hotkey the 2 new barracks and the 2 barracks in our base to control group 0. After defending against the attack in your base, run to the constructed towers and start getting out those golems, going past 50 food. At this point, purple will attack, with no hero. Let them come close to the towers before engaging with golems. This fight should be a piece of cake. Now, you had 2 necrolytes given at the start of the mission. Start summoning skeletons from purple's corpses, put it on auto-cast to make it easier, this is very important, as you'll soon see why. In the mean time, run Zairmak up the ramp and boop one of their towers. Their entire army, including their hero, should come chasing Zairmak, so lure them all to the towers. If you don't summon skeletons, then purple's corpses will remain. Their hero has the resurrect ability, and we don't want him bringing back his units. Their hero also has the shockwave ability, making short work of your towers, so what you need to do is cycle between sleeping, soulburning and stunning (in that order) their hero so he doesn't have a chance to cast it. You need to make sure the towers avoid hitting their vindicators, as they have defend. So have them focus knights, grey wolves, archers, or priests instead. I just hotkey the towers to control group 8 and que up targets that were not vindicators. Eventually his entire army will fall and you should not have lost any golems (If you're playing on the slowest speed). Remember to keep queing up those golems. You should be near 80 food at this point. Also, you don't need the necrolytes anymore, so kill them. Save here. Now, there is a choke point in purple's base, which is bad news for us because all our units are melee. So, what you need to do is move every golem past this choke point, and then let them attack. We need destroy the altar first, then the barracks (on the north side, avoid the south barracks!), then the castle, then the remaining units. Consider reloading if their hero revives before you destroy their altar. Have 1 golem dedicated to kill any workers trying to rebuild production structures. Stay away from the south side of their base, otherwise you'll aggro the units stationed there. You will encounter Ares Knights, which are buffed up versions of knights. Soulburn and sleep these. You want to take out the south barracks last. You will lose a few golems.
Before purple falls, your main base will get attacked by grey and light blue at the same time! We have to let our base fall, so select all your peons and bring them close to your towers. Once purple's production structures are gone (leave the armory or lumber mill alive so the mission doesn't end), we will construct our new base in purple. Congratulations, You have passed the hardest part of the mission!

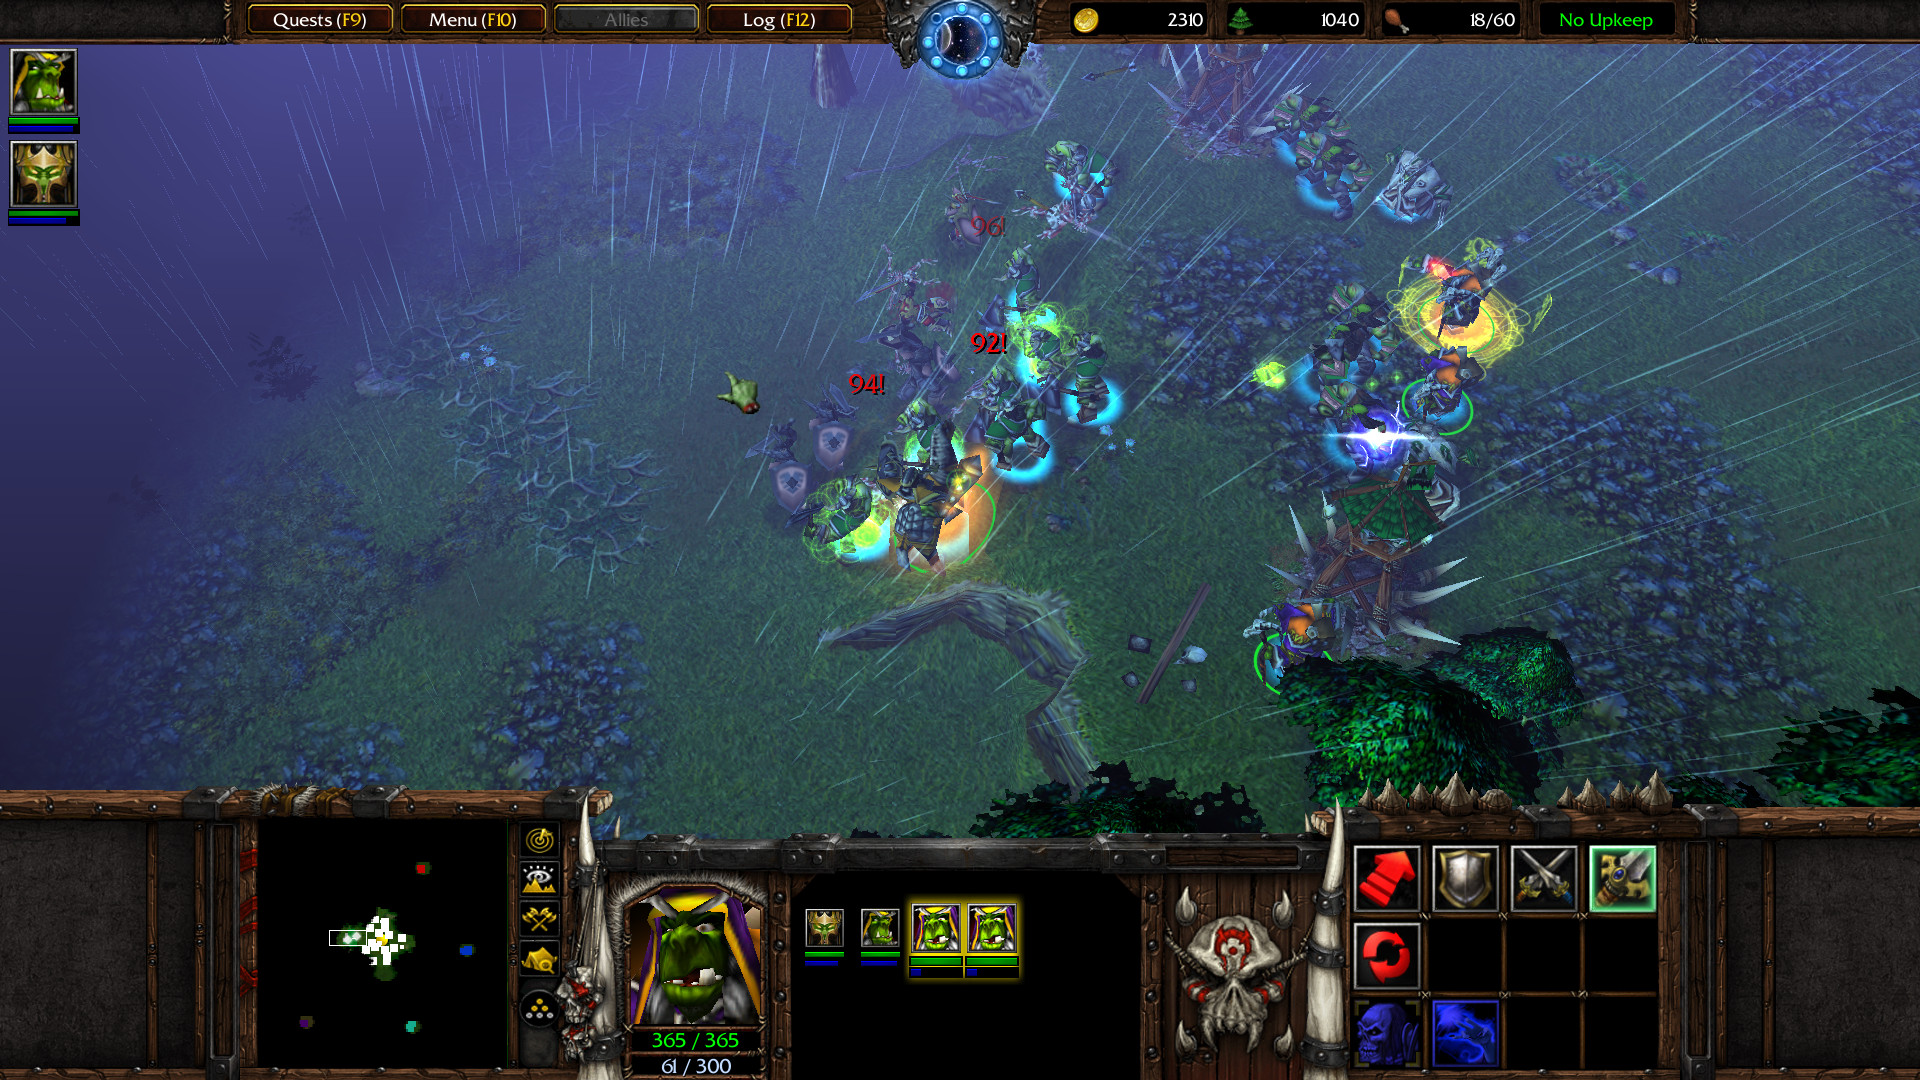
There are tomes in all of the town halls of the enemy bases (except grey), so it's your choice if you want to grab those. If you do, then we'll need to retake the middle part of the map, for the goldmine, and the healing fountain. After purple falls, bring a peon to construct a town hall in the middle. Kill your units to drop down to 80 food, we will be holding out middle for a long time, and you'll see why shortly. Make a catapult and move it northwest, up the ramp. Immediately up the ramp, start destroying the trees towards the west side. You want to cut up a path towards light blue's base, like so:

upload_2019-6-7_3-4-44.png


The normal path to light blue has a choke point, and we've seen how difficult that is to deal with. Get up to 100 food (kill your catapult, its not needed). Now, what you want to do is position your golems at the left end of this path. Get Zairmak to poke one of their towers, and run back towards your base. You want to lure light blue's army just up the ramp leading to your base. We have now divided light blue's army! So move up your golems and start killing their units. Focus down the production structures first, like we did with purple. Zairmak has probably been taking a beating, so teleport him to the main army. Light blue should fall at this point. Your middle base will probably get attacked by grey, but let that fall. One thing to note about enemy AI is once your town hall has fallen, they will satisfied and retreat back to base. Now, rebuild your base in the middle, and make a town hall in light's blue base. The other 3 bases, red, teal, and blue are much easier to destroy compared to purple and light blue, so I see no need to make a strategy for them. Just use the golem and warlock combo and they should fall with ease.

Good luck!

P.S. If anyone else has beaten this on normal or hard, I would be interested in hearing their strategy (without cheats).
 

Attachments

  • upload_2019-6-7_2-43-32.png
    upload_2019-6-7_2-43-32.png
    5.2 MB · Views: 177
Last edited:
Level 2
Joined
Jul 24, 2016
Messages
10
So I've passed your masochistic tests on hard and then once again on normal, I don't know if it's just me but I haven't seen any difference between them (besides of enemy army having 1 less catapult xd) except chapter 3 which is a main reason I'm not gonna play it on hard again. This one is truly the most brutal chapter on hard difficulty for me and pretty easy on normal. Where to start:
1) LB armies looks much larger (felt like almost twice as big as norm dif).
2) Limited time, very small windows for attacks, gotta almost predict it to the second.
3) A need to attack the left base before he attacks you which means paladin will be alive.
4) Inability to prevent divine shield, either kill footmans twice but fast because of pala ressurection (necrolytes oom) or kill them slowly and let him waste mana for holy lights, combined with №2 makes it very hardcore.
5) Biggest difference - once you are done with the left base you have to defend your base and purple because they launch 3 armies+3 heroes on him at the same time, lucky if you still have an army that able to defend your own base against two enemies, let alone your poor ally.

Not sure if I'm missing something, don't think you can sit in deep defense for too long. Despite of being beatable, overall this chapter felt quite unbalanced on hard difficulty compared to next ones...just a small suggestion. And as someone mentioned above - thanks for ch.6 reinforcement, made it much more enjoyable ;]
 
Level 2
Joined
Jan 2, 2015
Messages
14
To bollabink:

Here is how I beat chapter 3 on hard:

Army composition: 5 Warlocks and all ogres to maximize shreckage! You're also going to need towers for defense.
Why ogres? Because they have 1200 hp and have pulverize. With warlock's unholy frenzy, pulverize will be triggered very frequently.

A note about towers

1) Their damage is awful against vindicators due to their defend ability, so you need to manually select all of them and have them target non-vindicator units. I like to put towers on control group 9.

2) They are weak against catapults, so you need to prioritize catapults with ogres. But, they are guarded by enemy units, so you need to sit back behind your towers until the enemy units are really close to your towers, then you can order your ogres to attack the catapults.

First off, slow the game to the slowest speed (at least for the first minute).

Now, the mission starts. Order 1 peon to build a town hall in purple's base, like so:


upload_2019-6-11_20-8-27.png


When this town hall is built you need about 7 peons to saturate this mine. But you can't mine it because purple is mining it, so you need to kill at least 2 of their workers so your peons have a chance to sneak into the mine. Next, you want to get about 10 more peons on lumber duty. You have 5 peons on lumber duty at the moment, get those peons to construct towers, in the center, north part of your base like so:


upload_2019-6-11_20-13-2.png


Train 1 catapult. You need it to cut a path to the southwest by destroying trees. This will get you access to ogres. Every command mentioned has to happen in the first minute. So in summary:

1) Order peon to build a town hall in purple
2) Train 10 peons
3) Build towers in your base
4) Build a catapult

Forget about the 2 towers to the west and east sides, just let them die, you need to defend around the cluster of towers you have in your base. Once you get ogres, train more ogres while staying below 50 supply. You don't need the catapult anymore, so kill it. You also want to build towers in purples base like so:

upload_2019-6-11_20-12-7.png


This will keep purple safe. Now you want to start all your ogre related upgrades and store 1500 gold. If you have any units that are NOT ogres or warlocks, kill them all at this point, we won't need them. Get 5 warlocks and as many ogres as you can until you hit 100 food. I like to put the hero and ogres on control group 1 and 2, while warlocks on 3. Here is the order we're going to attack the bases:


upload_2019-6-11_20-8-56.png


Why northwest first? Because purple blocks the path from 6 from reaching the goldmine in 1, so it is the safest goldmine to acquire.

A note about attacking 1:

1) Position a warlock here, like so:

upload_2019-6-11_20-9-32.png


I'll explain soon why.

2) Wait until you've been attacked by 2 from the right side and killed their units.

Now, once 1) and 2) have been fulfilled, get your units right outside the range of 1's towers, from the south side. With the warlock in 1), hit one of the vindicators, their entire army will start chasing the warlock. You want to run towards purple base, but still hit the vindicators every 5 seconds so they don't lose aggro. Eventually, purple's entire army will be fighting 1's entire army:


upload_2019-6-11_20-9-43.png


With your army on the south side of 1's base, have them head towards the altar, ignoring everything else. Once you're attacking the altar, unholy frenzy the ogres and the hero. When the altar is destroyed, kill any units that have been rebuilt. Now, smash their townhall and have 1 ogre dedicated to killing their workers. Don't forget to reapply unholy frenzy. Once the townhall is down, kill any units that have been rebuilt, kill both towers, and then destroy their barracks. Finally, destroy the workshop and the arcane sanctum, in that order. To complete the side quest, the armory and lumber mill must be destroyed, so you can leave them alive if you choose not to complete it. Once 1 has fallen, build a townhall and take their goldmine.

Our next target is 2. 2 is also close to purple, so we apply the same exact strategy we did with 1. 2 will fall, but don't take their goldmine until I've said so. You need to build a cluster of towers on the north side of the goldmine. Have 1 warlock aggro 3's army so they chase them to these clusters of towers. With the towers and your ogres, they will fall with ease. Now, unholy frenzy your ogres. You need to destroy blue's units in this order:

2 towers around the townhall> townhall> units that have been rebuilt > 2 barracks > workshop > arcane sanctum

With 3 dead, you can take 2 and 3's goldmine.

Our next target is 4. You want to make a cluster of towers, 4 barracks, and 2 spirit lodges to the east of purple's base, like so:

upload_2019-6-11_20-9-55.png


Once they've been constructed, hit one of the knights to lure blue's entire army into your towers. Once their army is killed, as usual, go for the altar, townhall, barracks, and the remaining production structures. You will lose ogres, so you need to que them up in the ogre mound. But, since you only have 1 ogre mound, they will be rebuilt slowly, so we have to rely on the 4 barracks we've constructed earlier. We will build warlords along with ogres. Once 4 is dead, construct a cluster of towers in 4's mine. Lure 5's army into these towers, and do exactly what you did with 4. Same thing for 6.

Alternatively, you can lure 4's, 5's or 6's army into purple like we did with 2 and 3, but don't stay to fight them, let purple handle it, your army should be focusing on their structures.

Good luck!
 

Attachments

  • upload_2019-6-11_20-8-41.png
    upload_2019-6-11_20-8-41.png
    26 KB · Views: 151
  • upload_2019-6-11_20-9-17.png
    upload_2019-6-11_20-9-17.png
    3.1 MB · Views: 140
Last edited:
Level 2
Joined
Jul 24, 2016
Messages
10
@far336 I mean I've beaten it once with an ordinary playstyle and no towers (thought you can't spam towers from the start coz having big army to lower the pressure and claim additional goldmine early is more important) but it took too many reloads/restarts because of unforgivable timings. Though I like your tricks of the trade strategy but still wondering why one of the starting chapter is much harder than all of the following ones and unlike them requires some rocket science for a smooth completion.
 
Last edited:
Level 2
Joined
Jan 2, 2015
Messages
14
@bollabink, true, the first few chapters are one of the hardest ones in the campaign. I do enjoy having to come up with tricks to beat the harder missions, but that might not be for everyone, as it can be frustrating!
 
Level 1
Joined
Jun 5, 2019
Messages
2
I finally got around to finishing the second Orc book, and now its time for the final round of feedback. Due to the update, I played through everything again, which did make me retry some of the missions, with emphasis on "try"

Missions 1-3: Nothing new really, they're still alright.

Mission 4: I am still of the opinion that this takes the 2nd or maybe even 1st place for hardest mission in the entire campaign, even with demons no longer attacking blue. Attacking teal and red is simply completely worthless. Maybe have demons still attack blue, but stop once their base is destroyed, and then they instead spawn in attacking red and teal? This mission still needs something I feel like.

Missions 5-7: Still nothing new

Mission 8: I tried this one two more times before giving up. The Deathbreeze attacks don't help nearly as much as the Darkmind ones in mission 6 do, and heavily micro-managing two fronts(when you attack that is) is...tedious. Anyway, some more of the issues I found:
Cliffhunters and your main faction are almost indistinguishable from their colours, but maybe that's just me.
Cliffhunters only ever get attacked by the dwarven air units. While not having to worry much about their defense is a good thing, and a relief for the player, it still seems weird considering there is a path from Wolf-Regiment to Cliffhunters.
If the enemy uses Resurrect and revives allies with that, those allies will be added to that bases defensive force. And the enemy always uses its entire defensive force of its base, or the force itself is attacked. The end result is that resurrect will oftentimes make an enemy attack you twice as hard and keep sending stuff your way for a while, which is doubly worse if that enemy happens to be the Wolf-regiment, because they can reinforce so quickly and have arguibly the most dangerous heroes. The resurrect issue is one that will come up several more times in this campaign btw.
Wolf-Regiment base is still an unholy amount of chokepoints, which then leads into a vast-spread out base which means you will take ages to clear it out, and not clearing it out means Wolf will still try to attack you.
The top base isnt much better with its fortress-like appearance and the pre-placed units
The subsequent bases also like to choke the life out of you. You and your 240 food army.
Also, all of your bases lack some vital buildings, which can makes setup even more tedious, and can bite you in the back if you dont notice. Flammedus doesn't have an altar, barracks or a totem. I know, he is supposed to build centaurs, but then why can you even build barracks? Shieldbearers are just so much better than the centaur roster.
Your main base doesn't have a caster-upgrade building.
Cliffhunters also don't have a totem.

I'm not sure what to do with this mission to make it more enjoyable. Maybe give control of Flammedus to the AI? Or make it so the bases that are further back don't start attacking you until you clear out the frontal ones. This is actually another issue that crops up in more missions: They only keep getting easier as you clear out enemy bases, because all of them are active from the beginning, keep attacking you, and when you destroy them, it's simply one less threat.

Mission 9: Here lies the beginning of the Red Dragon Airforce...

Mission 10: You kind of do need quite a few towers to be able to comfortably, and effectivly attack while not having your base molested by fire golems. Other than that, it's fairly alright, even though most of the gnoll units are just kind of Meh. This is the mission where I learned to love the Witch Doctor/Shieldbearer combo, but even if you only have Clan Elites, thats a brutally effective combo.
Taking out bases while mad-dashing to the harpy cages for some additional support was fairly enjoyable, even though they aren't terribly effective at clearing out the center. Even *your* air units aren't, so I don't know why the tooltip at the beginning says that you *may* rush the center with air units. Maybe it was a prior choice that locked me out of something, but only bat riders and zeppelins aren't gonna do a whole lot to the units or the hero in the center, it'd just be a waste of resources.

Mission 11: Oh look, the island grew gold mines. Anyway, my only real gripe with this mission is how close the second goldmine you can take is to the shoreline, which means all your enemies will more or less be dropping right on top of it, but that's probably intended, so idk.
Your ally might as well not exist at all though. I saw him getting attacked a grand total of two times, and his ai attacks managed to clear out a grand total of two ships before I finished the mission. Could they at least come and help you defend when you're attacked, so they don't feel like complete extras?
I also noticed for the first time this mission that enemy structures seem to have a lot more health. Like, 4k for a castle, 900 on turrets and 2400 on Barracks. And Zoras main base has even more, with the castle clocking in at 4600, which I would assume comes from a Merlon Seabright-esque leadership buff.But why does everything else have more health? Is there some form of tooltip I missed, or is it for balance reasons or something?

Mission 12: This might be my favourite mission in the entire campaign. You need to keep bouncing between bases because they can fairly easily get overrun(except Brocktas base, he hasn't ever had issues), and poke into the enemies bases to do some damage. A full stack of Red Dragons plus your heroes can handle most anything easily, but you do need to keep an eye out on your allies still. One thing I found odd is that when the undead attack, and Logan says to cease attacks on the orcs, the human AI will still occasionally send forces your way. Not many, since they're mainly occupied with the Undead before getting overrun, but still.

Mission 13: A Red Day for Red Dragons, how quaint. Also a very enjoyable one, with AI allies that actually send out considerable forces. Personally, I stuck with the Red Dragon Airforce, and the enemy can't do a whole lot against those honestly. Any why would you ever build anything else actually? For 8 food, you get over 2k hitpoints with Hardened/Resistant Skin, and chaos damage. I feel like spamming the shit out of the RDA makes these last few missions easier than they're supposed to, at the other hand, some become more bearable due to them.

Mission 14: 6th time on this map...yay :/. I know the Purifier is kind of a focal point of the story, but at some point this mission gets tiresome, especially since it just feels like a downscaled version of the one in the Human book. I did pick Blen to win the conflict this time around, so I don't know how the mission goes if Rath kills him, but this mission still feels...not really painful like others, just really boring honestly. Although, still thanks to the RDA for kind of trivializing it. Wait out enemy attacks->poke in with heroes and the RDA->rinse->repeat->done. And it's kind of necessary with the sheer amount of Artillery tanks and Energy towers the AI has. Also, halfway through Blen seems to have gotten lobotomized. He would build up 5 elites and a hero, attack with them, and simultaneously produce a bunch more elites, and send them in as soon as they were built, which meant his attack waves would come in trickles and not do a whole lot. Also, he'd run past enemies for some point in the middle of Renalds base, only to get killed on his way there.
The air attacks are a bit heavy though. With how many destructors they throw at you, you can't even rely on turretspam, so in the RDA we trust...
Also, Van Durce has resurrect here, an actually useful ability. Good for him(I think the van Durce you get in the Human book is the worst hero you ever get to play in the Arkain series)

Mission 15: Kind of unremarkable actually. Once again, you throw the demons from the doorstep of the Purificator, only this time, it's not a holdout mission. Your ally is fairly active, Logan being here if you let him live is neat, but the RDA still kind of stomps all over this mission. The double-gate main demon base may be a bit of a tough nut to push into, but afterwards, its just kind of a trivial cleanup.

So, phew, that's that. overall, the second orc book is in my opinion the least enjoyable book to play out of the five released currently. Maybe I'll get around to also typing out a review for the second Human book, who knows...
 
Level 1
Joined
Jun 26, 2019
Messages
1
heyy i sorta cant recall wether i killed salomar or nah for the last choices, any suggestion?:confused:

and im sorry Shar i played all the rest of series but i just created this acc so i havent leave some review:(. maybe i post soon if u need those:D

but overall i loved them.
it is challenging and i do into the story, so thanks for all these work Shar:)
 

Shar Dundred

Community Moderator
Level 72
Joined
May 6, 2009
Messages
5,862
Version 1.23 released!

General:
- Shieldbearer Changes:
* Decreased the damage dealt by Shieldbearers by 3
* Decreased hit points from 1500 to 1100
* Decreased food cost from 6 to 5
- Increased the food cost of Red Dragons and Sand Dragons from 8 to 10
- All workers now start with Repair activated automatically
- Increased the intervals between the attacks to make it less likely for several attacks to occur at the same time
- Minor model adjustments

Chapter Five:
- Grammar fix in the quest log

Chapter Six:
- Choosing Blen now results in all Towers & Burrows of the Orcs getting destroyed to make tower spam less likely to hurt yourself
- Corrected the name of Captain Gregor
- The Captains Gregor & Elias who have been with Blen since the first mission of the First Human Book now stay if you choose Blen over Rath
- The flames in the ending cinematic now are also properly displayed if Blen is chosen
- Human towers will now shoot their enemies correctly after the cinematic if Blen is chosen (the rest of the bases will remain passive)
- Some (by far not all!) of the defensive forces now belong to the base next to them, meaning that some of the defensive troops will be reinforced by nearby bases
- Replaced some units around Harmos' base with units of the Order of the Flame

Chapter Seven:
- Fixed the message regarding the new units
- Slightly increased the number of units for the Stonelord Dwarves and the Salrian Army
- The Redfist is no longer displayed in the score screen

Chapter Eight:
- Fixed the Knights of Salria not being able to train Paladins
- Adjusted the attack times of the enemy bases to slightly decrease difficulty
- Increased the strength of the attacks coming from the Knights of Salria
- Decreased the time in the ending cinematic until Zairmak uses Finger of Death
- Flammedus' Centaurs are now controlled by an AI
- Doubled the amount of resources gained for completing the optional quest in Chapter Seven
- Cliffhunter Clan starts with Centaur Hooves already researched
- The Deathbreeze Clan (Player) has been replaced with Ravaging Fire Clan to make colors more distinct
- The Ravaging Fire Clan starts with Burning Oil already researched
- The Ravaging Fire Clan starts with Golem Power already researched
- The Cliffhunter Clan no longer has access to any Orc units (apart from female ones)
- The Ravaging Fire Clan no longer has access to any female Orc units or any race allied to the Orcs apart from Golems (and Bearmen if recruited)
- Moved Magic Vault to a new position between the two bases of the player
- Both the Ravaging Fire Clan and the Cliffhunter Clan are back at a maximum of 100 supply instead of 80
- Replaced the Merciless accompanying Thorn with a new unit type
- Increased the hit points of Commander Thorn by 1500
- Cassius now also trains Mercenary units

Chapter Nine:
- Fixed the message regarding the new units
- The Ogre Legion now joins the fight against the Moghtar once the avalanche has been caused by higher powers and will also train more units to join in
- Improved the graphical effect of the avalanche
- Sand Dragons & Sand Drakes in this chapter no longer cost any food

Chapter Ten:
- Doubled the interval between the summoning of new Fire Golems after the initial summons
- Slightly increased the time for the first group of Fire Golems to be spawned
- Decreased the number of summoned Fire Golems
- Increased the intervals between the attacks to make it less likely for several attacks to occur at the same time

Chapter Thirteen:
- Added some defensive units
 
Level 20
Joined
Dec 19, 2013
Messages
1,083
Very glad to see the nerf to the dragons(especially sinc,unlike the human book,the orcs do not have the restriction of training more than 2 dragons)
Regarding my statment on Shieldbearers...I will have to further look into it (how the brutes fair with the new shieldbearers) although i still think this wasen't a nerf this was more of a butchering but at least this gives us a broader avenue of choices regarding our army compositions(even tho i think the players will simply opt to go mass gladiators)
Was shieldbearer OP?If they were another project absolutely yes,in arkain where we have to constantly deal with three+ armies an absurd number of paladins(or paladins in disguies,yes shar those Knight heros should be renamed to Paladins with different flavors) they aren't entirely op,maybe a more harsher hit to their damage,attack rate and cost would be better than messing with their innate tankiness,remember they are supposed to be immovable objects basically a brute on Elite's armour...I am open to further discussion regarding to this topic,i will need to look this further tho.
 

Shar Dundred

Community Moderator
Level 72
Joined
May 6, 2009
Messages
5,862
especially sinc,unlike the human book,the orcs do not have the restriction of training more than 2 dragons
Humans lost that limitation in one of the recent updates, that is why I have increased the
food cost of Black Dragons for them.

The Shieldbearers simply were overperforming for their cost.
High armor values combined with 1500 hit points, anability that reduces all piering damage to 65%
and even an ability decreasing all incoming damage by 12 per hit was too much.
The new update does not take away their tankiness, yes they lost almost 25% hp but they still have
tons of armor and the two aforementioned abilities. Also keep in mind that they now take less
of your food, 5 instead of 6, meaning that they are still a viable option.

The problem with them was that they were so powerful that it was almost a restriction of sorts
when player wanted to try new units as their elite melee instead of Shieldbearers, simply due
to the fact that Shieldbearers were so good.
They are still a great unit, they are just less over the top than they used to be and more on par
with the Clan Brutes - which is another reason for the change. Before this update Shieldbearers
simply outmatched Clan Brutes easily.
 
Level 20
Joined
Dec 19, 2013
Messages
1,083
Shar let's be honest how many players opted to use shieldbearers once we got access to the Dragons?Exactly not that many,you cutting their HP by 25% makes them way more weaker to chaos damage which they already struggled with,I am pretty sure I am not the only one remembering how hard was to keep them alive without at least three which doctors during the chapter where we had to save Gnoll king...I don't know what's in store for the third book of Orcs but i would take a guess and say DEMONS would still be around and they do chaos damage.

Imo what made Shieldbearers so strong was the fact they were perfect at tanking and dishing out damage...Why not just take their damage away then they become just meatshields(which is their role) then this would force us the player to opt for gladiators and ogres(or even impalers) to fulfill that role.

Did they deserve a nerf?Yes i just think you should have targeted other aspects of what made them so great as units...Dont take away what there supposed to be,take away what they weren't supposed to be.The food cost decrease just means that we will get another 2 or 3 shieldbearers(I usually went with 12 and the rest was filled with supporting spellcasters and siege) yes more units to fight and tank but they die faster and the witchdoctor healing is not as effective.

My two cents.
 
Level 21
Joined
Dec 20, 2015
Messages
328
I think this last update was a very good one, Shieldbearers were objectively too good and it really didn't matter in what way they were toned back. They still have the best survivability of all the tanks given their passive upgrades. The attacks in 11 and 12 did feel lighter also, so that helped and encouraged different unit play. I'm tempted to replay the earlier missions for fun now.

Anyways, wall of text feedback incoming. Now that maps 4, 6, 8, and 10 have all lost their meme-worthy ridiculousness, it seems it's onto Ch13. Mass dragons is very clearly the most boring way to play and there is basically no way around it when you have three, four, sometimes FIVE, SIX (I AM NOT EXAGGERATING) attack waves consecutively attacking/clumping into one another with resurrection popping once or twice too, while individual Redfist footman heroes are better than all of the players heroes combined. I had even already destroyed the closest top and bottom Daric bases.

Trying any ground comp offensively probably CAN work, don't get me wrong, but you simply cannot have enough heroes and units where they need to be to promptly defend also without the waves then stacking on each other. So, you have to use dragons and leave anything else at home. (I got rolled anyway after five, maybe six consecutive attacks...)

Ch12 worked similarly, but it felt purposeful given the layout and more interesting because you had to defend a big circle while sniping with dragons - the waves didn't really stack up.

I don't want this map nerfed into the ground, but jfc did anyone else actually play this without cheats to give constructive feedback? I know you all used mass dragons or cheated, don't lie to me :) (let's be straight, I'm confident MOST folks are using cheats when playing any of these campaigns, therefore not giving good testing feedback).

There is a limit to how overbearing attack waves can get (assuming they're all running at you down a central lane like this) and, when that limit is hit, the player will always make flyers to snipe structures for a lengthy 90-120 min, or simply give up when it comes down to bad luck attack timings. There is a point where it peaks and adding enemies and making those enemy units have crazy stats begins to detract from the maps more than anything else.

My opinion on possible changes/things to think about. Implementing all would be overboard:
  1. An extra 10-15 seconds spacing between the scripted waves of each faction relative to the others would make a very noticeable difference. AFAIK this time has already been increased with the last update, but am not sure if it affected every map or not. It's possible the recent changes inadvertantly caused bad luck wave buildup for me even though you increased the timings.
  2. As far as I can tell, there are 8 enemy factions (3 Redfist, 3 Daric, 2 Dwarves) versus the player; I really can't count the two allies, they stopped doing much at all once the front merc bases were gone. Are 8 factions/distinct attack waves really necessary? I think the crux of it is the stacking attack waves. Fewer enemies but with larger volume attacks retains a similar challenge but reduces the risk of crazy consecutive wave buildup.
  3. Reduce the volume of units in their separate attacks. I took a look at my video from Last Stand of the Golden Guard for comparison and the number of units per attack was much lower and my heroes were much stronger. The individual enemy units were also much less powerful, specifically the survivability of Redfist stuff verges on comical, hence attack waves stacking up. I had even destroyed two enemy bases, but still was overwhelmed.
  4. Allow some function to call for help from your allied defensive forces.
  5. Provide a safe, second gold mine.
Arkain has a reputation of being a wild, grindy ride; I've enjoyed much of it along the way, but - let me stress - every big milestone map does not need to outdo the absurdity of every one that preceded it. SOB has not been comparable in challenge to SHB for me and is significantly harder, which I did not think could even be possible, haha. Mind you, I don't want this feedback to result in too many difficulty nerfs or SUB to end up being way easier, but there has been a running theme of escalating, overbearing craziness throughout SOB and I'm glad my and others' feedback has been helpful to apply recent patches.
 
Last edited:
Level 10
Joined
May 10, 2018
Messages
120
I don't want this map nerfed into the ground, but jfc did anyone else actually play this without cheats to give constructive feedback? I know you all used mass dragons or cheated, don't lie to me :) (let's be straight, I'm confident MOST folks are using cheats when playing any of these campaigns, therefore not giving good testing feedback).

Does Easy Mode count as cheating? Because it is possible to not use mass Dragons then, and allies can be of use beyond the mercs, but then again, it is against enemies with 30% less HP and no base rebuilds (and being lucky with the wave stacking not happening too much)... Okay, I guess it is cheating.

...

Okay, I frequently use iseedeadpeople, but that's far more me wanting to see the whole map because I enjoy this than anything else (you wouldn't believe the number of time I got surprised by attack waves for someone theoretically able to see them all).

Still, it is all nice feedback, Jay. I wonder what you will think of the last two missions... They could feel familiar somehow...
 

Shar Dundred

Community Moderator
Level 72
Joined
May 6, 2009
Messages
5,862
I had hoped the Second Orc Book would not give me as much headache as the First.
I mean, the reasons are different but it is always the Orcs. :p

Anyway, I have analyzed the chapter and its issues once again:
There is a total of 9 enemy AIs with bases that actively send forces. Out of these 9, 4 are
assigned to attack the allies of the player rather than the player himself.
That means that theoretically, only 5 AIs attack the player directly.
(as comparison: In Chapter Eleven A of the Second Human Book, it was 5 as well)
There are a few problems that appear in reality that go unnoticed on paper and for some reason
seemingly have not been as severe in the last version of the campaign though the AI changes
should not have affected this.
a) The gold mines: The secondary gold mines are located in a way that they pretty much
lie exactly en route of the forces that attack your allies, meaning that there is no way around you
being the one under attack in the end.
b) The AI pathing: The location of the player base makes it very tempting for the enemy AIs to
walk through it rather than go around it to attack your allies, meaning that you once again get
an attack that was not meant to target you. Commander Thire, for example, keeps walking through
the player base simply because it seems to him that it is a few meters less than the other way!
c) The Rage of the Redfist: The Redfist not only has the most powerful units in the entire human
arsenal (keep in mind that this mission is using elite versions of their ordinary units), they are also
sending MASSIVE amounts of soldiers into battle. Their allies are not weak either, but I think we
all can agree that the Redfist is the real nightmare to do battle against - as it is supposed to be.
d) Attack timers: As only 5 enemy AIs are supposed to attack the player directly, the other 4 are
not part of the pattern I usually use for AI attacks. Therefore they can stack with the other attacks
since they have different targets.​

I am currently working on a solution, planning to:
  1. (Re)move the connection between the player and his allies to stop enemies trying to walk through your base
  2. Adjust the activation of the AIs so that the bases in the back remain passive until you made a certain amount of progress
  3. Add a secure goldmine as suggested by @Jayborino
  4. Adjustments for the individual attacks & their timers (enemies & allies alike)
I need to see if these changes have the desired effect or not & continue testing.
It will take some time but I want my campaigns to be in the best shape possible and it was a mistake to
release the Second Orc Book as fast as I did. That will not be the case with the Second Undead Book.

I really can't count the two allies, they stopped doing much at all once the front merc bases were gone.
This is something that I need a bit more information on, for me the allies worked perfectly fine even
after the front merc bases were gone.
Do you mean that they stopped attacking or that their attacks were ineffective?
Okay, I frequently use iseedeadpeople, but that's far more me wanting to see the whole map because I enjoy this than anything else (you wouldn't believe the number of time I got surprised by attack waves for someone theoretically able to see them all).
Little fyi, not judging you or anything, just saying that the AI in chapters like Twelve or the
secret chapter REALLY does not like iseedeadpeople and may screw up because of it.
 
  • Like
Reactions: San
Level 21
Joined
Dec 20, 2015
Messages
328
Thank you for clarifying, this makes a big difference to know those waves are meant for the allied bases, please disregard the last paragraph in my initial feedback in that case. Looking forward to trying an updated version!
 

Shar Dundred

Community Moderator
Level 72
Joined
May 6, 2009
Messages
5,862
Version 1.25 released!

General:
- Fixed the Batrider model for newer game versions

Chapter Thirteen:

- Increased the gold in the inital goldmine
- Added a second goldmine to the player base
- Tweaked AI attacks
- Seperated the bases of the player and his allies by trees to avoid the AI walking through the player to attack the allies
- Increased the lumber per tree from 50 to 300
- The Redfist Elite, a faction of the Bloodstone Dwarves & the Redfist (not the Redfist Vanguard) remain passive until certain conditions are met
- Tweaked the target change for the allied AI

Chapter Fourteen:
- Tweaked AI attacks


EDIT:
The Batrider model has been fixed for newer versions.
 
Last edited:
Level 20
Joined
Dec 19, 2013
Messages
1,083
My allies in chapter 13 kept sending attack waves even after I finished off the two outlying merc bases,they sometime seemed to be disoriented tho,like sending a bunch of units ahead while the hero the spellcasters and ranged were lagging behind I noticed this happening to the northern base(The one whith Zarimak),while the southern one seemed to do just fine don't know if jay was refering to this occurrence.


I found it easier to remove the first line of redfist bases then turn into the outlying merc bases i did not have that much issue with my gold mines being exposed to attacks.
 
Level 1
Joined
Aug 18, 2019
Messages
2
Hello. I try to play this campaign but not can. Exception: 0xC0000005 (ACCESS_VIOLATION) at 0023:651ABAC0

The instruction at '0x651ABAC0' referenced memory at '0x651ABAC0'.
The memory could not be 'written'.

I try to put in window mode, but nothing.. I have Windows 10. Help me please
 
Level 1
Joined
Aug 18, 2019
Messages
2
Ok.. I download Warcraft III 1.31 but the folder "Campaigns" doesn't exist.. and I created one of name Campagins and still doesn't work
 
Level 29
Joined
Mar 28, 2015
Messages
2,678
i have a question about forest troll aka old allies of the orcs. After they were massacred by demons, their race was extinct, right?

They were either slaughtered by the demons or imperials, or they were forced to flee to some place away from their orc allies.
 
Level 20
Joined
Dec 19, 2013
Messages
1,083
i have a question about forest troll aka old allies of the orcs. After they were massacred by demons, their race was extinct, right?

Their civilisation is wiped clean from the face of the earth...Now there "could" be stragglers left behind but them as a political/faction entity are nothing but ash.
 
Level 1
Joined
May 13, 2019
Messages
7
Of course not, this is the actual release date!
It was chosen to be the 1st of April on purpose, but I guarantee you it is not a prank. :p
Hi i want to ask you when i click on first mision i mean where i must choose the ways how i finished first book it doesnt load and it gives FATAL ERROR exception:0xC0000005 (access_Violaion) at 00:23:025240EC The instruction at 0x025240EC referenced memory at 0x00000014 the memory could not be "written" Press Ok to terminate the application PLEASE HELP ME FIX THIS i really want o play this campaign help me please
 
Level 2
Joined
Nov 27, 2019
Messages
10
The entire campaign is sick! I love it! Although some chapters are really tough the campaign is amusing. Where did you find the conqeuror's model? I want it as a I want to create my own campaign and that model fits a character perfectly. Would appreaciate it if you answer me.
 
Top