- Joined
- May 9, 2014
- Messages
- 1,824
Ah, the newest chapters released were quite a bundle. The first of these chapters was a relaxing micro-gameplay, while the second among them was as intense as always.
Gameplay:
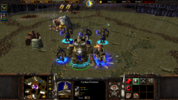
- Having Gardon and Merlon learn their respective ultimate abilities was a huge QoL improvement. While the Golden Guard escorts were already powerful on their own, the additional war aura helped Gardon clear the camps quite easily.
- This version of the map requires less micromanagement compared to the original. You don't have to worry about keeping the Golden Guard escorts alive.
- Changing Gardon's first skill into a ranged nuke with lingering DPS was a wise decision, at least from my POV. With a longer cast range, Gardon won't have to worry about not dismembering demons without getting closer.
Gameplay:
This strategy was formulated for the Normal difficulty.
- Rath having access to Avenge is interesting. Compared to the SOB equivalent, Rath in the True Story is far more vengeful, his hatred and wrath towards Blen only being further amplified in a positive feedback loop by Inara, a former orc captive.
- Having Inara as a playable hero is somewhat of a mixed blessing to the player. While having access to a powerful small AOE nuke in S1 and a Metamorphosis-base ultimate, her mana pool ensures that she cannot cast her spells more than 3 times in quick succession (understandable from a balancing perspective). While she can attack air units, this is done so by morphing into her ranged form, which is quite odd since she just changes her weapon from a dagger/sword/melee equivalent to a bow and arrow.
- By Brian, the two Imperial paladins won't just let up. Thanks to their maxed out Divine Shield, they can stay alive a lot longer and take out key units without repercussions to themselves. Cast a poorly timed Avenge, and you might as well have clicked on an ability that does nothing if the Paladins have their Resurrection skill off cooldown. Denying them the corpses of their allies is advised.
- The attack waves from the imperial forces are formidable, even when one is prepared to deal with them. Pray you do not fight one with the Paladin in it.
- While the Kodo Beasts are no longer trainable, you can now have Shamans and Witch Doctors at your disposal. While Witch Doctors won't have their IMBA Healing Ward, they are still valuable spell casters due to their S2 which offers a large amount of crowd control. Shamans do not have access to their Bloodlust ability (IIRC), so they can only cast Purge and Lightning Shield.
This strategy was formulated for the Normal difficulty.
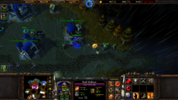
- At the start of the game, a few minutes will pass before the imperial forces on the east will unleash their first attack wave. Before that happens, have a Peon construct a Town Hall as an offering.
- Check on the progress of the Town Hall from time to time. If it is nearing completion, cancel it and build another Town Hall immediately.
- Order the builder to hold position to increase your chances of keeping the builder alive.
- Order the builder to hold position to increase your chances of keeping the builder alive.
- Check on the progress of the Town Hall from time to time. If it is nearing completion, cancel it and build another Town Hall immediately.
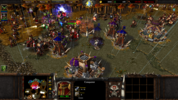
- While training up your demolishers, lure the Imperial forces on the west to your outer towers. Your goal is to eliminate their standing forces as soon as possible, since at this time, there aren't as many units to clear.
- Be careful when attacking the enemy forces when the Paladin is nearby.
- Stun the Paladin if the opportunity presents itself, and keep him stun-locked for as long as possible. This is especially important if the Paladin still has Divine Shield off cooldown.
- If you haven't destroyed the altar yet; the Paladin's Bubble is still active and you can easily destroy the altar, demolish the altar as quickly as possible.
- Watch your units' positioning. One less demolisher might cost you the opportunity to take down the base for good.
- When assaulting the enemy's base, target their production structures first (The highest priority target is the barracks for this map). The AI tends to spam units from the barracks and destroying them first will ease the defensive pressure they exert.
- For all intents and purposes, except those specified herein, you may choose to ignore the Ironthunder clan's defenses against most attack waves.
- Redfist attack waves will only spawn twice. As an exception to the above, one must help defend the Ironthunder clan from their assault when they do, especially when combined with a current attack wave.
- In my playthrough, after the second Redfist attack wave, I built a lot of towers guarding one of the spawn points of the Redfist attack waves. Unfortunately, the towers ended up being for naught, since I could not get the Redfist to spawn again.
- It is up to you whether to complete the side quest or not. If you don't want the side quest marked as completed, leave behind the Arcane Sanctums and other non-production structures. This may not be 100% successful, but it does help out a lot.
- Once you start mining at least 3 gold mines, you practically have unlimited resources. Use that to your advantage by continuously producing troops while in battle.
- At this point, it will be a slow crawl to actual victory, but the chances of securing a victory are all but guaranteed.


