Index
[r]⇲[c]Units
[r]⇲[c]Survivor Units
[r]⇲[c]Infected Units
[r]⇲[c]Weapons
[r]⇲[c].............Equipment.............
[r]⇲[c]Changelog

.......Pandemic is a Starcraft 2 map, formally known as Epidemic, it has been redesigned with longevity and competition in mind. Please take time to review this entire post and give us feedback on the ideas we have thought up. Keep in mind this map is being designed for Starcraft 2 so therefore we are unable to provide ingame screenshots.
Thread Key:
Major Gameplay Features:
- Keep in mind the game is in the design phase and is being made for Starcraft 2, so keep all hateful comments about me putting so much work into a project before the engine is even released. Thank you.
- We made this thread for feedback and help on the project, so please give us suggestions on skills, items, gameplay and more that you want to see in Pandemic.
Thread Key:
| ■ | "Notices" Make sure to read these. |
| ■ | "Main Headers" The beginning of a large section. |
| ■ | "Quick Headers" The beginning of a smaller section. |
| ■ | "Minor Headers / Statistics" Marks statistics / minor headers / and items. |
| ■ | "Work in Progress" Marks that a section is currently a WIP. |
Major Gameplay Features:
- 4v4 competition
- Hundreds of items
- A plethora of infected units
- 2 round system
- Survivor to infection transformation
.......Pandemic is based around competition in an equal game that allows alot of customization for players units. The game is a 4v4, two round, zombie survival custom map. The game starts off with two teams, the Infected and Survivors. Infected players are given a random hero unit each time they respawn, for more information visit the Units section. On boss waves the boss is in control of one of the infected players, the only AI factors in the game are the common hordes of zombies. Other than that the players completely determine their fate in the game.
Two Round System:
Point Accumulation:
Game Objective:
Two Round System:
.......The Two Round System in Pandemic allows for an equal game. If it was not for this system players would end up getting stuck playing Infected or Survivors for an entire match, multiple matches. The Two Round System fixes this issue. The first round of the game follows the standard lobby format (players who selected Infected will be Infected, players who selected Survivors will be Survivors). At the end of round 1 all points accumulated throughout the match are added up for a team score. Points are accumulated by damaging the other team and for other tasks (for more information on points refer to the section below). Round bonus is also added to each team for completing certain objectives throughout the round. This process is repeated for round 2 but the teams get swapped. People that were originally Infected are now playing as Survivors. At the end of the game all of the scores from the two rounds are added up and a winning team is determined.
Point Accumulation:
.......The primary objective for a team playing Pandemic is to acquire the most points over the two rounds, whichever team has the most at the end of the 2nd round wins the game. One may ask how to accumulate points to help their team, that is what i am about to cover. A few details about point accumulation in Pandemic: if a survivor is killed he becomes an infected for the remainder of the round, this meens if Jim is on Team A (survivors), and is killed he is swapped over to Team B for the remainder of the round, but will be moved back to Team A at the end of the round. Points accumulated by Jim when he is killed and becomes Infected are added to Team B, because he is part of this team for the remainder of the round. So keep in mind, if your a Survivor and your teammate dies he'll now be working against you in both score and numbers as it would be 5v3, 6v2, or even 7v1 if your whole team dies; you've been warned.
Point Accumulation for Survivors:
Point Accumulation for Survivors:
- Killing zombies
- Damaging Infected
- Reaching the objective
- More points for higher number of survivors left at the end of the round.
- Killing survivors
- Damaging survivors
- Common Infected damaging survivors
- More points for lower number of survivors left at the end of the round.
.......Round bonus is a great addition to a teams points at the end of a round which can completely tip the scale of who's winning the game. Round Bonus for Survivors is gained by reaching the objective, killing a certain number of Infected, or playing with a handicap (less amount of players on their team). For Infected, Round Bonus can be gained in several ways. The biggest Round Bonus is added for defeating the entire Survivor team before they reach the objective, other forms of Round Bonus for the Infected include playing with a handicap, killing several Survivors, and doing a certain amount of damage to the survivors.
Game Objective:
.......For both teams the Objectives are rather simple instructions wise, but very challenging to actually complete as team cooperation is the key to success.
Survivor Objective: The objective for Survivors is to get from point A to point B. Seems simple enough, right? No, it's alot more difficult than it sounds. Throughout the Survivors journey they must take up camp along the way to avoid swarms and large hordes of zombies, failing to do this will result in a guarenteed failure. The game from a Survivors viewpoint includes running, shooting, and building. Running during the day time and uneventful nights is the simplest, but when the Swarm Warning comes up on your screen you better find a nice corner and start building barricades because you've got a fight ahead of you. If you manage to juggle of these tasks and reach the final destination, then my hat is off to you.
Infected Objective: This is quite a bit simpler than what the Survivors have to do, but can be rather challenging if the other team is good at watching eachothers backs and staying together. Your goal is to simply kill off all of the survivors before they reach the final destination. There are many methods to killing survivors as there are many Infected you can play as. The best strategy is to seperate the Survivors, if they are seperated for even a few seconds then you have quite the advantage.
Tools Available:
.......Our team is equipped with the best tools for designing, and creating the game. If you are too join the team you will be working with people that are well equipped for the job and can help you out. I recently upgraded to Max 2010 which Starcraft II will hopefully take advantage of, as the power of Max is growing exponentionally. These tools have been accumulated by me over the last few years and are going to end up making Pandemic one of the top played games on Battle.net 2.0, Starcraft II. Our inventory of tools being used for Pandemic includes but is not limited to:
- Max 2010
- Photoshop CS2
- Aftereffects CS2
- Sony Vegas 8 Pro
- Flash 8
- Dreamweaver 8
Team Slots:
.......I won't be able to advertise, promote, design, texture, model, and create the game solo. This is a very daunting task and isn't doable by one person. With a very solid team of 3+ people that are dedicated to developing the game i believe we can reach some amazing heights with this project. The following are team slots that will become available once the release of Starcraft 2 becomes closer.
I will be taking care of modelling/texturing/animating as that is more down my ally. I will also be doing terraining/object editing/some triggers if we cannot find people for these positions. I am in no way "avoiding" parts of the project by handing it off to other people but i am trying to spread the work load out so we can make a successful game right off the bat.
Beta TesterThis job slot is currently closed.
Beta testers will be selected after Starcraft 2 is released and we have begun work on the game itself. There will be 100 open beta slots which will be given to people that are dedicated to helping us improve the game. Beat testing will begin soon after Starcraft 2's release.
Concept ArtistThis job slot is currently open.
We need an artist to begin sketching out level designs and character designs so i can begin modelling the infected/survivor units and creating scenery objects for the game. You must have a passion for gaming and not ditch the development team, we are looking for an artist that loves to draw and can give us front/side "T" views of characters and environments that we can model in Max. Please send me a Private Message if you are interested in the job, please attach sample work to the message.
CoderThis job slot is currently closed.
Even though this slot is closed feel free to message me with a casual PM if you think you may be interested, we can work something out. The job of the coder will be to work on the triggers for the map, giving it a unique ambience and making the game fun to play. This is a crucial job, me and the coder will be working close; sharing work load.
TerrainerThis job slot is currently closed.
I will be taking care of the early terrain but we need a skilled terrainer to take care of the big picture, i am okay with terrains but lack the skill needed to create an exceptional but playable map that looks great. Feel free to message me about this opportunity.
.......Pandemic features many different units on both the Infected side and the Survivor side. I will go over the different units one by one explaining their strengths / weaknesses and detailed explanations for each one. The unit system is different for the two different teams. For the Survivors players select the unit they want to play, (Gunner, Demolitions, etc.) and then can pick whatever weapons they choose. Certain professions have recommended guns (ex. Gunner is recommended to have an LMG.) but there is nothing standing in your way from being a Medic with a Sniper, it just might not be the smartest decision. For the Infected the system is quite different, each time an Infected team member respawns after death they are given a random unit. This evens out the playing field so they can't all be insanely overpowered Infected units. During boss spawns the boss is assigned to a random Infected player to play as, this will make some very interesting boss battles. Below is detailed information on each Survivor, Infected, and Boss unit currently designed (expect alot more in the future.)
Many values (especially hitpoints and damage) are marked as X as we don't have the information to determine these values yet.

Many values (especially hitpoints and damage) are marked as X as we don't have the information to determine these values yet.

|
Description: Some call him a pyromaniac, i would just call him a badass. This class is all about blowing shit up. From Claymores, to C4, to Nukes this profession has it all. It is recommended to have one player playing as Demolitions, the reason for this being his skills are crucial for taking down large hordes, swarms, and bosses. With C4 and Nukes, Demolitions can clear whole areas of Infected. Although powerful, these abilities are rather slow and it is suggested to have no more than one Demolitions per group.
Recommended Weapon: [Rocket Launcher] or [Shotgun] These are the recommended weapons because they harness the power that goes hand in hand with the abilities of this profession. The Rocket Launcher is the preferred weapon as even with your regular attacks you carry out large AOE's and massive damage. The Shotgun is much better if there are other people in your group that have slow shooting weapons. One thing you don't want to do in Pandemic is get caught reloading without a team to back you up. If there are Sniper Rifles and Rocket Launchers in your group think twice before picking a Rocket Launcher.
Skills:

|
C4 Explosives
| Plant a pack of explosives at the designated location which is detonated remotely. Rank[1]: 3 second plant time, inflicts 300 damage in a small AOE. Rank[2]: 2.25 second plant time, inflicts 500 damage in a medium AOE. Rank[3]: 1 second plant time, inflicts 700 damage in a medium AOE. Rank[4]: Instant plant time, inflicts 1000 damage in a large AOE. |

|
Claymore Mine
| Instantly place a Claymore Mine at the designated location, detonates upon movement infront of it. Rank[1]: Inflicts 500 damage on units in it's front 180o. Rank[2]: Inflicts 750 damage on units in it's front 180o. Rank[3]: Inflicts 1000 damage on units in it's front 180o. Rank[4]: Inflicts 1300 damage on units in it's front 180o. |

|
Carpet Bomb
| Control a remote air raid using your laptop, carpet bomb is very effective against Swarms and large hordes of infected. (Player actually controls an air raid from the perspective of a pilot using their HUD.) Rank[1]: Incinerates infected below, has no effect on bosses., drops one bomb in a line. Rank[2]: Incinerates infected below, has no effect on bosses., drops two bombs in a line. Rank[3]: Incinerates infected below, has no effect on bosses., drops three bombs in a line. Rank[4]: Incinerates infected below, has no effect on bosses., drops four bombs in a line. |

|
...Incendiary Rounds...
| Changes the rounds your gun uses to incendiary rounds, which causes victims to ignite in flame. (It is for this reason that the Flamethrower is a very ineffective weapon for this profession.) Rank[1]: Causes initial target to ignite. Rank[2]: Causes initial target to ignite and spread to other enemies. Rank[3]: Causes multiple enemies to ignite and spread to other enemies. Rank[4]: Causes multiple enemies to ignite and spread to other enemies, also leaves a burning patch of tar beneath the initial target. |

|
Tactical Nuke Tactical Ability | Control a nuke which does an obscene amount of damage, leaves behind radioactive waste which damages any Infected that near it. (Player actually controls the nuke using their HUD.) Rank[1]: Small radius, light radiactive residue. Rank[2]: Medium radius, mediocre radiactive residue. Rank[3]: Large radius, heavy radiactive residue. Very similar to the Predator Missile from Modern Warfare 2, video below: |

|
Description: This profession does exactly what you think it does; exterminates. The ultimate zombie and chemical specialist, with multiple tricks up his sleeve to take down any zombie threats. His skills allow him to turn zombies against eachother, confuse them, turn them into time bombs, and just mess shit up. Using chemical warfare and his smarts he is the Infected's worst nightmare, you'll want one of these guys on your team.
Recommended Weapon: [Flame Thrower] The Flame Thrower is by far the best weapon for the Exterminator, you can cause some serious damage with an LMG or Shotgun but the Flame Thrower really just makes this class so much more powerful. Your skills really synergize nicely with this weapon, Tier Gas + Flame Thrower = Super confused flaming clusterfuck of zombies. This is just one example of how much havok you can cause with this weapon, the possibilities are truly endless.
Skills:

|
Mustard Gas
| Toss a Mustard Gas grenade at the target location causing all infected in the radius to collapse for a duration due to irritation. Has less of an effect on bosses. Rank[1]: 300 toss range, small AOE, 4 second duration. Rank[2]: 450 toss range, small AOE, 5.25 second duration. Rank[3]: 600 toss range, medium AOE, 6.5 second duration. Rank[4]: 775 toss range, large AOE, 7.75 second duration. |
|
|
Nitrous Oxide
| Roll a Nitrous Oxide canister "Laughing Gas" towards a target location, causing Infected to turn against and attack one another. Must be a direct path from you to the target, gas will be released upon collision with anything, or if max range is reached. Has no effect on bosses. Rank[1]: Max range of 500, duration of 4 seconds. Rank[2]: Max range of 625, duration of 5.25 seconds. Rank[3]: Max range of 775, duration of 6.5 seconds. Rank[4]: Max range of 950, duration of 7.75 seconds. |
|
|
Decoy
| Call down a decoy airdrop on the target location, 5 second delay, the decoy attracts nearby infected causing them to attack it; the ultimate distraction. Rank[1]: 1000 hit points, 60 second max duration. Rank[2]: 1500 hit points, 100 second max duration. Rank[3]: 2000 hit points, 140 second max duration. Rank[4]: 2500 hit points, 180 second max duration. |
|
|
...Nitrogen Cocktail...
| Toss a bottle that contains liquid nitrogen at the target location, freezing all nearby infected upon impact. Rank[1]: 200 AOE, 3 second duration. Rank[2]: 300 AOE, 4.5 second duration. Rank[3]: 400 AOE, 6 second duration. Rank[4]: 500 AOE, 7.5 second duration. |
|
|
Concealed Genocide Tactical Ability | Inject an infected with neurotoxins turning it into a walking timebomb, the zombie will combust creating a chain reaction and annihilating anything near it. (Premature death of the target will cause the neurotoxins to die down and have no effect.) Bosses cannot be targeted, but can be victims. Rank[1]: 6 second countdown, medium radius, chain reaction to zombies within 150 units. Rank[2]: 4 second coundown, rather large radius, chain reaction to zombies within 225 units. Rank[3]: 2 second countdown, large radius, chain reaction to zombies within 300 units. |

|
Description: Are you into building stuff? Do you like your LEGO's alot? I sure do, if so then this profession is for you. The Engineer is a profession that is in very high demand, if a team is without an Engineer they are pretty screwed unless they are total mofos at the game. Don't get me wrong, the game is doable without an Engineer but it makes it more difficult. This guy can whip out barricades, turrets, and other gadgets like its no'thang. Personally, this is my cup of tea.
Recommended Weapon: Anything There is no "best" weapon for the engineer, but there are better choices based on your team. If your team already has a sniper and rocket launcher you obviously don't want a slow reloading weapon. Go for a weapon that makes the most sense for the situation and don't condemn your team by being the third guy with an RPG or Flamethrower.
Skills:

|
Barricade
| Place down a barricade at the target location, keeps out all zombie threats while it lives except ones that can travel below or above it. Rank[1]: X hitpoints (value not yet determined). Rank[2]: X hitpoints (value not yet determined). Rank[3]: X hitpoints (value not yet determined). Rank[4]: X hitpoints (value not yet determined). |
|
|
Repair
| Gives you the ability and knowledge to repair your own creations (useful, eh?). Rank[1]: 20 damage repaired / second. Rank[2]: 35 damage repaired / second. Rank[3]: 50 damage repaired / second. Rank[4]: 65 damage repaired / second. |
|
|
Turret
| Place an attack turret at the target location that attacks both ground and air units. (Lasts indefinately or until destroyed.) Rank[1]: Turret does X damage. (value not yet determined). Rank[2]: Turret does X damage. (value not yet determined). Rank[3]: Turret does X damage. (value not yet determined). Rank[4]: Turret does X damage. (value not yet determined). |
|
|
...Mechanical Arm...
| Use a special contraption to extend a mechanical arm, pulling the first target it hits to your location, Infected or Survivor. Has no of an effect on bosses. Rank[1]: Mechanical arms range is 700. Rank[2]: Mechanical arms range increases to 1500. Rank[3]: Mechanical arms range increases to 2300. Rank[4]: Mechanical arms range increases to 2900. |
|
|
Nanotank Tactical Ability | Engineer a Nanotank to fight for you and your team, the tank moves at immense speeds and is equipped with a long range cannon. (Lasts indefinately or until destroyed. Only allowed one at a time.) Rank[1]: Nanotank has X hitpoints and does X damage. (value not yet determined). Rank[2]: Nanotank has X hitpoints and does X damage. (value not yet determined). Rank[3]: Nanotank has X hitpoints and does X damage. (value not yet determined). |

|
Description: The trigger-happy gunmaster. This guy is all about the firepower coming out of the barrel of his gun. Any gun you put in this guys hands is much more lethal than usual. Be it a Sniper, AR, LMG, or SMG the Gunner will destroy Infected with it. If your the kind of player that likes to sit back and shoot shit up then the Gunner is for you. With skills that benefit his "on-the-move" run and gun style he is the ultimate gunmaster.
Recommended Weapon: [LMG] or [Assault Rifle] The gunner specializes in guns, hence his name. So technically you could roll with any gun you choose, but the best choice would be an LMG. The reason for this is that the gunner is supposed to be a constant source of damage against the horde, the LMG provides and steady flow of DPS with a large clip and damage. A shotgun or assault rifle would also work, play with what you prefer and what your team chooses.
Recommended Weapon: [LMG] or [Assault Rifle] The gunner specializes in guns, hence his name. So technically you could roll with any gun you choose, but the best choice would be an LMG. The reason for this is that the gunner is supposed to be a constant source of damage against the horde, the LMG provides and steady flow of DPS with a large clip and damage. A shotgun or assault rifle would also work, play with what you prefer and what your team chooses.
Gunner Skills coming soon.

|
Description: The Medic is a very fun profession to play, one of the few defensive survivor classes, you will be hanging back behind your teammates healing them up. With skills that allow you to benefit everyone on your team the Medic is a necessity. If you get damaged pretty hard, don't worry for the medic will heal you up rather fast. The Medic should always be one of the first targets for the Infected, because if he dies the Survivors are at a huge disadvantage.
Recommended Weapon: [Shotgun] or [SMG] When the Medic isn't caring for his teammates he needs to provide short bursts of damage inbetween heals. SMG's and Shotguns are the best option for this. The reason being that these kinds of guns offer short, high-damage burst. The Medics main purpose is to assist his team, so always go with what benefits your team the most.
Skills:
|
|
Firstaid
| Restores a survivors lost hitpoints, the medics primary skill that keeps the team alive. Rank[1]: Use firstaid on a teammate, restoring X hitpoints. Rank[2]: Use firstaid on a teammate, restoring X hitpoints. Rank[3]: Use firstaid on a teammate, restoring X hitpoints. Rank[4]: Use firstaid on a teammate, restoring X hitpoints. |
|
|
Steroids
| Shoot a syringe containing stimulants at either a teammate or infected unit, unit affiliation affects the outcome. Rank[1]: Increases movement speed, hitpoints, and rate of fire of a survivor for X seconds / slows and disorients an infected for X seconds. Rank[2]: Increases movement speed, hitpoints, and rate of fire of a survivor for X seconds / slows and disorients an infected for X seconds. Rank[3]: Increases movement speed, hitpoints, and rate of fire of a survivor for X seconds / slows and disorients an infected for X seconds. Rank[4]: Increases movement speed, hitpoints, and rate of fire of a survivor for X seconds / slows and disorients an infected for X seconds. |
|
|
Condition Kit
| Fix negative conditions affecting teammates such as broken bones, fractures, hypothermia, heatstroke, sprains, hallucinations and more. Rank[1]: 3 second heal time, both survivors must remain still. Heals fractures and sprains only. Rank[2]: 2.25 second heal time, both survivors must remain still. Heals fractures, sprains, and torn muscles. Rank[3]: 1.5 second heal time, both survivors must remain still. Heals fractures, sprains, torn muscles, hypothermia, and heatstroke. Rank[4]: Instant heal time, both survivors must remain still. Heals all negative conditions. |
|
|
...Energy Stimulant...
| Restore a survivors lost energy using medical stimulants. Rank[1]: X energy restored. Rank[2]: X energy restored. Rank[3]: X energy restored. Rank[4]: X energy restored. |
|
|
Morphine Tactical Ability | Inject a teammate with morphine restoring their hitpoints too full, can have negative effects. Rank[1]: X cooldown, 65% chance to cause hallucinations. Rank[2]: X cooldown, 35% chance to cause hallucinations. Rank[3]: X cooldown, 10% chance to cause hallucinations. |

|
Description: The master of sight. The Recon has skills that allow him to see Infected that are coming for the team, be it in the air, or underground he can place down beacons to let the team know what's coming and what direction it's coming from. With the ability to scavenge for items on the radar he is incredibally powerful. Having a recon player on your team is always a great benefit, especially if you are running low on items which happens lategame also when camping out through bosswaves and swarms. The Encroacher is the Survivors worst nightmare, as it travels underground, pops up and grabs somone. A recon can place down beacons which have the ability to see units underground, which gives the Survivors the upperhand.
Recommended Weapon: [Sniper] The recon helps his team spot Infected and items around the map using becons and scouting equipment. No other weapon suits the Recon player better than a sniper rifle. The sniper allows very high damage in a single bullet with exceptional range. This allows the recon player to move about scouting and still assist his team if they're not right next to him. The recons abilities also go perfect with a sniper rifle choice. Keep in mind any weapon is viable but the sniper is probably the best option.
Recommended Weapon: [Sniper] The recon helps his team spot Infected and items around the map using becons and scouting equipment. No other weapon suits the Recon player better than a sniper rifle. The sniper allows very high damage in a single bullet with exceptional range. This allows the recon player to move about scouting and still assist his team if they're not right next to him. The recons abilities also go perfect with a sniper rifle choice. Keep in mind any weapon is viable but the sniper is probably the best option.
Recon Skills coming soon.

.......Welcome to the Infected units section of the post, the way Infected units work is quite interesting so stick with me while i explain. The game is still in the planning stage, especially the Infected gameplay type, so when you post please if you have any suggestions for this section post them because i want to know what you guys think about this. So how do the Infected work? When you spawn/respawn as an Infected player you are given control of a random Infected unit. When you spawn all abilities are already unlocked for you. The trick is, when you die as an Infected your level carries over to your next unit. Your unit will change upon death but your level, xp, and chosen level bonuses will transfer. So how exactly does leveling up help an Infected player if you keep changing units? You gain skill points which you can put into your favorite attributes and bonuses. These include and are certaintly not limited to movement speed, attack speed, skill potency, radar jammer, visibility, and many others. Infected units have permanent vision of the Survivors for locating purposes.
Skills for Infected units coming soon, please post recommended skills and help us improve this section!
Skills for Infected units coming soon, please post recommended skills and help us improve this section!
|
Description: Every Infected unit poses a different threat to the Survivors, the screecher enstills fear in its enemies verbally. He can screech calling hordes to the target location, and i meen, hordes of zombies. This unit wouldn't exactly win American Idol but in the zombie apocalyptic world he's the king of vocals.
Screecher Skills coming soon.
|
Description: There are three heights to Pandemic, below, level, and above. The Predator falls in the last two of those three. Jumping over barricades, cliffs, walls, and virtually anything that stands in his way he poses the second biggest threat to survivors when they are camping through swarms. With the ability to leap over barricades and get behind the Survivors he can cause some major damage if played correctly. With the ability to leap, and the grab and drag his opponents away from the group if he is not taken down fast he will bring prey back to the other Infected to feast on.
Predator Skills coming soon.
|
Description: Ahhh, the Encroacher, my favorite Infected by far. As stated in the previous description i talked about the three different heights in the game: below, level, and above. What makes this Infected so great is that he plays below ground coming up at the right time to snatch his prey, sounds pretty baller, right? The Encroacher can move below ground and is very hard to detect, a small crack above ground will give away his position if the Survivors have their brightness up and are watching closely. Your worst enemy is the recon, if you arn't rocking the radar jammer bonus then it's possible that you'll be easy prey unless you are pretty sneaky. If you are given this unit, use him to benefit your team, get below the enemy pop up and grab somone then haul ass dragging him behind you while the others are distracted. Never strike alone without a horde/swarm/other infected causing a distraction or else you'll die fast.
Encroacher Skills coming soon.
|
Description: There has to be a brute in every game, the guy that likes to just stand in front of everyone that can take boatloads of damage, well this is your man. The brute has many defensive aswell as offensive abilities that make him especially powerful against Survivors that are on the run, half the game involves moving not just camping, which meens the Brute is a major player. He can charge in from the shadows, knock down survivors, and even smash in barricades. His main weakness is getting killed from behind, don't let them get behind you or circle you. If this happens you will die.
Brute Skills coming soon.

|
Description: In every play theres the guys that work their asses off backstage making the play enjoyable for the audience, now take a guess what the hatcher does, exactly that. The hatcher can create hatcheries wherever he feels is a nice spot for breeding, if the hatcheries are not taken down they increase in power over time. The hatcheries spawn powerful swarm which are controllable by the Hatcher himself. So in a sense he is more of a puppetmaster. Keep in mind that your hatcheries and swarm will live until killed, even if you are killed, this makes you exceptionally powerful early game so you can setup hatcheries.
Hatcher Skills coming soon.
|
Description: The mutilator is a very interesting unit to play. The reason for this being he is one of the of the stealthy Infected that is still up in the action. The mutilator is pretty messed up as his name suggests, with his intestine's extending out of his arms he is a deadly character to face. The mutilator is able to launch his intenstines out, grab his target and reel them back towards him thrashing and mutilating his victims horribly if they reach him. It is suggested for the survivors that if you are the unfortunate target of one of these attacks try to fight the pull by moving forward, this will buy your team time to free you. There are a few ways of freeing a teammate being pulled by a Mutilater. The intestine's are an individual target and can be killed, incapitating the Mutilator's ability to pull people for a period of time. Or you can hunt down the Mutilator and end him in a few different ways, there are various kinds of shooting, stabbing, and nuking you can do to kick his ass.
Mutilator Skills coming soon.
|

......Welcome the Items section for Pandemic. Items play a huge role in the game, the reason for this is that it is the one major system that allows you to totally customize your character and switchup the game. Want to be a Exterminator with a sniper? Go for it, items allow you to totally mess with your character and bring out other sides of the game that allow you to have alot more fun. "Everyone want to use snipers this round?" Fuck yeah, that's what im talking about. There are two major classifications for items: Equipment and Weapons. The weapons category has everything from Frying Pans to deployable Gatling Guns. The equipment section contains everything from Barricades (if you don't have an engineer for some reason) to Scout Beacons. This is the section for items that really change up the game, and items that allow you to substitute for classes that you don't have in your group. So sit back, relax, and enjoy the items section of the post. (Please keep in mind if there is a value marked as "X" it meens i have not yet determined the number yet, it is not a typo.)
All weapon images in this section were created by me, some are also posted my website www.mw2hub.com, just incase you feel like you've seen them before.
All weapon images in this section were created by me, some are also posted my website www.mw2hub.com, just incase you feel like you've seen them before.

..........[Assault Rifles]
AK-47:


The AK47 is the [rank 1] weapon in the assault rifles weapon tree, this weapon is great for people that like fully autos without a long reload but still packs a big punch. It is the balance between the SMG's and the LMG's, powerful with a medium sized clip.
M4A1 Carbine:


The M4A1 Carbine is the [rank 2] weapon in the assault rifles weapon tree, this weapon is obtained by reaching X points while using the AK-47. Your weapon will be automatically upgraded upon reaching this goal.
G36c:


The G36c is the [rank 3] weapon in the assault rifles weapon tree, this weapon is obtained by reaching X points while using the M4A1 Carbine. Your weapon will be automatically upgraded upon reaching this goal. The G36c is the ultimate lawn mower, you'll mow down zombies dead in their tracks with this thing.
The AK47 is the [rank 1] weapon in the assault rifles weapon tree, this weapon is great for people that like fully autos without a long reload but still packs a big punch. It is the balance between the SMG's and the LMG's, powerful with a medium sized clip.
M4A1 Carbine:
The M4A1 Carbine is the [rank 2] weapon in the assault rifles weapon tree, this weapon is obtained by reaching X points while using the AK-47. Your weapon will be automatically upgraded upon reaching this goal.
G36c:
The G36c is the [rank 3] weapon in the assault rifles weapon tree, this weapon is obtained by reaching X points while using the M4A1 Carbine. Your weapon will be automatically upgraded upon reaching this goal. The G36c is the ultimate lawn mower, you'll mow down zombies dead in their tracks with this thing.
.............[Shotguns]
Model 1887:


The Model 1887 is the [rank 1] weapon in the shotgun weapon tree. The model 1887 has a spray and will completely wreck infected that dare stare down either of your barrels. Keep in mind that this gun only has 2 shots before reloading but can clear out wide areas in those two shots, the Spas-12 and AA-12 are rediculous so the shotgun is worth getting for the later models.
Spas-12 Semi-Automatic Shotgun:


The Spas-12 is the [rank 2] weapon in the shotgun weapon tree, this weapon is obtained by reaching X points while using the Model 1887. Your weapon will be automatically upgraded upon reaching this goal.
AA-12 Fully-Automatic Shotgun:


The AA-12 is the [rank 3] weapon in the shotgun weapon tree, this weapon is obtained by reaching X points while using the Spas-12. Your weapon will be automatically upgraded upon reaching this goal. I like to call the AA-12 R.A.P.E (really awesome purposeful equipment), a fully automatic, 8 shot, fast reloading shotgun. What else could you ask for? If you manage to get this shotgun (if your team makes it far enough), the props to you because you are going to be blowing heads off left and right.
The Model 1887 is the [rank 1] weapon in the shotgun weapon tree. The model 1887 has a spray and will completely wreck infected that dare stare down either of your barrels. Keep in mind that this gun only has 2 shots before reloading but can clear out wide areas in those two shots, the Spas-12 and AA-12 are rediculous so the shotgun is worth getting for the later models.
Spas-12 Semi-Automatic Shotgun:
The Spas-12 is the [rank 2] weapon in the shotgun weapon tree, this weapon is obtained by reaching X points while using the Model 1887. Your weapon will be automatically upgraded upon reaching this goal.
AA-12 Fully-Automatic Shotgun:
The AA-12 is the [rank 3] weapon in the shotgun weapon tree, this weapon is obtained by reaching X points while using the Spas-12. Your weapon will be automatically upgraded upon reaching this goal. I like to call the AA-12 R.A.P.E (really awesome purposeful equipment), a fully automatic, 8 shot, fast reloading shotgun. What else could you ask for? If you manage to get this shotgun (if your team makes it far enough), the props to you because you are going to be blowing heads off left and right.
.......[Rocket Launchers]

RPG-7:


The RPG-7 is the [rank 1] weapon in the rocket launcher weapon tree. This weapon only has 2 shots before reloading, with a rather long reload, do not have more than one of these per group; you'll get screwed. Great for clearing out hordes and swarms, take a look at the rank 3 rocket launcher, that is the reason to buy this.
Thumper:


The Thumper is the [rank 2] weapon in the rocket launcher weapon tree, this weapon is obtained by reaching X points while using the RPG-7. Your weapon will be automatically upgraded upon reaching this goal.
MGL-140 Semi-Automatic RPG:


The MGL-140 is the [rank 3] weapon in the rocket launcher weapon tree, this weapon is obtained by reaching X points while using the Thumper. Your weapon will be automatically upgraded upon reaching this goal. Probably the best gun in the game as of now, a semi-automatic 5 round rocket launcher. That is 5 shots without having to reload, with a rocket launcher. Swarms and hordes look out for this mofo.
The RPG-7 is the [rank 1] weapon in the rocket launcher weapon tree. This weapon only has 2 shots before reloading, with a rather long reload, do not have more than one of these per group; you'll get screwed. Great for clearing out hordes and swarms, take a look at the rank 3 rocket launcher, that is the reason to buy this.
Thumper:
The Thumper is the [rank 2] weapon in the rocket launcher weapon tree, this weapon is obtained by reaching X points while using the RPG-7. Your weapon will be automatically upgraded upon reaching this goal.
MGL-140 Semi-Automatic RPG:
The MGL-140 is the [rank 3] weapon in the rocket launcher weapon tree, this weapon is obtained by reaching X points while using the Thumper. Your weapon will be automatically upgraded upon reaching this goal. Probably the best gun in the game as of now, a semi-automatic 5 round rocket launcher. That is 5 shots without having to reload, with a rocket launcher. Swarms and hordes look out for this mofo.
......[Light Machine Guns]

Steyr AUG:


The Steyr Aug is the [rank 1] weapon in the light machine gun weapon tree. The Steyr Aug is quite different than the other two LMG's in the tree, it's clip size is about half but does about the same damage, rank 2 and 3 of this weapon tree are much better and if you can tough it out you won't regret it.
RPD:


The RPD is the [rank 2] weapon in the light machine gun weapon tree, this weapon is obtained by reaching X points while using the Steyr AUG. The RPD is quite an upgrade from the Steyr AUG, it has a little bit longer reload time but over double the clip size with bigger rounds. Expect to sit behind your shotgun friends and mow down infected, they'll think they're pwning when it's actually you getting all the kills!
HK MG4:


The HK MG4 is the [rank 3] weapon in the light machine gun weapon tree, this weapon is obtained by reaching X points while using the RPD. Your weapon will be automatically upgraded upon reaching this goal. The king of spray and pray, biggest clip in the entire game, fast rate of fire, faster reload than the RPD, and even bigger rounds. Prepare to kill.
The Steyr Aug is the [rank 1] weapon in the light machine gun weapon tree. The Steyr Aug is quite different than the other two LMG's in the tree, it's clip size is about half but does about the same damage, rank 2 and 3 of this weapon tree are much better and if you can tough it out you won't regret it.
RPD:
The RPD is the [rank 2] weapon in the light machine gun weapon tree, this weapon is obtained by reaching X points while using the Steyr AUG. The RPD is quite an upgrade from the Steyr AUG, it has a little bit longer reload time but over double the clip size with bigger rounds. Expect to sit behind your shotgun friends and mow down infected, they'll think they're pwning when it's actually you getting all the kills!
HK MG4:
The HK MG4 is the [rank 3] weapon in the light machine gun weapon tree, this weapon is obtained by reaching X points while using the RPD. Your weapon will be automatically upgraded upon reaching this goal. The king of spray and pray, biggest clip in the entire game, fast rate of fire, faster reload than the RPD, and even bigger rounds. Prepare to kill.
.......[Sub Machine Guns]

Mac-11 .380:

The Mac-11 is the [rank 1] weapon in the sub machine gun weapon tree. The Mac-11 is a difficult weapon to start off with because of its small clip, range, and damage. The gun has an instant reload time because of the exceptional clip type, the guns later on increase in quality exponentionally, so if you like close range, fast shooting, fast reloading guns, these guns are for you.
UMP .45:

The UMP .45 is the [rank 2] weapon in the sub machine gun weapon tree, this weapon is obtained by reaching X points while using the Mac-11. This gun is quite better than the Mac-11, twice as big of a clip, more damage, and range, a very solid upgrade.
MP5 9mm:

The MP5 9mm is the [rank 3] weapon in the sub machine gun weapon tree, this weapon is obtained by reaching X points while using the UMP .45. Your weapon will be automatically upgraded upon reaching this goal. Rated the best SMG in the world by multiple sources, one of the top close range guns in the world, this thing kills it. A solid upgrade from the UMP.
The Mac-11 is the [rank 1] weapon in the sub machine gun weapon tree. The Mac-11 is a difficult weapon to start off with because of its small clip, range, and damage. The gun has an instant reload time because of the exceptional clip type, the guns later on increase in quality exponentionally, so if you like close range, fast shooting, fast reloading guns, these guns are for you.
UMP .45:
The UMP .45 is the [rank 2] weapon in the sub machine gun weapon tree, this weapon is obtained by reaching X points while using the Mac-11. This gun is quite better than the Mac-11, twice as big of a clip, more damage, and range, a very solid upgrade.
MP5 9mm:
The MP5 9mm is the [rank 3] weapon in the sub machine gun weapon tree, this weapon is obtained by reaching X points while using the UMP .45. Your weapon will be automatically upgraded upon reaching this goal. Rated the best SMG in the world by multiple sources, one of the top close range guns in the world, this thing kills it. A solid upgrade from the UMP.
..........[Sniper Rifles]

M21:

The M21 Sniper Rifle is the [rank 1] weapon in the sniper rifle weapon tree. The sniper rifle tree is an interesting one, they have insanely long range and rediculous damage. Sniper bullets travel in a line through enemies, so if you get a nice line of infected running towards you, collateral damage their ass. Because of the inconvenience of aiming a sniper it has a low rate of fire but is very good against bosses because it is single target only but packs quite a punch.
Dragunov SVD:

The Dragunov SVD is the [rank 2] weapon in the sniper rifle weapon tree, this weapon is obtained by reaching X points while using the M21. The Dragunov has a higher rate of fire than the M21, does more damage, and has a higher chance to headshot the enemy, quite a good all around upgrade from the previous weapon.
Barrett .50 cal:

The Barrett .50 cal is the [rank 3] weapon in the sniper rifle weapon tree, this weapon is obtained by reaching X points while using the Dragunov SVD. Your weapon will be automatically upgraded upon reaching this goal. Ahhhhh, the Barrett .50 cal, bullets 3x the size of normal bullets, most powerful gun in the world. This thing will blow anything that stands in its way to shreds, insanely high damage, range, and rate of fire, insanely good upgrade from the Dragunov.
The M21 Sniper Rifle is the [rank 1] weapon in the sniper rifle weapon tree. The sniper rifle tree is an interesting one, they have insanely long range and rediculous damage. Sniper bullets travel in a line through enemies, so if you get a nice line of infected running towards you, collateral damage their ass. Because of the inconvenience of aiming a sniper it has a low rate of fire but is very good against bosses because it is single target only but packs quite a punch.
Dragunov SVD:
The Dragunov SVD is the [rank 2] weapon in the sniper rifle weapon tree, this weapon is obtained by reaching X points while using the M21. The Dragunov has a higher rate of fire than the M21, does more damage, and has a higher chance to headshot the enemy, quite a good all around upgrade from the previous weapon.
Barrett .50 cal:
The Barrett .50 cal is the [rank 3] weapon in the sniper rifle weapon tree, this weapon is obtained by reaching X points while using the Dragunov SVD. Your weapon will be automatically upgraded upon reaching this goal. Ahhhhh, the Barrett .50 cal, bullets 3x the size of normal bullets, most powerful gun in the world. This thing will blow anything that stands in its way to shreds, insanely high damage, range, and rate of fire, insanely good upgrade from the Dragunov.
........[Flamethrowers]

Flamethrower:
The Flamethrower [not upgraded] is the [rank 1] weapon in the flamethrower weapon tree. The Flamethrower tree works differently than any other type of weapon in the game. Instead of getting a new weapon when upgrading your tank is upgraded. The #1 problem with flamethrowers is overheating tanks, with these upgrades you get improved fuel (better range and damage), aswell as more collant to reduce overheating.
Tank Upgrade #1:

The Flamethrower [upgrade #1] is the [rank 2] weapon in the flamethrower weapon tree, this weapon is obtained by reaching X points while using the Flamethrower [not upgraded]. This upgrade improves the coolant and fuel in your tank, increasing range and damage by a fair amount. The coolant increases the longevity of your tank and reduces the cooldown time between overheats.
Tank Upgrade #2:
The Flamethrower [upgrade #2] is the [rank 3] weapon in the flamethrower weapon tree, this weapon is obtained by reaching X points while using the Flamethrower [Upgrade #1]. This upgrade improves the coolant and fuel in your tank, increasing range and damage by a fair amount. The coolant increases the longevity of your tank and reduces the cooldown time between overheats.
The Flamethrower [not upgraded] is the [rank 1] weapon in the flamethrower weapon tree. The Flamethrower tree works differently than any other type of weapon in the game. Instead of getting a new weapon when upgrading your tank is upgraded. The #1 problem with flamethrowers is overheating tanks, with these upgrades you get improved fuel (better range and damage), aswell as more collant to reduce overheating.
Tank Upgrade #1:
The Flamethrower [upgrade #1] is the [rank 2] weapon in the flamethrower weapon tree, this weapon is obtained by reaching X points while using the Flamethrower [not upgraded]. This upgrade improves the coolant and fuel in your tank, increasing range and damage by a fair amount. The coolant increases the longevity of your tank and reduces the cooldown time between overheats.
Tank Upgrade #2:
The Flamethrower [upgrade #2] is the [rank 3] weapon in the flamethrower weapon tree, this weapon is obtained by reaching X points while using the Flamethrower [Upgrade #1]. This upgrade improves the coolant and fuel in your tank, increasing range and damage by a fair amount. The coolant increases the longevity of your tank and reduces the cooldown time between overheats.
.....[Melee Weapons]

Melee Weapons:


More to come...
More to come...

.......Equipment in Pandemic plays a huge part in the game. As there is only 4 people per team the survivors are unable to have every class on their team, this forces them to pick and choose and good combo (or a really shitty one if no one listens to eachother.) Equipment is here to help you fill in for the slots that you are missing aswell as just add diversity to the game and allow players to customize their play style.
This section is a very big WIP, expect alot more information here in the near future.
This section is a very big WIP, expect alot more information here in the near future.
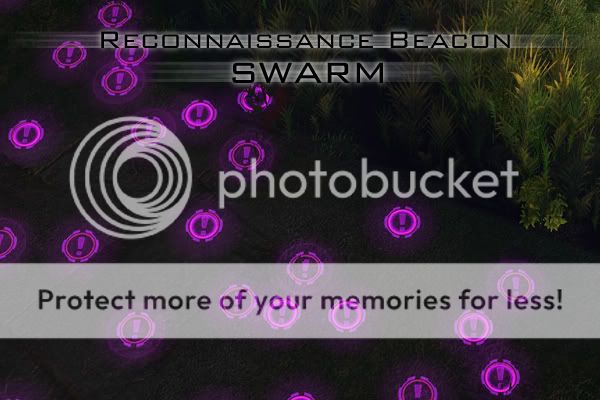
[Reconnaissance Beacon:]
...

.....The Reconnaissance Beacon is a less powerful version that mimics one of the major roles of the Recon player, locating infected before they reach you. The Reconnaissance Beacon can be placed down anywhere on the map with a build time of 10 seconds and will show Swarms, Hordes, and Infected as red circles that are in the fog. Keep in mind that Swarms show up as purple circles, but Infected and Hordes appear the same. So you will not be able to tell the difference from somone that is playing an Infected versus the average AI zombie til they actually show themselves.
 [C4 Explosives:]
...
.....Plant a pack of explosives at the designated location which is detonated remotely, causing 500 damage to nearby infected units. Has a plant time of 3 seconds.
(C4 Explosives in item form must be detonated by clicking on the C4 itself, there is no ability to detonate it from your character)
[Wooden Barricades:]
...
.....Place down a weak barricade to defend your team from charging infected. These barricades are rather weak and it is recommended to have an Engineer on your team instead of using these, having to use Wooden Barricades as an item should be a last resort if no one on your team will cooperate.
This section is no where near completion.
...
.....The Reconnaissance Beacon is a less powerful version that mimics one of the major roles of the Recon player, locating infected before they reach you. The Reconnaissance Beacon can be placed down anywhere on the map with a build time of 10 seconds and will show Swarms, Hordes, and Infected as red circles that are in the fog. Keep in mind that Swarms show up as purple circles, but Infected and Hordes appear the same. So you will not be able to tell the difference from somone that is playing an Infected versus the average AI zombie til they actually show themselves.
...
.....Plant a pack of explosives at the designated location which is detonated remotely, causing 500 damage to nearby infected units. Has a plant time of 3 seconds.
(C4 Explosives in item form must be detonated by clicking on the C4 itself, there is no ability to detonate it from your character)
[Wooden Barricades:]
...
.....Place down a weak barricade to defend your team from charging infected. These barricades are rather weak and it is recommended to have an Engineer on your team instead of using these, having to use Wooden Barricades as an item should be a last resort if no one on your team will cooperate.
This section is no where near completion.
[Piercing Rounds:]
...

.....Lethal rounds which penetrate any surface, be it bulletproof surfaces or rock-hard skin, these bullets will destroy infected.
...
.....Lethal rounds which penetrate any surface, be it bulletproof surfaces or rock-hard skin, these bullets will destroy infected.
+X damage
This section is no where near completion.This section is no where near completion.
This section is no where near completion.
.....Thank you for taking the time to review my post, if you havn't read the entire thing i strongly encourage that you go back and do, as i've been working on this thread for two weeks and i want everyone on the hive to enjoy this thread. Please if you find any mistakes, grammar issues, miss-spellings, or have any suggestions whatsoever make a post in the thread letting me know. Keep in mind this project is for Starcraft 2 and changes are competely likely to occur, make sure to check the change log below this post frequently to see what i've updated so you can check it out! Help us make this one of the top Starcraft 2 maps and help promote the hive.
Cheers,
-Bane
-Bane
Last edited:

 Now first off, uuu...the picture at the top has bullet shells flying out of the gun, but the shells still have the tips on them. So...they where never fired?
 If so will it still be posted on the HIVE when its done? Please give reply.

