- Joined
- Apr 19, 2008
- Messages
- 2,582
How to Swap Reforged Model Parts
In this tutorial, we will learn how to swap parts of a Reforged model. I was chatting with the user MayDay on Discord, and he asked me how to give the Jaina hero the legs of the Succubus demon. I was able to do this in a couple of minutes, and he seemed surprised, so I think we should encourage for this to be common knowledge.
Requirements
Step 1: Open the Model Files
I will assume you have your Retera Model Studio setup completed from a previous tutorial.
Personally I like to disable the "Quick Browse" setting in the options menu. You can access the preferences by going to "Edit > Preferences".

Once the Quick Browse is disabled, any time that you open a model the model will remain open and continue to consume memory and resources on your PC until you close the Retera Model Studio. This is not desirable if you are going to do a lot of model browsing without editing anything. But if you are a user who already is familiar with the model database, and you want to use this program for editing files, I find it more convenient if any model file that I open remains open.
This is where the magic happens.


At this point we have a mostly functional model! You can try "File > Save as" and choosing the MDX format type for the model if you would like to test the model in-game or in the Warcraft III: Reforged World Editor.

Step 4: Configure Visibility
At this stage the model is good enough that you could probably show it off to your friend, but there is a problem you will quickly notice if you attempt to use this model in-game.

Congratulations! Now you know how to swap Warcraft III: Reforged model parts between models, while keeping their animations!
In this tutorial, we will learn how to swap parts of a Reforged model. I was chatting with the user MayDay on Discord, and he asked me how to give the Jaina hero the legs of the Succubus demon. I was able to do this in a couple of minutes, and he seemed surprised, so I think we should encourage for this to be common knowledge.
Requirements
Step 1: Open the Model Files
I will assume you have your Retera Model Studio setup completed from a previous tutorial.
Personally I like to disable the "Quick Browse" setting in the options menu. You can access the preferences by going to "Edit > Preferences".
Once the Quick Browse is disabled, any time that you open a model the model will remain open and continue to consume memory and resources on your PC until you close the Retera Model Studio. This is not desirable if you are going to do a lot of model browsing without editing anything. But if you are a user who already is familiar with the model database, and you want to use this program for editing files, I find it more convenient if any model file that I open remains open.
- Enter Reforged models mode if you have not already. If your program did not automatically setup to use this mode, you should be able to go into "Preferences > Warcraft Data" and then find the UI option for "Reforged Graphics Mode". Simply click this button, then press OK on the Preferences window.
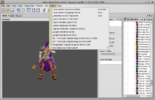
- Open Jaina by navigating the Unit Browser on the right-hand side to find "Standard Units / Human / Campaign / Heroes / Jaina". Double click on the Jaina icon and you should see Jaina appear in the 3D preview in front of you. Because we disabled Quick Browse, this has created an editor context to modify Jaina that will remain open even if we browse to a different model file.
- Now navigate to "Standard Units / Neutral Hostile / Melee / Units / Succubus". Double click on the Succubus icon and you should see the Succubus appear in the 3D preview in front of you. Because we disabled Quick Browse, again this has created a second editor context to modify the Succubus. We will use this to delete everything besides her legs. Then when we have a "legs model" like this, we will be able to put it onto Jaina.
- In order to make a model of Jaina's body with the Succubus legs, we need to have a model of the Jaina body without legs and a model of the Succubus legs so that the Retera Model Studio automation can combine them for us.
- Let us begin by creating the Jaina model that has no legs. To do this, assuming your 3D previewer still is showing a Succubus, click on "Window > Jaina" in the menu bar across the top of the program.
- (Similar to how the Warcraft III World Editor can have multiple maps open at a time, the Retera Model Studio can have multiple models open at a time. You will probably notice on the dropdown that four models have been opened: Jaina, Jaina_Portrait, Demoness, and Demoness_Portrait. For now we can ignore the portrait model files because they are outside the scope of this tutorial.)
- (Similar to how the Warcraft III World Editor can have multiple maps open at a time, the Retera Model Studio can have multiple models open at a time. You will probably notice on the dropdown that four models have been opened: Jaina, Jaina_Portrait, Demoness, and Demoness_Portrait. For now we can ignore the portrait model files because they are outside the scope of this tutorial.)
- Now that Jaina is the active context for editing, click on the Edit tab to begin customizing the model file. In this view, you will see the model in several 2d editor views as well as a 3d editor preview.
- I usually begin this kind of model edit by expanding out the Mesh section on the Outliner that we see to our left. In particular, in this tutorial we are not interested in modifying the animation data of Jaina so we will not touch the Nodes box.
- Under the Mesh section, we can see a list of Jaina's 3d components. If you hover the mouse over the name of a component, that component will highlight in green and yellow in the four views. This can help to get a better sense of how the different 3d components are divided.
- Also notice how some of the geometry of Jaina is hidden by default. The program hides the geometry that is named "_LOD1" or "_LOD2" or "_LOD3" because these are lower Levels of Detail of the Jaina geometry. According to a former Blizzard Employee Reforged producer, and long-time member of the Hive Workshop, these Level of Detail geometries inside of the Reforged model are completely unused. Because of this, it is safe to ignore them completely, or even delete them if you would like. For the purposes of this tutorial I will ignore them.
- For this sample model, we can pretty quickly see that only the first row, titled human_jaina_rig_ingame:main_geo contains the legs of Jaina.
- Uncheck all of the boxes except for the first one, so that we will use the editor to modify only the first row of geometry on Jaina. The row we will modify is the first one titled human_jaina_rig_ingame:main_geo. This geoset of data contains the legs. So, to remove them, we need only modify this geoset.
- Now that the editor is set to only modify the main body of Jaina, use a left-click drag to draw a box across most of Jaina's legs. This will select them and offer us an option to delete the legs, but do not delete them just yet.
- Before deleting the legs, we should make sure that we select every part of the legs that we want to remove, and nothing more. To do this, press CTRL+E on the keyboard or use "Edit > Expand Selection." This option will select more of Jaina, selecting outwards until it reaches a seam. In this case, the seam that will end the automated selection will be at her waist, allowing us to exactly select her legs -- nothing more, and nothing less.
- Now press DEL on your keyboard to delete the legs, or use "Edit > Delete" from the menu. Jaina's legs should immediately disappear, leaving us with a view of her remaining upper body in the editor. If you would like, you could pause to make sure no model data was damaged and click back on the View tab to see a preview of the current model. It should look like Jaina, but with no legs.
- Now that we have created a model of Jaina with no legs, we need to create a model of the Succubus legs only. First, click on "Window > Demoness" in the top menu. Because the Retera Model Studio supports having multiple editor contexts open at a time, our modified Jaina model will remain open and waiting for us when we get back. If you are worried that your computer might lose power, now would be a good time to save a backup of this Jaina model to save your progress. However, in general this is not necessary until we are finished because Jaina will remain open while we change over to work on the Succubus model.
- Return again to the Edit tab and expand the Mesh section like we did on the Jaina model. This time, we can see that the legs we want are in the third geoset listed under Mesh rather than the first. Similar to Jaina, the legs are in a geoset whose name ends in "main_geo": in this case "VileTormentor_rig:main_geo". Again, uncheck the boxes other than this one geoset so that we can select only her legs.
- Left-click drag a select box across the legs of the model, and then expand selection once again like we did with the Jaina model. If you are like me, you may have accidentally selected the tail, too. Do not worry about that yet.
- Now that we have the legs of the Succubus selected, we need to do something different than what we did for Jaina. In this case, we want to isolate this part of the model to keep it. To do that, press CTRL+I on the keyboard or use "Edit > Invert Selection" from the program menus. Now you should have the top half of the Succubus selected.
- Press DEL (or use "Edit > Delete") to delete the top half of the Succubus. However, after doing this we will still see the legs and tail of our character showing. To remove the tail, drag select a small part of it -- even just the very tip -- and use the Expand Selection feature again (CTRL+E or "Edit > Expand Selection"). Then, press DEL to delete the tail. If part of the tail remains showing (floating in the air), repeat the process of selecting it and expanding your select and deleting what remains.
- Now, you should be left with the legs of the Succubus showing.
- Notice: this model has many other geosets that are currently not shown. We need to remove those as well. To do this, double tap the checkbox labelled Mesh in the upper-left hand corner of the Outliner. This will hide all mesh, then show all mesh. You should see the entire Succubus re-appear (because of the unused LOD copies of the mesh).
- We want to delete all of this stuff, except for the customized Legs that we prepared on the third geoset listed. To do this, click on the checkbox for the third geoset listed to toggle it to OFF so that we will not modify it. As a result, when we delete everything, the customized legs will not be deleted.
- Now that we are set to edit everything we do not want, select everything. You can do this by doing a left-click drag. If you want to be slightly more efficient, you can use the CTRL+A hotkey or "Edit > Select All". It may be necessary to click once on the background in one of the 2D views to ensure that the 2D view receives the CTRL+A hotkey instead of some other part of the program consuming the keyboard input.
- Once you have selected everything, delete it! It should be impossible to delete our customized leg geometry, because that was toggled to OFF so it is hidden from us and is not editable. At this point, we should see our custom leg geoset as the only item listed under the Mesh checkbox.
This is where the magic happens.
- Return to the Jaina model by using "Window > Jaina" from the menu bars. On this model, use the menu option "Scripts > Skin Splice into Current > Workspace".
- At this point, a popup will appear from the program. Choose the Demoness in the popup as the source of mesh.
- Press OK on the popup. At this point, you should see a combined model, but the scale of the geometry probably does not fit.
- Uncheck the box for the Jaina top half. Then drag select the Succubus legs, which should be the only part of the model remaining visible. Once you have the legs selected, check the box for Jaina's top half once again. This way, you can preview the Jaina top half while editing the legs.
- Click on the Scale button or use the hotkey R to enter the Scale mode. Your selection will be preserved, so you should see a Scale widget appear on her legs in the 2D edit planes. To change the size of the legs you can click drag on that widget, or if it is simpler you can right-click drag anywhere else in the 2D view. Using the scale tool and also the Move tool (hotkey W) you can scale and move the legs until they look like they are in generally the correct location to match where the Jaina legs that we deleted were previously.
- Now that the legs have been moved to the correct location, click on the View tab to preview our character! If all has gone well, you should see Jaina with a custom set of fully animated Succubus legs!
At this point we have a mostly functional model! You can try "File > Save as" and choosing the MDX format type for the model if you would like to test the model in-game or in the Warcraft III: Reforged World Editor.
Step 4: Configure Visibility
At this stage the model is good enough that you could probably show it off to your friend, but there is a problem you will quickly notice if you attempt to use this model in-game.
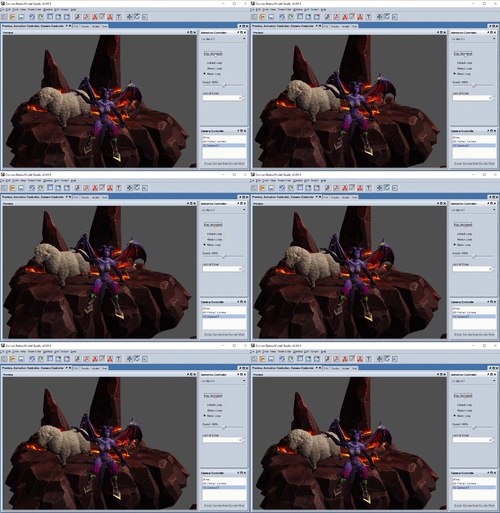
- If you played around with the model in the preview, or in game, you will quickly notice a dumb bug. In the "Stand 2" and "Stand Second" animations, the legs of our hero will mysteriously disappear! Why does this happen?
- The problem is that the leg mesh still has its visibility information that was left from the Succubus model "Decay" animation when she fades into the ground. However, the numeric animation time information has become meaningless in the Jaina model and is causing the legs to disappear at the wrong time.
- To overwrite this, we can use an old feature of Retera Model Studio which can fix our issue using a bit of a workaround. First, to use the workaround feature, make sure that you have saved the model to your hard drive.
- Now, after the file has been saved, choose "Scripts > Edit/delete model components."
- This feature is a legacy option that I included in my program from the early development days, but it should still work fine for our purposes. After a short load time, you should see a popup appear with lots of different options on it.
- In this popup, do not touch anything. Even a single click could break your model because selecting items in the viewing box will not only select but also re-assign model information.
- Instead, only click on the tab that is labelled "Visibility". To view this tab, you may wish to expand the window to be full screen, and make the left-hand selection list wider so that it is easy to read. To widen it, simply drag on the divider between the two parts of the Visibility tab.
- In this menu, click on the item that says Units/Demon/Demoness/Demoness_Main_Diffuse layer (mode Transparent). This should change the title across the top of the right-hand panel to match what you have selected.
- Now on this view, change the second dropdown on the right-hand side which is labelled Imported animation visibility from: so that the dropdown option will read visibility data from something else. In this case, we want to overwrite the "visibility of her legs" with the "visibility of her body". So, since we have the leg layer selected, we should choose Units/Human/Jaina/Human_JainaProudmoore_Main_Diffuse layer (mode Transparent). Click on that item and see that it fills the box.
- After changing this visibility item, go ahead and immediately click on "Finish" down at the bottom of the UI without changing anything else.
Congratulations! Now you know how to swap Warcraft III: Reforged model parts between models, while keeping their animations!


