- Joined
- May 1, 2018
- Messages
- 333


- In this tutorial, you'll find how to get a HD Loading Screen.
- There's two methods available. ".dds" & ".tga"
- The one you choose is based on the Warcraft 3 version you have.
- Users on the Latest Patch can choose between either, although using a ".dds" import is superior as it uses a lower file size and is more performance friendly.
- Users using a Classic Warcraft Patch do not have ".dds" support enabled, and therefore will need to use ".tga"
- Let's take a look at some of the tools you can use to complete this task. You'll need a decent photo editor, such as:
- Note: Your version of Photoshop may not support ".dds" and you'll need to install the Nvidia Texture Tools Plug-in. Both GIMP and Paint.net support ".dds" natively and no plug-in is required.
- Now that we have the tools required, we're going to need to find or create an image to use as our Loading Screen.
- This is where you'll need to pick a resolution size. Realistically, a 1920×1080 image is ideal due to its high quality and low file size. You may, however, use much higher resolution images, although it is not recommended unless it's a single player game.
- "But wait, what's the maximum?" - I've tested up to 7680×4320 with success.
- Now that we've chosen our size and image, it's time to make it compatible for the game to read it.
- This is where you'll choose between ".dds" and ".tga" depending on the version of the game you're using.
- From here on, all examples will be using an image from my own map and GIMP as the tool.
- Here we have a 1920×1080 image to use, with some empty space on the bottom so the loading bar doesn't intrude.
- If you own Reforged, but play on SD graphics only, do not worry, ".dds" is still supported. It's what all the in-game files use, and it's what you should use too.
- REFORGED (1.32+) USERS: Now we're going to use our tool to convert the image to ".dds"
- Open the image in your tool of choice, double check the sizing of the image, and save the file as "Fullscreen.dds"
- "Why 'Fullscreen.dds'?" - It's the path I've set for the texture on the model I created. You'll be able to download the model at the end of the tutorial.
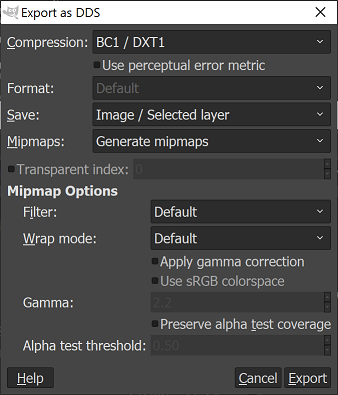
- Once you've saved the file, it will ask you what special settings you wish to use. We're going to use the settings I provide for you here:
- NOTE: Mipmaps may not be required for loading screens and you can save on file size by setting it to "No mipmaps"
- Now we have the image for the Loading Screen. Hang tight while I show Classic users how to do theirs.
- CLASSIC (1.00-1.31.1) USERS: Now we're going to use our tool to convert the image to ".tga"
- Open the image in your tool of choice, double check the sizing of the image, and save the file as "Fullscreen.tga"
- "Why 'Fullscreen.tga'?" - It's the path I've set for the texture on the model I created. You'll be able to download the model at the end of the tutorial.
- "But wait, what if I want to use '.blp'?" - You'll never see me support the use of ".blp" in any of my guides, but you can use ".blp" just as you can use ".tga"
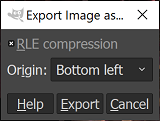
- Once you've saved the file, it will ask you what special settings you wish to use. We're going to use the settings I provide for you here:
- Now we have the image for the Loading Screen.
- Next, we're going to look at how to actually use this image in-game for your map.
- Import your converted image file through Asset Manager/Import Manager under the correct path, "Fullscreen.dds" OR "Fullscreen.tga"
- Download and import LoadingScreen.mdx with the path "LoadingScreen.mdx"
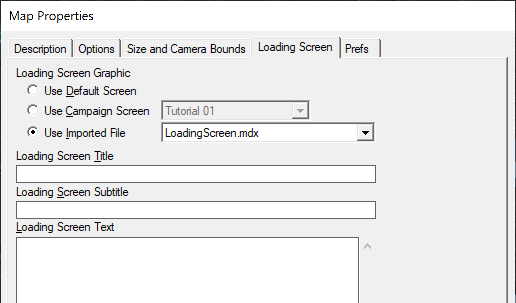
- In World Editor, select Scenario -> Map Loading Screen
- Under Loading Screen Graphic, select your imported "LoadingScreen.mdx"
- Note: If you want no default map text to appear on your loading screen, simply input a "space" on each line of the three description boxes.
- Note: If the image appears as completely black, double check that you have removed the "war3mapImported/" from the path file on the imports.
- Now, it's time to test out our new image.
- Simply test your map and check out your awesome new loading screen!
Attachments
Last edited:


") i imported both files, then i saved the map as a Folder (Save Map as -> File Type - Folder).
i imported both files, then i saved the map as a Folder (Save Map as -> File Type - Folder).


