XxNiNjAsHaDoWxX
X
XxNiNjAsHaDoWxX
Ever wanted to create a custom loading screen, but never been into the whole "cut to size import all 4 and fix path" thing? well then today is your lucky day. I'm going to explain how to create a custom loading screen without cutting the image or anything in 6 easy steps.
Tools Required:
Adobe Photo-Shop or any other image editing programs. you can download the one I used here: http://www.irfanviewpack.com/ and the WarCraft3Viewer. Download Here: https://www.hiveworkshop.com/resources_new/tools/6/
And finally a MDX Loading Screen File Downloaded Here http://world-editor-tutorials.thehelper.net/loading/LoadingScreen.mdx
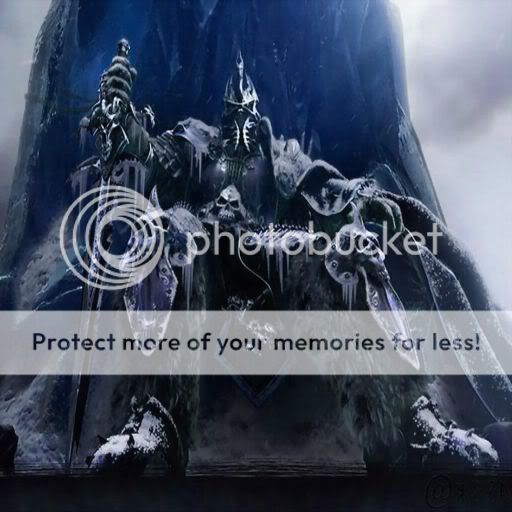
Step 1: Getting and image. pull yourself up any image off the web, I've found and interesting one right here:

Step 2: Resizing. Now you will need to resize your image to a 512x512 box, it will look like its squished but when it has been imported and all is done it will stretch back out to normal size. this is what my image looked like after resizing:
Step 3: Converting Image. Now open Warcraft 3 Image Viewer and on the top tool-bar select Convert File -> BMP, JPG or TGA -> BLP
and select a quality of compression, 85% - 90% is probably the best because the slightly lower quality is a small price to pay for the big decrease in size.
Step 4: Importing The Image. Open your map and select the
import manager and import your image. (please excuse me for not using screen shots in this part. i don't know how to take them in W.E)
Step 5: Changing The Images Path. This is the most simple part of the whole tutorial. Double click on the imported image, select "Use Custom Path" and change the path to FullScreen.blp
Step 6: Importing The Model. Because the image can't be displayed on its own, we need a MDX file to, hook it on if you will, its kind of like a 3D sound were it needs to be attached to something before it will work. this is why we use the MDX File. Ok now we import the MDX file (Again, excuse me for having no screen shots) now we go to Scenario -> Map Loading Screen. Check were it says "Use Imported File" and select the LoadingScreen.MDX
Weighing the Pros And Cons:
Pros: Easier to do for beginner map makers. Takes alot less time. Takes up less room in your map
Cons: Less quality makes it hard to see details in the picture. About one in about 30 times the image appears in the loading screen you will fatal error, still trying to fix this problem
Over All Mark: 6/10 Because of the Non-Fiddly approach to it but not recommended for better map makers/2D graphics designers because it has alot less quality then the 4 sections version.
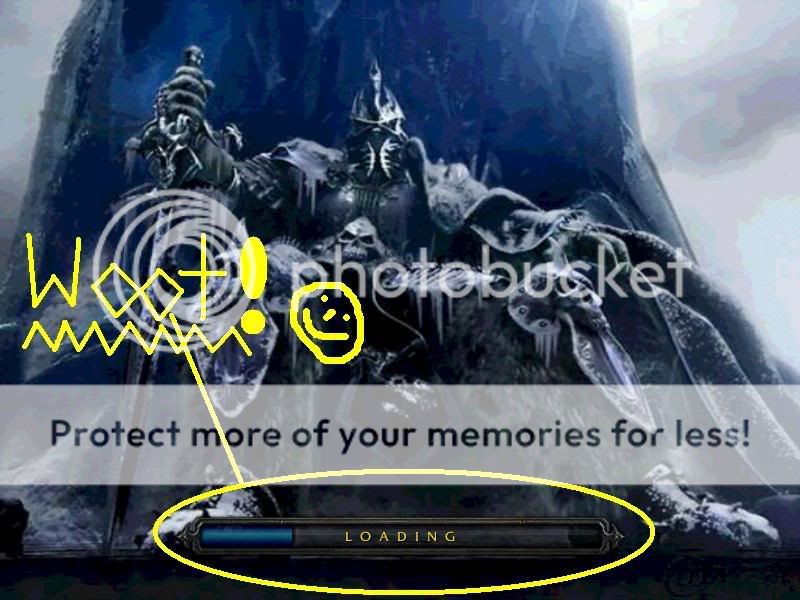
And Here Is The Final Out-Come (For me at least )
)
Tools Required:
Adobe Photo-Shop or any other image editing programs. you can download the one I used here: http://www.irfanviewpack.com/ and the WarCraft3Viewer. Download Here: https://www.hiveworkshop.com/resources_new/tools/6/
And finally a MDX Loading Screen File Downloaded Here http://world-editor-tutorials.thehelper.net/loading/LoadingScreen.mdx
Step 1: Getting and image. pull yourself up any image off the web, I've found and interesting one right here:
Step 2: Resizing. Now you will need to resize your image to a 512x512 box, it will look like its squished but when it has been imported and all is done it will stretch back out to normal size. this is what my image looked like after resizing:
Step 3: Converting Image. Now open Warcraft 3 Image Viewer and on the top tool-bar select Convert File -> BMP, JPG or TGA -> BLP
and select a quality of compression, 85% - 90% is probably the best because the slightly lower quality is a small price to pay for the big decrease in size.
Step 4: Importing The Image. Open your map and select the
import manager and import your image. (please excuse me for not using screen shots in this part. i don't know how to take them in W.E)
Step 5: Changing The Images Path. This is the most simple part of the whole tutorial. Double click on the imported image, select "Use Custom Path" and change the path to FullScreen.blp
Step 6: Importing The Model. Because the image can't be displayed on its own, we need a MDX file to, hook it on if you will, its kind of like a 3D sound were it needs to be attached to something before it will work. this is why we use the MDX File. Ok now we import the MDX file (Again, excuse me for having no screen shots) now we go to Scenario -> Map Loading Screen. Check were it says "Use Imported File" and select the LoadingScreen.MDX
Weighing the Pros And Cons:
Pros: Easier to do for beginner map makers. Takes alot less time. Takes up less room in your map
Cons: Less quality makes it hard to see details in the picture. About one in about 30 times the image appears in the loading screen you will fatal error, still trying to fix this problem
Over All Mark: 6/10 Because of the Non-Fiddly approach to it but not recommended for better map makers/2D graphics designers because it has alot less quality then the 4 sections version.
And Here Is The Final Out-Come (For me at least
)


