- Joined
- Jun 29, 2008
- Messages
- 16
Edited(added second effect tutorial)
Cool Text Effect
1. Create a document 500x500.
2. Create a new layer and write a text ORANGE color( FFA200 ).
3. Create a new layer and make foreground color black and background - white.
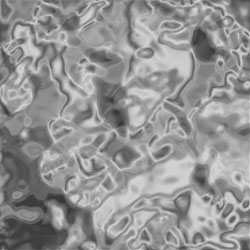
4. Now use filters on your new layer: Filter > Render > Clouds.
5. Then: Filter > Sketch > Chrome with paramethers:
detail = 4
smoothness = 6
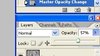
6. Change the blending mode of the layer to Colour Dodge.

7. Select your Text layer and Right mouse click on it > Rasterize layer.
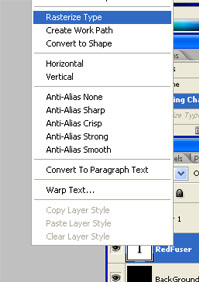
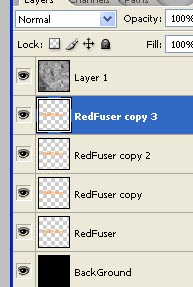
8. Dublicate text layer 3 times( CTRL+J ). Now we must have 4 text layers between first layer and chrome layer.
9. Now with 3 text layers use this filter and paramethers:
Filter > Blur > Motion blur
1 text layer: angle = 0, distance = 100
2 text layer: angle = -45, distance = 100
3 text layer: angle = 45, distance = 100
10. Now merge all text layers( CTRL+E ). We have 3 layers: Chrome, Text, Background.
11. With Text layer use Filter > Blur > Gausian blur with paramethers:
radius = 3
12. Now press CTRL+U, tick Colorize and choose a good color.
13. Create a new layer and write your text again black color.
14. Change Transparency of black text.

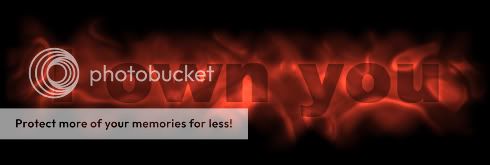
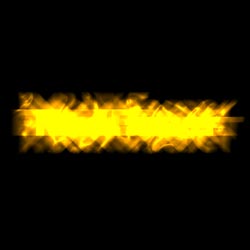
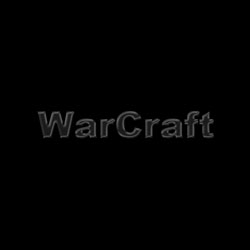
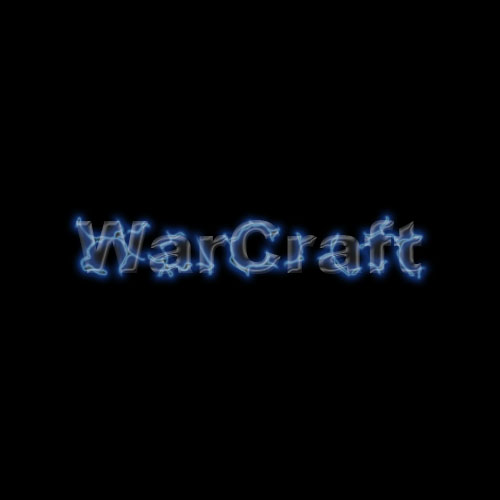
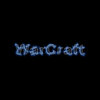
15. Now you're done! Here is my example what you'll get:

*Hint: with this tutorial you can use not only text but and any images!
1. Write text or use image, add any effects to it. Rasterize it if it was text( right click on layer > Rasterize type ). I've made something like this:
2. Now CTRL+Click on your text layer to make selection. Then go to Select > Modify Selection > Expand - 2px
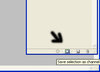
3. In your Layers panel go to Channels and click Save selection as Channel.

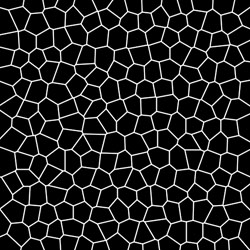
4. Press CTRL+D, and D to make colors get back default. Press Create new Channel. Go to Filter > Texture > Stained Glass
Cell Size = 16,
Border Thickness = 3,
Light Intensity = 0
5. Now, holding CTRL click on your grid's channel icon, then holding CTRL+ALT+SHIFT on text's icon( now we are working in Channels ).

6. Go back to Layers and create a new one. Press SHIFT+F5 or se Paintbucket tool to fill your selection, use any color you want and make the Fill = 0%.
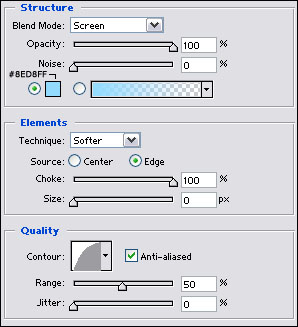
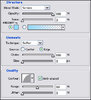
7. Now you can release selection( CTRL+D ). Go to Layer Style( doubleclick on layer ). Now use these paramethers:
Outer Glow
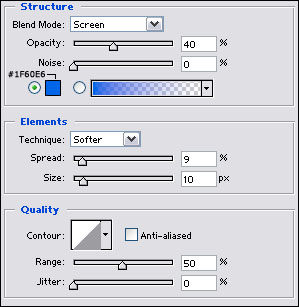
Inner Glow
8. Use Filter > Distort > Ripple 2 times. Then Filter > Blur > Gaussian Blur, radius = 0.75
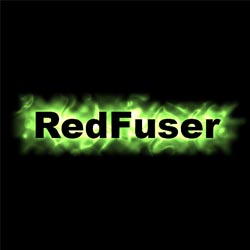
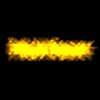
You're done! Here is my example:
Hope I've helped you to make your map or anything else original.
RedFuser
Cool Text Effect
1. Create a document 500x500.2. Create a new layer and write a text ORANGE color( FFA200 ).
3. Create a new layer and make foreground color black and background - white.
4. Now use filters on your new layer: Filter > Render > Clouds.
5. Then: Filter > Sketch > Chrome with paramethers:
detail = 4
smoothness = 6
6. Change the blending mode of the layer to Colour Dodge.
7. Select your Text layer and Right mouse click on it > Rasterize layer.
8. Dublicate text layer 3 times( CTRL+J ). Now we must have 4 text layers between first layer and chrome layer.
9. Now with 3 text layers use this filter and paramethers:
Filter > Blur > Motion blur
1 text layer: angle = 0, distance = 100
2 text layer: angle = -45, distance = 100
3 text layer: angle = 45, distance = 100
10. Now merge all text layers( CTRL+E ). We have 3 layers: Chrome, Text, Background.
11. With Text layer use Filter > Blur > Gausian blur with paramethers:
radius = 3
12. Now press CTRL+U, tick Colorize and choose a good color.
13. Create a new layer and write your text again black color.
14. Change Transparency of black text.
15. Now you're done! Here is my example what you'll get:
*Hint: with this tutorial you can use not only text but and any images!
Second, Electrical Effect
1. Write text or use image, add any effects to it. Rasterize it if it was text( right click on layer > Rasterize type ). I've made something like this:
2. Now CTRL+Click on your text layer to make selection. Then go to Select > Modify Selection > Expand - 2px
3. In your Layers panel go to Channels and click Save selection as Channel.
4. Press CTRL+D, and D to make colors get back default. Press Create new Channel. Go to Filter > Texture > Stained Glass
Cell Size = 16,
Border Thickness = 3,
Light Intensity = 0
5. Now, holding CTRL click on your grid's channel icon, then holding CTRL+ALT+SHIFT on text's icon( now we are working in Channels ).
6. Go back to Layers and create a new one. Press SHIFT+F5 or se Paintbucket tool to fill your selection, use any color you want and make the Fill = 0%.
7. Now you can release selection( CTRL+D ). Go to Layer Style( doubleclick on layer ). Now use these paramethers:
Outer Glow
Inner Glow
8. Use Filter > Distort > Ripple 2 times. Then Filter > Blur > Gaussian Blur, radius = 0.75
You're done! Here is my example:
Hope I've helped you to make your map or anything else original.
RedFuser
Attachments
-
 2 step.jpg28.2 KB · Views: 1,960
 -
 3 step.jpg37 KB · Views: 1,328
 -
 5 step.jpg50 KB · Views: 1,359
 -
 6 step.jpg41 KB · Views: 1,309
 -
 7 step.jpg47.5 KB · Views: 1,307
 -
 8 step.jpg47.8 KB · Views: 1,109
 -
 9 step.jpg31.1 KB · Views: 1,671
 -
 15 step.jpg33.8 KB · Views: 1,286
 -
 16 step.jpg41.4 KB · Views: 1,055
 -
 done.jpg47.8 KB · Views: 3,789
 -
 step 1.jpg27.3 KB · Views: 1,087
 -
 step 3.jpg39 KB · Views: 1,050
 -
 step 4.jpg82.8 KB · Views: 1,758
 -
 step 5.jpg39.3 KB · Views: 1,040
 -
 step 7.JPG41.8 KB · Views: 1,055
 -
 step 7b.JPG42.5 KB · Views: 1,131
 -
 done2.jpg39.3 KB · Views: 1,126
Last edited:
")