- Joined
- May 1, 2008
- Messages
- 3,213
Hello, my name is FrIkY and in this tutorial I'm going to show you
- Flounce cloth
- Linen cloth
- Wool cloth
- Photoshop
or any program that has the tools we will be using
- Airbrush
- Dodge
- Burn
- Colorize Pen
1. Take area you want to edit and make it 1 color, I prefer some darker color.
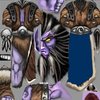
2. Now use Dodge tool to make light spots and shading, like on the picture. Spacing 30, width and height 20.
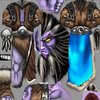
3. Use colorize pen and color everything in one color.
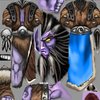
4. Take Airbrush, white color and ad it to make it light. Spacing 25, width and height 20.
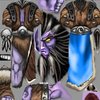
5. And now just burn some parts. Spacing 30, width and height 20.
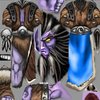
6. Voila! Silk cloth is done, well it might not look best on his wrap, but as long as you know how to make silk, it's ok.

1.Take area you want to edit and make it 1 color, I prefer some darker color.
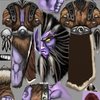
2. Use Airbrush to just make it have shadings. Spacing 25, width and height 20.
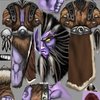
3. Now use Burn tool to make these dark lines. Burn - Spacing 25, width and height 5, Highlight 50, Midtone 0, Shadow 0.
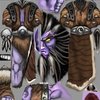
4. Now use Dodge tool and dodge above that dark lines, and use Airbrush with some darker color to shade the space that is bellow dark lines. Dodge - 30 spacing, width and height 10, Highlight 0, Midtone 50, Shadow 0.
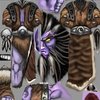
5. Now use burn tool to finish it and make it better, maybe sharpen if it's needed.
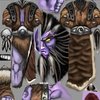
6. Done! Now it looks better on the wrap!

1. Take area you want to edit and make it 1 color, I prefer some darker color.
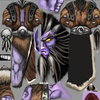
2. Ok, take Paintbrush at size 1, use lighter color and just scramble right-left right-left-right-left etc. Until it's filled up, but don't paint it whole or it won't get right. Paintbrush - Spacing 25, width and height 1.
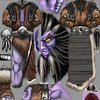
3. Use Dodge tool and make some highlight. Dodge - Spacing 30, width and height 3, Highlight 50, Midtone 0, Shadow 0.
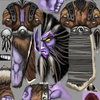
4. Use Paintbrush again, size 1 but use even lighter color then that you used in 2. And then just go up-down-up-down-up-down etc. Until it is covering enough, not too much so the past Paintbrushing can't be seen. Paintbrush - Spacing 25, width and height 1.
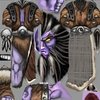
5. Ok now use Airbrush with white color and lighten it up, and after lightening use burn tool to dark the edges. Airbrush - Spacing 80, width and height 3. Burn - Spacing 30, width and height 20.
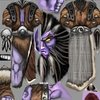
6. Another one, done! It looks ok in the wrap.

1. Take area you want to edit and make it 1 color, I prefer some darker color.
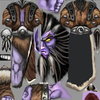
2. Take Airbrush at size 5, with Pathing 70. Paint up and down until it is filled.
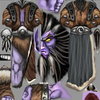
3. Use same tactic with Airbrush, but with another color, lighter than in past. Go right and left until it's enough. After that use Dodge to light it more. Dodge - Spacing 70, width and height 100, Highlight 0, Midtone 0, Shadow 50.
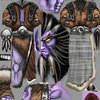
4. Use Colorize pen and color it whatever you want.
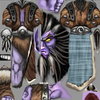
5. And then use Airbrush at size 5, with Pathing 70. Paint if right and left and up and down, enough so it looks like it 50/50
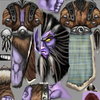
6. And, last picture of wrap.

That's all folk, maybe some another cloths will come up.
How to make Cloths
The guide will teach you how to create the following
- Silk cloth- Flounce cloth
- Linen cloth
- Wool cloth
Requirements
- PhotoImpactX3 (that's what I'm using) or- Photoshop
or any program that has the tools we will be using
Required Tools
- Paintbrush- Airbrush
- Dodge
- Burn
- Colorize Pen
Cloths
Silk Cloth
We will take some skin from mpq and edit it. I will use Druid of the Claw skin1. Take area you want to edit and make it 1 color, I prefer some darker color.

2. Now use Dodge tool to make light spots and shading, like on the picture. Spacing 30, width and height 20.

3. Use colorize pen and color everything in one color.

4. Take Airbrush, white color and ad it to make it light. Spacing 25, width and height 20.

5. And now just burn some parts. Spacing 30, width and height 20.

6. Voila! Silk cloth is done, well it might not look best on his wrap, but as long as you know how to make silk, it's ok.

Flounce Cloth
Well, I don't know is this the right name of cloth, I think it is.1.Take area you want to edit and make it 1 color, I prefer some darker color.

2. Use Airbrush to just make it have shadings. Spacing 25, width and height 20.

3. Now use Burn tool to make these dark lines. Burn - Spacing 25, width and height 5, Highlight 50, Midtone 0, Shadow 0.

4. Now use Dodge tool and dodge above that dark lines, and use Airbrush with some darker color to shade the space that is bellow dark lines. Dodge - 30 spacing, width and height 10, Highlight 0, Midtone 50, Shadow 0.

5. Now use burn tool to finish it and make it better, maybe sharpen if it's needed.

6. Done! Now it looks better on the wrap!

Linen Cloth
This is simple to make, and we are using Druid of the Claw again.1. Take area you want to edit and make it 1 color, I prefer some darker color.

2. Ok, take Paintbrush at size 1, use lighter color and just scramble right-left right-left-right-left etc. Until it's filled up, but don't paint it whole or it won't get right. Paintbrush - Spacing 25, width and height 1.

3. Use Dodge tool and make some highlight. Dodge - Spacing 30, width and height 3, Highlight 50, Midtone 0, Shadow 0.

4. Use Paintbrush again, size 1 but use even lighter color then that you used in 2. And then just go up-down-up-down-up-down etc. Until it is covering enough, not too much so the past Paintbrushing can't be seen. Paintbrush - Spacing 25, width and height 1.

5. Ok now use Airbrush with white color and lighten it up, and after lightening use burn tool to dark the edges. Airbrush - Spacing 80, width and height 3. Burn - Spacing 30, width and height 20.

6. Another one, done! It looks ok in the wrap.

Wool Cloth
And the final one, wool cloth.1. Take area you want to edit and make it 1 color, I prefer some darker color.

2. Take Airbrush at size 5, with Pathing 70. Paint up and down until it is filled.

3. Use same tactic with Airbrush, but with another color, lighter than in past. Go right and left until it's enough. After that use Dodge to light it more. Dodge - Spacing 70, width and height 100, Highlight 0, Midtone 0, Shadow 50.

4. Use Colorize pen and color it whatever you want.

5. And then use Airbrush at size 5, with Pathing 70. Paint if right and left and up and down, enough so it looks like it 50/50

6. And, last picture of wrap.

That's all folk, maybe some another cloths will come up.
Last edited by a moderator:


