- Joined
- Jun 7, 2009
- Messages
- 181
Welcome to Mobilize's handle tutorial, Today, you're going to (hopefully o learn how to make a "good" handle.
Programs needed:
GIMP 2.6.6 (or any version, really...)
 White: Note, a personal message, usually helpful.
Red: Tools in the tool palette.
( note: details is the devil, which in this case means, take your time.
Even though I did these two in about 1 minute, doesn't mean you have to.
Take your time, tweak your handle and make it awesome. I'm waiting.)
"These goes to eleven"
There is more than one way to make handles,
and if I figure out a new way myself, I'll sure update this and let you know.
But for now, I got two types.
Youtube doesnt work.
As youtube is being a total failure to me
(because I dont want to wait 5 hours for the video)
We'll do this image-wise.
Start with making some very basic outlines in white, like this:
( note: in another layer, ofc.)
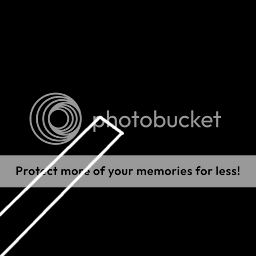
Then make another layer beneath, and fill it with a gray color.

Pick the Dodge/Burn tool, set it to Dodge and do lines back and forth at the left side of the handle (Light source).
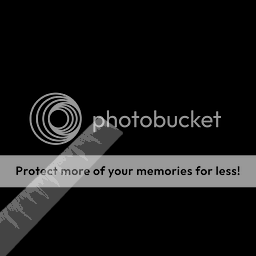
Then make the long lines a bit brighter and begin with the same way burning the right side.
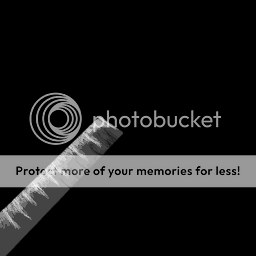
Then pick a big brush and brighten the left side of the handle, do the same with the burn on the right side.
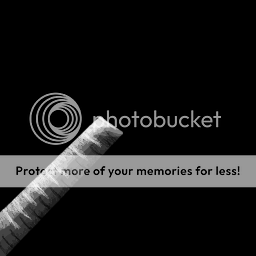
Scale it down to 64x64 pixels and there you go.
( note: this tut doesn't include borders because mobilize is lazy.)

I suggest adding a glow to the weapon after doing this type,
because the shading here is very intense and it'll fade into the background
if you don't add some sort of special fx around it.
Well, begin with the outlines again, and fill it on a layer behind.

Then burn two big spots somewhere on the handle.

After that's done, dodge the area near where you burned before.

Like that, yes...
Do both parts more intense, and add a little extra dodge at the side where the light hits the handle.

Even more intense, and dodge a line in the middle.

( note: White bg here because of the reason above.)
Even more intense, burn the sides and dodge the middle even more.
Scale it down and...

Done!
After reading this, you have completed my handle tutorial.
Thanks for reading all this crap,
go make me proud :>
Programs needed:
GIMP 2.6.6 (or any version, really...)
 White: Note, a personal message, usually helpful.
Red: Tools in the tool palette.
(
 note: details is the devil, which in this case means, take your time.
Even though I did these two in about 1 minute, doesn't mean you have to.
Take your time, tweak your handle and make it awesome. I'm waiting.)
"These goes to eleven"
There is more than one way to make handles,
and if I figure out a new way myself, I'll sure update this and let you know.
But for now, I got two types.
Youtube doesnt work.
As youtube is being a total failure to me
(because I dont want to wait 5 hours for the video)
We'll do this image-wise.
Start with making some very basic outlines in white, like this:
(
 note: in another layer, ofc.)
Then make another layer beneath, and fill it with a gray color.

Pick the Dodge/Burn tool, set it to Dodge and do lines back and forth at the left side of the handle (Light source).

Then make the long lines a bit brighter and begin with the same way burning the right side.

Then pick a big brush and brighten the left side of the handle, do the same with the burn on the right side.

Scale it down to 64x64 pixels and there you go.
(
 note: this tut doesn't include borders because mobilize is lazy.)
I suggest adding a glow to the weapon after doing this type,
because the shading here is very intense and it'll fade into the background
if you don't add some sort of special fx around it.
Well, begin with the outlines again, and fill it on a layer behind.

Then burn two big spots somewhere on the handle.

After that's done, dodge the area near where you burned before.

Like that, yes...
Do both parts more intense, and add a little extra dodge at the side where the light hits the handle.

Even more intense, and dodge a line in the middle.

(
 note: White bg here because of the reason above.)
Even more intense, burn the sides and dodge the middle even more.

Scale it down and...

Done!
After reading this, you have completed my handle tutorial.
Thanks for reading all this crap,
go make me proud :>


