- Joined
- Oct 8, 2022
- Messages
- 62
Converting models from Morrowind
|
Difficulty:medium
|
|---|
|
Working time:10-60 minutes
|
Hi all. Today I will tell you how to convert models from The Elder Scrolls III:Morrowind.
For work, we need the following tools and resources:
- The game itself
- War3 Model Editor
- Mdlvis 1.41
- BLP Lab v0.5.0
- NifSkope 1.2.0 Alpha 2
- Blender 2.83
- Milkshape 3D
- mdx plugin Milkshape 3D
Conversion steps
Stage 1:Open NifSkope and in it open any model that you like from the meshes folder. The folder itself is divided into many different folders containing different models. For example: folder x contains exterior models, all sorts of buildings, rocks, caves and so on.
For this article, I will take a simple model, for example: Daedric Daikatana
So, now we go to the File tab and find the Export tab there, after which we select Export.OBJ. In the new window, press the OK button and save the model anywhere under any name. After that, we won't need NifSkope yet.
We only need NifSkope to correctly export the model in .obj format
"Why not just open the model in Blender?" - you ask. Everything is very simple - the blender does not transfer geosets as it should. For example: a door model consists of 4 models, which have their own geoset and their own texture, while Blender transfers the model as a whole, which becomes a problem for texture mapping.
Before moving on to the next step, we need to install the plugin for MilkShape 3D. After installing the plugin according to the instructions, we can proceed to the next step.
Stage 2:
Next, move on to MilkShape 3D. Open it and import our model in .obj format
After it has opened, we export the model in .mdx format
This completes our work in this program and it can be closed.
Stage 3:
Next, go to NifSkope, with which we will search for the textures of our model. To do this, open all the tabs in the "Block List" block.
When you expand all sections, you will see the name of the texture in .bmp format next to the NiSourceTexture line. If you do not understand, then under the spoiler is a screenshot.
Next, double-click on the name of the texture. Right on the title! It is important!
Copy everything that is selected and go to the textures folder, which is located in the game folder. Paste the name into the search bar and search. Then copy the texture to a separate folder and do the same with the rest of the textures. Copied - pasted - found - copied the texture - saved a copy in a separate folder.
You should get 3 textures and one model, as in the screenshot under the spoiler.
Stage 4:
Now we need BlpLab, through which we will convert textures to .blp format
Everything is very simple here: open the program, press the F7 key, select our folder with the model and textures in two sections, adjust the quality and alpha channel, then press the Convert button and wait for the end of the process, after which you can safely close the program. We won't need it anymore. Leave the alpha channel unchanged, as indicated in the screenshot under the spoiler!
Textures can be named as you like and as it will be most convenient, but the main thing is to do it before applying it to the model, otherwise you will have to apply it again.
Old textures can be deleted, we no longer need them, because we have textures in .blp format.
Stage 5:
Now open our model in War3 Model Editor. In it we will apply textures to our model.
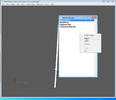
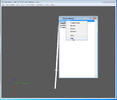
What do we see? We see a katana without textures. To fix this, go to the Windows tab, find the Texture Manager block there, and then open it.
To add textures to the texture manager, you need to right-click in this block, after which a menu will appear in which there will be an "import" button. Click it and import our textures one by one.
After we right-click on the texture and select the Edit button in the drop-down menu, after which we do everything as shown in the screenshot under the spoiler.
This is necessary so that the textures are correctly applied to the model.
Now open the Material Manager and see three lines there, as in the screenshot.
Double-click on the first line and get into another block. In this block, we again double-click on a single line and get into the menu as in the screenshot. In this section, we see which texture is currently in use.
We replace this texture with one of ours, press OK everywhere and see what happens. If the texture is not superimposed on its mesh, then you need to repeat the steps until everything is superimposed correctly, as in the screenshot. It is best to focus on screenshots from the game in good lighting.
Here, I got a finished model of a steel daikatana, apparently I mixed up the model. It happens.
Next, we go to Mdlvis and adjust the size, position, rotation, and so on, so that the model is displayed correctly in the unit’s hand or just in the game.
Similar actions must be done for all models convertible from Morrowind.
Building models will have to be assembled as a puzzle, for this we need Blender so that we can assemble several models into one, or even assemble the building and safely remove collisions. The same steps are carried out, only after exporting from NifSkope you need to import into Blender, after all the manipulations again export to .obj
What is it for? MilkShape cannot import several models at the same time, which leads to a crash from the program, for this, Blender is required in which you can safely assemble the models into one, and then follow the steps from the article.
Attachments
Last edited:


