- Joined
- Jul 14, 2010
- Messages
- 235
AD: Defense of the World Pillar - Map released!
Azeroth Defenders: Defense of the World Pillar
Map is released
Created by aiDer
Hello, and welcome to the old development thread for http://www.hiveworkshop.com/forums/maps-564/defense-world-pillar-v1-0-a-202178/ . Here you can download the unprotected version of DotWP.
Currently: Right after the release I noticed some heroes have actually gotten their tooltip shortened, because of Blizzard's limit of characters in tooltips. So in this very moment Im working hard to shorten down all the heroes' stories. So by tomorrow, much of this description text and DotWP's tooltips will be finished.
Facebook Fansite: http://www.facebook.com/pages/Azeroth-Defenders/133427660058675
Last Map Attachment Update: 05.10.2011 - 17:21
Azeroth Defenders: Defense of the World Pillar
Map is released
Created by aiDer
Hello, and welcome to the old development thread for http://www.hiveworkshop.com/forums/maps-564/defense-world-pillar-v1-0-a-202178/ . Here you can download the unprotected version of DotWP.
Currently: Right after the release I noticed some heroes have actually gotten their tooltip shortened, because of Blizzard's limit of characters in tooltips. So in this very moment Im working hard to shorten down all the heroes' stories. So by tomorrow, much of this description text and DotWP's tooltips will be finished.
Facebook Fansite: http://www.facebook.com/pages/Azeroth-Defenders/133427660058675
Map Info:
AD: DotWP is a combination of AoS, Survival, Hero Defense, Footmen Frenzy, Offense, TD.
For you who have played the first chapter; AD: Defense of Stormwind, will see that this second chapter have a lot of the same concept, but with a lot of improvements. The defending players (The Earthern Ring) still starts with choosing a Hero, and then upgrading their headquarter to either a Defensive or Offensive one. After some defending and boosting your hero with items and abilities, its time to retaliate and destroy Deathwing's bases. Push towards the bases the waves of enemies are coming from until Deathwing is provoked fourth, then put the Corrupted Earth Warder to rest!
The attacking players (Deathwing's "Twilight's Hammer" and "Darktide Naga") still need to pick their units and create a squad that will interrupt and slow down the defenders progress. They also need to defend bases the defenders need to destroy, while also trying to attack the Deepholm Gate and interrupt the Shamans sealing off the Deepholm entrance. The new thing in AD: DotWP is that special units is removed, and attacking players can pick between a few units that are a little better than normal, up to 20 food limit, some units cost 10 food others cost down to 1 food. These units is the only units the attacking players can control (except bosses), because attacking players can also buy units that automaticly will attack the Deepholm Gate (like offensive units). The reason for this is that in AD: DoS there were too many units to controll, it turned into a spamfest and little strategy. Tower building is still available through the Shade (like AD: DoS). In DotWP, Shades can also level up to a maximum level of 20, they got four abilities they can learn and each ability got 10 levels, so you can max two of them, or all four to level 5. Every minute you get as much experience for your Shade as you got Combat Points, so the more active you are the more experience your Shade get, some units also cost Combat Points, so buying those decrease the amount of experience your shade gets.
-Only spells that are Recommended or higher by the moderators of www.hiveworkshop.com
-A lot the great things you loved about AD: Defense of Stormwind
-Up to 8 players, 1v1-4v4 / 1vC-4vC / Cv1-Cv4
-Balanced for singleplayer and every other combination.
-Attacking forces grow stronger every minute, progression is a must!
-In addition to you hero, you can upgrade your headquarter to either a Defensive HQ or Offensive HQ. Defensive HQ making tower building avaible. Offensive HQ making reinforcements available. Choose your playstyle!
-Interesting bossfights with player interaction on their side!
-Imba models/spells made by masters of art from hiveworkshop.com
-This map requires you to think, observe your enemy, prioritize units, choose between dilemmas and communicate with your friends.
-Your friend left you, but you still want to finish? No problem! Triggers in DotWP is balancing every event to fit the current number of players.
-On higher difficulties this map can keep you entertained for 2 hours!
Terrain Description:
Since terrain was my minus in Azeroth Defenders: Defense of Stormwind, I have used a few more hours on the terrain.
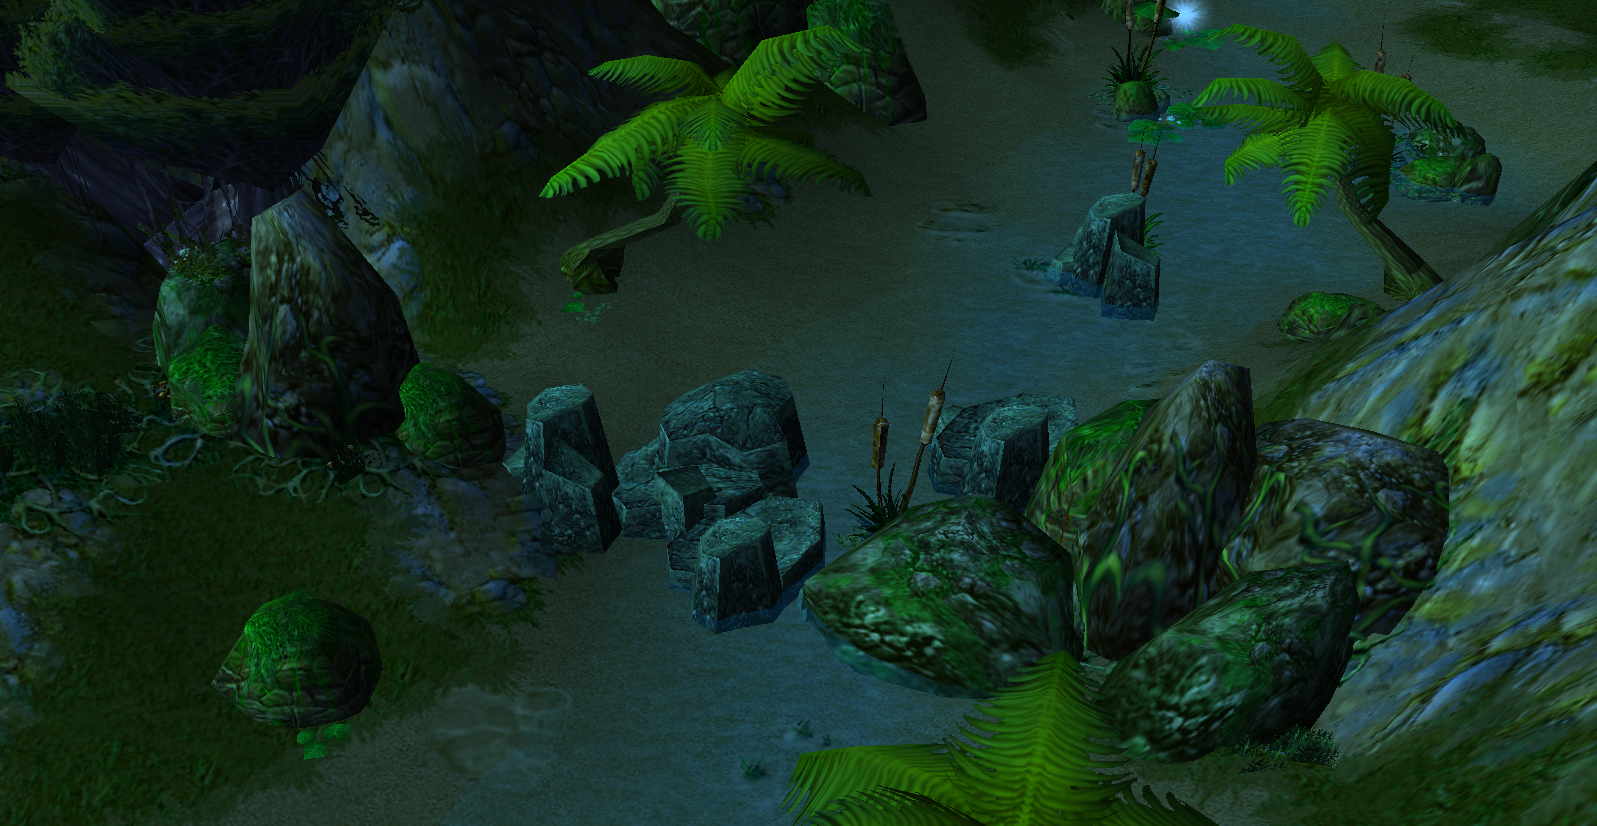
The tileset is Sunken Ruins because Deepholm is located under the Maelstrom over the South Seas. So the Echo Isles is not far from it, which made it a natural choice to put the other entrance to Deepholm on an isle in the Echo Isle group. The isles in the Echo Isle group is placed under equator in the middle of the sea, so it got a lot of tropical environment, with palms and overgrown terrain.
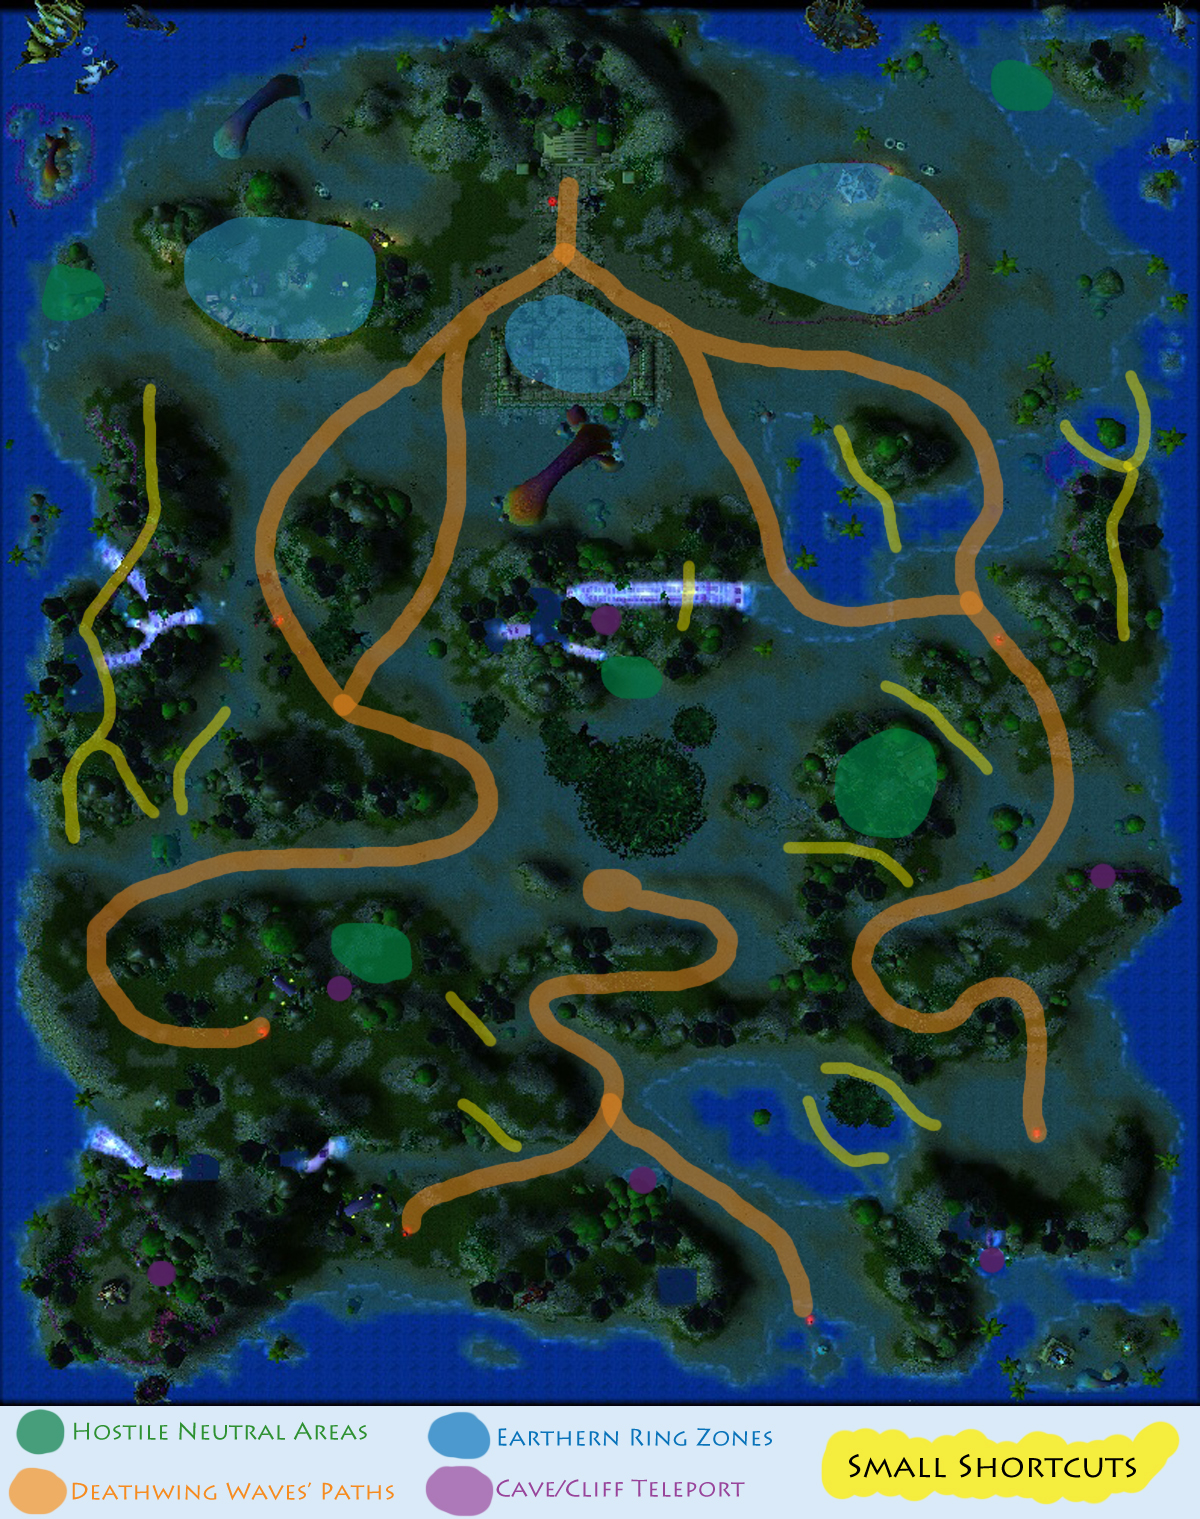
Also, if you see under Battlefield map, you can see orange paths lead to total of four bases, for example if only player 1 is playing; when the bases on the left get destroyed, the southern middle orange paths get activated, after those southern bases is destroyed, the epic bossfight against Deathwing the Destroyer starts!
The terrain will most likely get a new doodad here and there for every update here on HiveWorkshop, so tell me if I should fix anything to make it look better. Please be honest!
This Battlefield overview is a old picture, but it's just to show you how the structure of the map is")
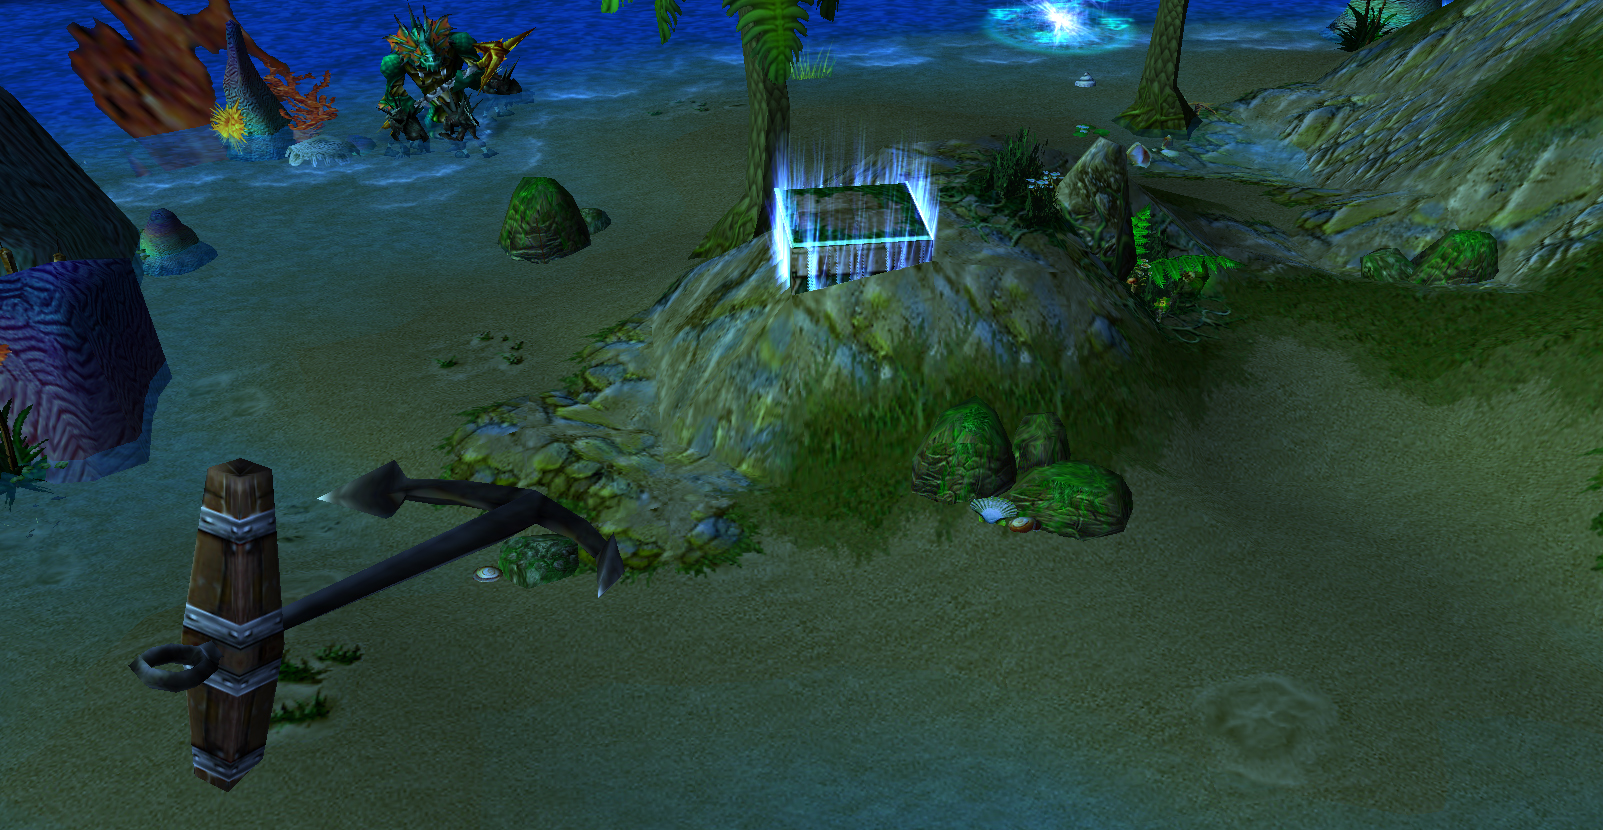
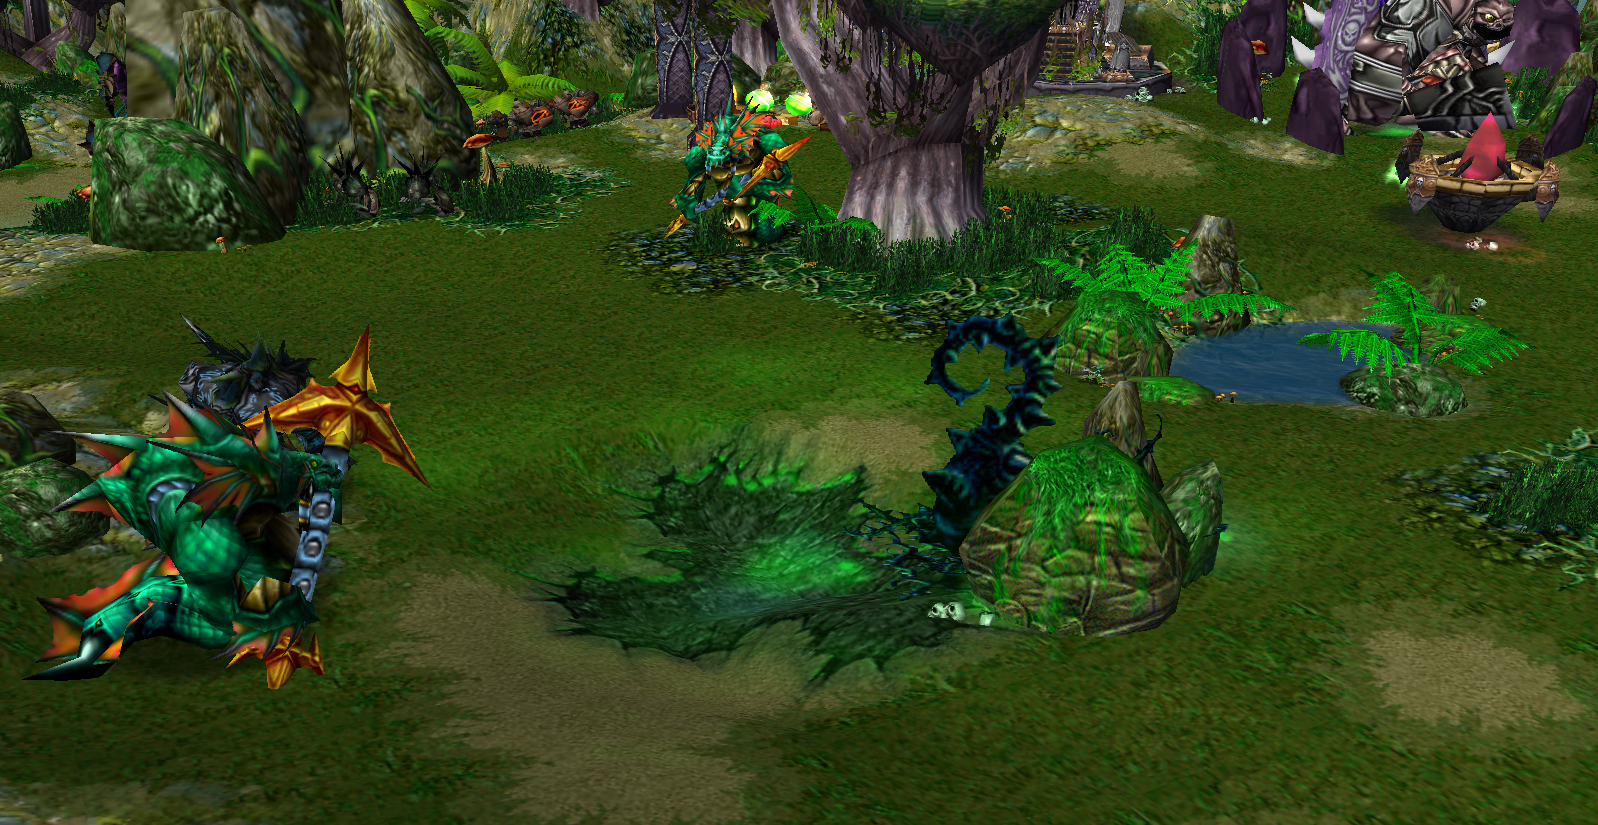
A Guardian of the Twilight protecting a Twilight Stone
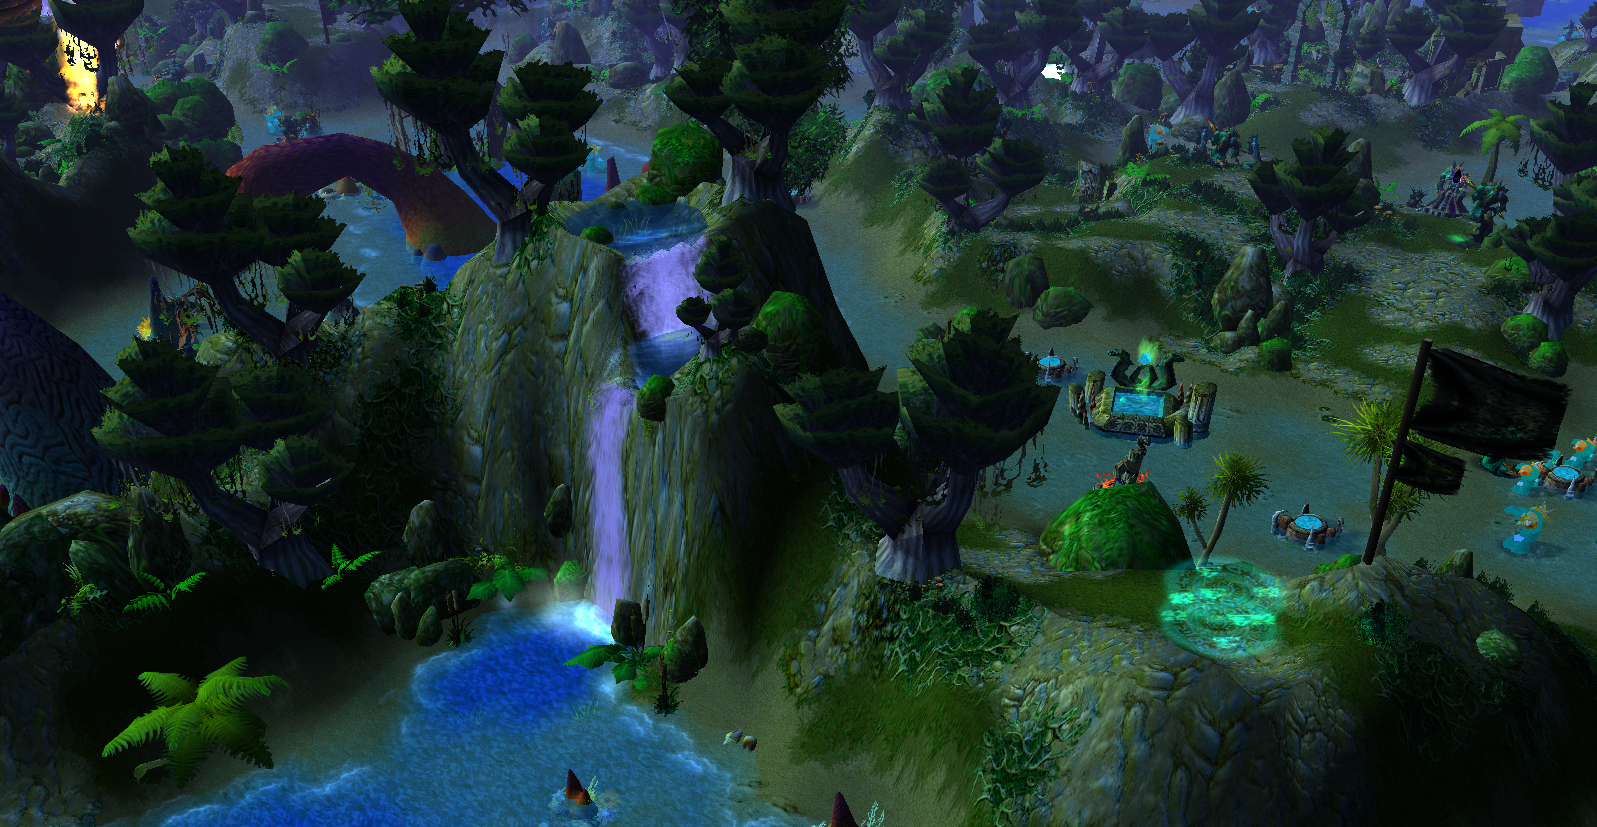
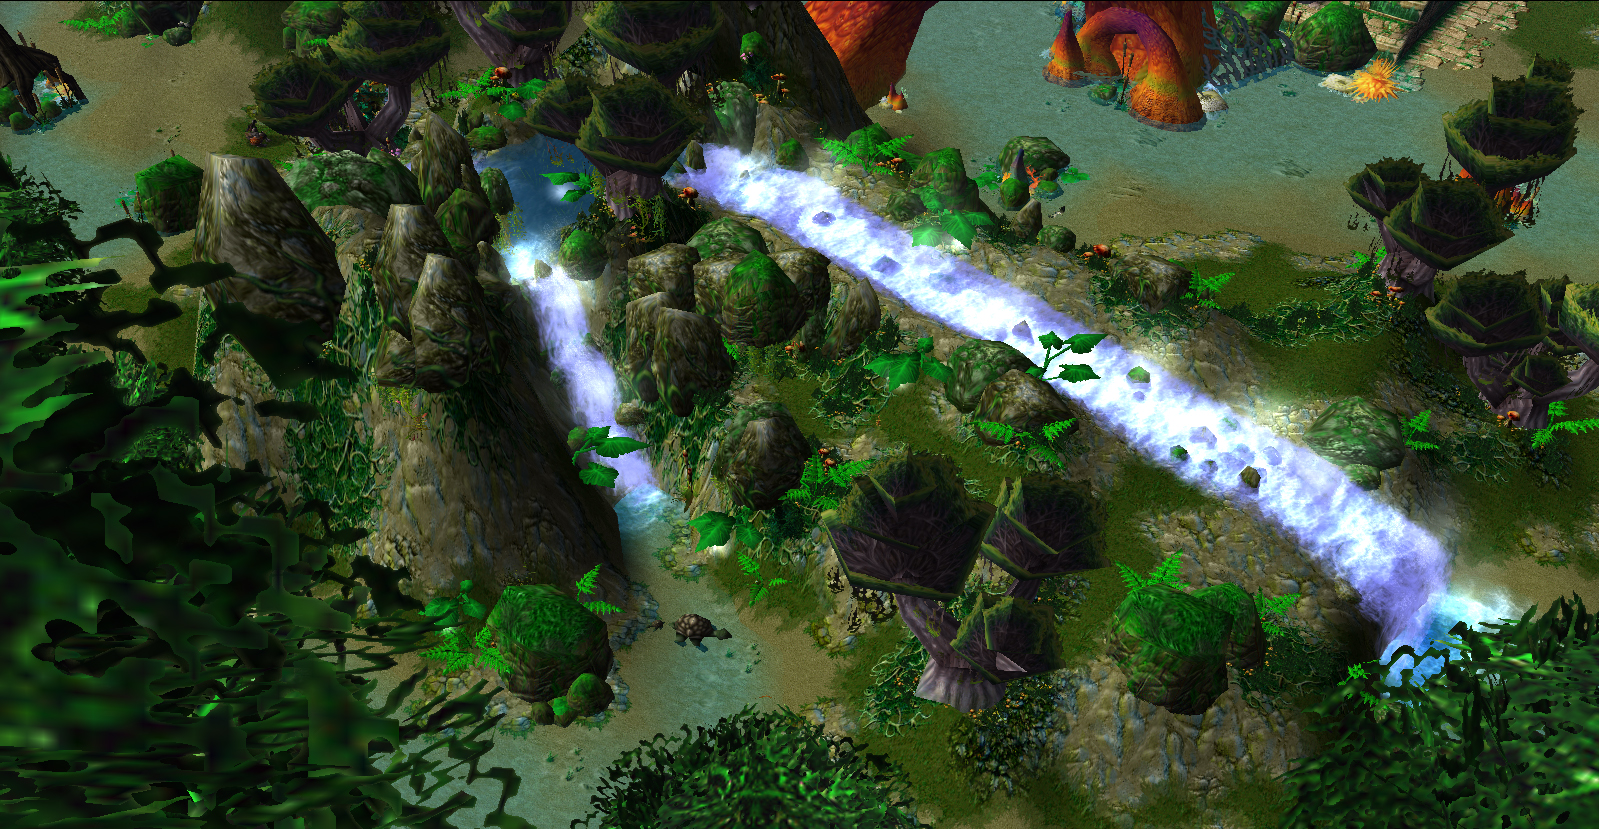
A waterfall between two Darktide Naga bases
Lady Vashj awaiting her command from Deathwing
Massive corals can be seen over all of Vedok Isle
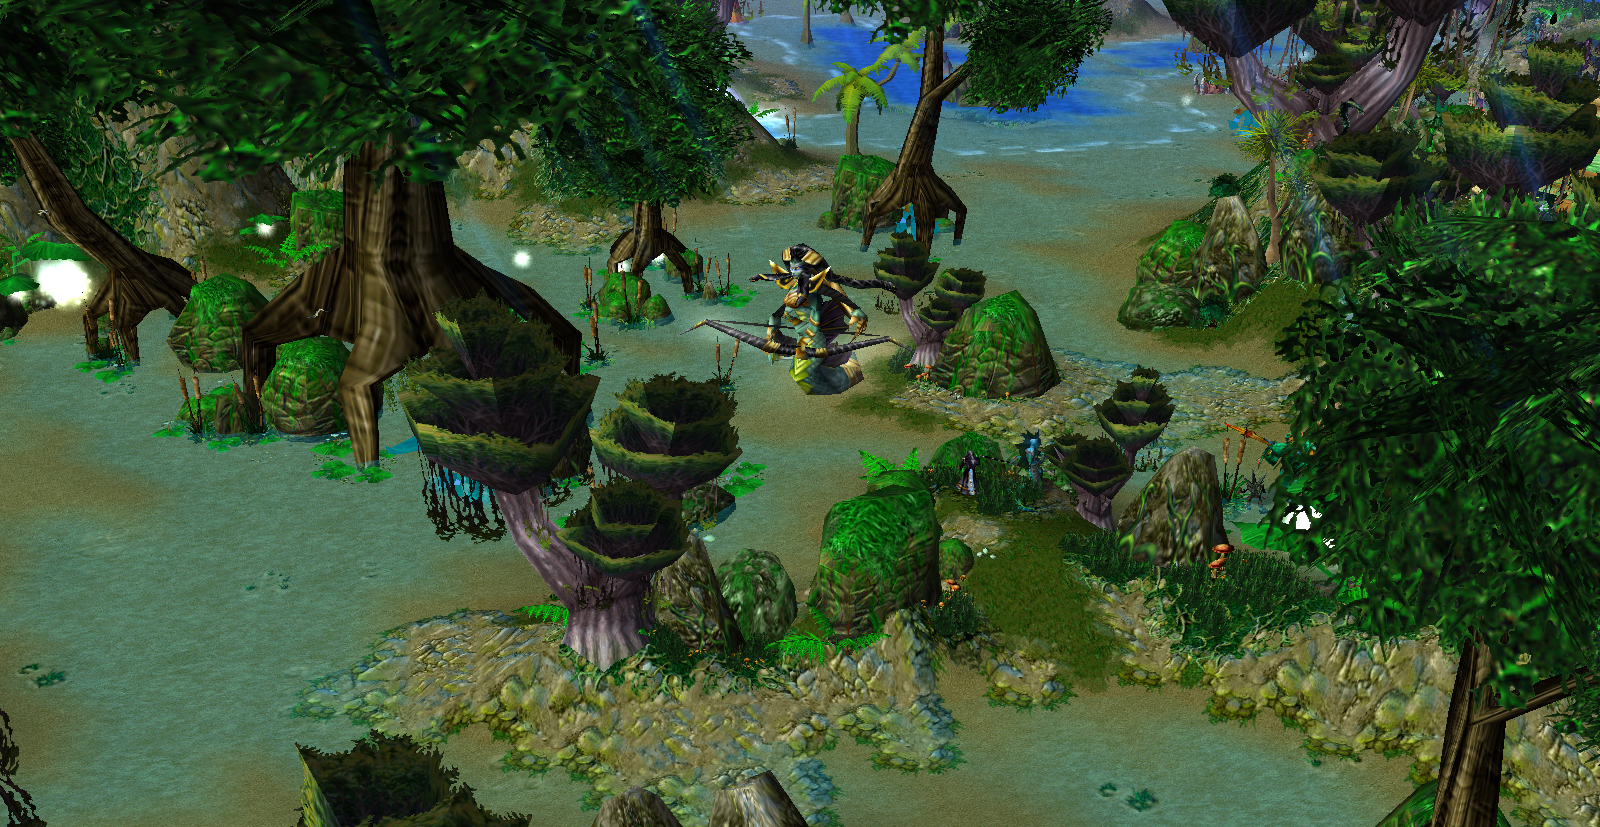
A twisty and rocky path to the second Darktide Naga base
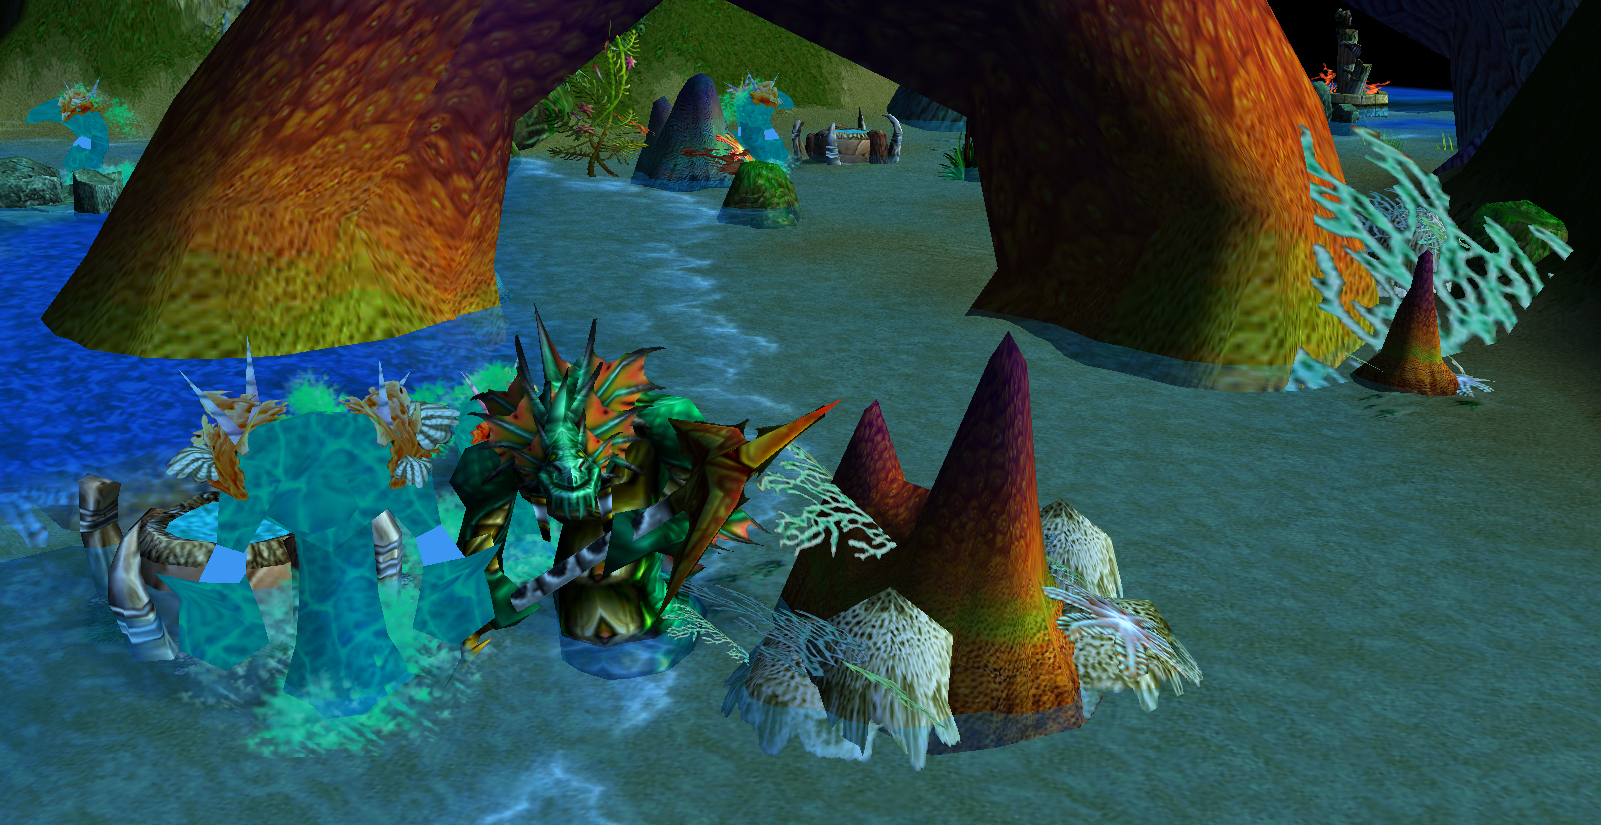
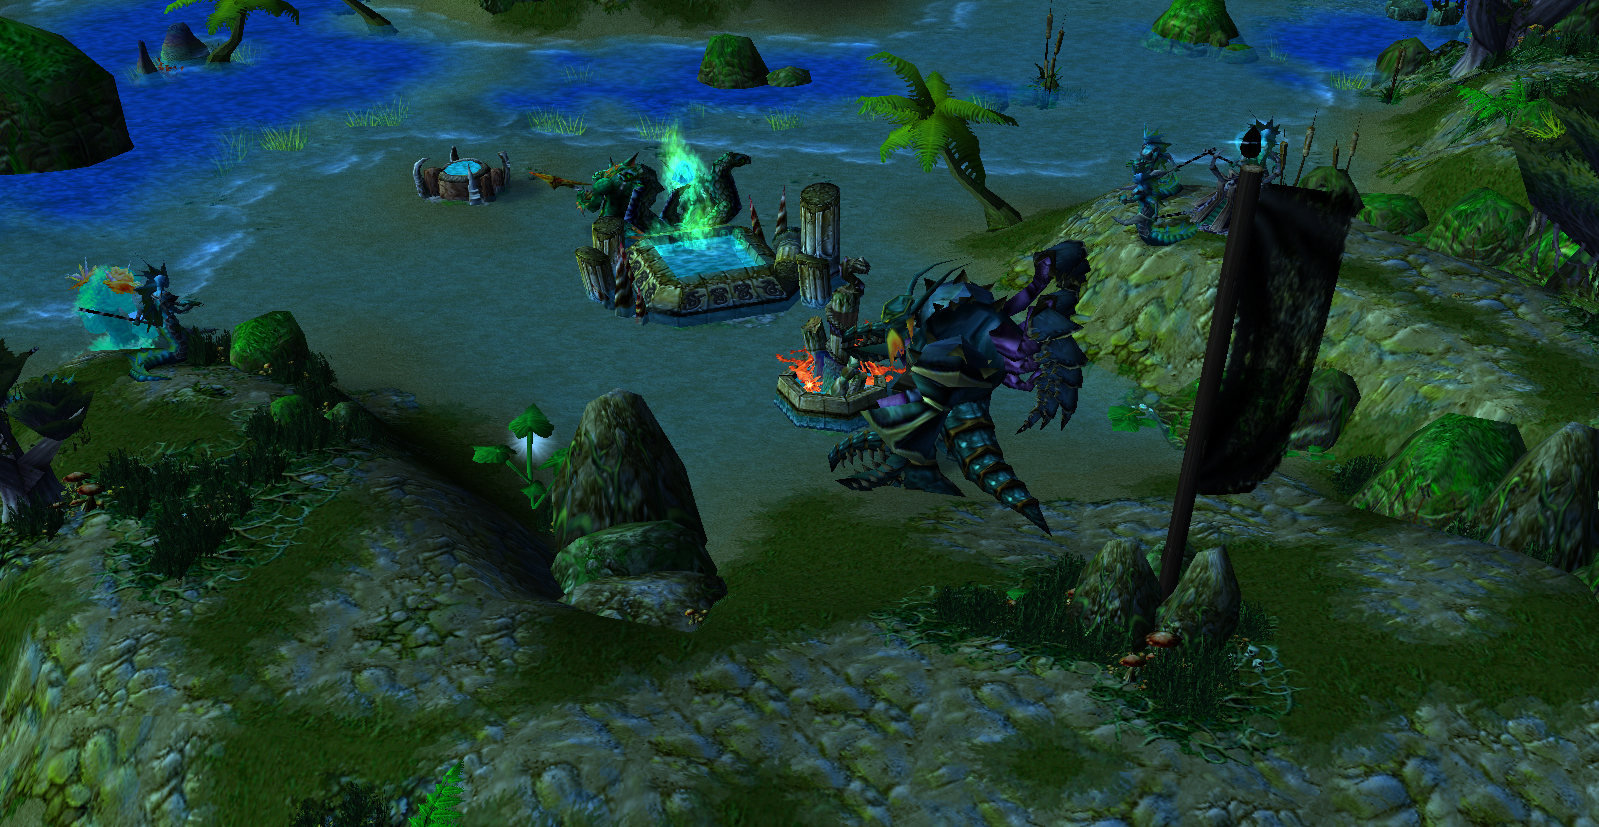
A Sea Elemental and a Naga Royal Guard defending the third Darktide Naga base
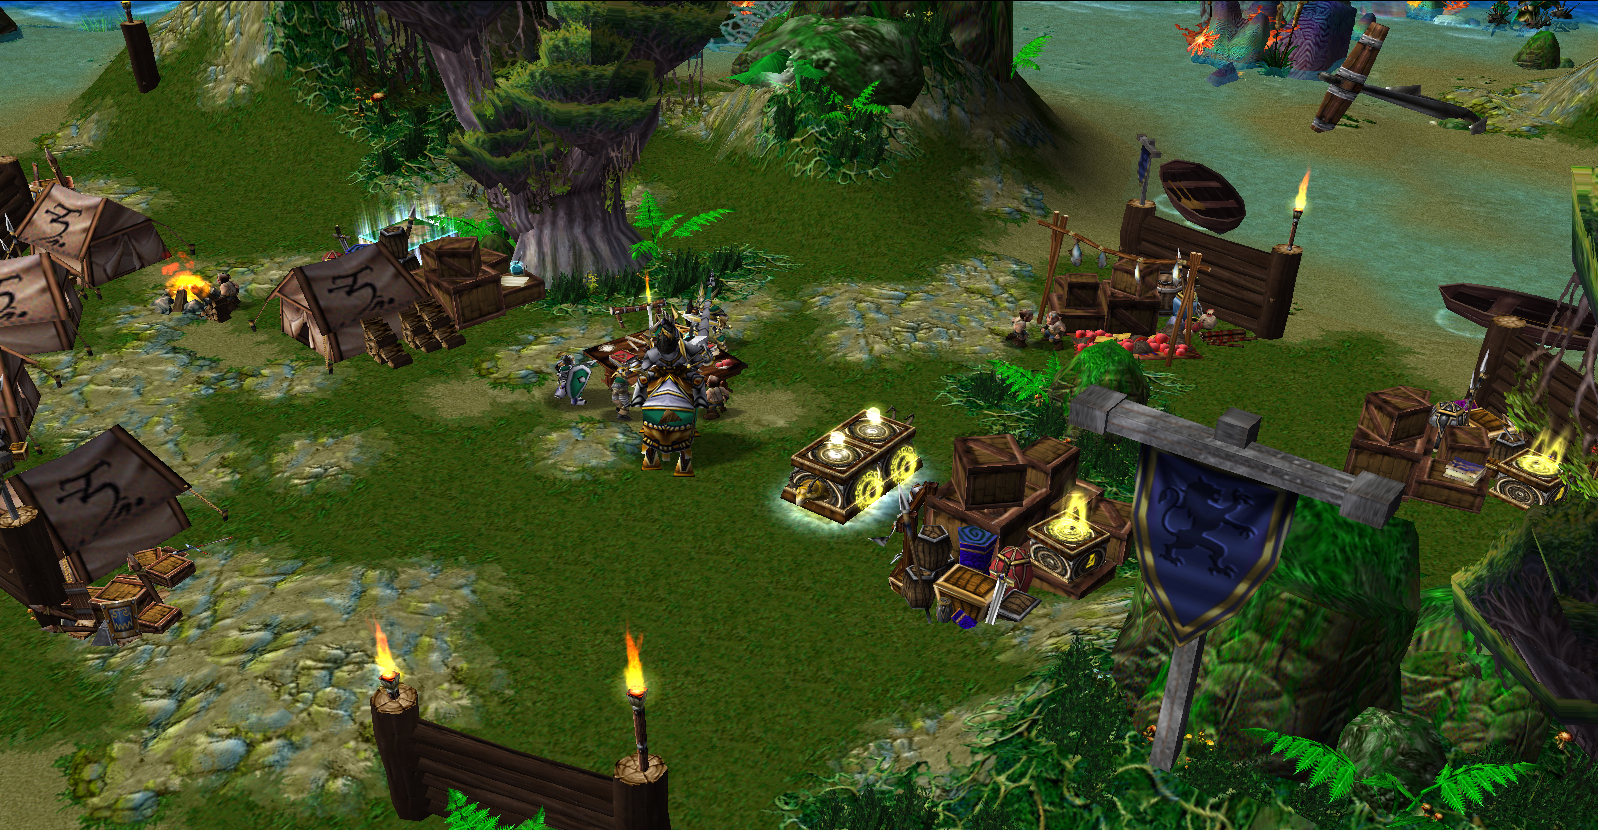
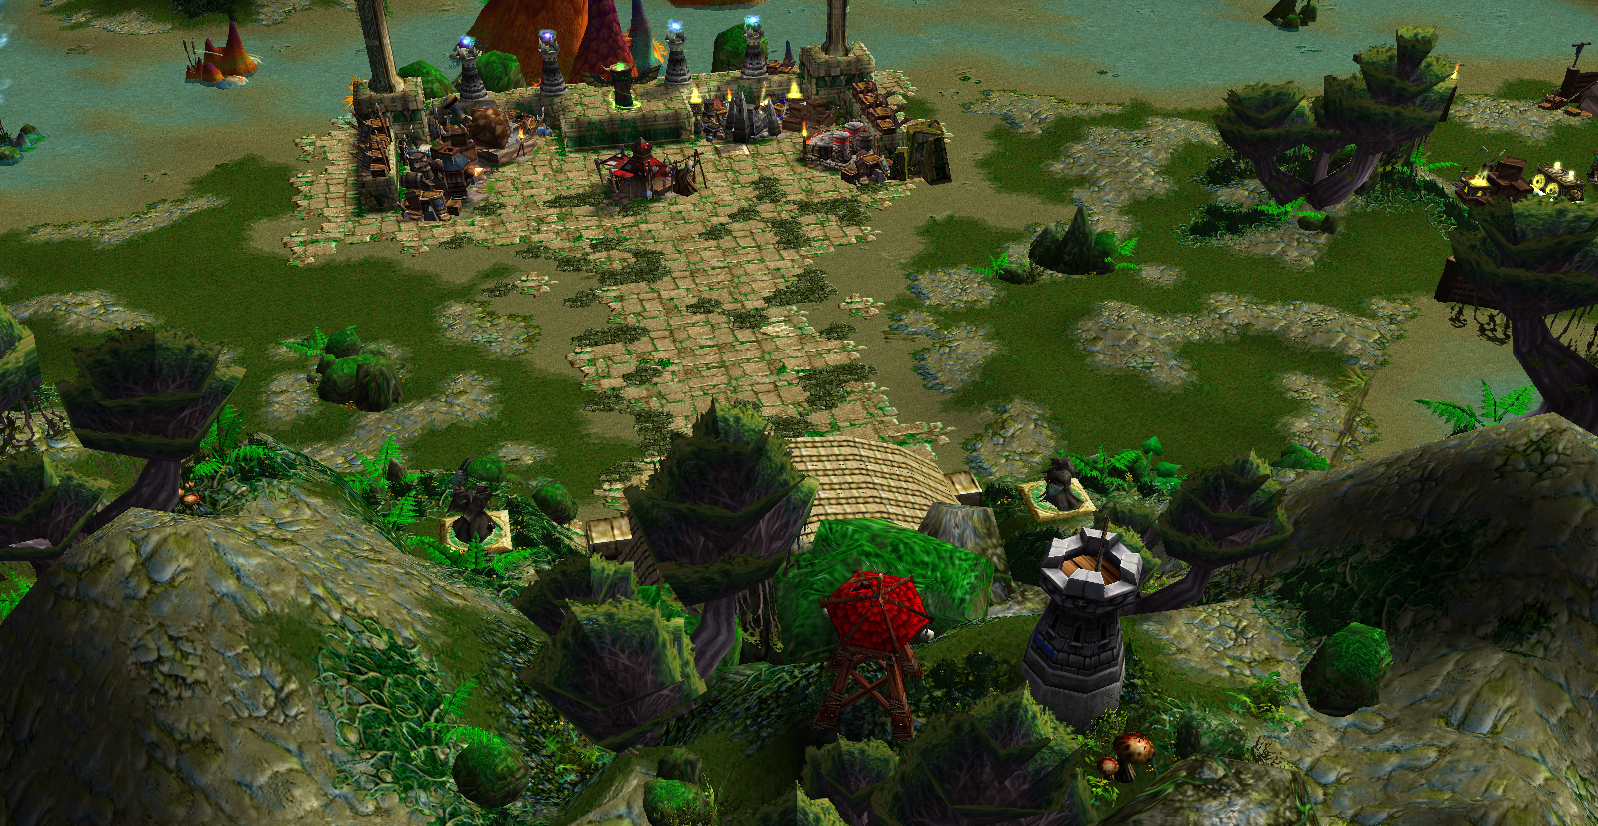
The Alliance base
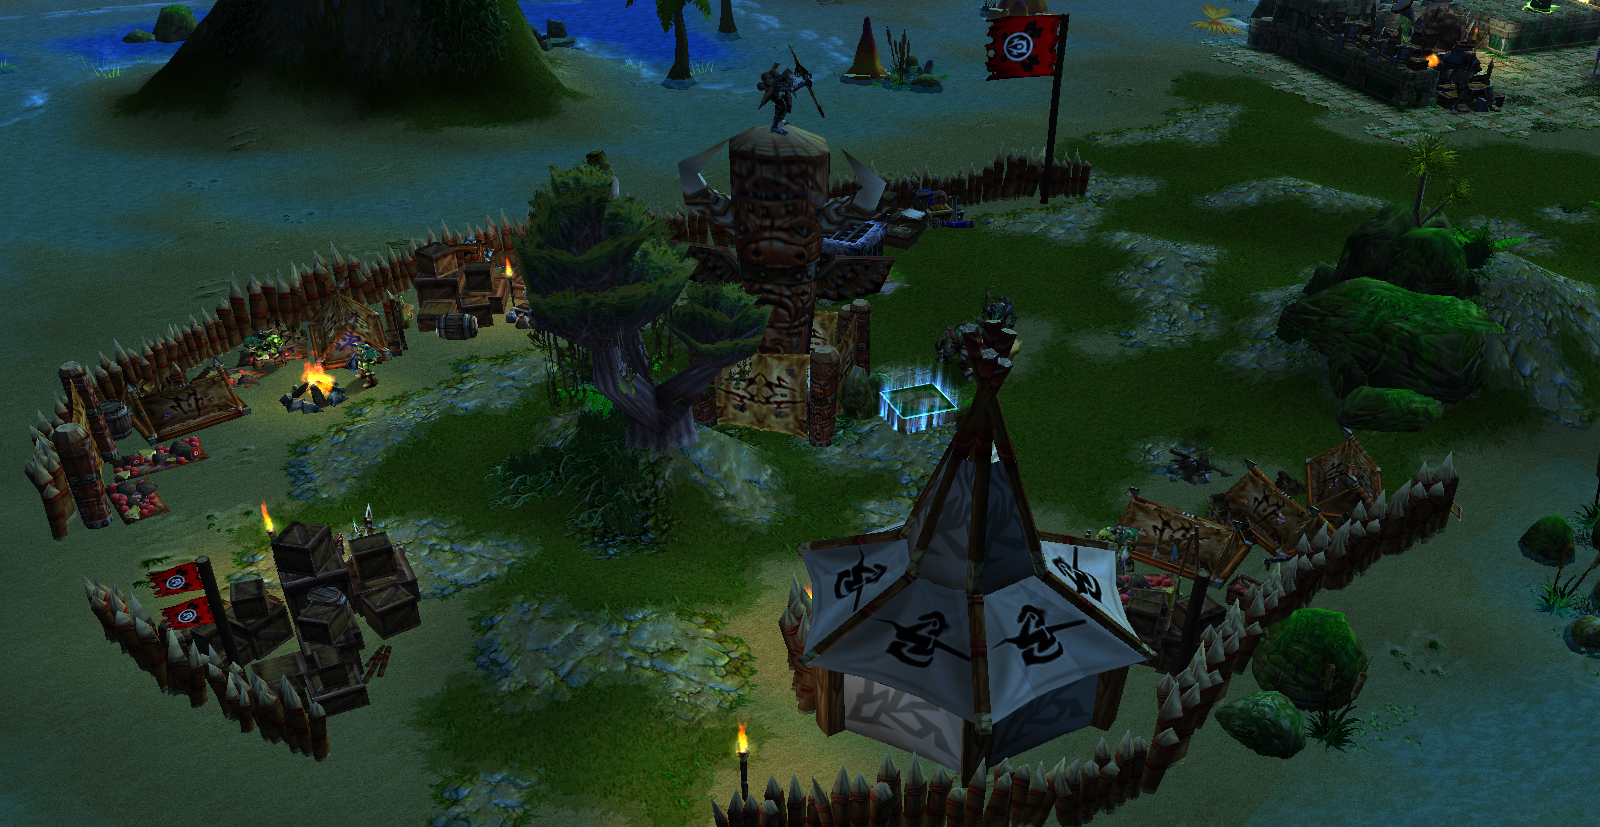
The Horde base
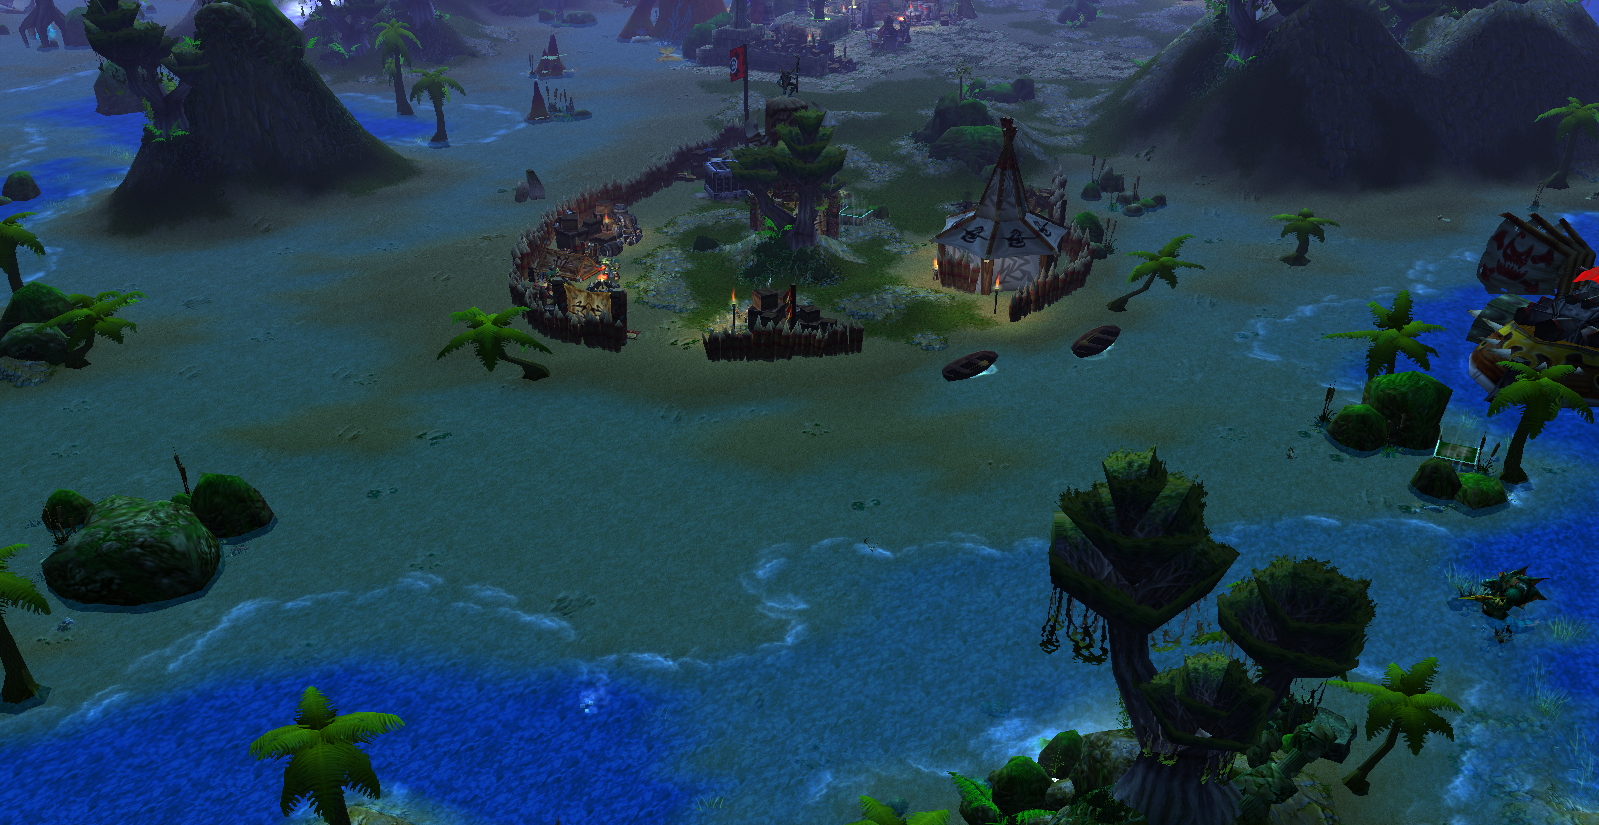
The coastline near the Horde base
These foot switches are important in order to turn of an eventual activation process of a Guardian of Vedok
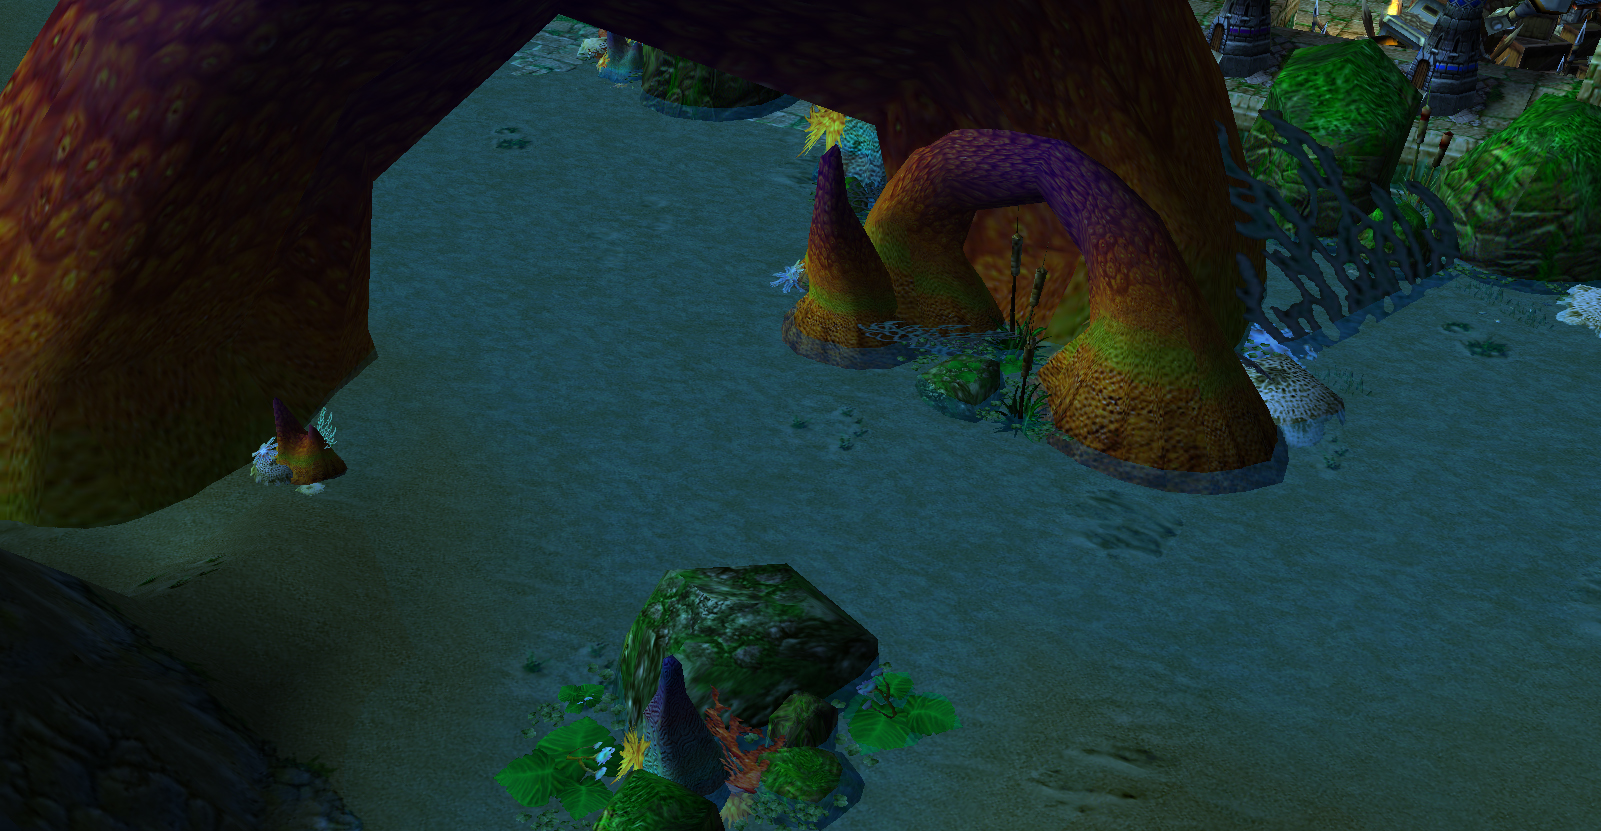
A great river flowing through Vedok Isle
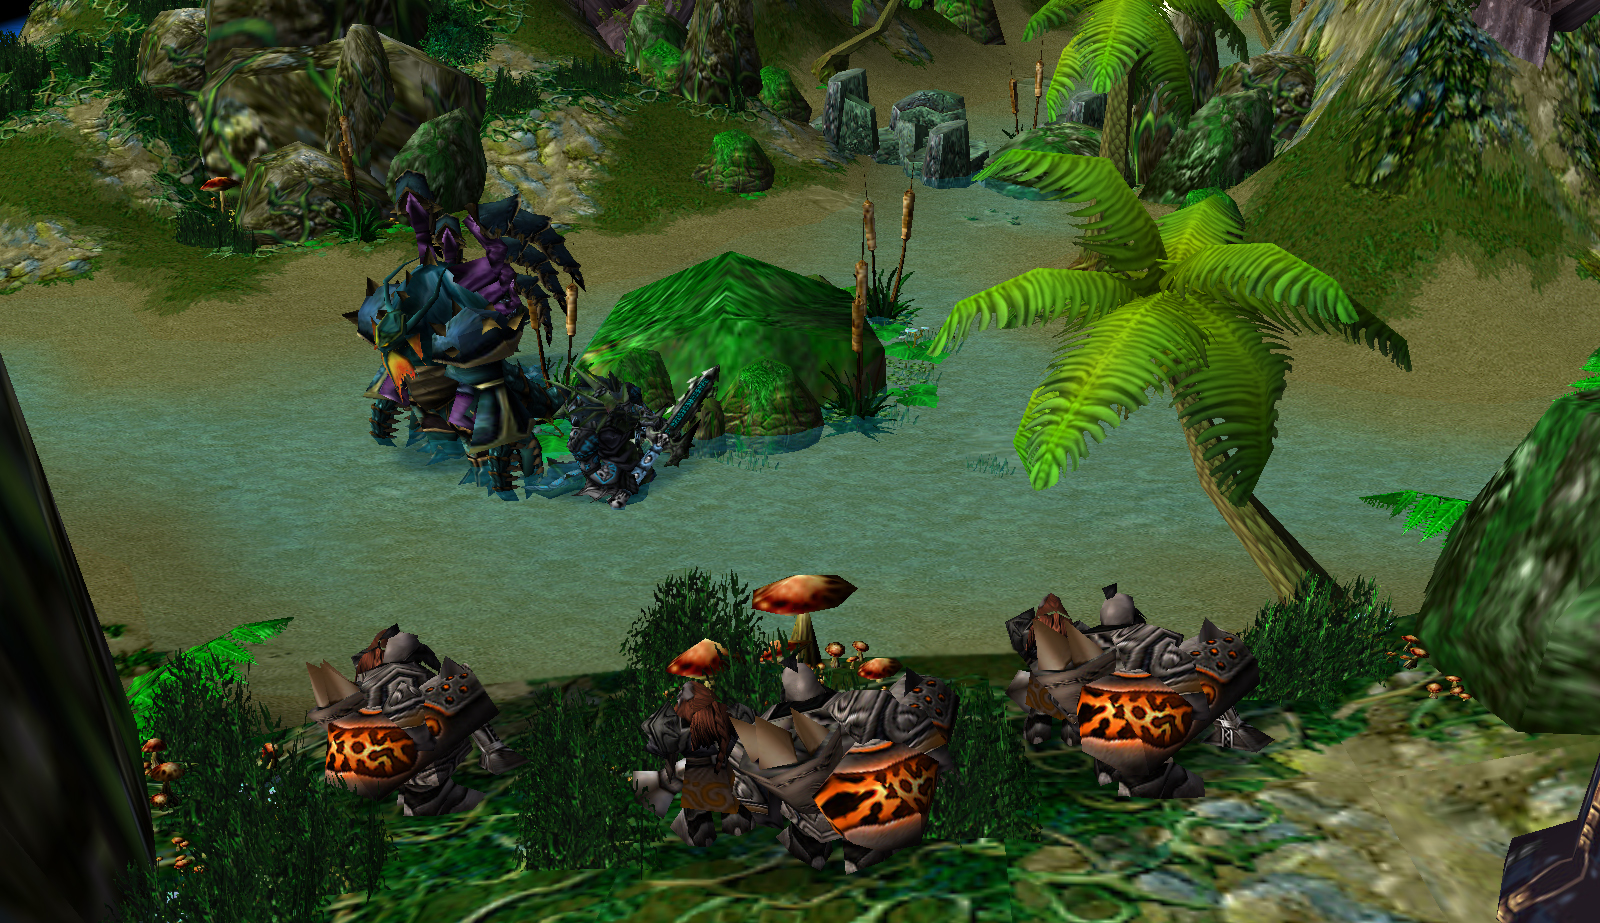
Darktide Nagas and Twilight Warriors defending the first Twilight base
First Darktide Naga base
Destroy rocks to open up new paths
Dark Iron Demolishers awaiting to ambush from a ledge
A bridge that can take you over the chasm

Infested ground that will damage anyone who step into it
Gate of Deepholm seen from behind
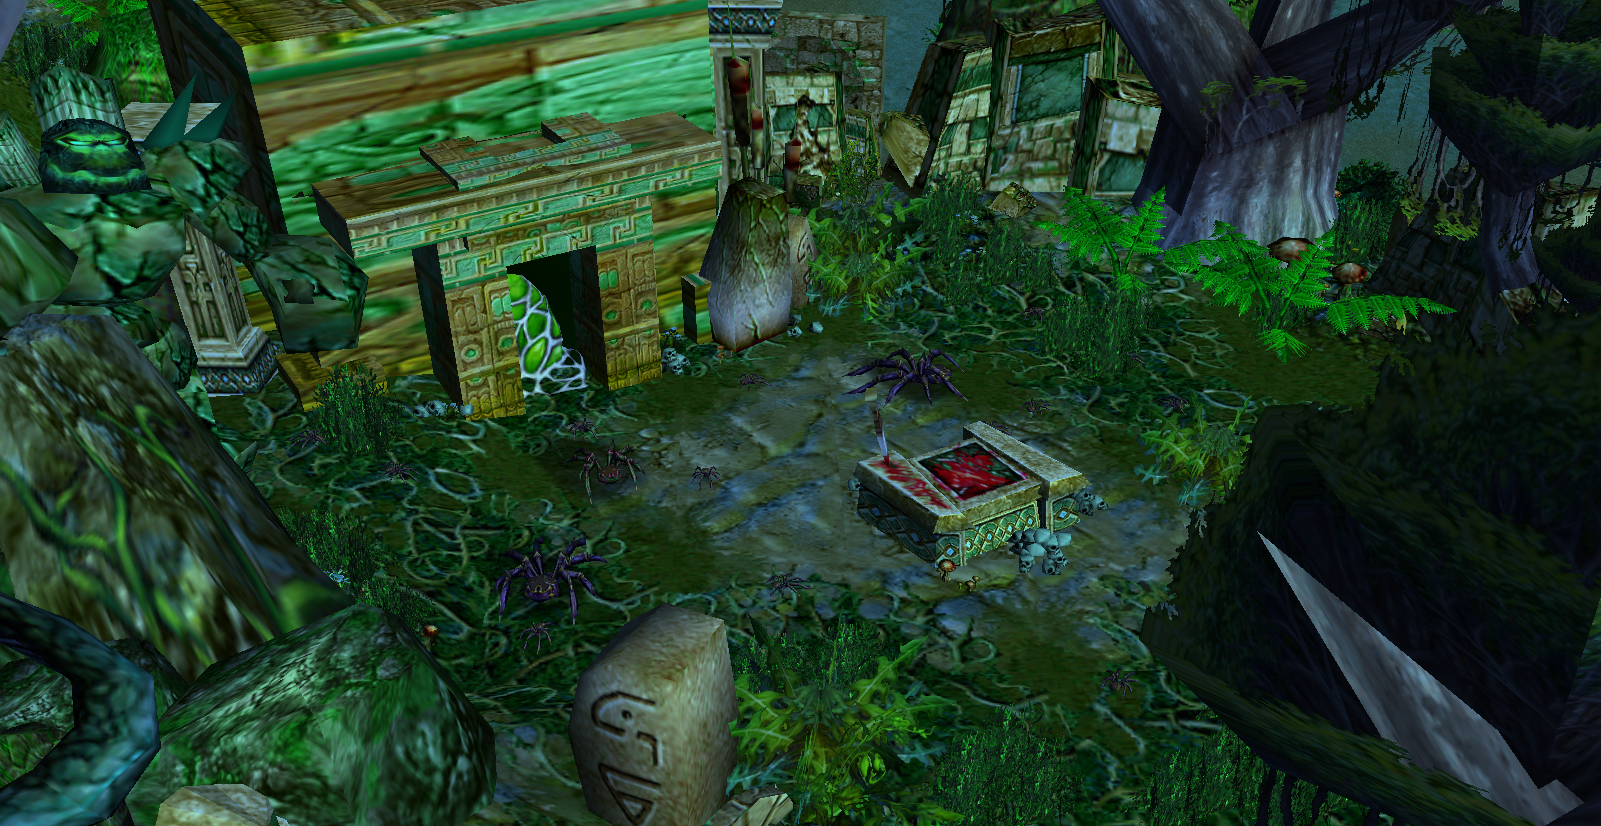
Some ancient ruins hiding a spider nest
Units Description:
There are two forces here, The Earthern Ring and Deathwing Forces.
The Earthern Ring have convinced Warchief Thrall's Horde and King Wrynn's Alliance to stand together against this massive threat to all of Azeroth, so there can be a lot of variety in unit types on this side; Orcs, Undead, Human, Night Elf, Troll, Dwarves, Gnomes, Blood Elves, Tauren, Worgen, Draenei and Goblins. Depends of what models I find and their filesize etc ;P
Deathwing the Destroyer seeks to destroy the World Pillar for good, and have called upon his allies and minions. The attacking units you will see in DotWP will be the Darktide Naga and the strongest warriors of the Twilights Hammer.
Modes and Commands:
Deathwing's units will increase % of their base HP every minute based on the difficulty set. In addition, the difference between -easy and -veryhard is huge. A few things is that -veryhard reduces the Gate of Deepholm's HP heavily, gives you only 1 gold every 2 seconds, gives you lesser time in timers like "Guardian's Awakening" and "Wrath of Deathwing", increases HP every minute heavily compared to -easy.
Author's notes: I have moved on to music production and studying micro- and nanotechnology, so I will not update this map every often. Maybe I get an urge to sit down with the editor in a few months and make a lot of changes. But I think the game is very entertaining when playing with friends, so I will put this on pause a little.
AD: DotWP is a combination of AoS, Survival, Hero Defense, Footmen Frenzy, Offense, TD.
For you who have played the first chapter; AD: Defense of Stormwind, will see that this second chapter have a lot of the same concept, but with a lot of improvements. The defending players (The Earthern Ring) still starts with choosing a Hero, and then upgrading their headquarter to either a Defensive or Offensive one. After some defending and boosting your hero with items and abilities, its time to retaliate and destroy Deathwing's bases. Push towards the bases the waves of enemies are coming from until Deathwing is provoked fourth, then put the Corrupted Earth Warder to rest!
The attacking players (Deathwing's "Twilight's Hammer" and "Darktide Naga") still need to pick their units and create a squad that will interrupt and slow down the defenders progress. They also need to defend bases the defenders need to destroy, while also trying to attack the Deepholm Gate and interrupt the Shamans sealing off the Deepholm entrance. The new thing in AD: DotWP is that special units is removed, and attacking players can pick between a few units that are a little better than normal, up to 20 food limit, some units cost 10 food others cost down to 1 food. These units is the only units the attacking players can control (except bosses), because attacking players can also buy units that automaticly will attack the Deepholm Gate (like offensive units). The reason for this is that in AD: DoS there were too many units to controll, it turned into a spamfest and little strategy. Tower building is still available through the Shade (like AD: DoS). In DotWP, Shades can also level up to a maximum level of 20, they got four abilities they can learn and each ability got 10 levels, so you can max two of them, or all four to level 5. Every minute you get as much experience for your Shade as you got Combat Points, so the more active you are the more experience your Shade get, some units also cost Combat Points, so buying those decrease the amount of experience your shade gets.
When Deathwing broke out of his prison in Deepholm and caused the Cataclysm, he destroyed the World Pillar, which
held all stone and mass of Azeroth and prevented it from collapsing into Deepholm.
Quickly the good-hearted druids and shamans of The Earthern Ring gathered to rebuild the shattered World Pillar.
And with help the Stone Lords of Deepholm and some of Azeroth's finest heroes from The Alliance and The Horde,
the rebuilding of the World Pillar was done in a hurry.
Now, Deathwing seeks to destroy the World Pillar once more. Only this time, he will not leave fragments to rebuild.
The Earthern Ring have called YOU to aid them in sealing off the entrance to Deepholm. With enough time and
the combined powers of the elements, the shamans can build a blockade so strong that Deathwing never can break through to the World Pillar. If the sealing fails, Azeroth will be destroyed...
Defense of the World Pillar takes place at Vedok Isle. Vedok Isle seems like a tiny meaningless
isle in the Echo Isle group, but during the Cataclysm shamans from the The Earthern Ring have been informed that Vedok Isle holds the
Gate of Deepholm, which is the only entrance to the elemental plane of Earth; Deepholm.
-Only spells that are Recommended or higher by the moderators of www.hiveworkshop.com
-A lot the great things you loved about AD: Defense of Stormwind
-Up to 8 players, 1v1-4v4 / 1vC-4vC / Cv1-Cv4
-Balanced for singleplayer and every other combination.
-Attacking forces grow stronger every minute, progression is a must!
-In addition to you hero, you can upgrade your headquarter to either a Defensive HQ or Offensive HQ. Defensive HQ making tower building avaible. Offensive HQ making reinforcements available. Choose your playstyle!
-Interesting bossfights with player interaction on their side!
-Imba models/spells made by masters of art from hiveworkshop.com
-This map requires you to think, observe your enemy, prioritize units, choose between dilemmas and communicate with your friends.
-Your friend left you, but you still want to finish? No problem! Triggers in DotWP is balancing every event to fit the current number of players.
-On higher difficulties this map can keep you entertained for 2 hours!
| Icon | Item Name | Inscription | Effect | Requires |

| Zin'rokh, Destroyer of Worlds | "Even the bravest cannot fight beyond his strength. So take this my child and feel your strength renewed!" | Zin'rokh can be swung with enormous force; gives a 15% that an attack deals 300% bonus damage. In addition, increases the Heroe's base damage by 50 and strength by 20. | Titan Essence |

| Crul'korak, Nemesis of Archmages | "Let no man forget how menacing we are! We are lions! Do you know what's there, waiting beyond that hill? Immortality! Take it! It's yours!" | Increases the attack damage of the Hero by 30 and attack speed by 30%. In addition the wielder burns enemies' mana for every attack, burning 15 mana and dealing bonus damage equal to the mana burned. | Titan Essence |

| Akmin-Kurai, Bulwark of Azeroth | "When the will defies fear, when duty throws the gauntlet down to fate, when honor scorns to compromise with death - Azeroth will never fall." | This legendary artifact was one of the many gifts the Titans gave to the Azerothians under one of the first wars in Azeroth. Gives the wielding Hero 20 bonus armor, spell immunity and 1000 bonus hit points. | Titan Essence |

| Aiur, Greatstaff of the Lost Universe | "The Gods envy us. They envy us because we're mortal, because any moment might be our last. Everything is more beautiful because we're doomed." | Increases the attack damage of the Hero by 20, mana by 1000, mana regeneration by 50% and 75% magic damage reduction. | Titan Essence |
Playable Map Size: 125x155
Trees/Destructible: NO destructible trees in this map, only beautiful custom trees.
Doodads (Other): Over 17 000 doodads placed with love.
Players: 1-8
Trees/Destructible: NO destructible trees in this map, only beautiful custom trees.
Doodads (Other): Over 17 000 doodads placed with love.
Players: 1-8
Main objective: The Earthen Ring have already started to seal off the entrance to Deepholm, and need your help to defend them while they do it! The sealing will take days, so all of Vedok Isle must be secured!
Loss condition: Gate of Deepholm is destroyed, resulting in exposing the shamans doing the sealing progress.
Optional: Hunt down Merciless Turtles for a nice bounty.
Loss condition: Gate of Deepholm is destroyed, resulting in exposing the shamans doing the sealing progress.
Optional: Hunt down Merciless Turtles for a nice bounty.
Main objective: Destroying the Deepholm Gate, while defending Deathwing's bases with squads of units and tower building.
Loss condition: Deathwing the Destroyer is defeated.
Loss condition: Deathwing the Destroyer is defeated.
Here I will add text that explains a normal game of Defense of the World Pillar, so you get how it is.
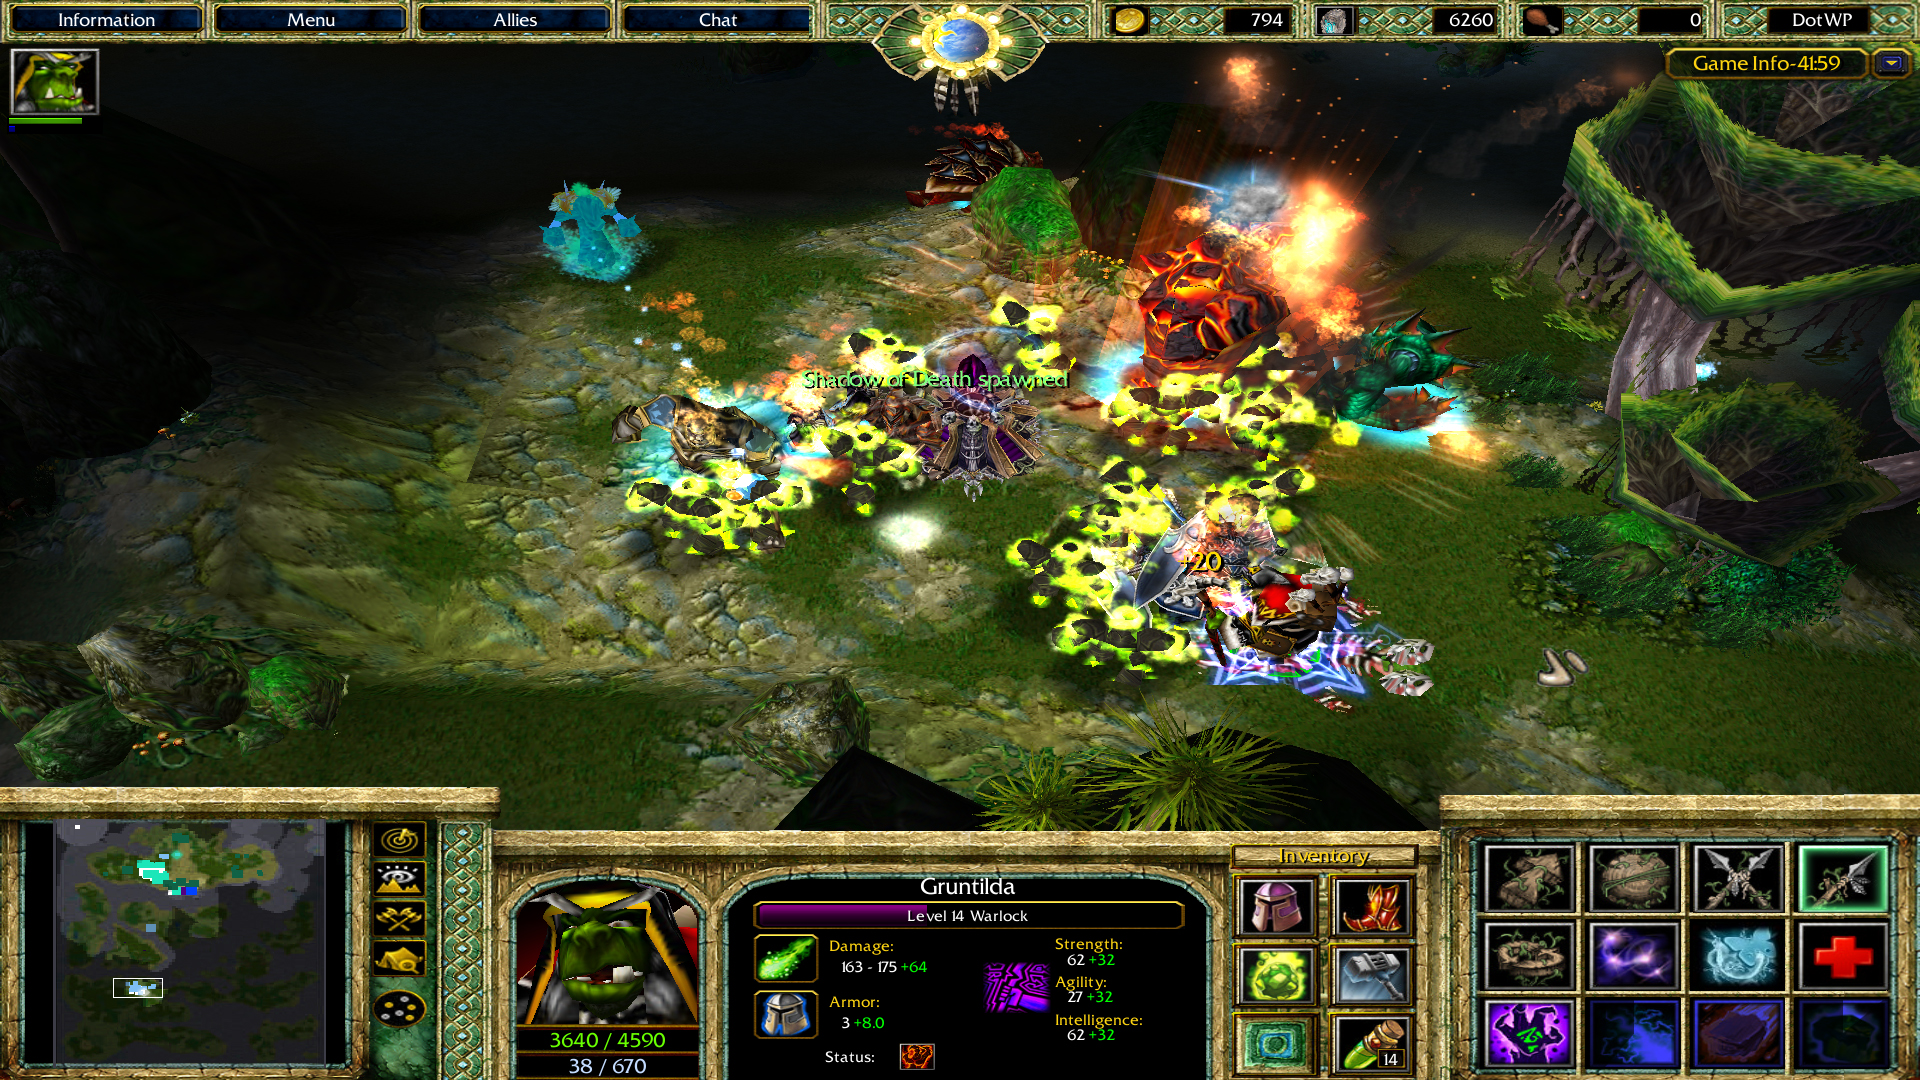
-The most important tip first; Shadow of Death can be spawned by Twilight Cultists (Acolyte model) if there are corpses around. Shadow of Death is a huge untargetable green skull that move very slowly, but if it get close to an enemy, it will damage it a lot. To avoid this insane damage, avoid the skull until its gone or kill the Twiligth Cultist first (if the Cultist die first, there is no corpse it can spawn Shadow of Death from in the first place.
-If you choose the Defensive Headquarter, place your towers close to the Gate of Deepholm, because the waves after wave 1 sends units that flank you from the sides.
-Barricades, which you can buy at the Alternate Medicine store, is very usefull if you are leaving the defenses for awhile. Attack units will use time destroying these Barricades before they advance against the Gate of Deepholm
Terrain Description:
Since terrain was my minus in Azeroth Defenders: Defense of Stormwind, I have used a few more hours on the terrain.
The tileset is Sunken Ruins because Deepholm is located under the Maelstrom over the South Seas. So the Echo Isles is not far from it, which made it a natural choice to put the other entrance to Deepholm on an isle in the Echo Isle group. The isles in the Echo Isle group is placed under equator in the middle of the sea, so it got a lot of tropical environment, with palms and overgrown terrain.
Also, if you see under Battlefield map, you can see orange paths lead to total of four bases, for example if only player 1 is playing; when the bases on the left get destroyed, the southern middle orange paths get activated, after those southern bases is destroyed, the epic bossfight against Deathwing the Destroyer starts!
The terrain will most likely get a new doodad here and there for every update here on HiveWorkshop, so tell me if I should fix anything to make it look better. Please be honest!
This Battlefield overview is a old picture, but it's just to show you how the structure of the map is
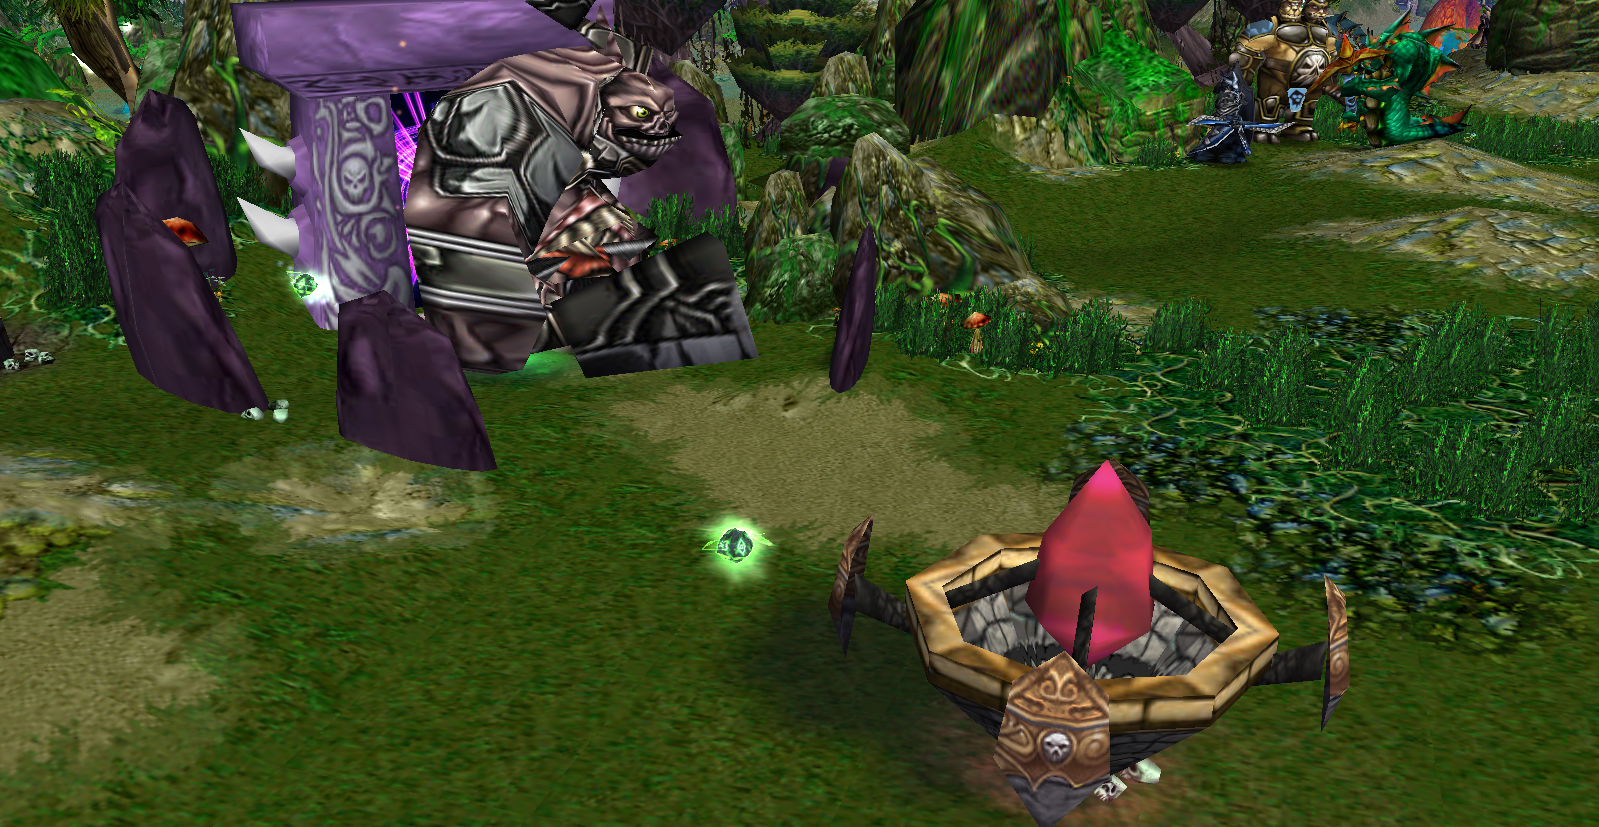
A Guardian of the Twilight protecting a Twilight Stone
A waterfall between two Darktide Naga bases
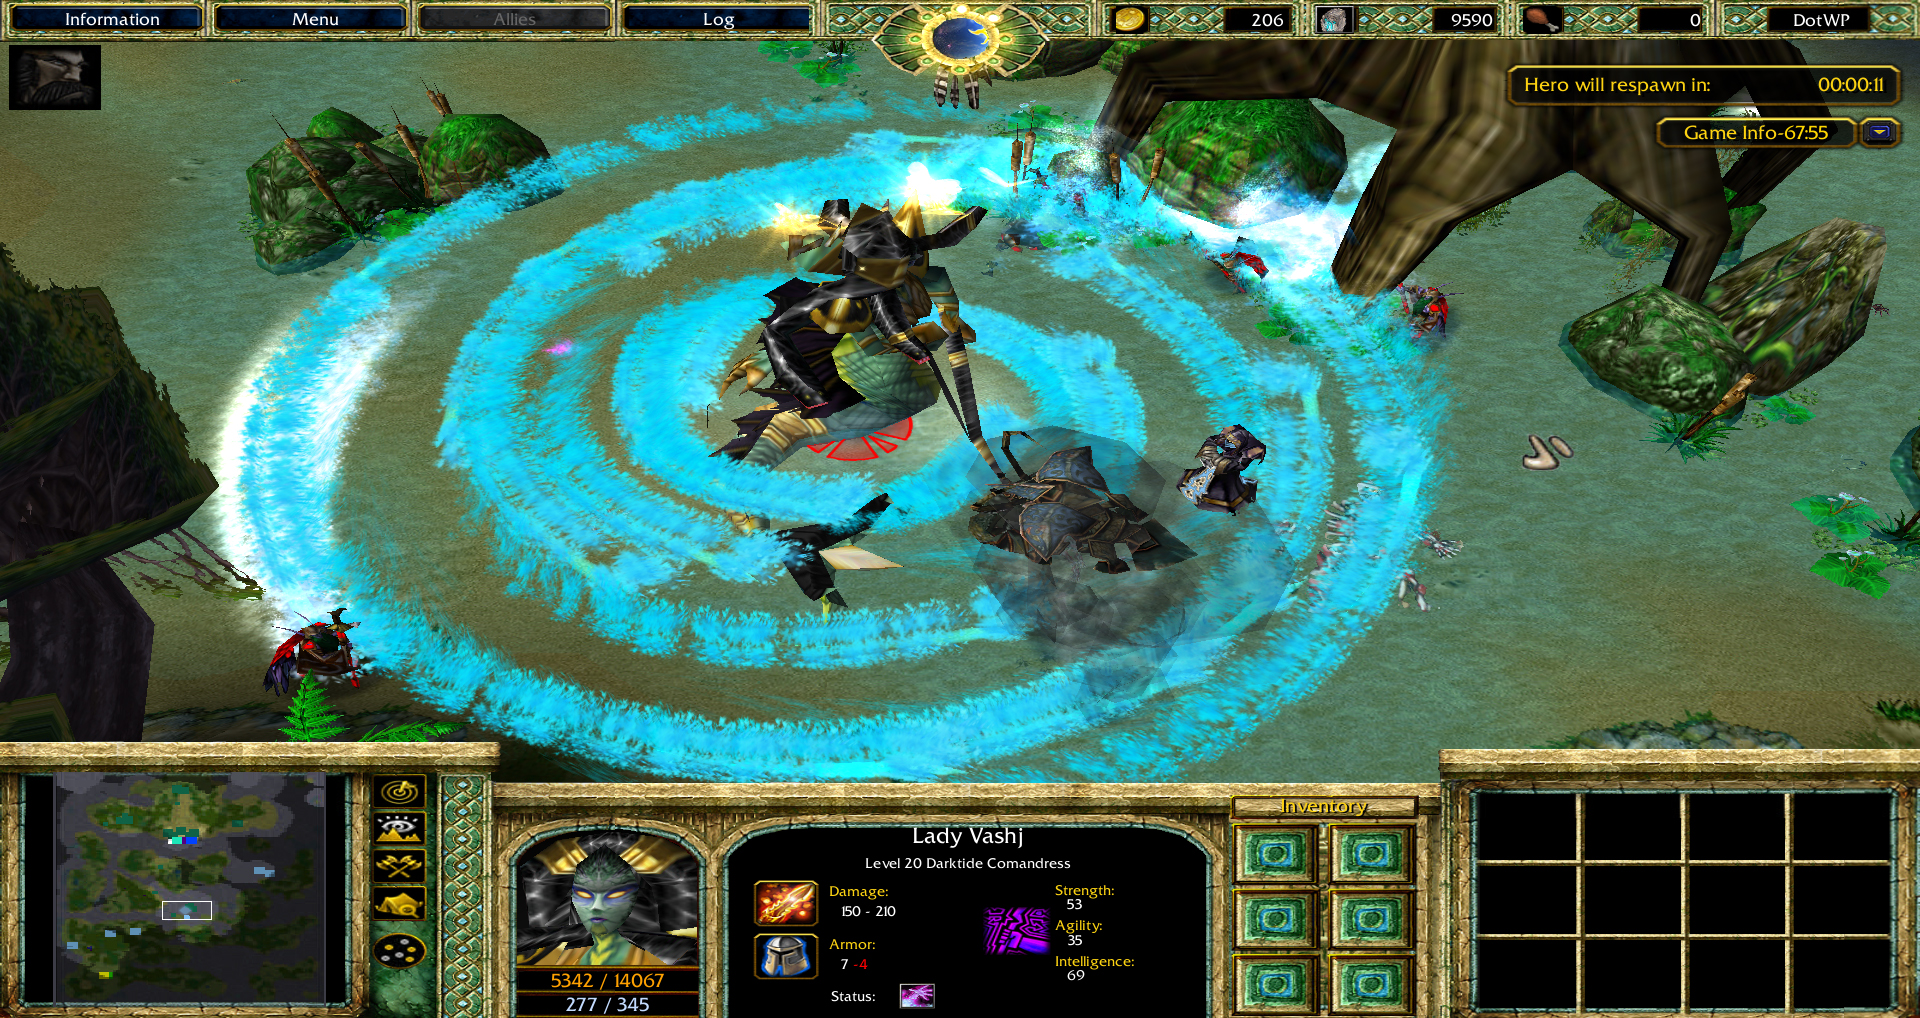
Lady Vashj awaiting her command from Deathwing
Massive corals can be seen over all of Vedok Isle
A twisty and rocky path to the second Darktide Naga base
A Sea Elemental and a Naga Royal Guard defending the third Darktide Naga base
The Alliance base
The Horde base
The coastline near the Horde base
These foot switches are important in order to turn of an eventual activation process of a Guardian of Vedok
A great river flowing through Vedok Isle
Darktide Nagas and Twilight Warriors defending the first Twilight base
First Darktide Naga base
Destroy rocks to open up new paths
Dark Iron Demolishers awaiting to ambush from a ledge
A bridge that can take you over the chasm
Infested ground that will damage anyone who step into it
Gate of Deepholm seen from behind
Some ancient ruins hiding a spider nest
"They are too many! Fall back!"
Take that ledge! Attack them from above!
The Darktide Naga is attacking from behind, brace yourself!
Hale Sunchaser the Pyromaster with one of his spells
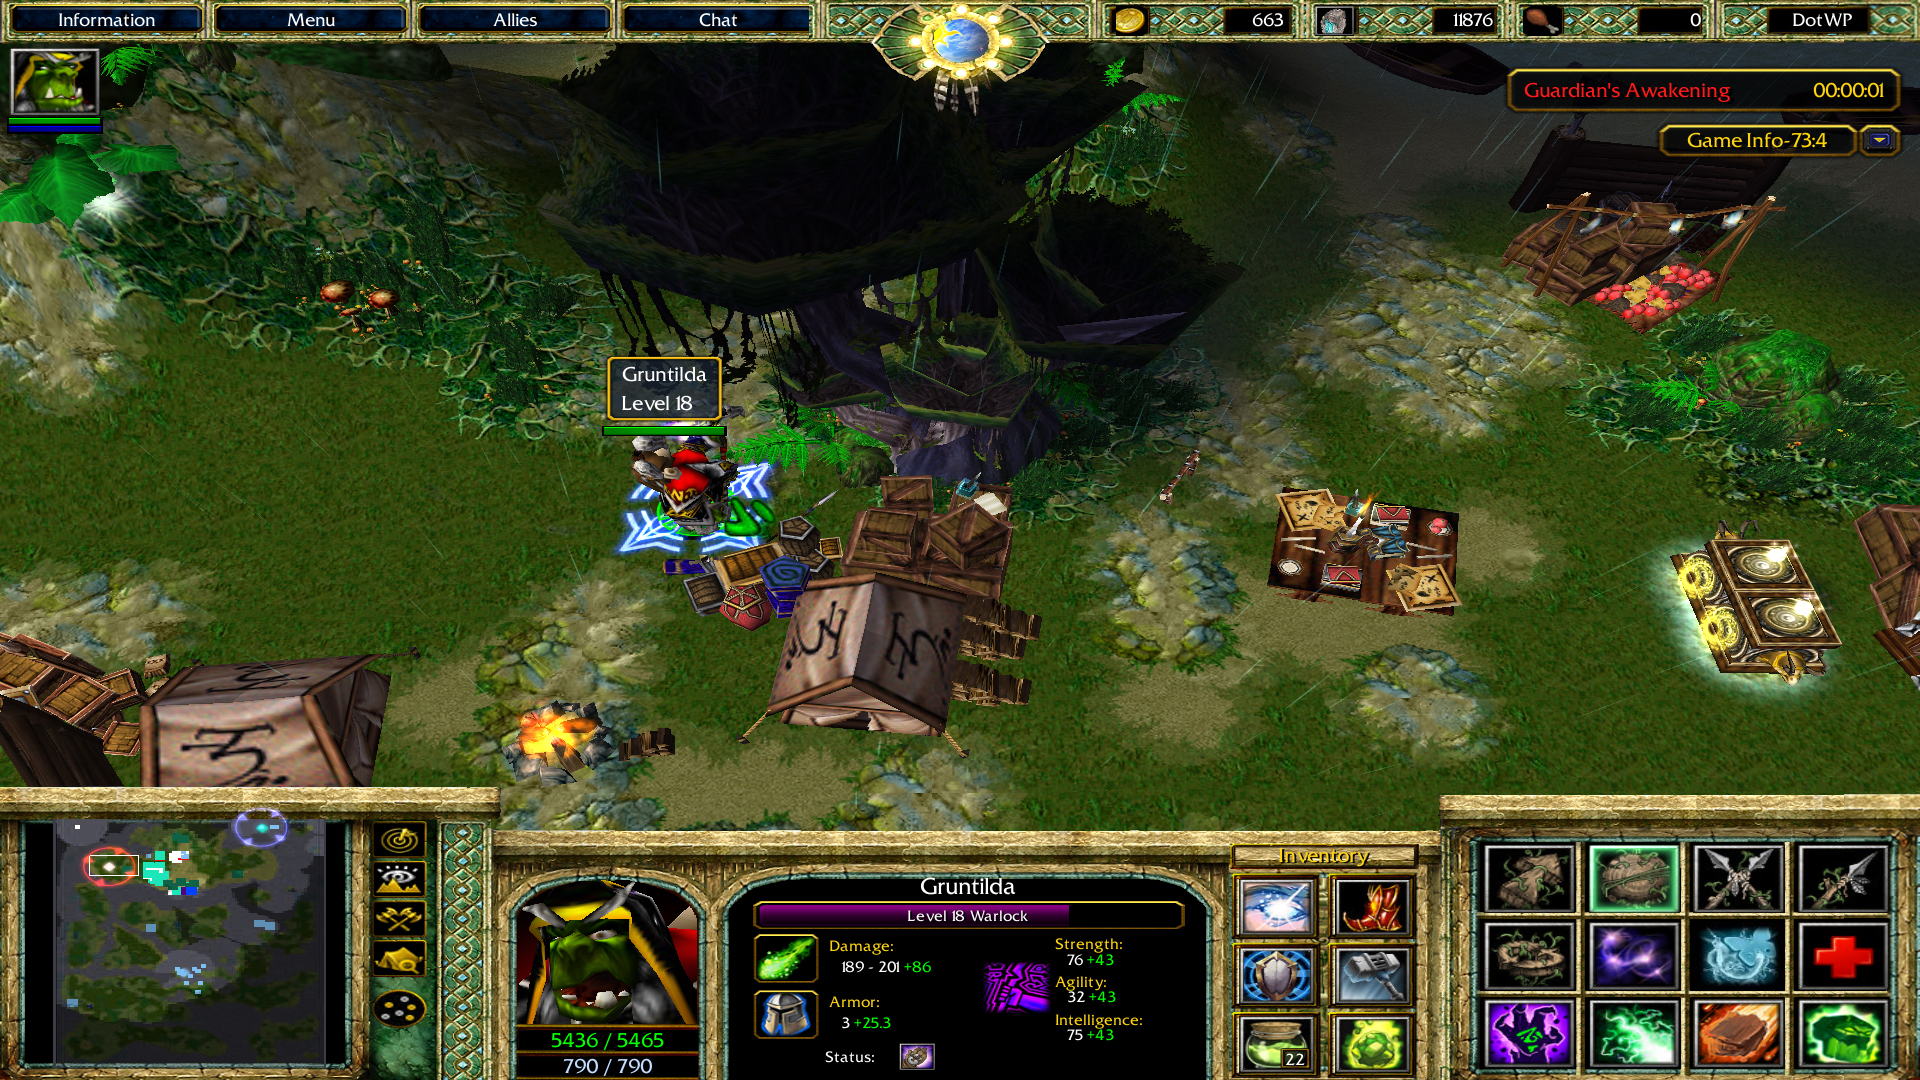
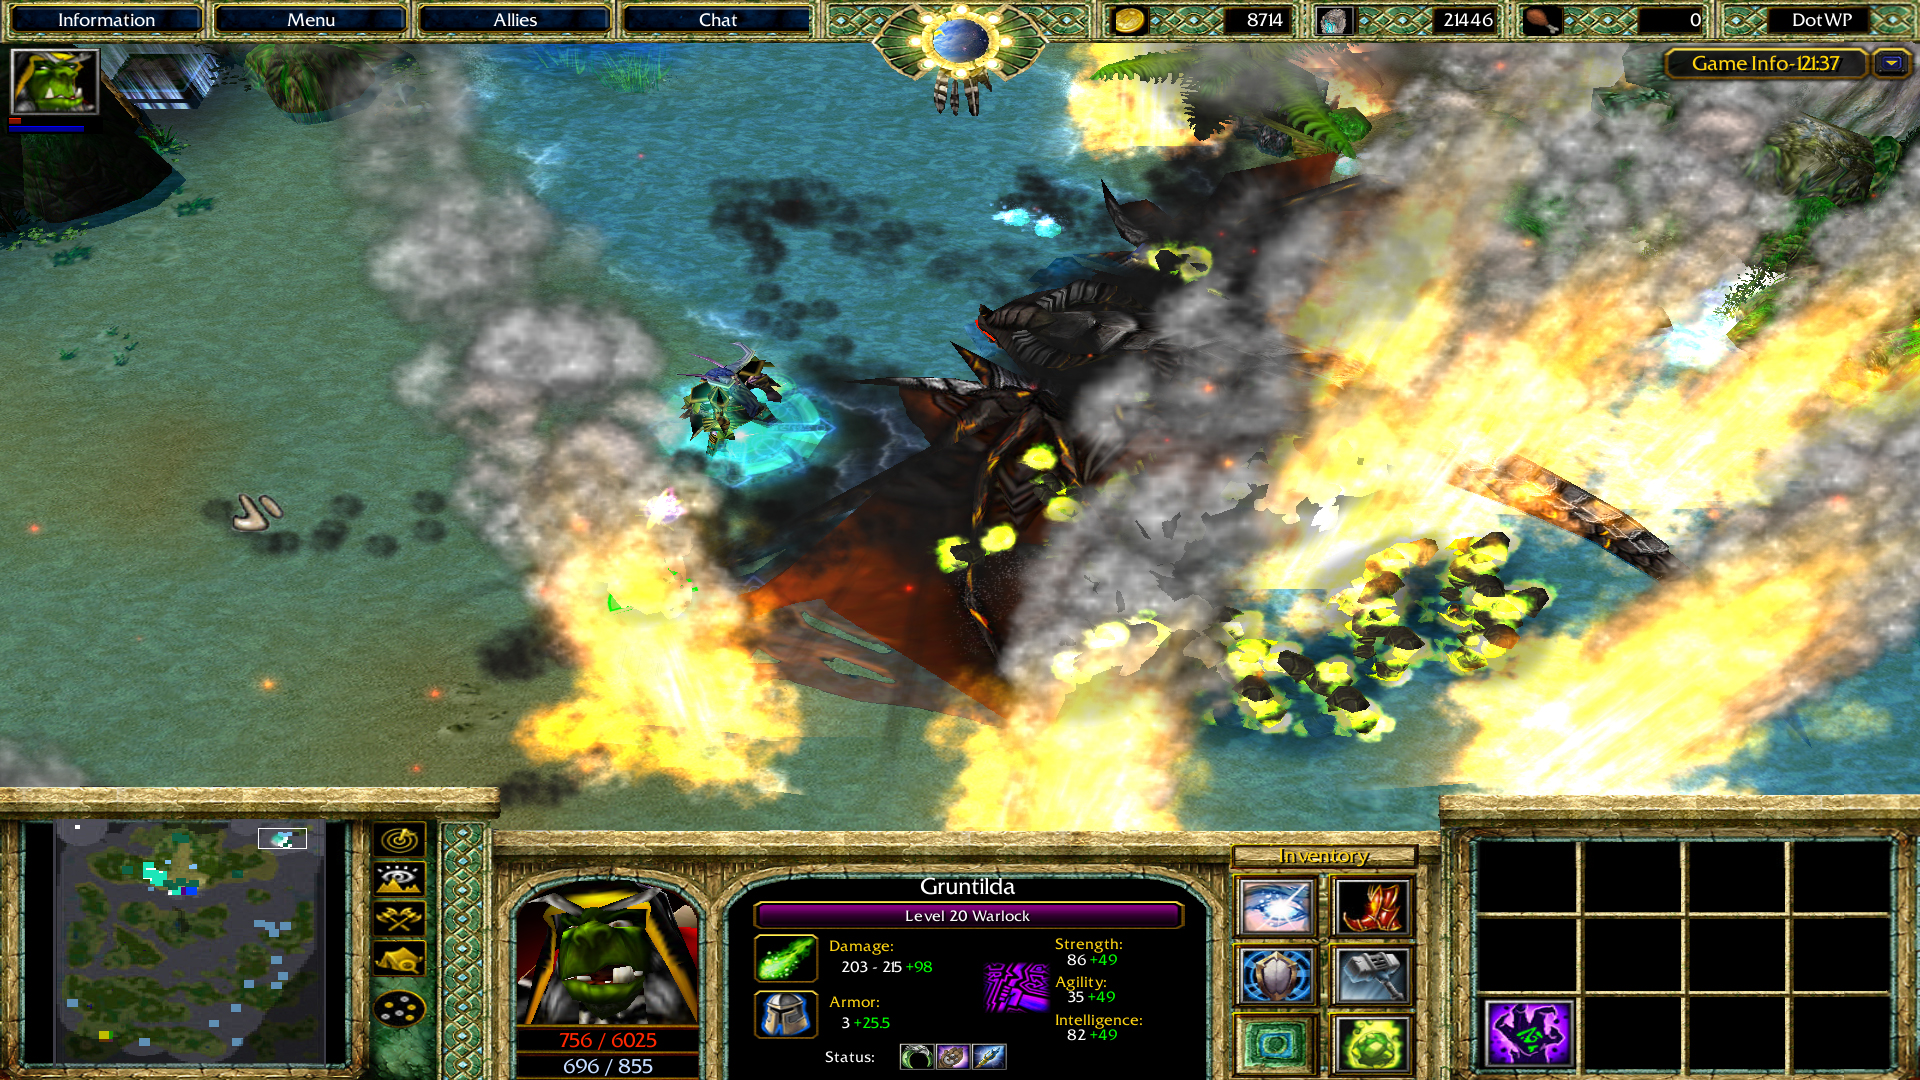
Gruntilda the Warlock destroying some rocks to get to the portal. Portals teleport you to a random spot on Vedok Isle
Phoenix Towers roasting some poor enemies
Bossfight with Iso'rath, Servant of the Old Gods while Deathwing comes flying and drops deadly flames
Centrius and Gruntilda taking out a Twilight outpost
Druids from the Cenarion Circle taken by Lady Vashj's whirlpool
Barricades and towers is a good combination to avoid leaks
Only 1 second more and the Guardion of Vedok would be awoken, phew!
Deathwing in trouble
Take that ledge! Attack them from above!
The Darktide Naga is attacking from behind, brace yourself!
Hale Sunchaser the Pyromaster with one of his spells
Gruntilda the Warlock destroying some rocks to get to the portal. Portals teleport you to a random spot on Vedok Isle
Phoenix Towers roasting some poor enemies
Bossfight with Iso'rath, Servant of the Old Gods while Deathwing comes flying and drops deadly flames
Centrius and Gruntilda taking out a Twilight outpost
Druids from the Cenarion Circle taken by Lady Vashj's whirlpool
Barricades and towers is a good combination to avoid leaks
Only 1 second more and the Guardion of Vedok would be awoken, phew!
Deathwing in trouble
Units Description:
There are two forces here, The Earthern Ring and Deathwing Forces.
The Earthern Ring have convinced Warchief Thrall's Horde and King Wrynn's Alliance to stand together against this massive threat to all of Azeroth, so there can be a lot of variety in unit types on this side; Orcs, Undead, Human, Night Elf, Troll, Dwarves, Gnomes, Blood Elves, Tauren, Worgen, Draenei and Goblins. Depends of what models I find and their filesize etc ;P
Deathwing the Destroyer seeks to destroy the World Pillar for good, and have called upon his allies and minions. The attacking units you will see in DotWP will be the Darktide Naga and the strongest warriors of the Twilights Hammer.
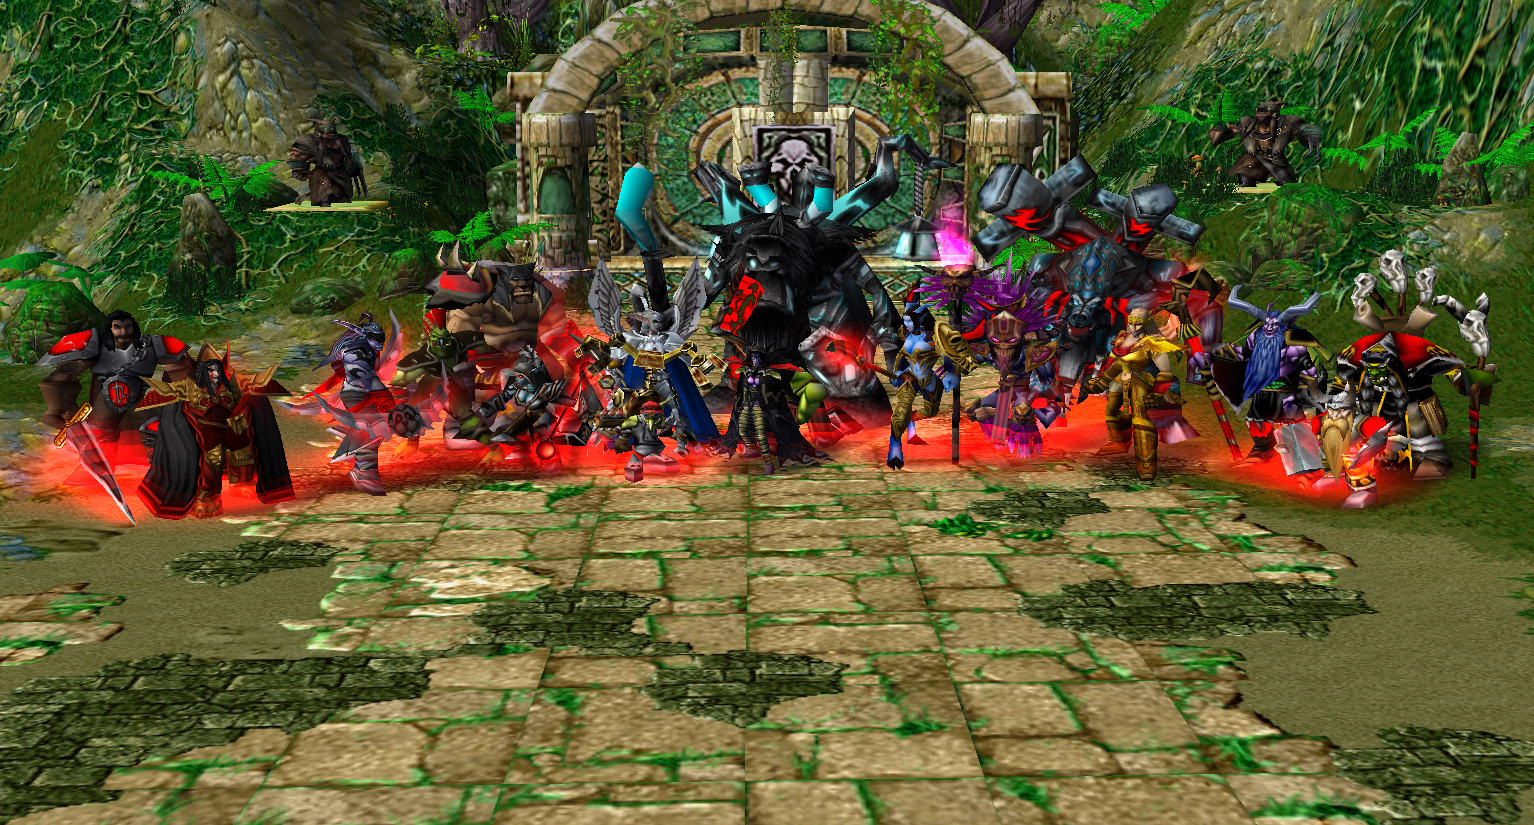
There is 6 Strength, 6 Intelligence and 6 Agility Heroes. 9 Heroes from the Alliance and 9 Heroes from the Horde, summoned at Tower of Grand Marshals and Tower of High Warlords respectively.
Intellect Heroes
Agility Heroes
Strength Heroes
Intellect Heroes
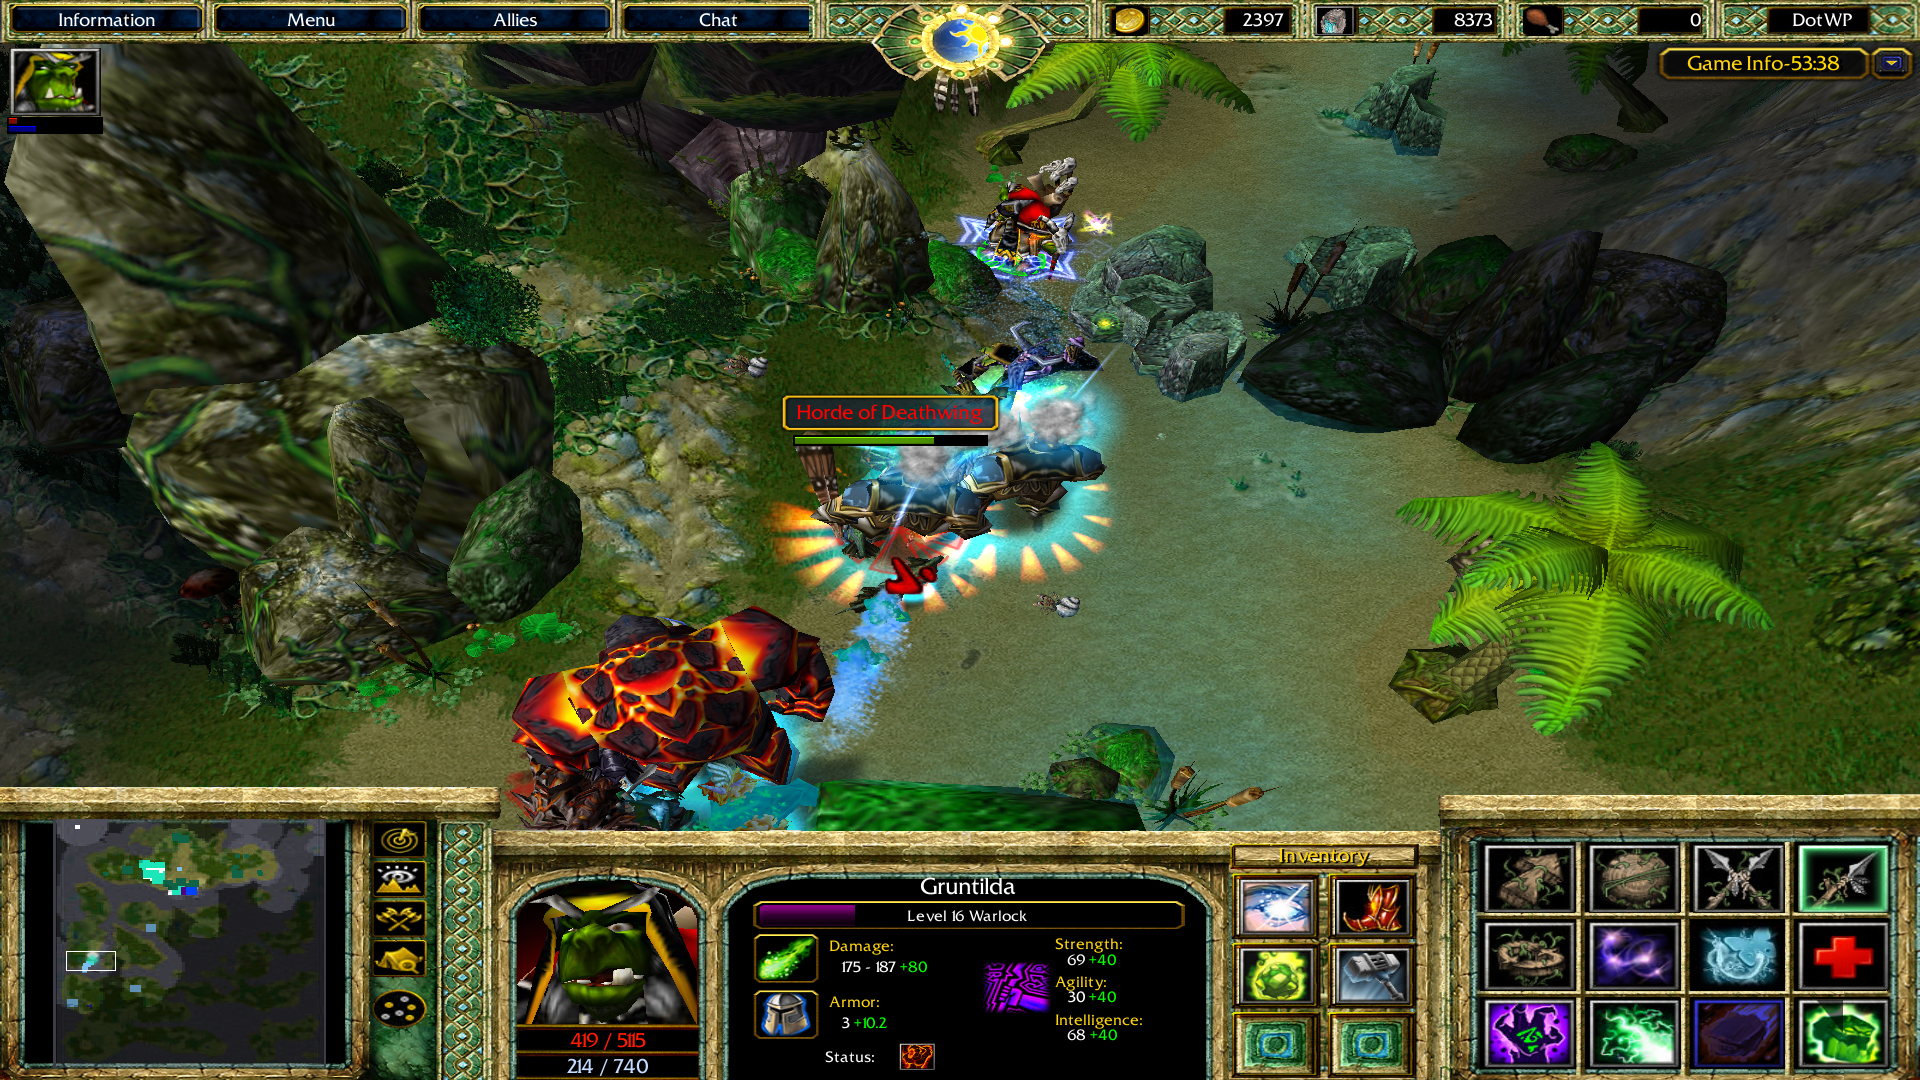
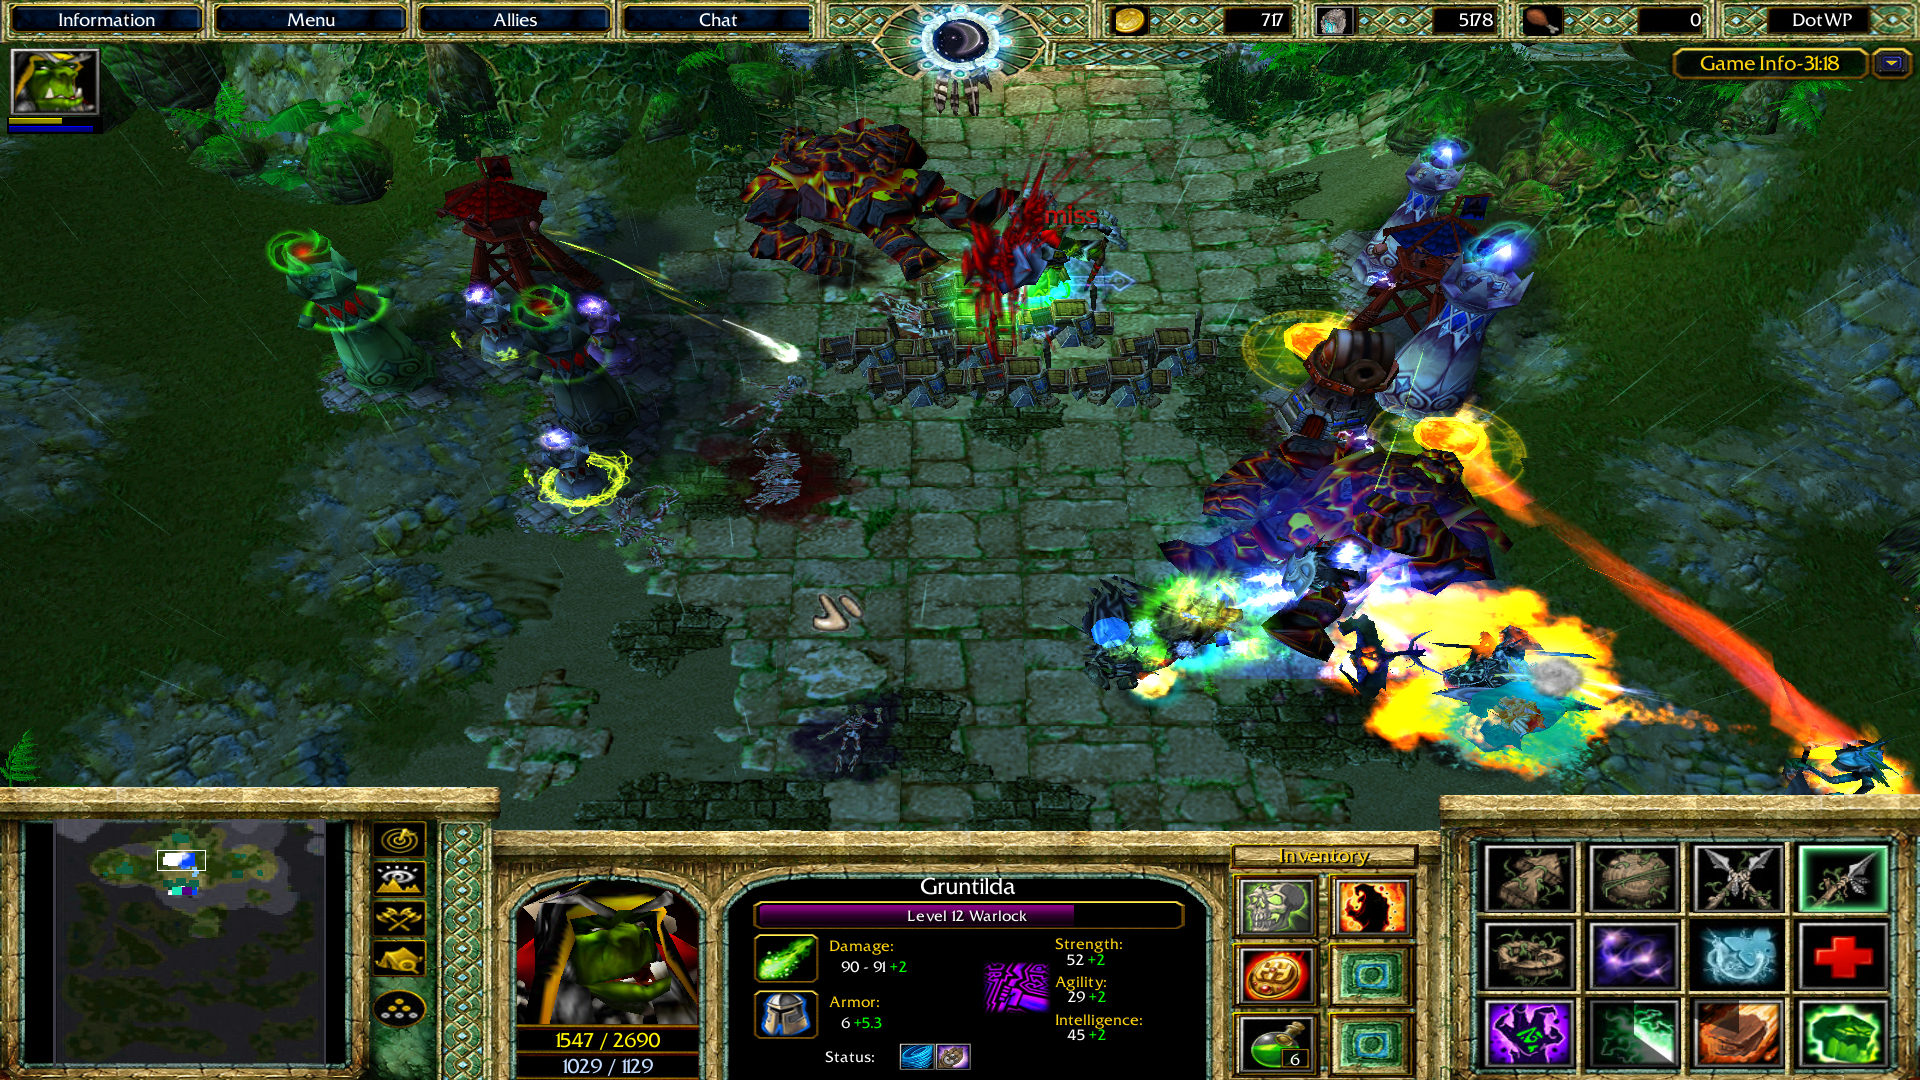
The WarlockGruntilda The Warlock: Many was freed from the Lich King's grasp and had their minds returned, however this was not expected when Illidan Stormrage and his cultists were defeated. Gruntilda was one of few that managed to heal their minds. After she understood what terrors she had performed in the name of Illidan, she returned to Thrall, asking forgiveness. After months of trials she was accepted into the Horde again, and set to learn other warlock apprentices how to use black magic correctly. Gruntilda and Aisha the Battle Mage does not come along very well, for obvious reasons.
Can learn Aura of Terror, Chaos Bolts, Hellfire and Rain of Chaos.
Special Ability: Gruntilda is able to life tap herself for 250 HP, converting it to 200 mana.
The ShamanThordin Thunderbrew The Shaman: As a former protector of the Nesingwary Expedition, Thordin joined the expedition as a warrior when the Dark Portal opened the path to Outland. There they found a whole new world, which drove them deeper into Outland, until they reached the beautiful land of Nagrand. One night Thordin walked to an ancient area the expedition called Throne of the Elements, where he saw a glowing shard. He touched the shard and a blast of all the four elements flashed in front of him. The flash sent him into sleep for one night with many visions and dreams. The day after the flash he was found by the local orcs, the Mag'har, and brought to their village, Garadar. There Greatmother Geyah told him that he had been chosen by the elements for something great.
Can learn Fire Totem, Telluric Currents, Chain Lightning and Neptulon's Rage.
Special Ability: Can summon an Earth Totem that heals nearby friendly units.
The DruidCentrius Moonlight The Druid: Centrius Stormrage was the first mortal druid of all time, and initiated the mainstream use of druidism among the night elven people ten millenia ago under tutelage of the demigod Cenarius. Through Centrius' guidance, the kaldorei managed to successfully halt the Burning Legion's first invasion of Azeroth during the War of the Ancients. In its aftermath, he became the greatest of the world's archdruids. Centrius Stormrage is the twin brother of Illidan Stormrage, as well as the loving and beloved husband of the high priestess of Elune, Tyrande Whisperwind. Together, the two have represented the highest leadership of the night elves ever since the fall of Queen Azshara and her Highborne caste.
Can learn Gaia's Defense, Carnivorous, Entangling Roots and Twister.
Special Ability: Centrius' armor is made of living thorns, which will retaliate enemy units' melee attacks.
The Stone ElderWiserock The Rock Elder: The Stone Elder Wiserock is a respected Stone Lord in Deepholm, he is also Therazane the Stonemother's greatest advisor. But he is not only wise and knowledgeable, over the millennias he has been living, he has also been strongly connected to Deepholm's immense magnetizing powers. All of his body is covered with sparkling energy of the Earth element, and with this power, he can command rock and magnetic flux to wreak havoc!
Can learn Force of Deepholm, Earth Shock, Splitting Boulder and Flux Storm.
Special Ability: The Rock Elder's attacks deal AoE damage.
The Arcane MageMesil-kree The Witch Doctor: Mezil-kree is the previous advisor for Shadow Hunter Vol'jin, leader of the Darkspear Tribe. When Thrall decided to follow the path of the Elements, Garrosh Hellscream was declared Warchief of the Horde, something the Darkspear Tribe was not very fond of. Thrall convinced Vol'jin that there were no other acceptable leader but Garrosh, despite his barbaric way of thinking. Vol'jin, who respect Thrall more than anyone, accepted his choice of Garrosh as the new leader of the Horde. However Mezil-kree was raged by Thrall's decision and left the Darkspear Tribe. But with the news of Deathwing's plans, he returned to aid his brothas on Vedok Isle.
Can learn Voodoo Curse, Acid Bomb, Shaking the Voodoo Doll and Soulfire.
Special Ability: Offers soup to the target unit, reducing its attack damage, but heals it every second.
The PyromasterHale Sunchaser The Pyromaster: At the young age of 17, Hale was sent by the Kirin Tor to apprentice under the wizard Medivh in his tower at Karazhan. At first, Hale believed Medivh to be nothing more than he appeared to be - a kindly, old, if slightly eccentric wizard - but it wasn't long before he discovered Medivh was actually a Guardian of Tirisfal, a lineage of incredibly powerful wizards empowered by a council to combat the forces of the Burning Legion. Soon after he began to sense something was drastically wrong with his master, which was corrupted by Sargeras to open the Dark Portal, Hale tried to stop him from doing this to Azeroth. Medivh blocked him out, but Hale then ran to the Alliance telling them that The Burning Legion is coming. If he had not did this, The Burning Legion could have destroyed Azeroth.
Can learn Phoenix, Magma Burst, Liftoff and Meteorites.
Special Ability: Releases streams of fire toward incoming enemies.
Agility Heroes
The Combat RogueFur'talos Ravencrest The Combat Rogue: According to Altruis the Sufferer, Fur'talos was one of five warriors sent to Illidan by Kael'thas to be trained as demon hunters - the first time that night elves were allowed to do so. Illidan put the night elves through excruciating trials that would have defeated most fully trained demon hunters. Three of the night elves died during the training, and a fourth was driven to insanity. Fur'talos was the only one to succeed. With the death of Illidan Stormrage, Fur'talos returned to Azeroth and went into exile. But with the news of events that could destroy the world he lives in, he offered his skills for the survival of Azeroth.
Can learn Telepathic Aura, Parry, Fan of Knives and Telekinesis.
Special Ability: Ravencrest's agility gives him a chance to avoid incoming attacks.
The HunterMira Moonshadow The Hunter: Mira was one of the turned high elves that joined Sylvanas when she decided to trap Arthas and break loose. Since then she has always been with Sylvanas as her trusted guardian and personal scout.
Can learn Ravagers, The Great Escape, Concussive Shot and Blot Out the Sun.
Special Ability: There is a chance Mira will headshot her targets, dealing bonus damage.
The Goblin EngineerGazz Stripbolt The Goblin Engineer: Gazz was once a warrior trainer for the Echo Isles, but when the Cataclysm occoured he was one of the few that managed to get to Bilgewater Harbor, the Goblins' new capital. After the ship Bilgewater's arrival, there was so much to maintain and fix that every goblin was set to do engineering work. After months of repairing and rebuilding, Gazz had been quite fascinated by the engineering proffession he earlier had refused to try out. Now he uses a mix of melee combat and engineering devices to blow enemies up!
Can learn Bob-Omb!, Ion Beam, Goblin Nano Mine and Roflcopter.
Special Ability: Deals bonus damage to buildings and bosses.
The BerserkerBale Doomaxe The Berserker: Bale Doomaxe has served with the Horde as part of the Blackrock Clan ever since he drank the blood of Mannoroth alongside Grom Hellscream. Bale led forces in the sacking of Shattrath, Stormwind, and everything between, never losing in battle until the Horde was routed at the end of the Second War.
When Orgrim Doomhammer seized control of the Horde in the First War, he chose Bale Doomaxe as his second-in-command after witnessing Bale's efficient and brutal tactics on the field. After the demonic bloodlust had been lifted from the orcs due to Grom Hellscream's sacrifice, Bale helped dozens of veterans come to grips with their previous atrocities, ultimately saving the lives of many great Horde soldiers
Can learn Killing Spree, Colossus Smash, Cutting Edge and The Unstoppable Force.
Special Ability: Bale has a chance to avoid incoming attacks and deal bonus damage.
The ShadowstalkerAriel Moonfang The Shadowstalker: Alas, the story of Ariel Moonfang is a short one. There is not much to be said as she has shrouded her entire past and killed off anyone who knew it. What is known however is that she comes from an ancient and secret demonic clan in the far depths of Outland. Her fellow members are unknown and the question of why she joined can just as well be cast away, as no one will be able to answer it but her. She is highly skilled in the belief of energy with devastating skills and cunning devices. It is altogether a rather deadly combination.
Can learn Vanish, Paralyzing Dagger, Slice and Dice and Smoke Bomb.
Special Ability: Ariel Moonfang's attacks have a chance to kidney shot the target, stunning it and dealing minor bonus damage.
The Discipline PriestAnaya Stardust The Discipline Priest: Anaya Stardust is the leader of the Moon Knights and is currently located in Shattrath City. The Moon Knights are an order of former priests and warriors who use the Light magics from the enslaved naaru M'uru. Anaya herself, a former elven priestess, became disillusioned with the Light following the Fall of Quel'Thalas. She had long forsaken her Light-given powers when M'uru was transported to Silvermoon following the capture of Tempest Keep. Magister Astalor Bloodsworn proposed using the naaru's powers to bestow certain elves with the powers of M'uru. Anaya was the first to volunteer to make use of these powers, and thus she became the first and leader of the Moon Knights.
Can learn Reflections of Light, Pain Suppression, Flash of Light and Omega Wave.
Special Ability: Anaya Stardust can link friendly units' spirits together, making them all share incoming damage to the other linked units.
Strength Heroes
The Blood DrinkerZul'rajas The Blood Drinker: Zul'rajas was a mighty warrior of the Shatterspear Tribe during the Tribe Wars. He was one of the few from his tribe that survived the wars. Unfortunately his wife was slaughtered during one of the last attacks at their village. Having his life destroyed and sent on the run, the only thing he could think about was a gruesome revenge for the ones that killed his wife. With no allies left, he turned to an evil witch doctor for help. The witch doctor turned Zul'rajas to a deadly killing machine and gave him his revenge, but this also cursed him with a terrible hunger for blood. Searching for meaning, he joined the Horde and their cause.
Can learn Unholy Bite, Blood Worms, Taste for Blood and Blood Craze.
Special Ability: Consumes HP to curse enemies with his attacks, if the enemies die while the curse is active, blood worms will spawn out of their bodies.
The Death KnightKel Frosthoof The Death Knight: Kel was one of Cairne Bloodhoof's few personal guards in Thunder Bluff, until Cairne visited Icecrown where Kel was killed during an assassination attempt on Cairne. But the Lich King saw immense potential and strength in this brave Tauren that fought to defend Cairne. The Lich King stole Kel's body and he was risen as a powerful Death Knight. For over a year he served under the banners of the Scourge, until the Lich King was defeated. As Highlord Bolvar Fordragon took Ner'zhul's armor and imprisoned the Scourge, he was able to free many minds from the Lich King's grasp, Kel Frosthoof was one of them. He has now returned to the Horde, trying to heal the scars in his soul. Now his mind is turned, destroying everything that threatens the Living.
Can learn Animate Dead, Death Pulse, Chilled to the Soul and Blizzard.
Special Ability: Kel can raise the Shadow of Death that will tear enemies' soul apart if it gets close.
The WarriorMaxx Rocmane The Warrior: Maxx was a little known name before the events that occurred after the Cataclysm. After that he has been seen all over Azeroth, defending those who need it most. His brutal strength but kind personality has been noticed by many villages around The Eastern Kingdoms and Kalimdor lately. After he heard whats happening on Vedok Isle he met with the Horde's army offered his skills. "What is more important than defending the world you live in from utter destruction?" - Maxx Rocmane
Can learn Shattering Throw, Heroic Strike, Thunder Clap and The Beast Within.
Special Ability: Chance to smash the ground, dealing AoE damage to nearby enemies.
The PaladinKeira Lightbringer The Paladin: Keira was once a promising Mage apprentice, but one day she was approached by what seemed like a crazed old priest. The priest said that she had to turn her ways and join the Silver Hand, because she was one of the key persons who would defend Azeroth from utter destruction. She refused to listen to the madman and told him that the ways of Arcane was her destiny. But the Light was resilient and asked her to turn to the teachings of the Light through signs and dreams. After months the Light succeeded and she joined the Silver Hand. She has become a strong Paladin, but has always doubted if the crazed priest was right, but after she heard of the events on Vedok isle, she is now certain that this is her destiny, defending Azeroth as a Paladin.
Can learn Holy Birds, Judgement, Holy Storm and Flash of Heaven.
Special Ability: All friendly units around Keira get bonus armor as long as they stay close to her.
The Battle MageAisha The Battle Mage: Aisha was a former master of arcane in the Draenei Circle of Magic in Shattrath City, Outland. After the Horde and the Alliance defeated Illidan Stormrage in the Black Temple, she was so thankful by the two factions that she felt she had to return the favor when the Lich King invaded Azeroth. She aided both factions up to the events that defeated the Lich King. After the fall of the Lich King she decided to head home to Outland, but then Deathwing broke out... She was among the first to be asked to rally in Defense of the World Pillar, and she did not hesitate to do so.
Can learn To the Twisting Nether, Walk of Magi, Arcane Missiles and Arcane Blasts.
Special Ability: Aisha can hasten a target friendly unit's attack and movement speed for a short period of time.
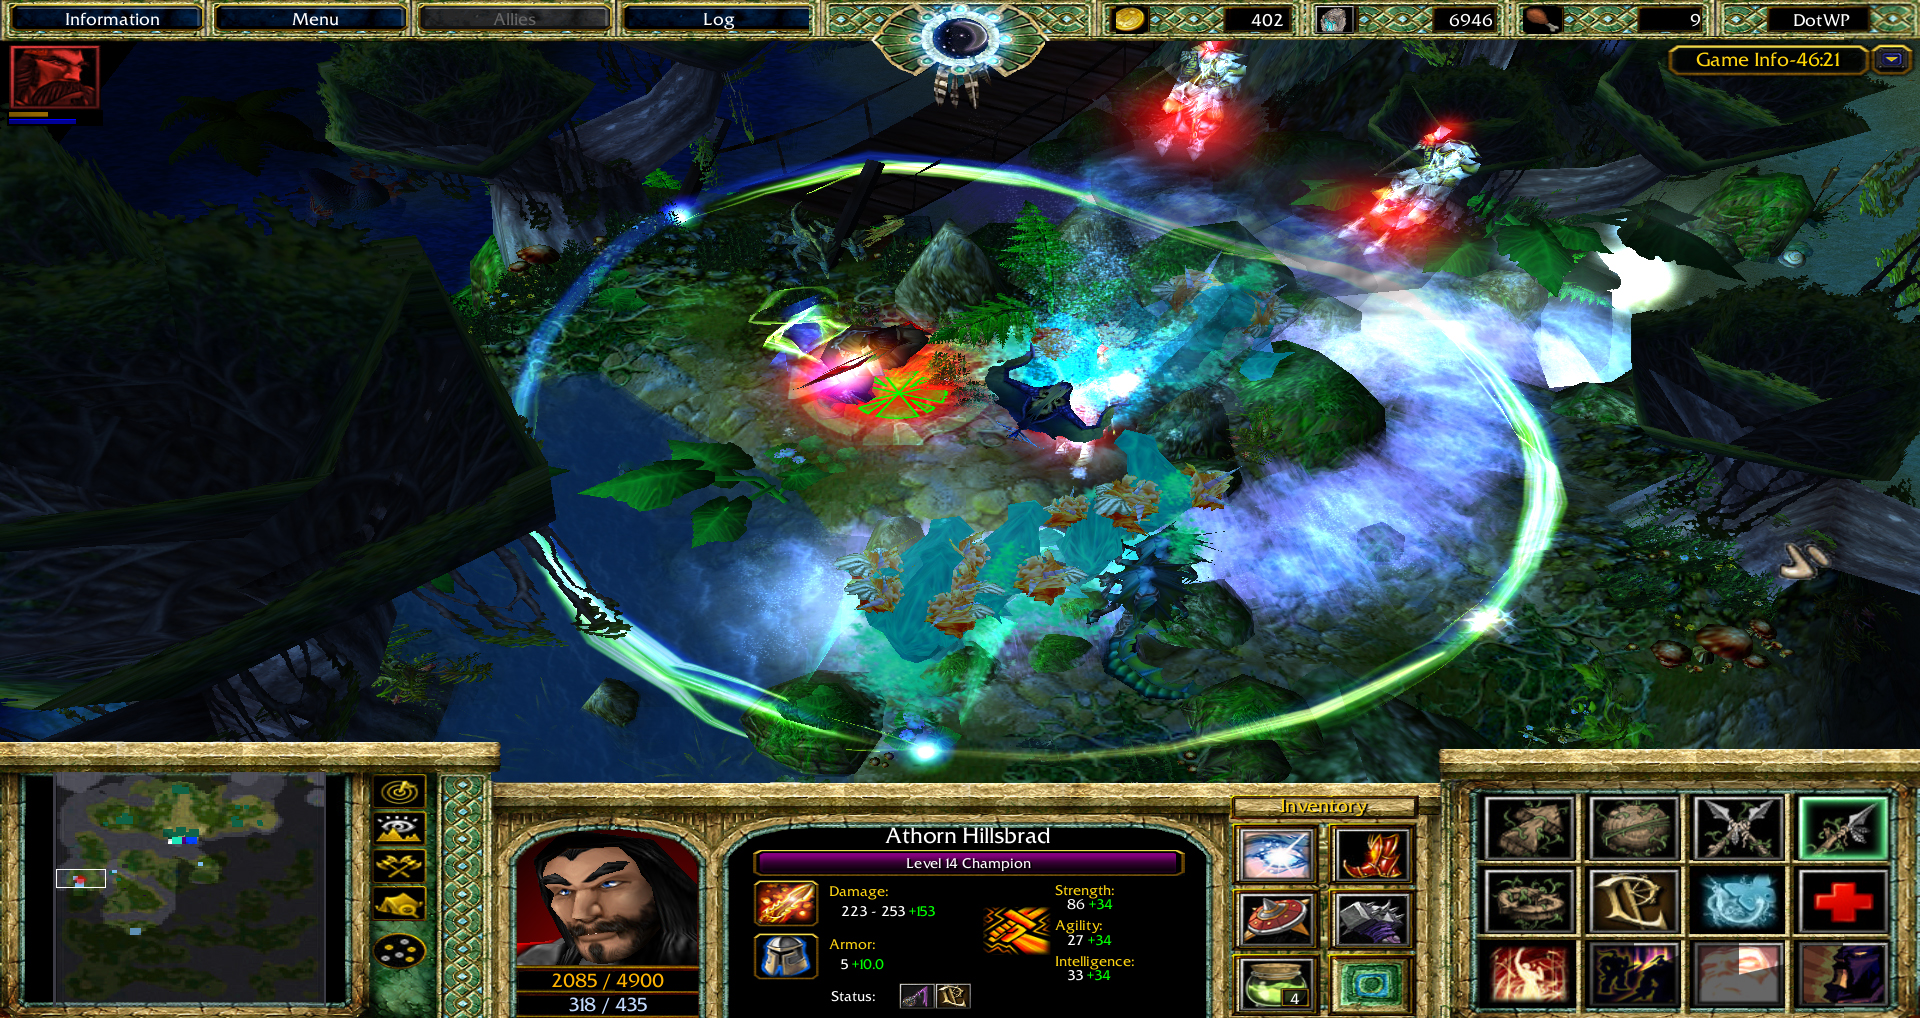
The ChampionAthorn Hillsbrad, Champion of the Alliance: Kidnapped by Grutom, an orcish gladiator trainer, as a teenager, the life of slavery was the only life Athorn remembered. Over the years he became a strong warrior and had been awarded the title of Champion. One day that changed his life was when he met King Varian Wrynn in the arena. Varian had been taken as a slave and had to defeat Athorn to be kept alive. The two of them quickly agreed to kill the guards and escape to Stormwind. By boat from Ratchet to Booty Bay they were barely able to make it home to Stormwind alive. After the return Athorn was titled Champion of the Alliance, for saving King Varian Wrynn's life.
Can learn Victory Rush, Comradeship, Summon Lordaeron Spectre and Warcry.
Special Ability: Increases movement and attack speed of nearby friendly units. Athorn's two-handed sword also deals AoE damage to enemies.
These are the units that can be bought from the Offensive Headquarter. Every unit got their strong and weak sides.
-Footman - Versatile foot soldier. Can use the Defend ability to reduce incoming Piercing attacks.
-Blood Elf Archer - Basic long-ranged archer with light armor. Got the Shadow Meld ability.
-Druid - Maneuverable spellcaster. Can cast Faerie Fire, which reduces armor and gives vision of an enemy unit. Can also cast Cyclone, which tosses the target unit up in the air, immobilizing it for a few seconds.
-Witch Doctor - Supporting spellcaster. Can cast Heal and Healing Totem to nourish friendly units' wounds.
-Sorcoress - Versatile spellcaster with freezing attack. Can initially cast Slow, which decreases movement and attack speed on enemy units. Can also cast Invisibility and Polymorph.
-Blademaster - Brutish orc warrior with low HP but high melee damage. Have the ability to avoid enemy attacks and make critical strikes.
-Rhonin Knight - Alliance's elite unit. Massive HP and armor and medium damage.
-Shaman - Horde's elite unit. Massive damage and the Bloodlust ability, medium HP.
These are the units the Deathwing players can buy, and will be sent in the controll of Deathwing:
-Darktide Murloc - Simple melee unit.
-Twilight Warrior - Efficient warrior of the Twilight's Hammer. Medium armor with a melee weapon.
-Dark Iron Demolishers - Long-range siege weaponry. Exceptional damage versus the Gate of Deepholm, but slow and vulnerable.
-Darktide Turtle - Strong unit with high HP and armor, but can only attack the Deepholm Gate.
-Glopgut Ogre - Ogre from the Twilight Highlands. This powerfully built Ogre can crush lesser beasts with his bare hands. Has Taunt, Bash, and Endurance Aura.
-Twilight Sky Dominator - Inspired by the zeppelin, this flying machine is capable of dropping powerful bombs down at enemies.
-Couatl - Light agile unit that can cast Abolish Magic. In addition, have a 75% chance to evade incoming attacks.
-Darktide Myrmidon - Powerful melee unit. Burns enemies' mana for every attack, got the Naga Slime ability aswell.
The players allied with Deathwing the Destroyer can also choose between 8 different units to put in their squad. Unlike the wave units, which you can't controll, these squad units can be controlled by the player and these units gather gold from their kills. The squad units cost food and a lesser amount of gold, so when your squad units die you can hire new ones. Weaker units cost less than the strong ones, currently the food cap is 20.
-Snap Dragon (3 Food) - Light naga unit with a short ranged attack that slows down enemies. Also has a very high movement speed, making it a perfect flanking unit.
-Naga Royal Guard (11 Food) - Incredibly powerful melee unit. Has Resistant Skin, which reduces the duration of negative spells, Frost Bolt, which stuns a target enemy unit, Crushing Wave, which deals damage in a line, and Heart of the Ocean, which summons tiny water elementals that can heal nearby friendly units.
-Massive Darktide Turtle (20 Food) - A powerful turtle that can devour enemy units. Good at destroying enemy buildings. Has Hardened Skin, which reduces damage taken, and Spiked Shell which deals damage to enemy melee attackers. And masses of armor to defend it on its path to the Deepholm Gate.
-Darktide Juggernaut (13 Food) - Naga unit with a heavy shell that defend it against any damage source. Its attacks is so powerful that it has a chance to stun the attacked enemy.
-Naga Siren (4 Food) - Powerful spellcaster. Can initially cast Parasite, which damages an enemy unit over time and can spawn a Watery Minion from their corpse. Can also cast Frost Armor, and Cyclone.
-Sea Elemental (3 Food) - Medium ranged water elemental that can Bash opponents. Splits into two new elementals when slain.
-Molten Beast (4 Food) - Magma beast inspired by Deathwing The Destroyer, spawned in molten rage. Medium amount of HP, armor and attack damage. Also has the ability to burn small amounts of mana.
-Guardian of the Twilight (13 Food) - Heavy melee unit. Got the Disease Cloud ability and Cannibalize.
-Faceless One Deathbringer (8 Food) - Heavy ranged unit that hurls bolts of chaos. Can cast Silence and Animate Dead.
-Twilight Cultist (4 Food) - Essential spellcaster. Can initially cast Raise Shadow of Death on corpses. Can also cast Unholy Frenzy and Cripple.
-Molten Giant (10 Food) - Massive melee unit with a lot of HP. Has Taunt, Resistant Skin and Hardened Skin.
All the bosses gets their base HP increased heavily for every Earthern Ring player active, tips and shared visual from the bosses is activated for -easy and -normal mode, deactivated for -hard and -veryhard.
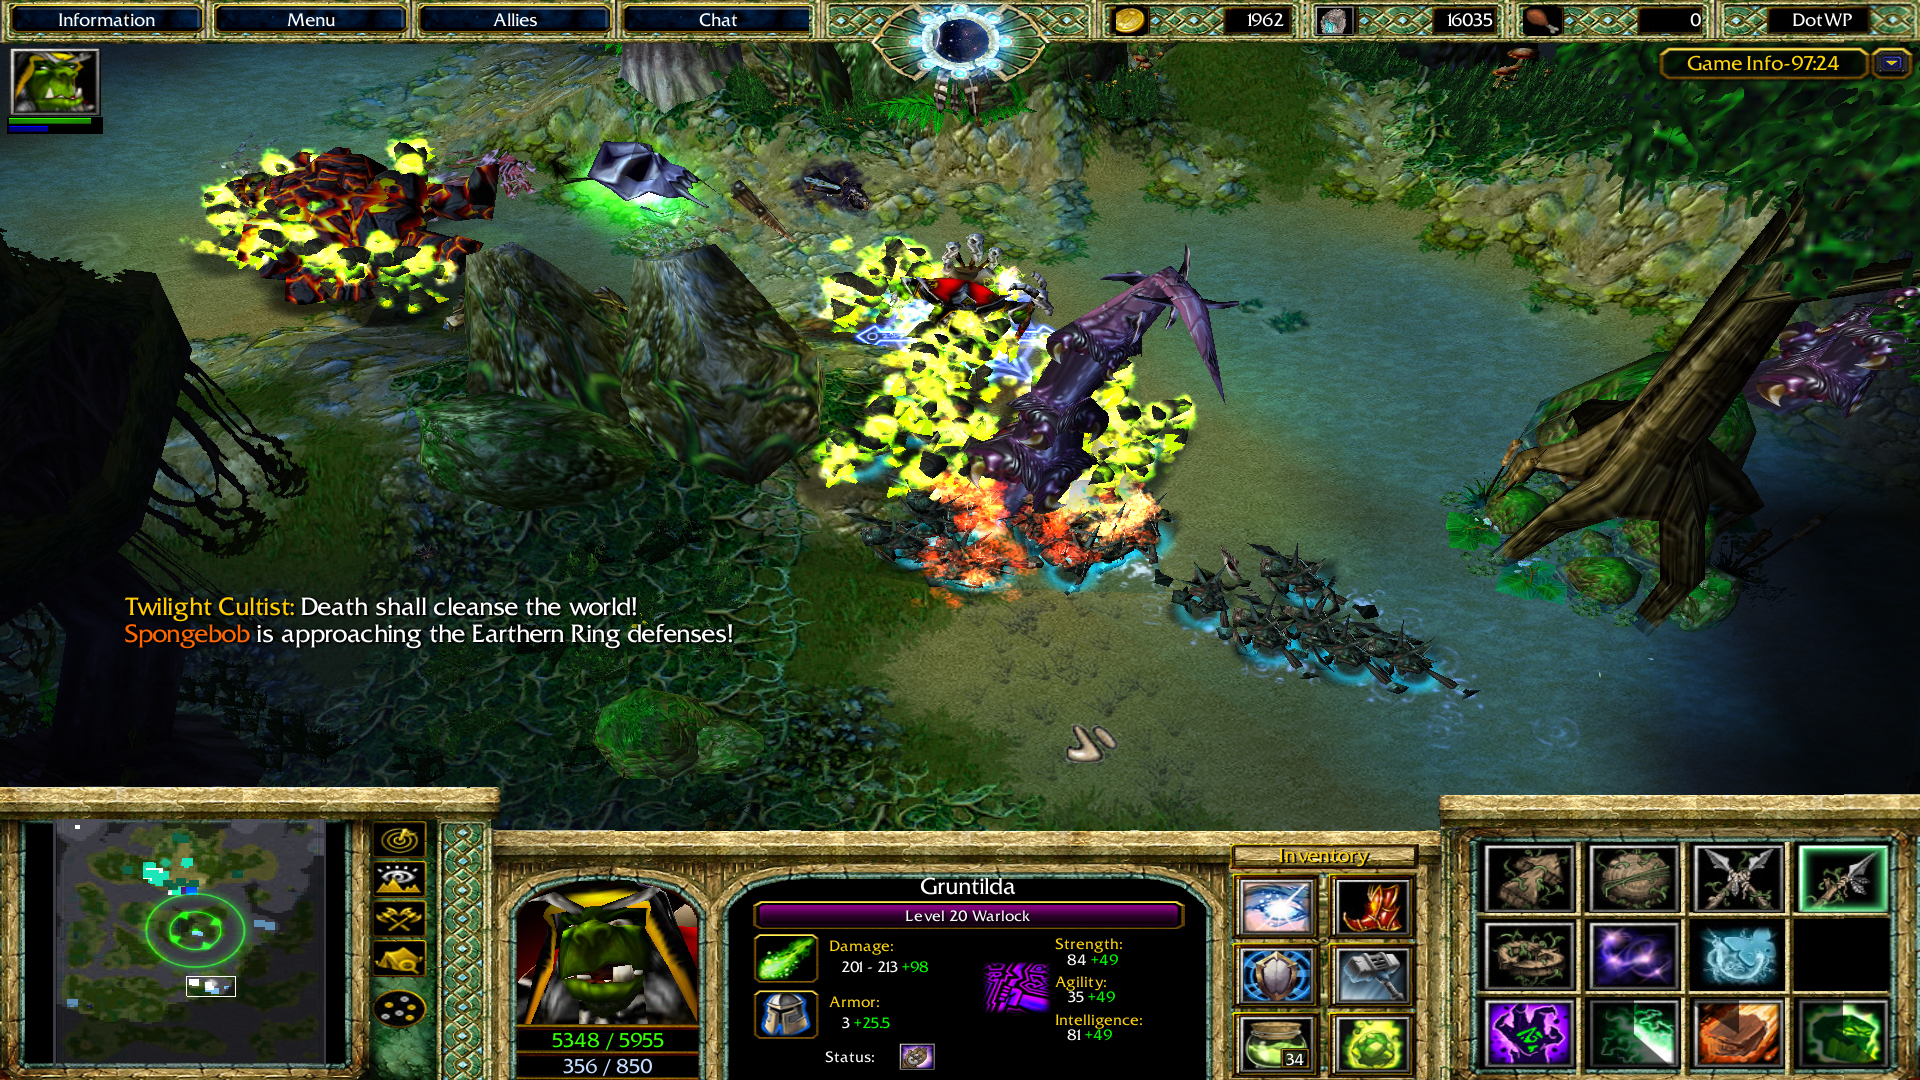
-Spongebob - Elite unit that spawns until the fight against Deathwing starts. He got a lot of HP and armor and his only goal is to destroy the Gate of Deepholm, kill him before he gets too close, because he deals heavy siege damage. He will cast rupture on units and heroes that attack him. Rupture forces you to stand still, cus if you move you loose heavy amounts of HP, watch your buffbar!
-Iso'rath, Servant of the Old Gods - Monstrous creature from the depths that spawn in the middle of The Earthern Ring base with 2 tentacles for every active Earthern Ring player, he also heals 1% HP for every Earthern Ring Player active every 4th second, making it impossible to solo him as one player if you are 4 Earthern Ring players. This boss has to be nuked, because he spawns new tentacles every few seconds, which can evolve to a serious number if left unchecked. Iso'rath spawns after the first base(s) is destroyed.
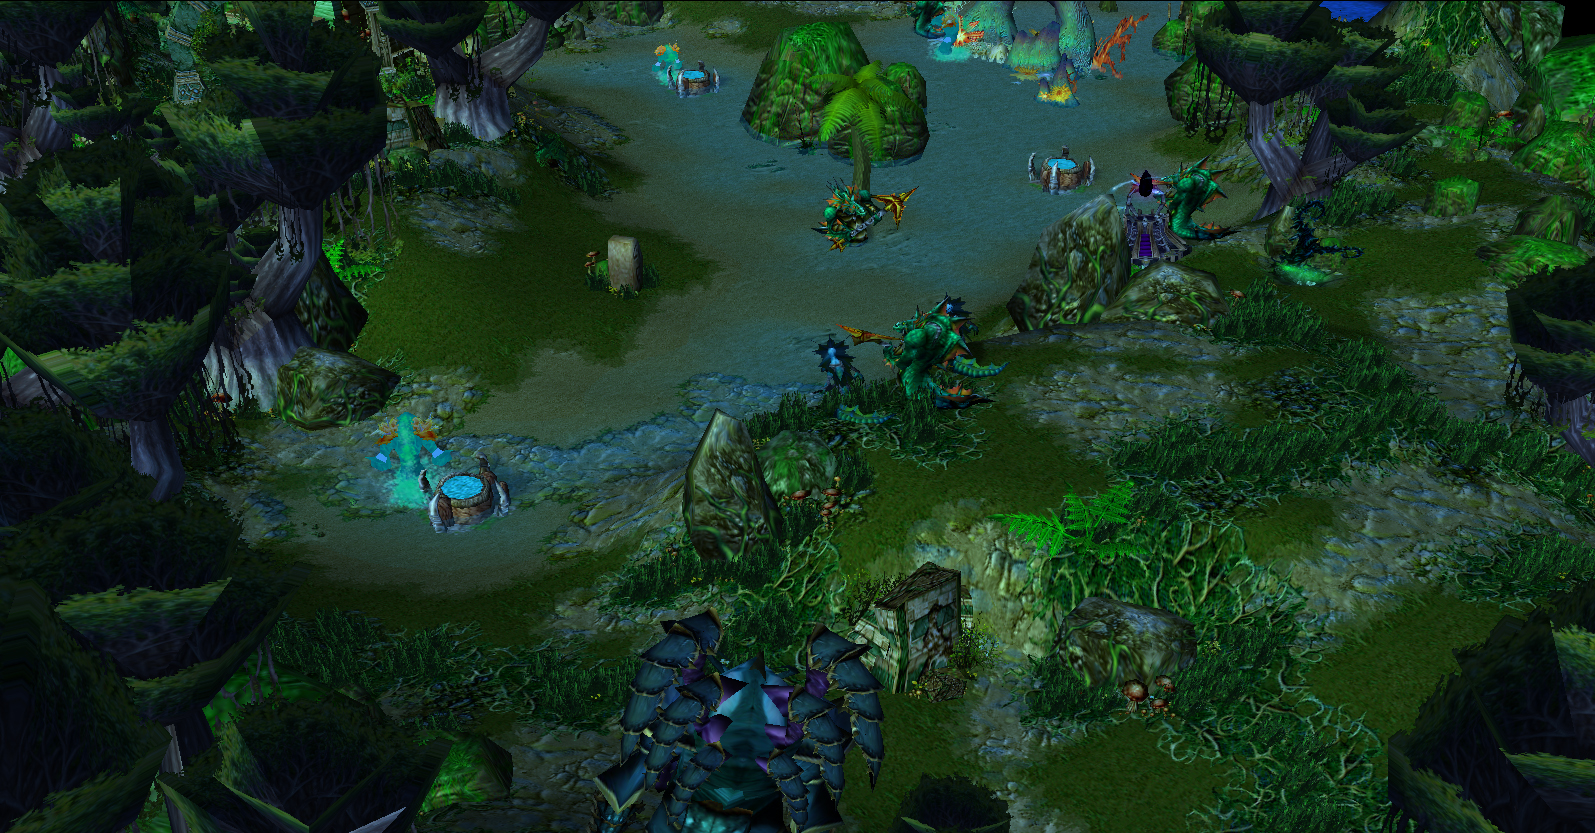
-Lady Vashj - She is surrounded by small and dangerous Makruras (1 for every Earthen Ring player active), which do massive damage if they get close to you. However the Makruras move very slowly, so you can avoid their attacks. She will cast a powerful whirlpool as often as she can, which forces you to keep distance for a few seconds. She is located in the middle of Vedok Isle, in the "swamp", and she gets vulnerable after you take out the 2nd level of base(s).
-Deathwing the Destroyer - The corrupted Earth Warder wants to destroy the World Pillar and Azeroth with it, so the Old Gods can be free. This bossfight requires a lot of movement, because every 15th second flames spawns at the position of Deathwing, burning every enemy close the the fires, drag Deathwing a few yards away to avoid being damaged. Deathwing also spawns 1 Magma Elemental at the location of every Earthern Ring Hero every minute, they follow the Hero slowly so you can avoid being burned. Deathwing will shoot out a fiery missile at a random attacking unit, the missile will circle around the target unit, forcing friendlies of the target unit to spread out, avoiding the missile. The last spell is the most dangerous; "Molten Rage", this spell will damage every unit around deathwing for 500 every second, the area this spell works in is small so you can move out of it fast.
Deathwing also lifts off and start flying to another location on the map, every 2min.
-Spongebob - Elite unit that spawns until the fight against Deathwing starts. He got a lot of HP and armor and his only goal is to destroy the Gate of Deepholm, kill him before he gets too close, because he deals heavy siege damage. He will cast rupture on units and heroes that attack him. Rupture forces you to stand still, cus if you move you loose heavy amounts of HP, watch your buffbar!
-Iso'rath, Servant of the Old Gods - Monstrous creature from the depths that spawn in the middle of The Earthern Ring base with 2 tentacles for every active Earthern Ring player, he also heals 1% HP for every Earthern Ring Player active every 4th second, making it impossible to solo him as one player if you are 4 Earthern Ring players. This boss has to be nuked, because he spawns new tentacles every few seconds, which can evolve to a serious number if left unchecked. Iso'rath spawns after the first base(s) is destroyed.
-Lady Vashj - She is surrounded by small and dangerous Makruras (1 for every Earthen Ring player active), which do massive damage if they get close to you. However the Makruras move very slowly, so you can avoid their attacks. She will cast a powerful whirlpool as often as she can, which forces you to keep distance for a few seconds. She is located in the middle of Vedok Isle, in the "swamp", and she gets vulnerable after you take out the 2nd level of base(s).
-Deathwing the Destroyer - The corrupted Earth Warder wants to destroy the World Pillar and Azeroth with it, so the Old Gods can be free. This bossfight requires a lot of movement, because every 15th second flames spawns at the position of Deathwing, burning every enemy close the the fires, drag Deathwing a few yards away to avoid being damaged. Deathwing also spawns 1 Magma Elemental at the location of every Earthern Ring Hero every minute, they follow the Hero slowly so you can avoid being burned. Deathwing will shoot out a fiery missile at a random attacking unit, the missile will circle around the target unit, forcing friendlies of the target unit to spread out, avoiding the missile. The last spell is the most dangerous; "Molten Rage", this spell will damage every unit around deathwing for 500 every second, the area this spell works in is small so you can move out of it fast.
Deathwing also lifts off and start flying to another location on the map, every 2min.
The Earthern Ring players with Defensive Headquarter, will have the chance to choose between 4 different tower types, each with further upgrades. Fire Towers deals low splashing damage. Lightning Towers deals frequent, medium single-target damage from a long distance. Tower of Auras has auras that enhance every friendly units fighting skills. Mage Towers got autocast abilities which enhance friendly units or reduce enemies' fighting skills.
-Basic Fire Tower. Can be upgraded to Advanced Fire Tower, and further upgraded to Tower of Burning Steppes or Tower of the Phoenix.
-Basic Lightning Tower. Can be upgraded to Advanced Lightning Tower, and further upgraded to Tower of Crushing Thunder or Tower of Piercing Thunder.
-Tower of Auras. Can be upgraded to either Tower of Devotion, Tower of Speed, Tower of Thorns or Tower of Energy.
-Mage Tower. Can be upgraded to either Tower of Bloodlust, Tower of Horror, Tower of Slow or Tower of Restoration.
Modes and Commands:
Deathwing's units will increase % of their base HP every minute based on the difficulty set. In addition, the difference between -easy and -veryhard is huge. A few things is that -veryhard reduces the Gate of Deepholm's HP heavily, gives you only 1 gold every 2 seconds, gives you lesser time in timers like "Guardian's Awakening" and "Wrath of Deathwing", increases HP every minute heavily compared to -easy.
Gold income: Players will get gold in the same way like DoS, gold every 2 seconds and gold from bounties. Gold income depends on mode set and the amount of players on the other side.
Use your gold: The Earthen Ring players can use their gold to buy items and units from Offensive HQ or towers from Defensive HQ.
Deathwing players can use their gold to buy units they can controll from Twilight Summoner or Naga Spawn, build towers with their shade Hand of Deathwing, or buy units that automaticly attacks the Gate of Deepholm from the Deathwing's Summoner. Units bought from Deathwing's summoner is cheaper than the ones bought from Twilight Summoner and Naga Spawn.
-si | Shared Income. This command shares all your gold income by 15% for each allied player you have
-roll | Roll. The roll command can be typed by all players. It allows for rolling on items or just for fun!
-pizza | Pizza Timer. Type this command to start a timer that will alert you in 15 minutes.
-elit | Extended Life Increasing Timer. Type -elit to increase Deathwing's units HP every 1min and 30th sec instead of every 1min.
-srs | Switch Revive System. Only available when there's more than one Earthen Ring player. Removes the Tombstone revive system and activates standard ressing system. Do not turn on standard ressing system while a Hero is under a tombstone, this will make it impossible to revive the Hero, if this happens, change back to Tombstone ressing system by typing -srs again.
-
 Gold Every Second
-

 Events
-


 Time - Every 2.00 seconds of game time
-
-

 Conditions
-

 Actions
-

 Set DeathwingPlayers = (All enemies of Player 11 (Dark Green))
-
Set EarthernRingPlayers = (All enemies of Player 10 (Light Blue))
-
 Player Group - Pick every player in DeathwingPlayers and do (Actions)
-
Loop - Actions
-
 Player - Add ((EarthernRingPlayersActive + 3) - DeathwingPlayersActive) to (Picked player) Current gold
-
 Camera - Set (Picked player)'s camera Field of view to 88.00 over 3.00 seconds
-
-
-
Player Group - Pick every player in EarthernRingPlayers and do (Actions)
-
Loop - Actions
-
Player - Add (Mode + 1) to (Picked player) Current gold
-
Camera - Set (Picked player)'s camera Field of view to 88.00 over 3.00 seconds
-
-
-
 Custom script: call DestroyForce(udg_DeathwingPlayers)
-
Custom script: call DestroyForce(udg_EarthernRingPlayers)
-
-
-
Very Hard
-
Events
-
Player - Player 1 (Red) types a chat message containing -veryhard as An exact match
-
-
Conditions
-
Actions
-
Set Mode = 1
-
Set DeathwingForceHPMultiplier = 4.00
-
 Game - Display to (All players) for 10.00 seconds the text: (Game mode is now set to |c00FF0000Very Hard|r. Deathwing's units' HP will increase by 4% every minute. 2gold/2sec for The Earthern Ring Heroes. + ((String(ShowGoldDeathwingGets)) + gold/2sec for Deathwing Players! Gate of Deepholm's HP is set to 5000!))
-
Player - Set Player 10 (Light Blue) handicap to ((Player 10 (Light Blue) handicap) + 30.00)%
-
Trigger - Turn off (This trigger)
-
Trigger - Turn off Easy <gen>
-
Trigger - Turn off Normal <gen>
-
Trigger - Turn off Hard <gen>
-
Trigger - Turn off Default <gen>
-
Trigger - Turn off Shadow of Death message <gen>
-
Trigger - Turn off Spongebob incoming <gen>
-
Trigger - Turn off Spongebob message <gen>
-
 Destructible - Set max life of Gate of Deepholm (Horizontal) 0009 <gen> to 5000.00
-
 Unit Group - Pick every unit in (Units of type Gnome Supply Carrier (Item Carrier)) and do (Unit - Kill (Picked unit))
-
-
Author's notes: I have moved on to music production and studying micro- and nanotechnology, so I will not update this map every often. Maybe I get an urge to sit down with the editor in a few months and make a lot of changes. But I think the game is very entertaining when playing with friends, so I will put this on pause a little.
Ideas that most likely will come in future updates:
-DeathwingPlayersOnly mode, summon warriors from the Twilight and nagas from the depths to destroy the Gate of Deepholm. Cenarius has been resurrected and will defend Azeroth's last defense with his life.
-DeathwingPlayersOnly mode, summon warriors from the Twilight and nagas from the depths to destroy the Gate of Deepholm. Cenarius has been resurrected and will defend Azeroth's last defense with his life.
Special Thanks To:
-All the people below ((X) is the number of resources the person has in "Azeroth Defenders: Defense of the World Pillar"):
Model/Skin: Kwaliti (Deathwing), Ganondorf (The Rock Elder), Dionesiist (Champion, Combat Priest, Pyromaster, Champion's Weapon), 67chrome (Blood Elf Archer, Paladin, Gnome Engineer), Kimberly (CritterTurtle), Red Shift (Dark Iron Blasters, Orc Shamans), l0w_kwaliti (Twilight Portal, Deathwing Felstalker), Werewulf (Darktide Murloc), shamanyouranus (Earth Totem, Fire Totem), WILLTHEALMIGHTY (CustomExplosion), xXMephistoXx (Crul'karok), Sunchips (Zin'rokh, Destroyer of Worlds), ironmaiden (Witch Doctor), sPy (CustomWaterMissile), dickxunder (Battle Mage), Usedwell (Aiur), Em! (Twilight Stone), M0rbid (CustomSelectionCircles), enjoy (Naga Siren), anarchianbedlam (TheRockElder's Missile Model), L_Lawliet (Molten Giant), zadelim (Death Knight), Dan van Ohllus (Bob-Omb), Ashenvale Golem (Guardian of Vedok), Ampharos_222 (Guardian of the Twilight)
Icon: Anachron (3), 67chrome (4), Mr.Goblin (3), shamanyouranus (3), dickxunder (2), zadelim (2), PeeKay (6), NFWar (5), oddsocks (1), Elainiel (2), CRAZYRUSSIAN (7), Army-of-Pandas (1), FrIkY (6), Destructor (1), bigapple90 (1), kola (2), SkriK (1), Hellx-Magnus (1), Dan van Ohllus (1), Naro (4), tonic (2)
Spells: aiDer (9), Maker (3), Deaod (2), Thanathos (1), Justify (1), -Berz- (8), Paladon (5), BlackHawk (2), Flood (3), Kricz (2), Marsal (1), baassee (1), kingarmor1 (1), Mantis_Style (2), xBlackRose (2), -JonNny (2), scorpion182 (2),
Check out all these artists' works on: www.hiveworkshop.com!
You found a resource of yours that is not credited for? My harddisk crashed in June, where I lost all credits up to that crash. PM me if there are missing credits for a resource.
Last Map Attachment Update: 05.10.2011 - 17:21
Map ProtectionThis map is unprotected, so everyone that wants, can learn from my project. But please don't steal or distribute my work. Thanks!
Attachments
Last edited:


