- Joined
- Jul 10, 2012
- Messages
- 1
I'm not sure if this has been done yet, but if this is a new idea I would like to
share it. I'm been lurking hiveworkshop over three years and have learned
alot from the members of this site. Here is my contribution to the map making
WC3 editor fanbase.
Why use water walls?
-easy simple to use visual effect
-can be integrated into any map
-one way to manipulate WC3 cliffs
Basic knowledge about WC3 cliffs and relation with water:
-individual cliffs can have either 1 or 2 levels
-water is "always" below land
-shallow water is 1 cliff level deep
-deep water is 2 cliff levels deep
-water walls are created by a bug when using deep water
The magic number is 2
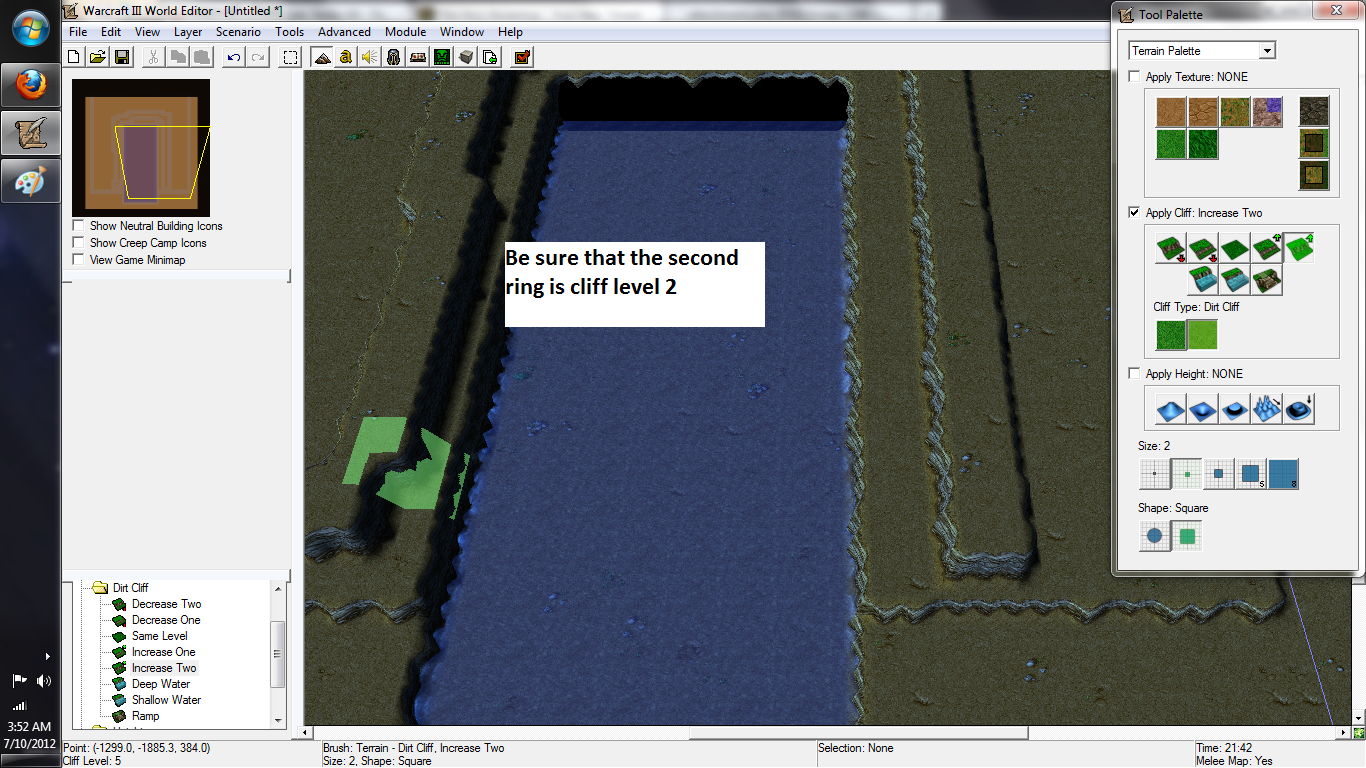
-when creating a water wall it must be made on cliffs level 2 cliffs
-because water is "below" land, the water wall MUST have one patch of high cliff land
Water walls are a BUG
-this means that water walls are actually exploits of the elevation mechanic
-the general rule is: wherever the water wall is created will be the most buggy
-thus where you CREATE the water wall should NOT be where you want to water wall to be LOCATED
-water walls can only be created on existing water
How to make a water wall:
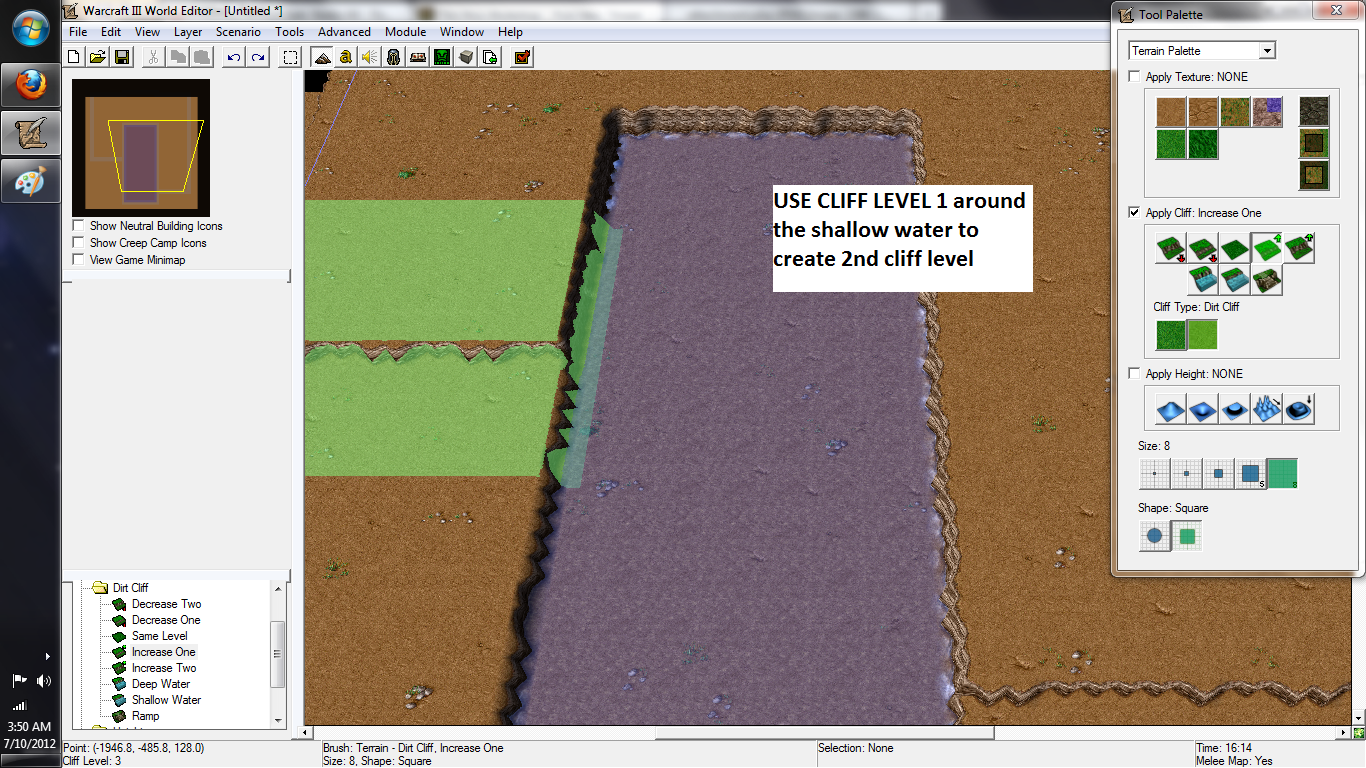
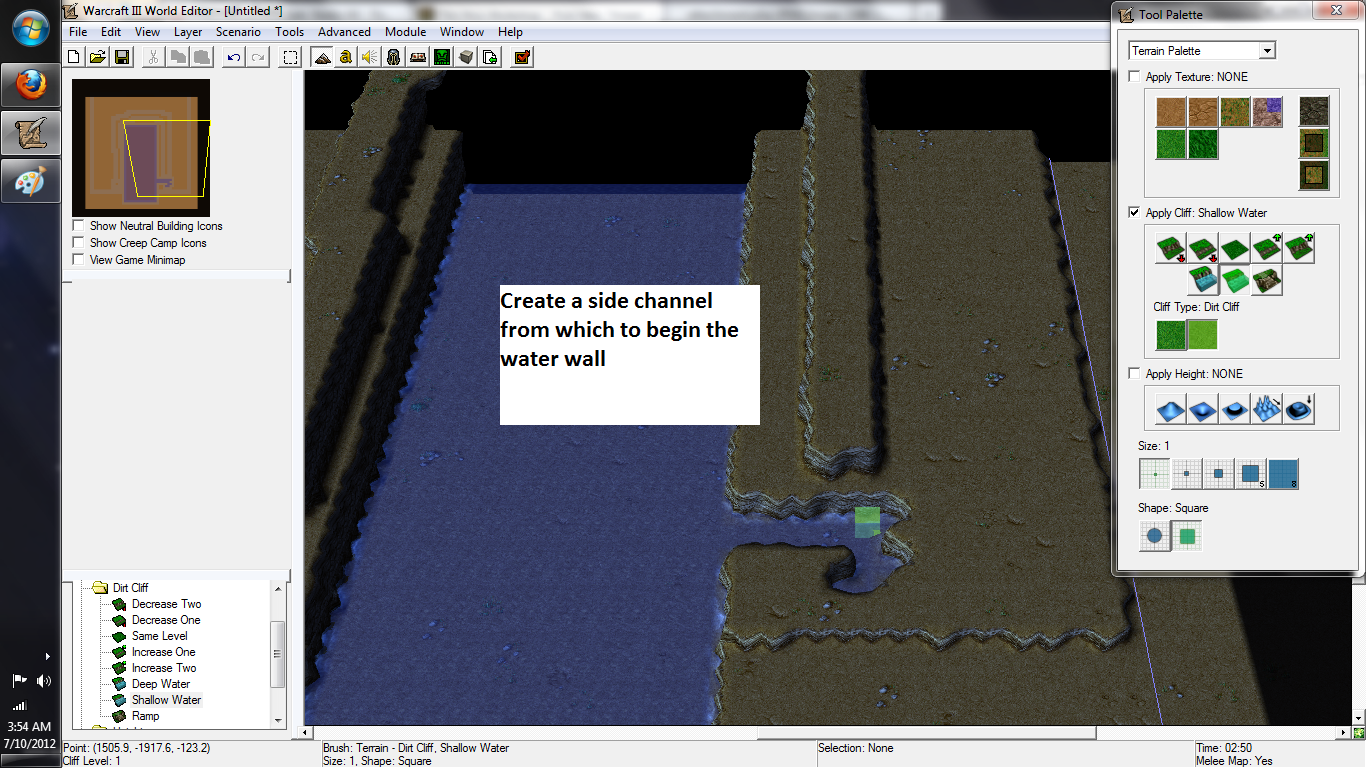
-create a patch of shallow water
-create a patch a path of ground 2 cliff levels higher (AWAY FROM WHERE YOU WANT THE WALL)
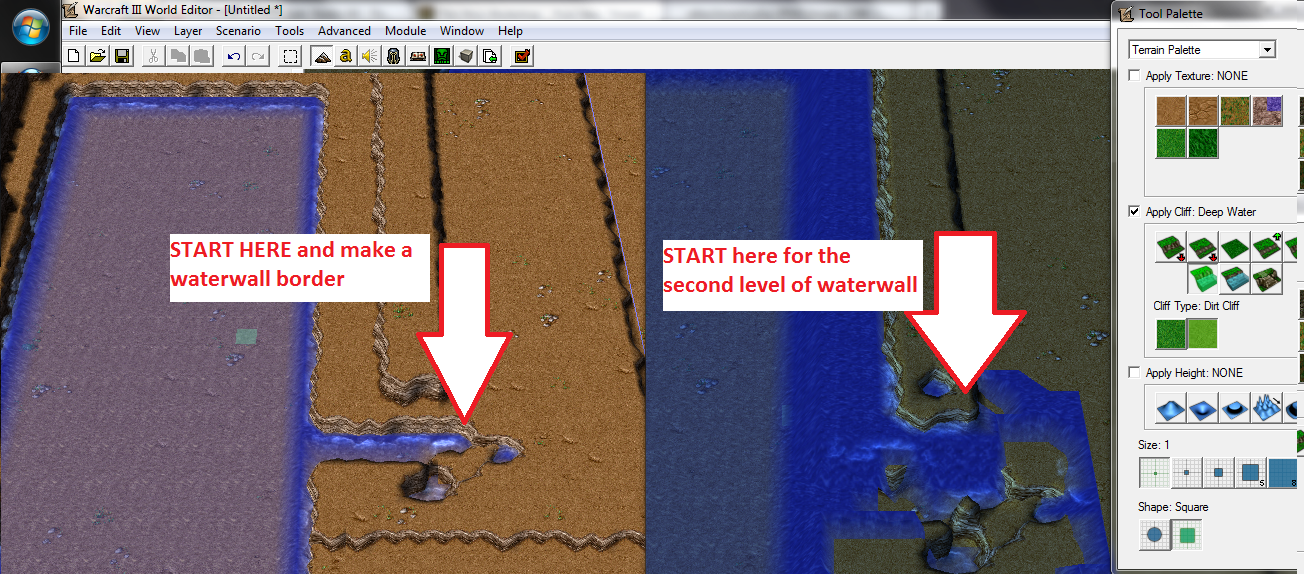
-on that cliff terrain create deep water, click hold and drag will you get the water wall
-polish up as needed
Picture tutorial:
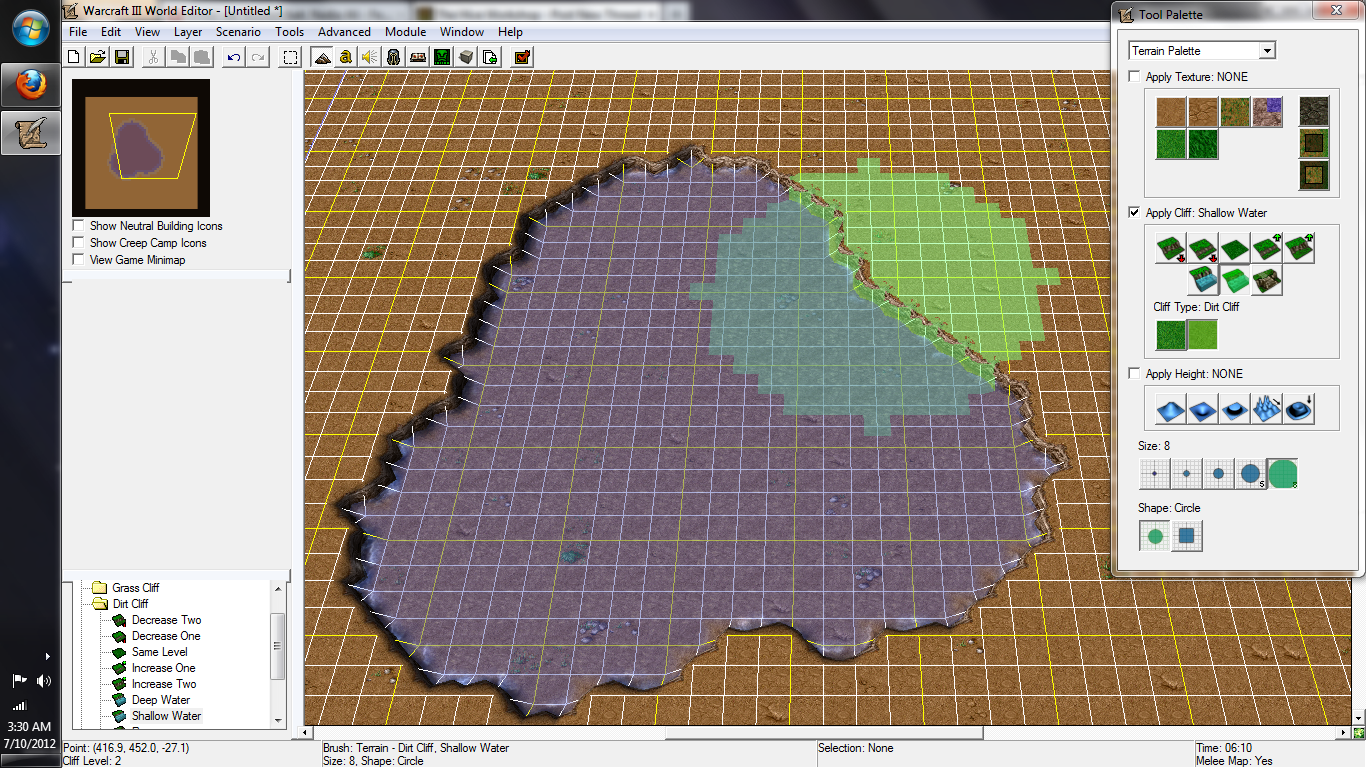
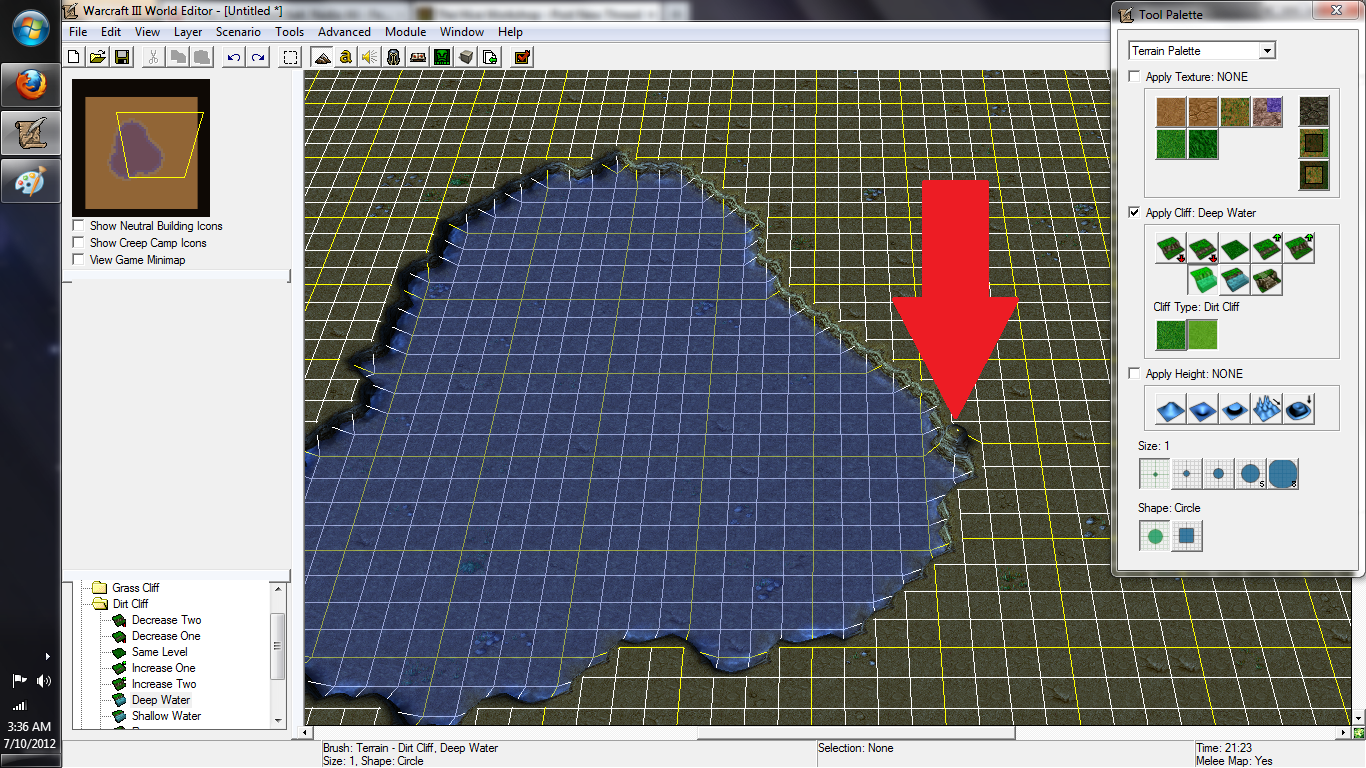
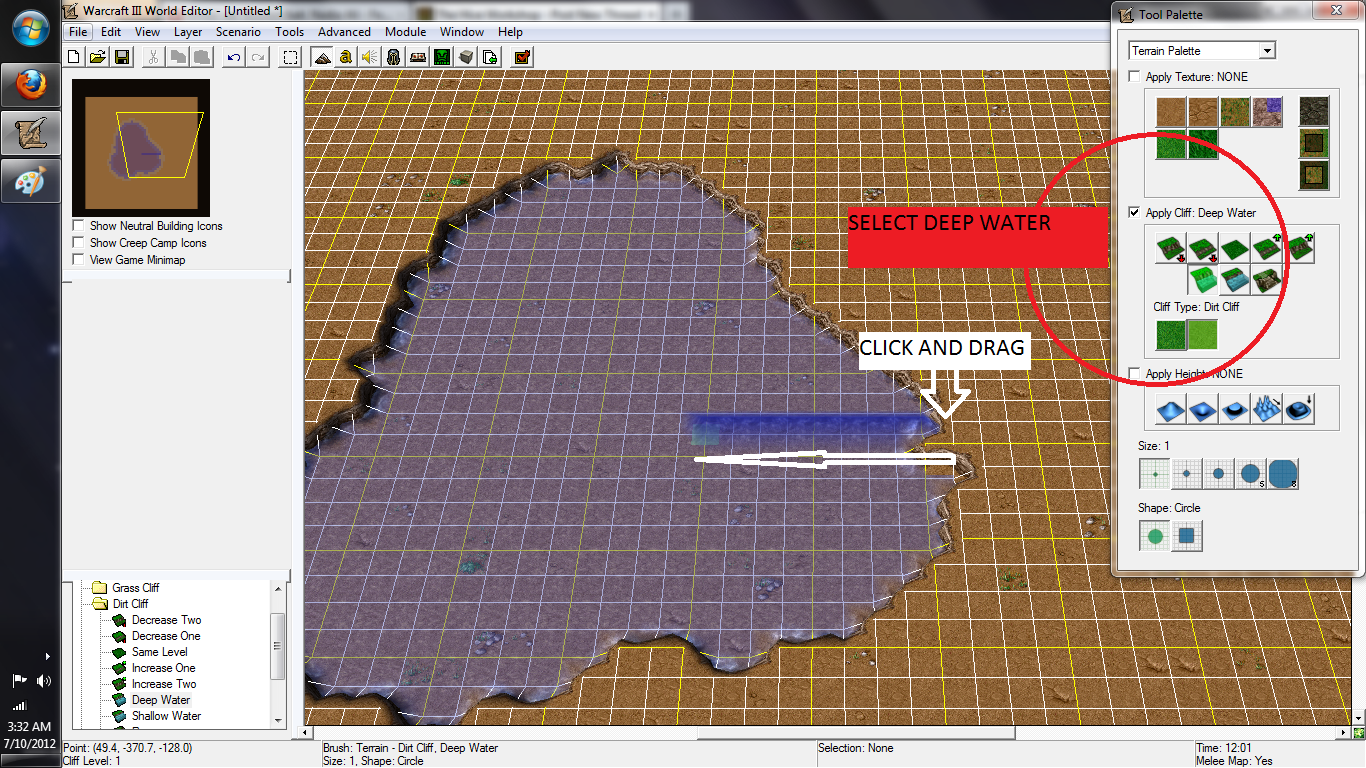
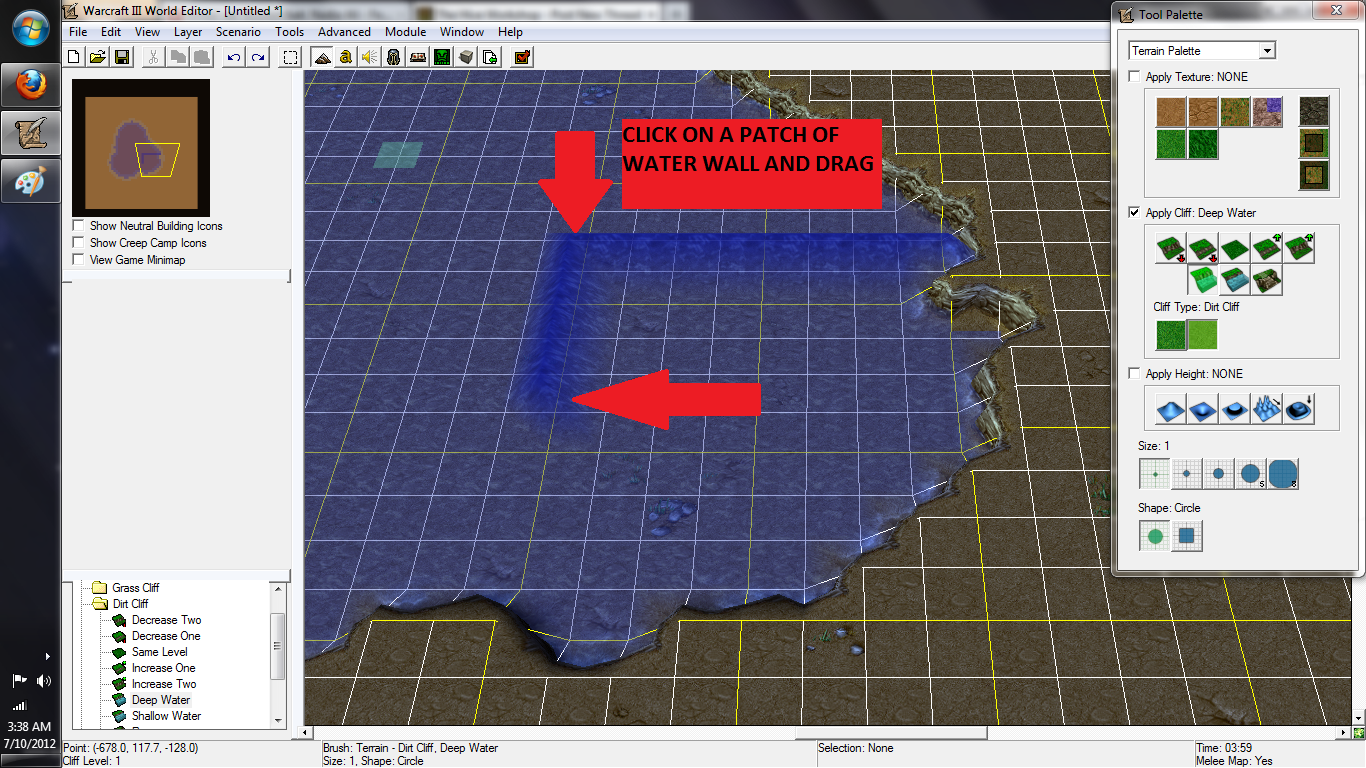
NOTE: This part works on the shallow water below as well. So you can break down parts of your water wall. Simply click on the shallow water and drag it through the water wall.
Tips and Tricks:
-WORK SLOWLY, water walls are EXTREMELY buggy
-WORK IN SMALL PIECES, do not attempt to drag out a water wall over huge distances
-Use undo to fix mistakes and retry
Advanced water walling:
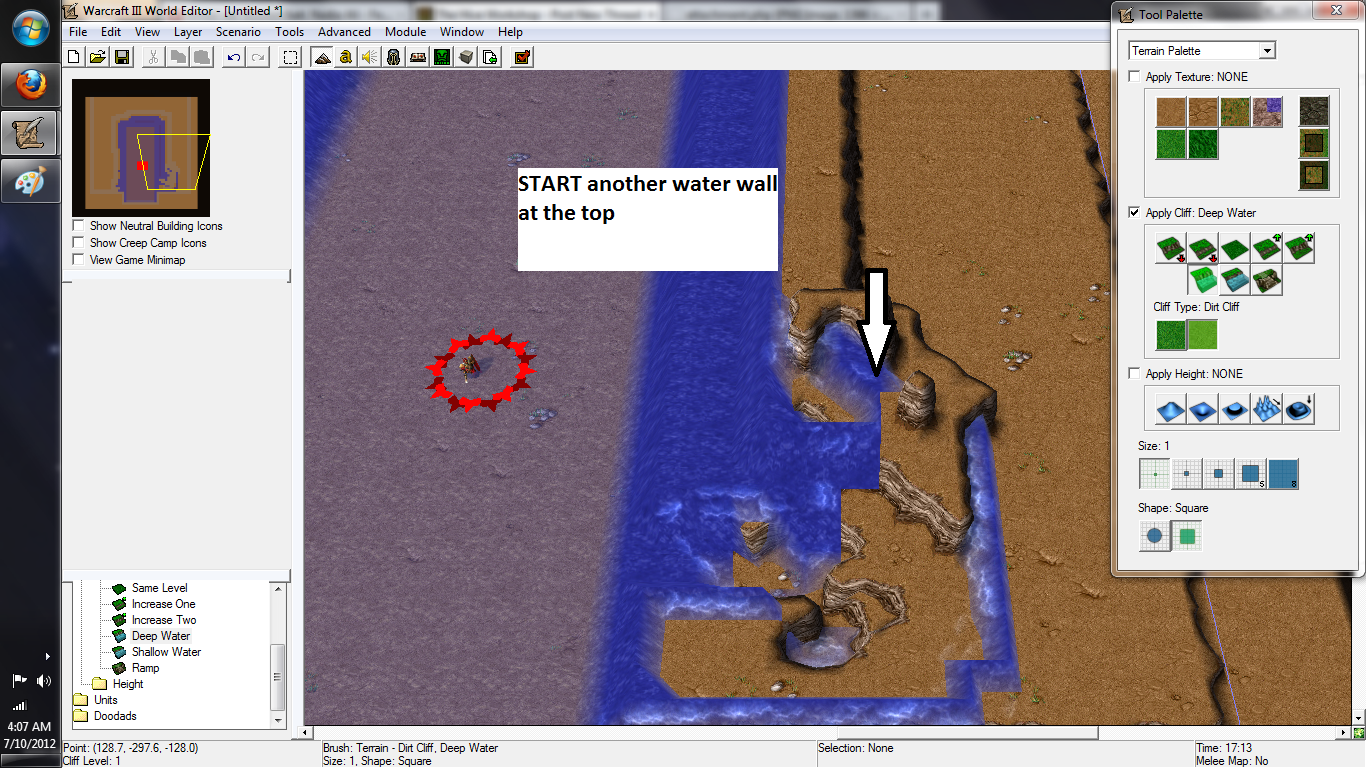
-MULTIPLE water walls can be stacked on top of each other for EPIC wall effects
-The same techniques and rules apply.
-ALWAYS begin water wall generation AWAY from where you want the finished product
Picture tutorial:
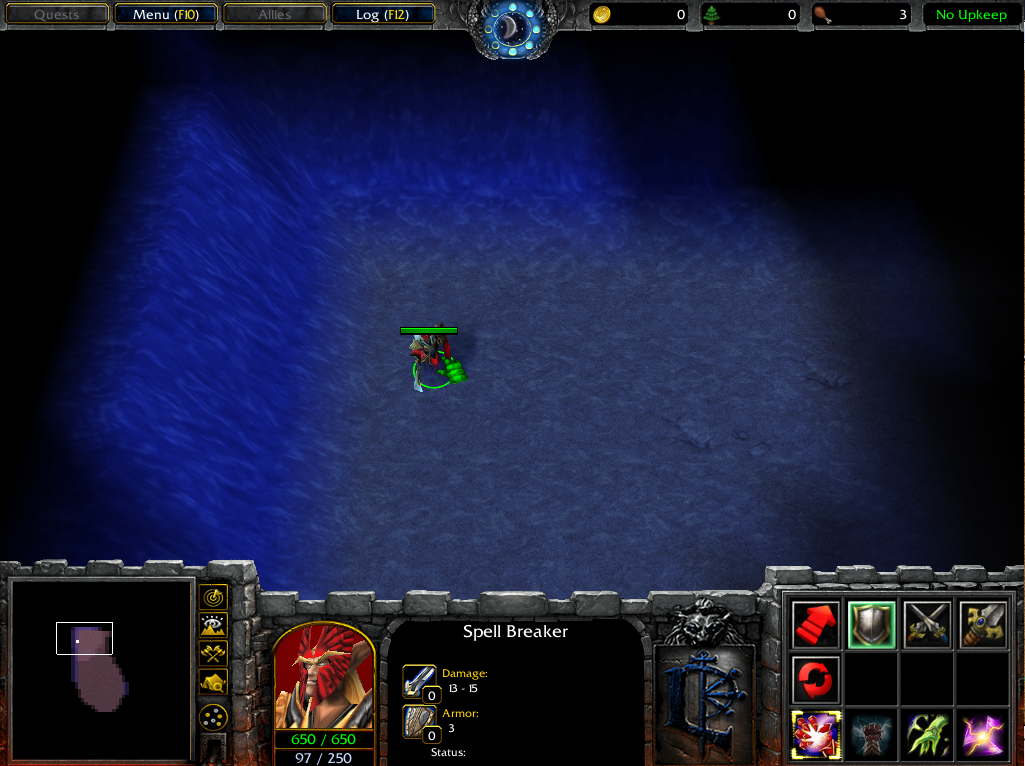
In Game View:
Best of luck in making water walls.
share it. I'm been lurking hiveworkshop over three years and have learned
alot from the members of this site. Here is my contribution to the map making
WC3 editor fanbase.
Why use water walls?
-easy simple to use visual effect
-can be integrated into any map
-one way to manipulate WC3 cliffs
Basic knowledge about WC3 cliffs and relation with water:
-individual cliffs can have either 1 or 2 levels
-water is "always" below land
-shallow water is 1 cliff level deep
-deep water is 2 cliff levels deep
-water walls are created by a bug when using deep water
The magic number is 2
-when creating a water wall it must be made on cliffs level 2 cliffs
-because water is "below" land, the water wall MUST have one patch of high cliff land
Water walls are a BUG
-this means that water walls are actually exploits of the elevation mechanic
-the general rule is: wherever the water wall is created will be the most buggy
-thus where you CREATE the water wall should NOT be where you want to water wall to be LOCATED
-water walls can only be created on existing water
How to make a water wall:
-create a patch of shallow water
-create a patch a path of ground 2 cliff levels higher (AWAY FROM WHERE YOU WANT THE WALL)
-on that cliff terrain create deep water, click hold and drag will you get the water wall
-polish up as needed
Picture tutorial:
NOTE: This part works on the shallow water below as well. So you can break down parts of your water wall. Simply click on the shallow water and drag it through the water wall.
Tips and Tricks:
-WORK SLOWLY, water walls are EXTREMELY buggy
-WORK IN SMALL PIECES, do not attempt to drag out a water wall over huge distances
-Use undo to fix mistakes and retry
Advanced water walling:
-MULTIPLE water walls can be stacked on top of each other for EPIC wall effects
-The same techniques and rules apply.
-ALWAYS begin water wall generation AWAY from where you want the finished product
Picture tutorial:
In Game View:
Best of luck in making water walls.
Attachments
-
 waterwall1.png1.4 MB · Views: 992
 -
 waterwall2.png1.3 MB · Views: 739
 -
 waterwall3.png1.3 MB · Views: 810
 -
 waterwall4.png1.2 MB · Views: 715
 -
 waterwall5.png1.3 MB · Views: 930
 -
 waterwall6.png1.2 MB · Views: 690
 -
 waterwall7.png1.1 MB · Views: 617
 -
 waterwall9.png1.3 MB · Views: 536
 -
 waterwall10.png1.5 MB · Views: 593
 -
 waterwall11.png1,013.3 KB · Views: 574


