- Joined
- Oct 31, 2009
- Messages
- 352

Special Effects - Manipulation and Modification (WIP)
In this tutorial I will go over some basic ways you can manipulate and modify special effects using only the WC3 editor. This tutorial was meant to teach beginners or people who are new to the World Editor tips and tricks regarding effects and was not meant for advanced users (though even the most advanced designers may learn something new).
Requirements
1. A basic understanding of effects
2. A basic knowledge of how to trigger
3. A basic knowledge of how to use the World Editor
4. A basic understanding of how to edit units and abilities
5. A basic knowledge of lightning effects and how they work
Table of Contents
1. Leaks
2. Dummy Units
3. Dummy Casts
4. Scale
5. Angle
6. Custom AoE Effects
7. Lightning Effects
Leaks
Special effects created in the WC3 editor need to be destroyed otherwise they can cause immense lag end-game. In order to remove special effects you must use the destroy command in the trigger editor. Additionally, if you create a special effect at a point, you must apply the position to a variable and then clear it after you are done so it does not permanently take up memory space.
The following is a function that creates a special effect at a point and clears both the effect and the point variable:
When you destroy an effect it doesn't immediately dissapear. It iether plays the death animation of the effect or approx. 5 seconds of its birth/stand animation. This becomes a problem if an effect model has a death animation but it displays nothing; as destroying the effect will give the appearance that the effect has dissapeared. The easiest way to deal with this is to set up a timer and destroy the effect after a pre-determined amount of time; like so:
Removing Point and Effect Leaks
Events
Unit - A unit Starts the effect of an ability
Conditions
Actions
Set TempPos1 = (Position of (Triggering unit))
Special Effect - Create a special effect at TempPos1 using Abilities\Spells\Human\ThunderClap\ThunderClapCaster.mdl
Custom script: call RemoveLocation(udg_TempPos1)
Countdown Timer - Start EffectRemoval as a One-shot timer that will expire in 5.00 seconds
Dummy units are an important aspect of effect manipulation that I will go over later in this tutorial. In order to clear dummy units you need to either remove the unit (which you will rarely do because most dummy units have locust which makes them difficult to refer to over extended periods of time) or give the unit an expiration timer as follows:
When a units expiration timer expires it will immediately remove the unit from the map, thus ensuring that dummy units don't stack up all over your map over the duration of the game.


Dummy Units
Much of what I will go over in this tutorial requires a knowledge of what dummy units are, how to create them, and how to use them. In order to facilitate your understanding I will go over step-by-step how to create a dummy unit.
What are dummy units?
Dummy units are a way of "cheating" in the world editor and going beyond the limited control that Blizzard gave us over the game. They are generally used in the following ways:
1. Casting a spell from an non-visible source
2. Creating an effect that can be manipulated in more ways than is allowed via effect-related triggers
How do I create a basic dummy unit?
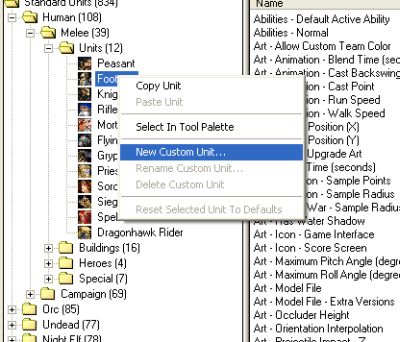
Step 1
Create a custom unit in the unit tab of the object editor
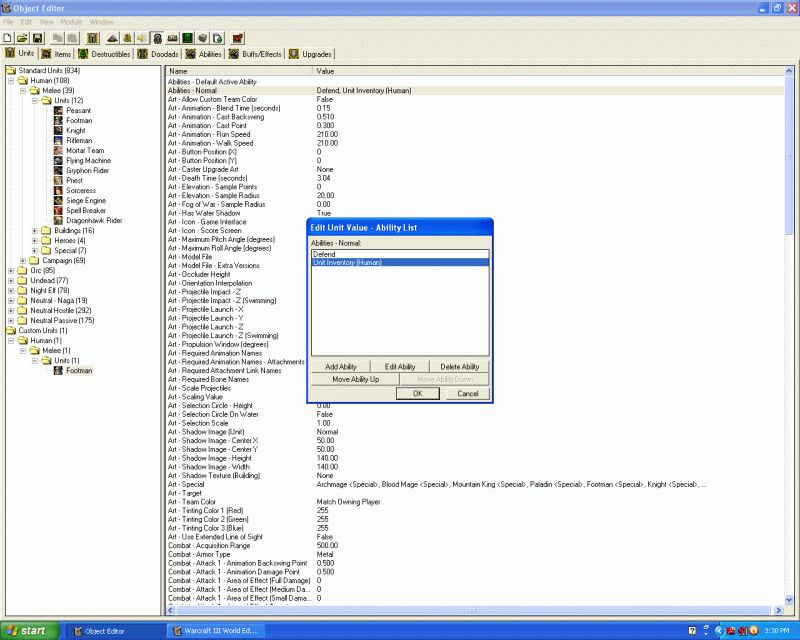
Step 2
Remove any abilities
Step 3
Add the locust ability to the unit

Step 4
Disable the shadow of the unit

Step 5
Disable the soundset of the unit

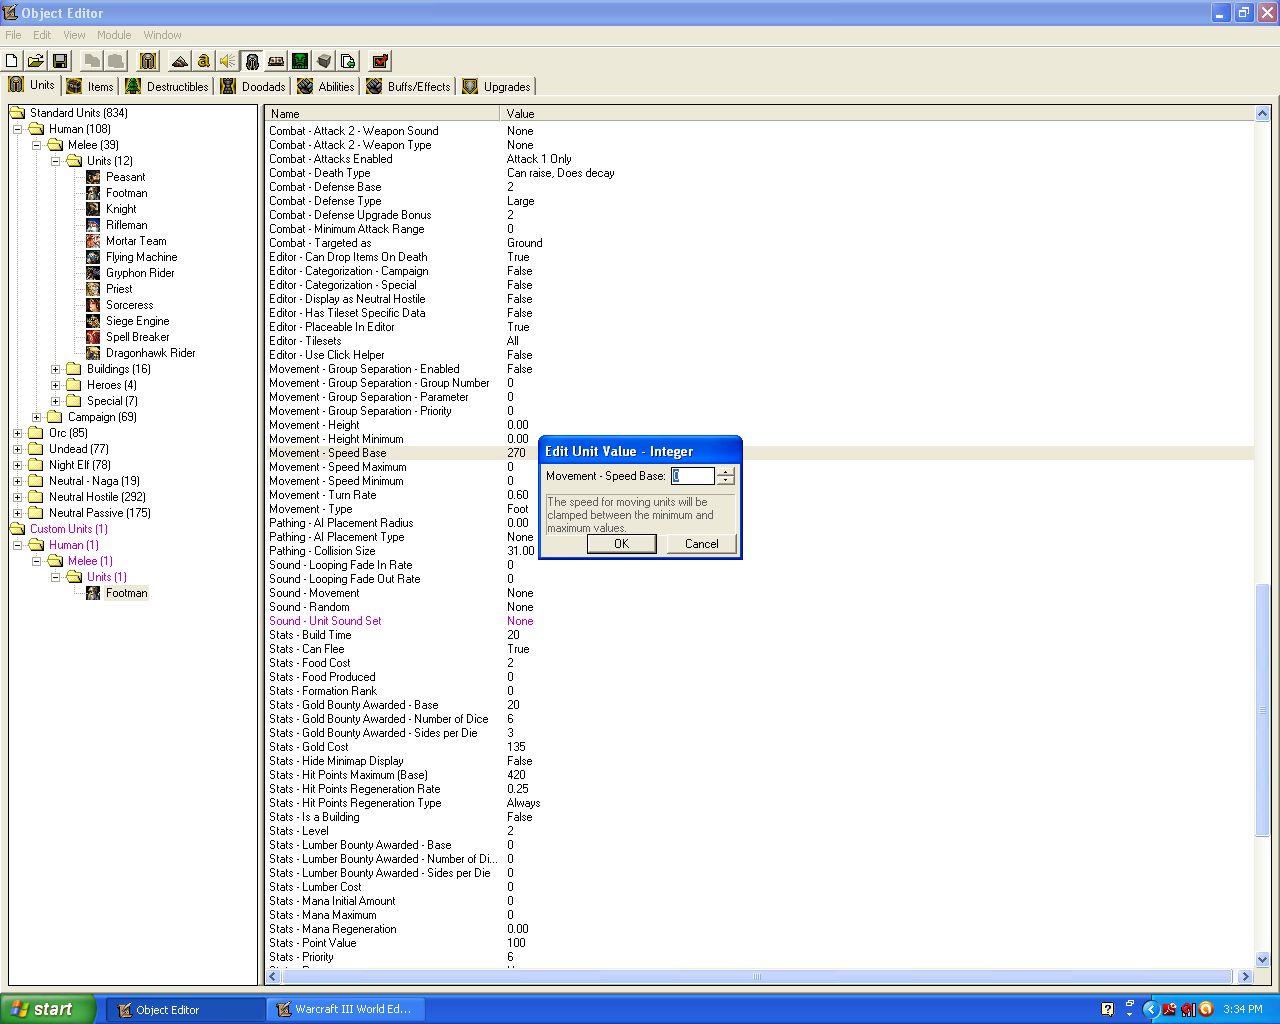
Step 6
Disable the movement speed of the unit
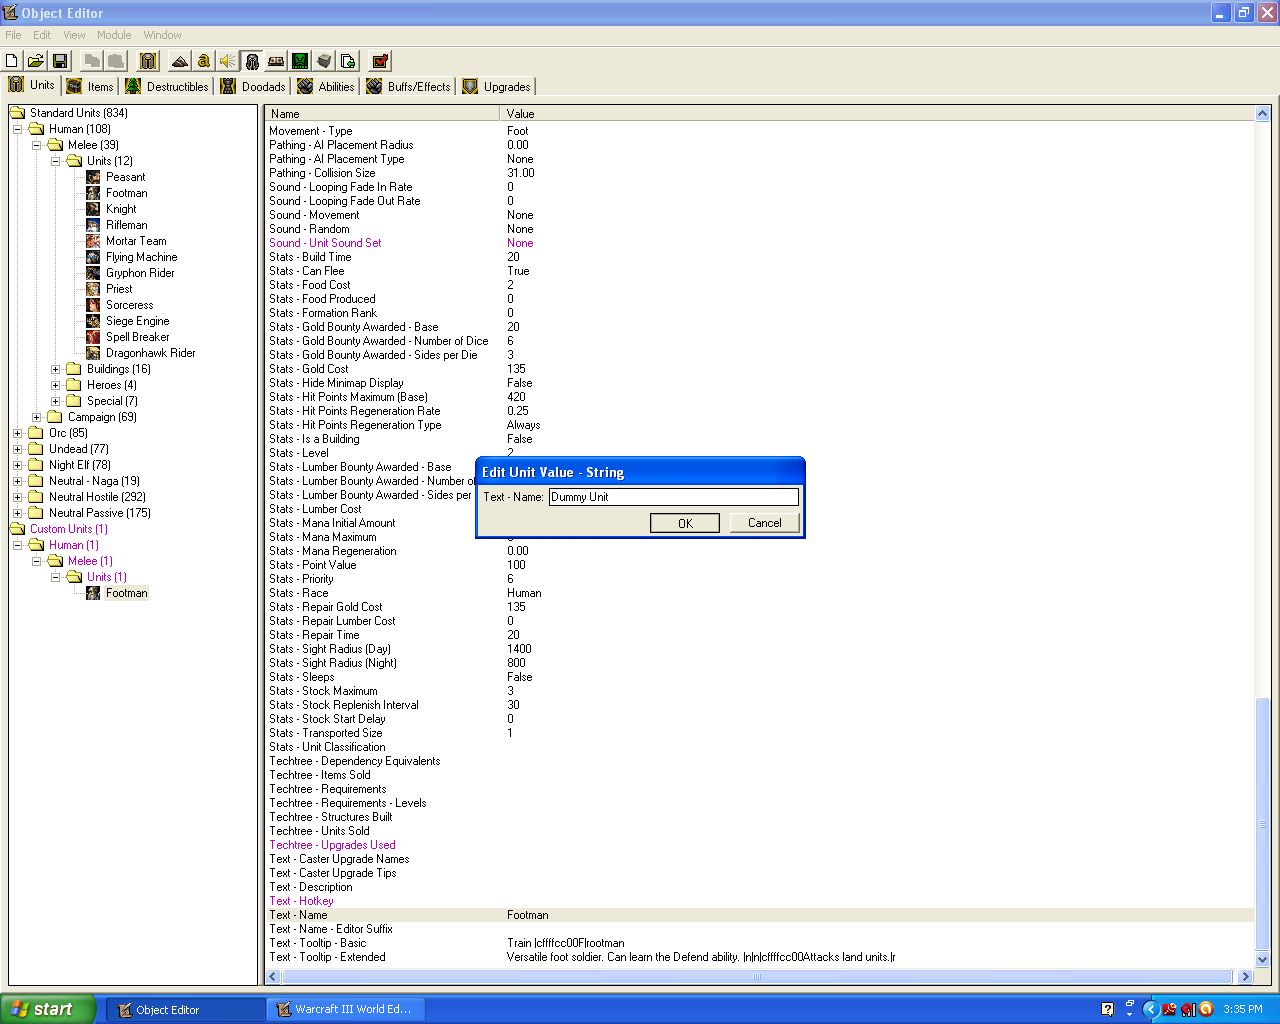
Step 7
Modify the name of the unit
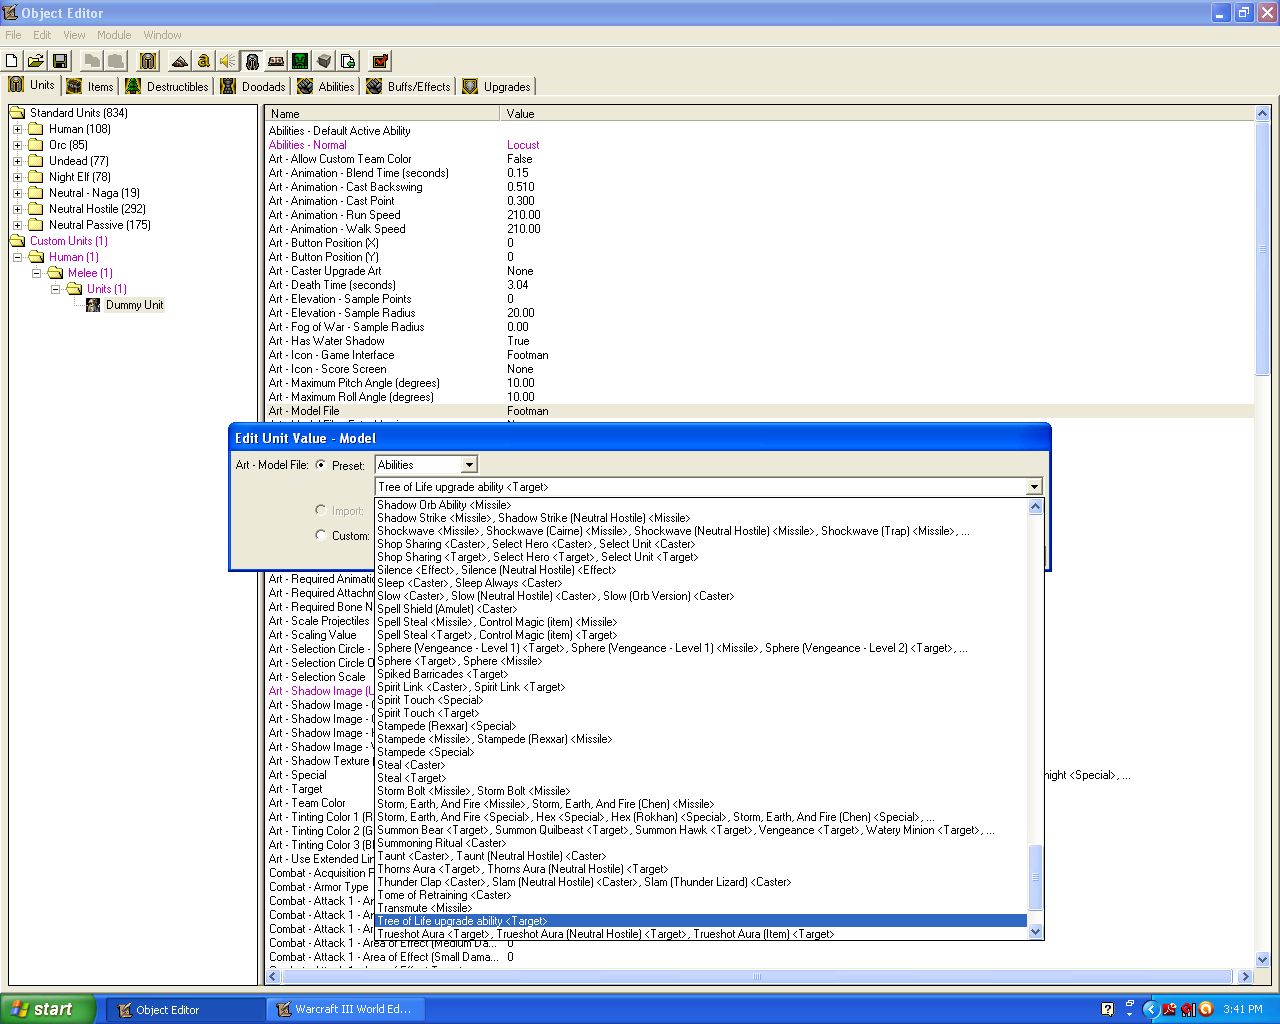
Step 8
Change the model of the unit (If your going to use the dummy unit to cast a spell just change it to [Abilities -> Tree of Life Upgrade])
Step 9
Disable the attack of the unit
Dummy Casts
So now you know how to create a dummy unit, but how do you use it? Lets say you wanted to make it so that a point-targeted ability now shoots out a poisoned arrow (yes you could just change the missile art of the ability but for the sake of this tutorial lets use a dummy unit cast instead). Choose any hero ability that targets a position on the ground, remove its missile art, and then do the following to create the dummy unit effect:
Step 1
Create a custom ability (base this particular one off carrion swarm)

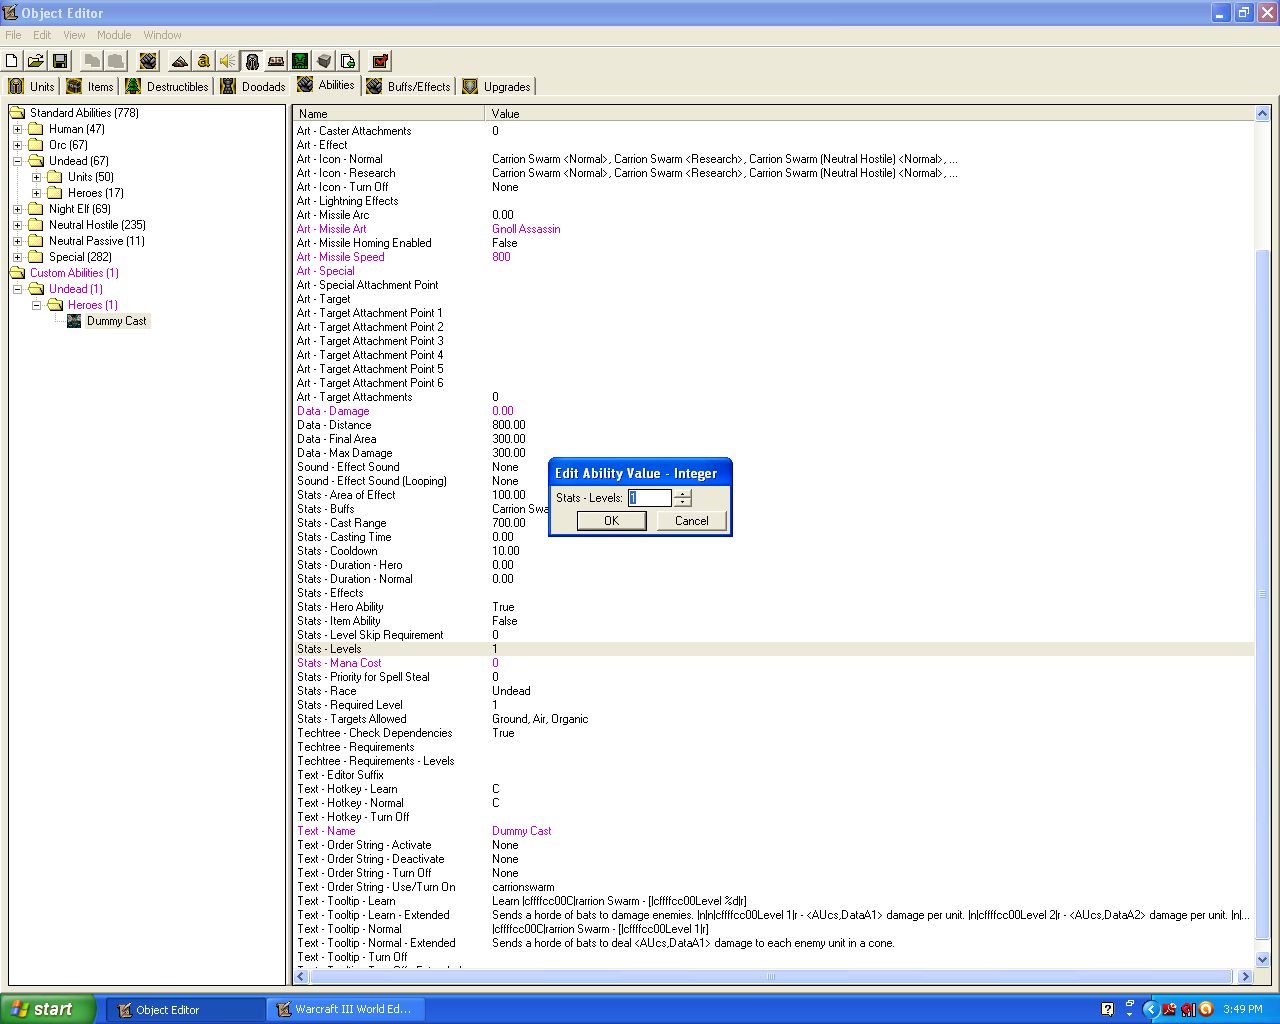
Step 2
Set the level of your new custom ability to 1
Step 3
Disable the mana cost of the ability

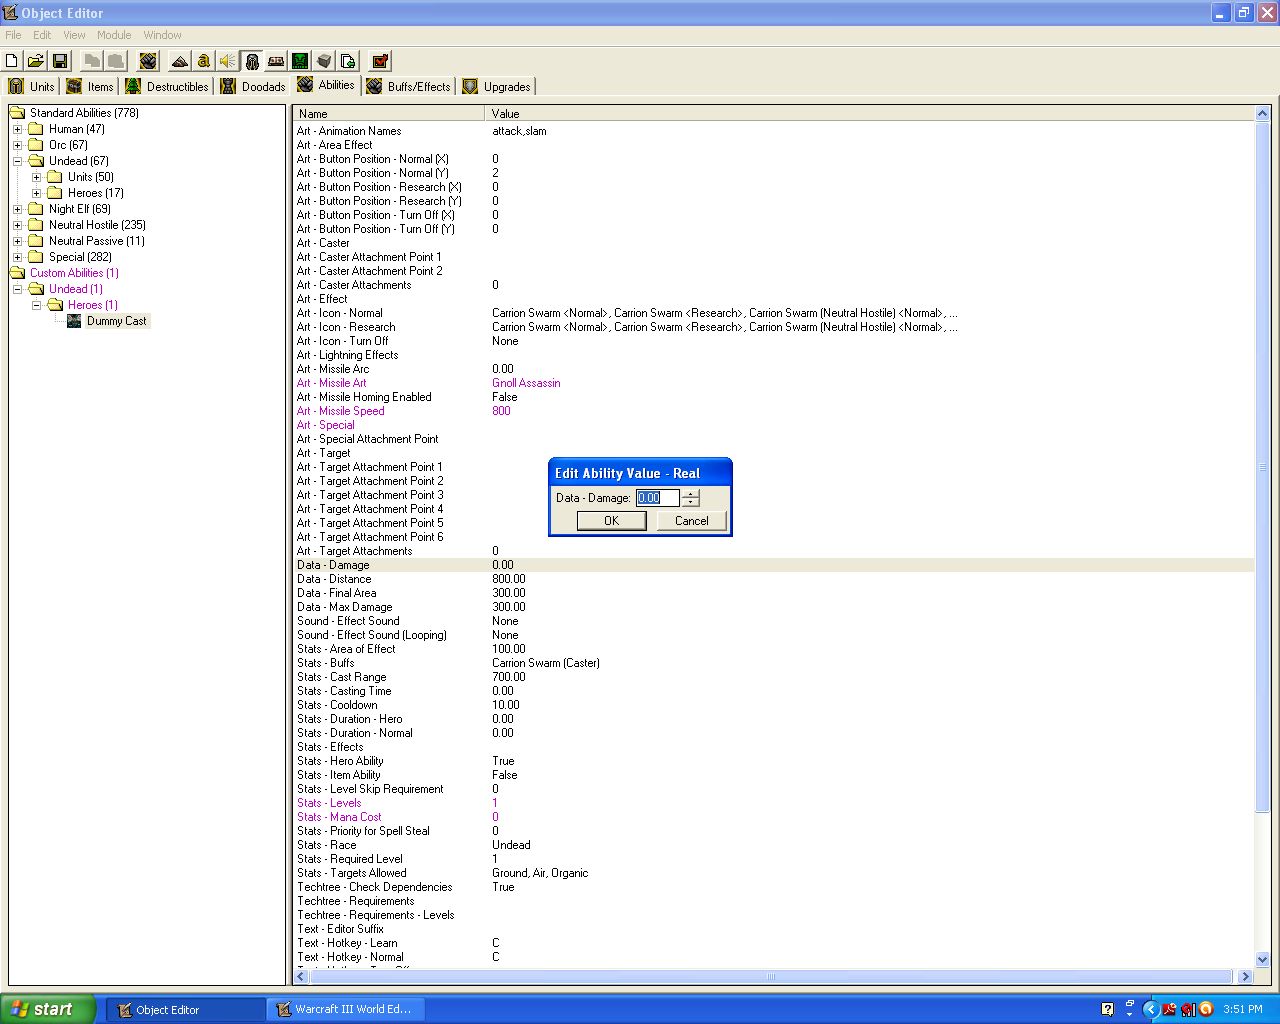
Step 4
Disable any damage done by the ability
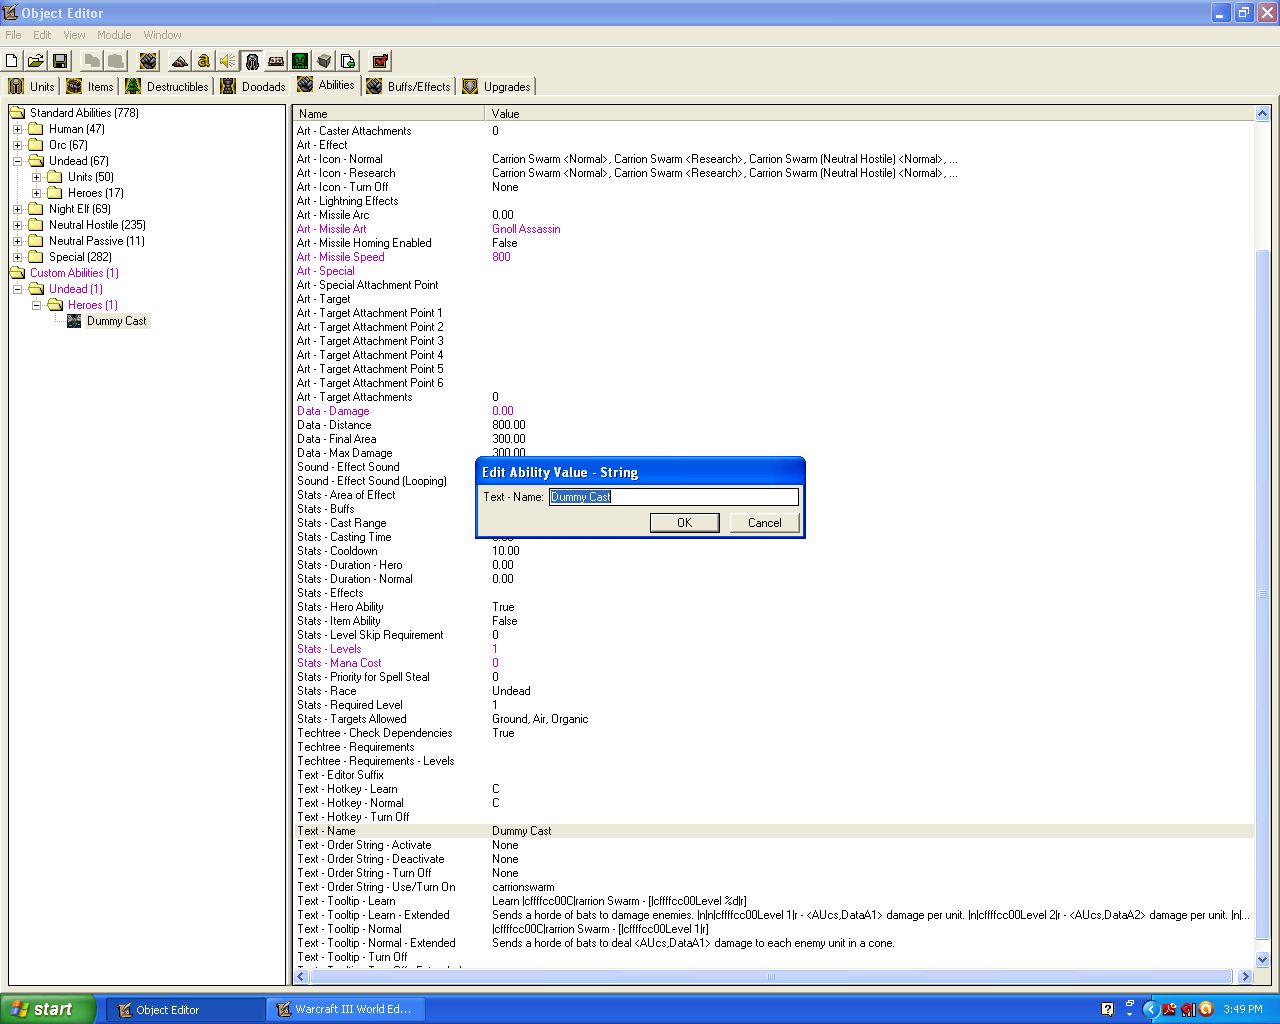
Step 5
Modify the name of the ability (for now call it "dummy cast")
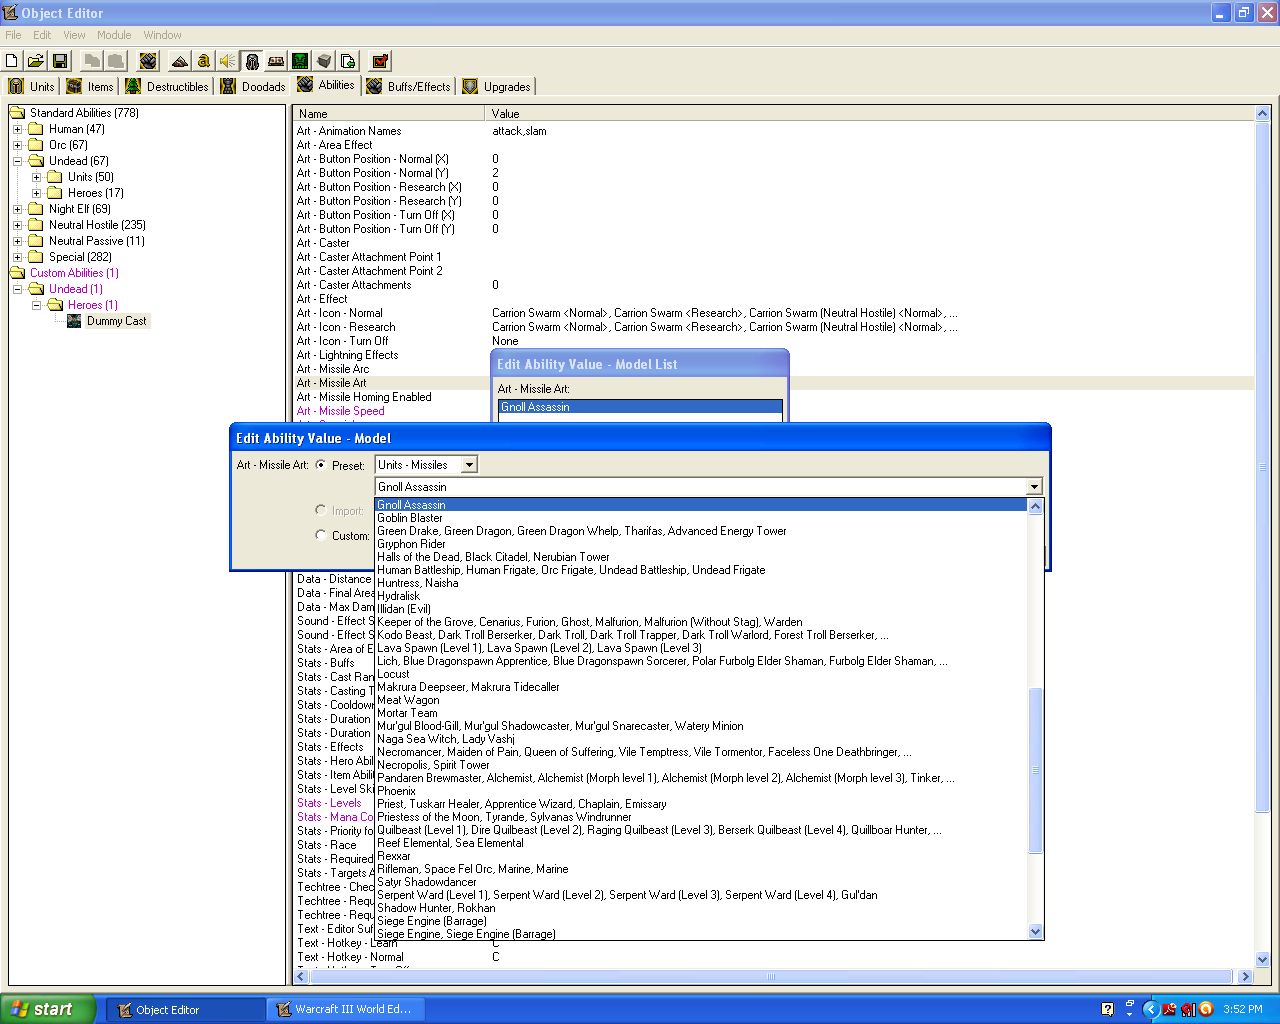
Step 6
Change the missile art of the ability (for now change it to the gnoll assassin/poisoned arrow missile found under missiles)
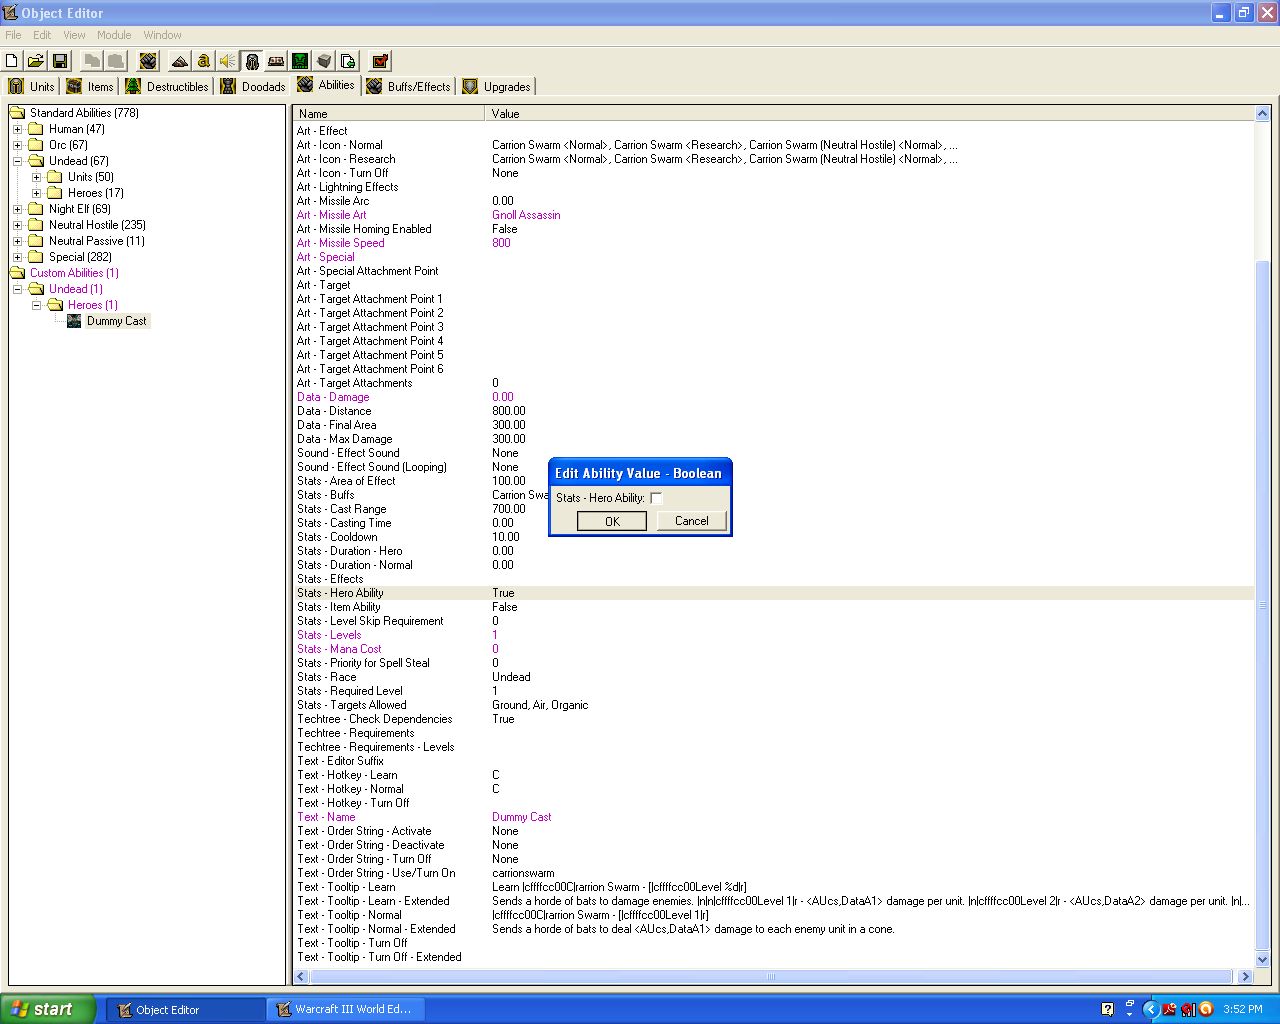
Step 7
Make the ability a unit ability (uncheck the "Stats - Hero Ability" box)
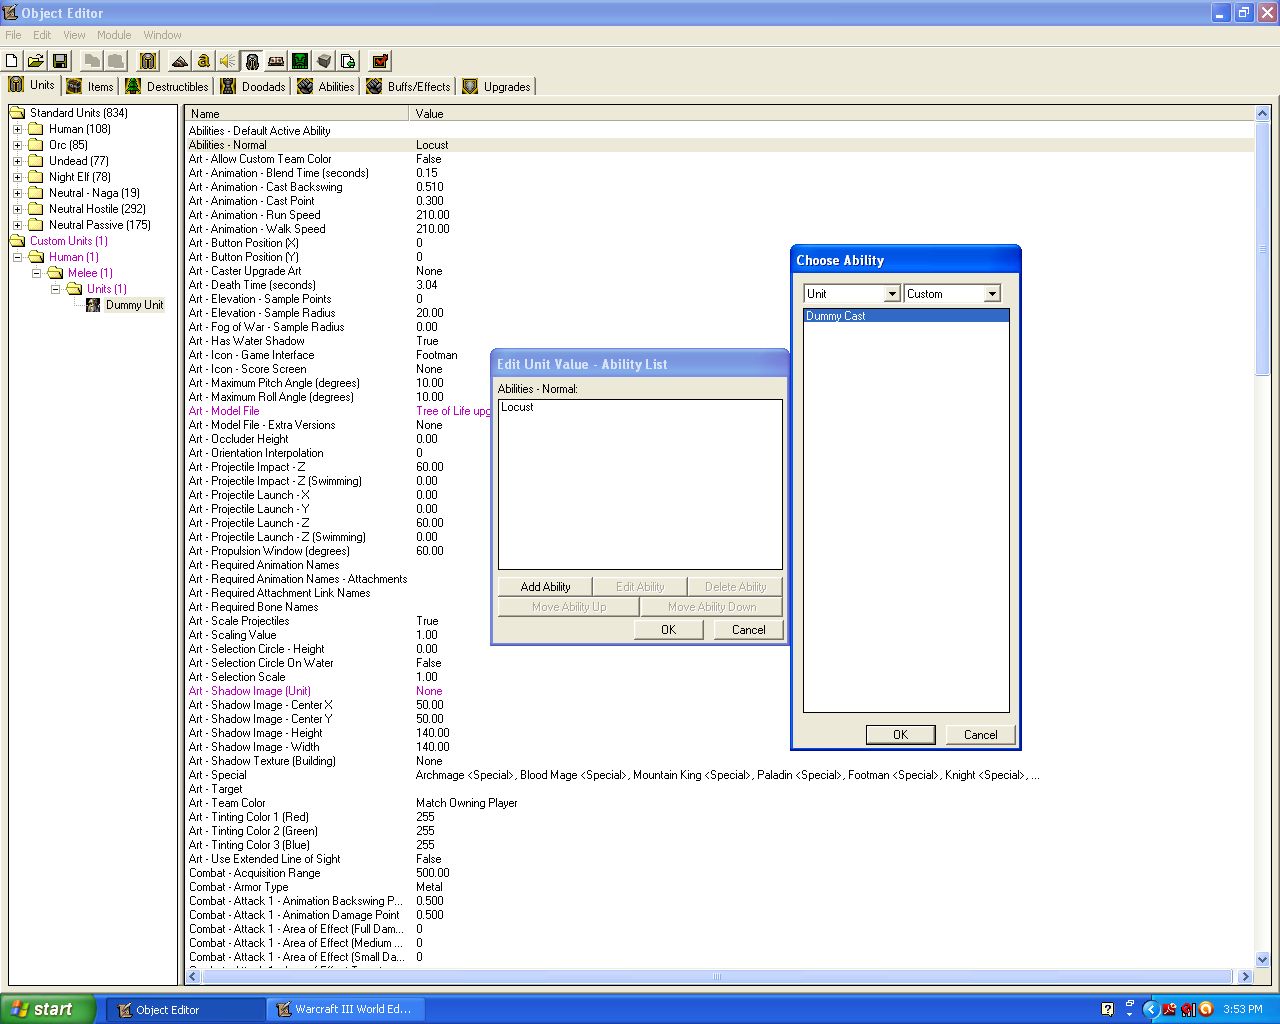
Step 8
Give the ability to a dummy unit (in this case give it to the dummy unit you created previously in this tutorial)
Step 9
Now you must create the dummy unit and order it to cast the carrion swarm ability at whatever position your hero cast his/her spell at. Use your knowledge of leaks gained at the start of this tutorial to clear up any leaks you may generate in this function.
This should create the following effect when you use whatever hero ability you started with:
(Ability being cast) Equal to INSERT ABILITY HERE

Alternative Course (optional)
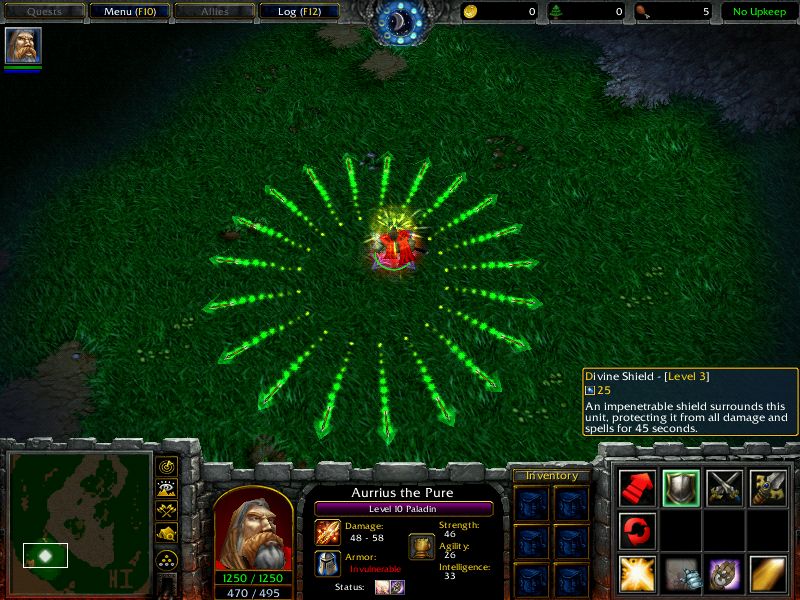
Let's say you wanted to make it so that the human Paladin's "divine shield" ability now shoots out poisoned arrows in all directions. You can still use the same dummy unit and dummy ability as before seeing as the actual base effect hasn't change. You must, however, change the triggering of the effect as you are both creating more than one effect in multiple directions and also using an ability that does not target a position. In this case, you can use the "For Each Integer A" function to create the effect at multiple angles as follows:
This should create an effect whenever you cast "divine shield" that looks like the following:
Scale
Aside from using dummy units to cast spells you can also use them to display effects themselves. This is particularily useful if you want to increase or decrease the scale of an effect. Take a look at this flamestrike spell:
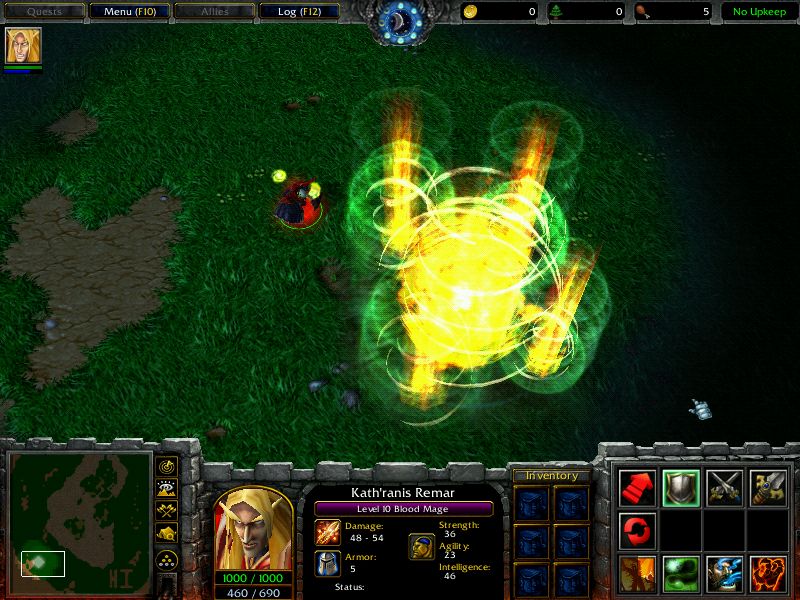
Any noob can see that flame eruption isn't NEARLY big enough. What you want to do here is change the model file of a dummy unit (you can still use the one you made earlier in this tutorial) to the flamestrike effect and then increase its scale.
Step 1
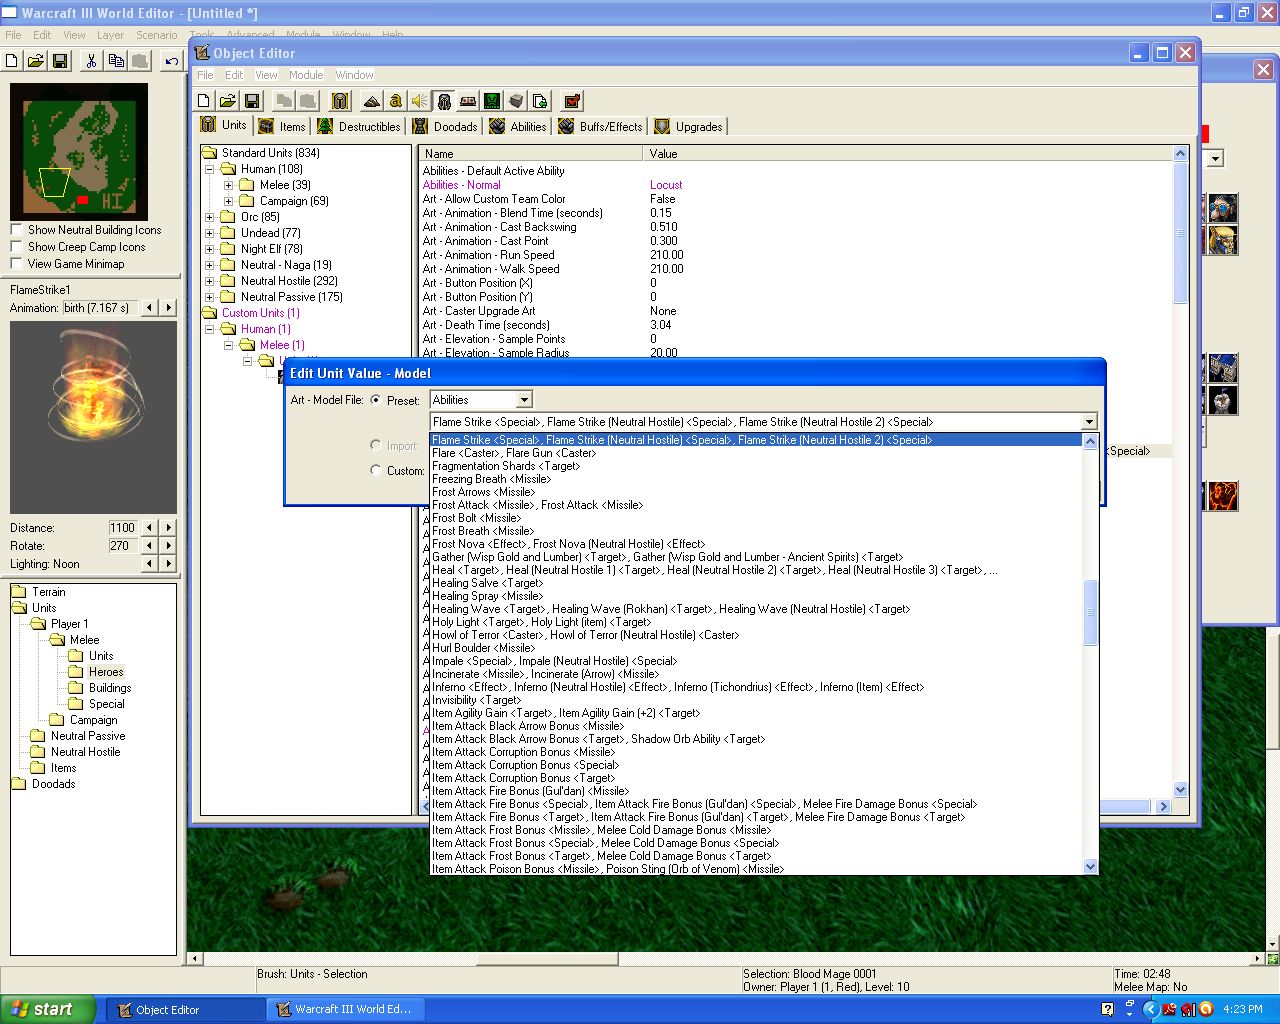
Change the model of the dummy to the flamestrike effect (it is under "abilities)
Step 2
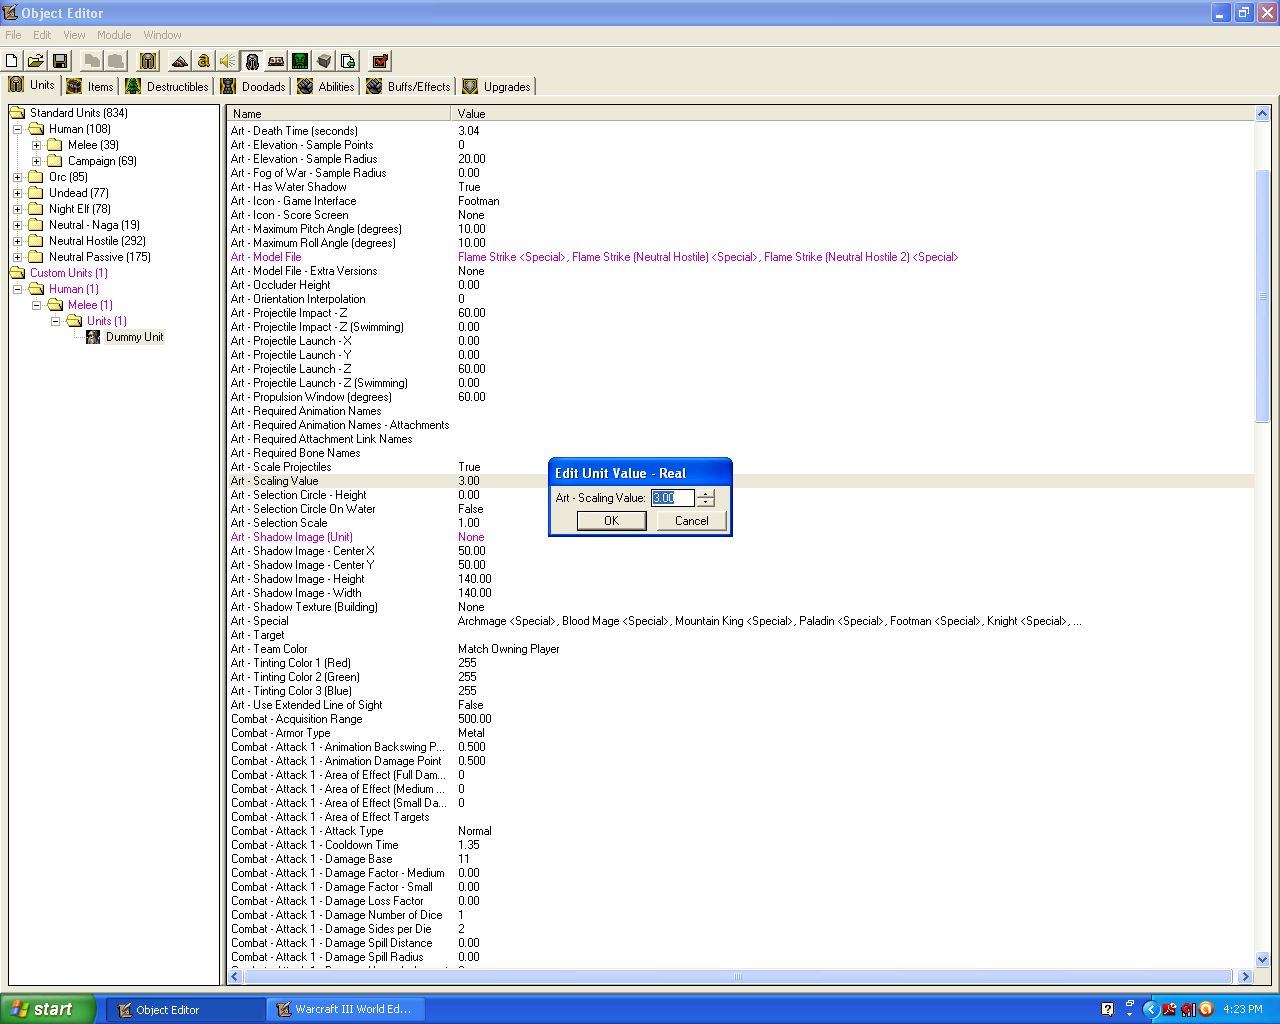
Increase the scale of the dummy unit (for now set its scale to 3x normal size)
Step 3
Whenever a unit casts the flamestrike ability, create the dummy unit at the target point
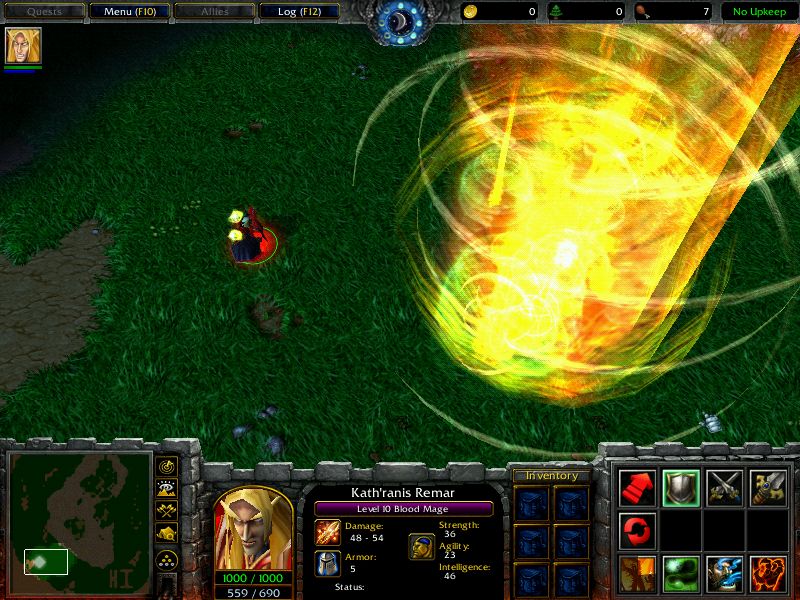
The result should be a satisfyingly huge flame eruption whenever a unit casts flamestrike:
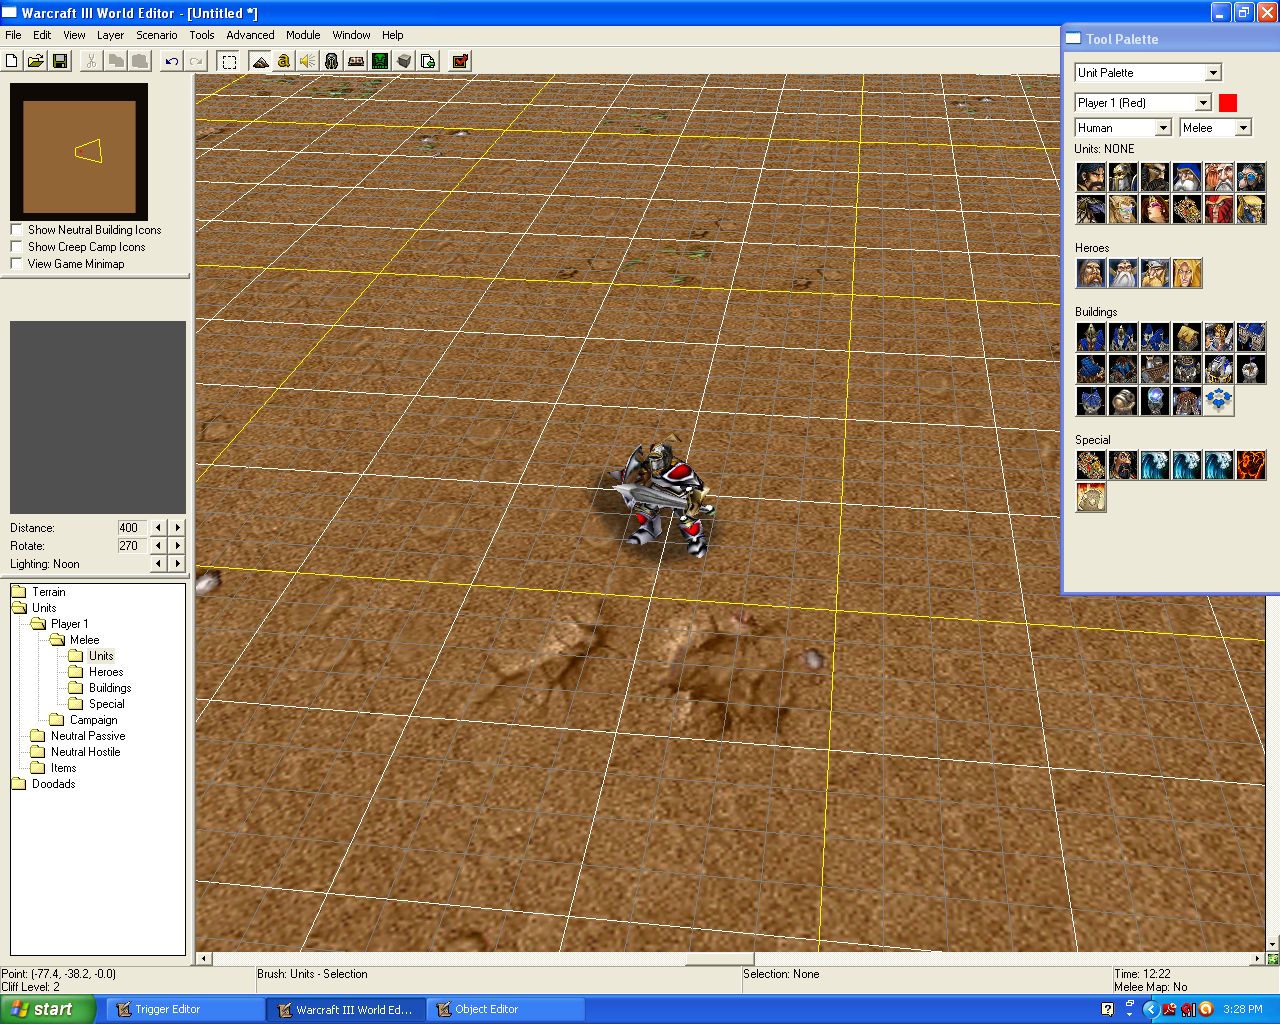
Angle
You can manipulate the roll and pitch angles of effects by applying them to a dummy unit (as seen above in the "scale" section) and then editing that unit's angle properties).
Lets say you wanted to take the "Tome of Retraining" effect and make it into a beam that can be shot at your enemies instead of into the air. You can do this quite simply by applying the effect to a dummy unit and then modifying the pitch angle of the unit.
Step 1
Create a dummy unit
Step 2
Change the model file of the dummy unit to "Abilities -> Tome of Retraining <caster>"
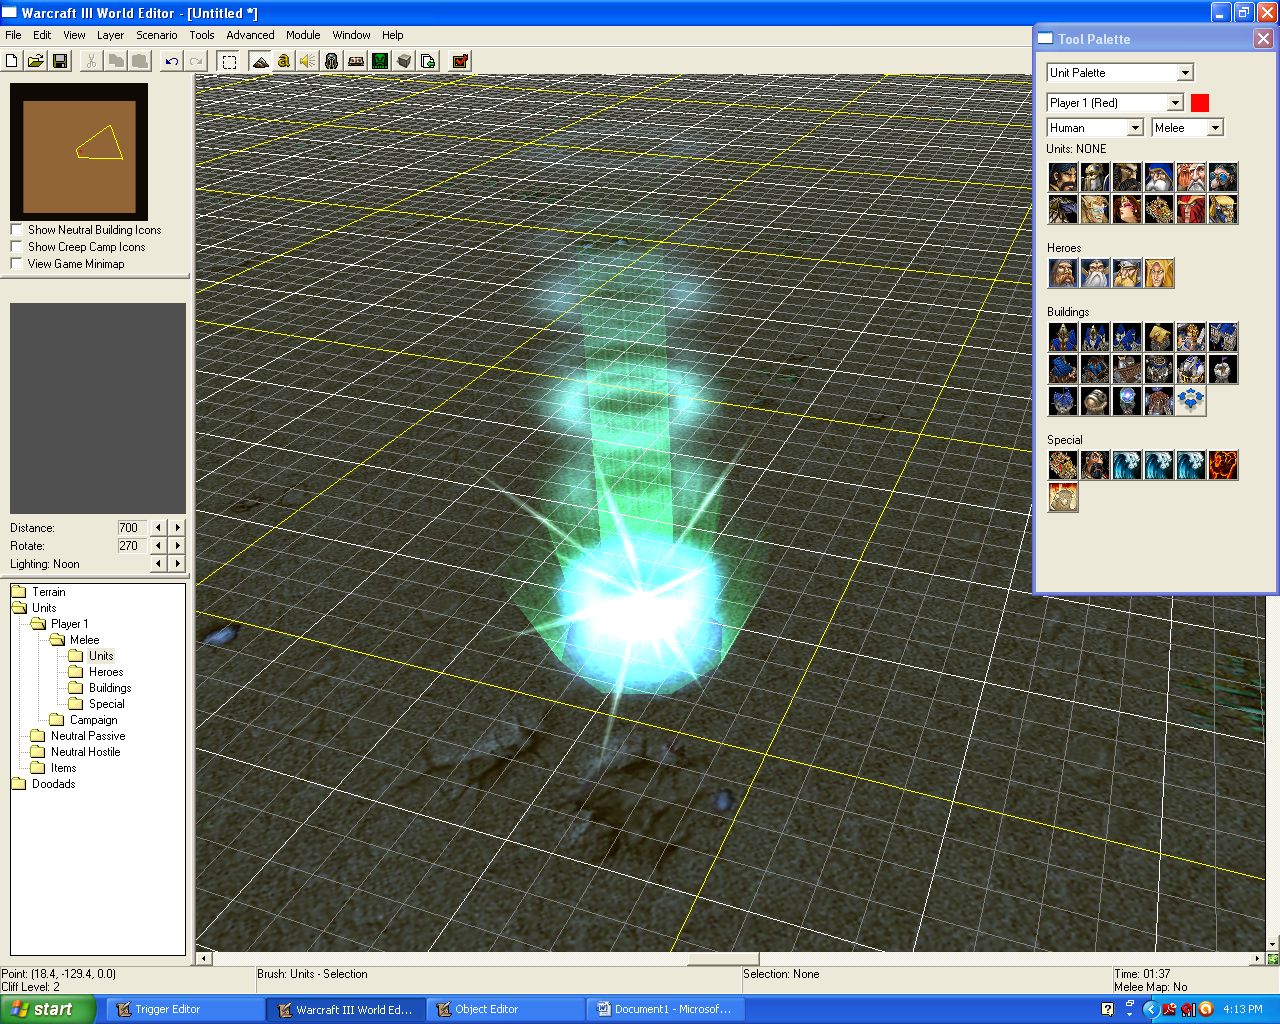
Step 3
Modify the pitch angle of the unit (by how much differs from model to model, but for this particular effect set it to -90)
You can modify the pitch angle by changing the data in the "Art - Maximum Pitch Angle (degrees)" field that is 19 lines below the top of the unit editor. In order to enter a negative value into the field, you can either shift+click it or go to "File -> Preferences -> General -> Allow Negative Values in the Object Editor".
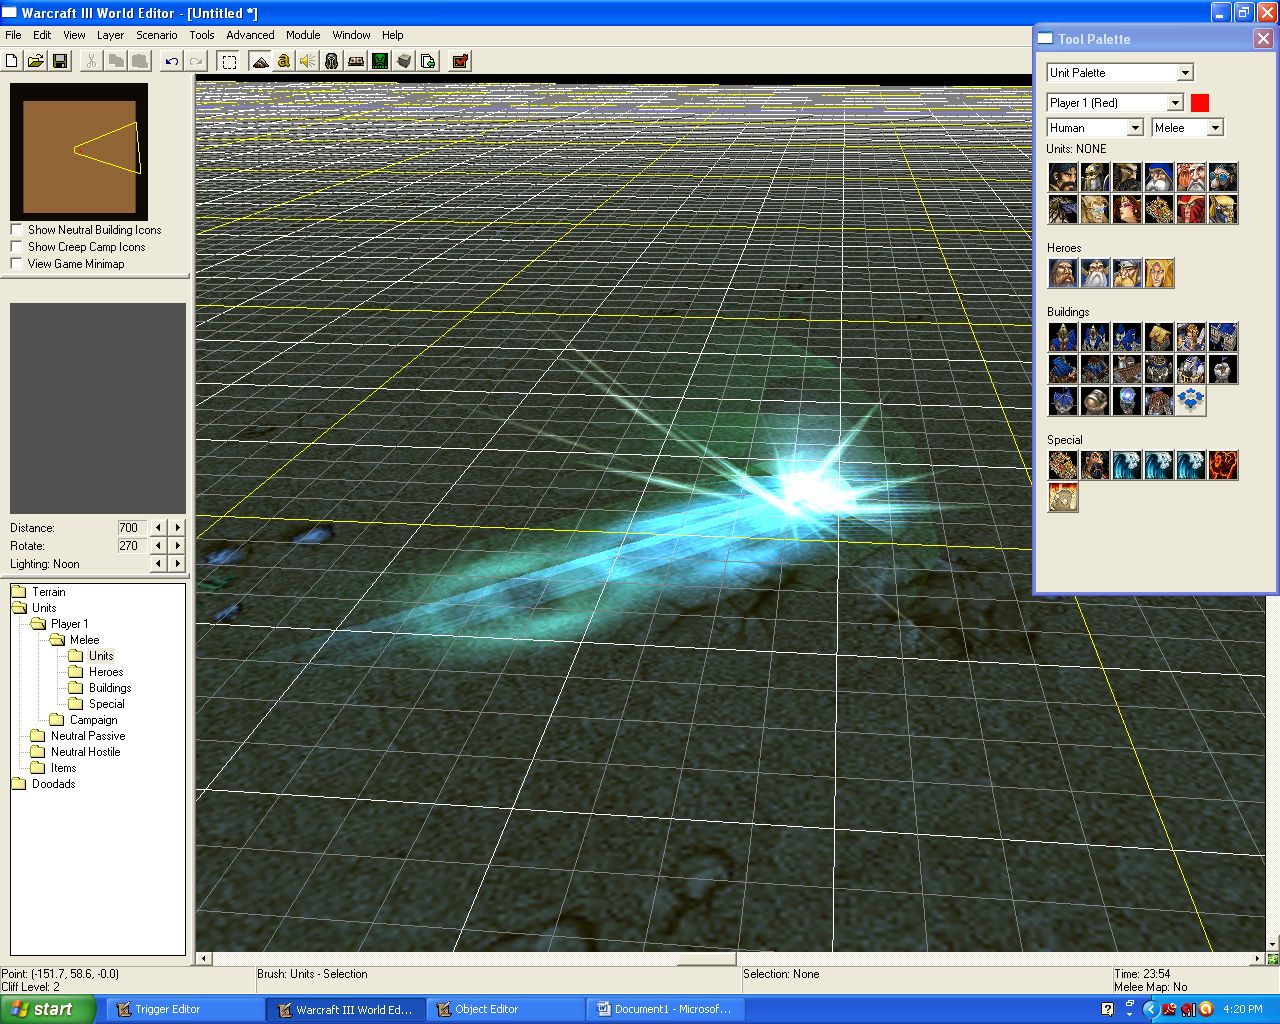
Step 4
Now you have correctly modified the angle of the effect, but its halfway in the ground. Just change the flying height of the unit to approx. 200 and it will look fine.
Step 5
Now the problem is that the effect is all smashed together. Increase the scale to about 2.5x its normal size and it will look much better.
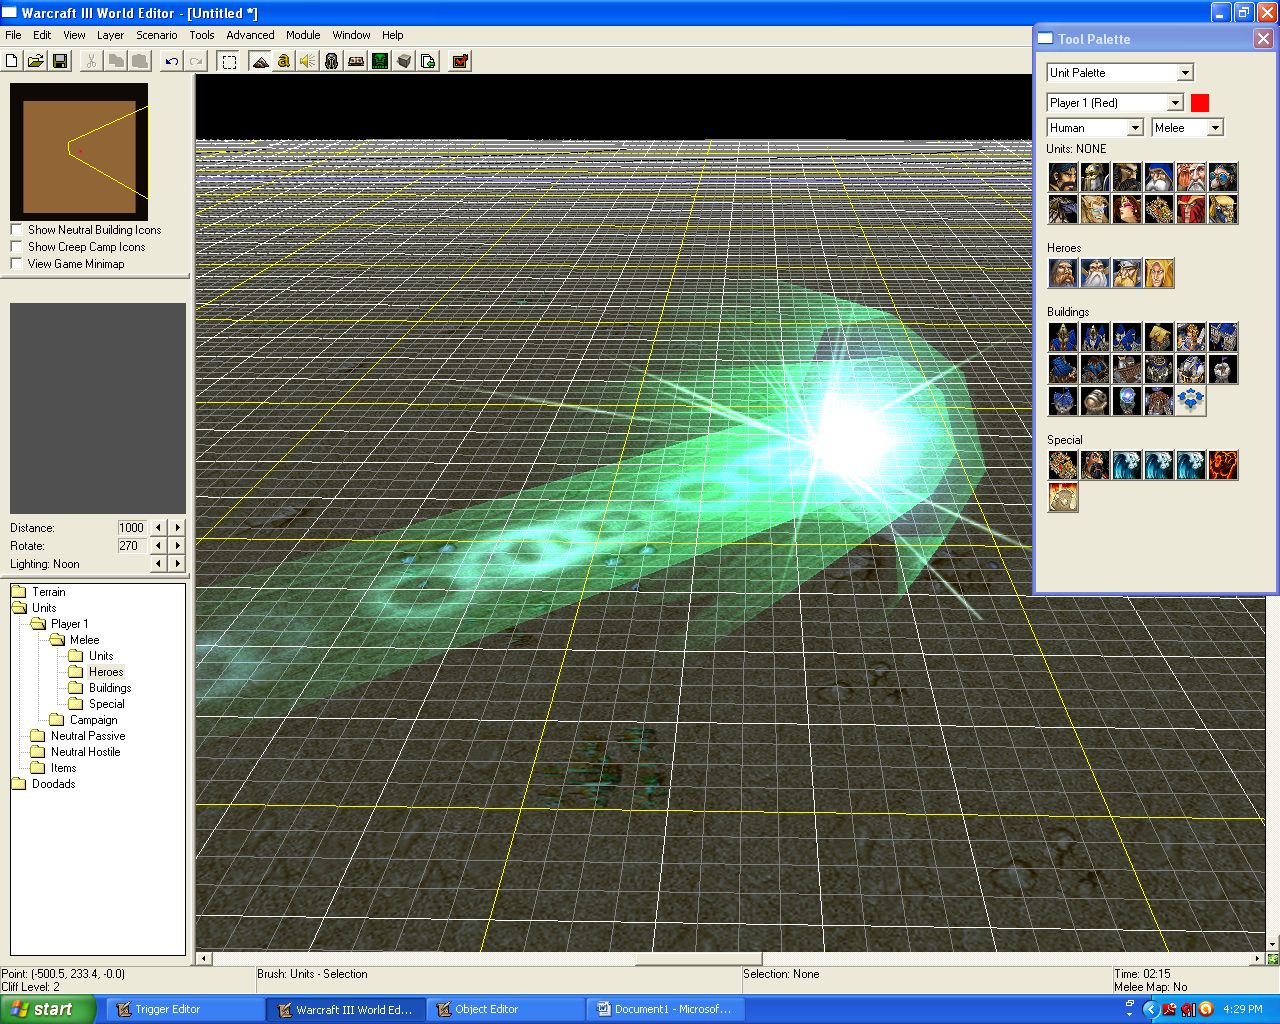
And now you have an angled effect! To implement it into a spell, just create the dummy unit at the correct position and angle as you have learned to do above. The following is a look at what you can do if you edit the angles of multiple effects:
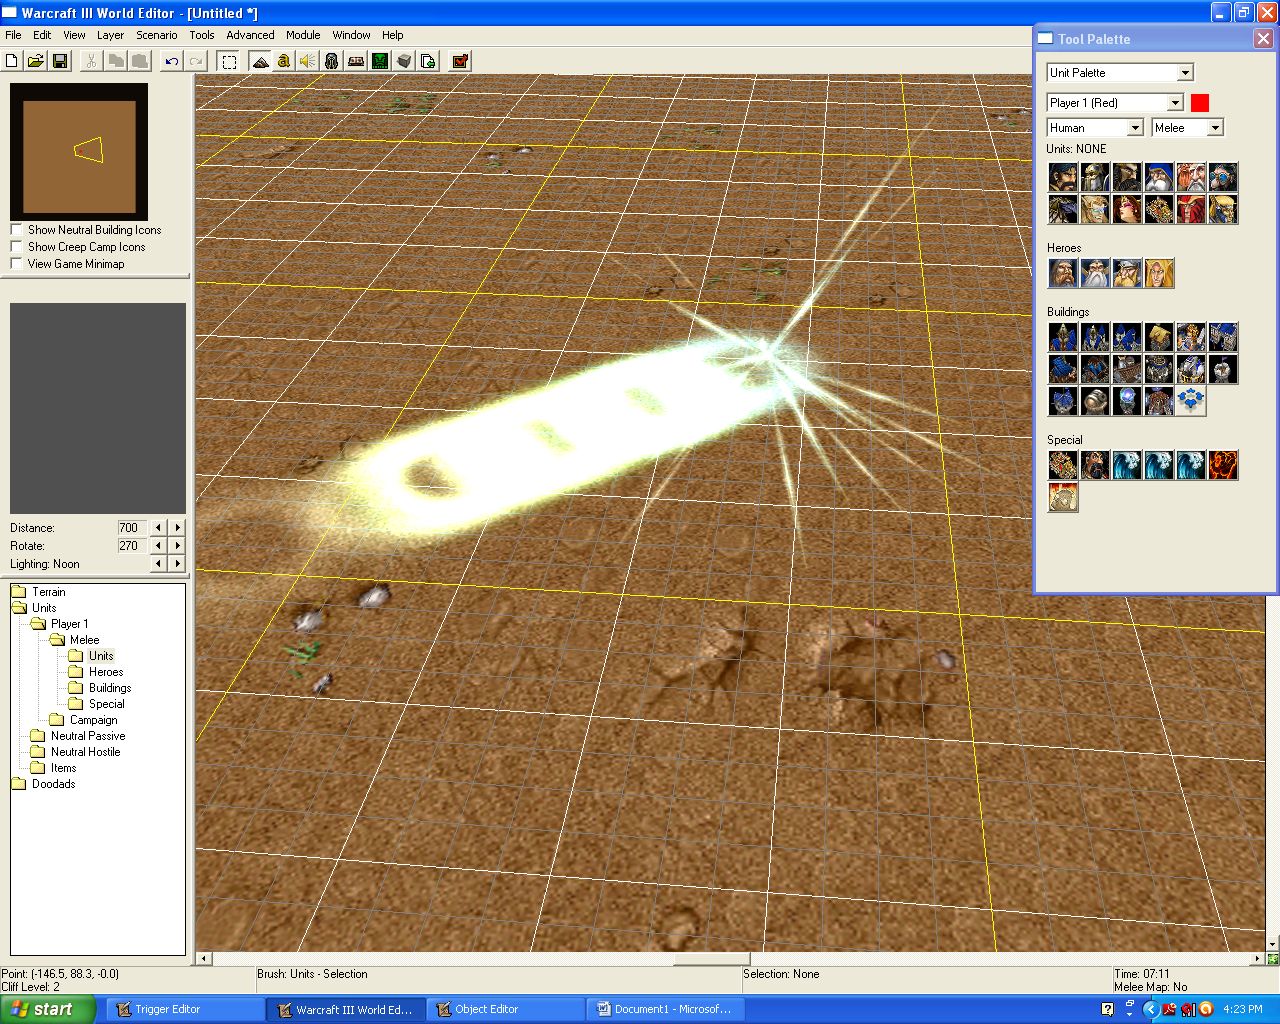
Custom AoE Effect
One cool thing you can do with triggers is create custom AoE effects by spamming smaller effects in an area. Lets say you wanted to give the Dark Ranger's "silence" ability a custom AoE effect by spawning tons of small eruptions in the area it is cast.
By simply taking the target point of the ability and creating multiple effects around it, you can make what appears in-game to be an AoE blast:
This should create an effect that looks similar to this whenever you cast the Dark Ranger's "silence" ability:

Lightning Effects
Let's say you wanted to make it so the Mountain King's "storm bolt" ability shoots out a bolt of lightning instead of a hammer.
Step 1
Remove the current missile art of the ability

Step 2
In order to create the lightning effect via triggers you will have to do the following things:
1. Create the lightning
2. Move the lightning as the target unit moves
3. Destroy the lightning after a set amount of time
You can do this by using the "Create Lightning", "Destroy Lightning", and "Move Lightning" commands in the GUI-trigger editor as follows:
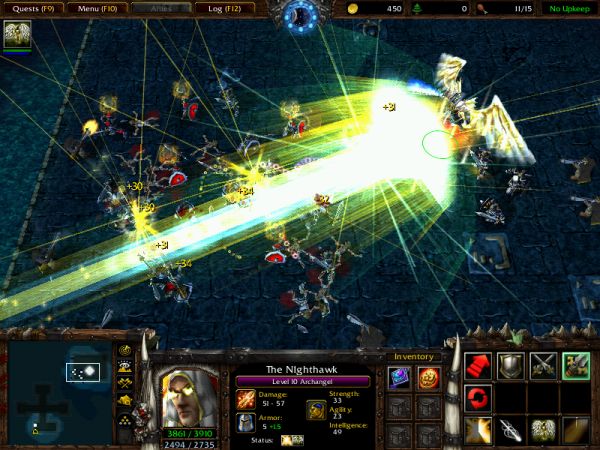
Now the Mountain King's "storm bolt" spell should shoot out a burst of lightning instead of a hammer:

Alternative Course (optional)
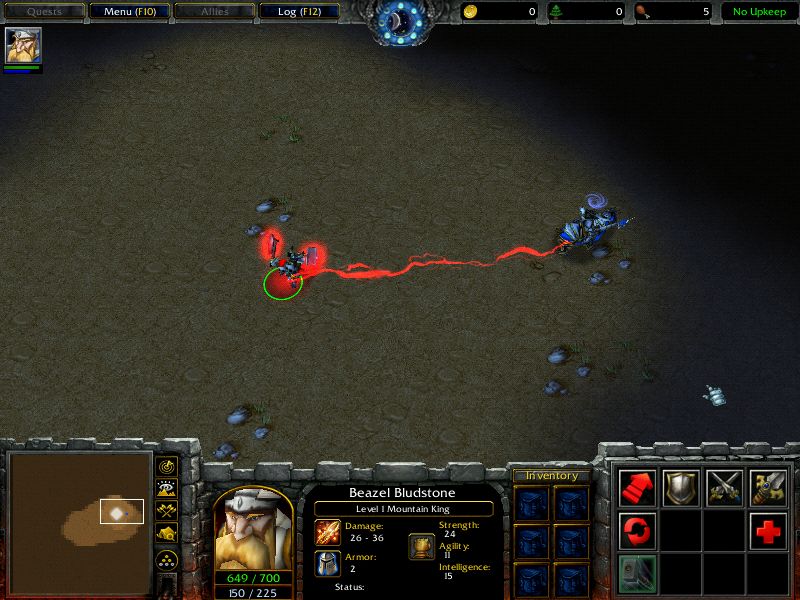
You can also edit the color of the lightning via triggers. In order to make the lightning red instead of blue, you would modify the first trigger as follows:
Which would create the following effect:
Last edited:


")