Community
Maps
Tutorials
Gallery
Support Us
Install the app
-
Listen to a special audio message from Bill Roper to the Hive Workshop community (Bill is a former Vice President of Blizzard Entertainment, Producer, Designer, Musician, Voice Actor) 🔗Click here to hear his message!
-
Read Evilhog's interview with Gregory Alper, the original composer of the music for WarCraft: Orcs & Humans 🔗Click here to read the full interview.
-
Create a faction for Warcraft 3 and enter Hive's 19th Techtree Contest: Co-Op Commanders! Click here to enter!
-
Create a void inspired texture for Warcraft 3 and enter Hive's 34th Texturing Contest: Void! Click here to enter!
-
The Hive's 21st Texturing Contest: Upgrade is now concluded, time to vote for your favourite set of icons! Click here to vote!
You are using an out of date browser. It may not display this or other websites correctly.
You should upgrade or use an alternative browser.
You should upgrade or use an alternative browser.
Legends of Arkain True Story

- Author(s)
- Shar Dundred
- Tags
- Campaign
- Size
- 113.23 MB
- Rating
-
(74 ratings)
- Downloads
- 36651
- Created
- Feb 5, 2022
- Updated
- Oct 18, 2024
- Resources
- 1
- State
 Approved
This bundle is marked as director's cut. It exceeds all expectations and excels in every regard.


A Campaign Series made by Shar Dundred
If you enjoy the Legends of Arkain series, please consider showing your support by becoming a Patron and joining the Arkain community today!

! Requires Version 1.29.2 or newer !
You are not allowed to publish any edited version of any Arkain map! This includes but is not limited to Reforged edits!
Story
The world of Arkain is at war, with the continent of the same name being the center of conflict, war and destruction. The First Voidwar ended in a stalemate, but the people of Arkain knew the next war would come. The Second Voidwar is at hand, heroes and villains alike will rise to stand against the tide of war
Command the brave General Blen Greymoore, one of the best generals of the human Empire of Rodan, and his allies to defend the vassal Kingdoms of Arkain. Bring glory to your Empire and Emperor.
Join the ruthless General Gardon Bloodclaw and withstand your enemies, both inside and out, and face the horrifying Demons. Be willing to walk the path of victory, even if it costs your soul.
Take control of the honorable Rangul and the Deathbreeze Clan to unite the Orcs under one banner. Fight everyone who stands between the Orcs and their wish to take the Kingdoms for themselves.
Control the mysterious Amari, the exiled daughter of Rangul, in her attempt to save the Orcs from themselves. Create a new realm for your people, like never seen before.
Fulfill the plans of the ancient Aridon the Watcher and his undead forces to maintain the balance of Arkain. Only the living dead can fight the upcoming chaos.
Walk the path of the brutal Ornasion the Destroyer and unleash countless undead monstrosities to destroy your enemies. Whether they are mortal or immortal, none shall withstand the wrath of the Destroyer.
The time has come to make your choice for only those who win the war will write history.
Campaign Series Info
The Legends of Arkain is a campaign series which takes place on the world Arkain.
The races of Arkain fight against the demon invaders, who try once again to enslave every being on Arkain. The Humans, the Orcs and the Undead will have to make a stand against them... or face complete annihilation or enslavement by the Demons.
This campaign series will consist of actually three different series. There will be a Human, an Orc and an Undead campaign series. They will all run in the same timeline but will present three different stories and outcomes. When they are all finished, it's completely up to you, who wins this conflict.
Those, who win the war, will write the history.
You like the campaign?
Click here to visit the forum!
Click here to see the progress of the series!
Click here for the First Human Book!
Click here for the First Orc Book!
Click here for the First Undead Book!
Click here for the Second Human Book!
Click here for the Second Orc Book!
Click here for the Second Undead Book!
Let's Play made by @Jayborino!
Features
- Three different storylines/campaign series
Take control of one of the three factions, the proud Humans of the Empire, the plundering and strong Orc Clans or the mysterious Undead Nexus and their endless army of the dead, and face the demonic invasion as well as other struggles that await you.
- New units
Command units, you already know, as well as completely new units with new upgrades and abilities.
- Decide the fate of Arkain
At some points of the campaigns, you'll have the opportunity to decide things, that affect the storyline, characters and sometimes even the chapters you play or how you have to play them. By doing or, well, not doing certain side quests, you can also affect the campaign.
- Three difficulties
You can play the campaign in either easy, normal or hard difficulty, just like in the original WC3 campaigns. It will impact on the AI difficulty and scripting as well as other minor changes.
In easy version, for example, the AI won't rebuilt lost buildings.
- Full Jass AI
In this campaign series, every single AI is written in Jass instead of being created with the AI editor. This makes the AI more intelligent.
- Universal hotkeys
All abilities, units and buildings use QWER hotkeys.
- Race Mechanics
Every available race has its own unique race mechanic to improve gameplay - and, in some cases, to add new ways influencing the story.
Characters

General Blen Greymoore
General Greymoore is said to embody everything the Empire stands for. He is an honorable warrior, proud to fight for the Empire and the Emperor, following every order and doing whatever he can to make the Empire a better place - even if it means that he has to fight the enemies of mankind without showing any mercy, hunting them until they are completely destroyed.
Already, many bards tell romantical tales of the veteran who was born a peasant and rose through ranks only by his wit, his tactical mind and his strength in both body and mind, saving not only his men but also fair ladies on a daily basis. Of course, the tales are exaggerated, as tales tend to be, and Blen wouldn't consider himself a paragon, having to send his men into certain death again and again to assure victory for the Empire, mourning those who he lost. Greymoore's soldiers all look up to him, seeing him, who fights at their side in every battle, as their inspirational role model.

General Gardon Bloodclaw
General Gardon is the most ruthless and merciless general in the Empire. He is known for using every available weapon against his enemies without showing any pardon. His background is a mystery. He simply appeared out of nowhere and became general. He proved very fast, that he got that position for a good reason, destroying the enemies of the Empire with fast, merciless effectiveness. He is the commander of the Ironfist, an elite force of the Empire, which often carries out top secret missions for the Emperor himself. According to rumors, Gardon himself enjoys the favor of the Emperor - much to the frustration of many higher-ranking Imperials. Yet none would dare make a move against him, as in the past, such attempts ended in disaster.

Rangul
Growing up as a usual member of the Deathbreeze Clan, Rangul's abilities and his dedication to his race along with his strength made him rise up the ranks of the clan quite fast until he became the first and most trusted lieutenant of the chieftain. Rangul sees his race on its way to utter extinction and dreams of a realm for his people. A strong realm that would prosper and serve as staging ground for many invasions. Dedicating his life to create this realm himself, he planned to not only be the successor of the chieftain but to also unite all other clans under his command, sending them against the Kingdoms of the Humans. Their lands would be taken over and used by the Orcs who would then become more than simple marauders and pillagers.
However, his plan has one major hole: The Demons and their constant attacks. While Rangul thinks that his people could be powerful enough to defeat some demonic army, he has yet to come up with any ideas on how his people should wage war on the Kingdoms on the one side and defend against the Demons on the other.

Amari
The chieftain of the Cliffhunter Clan, Amari, was born as the daughter of Rangul. While women in the Orc society were forced to stay at home and take care of it and the children while the males were fighting, Amari wanted to prove to her father, whom she knew was more tolerant towards new ideas - him adopting a human girl was perfect proof for his. She secretly gathered a few other members of the Deathbreeze Clan and went on a mission to gain his trust. However, she was betrayed and forced into exile - like all Orc women who were unwilling to "stay home". The fate of an exiled female was often death. However, Amari did not want to accept that fate. She sneaked her way through to the Kingdoms where she met other exiles and together they founded the Cliffhunter Clan - a clan consisting of all Orc women who had been exiled by their clains. Therefore the Cliffhunter Clan is considered an exile clan by the other Orc clans - and therefore hardly even considered a real orc clan.
Amari and her followers raided the Kingdoms for a long time, with Amari being smart enough to keep her clan moving instead of settling anywhere to avoid being detected by the armies of the Kingdoms. Since the foundation of their clan, the number of exiled Orc women has increased dramatically, showing that there are many women who want to fight. Amari promised to herself that, one day, she would make the other Orc clans accept her clan and reform the society of her people regarding females.

Aridon the Watcher
Aridon is the most mysterious creature of Arkain – also the most unknown. No one but the Demons even knows of Aridon's existence and the archlich intends to keep it that way as long as possible. It's unknown for how long he has existed, but he has always been here. He's even older than all of the oldest Demons together. It's also unknown who or what he used to be before – if he has ever been anything else before. He calls himself the humble Watcher of Arkain who ensures that the balance isn't disturbed by the other races. The Demons and the mortals alike often tend to threaten this balance with their actions and Aridon has often interfered in the actions of the mortals – but from the shadows without being noticed. He has seen the future and has known centuries ago that in this conflict, manipulations won't be enough and prepares for a full scale war. It's time for the Undead to fix the flaws of the other races.

Ornasion the Destroyer
Unlike other dreadlords, Ornasion had always prefered brute force over manipulations or mind games. This made others of his kind consider him a savage brute, not worth much more than some pitlord. He was considered simple-minded, no threat to the far more intelligent and cunning dreadlords. However, it was this apparent "simple-mind" that spared him from the political games between other Demons, allowing him to focus on what he did best: Warfare. He became a great tactician and led the Blooddrinker Legion into many successful battles against their enemies.
Ornasion turned out to be the greatest general of the Blooddrinker Legion, yet the other dreadlords never considered him a threat due to him being interested in nothing but war, even going as far as calling him a "Pit Dreadlord" in reference to the brutish Pitlords. It was the last time a dreadlord would underestimate any other dreadlord. One day, still centuries before the Void War, Ornasion made his move. He challenged all higher-ranking dreadlords of the Blooddrinker Legion at once - and tore them apart. While actually being the brute they always considered him to be, he was no fool and was driven by the same ambition as others of his kind were.
Ornasion used his brute force to make the Blooddrinker Legion the most numerous by absorbing several smaller Legions. In doing so and due to his tactical abilities, he had secured the place of his Legion as the one leading the charge against the Humans and other races of Arkain, planning to destroy all his enemies - be it by crushing their lands or by corrupting their minds.
Click here to learn more about the other characters!

Full release
General:
- Removed Robo Goblin for all AIs using Pechan
Act Three, Chapter Two:
- Removed Frank of Kome and his forge
- Removed Robo Goblin for all AIs using Pechan
Act Three, Chapter Two:
- Removed Frank of Kome and his forge
Models & Skins:
Blizzard Entertainment
67chrome
epsilon
Wandering Soul
infrenus
Tauer
AndrewOverload519
Mephestrial
Dojo
PrMosquito
Hawkwing
Em!
dickxunder
acagnip
Uncle Fester
Frankster
Mc !
IamMclovin
AhhFreshWeeD
Sin'dorei300
Elenai
Kuhneghetz
CloudWolf
alreadyused
Dark Hunter1357
Dmitry Rommel
Kitabatake
Shar Dundred
RazorClawX
Uljimasa Hojo
eXciTe
Sellenisko
frostwolf
-Grendel
Skipper
Deolrin
gookywooky
Callahan
BlinkBoy
Hueter
Coinblin
supertoinkz
SuPa-
Tarrasque
Power
Afronight_76
chr2
olofmoleman
imforfun
Deolrin
Pyramidhe@d
HerrDave
Meteor_demon
kangyun
Kael Theron
PROXY
JetFangInferno
JesusHipster
Makoodzaka
Rizz_Boomer
johnwar
Villagerino
frostwhisper
Icons:
Blizzard Entertainment
Uncle Fester
CloudWolf
xylign
SkriK
CRAZYRUSSIAN
Darkfang
GreyArchon
67chrome
Fjury
PrMosquito
INSEKT
Muoteck
dickxunder
Frankster
CloudWolf
Kuhneghetz
Elenai
Heinvers
Shar Dundred
Uljimasa Hojo
SinisterX
Darkfang
Hemske
Palaslayer
NFWar
Hellx-Magnus
Justicebringer
Sin'dorei300
sigelang
Mr.Goblin
Mythic
antihero
Sellenisko
-ToasT
jigrael
Just_Spectating
APproject
Pins
Eagle XI
kangyun
-Grendel
BLazeKraze
Mc !
Kael Theron
Stanakin
JollyD
The_Silent
-Berz-
chr2
olofmoleman
San
Scias
Akolyt0r
Peekay
Edge45
ChevronSeven
4eNNightmare
r.ace613
Music:
Sabaton
Campaign Preview Screen:
Heinvers
Campaign Logo:
Mythic
Everything else made by:
Shar Dundred
First Supporters:
Theoden of KoMe
Chen
youness
Kasrkin
kakuzu
BandolXD
Heinvers
Imperator
Veritas 117
PlankingWolf
Please contact me via PM if I forgot to give you credit for your resource!
Blizzard Entertainment
67chrome
epsilon
Wandering Soul
infrenus
Tauer
AndrewOverload519
Mephestrial
Dojo
PrMosquito
Hawkwing
Em!
dickxunder
acagnip
Uncle Fester
Frankster
Mc !
IamMclovin
AhhFreshWeeD
Sin'dorei300
Elenai
Kuhneghetz
CloudWolf
alreadyused
Dark Hunter1357
Dmitry Rommel
Kitabatake
Shar Dundred
RazorClawX
Uljimasa Hojo
eXciTe
Sellenisko
frostwolf
-Grendel
Skipper
Deolrin
gookywooky
Callahan
BlinkBoy
Hueter
Coinblin
supertoinkz
SuPa-
Tarrasque
Power
Afronight_76
chr2
olofmoleman
imforfun
Deolrin
Pyramidhe@d
HerrDave
Meteor_demon
kangyun
Kael Theron
PROXY
JetFangInferno
JesusHipster
Makoodzaka
Rizz_Boomer
johnwar
Villagerino
frostwhisper
Icons:
Blizzard Entertainment
Uncle Fester
CloudWolf
xylign
SkriK
CRAZYRUSSIAN
Darkfang
GreyArchon
67chrome
Fjury
PrMosquito
INSEKT
Muoteck
dickxunder
Frankster
CloudWolf
Kuhneghetz
Elenai
Heinvers
Shar Dundred
Uljimasa Hojo
SinisterX
Darkfang
Hemske
Palaslayer
NFWar
Hellx-Magnus
Justicebringer
Sin'dorei300
sigelang
Mr.Goblin
Mythic
antihero
Sellenisko
-ToasT
jigrael
Just_Spectating
APproject
Pins
Eagle XI
kangyun
-Grendel
BLazeKraze
Mc !
Kael Theron
Stanakin
JollyD
The_Silent
-Berz-
chr2
olofmoleman
San
Scias
Akolyt0r
Peekay
Edge45
ChevronSeven
4eNNightmare
r.ace613
Music:
Sabaton
Campaign Preview Screen:
Heinvers
Campaign Logo:
Mythic
Everything else made by:
Shar Dundred
First Supporters:
Theoden of KoMe
Chen
youness
Kasrkin
kakuzu
BandolXD
Heinvers
Imperator
Veritas 117
PlankingWolf
Please contact me via PM if I forgot to give you credit for your resource!
To Blizzard Entertainment for this great game.
To Turnro whose great campaigns inspired me to revive this old project.
To Jayborino for his enjoyable let's play projects of the Arkain series!
To all who supported this project!
To all who reported bugs and gave/give constructive feedback both during and after the development!
And very many special thanks to Kasrkin, who supported the creation of this project in many, even countless ways!
Feel free to post your suggestions, opinions and questions!
Please report any bugs!
Please report any bugs!
Keywords:
Arkain, Legends, Legends of Arkain, LoA, campaign series, True Story, True Story of Arkain
Contents
Legends of Arkain True Story (Campaign)

- Author
- Shar Dundred
- Filename
- Legends of Arkain - The True Story.w3n
- Required game
- Warcraft 3
- Recommended version
- 1.29
- Difficulty
- Variable
- Size
- 113.23 MB
- Uploaded
- Feb 5, 2022
- Updated
- Oct 18, 2024
Reviews
From looking at the past releases of this project combined with the stats and reviews of this one, it is evident to me that Shar Dundred has still got it.
Congratulations on another DC in your collection.
So few comments for an Arkain campaign thread.
Most people are writing in the New Content thread. But that's people who already knew the series before. Reforged has been really terrible for the WC3 custom campaigns...
I picked Arkain back up a few days ago. All missions played using 0.69a on v1.29.2 on hard difficulty (except mission 2, because I have to start each map from the campaign screen for the difficulty to work correctly, it's reset to normal when the game starts the next mission after a victory).
I'm now trying Mission 1 of the second arc, but difficulty seems a lot higher than in previous missions. My main issue is that my troops constantly have to travel between the Darkmind base, the gold mine expansion and other spots (I'm not quite sure if my main base stays completely safe once I have the expansion).
Towers are extremely weak compared to enemy units (Salrian pikemen obliterate towers for example), and of course they don't benefit from Rangul's scepter of healing. I usually like having tower support to take better trades, but I imagine the answer here is somehow to max out low upkeep to hold only with army, build a gold reserve before taking out one enemy base... But I can't properly use the scepter of healing bonus when moving troops back and forth between bases with barely any respite, and the Darkmind do a really awful job at keeping themselves alive, not even rebuilding destroyed structure (unless I missed it ?). This will need more thinking.
Review of Arc 1
About my mission ratings: there are some missions I prefer over others among the 5/5, but this rating means I think the mission serves its purpose well and I wouldn't wish for significant changes.
Going into mission 7, my first thought was that mission 2 of the first human book has been removed. I liked the human books, so I lean more on the side of keeping missions in general. But looking back at that mission, I don't think it could have been smoothly been introduced in the revised storyline. There was more tension between attacking and defending (because of having two paths), but the gameplay was not unique and exceptional, it made the perceived urgency of the demonic invasion quite smaller too. So in the end, I think removing it was the good choice, it would have been a weird filler otherwise.
Still, expect me to complain if I notice later that a mission I really liked has received the axe.
Mission 1
Difficulty (strategy): very low
Difficulty (execution): low
Story: sets up a lot of future narrative, a good way to start things.
Rating: 4/5
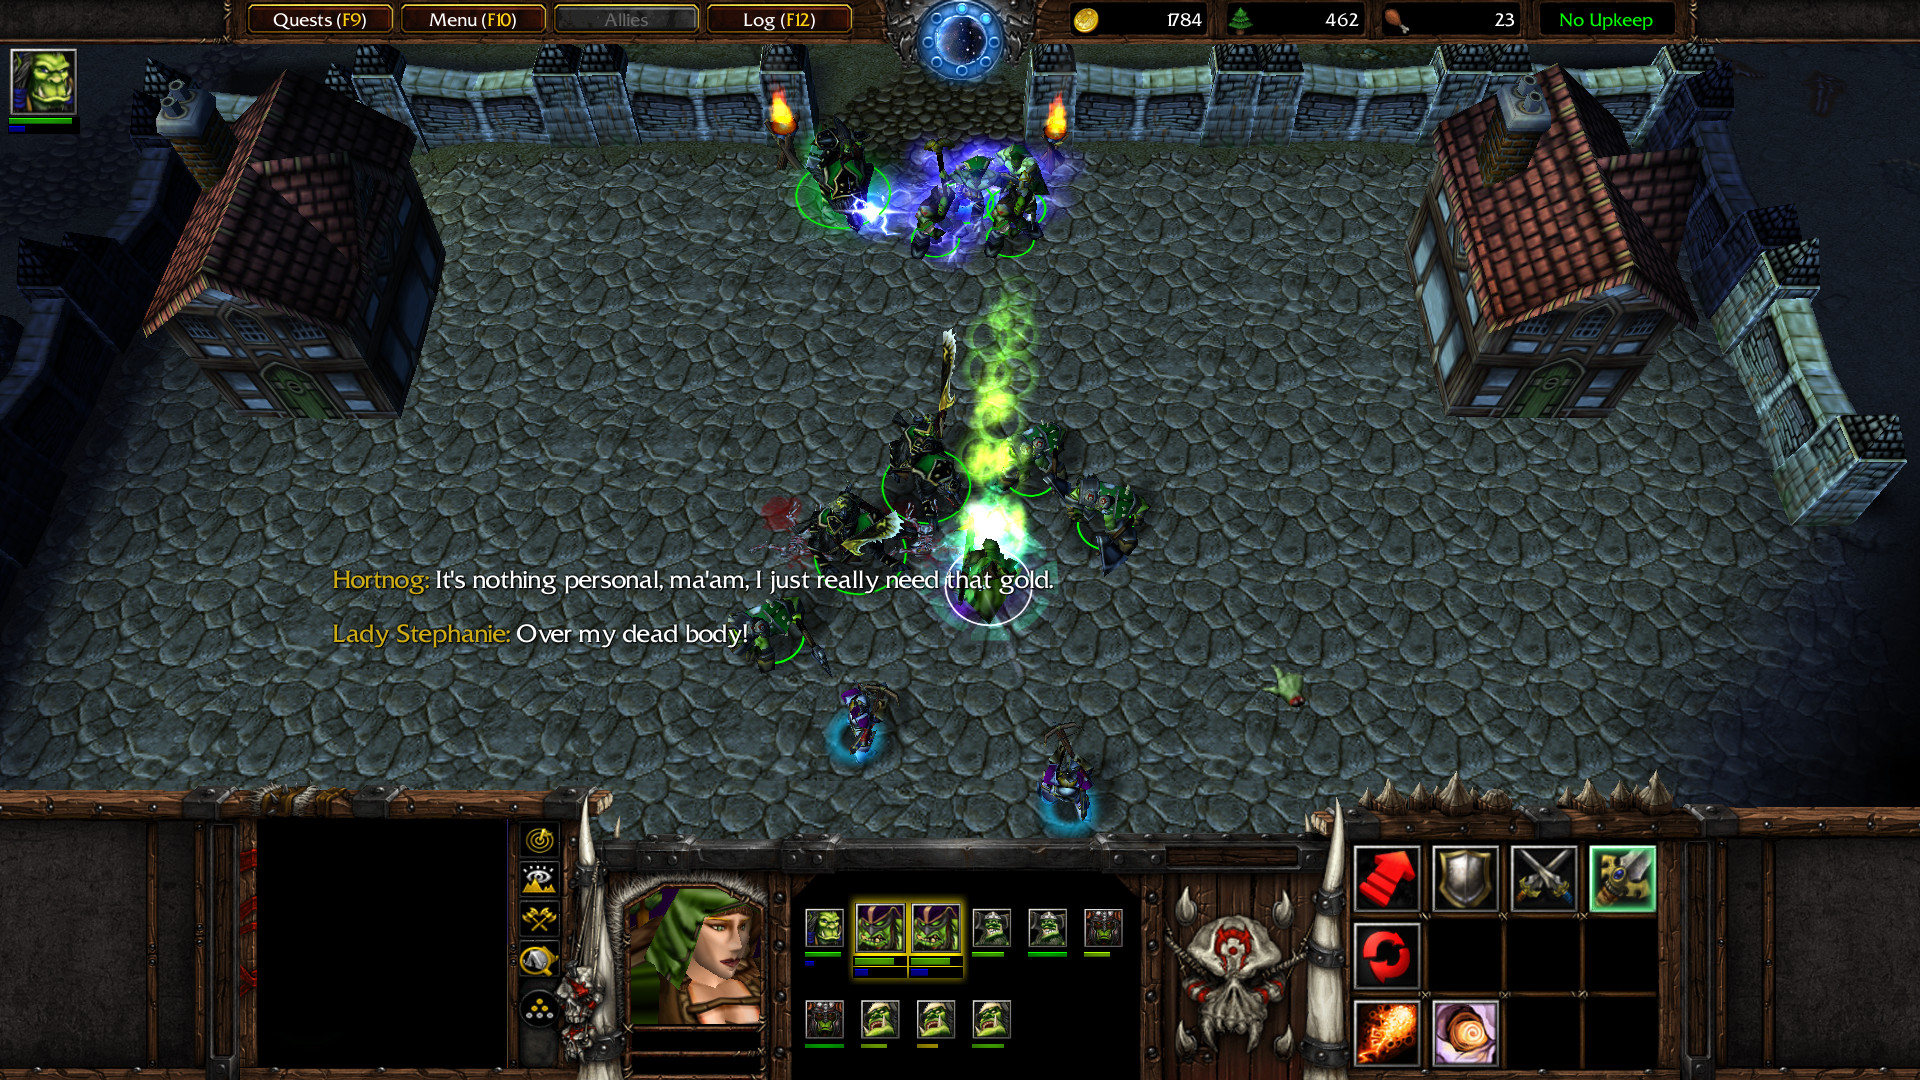
Comment : Not giving full marks because I stopped a few times to let Rangul regenerate. There are some runes along the mission, so the pacing isn't a disaster, but I feel some countdown to ransack the mansion before the return of the lord would have made the mission more dynamic. I understand you may not want to reveal who Vanessa's father really is, but I think this could be done without spoiling it.
Misc. issues: I noticed the following text (in Geographical Knowledge) : "We may not have taken Arkain yet, but its human nations feed us for our islands are not enough to keep us satisfied." I was extremely confused reading this the first time, enough to note it down. This sentence would be a lot clearer with a coma before the causal "for".
Mission 2
Difficulty (strategy) : low
Difficulty (execution) : high
Story : sets up more future story lines
Rating: 5/5
Comment: There is only one main path to defend, and unit compositions aren't too hard to figure out. But reclaiming the additional gold mines at the start while defending the main base is tricky at the start, and taking down the first enemy base is far from easy. The best solution is to make an advanced base to be able to quickly attack after having repelled a dwarven attack, and to quickly stream in reinforcements. Things get easier after that. (The secret path can also be used to finish things faster.) The typical Arkain experience in many ways.
Misc. issues: nothing
Mission 3
Difficulty (strategy): low
Difficulty (execution): medium
Story: not the most exciting, but important for the story
Rating: 4/5
Comment: I fortified the north side by luck. It's the only one attacks come from, and with a few units to support towers, it's very easy to hold, while Aridon, Krom and some light support can go kill creeps to reclaim the southern part of the map. I liked finding the hidden spots with enemies and items. But it felt unnecessarily slow. Actually taking out the orc base was more challenging, I had to stream in reinforcements to slowly overwhelm it.
Misc. issues: I actually noticed what I think is a meaningful bug. You don't need to actually activate all the Nexuses to complete the mission, only to take out the Icewind clan. Having the mission end by completing an unrevealed main quest while having another main quest still pending completion (I had only 3 out of 4 nexuses) isn't great.
Mission 4
Difficulty (strategy): low
Difficulty (execution): medium
Story: Not the most important lore/plot, but a wonderful way to present Largoth taking control of the mind of Selior
Rating: 5/5
Comment: The fighting is a bit repetitive, and the grouping issues made me lose some supporting vices, but I still think it's a very good mission.
Misc. issues: The selection priority of the vices has annoyed me a lot. Cruelty has healing, but it has a lower selection priority than Wrath, Revenge, Gluttony and Hatred. It would be a lot handier if Cruelty was selected at the top of the group. It's a lot more convenient to make a group with the units you may want to heal and to spell target the icon in the group when you see the HP bar drop, instead of trying to find it and click it on the main map. Hatred also has a higher selection priority than Lust, despite having no active spells, while Lust has.
Also, in the ending dialogue showing things Selior says, there is a typo: "unwinable" instead of "unwinnable".
Mission 5
Difficulty (strategy): medium
Difficulty (execution): medium
Story: I played this mission in the human book, and the story is a lot more fleshed out here. The imperial regiments, the characters, the enemies (no more "pillagers")... There has been big improvements.
Rating: 5/5
Comment: The big darmkind waves at the start are a great touch. It starts hot and fast. There is some strategic thinking required afterwards to repel attacks, and the limited gold in the first mine creates some tension. I tried using some soldiers at first, but ended up picking mass crossbows, with the heroes on the frontline, and some healing behind. (The Wolf regiment stalkers are worse than crossbows, so mass range units may not be the choice with them). Once the Goldaxe and the Ironthunder are out of the picture, it's more of a formality to really finish things, though.
Mission 6
Difficulty (strategy): medium
Difficulty (execution): medium
Story: The different human factions, all with appropriate units, made things interesting. The irregular of Lor were the most fun for me, the Demon Slaves spiced things up too.
Rating: 4.5/5
Comment: I picked the Zirr Nexus, I'm not sure if it matters too much which one is picked. I relied on mass abominations in front and fire-throwing thingies, lorekeepers and obsidian statues behind. But when first building the base, without having yet the gold reserve to get a big army, it was quite a challenge to repel attack after attack. I didn't have much margin. Having the second gold mine running quickly helped me a lot to not be overwhelmed.
When Krom is sent with reinforcements, I think the player is supposed to take out the Remnants of Lor and get a second base there. Because I didn't see where they spawned at the start, and because I wanted a third hero to help defend my base, I sent them right to my main base. Most units died on the way, but Krom made things easier, and the Remnants of Lor stopped sending attack waves anyway (I would suggest they keep attacking). I made use of shades to scout the map and to warn me of enemy attacks. Extremely useful.
When the first human base mentioned sending a messenger, I tried to look out for him, before being sure there actually was no way to prevent the other bases from being informed. It felt a bit odd that the mission emphasised not letting humans escape and discretion (only being able to pick one Nexus to help), yet the camp get informed like this. What would prevent the garrison from sending out its own messengers ? The map layout doesn't give the impression that the undead are really blocking the only way out after taking out the first base.
The gold for killing the Dragon was a bit disappointing.
Mission 7
Difficulty (strategy): medium
Difficulty (execution): high
Story: I liked it in the human book, it has been improved here.
Rating: 5/5
Comment: Playing with the Bulls mixes things up, with different choices compares to mission 5 units. However, brutes seem straight up bad compared to chargers (more gold, 3 food instead of 2 for less armor and 15% more HP?). The slayer is weak for its food cost, but it gives a good aura, so mixing one or two in a composition makes sense. Chargers vs Bullfighter is arguable (it's easier to keep bullfighters alive, and they are more cost efficient, but chargers are more population efficient) so I guess it's good. The hidden Bloodhand base is a neat touch compared to the original mission.
The Darkmind and Ironthunder don't rebuild their bases, so it's not too difficult to grind them out, but when your allies die, Darkmind counter-attacks can be really nasty if you're not prepared. The chokepoint to enter the Darkmind base is nasty, but not to the point of harming the fun of the big battles. Especially if you think to use AoE on the tightly packed orcs blocking the chokepoint.
Misc. issues: I noticed that two of the starting chaplains, and the two starting catapults, don't group correctly with others. They have identical stats, but the game seems to think they are a different unit type. It's relatively minor, but it's weird.
A more serious issue is that the Wolf regiment and Lerrig forces don't use their gold mine, so it's completely possible to build villages in their bases and start "stealing" their gold mines. This makes it trivial to get on three gold mines very quickly. I would definitely call this an exploit.
Most people are writing in the New Content thread. But that's people who already knew the series before. Reforged has been really terrible for the WC3 custom campaigns...
I picked Arkain back up a few days ago. All missions played using 0.69a on v1.29.2 on hard difficulty (except mission 2, because I have to start each map from the campaign screen for the difficulty to work correctly, it's reset to normal when the game starts the next mission after a victory).
I'm now trying Mission 1 of the second arc, but difficulty seems a lot higher than in previous missions. My main issue is that my troops constantly have to travel between the Darkmind base, the gold mine expansion and other spots (I'm not quite sure if my main base stays completely safe once I have the expansion).
Towers are extremely weak compared to enemy units (Salrian pikemen obliterate towers for example), and of course they don't benefit from Rangul's scepter of healing. I usually like having tower support to take better trades, but I imagine the answer here is somehow to max out low upkeep to hold only with army, build a gold reserve before taking out one enemy base... But I can't properly use the scepter of healing bonus when moving troops back and forth between bases with barely any respite, and the Darkmind do a really awful job at keeping themselves alive, not even rebuilding destroyed structure (unless I missed it ?). This will need more thinking.
Review of Arc 1
About my mission ratings: there are some missions I prefer over others among the 5/5, but this rating means I think the mission serves its purpose well and I wouldn't wish for significant changes.
Going into mission 7, my first thought was that mission 2 of the first human book has been removed. I liked the human books, so I lean more on the side of keeping missions in general. But looking back at that mission, I don't think it could have been smoothly been introduced in the revised storyline. There was more tension between attacking and defending (because of having two paths), but the gameplay was not unique and exceptional, it made the perceived urgency of the demonic invasion quite smaller too. So in the end, I think removing it was the good choice, it would have been a weird filler otherwise.
Still, expect me to complain if I notice later that a mission I really liked has received the axe.
Mission 1
Difficulty (strategy): very low
Difficulty (execution): low
Story: sets up a lot of future narrative, a good way to start things.
Rating: 4/5
Comment : Not giving full marks because I stopped a few times to let Rangul regenerate. There are some runes along the mission, so the pacing isn't a disaster, but I feel some countdown to ransack the mansion before the return of the lord would have made the mission more dynamic. I understand you may not want to reveal who Vanessa's father really is, but I think this could be done without spoiling it.
Misc. issues: I noticed the following text (in Geographical Knowledge) : "We may not have taken Arkain yet, but its human nations feed us for our islands are not enough to keep us satisfied." I was extremely confused reading this the first time, enough to note it down. This sentence would be a lot clearer with a coma before the causal "for".
Mission 2
Difficulty (strategy) : low
Difficulty (execution) : high
Story : sets up more future story lines
Rating: 5/5
Comment: There is only one main path to defend, and unit compositions aren't too hard to figure out. But reclaiming the additional gold mines at the start while defending the main base is tricky at the start, and taking down the first enemy base is far from easy. The best solution is to make an advanced base to be able to quickly attack after having repelled a dwarven attack, and to quickly stream in reinforcements. Things get easier after that. (The secret path can also be used to finish things faster.) The typical Arkain experience in many ways.
Misc. issues: nothing
Mission 3
Difficulty (strategy): low
Difficulty (execution): medium
Story: not the most exciting, but important for the story
Rating: 4/5
Comment: I fortified the north side by luck. It's the only one attacks come from, and with a few units to support towers, it's very easy to hold, while Aridon, Krom and some light support can go kill creeps to reclaim the southern part of the map. I liked finding the hidden spots with enemies and items. But it felt unnecessarily slow. Actually taking out the orc base was more challenging, I had to stream in reinforcements to slowly overwhelm it.
Misc. issues: I actually noticed what I think is a meaningful bug. You don't need to actually activate all the Nexuses to complete the mission, only to take out the Icewind clan. Having the mission end by completing an unrevealed main quest while having another main quest still pending completion (I had only 3 out of 4 nexuses) isn't great.
Mission 4
Difficulty (strategy): low
Difficulty (execution): medium
Story: Not the most important lore/plot, but a wonderful way to present Largoth taking control of the mind of Selior
Rating: 5/5
Comment: The fighting is a bit repetitive, and the grouping issues made me lose some supporting vices, but I still think it's a very good mission.
Misc. issues: The selection priority of the vices has annoyed me a lot. Cruelty has healing, but it has a lower selection priority than Wrath, Revenge, Gluttony and Hatred. It would be a lot handier if Cruelty was selected at the top of the group. It's a lot more convenient to make a group with the units you may want to heal and to spell target the icon in the group when you see the HP bar drop, instead of trying to find it and click it on the main map. Hatred also has a higher selection priority than Lust, despite having no active spells, while Lust has.
Also, in the ending dialogue showing things Selior says, there is a typo: "unwinable" instead of "unwinnable".
Mission 5
Difficulty (strategy): medium
Difficulty (execution): medium
Story: I played this mission in the human book, and the story is a lot more fleshed out here. The imperial regiments, the characters, the enemies (no more "pillagers")... There has been big improvements.
Rating: 5/5
Comment: The big darmkind waves at the start are a great touch. It starts hot and fast. There is some strategic thinking required afterwards to repel attacks, and the limited gold in the first mine creates some tension. I tried using some soldiers at first, but ended up picking mass crossbows, with the heroes on the frontline, and some healing behind. (The Wolf regiment stalkers are worse than crossbows, so mass range units may not be the choice with them). Once the Goldaxe and the Ironthunder are out of the picture, it's more of a formality to really finish things, though.
Mission 6
Difficulty (strategy): medium
Difficulty (execution): medium
Story: The different human factions, all with appropriate units, made things interesting. The irregular of Lor were the most fun for me, the Demon Slaves spiced things up too.
Rating: 4.5/5
Comment: I picked the Zirr Nexus, I'm not sure if it matters too much which one is picked. I relied on mass abominations in front and fire-throwing thingies, lorekeepers and obsidian statues behind. But when first building the base, without having yet the gold reserve to get a big army, it was quite a challenge to repel attack after attack. I didn't have much margin. Having the second gold mine running quickly helped me a lot to not be overwhelmed.
When Krom is sent with reinforcements, I think the player is supposed to take out the Remnants of Lor and get a second base there. Because I didn't see where they spawned at the start, and because I wanted a third hero to help defend my base, I sent them right to my main base. Most units died on the way, but Krom made things easier, and the Remnants of Lor stopped sending attack waves anyway (I would suggest they keep attacking). I made use of shades to scout the map and to warn me of enemy attacks. Extremely useful.
When the first human base mentioned sending a messenger, I tried to look out for him, before being sure there actually was no way to prevent the other bases from being informed. It felt a bit odd that the mission emphasised not letting humans escape and discretion (only being able to pick one Nexus to help), yet the camp get informed like this. What would prevent the garrison from sending out its own messengers ? The map layout doesn't give the impression that the undead are really blocking the only way out after taking out the first base.
The gold for killing the Dragon was a bit disappointing.
Mission 7
Difficulty (strategy): medium
Difficulty (execution): high
Story: I liked it in the human book, it has been improved here.
Rating: 5/5
Comment: Playing with the Bulls mixes things up, with different choices compares to mission 5 units. However, brutes seem straight up bad compared to chargers (more gold, 3 food instead of 2 for less armor and 15% more HP?). The slayer is weak for its food cost, but it gives a good aura, so mixing one or two in a composition makes sense. Chargers vs Bullfighter is arguable (it's easier to keep bullfighters alive, and they are more cost efficient, but chargers are more population efficient) so I guess it's good. The hidden Bloodhand base is a neat touch compared to the original mission.
The Darkmind and Ironthunder don't rebuild their bases, so it's not too difficult to grind them out, but when your allies die, Darkmind counter-attacks can be really nasty if you're not prepared. The chokepoint to enter the Darkmind base is nasty, but not to the point of harming the fun of the big battles. Especially if you think to use AoE on the tightly packed orcs blocking the chokepoint.
Misc. issues: I noticed that two of the starting chaplains, and the two starting catapults, don't group correctly with others. They have identical stats, but the game seems to think they are a different unit type. It's relatively minor, but it's weird.
A more serious issue is that the Wolf regiment and Lerrig forces don't use their gold mine, so it's completely possible to build villages in their bases and start "stealing" their gold mines. This makes it trivial to get on three gold mines very quickly. I would definitely call this an exploit.
Last edited:
Review of Arc 2 - Missions 1 to 4
Mission 1
Difficulty (strategy): high
Difficulty (execution): very high
Story: As someone pointed out in the other thread, it's a bit strange that all units we use in this mission, but Rangul and a couple starting units, are Darkmind. I also want to ask how did Rangul manage to get there, while they are trapped and can't escape. Still solid story-telling.
Rating: 4.5/5
Comment : On my first two tries, I got destroyed. I was using outrunners/trackers that were just not effective enough in battle. I've been used to human towers (which are often useful), so I made the mistake of trying to use orc towers (which are garbage in this map). And despite the speed of wolf-mounted units, I was getting constantly outmanoeuvred. The Darkmind ally just dies if we don't help it a bit.
Hence, I tried to figure out a better strategy. I didn't try for some sort of cheese-rush, but something allowing to really defeat the enemies. I thought some magic attack might be useful against the many heavy-armored opponents, and the fireball stun/damage of the warlock also seemed very useful to get rid of enemies as fast as possible, so I used them a lot. The witch-doctor came invaluable to scout attacking enemies in advance, helping to be in the right position at the right time. I continued using outrunners as a frontline meatshield. This worked out much better than my previous attempt.
Still, the human attacks were relentless and I needed multiple save reloads to do things right and get rid of the base of the salrian phalanx. I just barely managed to destroy their castle, a barracks and all their peasants before the Phoenix Regiment came to kill all my units that couldn't escape. At the same time, the defense of the Darkmind base was very fragile. However, since the salrian couldn't rebuild, I eventually finished them off. I still had to pay attention to finish the mission afterwards, but with three goldmines and one enemy less, it was just a matter of time until I cleaned pink's base, stray units and red's base.
I got frustrated at times by the speed at which a fight could turn into a slaughter against me. But it's enjoyable to have to think more about strategy.
Still, the seesaw difficulty curve of Arkain missions is not ideal. In this specific mission, besides the regular attack from the bases, there is a massive assault from the bull regiment (early on) and a (smaller?) one from the wolf regiment (after quite some time, it was just as I was finishing off purple's base in my case). With 3 enemy bases and 2 special attacks, the difficulty seems quite front-loaded to me. I'm thinking changing the timing/size/number of the special attacks could make it smoother.
Mission 2
Difficulty (strategy): low
Difficulty (execution): very low
Story: It has been clearly improved over the FHB version of this.
Rating: 3.5/5
Comment: At the beginning, I wanted to ask why elven footmen with 80% protection from piercing attacks would need "Defend". But as we rescue some human footmen, I guess it makes it easier to handle them as a group. There is no more killing of isolated demons to get items, but then it didn't really make sense story-wise in the original.
However, I must question the point of having an automatic resurrection of the heroes in the second part of the mission. It makes victory very easy, it's basically impossible to lose. It felt like playing in easy, except I had picked hard. Even if a hero's death led to losing the mission, this mission would still be a lot easier than mission 6 of this act, so why not make it more challenging?
I like Salana and Gardon, but this mission remains somewhat bland.
Misc. issues: The "NEW LORE AVAILABLE" message mentions "Mira Trueshot". The cutscenes call her "Mina".
Mission 3
Difficulty (strategy): medium
Difficulty (execution): medium-high
Story: The demons and their slaves wanting to bring back some powerful item and undead crushing them turned out much better than I'd have expected from such a summary.
Rating: 5/5
Comment: It's difficult to keep the difficulty ratings consistent.
There is only one side of the base to defend, so once it's figured out, it helps a lot. There is no constant moving between different points to avoid collapse, like in mission 1, which increase difficulty significantly compared to static defense. Still, I found myself at the limit early on to repel attacks and expand to the northern gold mine. The undead demonlord we can get is extremely useful.
The Rohir Nexus felt useful as an ally, which is more than can be said from many campaign "allies".
I lost my advanced base in the middle of the map a couple times because my army wasn't there to defend, but I had more than enough gold to progressively wipe out most enemies. My composition was simplistic, with mass scourges and a couple obsidian statues. I doesn't work against air units, but defensive towers/heroes did the job well enough, and I could add a few poachers if really needed. Destroying the very well defended south-east base was completely worth it.
As said by others, the demon slaves buildings look nice, and it would be neat if there was some way to "extend" Edarus' list.
From the New Content thread, the side-quest was described as OP. On my first try, I completed it towards the very end of the mission. It killed off the remaining demons, but they were not much. After finishing the mission, I tried to rush the side quest just to see for myself. But when the enemies are still at full strength, its effect is fairly unimpressive. The item from the sidequest is worth it in any case.
Mission 4
One map, three missions!
I usually don't replay a map just to change the imperial regiment or undead nexus we have access to, but here the differences are much bigger. Also, because we use a different hero depending on the choice we make, items available to heroes in future mission change depending on the choice.
Story: No complaint, the motivations of all the clans are very well laid out, and the character personalities are interesting.
Goldaxe mission
Difficulty (strategy): low
Difficulty (execution): very low
Rating: 3/5
Comment: I tried this first because it seemed the most original in its goal. However, I have been disappointed by how insanely easy this mission is. I read in the "New content" thread that it was originally (pre-release) way too hard. I don't know if the goal was slashed from 50K to 25K or something similar, because the 25K goal is a joke. Build two more town halls, have all three town halls research mercenary contracts, don't invest any gold in anything, collect from the goldmine, wait 30 minutes doing nothing for Rangul's cash to come in, and win.
I really like the originality of this mission, but in its current state I'm disappointed. I don't even know if the Skullblades start attacking us after Rangul contracts us, because the mission didn't go to this point. I suspect the mission would be better with an increase of the target gold to something like 40K and an increase in the payout of bullying minor clans. As is, training an army is too costly compared to the benefits (defending against attacks/submitting minor clans) to really be useful in completing the main quest.
The hidden humans from the Boar Regiment watching what's going on was a neat touch too, but it's not something that matters at all when it comes to making gold.
Misc. Issues: Supposedly, the minor clans we submit pay us some cash, but honestly it didn't seem to make a big difference to my bottom line and I couldn't figure out how much they actually gave me. It would be much more convenient if the logbook specified the exact amount we are paid.
Deathbreeze mission
Difficulty (strategy): medium
Difficulty (execution): very high
Rating: 4/5
Comment: Thankfully, the Darkmind were able to defend themselves... The Ironthunder were a giant pain to take down. Admittedly, I didn't rely much on siege to take down casters, so that may be my fault. When I make a bunch of catapults, they usually end up being vulnerable and destroyed unless I have a chokepoint to exploit or a big amount of meatshield. The Ironthunder's supershamans are extremely unnerving, as are the witch doctor's stuns.
Thankfully, towers are effective enough against Skullblade attacks that, during an all-out attack on Ironthunder, there is no immediate worry there won't be a base left at home. And there is a second gold mine to exploit, which is very needed. I preferred to stay passive in the beginning to buy the Goldaxe clan's help as soon as possible, but two-thirds of my starting gold was used by the time I finally killed off purple.
I noticed that while the Ironthunder base is rebuilt by peons, the target to which it is rebuilt is not the same as its starting buildings. With 5 barracks and 6 spirit lodge, a single push will stall before it can break enough the production capacity of the enemy, but when they're down to 3-4 each, it's more feasible to destroy enough to reduce their production capacity, while preventing new ones from being built and continuously streaming reinforcements.
I found the Ironthunder too annoying ("going easy", he said...) to give this full marks. I wish there was some way to tell our allies which enemy base to target. A single attack by the Ravaging Fire clan or the Goldaxe clan on the Ironthunder clan would have made taking them down much less frustrating.
After the Ironthunder were down, it still took some effort to finish green and red, but it was much more relaxed. Minor clans attacking us on sight when we get near got annoying when I wanted to attack green, and they have to be completely wiped out to leave us alone, they don't submit at all to us. Gameplay-wise, it doesn't really matter, but it felt kind of inconsistent. Although the AI Darkmind doesn't know any better than to wipe out the bases of minor clans...
Misc. Issues : When we pay the Goldaxe, the completion text says the quest is named "Power of Riches", but the quest menu says it's called "Greed is Good".
Darkmind mission
Difficulty (strategy): high
Difficulty (execution): high
Rating: 5/5 (despite some minor but noticeable issues, this is an excellent mission)
Comment: I enjoyed this mission a lot. Increasing the population limit through submitting minor clans is a very clever game mechanic. I wanted to keep the submitted clans alive as much as possible, but I couldn't really move my army all over the place, so the white-colored minor clan that I submitted first died to a Skullblade attack. I didn't try to submit a lot of clans quickly, because with only one gold mine I wanted to stay in no upkeep anyway. But I got the Slavemongers and Spinefangers to the north, to help me against the Bloodhand. I used peons to repair their buildings whenever needed and to add a few towers, while my own army supported them. Instead of having to take the attacks from red alone, I had great support.
At some point, the Deathbreeze attacked the Bloodhand and I tagged along to kill a lot of enemies, but the progress in razing was limited. From then on, I was almost constantly fighting red. Something must have triggered the AI to think that my units/towers protecting teal and purple were too forward, because there often were streams of enemy units, with rare pauses followed by bigger attacks.
With allies (the slavemongers got about 100 kills throughout the mission), towers, and witch doctor healing, my mass warlord frontline suffered very little losses in these defensive fights, but it was difficult to take the initiative. I progressively managed to got rid of some buildings on the way to the fortress, then later to destroy it. I lost most of my units in these building-razing operations, and I had to rely on a lot of barracks to produce a new army quickly to try to rush down all the surviving peons. Even after that, red still had so many production buildings remaining that it took a long time to take them down, one by one, and I had mostly gone through my first gold mine (although I had reserves) by the time I could finally use red's.
Then I turned my attention to getting more minor clans under my control. I thought it would be easy with my main enemy defeated, but the Goldaxe clan turning against me, and the Skullblades attacking some of the clans I submitted meant that I was unable to prevent some of my newfound clients from getting destroyed. This difficulty spike was most welcome.
It was fun also luring some units from a minor clan to the nearby allied minor clan, for them to fight and open the way for the great hall.
I considered trying to get all major clans eliminated, but the Deathbreeze sucked at attacking the Ironthunder and the Goldaxe were doing nothing. The Ironthunder were very annoying when I tried to attack them, and I decided to just submit all minor clans and be done with it.
Misc. Issues : The text says how minor clans are using goldaxe mercenaries to defend them, but we don't see any goldaxe/mercenary units among their ranks, just their standard units.
The main quest text has a typo: "Destroy all Great Halls and Stronghols of the minor clans" It should be Strongholds.
Also, after Rangul paid off the Goldaxe clan, instead of attacking the Skullblades, they just sat around my towers at the spot they were attacking me when I submitted the 8th minor clan, triggering the Goldaxe alliance. Later on, they event sent further troops to the same spot. I believe the AI bugged out, with the AI "plans" not being properly reset with the alliance change.
Finally, the newly submitted minor clans don't immediately stop attacking us, but that's a known issue already.
Review of Arc 2 - Missions 5 to 7
Mission 5
Difficulty (strategy): medium
Difficulty (execution): medium-high
Story: The three Ironfist demi-heroes and all their talking, no more "picking one ally" to help you when you'd want everyone, the Ironbark, more dialogue on Larantos, the traitorous passiveness of the elven deserters... The improvements in story-telling are big compared to the first human book.
Rating: 4.5/5
Comment: I liked having the different sidequests to be able to improve my army (getting full upgrades helps so much, and judicators are fantastic units, basically 3-food pierce-resistant knights) in a way that makes sense story-wise.
However, I've been disappointed by the mission's difficulty. I completed this mission in the FHB without an ally and back when upkeep was still 7/4 instead of 8/6, and that was certainly too much. When I replayed the FHB later, I also used Gardon as an ally and it was still harder than here. Here I never really felt in trouble, in desperate survival. The elven deserters don't attack our base at all until we attack them, and obviously any good player will wipe them out on the first attack, so defending while resources are gathered and trolls are cleared is relatively easy. In the FHB, I would have died without the defensive walls. Here, I think I wouldn't have had much trouble without them (and don't get me wrong, I don't want them to be removed).
Still, taking out Lera's base require some good organization and gold reserves to overflood the castle area that gets defended by Larantos (I didn't try aerial units cheese, although I don't think it would have worked well against elves), so it was not exactly easy either. I simply expected something trickier.
I also have to say that the mission felt slow when I waited for attacks to repulse easily while my gold bank grew, because rushing an enemy base and building a lot of forward production buildings and units is too costly to be sustained without anything banked up.
Misc. issues: I understand that the troll huts in the southeast are invulnerable because that's where the Troll Warlord appears later on, but even after you defeat him you can't get rid of them.
Just like in mission 2, the "NEW LORE AVAILABLE" message mentions "Mira Trueshot". The cutscenes call her "Mina".
Some other text issues : "simple mistrust of human influence of the race as a whole" human influence on the race
"What difference does it make if I give the our lands" give our lands
In "Character Knowledge", Tormin: "I have no idea why seems to be so close" why he seems to be
Interlude
The amount of cutscene storytelling in Arkain is quite impressive.
Some typos : "eligable" eligible "rendevous" rendezvous. And there is a double space between two words in "Be prepared for anything".
Mission 6
Difficulty (strategy): medium
Difficulty (execution): extremely high
Story: The FHB classic, but with dwarves thrown in and a new paladin demi-hero.
Rating: 4.5/5
Comment: The first part of the mission (everything up to the final fight) is of normal difficulty. Better be careful to not have a minor unit die, so it's not too easy, but it's nothing an experienced player can't manage. However, the final fight is insanely hard. To win, getting Rahandir's HP below 1000 is sufficient, but the player doesn't know it and that makes failing with 2K HP remaining on Rahandir all the more demoralizing. This is a very micro-intensive fight, and even with hotkeys and cycling through units to spam spells (including the priests dispel, something I usually don't bother with) and move them around (keeping the Firemage with its stun alive is very important, but he is very frail) and save reloads it felt too hard.
I actually ended up reloading a way earlier save, to change the spell upgrades for my heroes and to load Salomar with more mana, in order to do better. It still took me many tries and save reloads. I find that dealing with the mass summoning of undead units is by far the hardest part of the fight, so I saved when I felt I had beaten their waves without losing anything important or burning through too many healing runes.
I like a challenge, and beyond Arkain I have played some micro-intensive boss fights (CotF has some good ones), but there is a big discrepancy in difficulty within Arkain itself. Story-wise, it can be argued that difficulty is never smooth, but for the gameplay that's not good. Some missions would deserve a bit more difficulty, and this one a bit less. I suspect even removing two or three units from each of the two first undead waves would make a noticeable difference. It would still remain the hardest mission I've played in the True Story (and I've played most of act 3 already), but people without great micro skills wouldn't have to lean as heavily on saves.
Misc. Issues: Having a hero dying during the fight against Rahandir doesn't immediately end the quest as failed (and having all units dead does not even end the mission as a failure) However, it's not possible to win after a hero dies. A hero dying does seem to disable Rahandir's scripted undead spawning, which unsurprisingly makes the fight much much easier.
Mission 7
Another "one map, three missions" chapter. I played through all three factions, just like in Rise of the Clans.
Story: I can't tell compared to the FOB and FUB. Compared to the FHB, there is more lore with the dragon regiment coming in the picture, and the different undead nexus on the map. But for the most part, it's similar. However, unlike the first "one map, three missions", there is a big discrepancy between what the player does and the canon result. The Goldaxe making money and being bought by Rangul, the Darkmind submitting minor clans and their alliance defeating the major clans, that's all compatible. Humans destroying the orc fleet, orcs destroying the human fleet and undead destroying both, that's not. This is even more glaring if the player destroys some enemy bases (which is not required by the mission, but many Arkain players will do it anyway). With each faction, I annihilated the two others and the demons (items picked leave a lasting impact on which faction we picked).
Undead
Difficulty (strategy): low
Difficulty (execution): low
Rating: 3/5
Comment: Before writing this comment, I went and played this mission again. Hard difficulty as usual, fast speed also (I usually play at a slower speed except when nothing much is happening, no save. It took me about half an hour to completely clean the orc and human navies. The start of the mission was about building more defensive towers in the northern and southern island, before massing navy. After suffering significant damage from a dragon regiment landing, I added a few twindragons to destroy units that land.
There is no food limit on navy, and once defences are set up, it's quick and easy to mass two dozens of doomships and two-three dozens of frigate-equivalents. The orcs and humans make no attempt to replace their lost navies, so any destroyed ship is definitive progress. With massive local number superiority, the fleets of the mortal get completely outmatched.
It makes sense lore-wise that the undead mission is easier than the two others, but it's not too interesting.
Playing to destroy enemy bases is slightly more interesting and difficult, but because the best way against humans is to mass twindragons to snipe castles/peasants before destroying the rest, the twindragons production bottleneck makes this annoyingly slow. By the time I got to the main orc base, I discovered the humans had already wiped it out. This made me chuckle. Ships are very effective to get island enemies to run to the shore, get all killed, leaving a land army free to finish destroying things.
The demons are relatively easy to kill (especially considering ship assistance is possible). There are some good items, but it's tedious to travel all over the map.
Orcs
Difficulty (strategy): medium
Difficulty (execution): medium
Rating: 4/5
Comment: The attacks we receive early on can be very deadly if unprepared, it's definitely more challenging than the undead version. Also, the 12 o'clock island isn't occupied yet, and undeads loves to attack it when it's occupied.
Because orc towers suck, defense must rely more heavily on having the appropriate units and using the heroes well. However, I don't recall having been attacked more than once by Galareth's base, and more importantly, sufficient number of frigate-class ships can completely annihilate the air transports used by the humans. Likewise, surrounding the Zirr nexus base with frigate-class ships and juggernauts allow a small force to clean it, to reduce enemy attacks and go on with four goldmines.
The rest of the mission is very easy. Just like with the undead, three or four dozens ships are enough to completely clean the human navy and win. Going for the complete elimination of the enemies is probably most interesting with orcs, as navy can't properly destroy the human bases and there is no twindragon equivalent. Landing in the eastern swamps to build a base and rush the Knights of Kome and the Dragon regiment is kind of interesting. The undead bases are relatively boring in comparison.
Misc. issues : At one point, I could see attack effects in the fog of war between humans and undead when playing as the orcs. I don't know if that's a common W3 bug or not, but it's the first time I noticed it. I have a savegame from a time when it happens.
Humans
Difficulty (strategy): medium
Difficulty (execution): low
Rating: 3.5/5
Comment: I'm sorry to say, but this felt like a downgrade compared to the FHB version. All the same comments about how the enemy navy is not replaced and how it's easy to overwhelm it still apply. We start with only one goldmine, but it's extremely easy to expand to three. With three and a half heroes (the paladin demi-hero is quite good), it's relatively easy to add some units to have a good defensive force that can tackle any attacks. Human towers are good, too.
But towers are not so needed when you can simply build a frigate wall. Yes, I'm not ashamed, I did this. At first I tried to position frigates to intercept orc aerial transports, but I ended up with a complete impenetrable frigate wall surrounding my territory. This is of course unnecessary (with the same resources, I could have easily made enough battleships to completely eliminate the orc navy and win the mission), yet it's still ridiculous that it is possible at all.

The Gezarrin units being limited in number is interesting. They have the same food cost as footmen, but are much better. This number limitation is much more appropriate than when the 7-food elites were limited in number (it made sense to prevent the player from having a full elite army, but at 7 food each the player already paid heavily the privilege to use them) in the second human book.
But I said this mission felt like a downgrade compared to the FHB version. Let me expand on this. In the original version, you don't have undead bases to destroy, but then again destroying them is both non-canon and not very interesting. However, you had to wait for a while for Aedale and Salomar to arrive, which made initial defense more challenging. Furthermore, Deathbreeze orcs would then be revealed as having landed in the swamp and having it occupied, starting surprise attacks on us. Getting rid of them was more fun than just sending ships to bombard an enemy base into oblivion.
Having access to the dragon regiment units is not a bad touch for variety, but we don't really play as the dragon regiment either in this mission.
Unfortunately, the constraints of having three missions on one chapter make it hard to make the outcomes of each consistent story-wise, especially if the player starts destroying enemy bases. Having the enemy make an attempt at replacing the lost ships (like was done in the final Van Durce mission in the SHB) would at least be an improvement. Right now, it feels like a formality. Scripting the AI to not rush to the port to get massacred by ships is probably too difficult, but alternatively maybe it shouldn't be so easy to have dozens and dozens of ships.
Misc. issues : Sir Chevaran's selection priority is lower than that of the Gezarrins. Likewise, Salomar is not on top for heroes. This makes using their healing spell slightly less convenient.
Mission 5
Difficulty (strategy): medium
Difficulty (execution): medium-high
Story: The three Ironfist demi-heroes and all their talking, no more "picking one ally" to help you when you'd want everyone, the Ironbark, more dialogue on Larantos, the traitorous passiveness of the elven deserters... The improvements in story-telling are big compared to the first human book.
Rating: 4.5/5
Comment: I liked having the different sidequests to be able to improve my army (getting full upgrades helps so much, and judicators are fantastic units, basically 3-food pierce-resistant knights) in a way that makes sense story-wise.
However, I've been disappointed by the mission's difficulty. I completed this mission in the FHB without an ally and back when upkeep was still 7/4 instead of 8/6, and that was certainly too much. When I replayed the FHB later, I also used Gardon as an ally and it was still harder than here. Here I never really felt in trouble, in desperate survival. The elven deserters don't attack our base at all until we attack them, and obviously any good player will wipe them out on the first attack, so defending while resources are gathered and trolls are cleared is relatively easy. In the FHB, I would have died without the defensive walls. Here, I think I wouldn't have had much trouble without them (and don't get me wrong, I don't want them to be removed).
Still, taking out Lera's base require some good organization and gold reserves to overflood the castle area that gets defended by Larantos (I didn't try aerial units cheese, although I don't think it would have worked well against elves), so it was not exactly easy either. I simply expected something trickier.
I also have to say that the mission felt slow when I waited for attacks to repulse easily while my gold bank grew, because rushing an enemy base and building a lot of forward production buildings and units is too costly to be sustained without anything banked up.
Misc. issues: I understand that the troll huts in the southeast are invulnerable because that's where the Troll Warlord appears later on, but even after you defeat him you can't get rid of them.
Just like in mission 2, the "NEW LORE AVAILABLE" message mentions "Mira Trueshot". The cutscenes call her "Mina".
Some other text issues : "simple mistrust of human influence of the race as a whole" human influence on the race
"What difference does it make if I give the our lands" give our lands
In "Character Knowledge", Tormin: "I have no idea why seems to be so close" why he seems to be
Interlude
The amount of cutscene storytelling in Arkain is quite impressive.
Some typos : "eligable" eligible "rendevous" rendezvous. And there is a double space between two words in "Be prepared for anything".
Mission 6
Difficulty (strategy): medium
Difficulty (execution): extremely high
Story: The FHB classic, but with dwarves thrown in and a new paladin demi-hero.
Rating: 4.5/5
Comment: The first part of the mission (everything up to the final fight) is of normal difficulty. Better be careful to not have a minor unit die, so it's not too easy, but it's nothing an experienced player can't manage. However, the final fight is insanely hard. To win, getting Rahandir's HP below 1000 is sufficient, but the player doesn't know it and that makes failing with 2K HP remaining on Rahandir all the more demoralizing. This is a very micro-intensive fight, and even with hotkeys and cycling through units to spam spells (including the priests dispel, something I usually don't bother with) and move them around (keeping the Firemage with its stun alive is very important, but he is very frail) and save reloads it felt too hard.
I actually ended up reloading a way earlier save, to change the spell upgrades for my heroes and to load Salomar with more mana, in order to do better. It still took me many tries and save reloads. I find that dealing with the mass summoning of undead units is by far the hardest part of the fight, so I saved when I felt I had beaten their waves without losing anything important or burning through too many healing runes.
I like a challenge, and beyond Arkain I have played some micro-intensive boss fights (CotF has some good ones), but there is a big discrepancy in difficulty within Arkain itself. Story-wise, it can be argued that difficulty is never smooth, but for the gameplay that's not good. Some missions would deserve a bit more difficulty, and this one a bit less. I suspect even removing two or three units from each of the two first undead waves would make a noticeable difference. It would still remain the hardest mission I've played in the True Story (and I've played most of act 3 already), but people without great micro skills wouldn't have to lean as heavily on saves.
Misc. Issues: Having a hero dying during the fight against Rahandir doesn't immediately end the quest as failed (and having all units dead does not even end the mission as a failure) However, it's not possible to win after a hero dies. A hero dying does seem to disable Rahandir's scripted undead spawning, which unsurprisingly makes the fight much much easier.
Mission 7
Another "one map, three missions" chapter. I played through all three factions, just like in Rise of the Clans.
Story: I can't tell compared to the FOB and FUB. Compared to the FHB, there is more lore with the dragon regiment coming in the picture, and the different undead nexus on the map. But for the most part, it's similar. However, unlike the first "one map, three missions", there is a big discrepancy between what the player does and the canon result. The Goldaxe making money and being bought by Rangul, the Darkmind submitting minor clans and their alliance defeating the major clans, that's all compatible. Humans destroying the orc fleet, orcs destroying the human fleet and undead destroying both, that's not. This is even more glaring if the player destroys some enemy bases (which is not required by the mission, but many Arkain players will do it anyway). With each faction, I annihilated the two others and the demons (items picked leave a lasting impact on which faction we picked).
Undead
Difficulty (strategy): low
Difficulty (execution): low
Rating: 3/5
Comment: Before writing this comment, I went and played this mission again. Hard difficulty as usual, fast speed also (I usually play at a slower speed except when nothing much is happening, no save. It took me about half an hour to completely clean the orc and human navies. The start of the mission was about building more defensive towers in the northern and southern island, before massing navy. After suffering significant damage from a dragon regiment landing, I added a few twindragons to destroy units that land.
There is no food limit on navy, and once defences are set up, it's quick and easy to mass two dozens of doomships and two-three dozens of frigate-equivalents. The orcs and humans make no attempt to replace their lost navies, so any destroyed ship is definitive progress. With massive local number superiority, the fleets of the mortal get completely outmatched.
It makes sense lore-wise that the undead mission is easier than the two others, but it's not too interesting.
Playing to destroy enemy bases is slightly more interesting and difficult, but because the best way against humans is to mass twindragons to snipe castles/peasants before destroying the rest, the twindragons production bottleneck makes this annoyingly slow. By the time I got to the main orc base, I discovered the humans had already wiped it out. This made me chuckle. Ships are very effective to get island enemies to run to the shore, get all killed, leaving a land army free to finish destroying things.
The demons are relatively easy to kill (especially considering ship assistance is possible). There are some good items, but it's tedious to travel all over the map.
Orcs
Difficulty (strategy): medium
Difficulty (execution): medium
Rating: 4/5
Comment: The attacks we receive early on can be very deadly if unprepared, it's definitely more challenging than the undead version. Also, the 12 o'clock island isn't occupied yet, and undeads loves to attack it when it's occupied.
Because orc towers suck, defense must rely more heavily on having the appropriate units and using the heroes well. However, I don't recall having been attacked more than once by Galareth's base, and more importantly, sufficient number of frigate-class ships can completely annihilate the air transports used by the humans. Likewise, surrounding the Zirr nexus base with frigate-class ships and juggernauts allow a small force to clean it, to reduce enemy attacks and go on with four goldmines.
The rest of the mission is very easy. Just like with the undead, three or four dozens ships are enough to completely clean the human navy and win. Going for the complete elimination of the enemies is probably most interesting with orcs, as navy can't properly destroy the human bases and there is no twindragon equivalent. Landing in the eastern swamps to build a base and rush the Knights of Kome and the Dragon regiment is kind of interesting. The undead bases are relatively boring in comparison.
Misc. issues : At one point, I could see attack effects in the fog of war between humans and undead when playing as the orcs. I don't know if that's a common W3 bug or not, but it's the first time I noticed it. I have a savegame from a time when it happens.
Humans
Difficulty (strategy): medium
Difficulty (execution): low
Rating: 3.5/5
Comment: I'm sorry to say, but this felt like a downgrade compared to the FHB version. All the same comments about how the enemy navy is not replaced and how it's easy to overwhelm it still apply. We start with only one goldmine, but it's extremely easy to expand to three. With three and a half heroes (the paladin demi-hero is quite good), it's relatively easy to add some units to have a good defensive force that can tackle any attacks. Human towers are good, too.
But towers are not so needed when you can simply build a frigate wall. Yes, I'm not ashamed, I did this. At first I tried to position frigates to intercept orc aerial transports, but I ended up with a complete impenetrable frigate wall surrounding my territory. This is of course unnecessary (with the same resources, I could have easily made enough battleships to completely eliminate the orc navy and win the mission), yet it's still ridiculous that it is possible at all.
The Gezarrin units being limited in number is interesting. They have the same food cost as footmen, but are much better. This number limitation is much more appropriate than when the 7-food elites were limited in number (it made sense to prevent the player from having a full elite army, but at 7 food each the player already paid heavily the privilege to use them) in the second human book.
But I said this mission felt like a downgrade compared to the FHB version. Let me expand on this. In the original version, you don't have undead bases to destroy, but then again destroying them is both non-canon and not very interesting. However, you had to wait for a while for Aedale and Salomar to arrive, which made initial defense more challenging. Furthermore, Deathbreeze orcs would then be revealed as having landed in the swamp and having it occupied, starting surprise attacks on us. Getting rid of them was more fun than just sending ships to bombard an enemy base into oblivion.
Having access to the dragon regiment units is not a bad touch for variety, but we don't really play as the dragon regiment either in this mission.
Unfortunately, the constraints of having three missions on one chapter make it hard to make the outcomes of each consistent story-wise, especially if the player starts destroying enemy bases. Having the enemy make an attempt at replacing the lost ships (like was done in the final Van Durce mission in the SHB) would at least be an improvement. Right now, it feels like a formality. Scripting the AI to not rush to the port to get massacred by ships is probably too difficult, but alternatively maybe it shouldn't be so easy to have dozens and dozens of ships.
Misc. issues : Sir Chevaran's selection priority is lower than that of the Gezarrins. Likewise, Salomar is not on top for heroes. This makes using their healing spell slightly less convenient.
Last edited:
Review of Arc 3
An arc with a more heavy focus on "micro" missions over "macro" missions. But I don't mind it too much, micro missions are a nice way to rest after a long macro missions... Except for that Rahandir boss fight in the previous act...
Mission 1
Difficulty (strategy): low
Difficulty (execution): medium
Story: So Blen mistrusting Genethas and going to help Gardon is canon, nice. I remember the Forgotten. In the FHB, it didn't seem to make much sense story-wise. It's quite better now.
Rating: 4.5/5
Comment: A rather straightforward no-base mission. Some fights requiring attention (to kill the red dreadlord in the south-east especially), but nothing crazy. We get a boss fight at the end, which is nice. It is easier than the old one against the Forgotten boss, and much easier than the boss fight against Rahandir. It lacks a little something to be as enjoyable as some other missions, but there is no glaring problem.
Misc. Issues : The ""Demon scum. Kill them all!" message can be displayed without actually seeing the demons (by being north of the ledge).
There is one spot where tiny-sized units can cut through among trees, while other units have to go around. Is that intended?
There is a duplicate Fire Golem that stands there and does nothing at the beginning of the fight (it was there whether or not I skipped the cutscene).
The corrupted fountain with 150K HP is actually destructible. What's the point?
Mission 2
Difficulty (strategy): high
Difficulty (execution): high
Story: It's ironic to have Orcs who brutally pillage and massacre human civilians without a care play the victim card. Hypocritical whiners. Poor Vanessa can't really explain it in the epilogue though.
Rating: 5/5
Comment: This is the macro map that took me the longest to complete so far in the True Story. I'm not sure it was the hardest, however, and it was easier than the Rahandir boss fight. There is a grind aspect to it, but in a mega-siege, that's to be expected.
I appreciated a lot the start with 240+ food worth of units. I picked goldaxe units, because they seemed simpler to handle, although they might be less powerful. It makes a lot of sense lore-wise to have such a big force available, and it makes for different gameplay. I experimented a bit to understand the map before my serious try. I destroyed the western Kome base, then the wolf regiment base, then the boar regiment base (the sneaky boar regiment units is a cool concept), replenishing losses with the two waves of reinforcements. I didn't bother actually defending my main base, my units were busy taking out the wolf regiment and I didn't want to thin my army needlessly. However, I took care to save some peons.
I waited for the darkmind to attack the central forward Kome base from the west, and I launched a two-pronged attack from the east and the north. The entrances are really narrow, and the chokepoints make it almost impossible to really take advantage of our numerical superiority. But with an attack on three fronts, the defense of the knights collapsed in the west and the north. As the base started to get destroyed from there, I could also attack units from behind and break this base. The massive amount of starting units and reinforcements was sufficient to clean up all the forward bases, although I suffered big losses.
I used my peons to build town halls as quickly as possible for all 5 available gold mines, I trained more peons for wood, and I started building training buildings in the former Kome base. My idea was to take advantage of the good defensive position it has against attackers from the main fortress. Although the narrow path made manoeuvring frustrating at times (still not as much as what prompted my rant about friendly unit collision being one of the worst issues in W3 in the SOB thread), it was manageable, and this also limited the strength of enemy attacks.
As my startings units died, I transitioned to a frontline of champions + hero, and a backline of axethrowers and ranged heroes, with witch doctors to cast their lifesaving healing spell. I also chopped through all the trees west and east of the path. I built a bunch of support towers over the ledge, and left a free area in the south of the eastern promontory to have the three catapults I had saved from the starting units. With their big range, they provided extremely good support. I had to repair or replace them from time to time, but they were quite safe and very cost-effective.
Most of the enemy attack waves weren't especially difficult to handle once I got my defensive setup fully in place, even the elven hero with its starfall ultimate could be handled with a good stun or by tricking her to start it on advanced units that would then retreat back over the bridge.
I spent a lot of time defending and banking up gold in low upkeep, taking only minor initiative. This caution was probably excessive and contributed to the mission taking so long (the final time in the end screen was over four hours), but then again being wasteful with gold would not have worked so great. I focused on training a few windriders to slowly clean up all the catapults, towers and archers over the walls of the enemy. I also made some towers near to the south-west goldmines to defend against aerial attacks. I would use the old orc hero teleport to go support the towers during attacks. This mission is maybe not the best to showcase it, but this teleport spell can be very powerful.
The darkmind were hell-bent on attacking the dwarves, but when I tried to support their attacks it failed miserably (sometimes I would test something risky and do a save-reload if gone wrong), so I switched objectives: getting rid of the Fist of Kome. The Knights of Kome had started their attacks against me, and the frequency of attacks was high enough that I couldn't move out too comfortably.
After a bit of testing, I choose aerial cheese. The Fist of Kome sucks at fighting against air units (their hero can't touch them), so a dozen of windriders, plus some bestiaries to be able to quickly train replacements for fallen units, worked very well. After losing more than 3-4 units, I would usually retreat, because the efficiency at which fights are taken in ranged units fights are basically dependent on the number of units squared. 6 units take much more damage to take out a few crossbowmen than 12 units would. In any case, my focus was to destroy towers near the castle, kill any ranged units, and kill the castle. I had to train reinforcements many times, to retreat because attacking waves from the southern bases were passing nearby or because I was busy microing against them in the main base... But I was getting the castle down slowly but surely, killing peasants that repaired it. Once the castle was destroyed and all peasants exterminated, it was just a formality to progressively erase from existence the base of the Fist of Kome using windriders.
After that, I blocked an attack wave from the Darkmind containing Rath. In the chokepoint it was fairly easy to place my axethrowers to not let a single blue unit pass. I waited to have repulsed attacks from both elves and the knights of Kome, and then with a full army I went to attack the dwarves. The Darkmind had already eliminated some of the forward cannon towers, so entering the base where numerical superiority could be used wasn't outrageously difficult. It was still a tricky fight, but the dwarves got broken, and I progressively got rid of their bases (I sent some units back to defending the main base I used).
The forge with the items we can buy is good, but I think it would be better if some items were single-buy only. Being able to equip each hero with a +7 armor item, the spell shield amulet, and other goodies was a bit too much. The cost isn't really a deterrent, and arguably I should have loaded my heroes even more than I did (but I didn't know which hero would be able to gift items to other heroes later in the campaign).
It was surprisingly difficult to establish a foothold in the former base of the Fist of Kome. I had a bunch of peons and soldiers killed in my first few attempts. However, the dwarven base was much safer, and was already closer to the front, so I used it as a stepping stone to finally take control of the former Fist of Kome base, exploiting the gold mine and filling it with production buildings.
I waited a bit for the Darkmind to help clear the front while I built some more defenses and prepared. Then when everything was ready, I rushed the elves. With Theoden and his forces being so close and able to provide support, it required massive flooding, but the elves themselves were broken long before my control of their base was uncontested. I think there was 15-20 minutes of the Knights of Kome almost constantly attacking my troops there, killing my heroes and getting me way below the foodcap a few times. At the end though, I got a bunch of towers plus my ideal army composition.
The Darkmind seemed to become kind of useless at this stage, but maybe that's intended. In any case, the fight to break the last bastion of the knights of Kome was intense, but I could spam so much troops that they had no chance. It was a relief when the altars were destroyed. The two heroes from this pain were a huge thorn in my side in this mission, with their massive HP and annoying spells.
I enjoyed this mission. I liked the scale of battle, and I appreciated the way the difficulty changed throughout the mission. There was no insane almost-unmanageable start, and at the same time once some enemies were out of the picture, it was still quite a challenge to finish off the rest. Very well done, Shar. I wonder if maybe it could be worth to have a 120 food cap like in some SHB missions, although that would arguably throw off the current balance.
Misc. issue: Why are the two barracks in the east of the Knights of Come base sitting on a big block of rock? It looks very strange.
Mission 3
Difficulty (strategy): medium
Difficulty (execution): high
Story: I'm glad that the perfect monster gets destroyed once and forever. The thoughts of the undead regarding the Ironfist are interesting.
Rating: 5/5
Comment: Adding the Ironfist trying to reach the leader of the Forgotten was a superb idea. It's immersive, and it acts as a soft timer that encourages the player to speed things up. In the end, I didn't find it especially hard to be faster than the Ironfist (but then I took the swamp path), but I played more aggressively than I would have otherwise, going from fight to fight, trying to use spells more... It made the mission more exciting.
There are some nice items to collect in this mission (including in the Ironfist base). I've been keeping track on what items are available in which mission, and I've noticed that some are almost devoid of anything worth a look, while others like this one have what it takes to make players happy, and some have arguably too much.
I was somewhat careless and lost the frost ghost and the scourge on the way, which made the final fight slightly harder than it should be. I needed to micro my best and to reload some saves to get things right at times, and at the end before killing the tentacled monstrosity, three of my heroes were in the red below 200HP, on the verge of being killed... So it was challenging, difficult. But it didn't feel punishing and frustrating like the Rahandir fight had. Good job.
Mission 4
Difficulty (strategy): low
Difficulty (execution): medium-low
Story: Aridon's plans to sow chaos and manipulate orcs, the thoughts of the orcs from the different clans about their situation... Solid story-telling.
Rating: 4/5
Comment: A very original mission, which is good. The more skilled you are, the less time you are going to spend here. Although I mostly found the less guarded entrances through exploration, the Duskbrand were quite annoying because I got attacked even from the southern entrance. Having to wait a while to recover HP and mana isn't particularly fun, more so as there is no time pressure at all to actually kill all the chieftains before dawn.
The chieftains drop potions of invisibility, but if the player is somewhat skilled, there will be enough mana to just use the invisibility spell again. I'd prefer if they dropped potions that give back some HP and/or mana to speed up the mission. It would also make more sense to have chieftains carrying such items, I think.
Also, the model for the chieftains wasn't quite as easy to differentiate from normal orcs as I'd wish. Sometimes I had the chieftain on screen but didn't notice it was not a mere grunt.
Mission 5
Difficulty (strategy): high
Difficulty (execution): high
Story: More whining from the orcs... But it's good to crush the arrogant undead who think they can manipulate everyone.
Rating: 5/5
Comment: I was probably too cautious at the beginning. I had basically used my first gold mine when I finally made my move to get rid of the Arjoz Nexus base (and it was a relief to have the Imperials flee giving me two more gold mines) which was less defended than I had expected at first. The attacks of the Rohir, Splecir and Scarec Nexus can be quite nasty to defend against, even with heroes (Vanessa has some great spells), units and towers. I particularly disliked the Scarec Nexus attacks, because air units are just more annoying to deal with, and they would snipe my spellcasters way too easily for my taste.
I discovered to my dismay that expansions are not safe from the Scarec Nexus (but safe from the two others), but then again I am glad it is so, because it would be too easy and boring to have a vulnerable expansion never threatened. But the expansion in the undead area "shields" the one in the imperial area, so I rebuilt it knowing it would still be attacked so that my northernmost goldmine would be safe.
I decided to make a move to take the central goldmine that had been guarded by demon slaves I eliminated a while before. It required the building of new production buildings and towers nearby, which made things very awkward. I got almost wiped out there a few times. On the other hand, this distracted the Scarec Nexus and made sure that my two other goldmines were safe, so I had enough gold income to manage to build a new base there in the end, with a lot of towers in front of which I put my troops.
I went with a 5-6 champions, 12 necrolytes composition to support my heroes (and also a witch doctor or two mainly to scout for enemy attacks early on, the heal wasn't necessary with Rangul's item). My tactic was to use my hero spells, then spam chain lightning from the necrolytes, then use again my reloaded hero spells. The dps this gets is excellent, and the enemy attack waves don't have the time to do too much damage, even the Rahandir ones, although it was important to soul burn some annoying enemy heroes.
I wanted the Scarec Nexus GONE as soon as possible, because their attacks were doing more damage to me than even Rahandir's. Throughout my exploration with windriders, I came across their island, and noticed they thankfully didn't have ways to rebuild damaged buildings. So I trained a dozen windriders. I would wait for an attack of the Scarec Nexus (otherwise, they would have all these air units defending too), kill some towers and ground defenders, retreat, heal and replace losses, rinse and repeat. It was satisfying when it was all gone.
Then my focus went to getting rid of the demon slaves (they were strangely passive during this mission, just waiting for us to attack them), which wasn't too hard and was completely worth it for the gold mine and items.
Once this was done, I used a full army to eliminate the Rohir Nexus. I don't recall it being too hard, although I couldn't finish them off before the Splecir Nexus attacked again, so I had some awkward times with a lot of my defensive buildings razed to the ground.
Once the Rohir Nexus was gone, my focus was to use my heroes and a few support units to completely eliminate the passive Ejara Nexus. Some good items available, especially in the mountain pass. The gold mine wasn't useful as the Splecir Nexus would focus it. It took a while to exterminate all the spiders in the mountain pass, which is completely useless, but I wanted them gone. The attacks from the Splecir Nexus weren't too scary, I was used to defend against them.
The base of the Splecir Nexus has some chokepoints at the entrances, but it's not very dense and it was surprisingly easy to destroy it, although I of course streamed reinforcements as some of my units died.
Mission 6
Difficulty (strategy): medium
Difficulty (execution): medium
Story: The FHB classic, but with enhancements such as the Shadows fighting the Undead, improved dialogues, Aedale's path to corruption seeming more believable. And the secret chapter made canon and so incorporated directly, makes sense.
Rating: 4.5/5
Comment: I have always liked how the player, if attentive, can know that "Blen Greymoore" is a fake here. Not only is his story ridiculous, but he doesn't have any items we might have given to Blen in earlier missions. So the signs are there, although I'm sure many players will still be fooled on their first playthrough.
Having to explore a bit to get all the interesting dialogues, tomes and items is fine. The beach to the north of the temple has become quite useless compared to the FHB version, though (I recall it having been used by orcs there).
I don't like too much how narrow the corridors are however. I purposefully avoided using any ordinary units until the boss fight (except in a few spots where it didn't matter), so it wasn't too bad, but I remember having already complained about it in the FHB thread. The pathing suffers from so few space in some spots.
The boss fight has been changed from the FHB. It didn't feel too challenging, maybe slightly harder than Gardon facing the (secretly undead) demon eredar, but easier than getting rid of the disgusting "perfection". And I had many unused healing runes by the end of it. I think this fight could be made slightly harder.
Integrating the secret chapter directly is a good choice.
Misc. Issues : the "W" spell shortcut didn't work for me for Blen and Aedale in this chapter (it worked for Salomar). I remember a similar issue with Aedale in the Rahandir mission. When trying to spam spell during battles, this is annoying.
The dialogue with Largoth contains this incorrect sentence : "But we let's save this for another day." It should be "But we shall save this for another day", or "But let's save this for another day."
Mission 7
Difficulty (strategy): medium
Difficulty (execution): medium
Story: Shar trying to make us guess if the Destroyer is going to create even more chaos among the Orcs... Nothing very fancy here, but it's adequate.
Rating: 5/5
Comment: I had to do dummy tries to get a feel of how things work. A mission with a base, but without a hero, and where gold comes from beating other clans into submission, rather than mining gold. An intriguing concept. I was afraid of running out of gold too easily, but although I ended using a sizeable amount at the end to beat the Blackrazors, it was well-balanced.
Once I had to start replacing my starting units, I went with Bersekers for the frontline, slingers to support from behind and especially help snipe strongholds as quickly as possible, and some witch doctors to dramatically reduce losses, with healing.
I like that once submitted, the subjugated clans join us in battle. They don't keep training units, but still offer a good meatshield from attack waves and help to overwhelm nearby clans and submit them to.
I liked the secret with the undeads, although it doesn't actually matter.
I think there should be a hint that The Destroyer is a demi-hero that can be revived at the altar of storm, like there has been in other missions for other units.
Misc. Issue : the third barracks from the left in the starting base (south-west of the fortress) can lead to trapped units between it and the trees. I just noticed as I was checking for something else for this review that I had a berserk idling there for who knows how long.
Last edited:
Review of Arc 4
Mission 1
Difficulty (strategy): high
Difficulty (execution): high
Story: Undeads using secret tunnels to move is a useful plot device, dwarves stumbling upon those an expected issue. The arrogant commander that can be mind-possessed, the great reluctance of Modrin in hurting his living kin, dwarves wanting to gather ore... The plot is limited but effective.
Rating: 5/5
Comment: Despite the many minor nitpicks I have, this is overall a very enjoyable mission, with a good balancing. It doesn't start too hard, and the air attacks especially aren't immediate. At the same time, if you don't take out the eastern human base early on, attacks ramp up enough that it becomes difficult to just hold, so there is incentive to not be too passive. Towards the end, when one dwarven base has been eliminated, it's a bit slow to wrap up the guaranteed win, but overall the challenge is good and sustained.
The first time around, I tried to build my defenses too far north. I ended up discovering the second gold mine, but walking between my northern defenses and the east of the base was causing issues, and I was mostly just managing to stay alive without making progress.
Informed by this first attempt, I went with a more compact base setup. Throughout the mission, I only trained three sorts of units: workers, chaplains and spirits. All the fighting bulk of my army outside my heroes and some starting units was composed of converted enemy units, mostly bear riders.
The workers were to focus on wood (the south has a good spot to build a lumbermill, also ultimately leading to a secret) and to build some towers. Human towers are useful, and they also were key to cover my air weakness. Although we nominally play as undead, this felt very much like playing as humans, with spirits tackled on to possess enemy units. I was a bit disappointed that there was not a single Rohir Nexus unit to train. If the starting officer dies, his aura is gone for good.
Lady Meya felt quite fragile as a frontline hero, her aura however is so good that I put points in it first rather than her ultimate. Mordin and Krom are solid.
After getting the second goldmine, I focused on converting Ross as soon as possible to be able to better focus my defenses. I did a test to see if sending spirits alone could work, but they just got killed. Attacking with the army, waiting for Ross to show up in the fight, and then converting him was much better, although spotting Ross was harder than expected. Getting an ally is quite useful. I sent a worker to build some support towers and to collect wood in their base. However, I noticed them being attacked by the bloodstone only once during the missions.
There is a lot of "static" buildings and units that don't get replaced if killed throughout the map, so eliminating them between attacks opens the way to the enemy bases. There are some useful items to grab, too.
Going to the food cap with a lot of spirits and then going over the maximum food cap by converting a lot of powerful dwarven units is very powerful. I eliminated the Stonelord, then the Bloodstone (the Rohir Nexus attacking provides a small help) and then the Hammerfall.
Misc. Issues : - Sir Ross is quite hard to make out when fighting among other units. Making him easier to pick apart visually would be good.
Mission 2
Difficulty (strategy): high
Difficulty (execution): high
Story: A good old FHB classic. But this time, there is a bit more depth to how the actions of the dwarves and the elves fit in the overall war against the demons, to why Salana and Zarin wish revenge against the orc. The order of the Lance aerial attacks aren't game-changing, but it makes the map feel more "alive", as do the dwarven reinforcements being bloodstone.
Rating: 5/5
Comment: I last played the FHB version quite a while ago, so it's difficult to compare with it, or with the old upkeep version. Destroying the Bloodhand with Salana's help was definitely easier here than I recall it in the FHB, but this version was still challenging overall.
After cleaning the orcs guarding the useful fountain of health to the east, my strategy was focused on getting my unit and building upgrades as soon as possible. It's very wood heavy, and many lumberjacks are required. I trained some runepriests, bear riders and riflemen, but stayed in no upkeep initially. Runepriests are a great addition to the dwarven roster compared to the FHB. They make dwarves less generic, and are overall very powerful with their ability to boost attack, defense and most importantly their healing rune. The healing rune helps to save massive resources with units dying much less, the upgrade to get it is completely worth the investment. The fountain of health is useful, but can only be used between battles, and sometimes it's just too far away even then.
Towers with max upgrades are dealing quite good damage and have decent bulk. You still want to put an army in front, but it makes fights much quicker and easier to have groups of supporting towers behind. Another great thing to have is gryphon riders. It's an investment to fully upgrade them and to get the building to produce them, but they are fast, airborne, and good against many enemies in this map. They are particularly awesome at sniping siege by just flying over enemy melee units and dealing massive damage to orc catapults. Gryphons also obliterate orcish towers, which are weak to magic attacks.
Regular attacks from the Deathbreeze and the Goldaxe come from the north-east, attacks from the Darkmind come from the south-east, and attacks from the Ironthunder come from the north-west. The Ironthunder caster-heavy composition can be annoying, but they don't bring siege and they're not that hard to fight against with a healthy army and some towers. The Deathbreeze and Goldaxe sometimes attack together forming a huge attack wave, and the Deathbreeze sometimes bring Grofzag too, but with heavy melee with healing runes, towers behind and catapult snipes doesn't take much losses. Their catapults often end up near the fixed towers and units up the first ledge to the destroyed fortress. There are not many units there, it's best to get rid of them as soon as practical to don't have them interfere during regular battles. The Darkmind attacks have been the most dangerous in my experience. Rath's ultimate is really nasty. But it's often possible to distract the Darkmind just enough to attract the attention of Salana's elves, which are a huge help. Salana's elven base is one of the most useful ally in all of Arkain.
While not the strongest, the Skullblade aerial attacks may take the spot for the most annoying ones. Having some means to fight against air units is mandatory to not get destroyed by them, and I mean more than just Zarin alone. Gryphons can fight the windriders off, but the losses they take make this not so appealing, so my primary method was to build guard towers in the north of my base where they attack.
Once I had consolidated my main base, my strategy was to clean the deathbreeze units to the north-west. There is another gold mine to exploit. The Ironthunder starts attacking when we build there, but I think it's still worth it as the income of two mines quickly makes up for the upfront investment. Supporting with army is annoying as it's a long walk, but I could get a double-layer "tower wall" with some cannon towers in the back. It wasn't ready right away, and I had a bunch of towers destroyed while I rushed to defend with my army, but I insisted and it worked out. My towers in the north-east of my base were also destroyed multiple times throughout the mission, by the Deathbreeze, Goldaxe or Skullblade, when I lacked troops or had them too far away. My barracks had to be repaired multiple times from heavy damage, too, and enemy units were fighting just next to my workers. But despite how close it felt to collapse a few times, I could always produce or bring back enough new troops to stall and repel these assaults. I didn't invest much in towers in the Darkmind direction, I preferred to rely on getting the elves involved, and they just would have destroyed towers too easily.
Then it was a methodical destruction, first of the Ironthunder base in three phases (doing a lot of damage and destroying the original fortress, then killing off the remaining peons that were trying to rebuild things, then destroying the production buildings), and also of the Skullblade structure north of the Ironthunder base and on the hill up north. I couldn't do it in one go, because my main base almost collapsed. Then with a third mine, after having consolidated, I went along with Salana to attack the Bloodhand clan, and it felt rather easy to wipe it out. I tried an operation with gryphons to destroy the skullblades, but the Goldaxe helped them too quickly so I bailed out on the idea. I wanted to destroy the Darkmind but Salana went for the Goldaxe, so I went with her. At this stage, they had no chance. With full upgrades, no resource constraints on replacing lost units and less worry about defending the main base (at worst, the gryphons riders could come back and snipe the siege), the Goldaxe had no chance. Then I took care of the Darkmind, of the Golems (there's an item to get) and of the Deathbreeze.
The mission was tight and difficult, with a lot of pressure. Wrong decisions could be costly, but it didn't require some godly micro or perfect build order or completely cheesy strat (I like out of the box strategies, but it shouldn't be some stupid exploit). It does suffer from decreasing difficulty syndrome, but by the time we get into the "easy" part of the mission, finishing off the enemies is at least relatively quick.
Misc. Issues : The side quest talks about KILLING greenskin heroes, yet we see them appear again in future missions. This inconsistency in the story bothers me a lot.
Interlude
Sometimes, Arkain feels more like reading a book than playing a game... However this interlude is not skippable. That's bad, obviously.
Mission 3
Difficulty (strategy): high
Difficulty (execution): very high
Story: The Orcs being their usual dumb selves, charging head first into battle without thinking about the practical concerns Vanessa dared to raise, such as a huge army of demons to their back. I swear, the more Shar tries to highlight orcs complaining about human cruelty, the more their whining bothers me. They got no problem burning down villages, killing human women and children, but when it's the turn of orc women and children, then it's not fair game anymore... A lot of dialogues with enemy heroes (I had to pause to read them). Poor Prideblade and Cleavehand. I would add the bear regiment general but I don't recall his name.
Rating: 5/5
Comment: This battle is so massive that I had performance dips at some points... But I'm not complaining. It's an epic-scale showdown, very challenging with huge armies on both sides. It is probably the most micro-intensive mission so far in the True Story, because of the sheer amount of things to do. Our heroes have powerful auras and spells (Rangul's scepter of healing is like an overpowered healing aura, too), so we want to have them in battle. We don't lack units to start with, and it's tempting to use those. This is micro-intensive by itself, but some care is also needed when it comes to base-building.
Not properly preparing future production is probably a bigger mistake than letting troops idle for a while. The very first thing to do in the mission, in my opinion, is to start producing peons, to cut much more wood, and to exploit both of the secondary goldmines in the south. The middle one got attacked several times throughout the mission, but never by more than a few units. With free resources not needed for unit production, I think that the main priorities are starting up the mercenary contracts (with three strongholds, that's over 300 gold a minute of bonus income, it's important to keep a place to product peons however) towering to protect the middle goldmine from these minor raids (Zoia Blackwolf ended up there twice, but stray ally units will pass too and a dozen towers will still do the job) and our main base from the Scarec Nexus air raid (a few towers, and the starting ranged units).
Our troops need to help both the northern fronts (where Lerrig is surprisingly dangerous) and the southern front. Moving around is a waste of their fighting time, but only staying in one area can be ineffective, especially early when the fight is going on in the chokepoints leading to the entrance to the human base. Without help, the enemy in the neglected front can snowball and end up with a scarily large army by the time they threaten our allies.
After some time, Lerrig deserts and Gorthag arrives. One hero more is useful, his wind riders are even better. From then on, my primary strategy was: get rid of the Scarec Nexus. I still recalled how annoying they were in previous missions, so my tactic was to rush their base with windriders just as they attacked my main base, destroy a couple buildings, and go back once new units were generated. I would lose a few windriders each time, which I had to replace, but after 3 or 4 times, the Scarec Nexus was gone. Not having to worry about defending the main base from aerial attacks save resources and focus best used elsewhere.
I tried to remember using Rangul's special power to summon more attacking orcs each time it was ready, but a few times I would forget for a time and delay it. Once the Scarec Nexus is gone, windriders aren't as useful, but they can be a good help to get rid of the canon towers guarding the main chokepoints. Shar has scripted the walls in these chokepoints to fall once the towers are destroyed, which makes it easier for an army to push. The leftover windriders are a good tool to destroy some. Our heroes have some spells that can be useful for this purpose, too.
I noticed it's easy to become too focused on one side's success, neglecting the other until it's very late and our allies are threatened. It's better to be more careful and move more to keep both front near the human base than going too deep in an attack, ending up unable to repel another on the other side.
When resources permit, building a lot of production buildings in front of our allied bases (I only bothered with barracks), in the path of the main attack waves is very useful. When things go wrong and a lot of army is lost, the ability to quickly produce troops using stocked resources is very precious. Few things are more frustrating than dying with a lot of gold available but no way to use it because all production buildings are getting taken down. Furthermore, these new buildings distract and slow down enemy attacking waves on their way, which might be just what's needed to have the time to bring back more units from elsewhere. This protects our allies, who unlike us won't replace lost buildings. Peppering down towers on the path towards the enemy bases isn't bad either once resources are abundant, although by this stage it's not required.
The Bear regiment was mostly destroyed by the Shkullblade. Then, I helped a breakthrough against the Bull regiment. Then later, after consolidating things again, a breakthrough took away the dragon regiment (or lizard regiment, as would say Vanessa) and the momentum took away the Falcon regiment and Phoenix regiment. I had to provide some aid in the north, but from then on my focus was mostly on taking care of the demons watching in the South and of course on killing Progaderas. Overrunning the Wolf Regiment and Selior's elite was a relatively straightrforward and quick process at this point.
Misc. Issues : When I first played, I thought the Goldaxe contracts in the town hall were a bug, an accidental leftover from Rise of the Clans. It's not that I really mind an additional way to make gold, but I don't see how they fit story-wise. Who exactly is paying us to lend out units? And we're not even playing as the Goldaxe.
Mission 4
Difficulty (strategy): medium
Difficulty (execution): medium-high
Story: Refined dialogues compared to the original. Aedale almost betraying how corrupted she has become. The Wolf Regiment provocation finally offering a believable reason as to why Greymoore gets arrested by the Golden Guard. This fixes one of the most glaring plot-holes of the original SHB (if the Gardon path had been picked in the FHB). I say provocation, because the Wolf regiment troops are not just stationed everywhere near the battlefield, they also auto-attack any of our units that walks nearby. The "Grey Guard is attacking us" message from the wolves is as much a lie as Gardon sending word to Blen that Genethas is attacking, except that there is no good excuse for it.
Rating: 4.5/5
Comment: When I played it in the FHB, it was the micro version. This macro version didn't feel that much different. No more ships, obviously, the wolf regiment now, but the core of the mission is still to have a few heroes to teleport around to lend critical support to friendly attacking waves.
Training some units (I just went boring with knights and healers for the most part, I used a few war golems too) is of course important, but there is nothing deeply strategic, and five heroes are more impactful than a couple of knights. By themselves they do a lot, and their auras also make allied attacks that much better. It is nice to see Lera alive, and even nicer to use her super-powerful Starfall onto enemies.
Without some support, our allies get eventually overwhelmed, so my first priority was to go help them whenever the main fight was in the western half of the map, especially if Starfall was available. My second priority was to get rid of the Demons east and west of our base. They aren't too dangerous, but it's nice to grab more goldmines.
The attacks by the wolves were relatively easy to stop with a couple of units supported by towers, and their base was easy to overwhelm with a full food army. I simply waited to already have weakened Genethas to go there, as you don't want to have to go rescue the Knights of Kome or Salana's Elves in the middle of the fight in the north.
Once the initial defences of an enemy base are broken, our allies are quite effective at destroying all the buildings there, and this reduces the spawning of new attackers enough that babysitting isn't really required anymore. When both the generic southern imperials and Lerrig's forces had their bases destroyed, my allies were in the process of destroying Genethas' final base all by themselves.
I also killed Progaderas for a second time, of course.
I am rating the difficulty as medium-high, because although it felt rather easy for the most part (and with Gardon having a numerical advantage, it makes sense), I had a moment were things went wrong in a battle and 4 out of my 5 heroes somehow died trying to stop an enemy attack wave. Although I rushed new altars, and would have had no trouble to defend myself against the Wolf Regiment, Salana's elves were actively dying, and I couldn't stop it fast enough. Since nobody rebuilds anything in this mission, it meant that I would have to handle the southern waves mostly by myself. I preferred to just reload an earlier save and avoid getting all my heroes dead.
Misc. Issues : - I strongly believe that Aedale's ultimate should be disabled. While Gardon and Blen might be willing to put off looking too closely in her demonic corruption until Genethas is defeated, I don't think that would hold up if she were to physically transform into a demoness in front of them. Actually, if that happened, the regular human soldiers would probably attack her even if they were on Gardon's side initially. (Not disabling it but instead adding catastrophic events leading to a forced defeat if Aedale took Lisara's form would be funny, but that's a lot of work to pull off a small practical joke like this)
Mission 5
Difficulty (strategy): medium-low
Difficulty (execution): medium-low
Story: If Aridon had just planned to go fight the demons head on, it would have worked better than all his machinations to manipulate orcs and humans... Ornasion is really overconfident, here. I liked the bit about Saphira being able to contradict Aridon, being bound to Rahandir.
Rating: 4/5
Comment: The very narrow space in which this battle is fought compared to the two previous ones is the first way that this battle is simpler, as there is no need to focus on multiple areas. So it's mostly a matter of spamming solid units (I played Splecir with Spirit Legionnaires, and later some Obsidian statues and Wyrms, I'm sure there are many viable choices with all nexuses) to support the heroes, and to spam your heroes spells as much as possible while the auras from our heroes help all our allies too. Some heals from Edoarus to friendly heroes are good, too.
I'm not fond of the spellsets of most of the heroes we have here (my favorites are Kazardius' and Rahandir's), but spamming what they have matters. In the end, the goal is to destroy demon gates. With the two front demon gates down, enemy attacks become much less dangerous, and with three gates down our allies are more or less enough to deal with the demons by themselves (the demons made a big push at one point, but I had towers to slow them down, and even without my units fighting my allies pushed back demons into their base). Destroying more gates just means that the demons will be overrun so fast that the side goals can't be done.
At this stage, I could focus on killing orcs to open a path to the Skullblade base for the optional quest, and to Progaderas, and so I did. Nothing too exciting.
Misc. Issues : "think, they stand a chance" should be "think they stand a chance" (already reported by someone else previously, but it's still there in 0.69a and presumably 0.69b)
Mission 6
Difficulty (strategy): very low
Difficulty (execution): low
Story: A good way to put some light on why the demons are waging this war in the first place and on the political power struggles between demon leaders.
Rating: 4/5
Comment: From the title, I expected this to just be a cutscene, not an actual mission. This mission being easy is normal lore-wise (although Kersidar's HP can get surprisingly low surprisingly fast), and in a way that's a bonus chapter for the player to recover after more intensive macro maps before.
While I don't mind this mission being easy (especially if Ebira's ultimate is properly used), I don't like how slow it is to explore the whole map. That's boring. Kersidar's aura helps, but not enough.
Misc. Issues : - Typo : "I WILL NOT GET KILLED A FORTH TIME!" FOURTH (spoiler : he did get killed a fourth time)
Mission 1
Difficulty (strategy): high
Difficulty (execution): high
Story: Undeads using secret tunnels to move is a useful plot device, dwarves stumbling upon those an expected issue. The arrogant commander that can be mind-possessed, the great reluctance of Modrin in hurting his living kin, dwarves wanting to gather ore... The plot is limited but effective.
Rating: 5/5
Comment: Despite the many minor nitpicks I have, this is overall a very enjoyable mission, with a good balancing. It doesn't start too hard, and the air attacks especially aren't immediate. At the same time, if you don't take out the eastern human base early on, attacks ramp up enough that it becomes difficult to just hold, so there is incentive to not be too passive. Towards the end, when one dwarven base has been eliminated, it's a bit slow to wrap up the guaranteed win, but overall the challenge is good and sustained.
The first time around, I tried to build my defenses too far north. I ended up discovering the second gold mine, but walking between my northern defenses and the east of the base was causing issues, and I was mostly just managing to stay alive without making progress.
Informed by this first attempt, I went with a more compact base setup. Throughout the mission, I only trained three sorts of units: workers, chaplains and spirits. All the fighting bulk of my army outside my heroes and some starting units was composed of converted enemy units, mostly bear riders.
The workers were to focus on wood (the south has a good spot to build a lumbermill, also ultimately leading to a secret) and to build some towers. Human towers are useful, and they also were key to cover my air weakness. Although we nominally play as undead, this felt very much like playing as humans, with spirits tackled on to possess enemy units. I was a bit disappointed that there was not a single Rohir Nexus unit to train. If the starting officer dies, his aura is gone for good.
Lady Meya felt quite fragile as a frontline hero, her aura however is so good that I put points in it first rather than her ultimate. Mordin and Krom are solid.
After getting the second goldmine, I focused on converting Ross as soon as possible to be able to better focus my defenses. I did a test to see if sending spirits alone could work, but they just got killed. Attacking with the army, waiting for Ross to show up in the fight, and then converting him was much better, although spotting Ross was harder than expected. Getting an ally is quite useful. I sent a worker to build some support towers and to collect wood in their base. However, I noticed them being attacked by the bloodstone only once during the missions.
There is a lot of "static" buildings and units that don't get replaced if killed throughout the map, so eliminating them between attacks opens the way to the enemy bases. There are some useful items to grab, too.
Going to the food cap with a lot of spirits and then going over the maximum food cap by converting a lot of powerful dwarven units is very powerful. I eliminated the Stonelord, then the Bloodstone (the Rohir Nexus attacking provides a small help) and then the Hammerfall.
Misc. Issues : - Sir Ross is quite hard to make out when fighting among other units. Making him easier to pick apart visually would be good.
- Typo in the intro cutscene "Î can feel a dark presence" I
- Dialogue during the mission "The conductions of the Bloodstone" concoctions
- The attack waves of the Rohir Nexus ally are sometimes very weak (I even saw one elite alone once) for no apparent reason.
- This is supposed to be tunnels, the flying machines flying right over impassable parts of the scenery which are supposed to be full rock is inappropriate. Flying machines inside tunnels is bizarre enough.
- The minimap colors suck at making clear where you can go, because "ground" level has the same color as two levels above. Even a blend with the very same color for one level above and two levels above would be much better. Also, the clearer color is more natural to indicate a passable terrain, but here it's the darker color that corresponds to the walkable level.
- It's just weird that the units we possess have a weapon/armor downgrade until we capture the forge... If it wasn't the case, capturing the forge would be quite useless (it already felt so honestly), but it doesn't make any sense to me story-wise.
Mission 2
Difficulty (strategy): high
Difficulty (execution): high
Story: A good old FHB classic. But this time, there is a bit more depth to how the actions of the dwarves and the elves fit in the overall war against the demons, to why Salana and Zarin wish revenge against the orc. The order of the Lance aerial attacks aren't game-changing, but it makes the map feel more "alive", as do the dwarven reinforcements being bloodstone.
Rating: 5/5
Comment: I last played the FHB version quite a while ago, so it's difficult to compare with it, or with the old upkeep version. Destroying the Bloodhand with Salana's help was definitely easier here than I recall it in the FHB, but this version was still challenging overall.
After cleaning the orcs guarding the useful fountain of health to the east, my strategy was focused on getting my unit and building upgrades as soon as possible. It's very wood heavy, and many lumberjacks are required. I trained some runepriests, bear riders and riflemen, but stayed in no upkeep initially. Runepriests are a great addition to the dwarven roster compared to the FHB. They make dwarves less generic, and are overall very powerful with their ability to boost attack, defense and most importantly their healing rune. The healing rune helps to save massive resources with units dying much less, the upgrade to get it is completely worth the investment. The fountain of health is useful, but can only be used between battles, and sometimes it's just too far away even then.
Towers with max upgrades are dealing quite good damage and have decent bulk. You still want to put an army in front, but it makes fights much quicker and easier to have groups of supporting towers behind. Another great thing to have is gryphon riders. It's an investment to fully upgrade them and to get the building to produce them, but they are fast, airborne, and good against many enemies in this map. They are particularly awesome at sniping siege by just flying over enemy melee units and dealing massive damage to orc catapults. Gryphons also obliterate orcish towers, which are weak to magic attacks.
Regular attacks from the Deathbreeze and the Goldaxe come from the north-east, attacks from the Darkmind come from the south-east, and attacks from the Ironthunder come from the north-west. The Ironthunder caster-heavy composition can be annoying, but they don't bring siege and they're not that hard to fight against with a healthy army and some towers. The Deathbreeze and Goldaxe sometimes attack together forming a huge attack wave, and the Deathbreeze sometimes bring Grofzag too, but with heavy melee with healing runes, towers behind and catapult snipes doesn't take much losses. Their catapults often end up near the fixed towers and units up the first ledge to the destroyed fortress. There are not many units there, it's best to get rid of them as soon as practical to don't have them interfere during regular battles. The Darkmind attacks have been the most dangerous in my experience. Rath's ultimate is really nasty. But it's often possible to distract the Darkmind just enough to attract the attention of Salana's elves, which are a huge help. Salana's elven base is one of the most useful ally in all of Arkain.
While not the strongest, the Skullblade aerial attacks may take the spot for the most annoying ones. Having some means to fight against air units is mandatory to not get destroyed by them, and I mean more than just Zarin alone. Gryphons can fight the windriders off, but the losses they take make this not so appealing, so my primary method was to build guard towers in the north of my base where they attack.
Once I had consolidated my main base, my strategy was to clean the deathbreeze units to the north-west. There is another gold mine to exploit. The Ironthunder starts attacking when we build there, but I think it's still worth it as the income of two mines quickly makes up for the upfront investment. Supporting with army is annoying as it's a long walk, but I could get a double-layer "tower wall" with some cannon towers in the back. It wasn't ready right away, and I had a bunch of towers destroyed while I rushed to defend with my army, but I insisted and it worked out. My towers in the north-east of my base were also destroyed multiple times throughout the mission, by the Deathbreeze, Goldaxe or Skullblade, when I lacked troops or had them too far away. My barracks had to be repaired multiple times from heavy damage, too, and enemy units were fighting just next to my workers. But despite how close it felt to collapse a few times, I could always produce or bring back enough new troops to stall and repel these assaults. I didn't invest much in towers in the Darkmind direction, I preferred to rely on getting the elves involved, and they just would have destroyed towers too easily.
Then it was a methodical destruction, first of the Ironthunder base in three phases (doing a lot of damage and destroying the original fortress, then killing off the remaining peons that were trying to rebuild things, then destroying the production buildings), and also of the Skullblade structure north of the Ironthunder base and on the hill up north. I couldn't do it in one go, because my main base almost collapsed. Then with a third mine, after having consolidated, I went along with Salana to attack the Bloodhand clan, and it felt rather easy to wipe it out. I tried an operation with gryphons to destroy the skullblades, but the Goldaxe helped them too quickly so I bailed out on the idea. I wanted to destroy the Darkmind but Salana went for the Goldaxe, so I went with her. At this stage, they had no chance. With full upgrades, no resource constraints on replacing lost units and less worry about defending the main base (at worst, the gryphons riders could come back and snipe the siege), the Goldaxe had no chance. Then I took care of the Darkmind, of the Golems (there's an item to get) and of the Deathbreeze.
The mission was tight and difficult, with a lot of pressure. Wrong decisions could be costly, but it didn't require some godly micro or perfect build order or completely cheesy strat (I like out of the box strategies, but it shouldn't be some stupid exploit). It does suffer from decreasing difficulty syndrome, but by the time we get into the "easy" part of the mission, finishing off the enemies is at least relatively quick.
Misc. Issues : The side quest talks about KILLING greenskin heroes, yet we see them appear again in future missions. This inconsistency in the story bothers me a lot.
Interlude
Sometimes, Arkain feels more like reading a book than playing a game... However this interlude is not skippable. That's bad, obviously.
Mission 3
Difficulty (strategy): high
Difficulty (execution): very high
Story: The Orcs being their usual dumb selves, charging head first into battle without thinking about the practical concerns Vanessa dared to raise, such as a huge army of demons to their back. I swear, the more Shar tries to highlight orcs complaining about human cruelty, the more their whining bothers me. They got no problem burning down villages, killing human women and children, but when it's the turn of orc women and children, then it's not fair game anymore... A lot of dialogues with enemy heroes (I had to pause to read them). Poor Prideblade and Cleavehand. I would add the bear regiment general but I don't recall his name.
Rating: 5/5
Comment: This battle is so massive that I had performance dips at some points... But I'm not complaining. It's an epic-scale showdown, very challenging with huge armies on both sides. It is probably the most micro-intensive mission so far in the True Story, because of the sheer amount of things to do. Our heroes have powerful auras and spells (Rangul's scepter of healing is like an overpowered healing aura, too), so we want to have them in battle. We don't lack units to start with, and it's tempting to use those. This is micro-intensive by itself, but some care is also needed when it comes to base-building.
Not properly preparing future production is probably a bigger mistake than letting troops idle for a while. The very first thing to do in the mission, in my opinion, is to start producing peons, to cut much more wood, and to exploit both of the secondary goldmines in the south. The middle one got attacked several times throughout the mission, but never by more than a few units. With free resources not needed for unit production, I think that the main priorities are starting up the mercenary contracts (with three strongholds, that's over 300 gold a minute of bonus income, it's important to keep a place to product peons however) towering to protect the middle goldmine from these minor raids (Zoia Blackwolf ended up there twice, but stray ally units will pass too and a dozen towers will still do the job) and our main base from the Scarec Nexus air raid (a few towers, and the starting ranged units).
Our troops need to help both the northern fronts (where Lerrig is surprisingly dangerous) and the southern front. Moving around is a waste of their fighting time, but only staying in one area can be ineffective, especially early when the fight is going on in the chokepoints leading to the entrance to the human base. Without help, the enemy in the neglected front can snowball and end up with a scarily large army by the time they threaten our allies.
After some time, Lerrig deserts and Gorthag arrives. One hero more is useful, his wind riders are even better. From then on, my primary strategy was: get rid of the Scarec Nexus. I still recalled how annoying they were in previous missions, so my tactic was to rush their base with windriders just as they attacked my main base, destroy a couple buildings, and go back once new units were generated. I would lose a few windriders each time, which I had to replace, but after 3 or 4 times, the Scarec Nexus was gone. Not having to worry about defending the main base from aerial attacks save resources and focus best used elsewhere.
I tried to remember using Rangul's special power to summon more attacking orcs each time it was ready, but a few times I would forget for a time and delay it. Once the Scarec Nexus is gone, windriders aren't as useful, but they can be a good help to get rid of the canon towers guarding the main chokepoints. Shar has scripted the walls in these chokepoints to fall once the towers are destroyed, which makes it easier for an army to push. The leftover windriders are a good tool to destroy some. Our heroes have some spells that can be useful for this purpose, too.
I noticed it's easy to become too focused on one side's success, neglecting the other until it's very late and our allies are threatened. It's better to be more careful and move more to keep both front near the human base than going too deep in an attack, ending up unable to repel another on the other side.
When resources permit, building a lot of production buildings in front of our allied bases (I only bothered with barracks), in the path of the main attack waves is very useful. When things go wrong and a lot of army is lost, the ability to quickly produce troops using stocked resources is very precious. Few things are more frustrating than dying with a lot of gold available but no way to use it because all production buildings are getting taken down. Furthermore, these new buildings distract and slow down enemy attacking waves on their way, which might be just what's needed to have the time to bring back more units from elsewhere. This protects our allies, who unlike us won't replace lost buildings. Peppering down towers on the path towards the enemy bases isn't bad either once resources are abundant, although by this stage it's not required.
The Bear regiment was mostly destroyed by the Shkullblade. Then, I helped a breakthrough against the Bull regiment. Then later, after consolidating things again, a breakthrough took away the dragon regiment (or lizard regiment, as would say Vanessa) and the momentum took away the Falcon regiment and Phoenix regiment. I had to provide some aid in the north, but from then on my focus was mostly on taking care of the demons watching in the South and of course on killing Progaderas. Overrunning the Wolf Regiment and Selior's elite was a relatively straightrforward and quick process at this point.
Misc. Issues : When I first played, I thought the Goldaxe contracts in the town hall were a bug, an accidental leftover from Rise of the Clans. It's not that I really mind an additional way to make gold, but I don't see how they fit story-wise. Who exactly is paying us to lend out units? And we're not even playing as the Goldaxe.
Mission 4
Difficulty (strategy): medium
Difficulty (execution): medium-high
Story: Refined dialogues compared to the original. Aedale almost betraying how corrupted she has become. The Wolf Regiment provocation finally offering a believable reason as to why Greymoore gets arrested by the Golden Guard. This fixes one of the most glaring plot-holes of the original SHB (if the Gardon path had been picked in the FHB). I say provocation, because the Wolf regiment troops are not just stationed everywhere near the battlefield, they also auto-attack any of our units that walks nearby. The "Grey Guard is attacking us" message from the wolves is as much a lie as Gardon sending word to Blen that Genethas is attacking, except that there is no good excuse for it.
Rating: 4.5/5
Comment: When I played it in the FHB, it was the micro version. This macro version didn't feel that much different. No more ships, obviously, the wolf regiment now, but the core of the mission is still to have a few heroes to teleport around to lend critical support to friendly attacking waves.
Training some units (I just went boring with knights and healers for the most part, I used a few war golems too) is of course important, but there is nothing deeply strategic, and five heroes are more impactful than a couple of knights. By themselves they do a lot, and their auras also make allied attacks that much better. It is nice to see Lera alive, and even nicer to use her super-powerful Starfall onto enemies.
Without some support, our allies get eventually overwhelmed, so my first priority was to go help them whenever the main fight was in the western half of the map, especially if Starfall was available. My second priority was to get rid of the Demons east and west of our base. They aren't too dangerous, but it's nice to grab more goldmines.
The attacks by the wolves were relatively easy to stop with a couple of units supported by towers, and their base was easy to overwhelm with a full food army. I simply waited to already have weakened Genethas to go there, as you don't want to have to go rescue the Knights of Kome or Salana's Elves in the middle of the fight in the north.
Once the initial defences of an enemy base are broken, our allies are quite effective at destroying all the buildings there, and this reduces the spawning of new attackers enough that babysitting isn't really required anymore. When both the generic southern imperials and Lerrig's forces had their bases destroyed, my allies were in the process of destroying Genethas' final base all by themselves.
I also killed Progaderas for a second time, of course.
I am rating the difficulty as medium-high, because although it felt rather easy for the most part (and with Gardon having a numerical advantage, it makes sense), I had a moment were things went wrong in a battle and 4 out of my 5 heroes somehow died trying to stop an enemy attack wave. Although I rushed new altars, and would have had no trouble to defend myself against the Wolf Regiment, Salana's elves were actively dying, and I couldn't stop it fast enough. Since nobody rebuilds anything in this mission, it meant that I would have to handle the southern waves mostly by myself. I preferred to just reload an earlier save and avoid getting all my heroes dead.
Misc. Issues : - I strongly believe that Aedale's ultimate should be disabled. While Gardon and Blen might be willing to put off looking too closely in her demonic corruption until Genethas is defeated, I don't think that would hold up if she were to physically transform into a demoness in front of them. Actually, if that happened, the regular human soldiers would probably attack her even if they were on Gardon's side initially. (Not disabling it but instead adding catastrophic events leading to a forced defeat if Aedale took Lisara's form would be funny, but that's a lot of work to pull off a small practical joke like this)
- Destroying Aedale's items is just evil, period. I'm disappointed, Shar. My Aedale lost a Gem of Health (+300HP, obtained in the previous mission with Aedale playable), a +4 intel/agil item, +15% faster attack gloves, and -33% magic damage bracelets. I'm also under the impression that the tomes of knowledge we may have given her don't matter. She's 36/32/52 in base stats in this mission, I had her at 37/30/53 at the end of her previous mission. I guess it's a win for the players who boosted other heroes instead, but I don't like it.
- The allied bases feel empty when looking at them. A couple of static defence units would look better.
- I would like more if Lerrig arrived only a few minutes into the battle. This has been a widely suggested idea, it would really tie in with the idea that he abandoned the frontline like a coward. It would also make the mission more lively.
- There is a double space in this dialogue line: "She's probably telling him what I just told you"
Mission 5
Difficulty (strategy): medium-low
Difficulty (execution): medium-low
Story: If Aridon had just planned to go fight the demons head on, it would have worked better than all his machinations to manipulate orcs and humans... Ornasion is really overconfident, here. I liked the bit about Saphira being able to contradict Aridon, being bound to Rahandir.
Rating: 4/5
Comment: The very narrow space in which this battle is fought compared to the two previous ones is the first way that this battle is simpler, as there is no need to focus on multiple areas. So it's mostly a matter of spamming solid units (I played Splecir with Spirit Legionnaires, and later some Obsidian statues and Wyrms, I'm sure there are many viable choices with all nexuses) to support the heroes, and to spam your heroes spells as much as possible while the auras from our heroes help all our allies too. Some heals from Edoarus to friendly heroes are good, too.
I'm not fond of the spellsets of most of the heroes we have here (my favorites are Kazardius' and Rahandir's), but spamming what they have matters. In the end, the goal is to destroy demon gates. With the two front demon gates down, enemy attacks become much less dangerous, and with three gates down our allies are more or less enough to deal with the demons by themselves (the demons made a big push at one point, but I had towers to slow them down, and even without my units fighting my allies pushed back demons into their base). Destroying more gates just means that the demons will be overrun so fast that the side goals can't be done.
At this stage, I could focus on killing orcs to open a path to the Skullblade base for the optional quest, and to Progaderas, and so I did. Nothing too exciting.
Misc. Issues : "think, they stand a chance" should be "think they stand a chance" (already reported by someone else previously, but it's still there in 0.69a and presumably 0.69b)
Mission 6
Difficulty (strategy): very low
Difficulty (execution): low
Story: A good way to put some light on why the demons are waging this war in the first place and on the political power struggles between demon leaders.
Rating: 4/5
Comment: From the title, I expected this to just be a cutscene, not an actual mission. This mission being easy is normal lore-wise (although Kersidar's HP can get surprisingly low surprisingly fast), and in a way that's a bonus chapter for the player to recover after more intensive macro maps before.
While I don't mind this mission being easy (especially if Ebira's ultimate is properly used), I don't like how slow it is to explore the whole map. That's boring. Kersidar's aura helps, but not enough.
Misc. Issues : - Typo : "I WILL NOT GET KILLED A FORTH TIME!" FOURTH (spoiler : he did get killed a fourth time)
- All the black buildings in the destroyed orc bases are quite annoying, they are dense enough that in the minimap it's not easy to figure out which part has already been explored.
- Ebira can convert orcs without issue, despite some dialogue saying otherwise.
Last edited:
Review of Arc 5 - Missions 1 to 4
Mission 1
Difficulty (strategy): very low
Difficulty (execution): low
Story: It's quite convenient how the Ironfist intervenes against the Dark Troll right when Amari needs it. The dialogues had more depth than what I recall in the second orc book.
Rating: 3.5/5
Comment: I'm not very fond of this mission. I knew from looking at my SOB notes that the fountain is to the east, so I didn't have trouble with it. But the Dark Trolls don't bother informing us about the existence of the fountain, so it's completely possible to clean most of the map before finally finding it.
It's also possible to head straight down and kill the dark troll renegate hero in less than 5 minutes. The only glimpse of difficulty I encountered during the mission was with the Ironfist base in the west (I had both heroes drop below 50hp, so I thought it wouldn't be fair to say execution difficulty is very low).
My only real suggestion here is to have Grella tell us about the nearby health fountain. Playing without it isn't difficult, it's just slow.
Misc. issues: During the end cutscene, Amari says "why I like prefer to be open-minded". "like" or "prefer" should be removed.
Mission 2
Difficulty (strategy): medium
Difficulty (execution): medium
Story: The Orcs are discovering the wrath of the Redfist... Quite simple, but it does the job to explain the burning of the Orc Islands.
Rating: 3/5
Comment: When I am watching entire videos during a mission to pass time while units recover HP, it says something is wrong. There is only static enemy groups and absolutely no threat against staying put. At the same time, the Redfist are formidable warriors. It's good I suppose to discover that even 1-on-1 these humans are a threat to the orcs. But the gameplay of "select all units and tell them to retreat to a point where they won't be pursued, then wait for a heal, then attack an enemy group" is rather repetitive and boring.
Once I had rescued the two groups of orcs, I had enough units to easily rotate units to fight with the most healthy, enough units to usually overwhelm enemy groups, and enough units to not care too much if I lost one or two during a battle. So I traded some units for speed, to finish the mission faster.
The removal of dripping poison from One-eye has made this mission even more aggravating than it was in the SOB.
In my opinion, for it to be really enjoyable, there should be Redfist patrols and/or reactions to some of our kills that prevent "wait 10 minutes for all grunts to heal" from being the boring but reliable go-to, and at the same time more room for sneaking around instead of fighting directly.
Misc. issues: The dialogue from the "Crusader" triggers even if Oneeye is invisible and pass through the group without being attacked.
Mission 3
Difficulty (strategy): low
Difficulty (execution): low
Story: Significant improvements in the dialogues early on compared to the SHB. Still the same funny dialogue with the royal army soldiers swearing that Demons killed Lerrig. Overall solid.
Rating: 4.5/5
Comment: Three micro missions in a row, that's quite a lot. But I like Gardon and Merlon, so that helps. And now, the death of the Golden bastards on the way is canon... I always did it in the SHB. I used them alongside my heroes to fight the orcs, demons, murlocs, but without taking much care of saving them, so they slowly died throughout the fights of the mission. This made the mission more relaxed and fun, although I had to pay attention during some fights.
The items dropped were mostly meh. I didn't care too much because I already had good items from the previous acts (items carrying over is neat compared to the FHB/SHB experience), but elven boots for completing the sidequests was disappointing. It's a very poor item on Merlon and Gardon, and we can't transfer it for future missions and heroes either. The orb of earth looked disappointing too, until I discovered it actually also grants 150HP, which makes it a very fine item.
Misc. issues: If we kill a Golden Guard unit by attacking it, they turn on us. That's well done. But if we just attack them, they don't. This means it's possible to get them down close to death without any reaction. Maybe they could have a "what are you doing?" reaction on the first hit, but more than two or three hits should in my opinion trigger the turning event.
It was mildly annoying to notice that the Golden Guard War Priest is a standard chaplain, just with a different model. Considering how armored the model looks, what about actually giving it a different armour type instead of unarmoured, and 3 or 4 armour points? It would make it more unique and be more consistent lore-wise. If it has to be changed in other ways to keep gameplay balanced, that's fine.
Mission 4
Difficulty (strategy): very high
Difficulty (execution): very high
Story: The presence of the order of the air instead of generic enemies are an improvement over the original, the intervention of the best papa's troops an even bigger one.
Rating: 5/5
Comment: I really disliked this mission in the SOB. I criticized it for having a bad case of "decreasing difficulty syndrome", with an extremely difficult start morphing progressively into a slow but easy grind.
I'm very pleased with how this map has been changed compared to the SOB. The start remains very difficult, but several things come to make things more manageable: Rath has avenge, we have Inara as a powerful second hero, we have the leadership bonus to make better units, we have the first and second wolf training upgrades (instead of none in the SOB).
In the SOB I had dismissed outrunners as too costly and weak compared to warlords, with cyclops as the best choice usually. once available (but limited in numbers). Unit selection is much more interesting now. Warlord are not worth it compared to outrunners once all upgrades come in (the 3 food cost and Rath's bonus are a big advantage for the outrunners). Inara's spiders having better regeneration is a true selling point in a mission with no way to heal our units, and they are definitely a viable choice. But in my tests, I found wolf-based units better. Cyclops pack a lot of punch, but they are not as compelling as they once were, as their power hasn't changed while other units are significantly stronger, and move faster too. Likewise, I preferred trackers over vengeful spiders.
My strategy at the beginning was to get more wood peons, regroup all my units, train some more outrunners, grab Rath's bonus and start on the path to max upgrades for my units. I trained a witch doctor because the scouting it offers is very valuable, to see attacks coming from the left and the right. As I defended against the attack waves from the left and right, I also made a catapult to cut towards the cyclops (I preferred to keep Rath's avenge for killing enemy units). The free units and the item are a boon even for a player that doesn't intend to train cyclops long-term.
It's better to go into low upkeep and to defeat human attacks quicker than to stay in no upkeep and to suffer more damages during fights. In the end you don't save gold when you need to train new units more often to replace losses. In the same spirit, I wanted to do necrolytes because of the dps boost of their chain lightning. I can't make use of shamans without bloodlust. Warlock are compelling, with their fireball and unholy frenzy (which I took advantage of in the SOB), but I didn't really use them.
The Paladins and their "bubbles" in the attack waves we receive were annoying, as they could keep doing damage I couldn't heal for a long while, but instead of getting the paladin to low health before it activated its bubble, I just killed the rest of his troops (spam chain lightning helping to do it quicker). The damage the paladin alone could do was limited.
I played this mission over a week ago now so I don't recall the little details, but I got all my upgrades and repelled multiple attack waves before rushing the imperial base in the north-west. I had to rush back home to save my base from destruction without properly finishing this imperial base. Throughout the first part of the mission, I placed some defensive towers to the east as support for my army (towers suck if they are alone), but I was short on gold before I could get the second goldmine, and I often lost them. Finshing off the imperial base was messy, but with two goldmines and only one direction I was attacked from, it became more manageable.
I sent Inara and the Cyclops overlord as support for the Ironthunder clan (although without any way to heal, the cyclops overlord ended up waiting doing nothing for most of the mission). When I could afford it, I also sent some peons to build a few towers, not in first line but still close enough to do damage. My towers in the west and east got destroyed quite a lot. Inara is powerful and helped the Ironthunder a lot, but sometimes I really had to send Rath and some of his troops to assist. The royal attacks on the east of the Ironthunder were particularly annoying, as was the Starfall from the elven heroine. Sometimes the north-eastern royals would attack my main base, and while this relieved the Ironthunder, it was a nasty surprise indeed the first time it happened. Their hero is very annoying.
In the SOB, I destroyed the second imperial base, and only later the south-east royal base. This time around, I went for the catapult cut on the forest towards the royal army camp. Once the cut was completed, royal army units got through and destroyed my catapult. I took time to prepare myself well, with a full army, gold reserves to replace losses quickly, and towers to help defend until I could send troops again there. I also pulled Inara to help, and waited until I had repulsed attacks from the imperial and royal bases. I cleaned most of it before I pulled back to defend, leaving only catapults to destroy uninmportant buildings.
I feared that enemy attacks would go there if I built a great hall in the former royal base, so although I had the peons ready, I waited until I had attacked and destroyed the second imperial base, in order to use these two new goldmines. At this point I built new production buildings and towers in the eastern imperial base. I expected the remainder of the mission to be a smooth but boring sailing. I prepared myself for yet another attack, targeting the north-eastern royal base.
And then, the Redfist came. This was unexpected, but it brought a new challenge to the mission. I dare think that my previous remarks about the "decreasing difficulty syndrome" were part of what motivated this most welcome change, that fixes the issue.
The Redfist calling able mens to arms and evacuating civilians was a very nice touch.

Rath even used Avenge on the poor fleeing civilians to make sure as little as possible of them made it through...
I already had good momentum against the north-eastern royal base and although I suffered significant losses, I had plenty of gold and production buildings to replace losses. The Ironthunder struggled against this new enemy and I had to help them. Although I had wiped one of the northern human bases (where I quickly started exploiting the goldmine and building more production buildings and towers, anticipating Redfist to arrive again from the eastern road), I struggled a lot to make progress at this stage. The Order of the Air resisted stiffly, and the Redfist attacks were more and more dangerous. Towers I had built between the north-east base and the Ironthunder base got wiped, my towers at the Ironthunder base and in my north-eastern base too, and I lost most of my troops at one point. I had good gold income to support things, but expenses were very high to keep up, and progress against the order of the Air was very slow when I had to rescue the Ironthunder or my base against renewed attacks.
The final attack wave from the Redfist was very violent, and brought more destruction to the Ironthunder than all previous attacks in the mission. My heroes and troops arrived late and I lost a lot of units again in the desperate fight. In the end, I still had a reasonable margin, and I didn't need to save-reload like I did to streamline things in the beginning, but I seriously thought at some point that these Redfist waves might overpower me and destroy the Ironthunder, forcing me to do such reloads. I was in particular worried about my gold, I was spending it too fast and with my starting goldmine already out, I wouldn't have been able to keep such production forever. Had I failed to wipe the north-eastern base, their attacks with their annoying hero combined with the Redfist might well have been fatal to the Ironthunder.
With no further Redfist attacks and about half of the Order of the Air's base destroyed, it was relatively easy to finish off the remaining human bases.
Misc. issues: - Rath's leadership bonus talks about "Outriders" instead of Outrunners.
- Warlord are on horses, yet they benefit from the second wolf training upgrade. That's weird. Maybe the name of the upgrade should be changed.
Mission 1
Difficulty (strategy): very low
Difficulty (execution): low
Story: It's quite convenient how the Ironfist intervenes against the Dark Troll right when Amari needs it. The dialogues had more depth than what I recall in the second orc book.
Rating: 3.5/5
Comment: I'm not very fond of this mission. I knew from looking at my SOB notes that the fountain is to the east, so I didn't have trouble with it. But the Dark Trolls don't bother informing us about the existence of the fountain, so it's completely possible to clean most of the map before finally finding it.
It's also possible to head straight down and kill the dark troll renegate hero in less than 5 minutes. The only glimpse of difficulty I encountered during the mission was with the Ironfist base in the west (I had both heroes drop below 50hp, so I thought it wouldn't be fair to say execution difficulty is very low).
My only real suggestion here is to have Grella tell us about the nearby health fountain. Playing without it isn't difficult, it's just slow.
Misc. issues: During the end cutscene, Amari says "why I like prefer to be open-minded". "like" or "prefer" should be removed.
Mission 2
Difficulty (strategy): medium
Difficulty (execution): medium
Story: The Orcs are discovering the wrath of the Redfist... Quite simple, but it does the job to explain the burning of the Orc Islands.
Rating: 3/5
Comment: When I am watching entire videos during a mission to pass time while units recover HP, it says something is wrong. There is only static enemy groups and absolutely no threat against staying put. At the same time, the Redfist are formidable warriors. It's good I suppose to discover that even 1-on-1 these humans are a threat to the orcs. But the gameplay of "select all units and tell them to retreat to a point where they won't be pursued, then wait for a heal, then attack an enemy group" is rather repetitive and boring.
Once I had rescued the two groups of orcs, I had enough units to easily rotate units to fight with the most healthy, enough units to usually overwhelm enemy groups, and enough units to not care too much if I lost one or two during a battle. So I traded some units for speed, to finish the mission faster.
The removal of dripping poison from One-eye has made this mission even more aggravating than it was in the SOB.
In my opinion, for it to be really enjoyable, there should be Redfist patrols and/or reactions to some of our kills that prevent "wait 10 minutes for all grunts to heal" from being the boring but reliable go-to, and at the same time more room for sneaking around instead of fighting directly.
Misc. issues: The dialogue from the "Crusader" triggers even if Oneeye is invisible and pass through the group without being attacked.
Mission 3
Difficulty (strategy): low
Difficulty (execution): low
Story: Significant improvements in the dialogues early on compared to the SHB. Still the same funny dialogue with the royal army soldiers swearing that Demons killed Lerrig. Overall solid.
Rating: 4.5/5
Comment: Three micro missions in a row, that's quite a lot. But I like Gardon and Merlon, so that helps. And now, the death of the Golden bastards on the way is canon... I always did it in the SHB. I used them alongside my heroes to fight the orcs, demons, murlocs, but without taking much care of saving them, so they slowly died throughout the fights of the mission. This made the mission more relaxed and fun, although I had to pay attention during some fights.
The items dropped were mostly meh. I didn't care too much because I already had good items from the previous acts (items carrying over is neat compared to the FHB/SHB experience), but elven boots for completing the sidequests was disappointing. It's a very poor item on Merlon and Gardon, and we can't transfer it for future missions and heroes either. The orb of earth looked disappointing too, until I discovered it actually also grants 150HP, which makes it a very fine item.
Misc. issues: If we kill a Golden Guard unit by attacking it, they turn on us. That's well done. But if we just attack them, they don't. This means it's possible to get them down close to death without any reaction. Maybe they could have a "what are you doing?" reaction on the first hit, but more than two or three hits should in my opinion trigger the turning event.
It was mildly annoying to notice that the Golden Guard War Priest is a standard chaplain, just with a different model. Considering how armored the model looks, what about actually giving it a different armour type instead of unarmoured, and 3 or 4 armour points? It would make it more unique and be more consistent lore-wise. If it has to be changed in other ways to keep gameplay balanced, that's fine.
Mission 4
Difficulty (strategy): very high
Difficulty (execution): very high
Story: The presence of the order of the air instead of generic enemies are an improvement over the original, the intervention of the best papa's troops an even bigger one.
Rating: 5/5
Comment: I really disliked this mission in the SOB. I criticized it for having a bad case of "decreasing difficulty syndrome", with an extremely difficult start morphing progressively into a slow but easy grind.
I'm very pleased with how this map has been changed compared to the SOB. The start remains very difficult, but several things come to make things more manageable: Rath has avenge, we have Inara as a powerful second hero, we have the leadership bonus to make better units, we have the first and second wolf training upgrades (instead of none in the SOB).
In the SOB I had dismissed outrunners as too costly and weak compared to warlords, with cyclops as the best choice usually. once available (but limited in numbers). Unit selection is much more interesting now. Warlord are not worth it compared to outrunners once all upgrades come in (the 3 food cost and Rath's bonus are a big advantage for the outrunners). Inara's spiders having better regeneration is a true selling point in a mission with no way to heal our units, and they are definitely a viable choice. But in my tests, I found wolf-based units better. Cyclops pack a lot of punch, but they are not as compelling as they once were, as their power hasn't changed while other units are significantly stronger, and move faster too. Likewise, I preferred trackers over vengeful spiders.
My strategy at the beginning was to get more wood peons, regroup all my units, train some more outrunners, grab Rath's bonus and start on the path to max upgrades for my units. I trained a witch doctor because the scouting it offers is very valuable, to see attacks coming from the left and the right. As I defended against the attack waves from the left and right, I also made a catapult to cut towards the cyclops (I preferred to keep Rath's avenge for killing enemy units). The free units and the item are a boon even for a player that doesn't intend to train cyclops long-term.
It's better to go into low upkeep and to defeat human attacks quicker than to stay in no upkeep and to suffer more damages during fights. In the end you don't save gold when you need to train new units more often to replace losses. In the same spirit, I wanted to do necrolytes because of the dps boost of their chain lightning. I can't make use of shamans without bloodlust. Warlock are compelling, with their fireball and unholy frenzy (which I took advantage of in the SOB), but I didn't really use them.
The Paladins and their "bubbles" in the attack waves we receive were annoying, as they could keep doing damage I couldn't heal for a long while, but instead of getting the paladin to low health before it activated its bubble, I just killed the rest of his troops (spam chain lightning helping to do it quicker). The damage the paladin alone could do was limited.
I played this mission over a week ago now so I don't recall the little details, but I got all my upgrades and repelled multiple attack waves before rushing the imperial base in the north-west. I had to rush back home to save my base from destruction without properly finishing this imperial base. Throughout the first part of the mission, I placed some defensive towers to the east as support for my army (towers suck if they are alone), but I was short on gold before I could get the second goldmine, and I often lost them. Finshing off the imperial base was messy, but with two goldmines and only one direction I was attacked from, it became more manageable.
I sent Inara and the Cyclops overlord as support for the Ironthunder clan (although without any way to heal, the cyclops overlord ended up waiting doing nothing for most of the mission). When I could afford it, I also sent some peons to build a few towers, not in first line but still close enough to do damage. My towers in the west and east got destroyed quite a lot. Inara is powerful and helped the Ironthunder a lot, but sometimes I really had to send Rath and some of his troops to assist. The royal attacks on the east of the Ironthunder were particularly annoying, as was the Starfall from the elven heroine. Sometimes the north-eastern royals would attack my main base, and while this relieved the Ironthunder, it was a nasty surprise indeed the first time it happened. Their hero is very annoying.
In the SOB, I destroyed the second imperial base, and only later the south-east royal base. This time around, I went for the catapult cut on the forest towards the royal army camp. Once the cut was completed, royal army units got through and destroyed my catapult. I took time to prepare myself well, with a full army, gold reserves to replace losses quickly, and towers to help defend until I could send troops again there. I also pulled Inara to help, and waited until I had repulsed attacks from the imperial and royal bases. I cleaned most of it before I pulled back to defend, leaving only catapults to destroy uninmportant buildings.
I feared that enemy attacks would go there if I built a great hall in the former royal base, so although I had the peons ready, I waited until I had attacked and destroyed the second imperial base, in order to use these two new goldmines. At this point I built new production buildings and towers in the eastern imperial base. I expected the remainder of the mission to be a smooth but boring sailing. I prepared myself for yet another attack, targeting the north-eastern royal base.
And then, the Redfist came. This was unexpected, but it brought a new challenge to the mission. I dare think that my previous remarks about the "decreasing difficulty syndrome" were part of what motivated this most welcome change, that fixes the issue.
The Redfist calling able mens to arms and evacuating civilians was a very nice touch.
Rath even used Avenge on the poor fleeing civilians to make sure as little as possible of them made it through...
I already had good momentum against the north-eastern royal base and although I suffered significant losses, I had plenty of gold and production buildings to replace losses. The Ironthunder struggled against this new enemy and I had to help them. Although I had wiped one of the northern human bases (where I quickly started exploiting the goldmine and building more production buildings and towers, anticipating Redfist to arrive again from the eastern road), I struggled a lot to make progress at this stage. The Order of the Air resisted stiffly, and the Redfist attacks were more and more dangerous. Towers I had built between the north-east base and the Ironthunder base got wiped, my towers at the Ironthunder base and in my north-eastern base too, and I lost most of my troops at one point. I had good gold income to support things, but expenses were very high to keep up, and progress against the order of the Air was very slow when I had to rescue the Ironthunder or my base against renewed attacks.
The final attack wave from the Redfist was very violent, and brought more destruction to the Ironthunder than all previous attacks in the mission. My heroes and troops arrived late and I lost a lot of units again in the desperate fight. In the end, I still had a reasonable margin, and I didn't need to save-reload like I did to streamline things in the beginning, but I seriously thought at some point that these Redfist waves might overpower me and destroy the Ironthunder, forcing me to do such reloads. I was in particular worried about my gold, I was spending it too fast and with my starting goldmine already out, I wouldn't have been able to keep such production forever. Had I failed to wipe the north-eastern base, their attacks with their annoying hero combined with the Redfist might well have been fatal to the Ironthunder.
With no further Redfist attacks and about half of the Order of the Air's base destroyed, it was relatively easy to finish off the remaining human bases.
Misc. issues: - Rath's leadership bonus talks about "Outriders" instead of Outrunners.
- Warlord are on horses, yet they benefit from the second wolf training upgrade. That's weird. Maybe the name of the upgrade should be changed.
Review of Arc 5 - Missions 5 to 7
Mission 5
Difficulty (strategy): high
Difficulty (execution): very high
Story: Ornasion, from foe to unliving servant of the Watcher... And a Ras scholar out of his library. An unlikely combination, but it works out fine.
Rating: 4/5
Comment: Others in the new content thread seem to have had a much easier time than me completing this mission, even managing to complete it more or less with starting units. I'm not sure why exactly. After playing around a bit to look at available units and so on, I had a first attempt where I quickly gather from the second gold mine ahead of Rahandir's base, but then it became the target of demonic attacks which made it less than ideal. I destroyed the two forward demonic gates and killed the demons and non-respawning defensive units of the demon slave base, but I only had 5K gold left in my home goldmine, no real reserves, and I had lost the forward goldmine. I felt it would be too much of a grind to try to win from this position, especially with no way to make defensive towers, so I started over.
This time around, besides getting upgrades and producing some units before the reinforcements destroyed my food-cap, I focused on cutting the wood in the west of the base. I also built some production buildings within Rahandir's base, that would be used later. I had to help Rahandir defend a bit, but my priority was to kill the Demon Count trapped behind the trees as soon as possible, in order to raise him as Deathlord. The Deathlord is arguably as useful as the low-level heroes we get in this mission.
As soon as I got the Deathlord, my priority was to heal up the flesh golems guarding Rahandir's base. They are not replaced if they die, but they do a wonderful job against enemy attacking waves, so keeping them alive was key to my plan of using the Splecir's base for defence. I later also added obsidian statues for mana and health regeneration of my heroes and units, but at the start I was over the food cap so I couldn't.
I cleaned up the static demons progressively, retreating whenever I was about to face a serious attack wave. I used my heroes and deathlord to help the flesh golems in defence, but for my standard units I preferred the spot near the forward gold mine. Enemy units never go there unless we have some buildings there, and this helps to cut down travel time when attacking back.
I progressively cleaned the two forward demon gates, using all the units I didn't care about. When I went below the foodcap, I did obsidian statues, firebearers, deathlords and a couple icekeepers to complement the remaining units I had. The demon slave base was more trouble, as there was a very long distance travel to there. At this stage, defending Rahandir's base was easier, however.
I was playing conservatively, to try and keep the Splecir spellcasters and the Officer alive for as long as possible. The Splecir spellcasters are really good, bulky and with wondrous spells. Lorekeepers aren't bad, but in my failed first attempt I had been frustrated by their skeleton spam when attacking the demon slaves. I had plenty of skeletons, but all my good units were paralyzed because of collision issues in the sea of skeletons, and I ended up slowly losing the battle.
As I didn't want to settle down with a production base that would face the full blunt of enemy attacks without even the ability to use some towers. I ended up making a meat wagon to cut trees south of the path that demons take to attack the dead mountain, which provided a closer spot to hide and retreat my regular units to than next to the forward goldmine. The destruction of the demon slave base had to be in two phases, one to clean its forward towers and all its non-replenished infantry units, the other to go after the buildings and raze it to the ground. I didn't have the infrastructure for a unit-flood war, as buildings need to be close for it to work well, and I wanted to keep my Splecir units alive. During the second fight, I left the Splecir nexus base defend itself, and a flesh golem died, but with the demon slaves eradicated, I finally sent acolytes forward to occupy goldmines and make forward buildings, as just one enemy sending attacking waves is much more manageable.
I found space to build production buildings, and I had no trouble progressively eradicating the remaining demons and demon gates. Although they came out en masse to defend some spots, they could at best force me to retreat temporarily before I came back to destroy more demons and buildings.
I also sent Ornasion to explore the south of the map. It's very peculiar to have such a big part of the map be completely useless for the actual mission at hand. Ornasion takes forever to get there for just a bit of dialogue.
One thing that might not come through clearly in this review is the number of time I ended up doing a save reload, because I had lost my deathlord, or a flesh golem died, or a splecir unit died before my deathlord healed it, or my attack timing was bad and I sent my army into attack waves... I was maybe overly careful, but I didn't want to have a second failure. It took me a long time to actually complete the mission. That's why I rate the execution difficulty very high, although maybe there is some strategy I'd find easier to execute.
Misc. Issues: - It's not possible to build in some areas of the demon slave base even after the terrain is corrupted. I know it's a known bug that's not easy to fix, but it's still a bad one.
Mission 6
Difficulty (strategy): high
Difficulty (execution): medium-high
Story: More or less the same as the SHB, but that's not a bad thing here.
Rating: 4.5/5
Comment: Some have had trouble with this mission. I found it rather straightforward, all things considered. Of course, I already beat it during my playthroughs of the SHB, so that helps, and I had to be careful (I reloaded after launching an ill-considered attack when I was far from ready enough, for example), but overall I could stick to my plan and get good results without micro being a serious concern.
The first phase of the mission is holding the base. More workers on gold (as the gold mine is farther than minimum), more on wood, researching all relevant upgrades... I picked Gardon's bonus. Although I like spamming towers, making Merlon's 25% more HP on towers valuable, it's much easier to defend than to attack, and the fully-upgraded Bloodfang are superior to the knights in that regard, the improved attack is more than worth it compared to the slightly better armor. The quicker enemies are killed, the less damage they have the time to do. The improved Zed is a bonus.
Because of regular demon attacks, I often had to send my heroes back and forth to defend the western, eastern and northern entrances, but my composition progressively went towards 1 greywolf and 2-3 bloodfang for each hero, one guarding the west, one guarding the east, plus a dozen crossbowmen and a group of spellcasters (mostly chaplains, but a few stormbringers too) that I would move according to the need. I would send troop to help the northern entrance when needed, too. On the western and eastern entrance I slowly built up to about ten towers each, more in the north.
@nchp1903 wrote:
Of course you can't full tower from the start, but the trick is to use Arcane Towers. Their ability that allows to look at any part of the map is useful to scout, but in direct fight they are also very effective. Most demons take increased damage from magic attacks (because of heavy armor), and the arcane tower mana burns destroys the two most annoying demons to deal with using units, the doom guards and the fellhounds. They take big damage from focused arcane tower fire, and the mana burn also limits their ability to use spells against our units. Arcane towers are also very good in chapter 5 of act 2 (Salana fighting the traitor Elves) to destroy demon attack waves.
Once my defensive position was fully secured, I prepared myself to attack the Darkblade legion. I had already cleaned the few "static" souleater units in between, and I waited to have repulsed a major attack from the Souleater before setting out. I added a few bloodfangs to my melee groups, and a few catapults to destroy towers and demon gates.
And it worked out very well. Merlon's ultimate helps a lot to clean massive enemy armies, and between bloodfangs, crossbows and the armor penalty from stormbringers, demons died fast. I cleaned up the whole Darkblade base in one go with less casualties than expected.
From then on, there was less worry about having to defend home. My towers were doing fine with some repairs to handle the Dreamhunter legion. I replenished troops, killed the sidequest boss, and used the same composition that worked so well to attack the Souleater base. The fight was easier than I recall it in the SHB, maybe due to using bloodfangs and having access to stormbringers, I'm not sure. Once the bulk of the demons is dead, they can't produce fast enough to repel a properly reinforced full-food army, and it was rather easy to destroy some demon gates. After two attack phases, I only left one standing, in order to clean the north of the map.
I built a town hall and a wall of towers west of it to guard against demons (they attacked while I was away in the north), but I could have essentially completed the mission using only the starting goldmine.
In the north, I took my time to slay every enemy, including the golem that requires cutting through trees to access. There are some strong enemies, but with a full army and two powerful heroes, it's nothing special.
Demons and other enemies drop a lot of interesting items during this mission, but Gardon and Merlon already had good items from previous missions, so this turned out to be quite frustrating. Who believes that Gardon, the half-brother of the emperor HIMSELF, champion of humanity, ready to use any means to win, even necromancy, would let plenty of powerful items in the woods?
@Shar Dundred Please give us a way to carry over additional items to give to Cora when Gardon meets her, and maybe also have a combinable item in the mix.

I ended up leaving behind the Orb of Demonology (dropped by the side-quest hero, inferior to the orbs we already get by that point), two regeneration rings, a +6 strength belt, +6 attack claws and a +4 armour ring.
Misc. Issues : the blacksmith upgrades still talk about greywolves instead of sergeants.
Mission 7
Difficulty (strategy): low
Difficulty (execution): low
Story: I'm not really convinced by the "cave orcs". It seems as if the only reason they exist, and somehow survived in caves where no plants can grow (and so no animals eating plants can live), is that orcs would be the most convenient enemy race that could also have bases. Also, it's a bit strange how the task of retrieving the artifact is not mentioned at the end. Otherwise, Ornasion is an interesting character.
Rating: 4/5
Comment: There is a fair bit of exploration to do in order to collect all items, but the first half of the missions is easy and in the second half it's basically impossible to lose with infinite free heroes respawn and Rahandir's troops winning by themselves. The only meaningful difficulty is to clean up the side enemies and claim their items before the Splecir Nexus finishes off the main cave orc base.
Overall, it was not unpleasant to play, but the lack of challenge and the less convincing story put it far from my favorite missions.
Misc. Issue: the minimap doesn't properly display the hidden "hey man".
Mission 5
Difficulty (strategy): high
Difficulty (execution): very high
Story: Ornasion, from foe to unliving servant of the Watcher... And a Ras scholar out of his library. An unlikely combination, but it works out fine.
Rating: 4/5
Comment: Others in the new content thread seem to have had a much easier time than me completing this mission, even managing to complete it more or less with starting units. I'm not sure why exactly. After playing around a bit to look at available units and so on, I had a first attempt where I quickly gather from the second gold mine ahead of Rahandir's base, but then it became the target of demonic attacks which made it less than ideal. I destroyed the two forward demonic gates and killed the demons and non-respawning defensive units of the demon slave base, but I only had 5K gold left in my home goldmine, no real reserves, and I had lost the forward goldmine. I felt it would be too much of a grind to try to win from this position, especially with no way to make defensive towers, so I started over.
This time around, besides getting upgrades and producing some units before the reinforcements destroyed my food-cap, I focused on cutting the wood in the west of the base. I also built some production buildings within Rahandir's base, that would be used later. I had to help Rahandir defend a bit, but my priority was to kill the Demon Count trapped behind the trees as soon as possible, in order to raise him as Deathlord. The Deathlord is arguably as useful as the low-level heroes we get in this mission.
As soon as I got the Deathlord, my priority was to heal up the flesh golems guarding Rahandir's base. They are not replaced if they die, but they do a wonderful job against enemy attacking waves, so keeping them alive was key to my plan of using the Splecir's base for defence. I later also added obsidian statues for mana and health regeneration of my heroes and units, but at the start I was over the food cap so I couldn't.
I cleaned up the static demons progressively, retreating whenever I was about to face a serious attack wave. I used my heroes and deathlord to help the flesh golems in defence, but for my standard units I preferred the spot near the forward gold mine. Enemy units never go there unless we have some buildings there, and this helps to cut down travel time when attacking back.
I progressively cleaned the two forward demon gates, using all the units I didn't care about. When I went below the foodcap, I did obsidian statues, firebearers, deathlords and a couple icekeepers to complement the remaining units I had. The demon slave base was more trouble, as there was a very long distance travel to there. At this stage, defending Rahandir's base was easier, however.
I was playing conservatively, to try and keep the Splecir spellcasters and the Officer alive for as long as possible. The Splecir spellcasters are really good, bulky and with wondrous spells. Lorekeepers aren't bad, but in my failed first attempt I had been frustrated by their skeleton spam when attacking the demon slaves. I had plenty of skeletons, but all my good units were paralyzed because of collision issues in the sea of skeletons, and I ended up slowly losing the battle.
As I didn't want to settle down with a production base that would face the full blunt of enemy attacks without even the ability to use some towers. I ended up making a meat wagon to cut trees south of the path that demons take to attack the dead mountain, which provided a closer spot to hide and retreat my regular units to than next to the forward goldmine. The destruction of the demon slave base had to be in two phases, one to clean its forward towers and all its non-replenished infantry units, the other to go after the buildings and raze it to the ground. I didn't have the infrastructure for a unit-flood war, as buildings need to be close for it to work well, and I wanted to keep my Splecir units alive. During the second fight, I left the Splecir nexus base defend itself, and a flesh golem died, but with the demon slaves eradicated, I finally sent acolytes forward to occupy goldmines and make forward buildings, as just one enemy sending attacking waves is much more manageable.
I found space to build production buildings, and I had no trouble progressively eradicating the remaining demons and demon gates. Although they came out en masse to defend some spots, they could at best force me to retreat temporarily before I came back to destroy more demons and buildings.
I also sent Ornasion to explore the south of the map. It's very peculiar to have such a big part of the map be completely useless for the actual mission at hand. Ornasion takes forever to get there for just a bit of dialogue.
One thing that might not come through clearly in this review is the number of time I ended up doing a save reload, because I had lost my deathlord, or a flesh golem died, or a splecir unit died before my deathlord healed it, or my attack timing was bad and I sent my army into attack waves... I was maybe overly careful, but I didn't want to have a second failure. It took me a long time to actually complete the mission. That's why I rate the execution difficulty very high, although maybe there is some strategy I'd find easier to execute.
Misc. Issues: - It's not possible to build in some areas of the demon slave base even after the terrain is corrupted. I know it's a known bug that's not easy to fix, but it's still a bad one.
- The reinforcements are a one-time thing. That's ok, but when first playing the mission, it's not clear that we won't receive further reinforcements, that they are just a one-time thing.
- Ornasion's orb description : "2times" instead of "2 times"
Mission 6
Difficulty (strategy): high
Difficulty (execution): medium-high
Story: More or less the same as the SHB, but that's not a bad thing here.
Rating: 4.5/5
Comment: Some have had trouble with this mission. I found it rather straightforward, all things considered. Of course, I already beat it during my playthroughs of the SHB, so that helps, and I had to be careful (I reloaded after launching an ill-considered attack when I was far from ready enough, for example), but overall I could stick to my plan and get good results without micro being a serious concern.
The first phase of the mission is holding the base. More workers on gold (as the gold mine is farther than minimum), more on wood, researching all relevant upgrades... I picked Gardon's bonus. Although I like spamming towers, making Merlon's 25% more HP on towers valuable, it's much easier to defend than to attack, and the fully-upgraded Bloodfang are superior to the knights in that regard, the improved attack is more than worth it compared to the slightly better armor. The quicker enemies are killed, the less damage they have the time to do. The improved Zed is a bonus.
Because of regular demon attacks, I often had to send my heroes back and forth to defend the western, eastern and northern entrances, but my composition progressively went towards 1 greywolf and 2-3 bloodfang for each hero, one guarding the west, one guarding the east, plus a dozen crossbowmen and a group of spellcasters (mostly chaplains, but a few stormbringers too) that I would move according to the need. I would send troop to help the northern entrance when needed, too. On the western and eastern entrance I slowly built up to about ten towers each, more in the north.
@nchp1903 wrote:
However, I'm pretty sure that a lot of Demons have Hardened Skin, so Guard Towers are not strong enough, and Cannon Towers are too expensive for the early game.
Of course you can't full tower from the start, but the trick is to use Arcane Towers. Their ability that allows to look at any part of the map is useful to scout, but in direct fight they are also very effective. Most demons take increased damage from magic attacks (because of heavy armor), and the arcane tower mana burns destroys the two most annoying demons to deal with using units, the doom guards and the fellhounds. They take big damage from focused arcane tower fire, and the mana burn also limits their ability to use spells against our units. Arcane towers are also very good in chapter 5 of act 2 (Salana fighting the traitor Elves) to destroy demon attack waves.
Once my defensive position was fully secured, I prepared myself to attack the Darkblade legion. I had already cleaned the few "static" souleater units in between, and I waited to have repulsed a major attack from the Souleater before setting out. I added a few bloodfangs to my melee groups, and a few catapults to destroy towers and demon gates.
And it worked out very well. Merlon's ultimate helps a lot to clean massive enemy armies, and between bloodfangs, crossbows and the armor penalty from stormbringers, demons died fast. I cleaned up the whole Darkblade base in one go with less casualties than expected.
From then on, there was less worry about having to defend home. My towers were doing fine with some repairs to handle the Dreamhunter legion. I replenished troops, killed the sidequest boss, and used the same composition that worked so well to attack the Souleater base. The fight was easier than I recall it in the SHB, maybe due to using bloodfangs and having access to stormbringers, I'm not sure. Once the bulk of the demons is dead, they can't produce fast enough to repel a properly reinforced full-food army, and it was rather easy to destroy some demon gates. After two attack phases, I only left one standing, in order to clean the north of the map.
I built a town hall and a wall of towers west of it to guard against demons (they attacked while I was away in the north), but I could have essentially completed the mission using only the starting goldmine.
In the north, I took my time to slay every enemy, including the golem that requires cutting through trees to access. There are some strong enemies, but with a full army and two powerful heroes, it's nothing special.
Demons and other enemies drop a lot of interesting items during this mission, but Gardon and Merlon already had good items from previous missions, so this turned out to be quite frustrating. Who believes that Gardon, the half-brother of the emperor HIMSELF, champion of humanity, ready to use any means to win, even necromancy, would let plenty of powerful items in the woods?
@Shar Dundred Please give us a way to carry over additional items to give to Cora when Gardon meets her, and maybe also have a combinable item in the mix.
I ended up leaving behind the Orb of Demonology (dropped by the side-quest hero, inferior to the orbs we already get by that point), two regeneration rings, a +6 strength belt, +6 attack claws and a +4 armour ring.
Misc. Issues : the blacksmith upgrades still talk about greywolves instead of sergeants.
Mission 7
Difficulty (strategy): low
Difficulty (execution): low
Story: I'm not really convinced by the "cave orcs". It seems as if the only reason they exist, and somehow survived in caves where no plants can grow (and so no animals eating plants can live), is that orcs would be the most convenient enemy race that could also have bases. Also, it's a bit strange how the task of retrieving the artifact is not mentioned at the end. Otherwise, Ornasion is an interesting character.
Rating: 4/5
Comment: There is a fair bit of exploration to do in order to collect all items, but the first half of the missions is easy and in the second half it's basically impossible to lose with infinite free heroes respawn and Rahandir's troops winning by themselves. The only meaningful difficulty is to clean up the side enemies and claim their items before the Splecir Nexus finishes off the main cave orc base.
Overall, it was not unpleasant to play, but the lack of challenge and the less convincing story put it far from my favorite missions.
Misc. Issue: the minimap doesn't properly display the hidden "hey man".
Last edited:
Review of Arc 6 - Missions 1 to 4
I noticed a fair number of typos in this act, but I'll put them all in another post, as they would get forgotten here.
Mission 1
Difficulty (strategy): very high
Difficulty (execution): extremely high
Story: We already had the regiment flavor in the SOB, but it's now explained more. The monoliths add a nice touch too.
Rating: 4/5
Comment: The mission is less insanely difficult than I recall it from the SOB. At least, this time I managed to complete it in hard. But I made heavy use of save reloads to help get micro and timings right, especially in the early part. Once the eastern royals and purple were out (save for a symbolic building for purple), I didn't need to abuse saves.
Some of the issues I complained about in the SOB are still present. Namely, the eastern royal base isn't attacked by the demons at all, which looks weird. It would be better to have it attacked, and then when the player take over that base, have some demon chief say something like "The Orcs are killing humans for us, let's focus our forces elsewhere" before the attack waves stop. Another is the base layout with the chokepoints that hurts us in defense, the war mill that hurts movement (but that we can't afford to destroy early) and the awkward congestion of buildings next to the health fountain. Although to be fair, movement collision didn't feel as aggravating as in the SOB.
At the beginning my priorities were wood peons, grabbing upgrades, building a Spirit Lodge, getting some additional units and running Grofzag to some of the Monoliths. It's neat that we have a goblin observatory to scan and scout, but I didn't feel like we have the luxury in hard to not know what to do. The south-eastern Monolith with the wolves and the north-western one with the two elites are very easy to grab early on, especially as we don't need to actually kill the elites.
I picked Grafzog's leadership bonus. Zairmak's bonus is definitely valid, as it makes spellcasters much less vulnerable, but overall I think spellcasters can be safe enough behind a layer of golems to prefer the minor damage and regeneration bonus to golems. I used rock golems in front, and a mix of necrolytes and shaman behind (mostly necrolytes at the start because I hadn't yet researched the crucial master upgrade for shamans). Warlocks are an option too, but I prefer raw damage over the stun. I didn't bother with towers early on, as they are too costly and weak compared to having a full low upkeep army.
I helped the Deathbreeze against attacks from pink (Daric's mercenaries) and grey (Falcon regiment) and built up my forces. Attack waves often hit in close succession, and it can be tricky to stave off both the south and west attacks. I made some catapults and as soon as I felt ready, after having repulsed attacks, I rushed the eastern royal base. Their army melted quickly under my ligthning chain spam, but I had barely the time to grab the items from the castle before sending back most of my troops home to defend against the attacks that were about to start. I only left a few golems and my catapults to clean the remaining barracks and other buildings.
The combined attack of purple and pink did significant damage, and grey's attack happened just as I finished cleaning the two others, but surviving with a great hall being built to get the second gold mine exploited as soon as possible was good enough. The next waves of attack had me on the brink of collapse, as I was at the limit resource-wise, but it barely held. Grey and purple have each an annoying hero, but fingers of death, stun and chain lightning kill them. I also snuck Grofzag to grab the last monolith in the north and complete the side-quest. The stats boost and the crystal golem were welcome (although costing more food and not being able to attack the falcon's regiment air units, crystal golems are not a full replacement for rock golems).
I slowly but surely built towers on the open ground in the west (not near the chokepoint, which prevents rushing down catapults). Cutting down all trees in our base helps to not feel so boxed in. Next, I destroyed royal units and buildings between my base and purple's. I had a bad surprise later when purple's hero had resurrected 6 royal knights, it's an idea to use necrolytes to dispose of the corpses. Then between another series of attack waves I softened purple's base entrance, getting rid of the two elites from Daric's Mercenaries and the towers. At the time of the final attack, they had no chance. I destroyed everything except for a token non-production building, built a gold mine there, and prepared for the other bases.
The process to destroy the falcon base was much the same as with the dragon regiment, except holding at home was simpler. There is a permanent hero boost available when destroying their castle, so it's worth going for.
Destroying the base of Daric's mercenaries or of the Phoenix and Bull regiments is pointless, but at least it's fun after all the suffering early in the mission. Daric's base might seem unmanageable with all the elites, but clearing some trees with catapults, peppering towers in the front of the enemy base (without blocking the attack path), and using catapults to attract the elites work very well. A dozen elites or more rush out, they get destroyed by our heroes, army and towers, losses are replaced, rinse and repeat. In the end catapults can destroy the six frontmost cannon towers. The group of 7 behind farms is more problematic, and it took me a while to get done. But once it's done, we can get a permanent foothold in the enemy base.
The enemy workers agressively rebuild barracks and cannon towers, but we can gain space and put our own towers and production buildings in safe spot, making it easier to defeat the onslaught of elites continuously produced from enemy barracks. Each time some enemy buildings were destroyed and more space was gained, I towered the area. Eventually, lack of space led to less barracks, which made it much easier to keep going. The enemy castle was finally vulnerable, and once it's gone and the peasants with it it's easy to destroy the rest. There is absolutely no point in destroying this base (no item or bonus) apart from the bragging rights.
I also destroyed the bases of the Phoenix regiment and the Bull regiment. Once again, there is absolutely no point (doing it earlier to have demons attack the falcon and dragon regiment is not worth it in my opinion), but killing humans for no good reason is the orc thing to do.
Mission 2
Difficulty (strategy): high
Difficulty (execution): high
Story: Dark Elves politics... Nasty
Rating: 4.5/5
Comment: As an outspoken critic of friendly collisions in Warcraft 3, I cannot be fully satisfied with this mission, although I have to admit that spamming AoE spells on enemy units in a chokepoint is pleasing.
I had a first try where I picked Pentiss' bonus because I wanted to try playing Dark Elves, but their units are unsatisfying and the poison feels weak as a leadership bonus. Ornasion's bonus is weak too here, but Haran's is very useful. The broodmothers are tanky and deal a lot of damage, so that's where I went with my second try (I stopped my first try after throwing away all Scarec Nexus units because I was annoyed they took me food (I expected AI attack waves like in Gates of Hell), before reading in the forum about the unyielding).
Having a cap on the available wood in this mission whereas gold is fairly abundant, is a very unusual and original twist of priorities. Getting upgrades early on eats lot of wood, but some upgrades are not optional. It's crucial to complete the side-quest to get more wood. I used some dark elven infantry (they don't cost wood so they are cheap here), one or two icekeepers, broodmothers, and 2-3 obsidian statues in the back.
Cleaning the isolated groups of the Aldera family is fairly easy, except in the library's final room, for the priestesses and in front of the city gates, so it can be done using only one hero or two and some troops, leaving others to defend. I went with Pentiss, Haran, and a couple units while keeping Ornasion and his flame AoE at home.
To open the city gates, I sent my whole army after having cleaned the path and repulsed attack waves, and had to quickly rush some units back to the defense. I was unsure where to attack the enemy, I ended up destroying the Chosen Lowborns first, then the orange family (who for a while had troops blocked by static Aldera units) and finally the blue family before finishing off red.
The friendly collisions generated by the tiny spiders that broodmothers create and by Haran's bugs were sometimes extremely frustrating. I ended up avoiding the spider invocation when I had plans to move out soon, and as for Haran's invocations, I found a good use for them : scouting. Burrowing them in some place gives permanent view on the surrounding area, which is great to have an early alert when an enemy attacking wave is moving out.
I had a laugh at the story text talking about "the fanatical elements of the Scarec Nexus, which is pretty much the entire nexus".
Mission 3
Difficulty (strategy): high
Difficulty (execution): high
Story: Cora's Golden Guard is now the Coast Battalion and explained to be less arrogant than the normal Golden Guard, Aveen sends help to Gardon... Small touches but it's improved over the SHB version. Cora also now gets her orb no matter what.
Rating: 5/5
Comment: This is one of my favorite mission, because there is something satisfying to annihilating hordes of militia with Cora's ultimate and a frontline of Gardon and executors.
I didn't find it especially hard, because for the most part we are attacked from one single direction, and I've always found that to be much easier to handle than being attacked from multiple directions. But I'm also familiar with the mission, so it helps to handle the trickier parts. Unlike many missions where the difficulty spikes early on, the difficulty of this one ramps up with time as we make progress through the Pyrrean Pass, only decreasing once one of the final enemy bases is eliminated.
I started as usual training more workers on wood and getting upgrades. It takes time to research the big amount of upgrades, but it's worth it. For my leadership bonus, I picked Cora's Secrets in the Dark. Executors are in my opinion superior to Bloodfangs. Movement speed doesn't matter, and cleaving bonus damage is massive. They are also tankier. Cora's Academical Knowledge is fine, but the limitation is usually mana regeneration rate rather than max mana. Frenzy on crossbowmen combined with Gardon's Aura makes their damage output scary. Zealots with Frenzy also deal huge damage, but I value a lot survivability and the advantage over Executors isn't big enough for me.
I went for a composition of executors, crossbowmen and war priests, staying in low upkeep. Crossbowmen and Cora are good enough at sniping units up on the ledges overseeing the pass, it's clunky mostly because we don't get vision there. But having a set or two of hotkeyed arcane towers solves this issue. Of course, once we get the falcons, they do it too. However, they are vulnerable, so without special care they will die one by one.
War priests don't use a lot of mana healing, so switching them to inner fire mode from time to time is possible and makes the whole army even better. However while they are useful when playing, they are merely reskinned chaplains, with exactly the same all-around stats and spells. There is a missed opportunity of making them more unique, and considering their clad-in-armour model, making them the only caster with some decent armour seems obvious, even if it making them worse in another way.
I built towers at the "teleport point", but enemy waves completely stopped teleporting, so the resources ended up wasted. I didn't have any significant trouble until I reached the first village. There, I had to divert forces to attack the village, which couldn't guard the pass. At the same time, the attacks from Retka's army were frequent, instead of only militia waves. I built two rows of towers, and some production buildings. The village itself couldn't really stop a full army, but it's very big so it took a while to raze it to the ground before I sent my army back to the pass. I used a few catapults for once to speed up building destruction.
The most difficult part of the mission happened soon after, as I had to divert forces to go attack the village of Essix and liberate it from Kajon Marauders, while defending against more frequent enemy attacks. The troops of Lord Retka's army are fairly effective if our heroes are not here to stop them. I had a forward base near the path leading to Essix razed to the ground while I liberated the town, but it didn't prove to be a major issue. I didn't have big gold reserves, but enough income to rebuild and replace losses, and there was no issue about having to be in multiple spots at once from then on. I built towers not far from the bridge, in front of Lord Retka's army, as support for my attacks. They ended up fighting more the cyan and purple armies from the west, but it was useful when my army was busing dealing with red's base. Red has a lot of production capacity, but our units and heroes do a great job, and pink's occasional attacks don't hurt. Red got progressively broken, and I put towers in the conquered land to hold it, although that wasn't necessary.
With red gone, it's a formality to destroy the two remaining enemies, although they can still throw a lot of bodies at us.
Misc. issue : the Essix village doesn't properly use its goldmine, so it's possible to parasite it and get an additional goldmine this way.
Mission 4
Difficulty (strategy): high
Difficulty (execution): very high
Story: There is one thing that seemed strange. On one hand, we had Pentiss claiming Quiraness left her daughter to die in the capital. On the other hand, the loading text and further dialogue heavily implies that losing in the capital broke Quiraness chances. Pentiss could have lied of course, she lies a lot, but something about how this was presented didn't feel right. Otherwise, more Dark Elves being evil bastards.
Rating: 5/5
Comment: The mission frustrated me at times, but overall I liked it. The goal to collect wood is original, but even to achieve it the player must still fight a lot and destroy some enemies, so it's not a walk in the park.
The orcs attack randomly and can help us when they attack the enemy dark elves, but when we get attacked by all three dark elven bases and some orcs soon after, it's noticeable. We have three heroes and we get some good AoE spells. My composition was fairly similar to mission 2, except we have deathguards here so I used that for my disposable frontline units, together with an icekeeper or two. Broodmothers are to me clearly the best choice when it comes to the leadership bonus, and I used them heavily. Some obsidian statues are extremely helpful to keep HP and mana up. The Spider caller is an interesting design, but it's too weak and micro-intensive to justify its food cost in my eyes.
The sludges hidden behind the mushrooms are annoying, but with some AoE spell we can eliminate them quickly. The sludges that stay in the middle of the map will be killed by the orcs and other dark elves if we let them be, so there is no need to hurry in this regard.
A key to make this mission more manageable is to distract enemy attack waves away from us. With a sacrificial unit or two (Haran's bugs can work but they are very frail for this job) and some good micro/placement, it's possible to send dark elves fight orcs, or orcs fight dark elves. It helped me a lot at time, but I couldn't make it very consistent and I still had to fight directly a lot. Once again, I made use of Haran's spawns as scouts throughout the mission, giving vision safely while burrowed.
When I had already taken all the starting wood, and attacked the purple orc base, with catapults thrown on top of my composition to kill towers and buildings, I couldn't keep defensive troops and my handful of spirit towers (I didn't build many because we don't have very good ground to both fight with units and defend with towers) had no chance against the three families. I ended up with my entire base razed (I decided it was pointless to throw my very weakened army away to try and save a handful of buildings), but with my lumberjacks and my acolytes hidden near walls in corner of my base, they got left alone, and I could later send them to the former purple orc base, which I decided to make into my new base. I still had gold in my old base, but there was more gold in the new one, and also some trees and a better location to launch attacks without having to walk as long. I didn't rebuild a gold mine in my old base because I feared it would be attacked while I couldn't defend it, and I could just grab it later.
I decided to leave the cyan orcs alone for now, as their waves weren't that threatening, and they also did some damage to the dark elves. I wanted to take out the orange and blue families whose bases are forward inside Quriraness' fortress. I waited to have repulsed attack waves and did the usual "softening" (here, getting rid of the "static" Aldera family units) before the next attack where I went deep inside. With the chokepoints, I had trouble retreating and even had heroes dying and the Unyielding lost definitely, but I had managed to kill about half the buildings of both the Sligera (blue) and Zundali (orange) families. Dark Elves bases don't have workers to repair or replace buildings, so once such damage is done, it has a lasting impact. The immediate effect was that it took them much longer to reform enough troops to launch their next attack wave, while I was replenishing losses and defending at home. They stood no chance against the next attack.
With both blue and orange gone, I prepared an attack against the remaining cave orcs in the north. They weren't too difficult to destroy with the same strategy I used against purple earlier, but this time around I didn't lose my base, I could send back troops to repel the Aldera family's attack. I didn't want to discover where Quiraness' army would attack from now on, I simply put my army at the entrance of the fortress. With my heroes in front, repelling attacks without losses was fairly easy. I exploited all three gold mines, and had lumberjacks collect wood.
While wood count was going up, I first decided to kill the mega-sludge. I'd rather have a good item than some special sludge monster. Then, I decided to assault Quiraness' main base, although Pentiss was protesting. I tried a normal big attack, but it didn't work, they replenished troops very fast and I didn't manage to really damage buildings. They have a lot of Temple-towers, but repeated attacks with Ornasion can kill those in front using his AoE spell. It's best to send something to distract on the other side (as there is a northern and southern path), wait for the enemy army to move en masse to one side, and go to the other to cast a spell and retreat for healing. They also have non-replaceable defensive units in the north and south production building areas. This was tedious, but I weakened them enough to get rid of most of the northern production buildings, and I repeated the process with the south.
I got the 25K wood right about that point in the game (I would have gotten it sooner had I not trained new troops to replace losses, or if I had invested more into lumberjacks, I was using maybe fifteen of them), and as I attacked Quiraness citadel with a catapult (I decided it did too much damage to just rush it normally), I also started the research of the peacemaker... Well, it instantly triggered the spawning of massive attack waves that Quiraness for some reason didn't thought of using when her last bastion was about to fall. That doesn't make a lot of sense! And that's how the mission ended.
Interlude
Some good perspective on what's going to happen in Toran's capital with the undead plans.
Last edited:
Ralle
Owner
- Joined
- Oct 6, 2004
- Messages
- 10,221

From looking at the past releases of this project combined with the stats and reviews of this one, it is evident to me that Shar Dundred has still got it.
Congratulations on another DC in your collection.
Congratulations on another DC in your collection.
Shar Dundred
Hosted Project: LoA
- Joined
- May 6, 2009
- Messages
- 6,140


I appreciate that, thank you Master Moose!
- Joined
- Feb 25, 2015
- Messages
- 10
You should put a date in your changelogs. Don't know when the game was last updated.
its right under the creation dateYou should put a date in your changelogs. Don't know when the game was last updated.
- Joined
- Oct 6, 2021
- Messages
- 153
The Best Campaign Maker at Hiveworkshop, everyone is inspired by you sir, especially me too 
- Joined
- Dec 20, 2017
- Messages
- 227
With Reforged finally bring Custom Campaigns back I finally had the chance to play this and I am glad to finally did as I always been a big fan of this porject to the point it was main inspiration for my custom campaign
Can't wait to play the whole story when you finally finish it, awesome work Shar
Can't wait to play the whole story when you finally finish it, awesome work Shar
- Joined
- Aug 18, 2022
- Messages
- 764
It's not meant to be played under Reforged. Check the recommended version to play.With Reforged finally bring Custom Campaigns back I finally had the chance to play this and I am glad to finally did as I always been a big fan of this porject to the point it was main inspiration for my custom campaign
Can't wait to play the whole story when you finally finish it, awesome work Shar
Last edited:
- Joined
- Dec 20, 2017
- Messages
- 227
I been playing it under Reforged and it has been working perfectly fine for meIt's not meant to be played under Reforged. Check the recommended version to play.
These "Reforged" guys how get exicted now days, because of the Custom Campaign addition... and now every player of reforged expecting all of the map makers and campaign makers, to make their stuff to reforged only, because of that update. You can have all the money of the world, and there are things that can't do. That's when you payed 30 bucks for a game, and thinking: all of the creators now forgeting the previous versions of the game, and move on.
- Joined
- Aug 18, 2022
- Messages
- 764
Some players had difficulties and problems under Reforged, and Shar can't help them. Check out the Bug Report forum section from this project for more info.I been playing it under Reforged and it has been working perfectly fine for me
Last edited:
- Joined
- Dec 20, 2017
- Messages
- 227
Sorry? I am having no troublesThan sorry. Some players had difficulties and problems under Reforged, and Shar can't help them. Check out the Bug Report forum section from this project for more info.
- Joined
- Aug 18, 2022
- Messages
- 764
I'm edited my previous comment. That was not meant to be here.Sorry? I am having no troubles
- Joined
- Dec 20, 2017
- Messages
- 227
I am having no problems while playing Arkain with Reforged, no problems at allI'm edited my previous comment. That was not meant to be here.
- Joined
- Aug 18, 2022
- Messages
- 764
Still, I'm suprised to read this. Have fun!I am having no problems while playing Arkain with Reforged, no problems at all
Shar Dundred
Hosted Project: LoA
- Joined
- May 6, 2009
- Messages
- 6,140
Happy to hear, enjoy!With Reforged finally bring Custom Campaigns back I finally had the chance to play this and I am glad to finally did as I always been a big fan of this porject to the point it was main inspiration for my custom campaign
Can't wait to play the whole story when you finally finish it, awesome work Shar
- Joined
- Apr 4, 2020
- Messages
- 20
So far, the campaign is wonderful. Keep up the good work, Shar.
A suggestion ( I encountered serious balance problems in a specific mission):
AI is messed up on hard difficult in Act Two, Chapter One, Rescue. The three enemy bases constantly attack almost non-stop and the Darkmind Clan allied base can neither defend itself properly nor help us. We are forced to constantly help them and at the same time the other two enemy bases were constantly attacking our base or expansion. Not to mention the attacks by the Bull Regiment and the Wolf Regiment. It's a very strange high difficulty peak for an Act start. This map needs to be rebalanced. Why enemy heroes reach level 6 while Rangul and Rath are capped at level 4?
Aren't Salrian Pikeman too powerful? For a foot soldier, they have very high attack and defense at +2 upgrade.
P.S.: One more suggestion: Are we to assume that not attacking the Grey Guard is the correct path in this mission? Why the "Pride" side-quest exist? It's not better to change it to have two different outcomes?
First outcome: Don't kill any Grey Guard unit.
Second outcome: Destroy the Grey Guard base.
Leave to the player to choose. And if any player has the courage and patience to destroy their base (even in Hard), maybe give a powerful item as a reward?
Last edited:
- Joined
- Aug 29, 2021
- Messages
- 60
How many chapters will be?
he has added exclusive chapters that weren't in the original game so i don't think he knows because of the extra content creativity should never be rushed though because this game is awesomeHow many chapters will be?
Shar Dundred
Hosted Project: LoA
- Joined
- May 6, 2009
- Messages
- 6,140
Oh, i know how many chapters there will be, I just keep that information confidental.
- Joined
- Dec 19, 2022
- Messages
- 99
Also leaving 5 stars
I see the cause, it's because the cliffhunter clan train gladiator as attack wave, but since the totem only one it need some time to train few, before the train complete, AI send attack wave, by this condition i see no use of two beastiary on cliffhunter clan. do you mind to resolve this?I test the new chapter, as long i play it, it's a enjoyful chapter, i want mention something, i wonder if cliffhunter clan can reach high upkeep as the other allies. it get high upkeep on early, but only go to low upkeep as game going
if someone could help me out here. every time a new mission or chapter comes out i have to restart the whole campagin again for items to be transferred is there a way to continue playing the new chapters without having to restart the whole thing again ?
Shar Dundred
Hosted Project: LoA
- Joined
- May 6, 2009
- Messages
- 6,140
You don't have to start anew if you are on the same WC3 profile.
There might be some condition that make this happen. all i know about the causeif someone could help me out here. every time a new mission or chapter comes out i have to restart the whole campagin again for items to be transferred is there a way to continue playing the new chapters without having to restart the whole thing again ?
1. Unintentional changes on WC3 profile, when i used to play on different WC3 version, sometimes the profile changes, or when testing on world editor it also changes the current profile.
2. Playing chapter not fully completed. I got this on newest mision, my Amari got no item on her, i realize that when i play chapter which play Amari on last Amari mission it not fully completed until mission end.
What i can say, try to check your profile and replay on newest map backward. As i know WC3 game cache always keep the item as long you play it forward not skip even one chapter.
- Joined
- May 14, 2021
- Messages
- 1,665
1.This problem also only happened if you are playing on both 1.28.5 and 1.29.2. This because the game installation for 1.28.5 had its registry called "User Game Saved Folder", which instead of using the backslashes (/) as the way to separate the path of the folder, it uses the proper one (\). As a result, some people might encountered an issue where, despite the new profile was created, the game will always ask to create a new profile due to the incorrect setting on the registry. You might want to try this fix in order to solve the problem.There might be some condition that make this happen. all i know about the cause
1. Unintentional changes on WC3 profile, when i used to play on different WC3 version, sometimes the profile changes, or when testing on world editor it also changes the current profile.
2. Playing chapter not fully completed. I got this on newest mision, my Amari got no item on her, i realize that when i play chapter which play Amari on last Amari mission it not fully completed until mission end.
What i can say, try to check your profile and replay on newest map backward. As i know WC3 game cache always keep the item as long you play it forward not skip even one chapter.
As for World Editor, the game will automatically create a new profile called "WorldEdit" if you attempt to perform a test map, which means you'll have to switch back again.
2.This is not an issue relating to profile. Incorrect game version are also known for producing big bugs. If you are using the 1.31.1, sometimes loading a saves can led to this infamous bug, where some important quests will be marked as incomplete, thus you can't actually complete a single chapter. This was also happened in other campaigns (such as the vanilla Undead one, where possessed units doesn't belong to yours).
- Joined
- Nov 25, 2021
- Messages
- 507
I noticed Elder's Healing Spray heals 25 hp instead od 50, as the description of the spell says. And why do the Murloc units have a floating select circle?
Healing Spray indeed heals for 50, however, in vanilla WC3 as well of LoA, there is a capped on how much HP a single cast of Healing Spray can restore. I'm not entirely sure how it works, but I think that since it was reaching that cap, it heals each unit less.
I think Murloc units have floating select circles for two reasons. First is because the models themselves are designed to be Amphibious units by Blizzard, which allow the selection circles to not sink when the unit itself goes into the water. Second is because the area near the Redfist base has a low cliff level (at least I remember it being that way), which causes the model shenanigan to happen.
- Joined
- Apr 10, 2020
- Messages
- 37
So far for me this campaign worked well untill i reached the mission called "Pride of the Empire" every time i start this mission my game freezes for good (and not once 5 times in a row ) and when i restart my game and start the mission again same thing..i suppose i can't play further.
i might try another custom campaigns ( preferable Undead ).
i might try another custom campaigns ( preferable Undead ).
Shar Dundred
Hosted Project: LoA
- Joined
- May 6, 2009
- Messages
- 6,140
What version of WarCraft 3 are you using?
- Joined
- Apr 10, 2020
- Messages
- 37
i own WC 3 Reforged and have the latest update Screenshot
Last edited:
Shar Dundred
Hosted Project: LoA
- Joined
- May 6, 2009
- Messages
- 6,140
In that case I can't help you. Reforged tends to destabilize things on its own and I cannot
reproduce the issue.
reproduce the issue.
- Joined
- Apr 4, 2020
- Messages
- 20
I use the 1.29.2 version.
Shar, you intend to optimize the campaign to be compatible with Reforged someday?
Shar, you intend to optimize the campaign to be compatible with Reforged someday?
Shar Dundred
Hosted Project: LoA
- Joined
- May 6, 2009
- Messages
- 6,140
Not at the present, no.Shar, you intend to optimize the campaign to be compatible with Reforged someday?
- Joined
- Apr 10, 2020
- Messages
- 37
is a great campaign but idk if i can play it further after this update ... i am still thinking if it will crash further even with a new update...when i played I couldn't play the mission Pride of the Empire every time i was starting the mission 10 sec later crash ... crash after crash so i quit playing it. To bad i realy wanted to finish it and also play General Gardon Bloodclaw more
you can try change game speed to sIow mine is aIso Iow spec and aIways Iagging. that is the one method i suggest. on the map that is much going on you can try that trick. its work for meis a great campaign but idk if i can play it further after this update ... i am still thinking if it will crash further even with a new update...when i played I couldn't play the mission Pride of the Empire every time i was starting the mission 10 sec later crash ... crash after crash so i quit playing it. To bad i realy wanted to finish it and also play General Gardon Bloodclaw more
Similar threads
- Replies
- 8
- Views
- 8K
- Replies
- 4
- Views
- 48K
- Replies
- 3
- Views
- 12K
- Replies
- 5
- Views
- 44K