So, I've recently been doing a playthrough of every campaign on hard, but with the twist of not being able to go above no upkeep, or 20/25 supply, if it was one of those missions where you can't build stuff. I've been doing this challenge run on all the Turnro campaigns, and this is the one that I saved for last. This campaign is a bit more "basic" than some of the other ones, but it still has a fair share of new things that it offers for players. The maps are also very well balanced and designed, which is the thing that really carries this campaign (along with the story ofc). I've heard somewhere that this campaign is the first one that Turnro made, and I can definitely believe that, since the other ones had a very specific idea, while this one feels like it was done to give players an orc campaign where they can use the Frozen Throne orc additions in a normal macro/micro setting (and that's not a bad thing, as Blizzard kind of left a hole here, and this campaign fills it perfectly, plus a concept has basically nothing to do with the actual quality of a campaign).
The story and the music are great, as they usually are with Turnro:
- One thing that I really love with the Turnro campaigns is how music is used for storytelling. The chapters all use different soundtracks based on the general atmosphere and situation. And just like in Rowan's and Malfurion's campaign, there's a clear shift in the tone of the soundtracks as you progress through the campaign, to represent how the fights that you're taking have changed from small skirmishes to giant battles that decide the fate of the Horde.
- Just like with the human and the undead campaigns, the story of this one is also somewhat based on a default campaign from Reign of Chaos (the default campaign is this case being The Invasion of Kalimdor). But there were also some elements from the Founding of Durotar, and a bunch of new ideas from Turnro that made it a drastically different story that is also quite fun.
- The only other comment I have about the story is how it does a pretty good job at laying the groundwork for the future storyline, without making it feel like that is the only purpose of the campaign. If you're going through the story for the first time, then this campaign will definitely make you ask questions. Questions, which will be thoroughly explored later.
The gameplay also didn't fall short of the mapmaker's standards:
- This campaign has apparently received an update since I last played it. There were a lot of changes, and a few of them were quite annoying, but overall, I still think the positives outweigh the negatives, as the campaign is definitely a lot more balanced than it was before (at least, it felt more balanced to me).
- The length of the maps felt perfect. There were some short and long ones, but none of them felt like they ended in a snap or have overstayed their welcome. About everything lasted for just the right amount of time.
- The difficulty felt pretty consistent. If you were to look at difficulty in a 1 to 10 scale, there wasn't really a single map that was in the 1/2 or the 9/10 category (I'm not sure if I can even think of an example for a 3 or an 8). Basically every map offered a decent amount of challenge, without really going into the ridiculous territory (which is a thing that Turnro kind of failed with in the past, so I'm very happy that he got it right here).
- The orc tech tree didn't get a single change, which is perfectly ok, though it is admittedly a bit of a missed opportunity. They could have been designed a bit like the Alliance from Rowan's campaign (but instead of humans-elves-dwarves, it would be orcs-trolls-tauren), or we could have had specific units associated to each of the heroes, and the units of the optional heroes would be unlocked upon those heroes being summoned.
- Saying that the tech tree didn't get a single change was a bit of a lie though, as we do have the optional hero summoning feature in the Altar of Storms, which is unique to this campaign. And honestly, I really like it. This campaign used to be fairly tricky to balance due to the insane amount of free heroes (which the other Turnro campaigns just didn't have to deal with), and making the heroes no longer free is certainly a way to fix this. And yeah, 1750 gold and 500 lumber is an enormous cost, but I think it's a pretty fair one in the grand scheme of things, and it shakes up the early game in a way that other campaigns simply don't, and puts the player through some interesting decision making.
- Another neat thing that this campaign has is the choice that the player has to make at the end of CH4. I really like seeing choices in campaigns, and this is one of the better ones, as it's a decision that really matters, since not only does it decide the map that you'll play next, but it also influences your cast of heroes in the final 3 missions, and the items that you'll be gaining.
As I've said, this campaign has an insane amount of heroes, and most of them were quite solid:
- The majority of the heroes are characters from the original campaigns with either completely identical, or slightly modified kits. Normally, it would feel a little boring to have the normal old Cairne and Rokhan, but it's perfectly fine here, as having a completely unique kit on all heroes could end up making things a little too complicated/confusing. Plus it stays loyal to how we've known those heroes, and if their kits are already good and fun, then what would be the point of changing them?
- Thrall is pretty much the same, except that his old W is now Drek'thar's, so he has the slow totem. I think it fits well into his kit, as he's always been a hero focused around aoe, but he was kind of lacking when it came to actually controlling the battlefield.
- Samuro being an important character is an interesting twist. I really liked his Dash, especially as someone who plays MOBAs a lot, and is used to seeing everything jumping around non-stop. It honestly changes up so much about how you play the Blademaster hero, and it also turns an otherwise bad ult into a pretty solid one. My only problem is that if you use it and then immediately select a different unit, then the game will automatically reselect Samuro, which can really throw you off in a hectic fight where you're switching to a different unit every second or so. I also think the ability should also give a bit of sight around the damage wave thingy.
- Araj is mostly just a necromancer turned into a hero, and he honestly fills the necromancer niche quite well. I'd probably increase his Q and W cooldown by a little bit (he can unload his entire mana pool very quickly, which is why he is so good at snowballing out of control in fights), while lowering the cooldown on his animate dead item
- Drek'thar is the second Far Seer of the group, and he is certainly very distinct from Thrall, while still keeping the basic idea of the Far Seer hero. Far Sight feels a lot more reasonable in this campaign, as the cooldown means that you have to be smart about its usage, and the lack of mana cost means that it's actually worth using, and it won't just make you weaker. The Earth Shield is a nice ability, though I really felt the lack of Brilliance Aura, and Volcano became a really bad ult, as it stops Drek'thar from spamming his buff, and even when I wanted to use it, I almost never had the mana for it. So I'd replace Volcano with something that gives mana in an aoe (of course, it doesn't have to be as simple as a stronger Scroll of Mana or a mana regen aura, just something that gives mana in some shape or form).
- Drak'thul isn't playable until basically the very end of the campaign, but I think he does his job pretty decently. His kit isn't really what I'd call interesting, but he definitely works as a warlock, and his Q and W are especially powerful. Tornado is a bit of a weird ult to have on him, but it isn't really a commonly used one, so I'm ok with it.
- While Samuro is the hard to kill Blademaster that is focused around spellcasting, Grom is the hard carry auto attacker that goes in and wrecks stuff. I think his kit does a great job at showing his aggressive approach to fighting, and I honestly really like it.
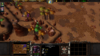
- It's a shame that in terms of overall usefulness, Rexxar just simply outclasses him, so if you're looking to make the future missions easier, then picking him is most likely better. Yeah, they're different heroes that fulfill different roles, but having the permanent bear from the Founding of Durotar instead of the timed bear from melee map Beastmasters is a huge deal breaker, and Grom needs to have some insane stats to even compete with that (since he has little to no utility). Maybe I'm just wrong here, but that's kind of how I felt about the choice. One thing that I'd like to report is that the quilbeast's Frenzy ability costs mana, but he doesn't have any, so the ability is just inaccessible. Here's a lil screenshot of that. View attachment 398631
There are some neat things that the campaign has going for it, that I couldn't really cover in the other sections:
- The difficulty being selectable at the start of maps is something I'll always appreciate. It's just a really nice way to do it.
- This campaign has some insanely well hidden secrets. I still think that Resurrection of the Scourge is the best Turnro campaign when it comes to well hidden loot, but this campaign is a very close second.
- Legendaries on hard difficulty is something I very much support. It really encourages you to think about trying the campaign on hard, even if you're an extremely casual player. Also, they aren't so overpowered that they practically neutralize the extra difficulty, but they still feel very helpful and rewarding to find.
- The terrain of the campaign felt solid. They were a few annoying tiny passageways, but none of them felt that bad (plus the orcs have a ton of mobility, with Endurance Aura, Bloodlust and Berserk, while Samuro and Grom have their Qs). I think the terrain in the Barrens could have been a tad more wild (somewhat like in the Founding of Durotar), but I still kind of liked it.
And now with that out of the way, let's talk about the chapters themselves:
CHAPTER 1 - Pretty straightforward quick micro mission to start off things. This is kind of a safe way to start a campaign, as the short length of the map will leave the player wanting more, so he'll feel compelled to keep going (and the way the map sets up the story also supports this little "reaction"). Blizzard has done this in 4 out of their 7 normal campaigns (or 5 out of 8, if we're counting Exodus of the Horde), and this is basically the reason for it. And this map definitely does a great job at being a simple introduction to the campaign, while still having some ideas to make it interesting and fun. I really liked how the legendary item was hidden here, as I've always enjoyed the idea of infiltrating into dangerous enemy territory to get the loot. I don't really have anything else to say here, it's just a solid map.
CHAPTER 2 - For some reason, Turnro really likes to do this thing where the second map has basically the same base concept as the first one, but with a new idea to support it. In Malfurion's Quest, the first two missions are both long micro maps where you're exploring the map with a small squad and you get reinforcements on the way, and in Resurrection of the Scourge, the first two missions are both small maps where you're controlling 3 low level heroes, and you're trying to find loot while avoiding powerful enemy camps. And here, the first two missions are both short micro maps where you're gathering reinforcements while killing stuff. I wouldn't really call this lazy, as the mapmaker still done a lot to make all these maps unique in a way, and they're still fun, but this is just a weird pattern that I've noticed. The gold mine being removed was a change that really caught me off guard, but honestly, it kind of makes sense, considering the general design of the map, and the cargo quest (if you could just harvest resources, then collecting them wouldn't feel as important y know). Overall, I think the map is quite good, especially since it has a lot of stages and events, which should usually be the main goal when designing micro/adventure maps.
CHAPTER 3 - If CH1 was a basic micro map, then this is a basic macro map. I always felt like this mission is a bit of filler, but actually, I now just realized that it may have been a teaser for Araj, since the Scourge wasn't present in Kalimdor, which means that someone had to bring them here. And not to mention, the campaign doesn't really have a lot of macro maps before the final 3 chapters, so this map kind of balances it out. I really appreciate the fact that the fountains are actually usable now, as the map used to be an absolute nightmare, back them Rokhan's Healing Wave was the only source of sustain available (which isn't quite enough this early in the campaign, as he lacks items and levels, plus the player doesn't get a Voodoo Lounge). Speaking of which, I like how Rokhan was really well hidden, but not so well that even some very observant players would easily miss him. The undead bases were quite tricky to take down, but I think they should be perfectly balanced if the player isn't doing a challenge run (I'm just glad they don't have a hero, cus even a single level 5 hero in 1 base would make things a lot harder).
CHAPTER 4 - This is honestly a pretty interesting map. The start is kind of rough, as the you don't really get too much time, but you should be fine if you aren't getting sidetracked by all the loot (don't forget that you can backtrack after you defended Santron, so just stick to the main path). The night elf attacks were a tad excessive, but I don't think they're really that bad, especially since your heroes can take care of them pretty reliably, though you do need to be on top of your micro game to handle everything they send at you. Afterwards, the map became pretty easy. I was excepting the base to be a little bit rough, as I had to kill a lot of my units due to my challenge rules, yet it still didn't give me too much trouble. Overall, I think everything was good here. I liked this map basically for the same reason I liked CH2. The only thing I'd maybe change, is that I would buff the night elf base a little, while also nerfing their attacks (though I understand that the huge power difference is in place, because at first, the orcs are outnumbered, but it flips at the end, and the night elves become the outnumbered ones).
CHAPTER 5 OGRE - Unless there's another long term change that I'm not aware of, then I think picking this map is better than picking the other one. This one is just simpler/easier, and I feel like Rexxar is more consistently useful than Grom (though the legendary item of the other map looks slightly more useful, but that's really the only strategic benefit that I could find). I really like how Turnro made a custom ogre faction just for this mission alone, and I think it's a shame that they don't appear in any Turnro map again. I think the balance was pretty good here, as the ogres will kind of you a run for your money in the early game, but they get outscaled hard. I'm not really sure why Rexxar is present in the final fight against Kor'gall, since I thought that it was supposed to be 1 on 1 combat. Rexxar's inclusion also brings some balance problems, because if you make the fight balanced for the 1v1, then the 2v1 becomes laughably easy, but if you make it balanced for the 2v1, then the 1v1 will be stupidly hard (and the side quest will basically be a requirement). Though, I think the campaign did an ok job at balancing it, despite this issue. Oh, and the Altar is placed in way, where a hero could get stuck if the player puts the rally point to the north, so that should probably be fixed.
View attachment 398647
CHAPTER 5 FEL ORC - I've backtracked to play through this mission after I finished the campaign, and I'm kind of struggling to figure out what to really say here about the gameplay. There weren't any bugs, balance issues, or noteworthy changes. It's just a solid marco map with decent sidequests, lots of camps and areas to explore, and pretty reasonable enemy bases and attacks. I especially liked the Grom sidequest, and how his curing happening so early helps him become pretty likeable, and not a dumb jerk like in the original campaigns (I'm not saying that the original Grom was bad, but he really didn't get a lot of chances to do good things, as he died right after his redemption). There were definitely some interesting lore implications with the fel orcs here, and thanks to Malfurion's Quest, we now know that they were either sent here by Magtheridon to investigate and look for the fountains, or by Kil'jaeden to prepare ahead of time, so that the invasion can immediately be started when both Azgalor and Tichondrius are dead (and since there was a demon gate here, I imagine that Kil'jaeden is the correct answer). Overall, I think this was a pretty well made map. It suffers from being a little forgettable, but that's perfectly fine, since when you have 11 maps in your campaign, then a few of them are bound to be a bit less memorable, and not every map needs to be a gigantic battle, or something with a really weird gimmick that completely changes everything.
CHAPTER 6 - If you play this on hard, and don't know where the legendary is
(and naturally, this was literally the only legendary item in all of the Turnro campaigns that I couldn't find until after I already completed the map...), then this will unironically be one of the most difficult maps of the campaign, because Turnro straight up removed the Healing Wards ability of the witch doctor, without actually putting in extra runes of healing to compensate, so now you have to play a very lengthy micro map without any sustain. Thankfully, he didn't remove Ancestral Spirit and Mirror image, so you can still use the taurens and the clones to soak damage, but if anything else gets low, it will most likely stay low for a
veeeeery long time (poor grunt). The map is still very fun, as it has a lovely caravan escorting sidequest, and you get to have a lot of fun with Samuro's Dash, similarly to Maiev's Blink in The Tomb of Sargeras. But yeah, you have to get ready to let your taurens die non stop, as that is literally the only way you'll actually survive what the map will be throwing at you. I think it would enough if the Healing Wards would just be nerfed to 1% heal per second from 2%, and then it could be justified by saying that the blight of the undead is reducing the effectiveness of the healing.
CHAPTER 7 - Ah, my sweet overpowered Araj. I'm not gonna lie, having a mission that's just about you running down entire bases with the sheer power of a necromancer hero is extremely fun. It's also very unexpected, since this is an orc campaign, and necromancers are usually playable when you're the undead, so it's a nice subversion of expectations too. The legendary item was also really well hidden here, and I have only found it way later through the map. I'm not sure why the Vials of Mana were removed from the fountain quest, as it added a long-term benefit, and it wasn't just a glorified hint about the fountain like the sidequest in the third chapter of The Scourge of Lordaeron (which was there to teach new players about how fountains work, but if you're playing this mission, then it's
very likely that you already know it). I think I would have increased Araj's level, or mana regeneration, or maximum mana, but the level isn't that hard anyway, so I guess it isn't really necessary.
CHAPTER 8 - The final 3 maps of the campaign are where things really go crazy, giving the player 7 heroes, while also having big map sizes and a lot of enemy bases. I would really call them overly difficult or anything, but it's insanely chaotic (even if you're an experienced Warcraft player) and I absolutely love it! But funnily enough, I actually forgot that Rokhan was supposed to be trained at the Altar, and I only noticed it when I was about 70% in, so I kind of shot myself in the foot here (wish I could go back and tell past me about it, cus Starfall and the lack of sustain was quite annoying). I think the optional heroes should appear as dead at the start of the map, kind of like in SevenBlood's revamped campaigns, especially when the rules for when they appear in the Altar compared to just being free is a little inconsistent. (I'm a bit confused on why Rexxar gets to break this rule here, but not Rokhan. I guess it's probably due to balance reasons, which I can kind of accept.) But I guess the fact that I managed to beat the map without really making use of Rokhan just goes to show how well balanced it is, and how the campaign is still doable even if you aren't on a mad hunt for the optional bonuses. The idea of the map is pretty interesting. Usually, the players get at least some time where they can safely harvest resources from their main, well protected base, since it allows them to be well prepared for when they need to leave it, and harvest from a different location that is much more vulnerable. But this map throws this entire concept out the window, and forces the player to harvest resources from a dangerous position at the very beginning, which results in an extremely intense defense map, as loosing either of the two bases will result in certain doom. I really appreciate the addition of the timer in the first part. Yeah, it does remove a bit of the immersion (since none of the defenders know about Araj and Samuro being on their way), but the lack of the timer could easily deceive people into thinking that the defense part is a scripted loss, so I'd say that adding the timer is still worth it.
CHAPTER 9 - Storywise, this isn't really the most interesting map, but I think this is a great way to do a macro mission focused around exploration. I believe that Turnro's main strength as a mapmaker are those big adventurous maps with lots of secrets to uncover, and it's nice to see that he doesn't restrict himself to only using it on micro missions. Making the trees invulnerable on the main way is a bit cheap, though I do understand that it was done to prevent players from just using Volcano and Earthquake to break through them very quickly, and increasing their numbers or their health won't solve that. (I'm not 100% sure if the health of trees can be increased, but I think I've seen it somewhere. And I imagine spells that destroy trees are instant kill effects, so health increases don't work against them.) Something that I really like about this map is the design of the Drak'thul sidequest. Its great for the story, its great for the gameplay, and it makes the hero feel very satisfying to use, as you've had to actively work to get him added to your arsenal, rather than having him offered to you on a silver platter. It also does a lot for the characterization of Thrall. He didn't really feel as developed as the other Turnro campaign main characters, since he was constantly being surrounded by other important characters, so having him interact 1 on 1 with a Gul'dan supporting traditionalist was an awesome idea.
CHAPTER 10 - So, lategame Turnro maps are kind of notorious for using an insanely powerful enemy force against players, which forces people that challenge run on hard to whip out their hidden weapon, the cheese. Basically, I got the side objective, killed some creeps, and then immediately rushed through an enemy base to kill the demon, only to teleport back to the base safely (thanks teleport book). Doing this meant that the elves and demons should be killing and distracting each other, and it also got rid of the demon gate near the prison cell for free. Unfortunately, I was unaware of two important details. The first one being that the demons are actually hostile towards neutral creeps
(including satyrs, which is hilariously ironic), so I would have been better off leaving them alone. And the second one was that both Azgalor and the three guardians hate the orcs with a burning passion, and it's pretty difficult to get them to fight their other enemy. Thankfully, my heroes were well equipped with items, but even that wasn't enough to defeat the magic immune boss, so I had to lure him near a guardian, so I could him to tank while I swoop in with my tiny survivor group and steal the kill to end the campaign (if you're wondering why I really love the highborne and undead, but never felt
strong about the orcs... well, I think this dirty playstyle is a perfect demonstration

). As for the design of the map, I actually really liked it. Giving the workers,
and only the workers, to an allied AI is a pretty smart call for a final mission with 7 heroes, as not only does it entirely stop tower spamming (which would completely ruin the point of the map), but it'll also allow players to focus purely on the combat with minimal distractions (which is great, because the combat alone is pretty darn chaotic). Though there's a pretty big bug that happens with the second optional base. That base gets an extra
Voodoo Lounge, but when it's done, there's a chat notification about a
Tauren Totem being complete, which is just a complete lie.
And that is it for my review of Jeopardy for the Horde! It's a bit ironic to end my journey through the Turnro campaigns with a bug and a cheese, as he actually did a really great job at balancing and polishing his campaigns. This guy has been making custom campaigns for a very long time, and the quality of his work has improved a lot, while he also managed to craft a pretty funny, yet interesting narrative that binds all the campaigns together. The campaigns definitely have what makes the original Warcraft 3 campaigns so beloved, except that there's a lot of new things that the creator envisioned, that the original campaigns would have simply never thought of doing, which results in a similar experience that also feels very refreshing. So I absolutely recommend these campaigns to anyone who liked the default campaigns. (Just don't forget to play these in canonical order if you're a first time player. Which would be: Human - Orc - Undead - Night Elf/Highborne.) For this campaign specifically, I'd give it a 9/10 or a 10/10, as I didn't find many issues with it, only a very few minor ones.
Thanks to anyone who made it this far, and thanks to Turnro for putting in so much work to deliver an insane amount of great content to us! Here's a little screenshot of the mysterious God Mode Baiter (whatever the hell that is supposed to be, though I wonder if synchronized demolisher shots could kill it) as a reward to you all! Have a great day and night!
View attachment 398705
 Approved


") . I have finished rowan on hard and now I'm playing this one, and I just wasn't able to assault to fel orc fortress in chapter 6, until I found out this funny trick and wanted to share it: I blocked the fel army with spirit walkers while I destroyed their base lol
. I have finished rowan on hard and now I'm playing this one, and I just wasn't able to assault to fel orc fortress in chapter 6, until I found out this funny trick and wanted to share it: I blocked the fel army with spirit walkers while I destroyed their base lol