- Joined
- Mar 29, 2011
- Messages
- 3,762
grass
MODELING DOODADS IN GMAX(Simple Grass)
I suppose that you already know how to save in-game textures using the image extractors and also that you have the knowledge in exporting models using dexporter. I will not be including those things here because I know that there are already tutorials about them here in the hive.
Requirements:
1. Gmax, of course.
2. Basic gmax knowledge;
3. Knowledge in saving in-game textures;
4. Knowledge in exporting models from gmax using dexporter.
If you don't know those three things, then you better look for them and read about them. I am sure there are tutorials for them that are already present here.
TOPICS:
1. Creating the Plane
2. Texturing the Plane
3. Creating the new Plane
Let us start.
1. Save some in-game textures to use in our grass model. In this tutorial I will use Felwood Natural.tga.
2. Open your gmax software.
CREATING THE PLANE
1. Click the front view port. In the "create geometry" roll out, in the keyboard entry, type the length: 50 cm, width: 50 cm. In the parameters type in the length segs 1 and in the width segs 1. Click create.
2. In the modify panel, right-click Plane then click convert to editable mesh.
3. Click the Gmax Material navigator. A window will appear similar to the one below.
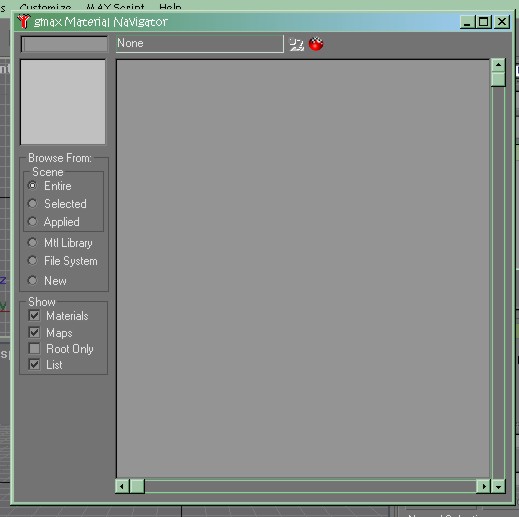
Click file system and find the texture that you have saved earlier. In this case I use Felwood Natural.tga. Drop the texture to the plane that you have created. Close the Gmax Material Navigator.
4. So far, you have created a plane to where we will start creating our grass model. We also have identified the texture to use for our model. So, the next step will be the texturing process for our model.
TEXTURING THE PLANE
1. In the modify panel, modifier list, click Unwrap UVW under the UV Coordinate Modifiers. We now have the new modifier, the Unwrap UVW.
2. Now, click the + sign in the Unwrap UVW, then click Select Face. In the parameters, click edit. The Edit UVWs window appears.
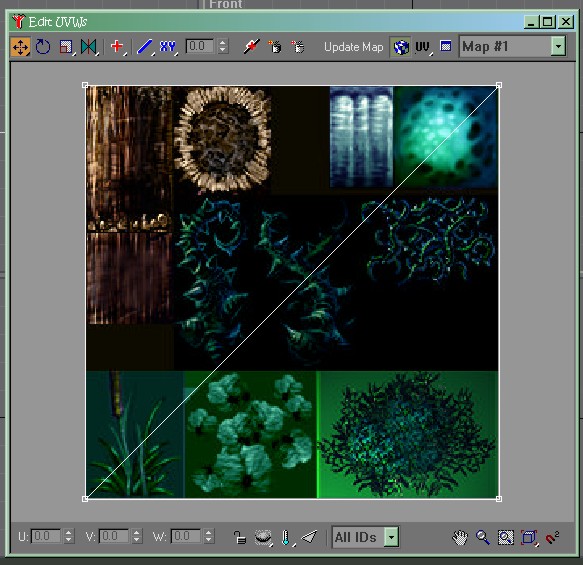
3. Box select all the points. Click scale. Now, point the cursor to any of the points, left-click and drag to scale it.
4. Now, click the "move" command button. Point the cursor to any of the points (the points should be red in color) then, hold and drag it to the grass drawing. If the rectangle for UV mapping still doesn't fit the drawing or still needs some work, you have to edit it so your work will look like the picture below.
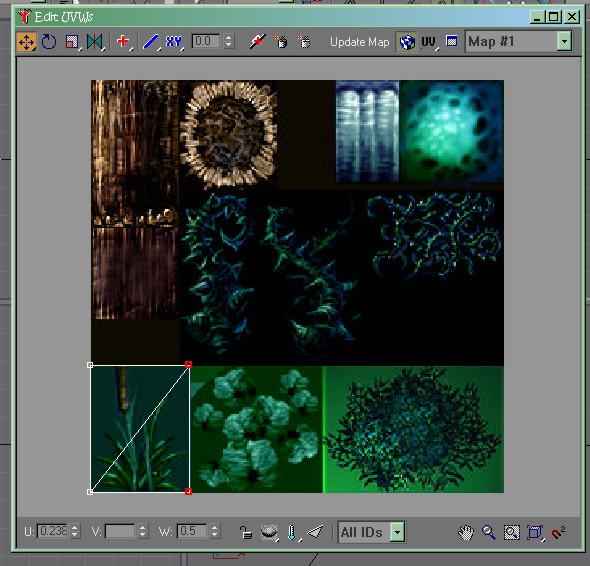
5.close the Unwrap UVWs Window. The plane should now looks like the picture below.
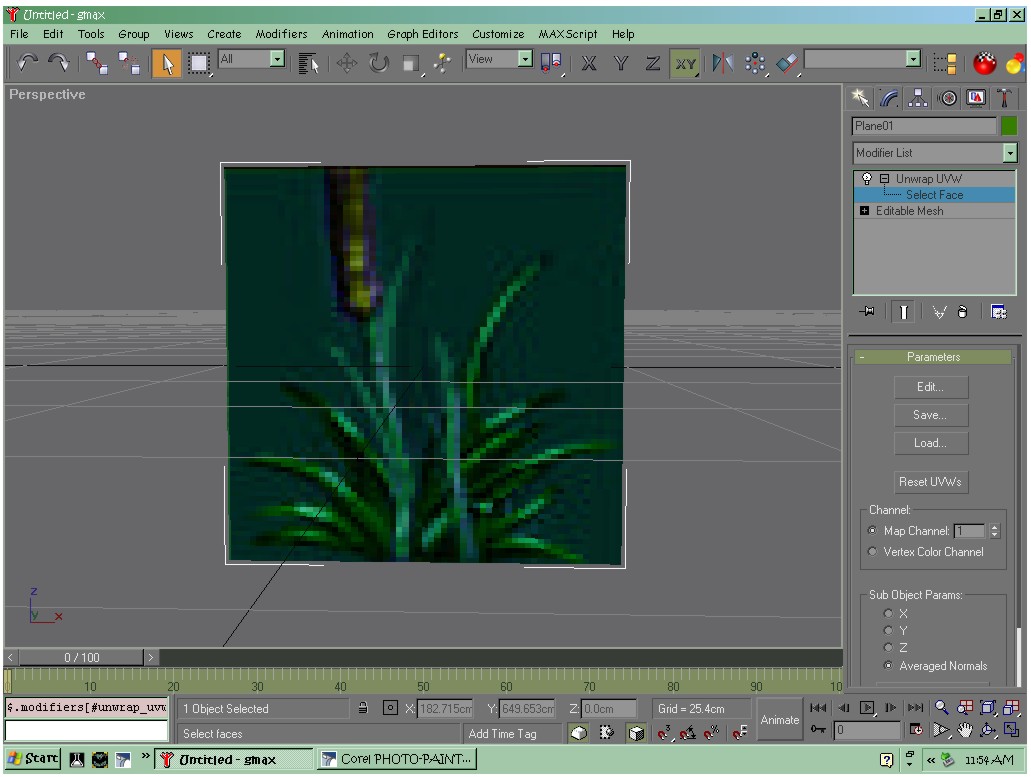
6. Click "select face" to end the command.
So we have come up with the texturing process and our work is at 50% completion. Now, we move on.
CREATING THE NEW PLANE
So far, we only have a single plane for our model. That is not a good model. To continue, we will create another plane from the existing one.
1. Click the Select and Rotate Command Button. In the front view, select the Y axis. Hold Shift and start rotating the plane by holding the Y axis (left clicking it) downward. A clone option window will pop up as soon as you release the mouse. Just click "OK". We now have two planes crossing each other.
2. Select both planes in the front view. Click the select and move command buttons. Position the cursor in the Y axis and pull the model upward until it looks like the picture below.
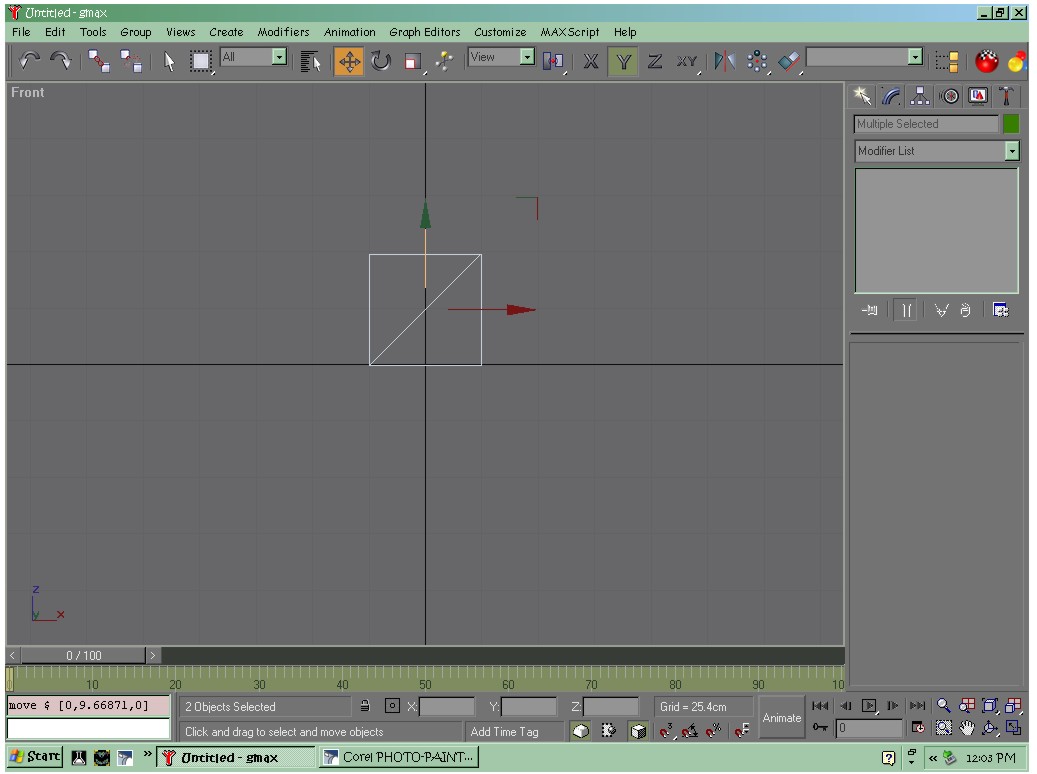
Below is our model ready for exporting...
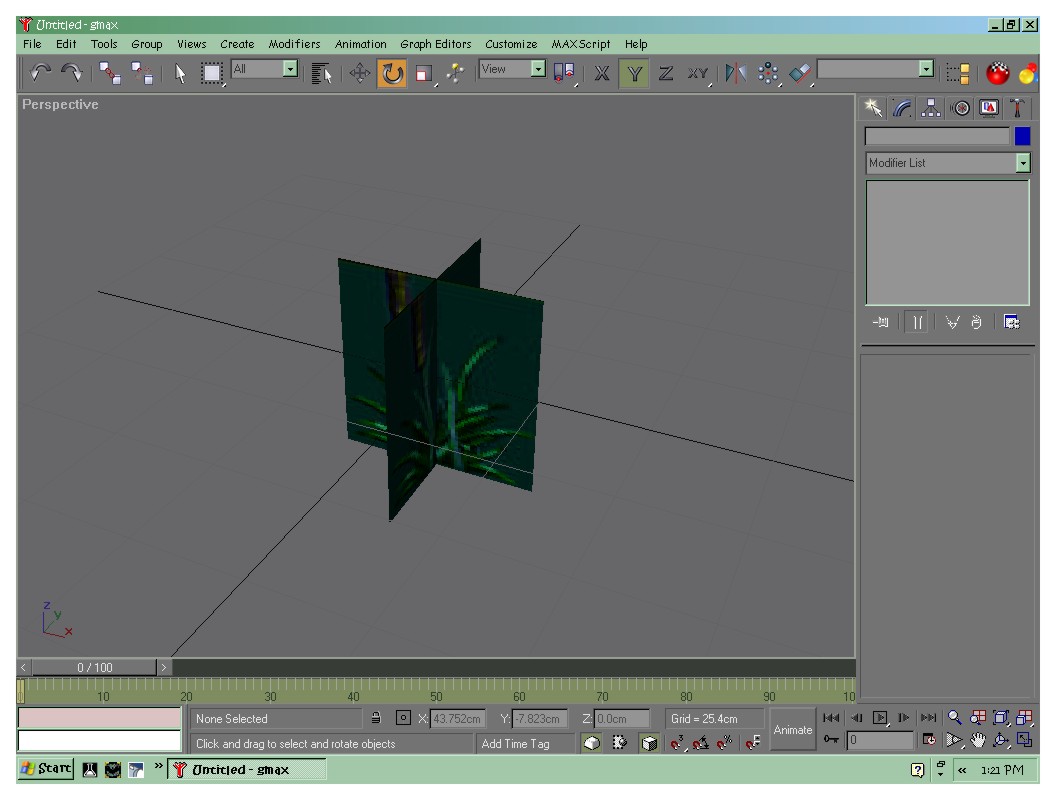
At this point, you can already export the model, and after exporting and converting it to .mdx file to use it in game. In our tutorial, I only use two planes for the grass but you can create more if you'd like.
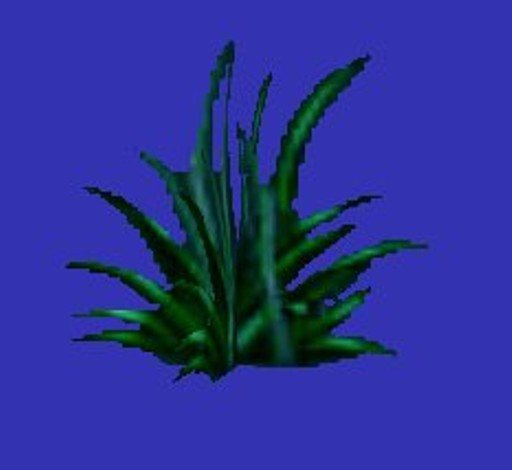
Below is our final model:
Attachments
-
 edit uv window.jpg86.5 KB · Views: 1,704
 -
 End of UVW unwrapping.jpg87.2 KB · Views: 1,802
 -
 final model.JPG19.7 KB · Views: 1,723
 -
 material navigator.jpg33.3 KB · Views: 1,704
 -
 ready for export.jpg100.6 KB · Views: 1,956
 -
 unwrap UV.jpg151.3 KB · Views: 266
 -
 unwrapping done.jpg141.9 KB · Views: 1,710
 -
 adjusting height.jpg102.3 KB · Views: 1,700
Last edited:


