___________________________________________________________________________________________________________________________________________________________________
Changelog
18. 2. 2017. - posted original guide
Table of contents
Introduction
Rewards
General strategy
___________________________________________________________________________________________________________________________________________________________________
___________________________________________________________________________________________________________________________________________________________________
Disclaimer
Welcome, fellow player! The fact that you are here probably means that you are interested in Blackfire Deep in one way or another. This guide will serve as your stepping stone and information source should you decide to join us in exploring the depths of this dungeon. It is also meant to be the place where you will get all information about Blackfire Deep without any external sources required.
You should understand, however, that this guide is a work in progress, and due to the nature of the dungeon, the difference in experience of multiple players contributing in writing this guide, errors in memory of contributors etc, it will probably remain forever a work in progress. Blackfire Deep is the most difficult part of Gaia's Retaliation and has the most steep learning curve of any content you will find in this RPG. It is impossible to give exception to every rule and prepare you for everything that game can throw at you. It should, however, give you good head start whether you are a part of a small group of players playing on LAN or simply a new player wanting to join a group interested in Blackfire raids. In case you are looking for an active community to play with, consider joining Gaia's Retaliation discord channel Discord.
The amount of wipes required to get this information to you was high, but you don't have to repeat all the mistakes we ever made. We hope that you will find this information useful and have fun while exploring this dungeon. If you are interested in a specific part of the guide you can access it easily via links to those sections through table of contents, but it is recommend that you read the entire thing. With this small disclaimer out of our way...
___________________________________________________________________________________________________________________________________________________________________
What is Blackfire Deep?
Blackfire Deep is a fully randomized dungeon heavily inspired by old school, rouge-like genre. When you enter, your level is reset to 1 and you fight and kill mobs to get experience, items and progress as far as possible. The dungeon has rewards different from anything that can drop in the outside world and has very unique gameplay. Everything is randomized - floors, tilesets, mobs skills, bosses and item drops. Because of its randomness, replay value is very high and no raid will be the same as one before. As you progress through floors in dungeon, mob strength scales as well as yours, making it always challenging. Mobs get assigned randomized hp/ap/sp depending on the floor level, as well as skills from a large pool of skills taken from all outside areas of Gaia’s Retaliation, so you should be familiar with most of them. As you progress deeper and deeper into the dungeon, chances of finding rewards increases exponentially so every additional floor greatly increases the chance of finding your shiny item, but it also increases the chance of getting wiped. Knowing when to call it a day, pick your loot and leave is something you will likely learn the hard way.
___________________________________________________________________________________________________________________________________________________________________
Rules
___________________________________________________________________________________________________________________________________________________________________
Why should I play Blackfire Deep?
There are plenty of reasons. When you get thrown into a situation that isn't predictable, you need to improvize a lot with minimum resources available. As a result, players playing Blackfire Deep will greatly improve their understanding of the game and their playing skills. It's not a surprise that the best players of Gaia’s Retaliation have spent many hours in Blackfire Deep. Add in the fact that every run will be different from the previous one, it is fun, non-repetitive content, and you will have lots of reasons to play. Last but not least, there are plenty of rewards that are exclusive to Blackfire Deep, and we will cover them in next section.
___________________________________________________________________________________________________________________________________________________________________
The reward section of this guide will focus on items that you can take outside Blackfire Deep and use them in the outside world. Some are exclusive to this dungeon, like Collectibles and new legendary items. Things like legendary souls can be found even in the outside world but inside Blackfire you have much better chances of actually finding them. There are plenty of rewards to anyone's liking.
___________________________________________________________________________________________________________________________________________________________________
Keystones and why they are important
Keystones are possibly the most confusing part of Blackfire Deep for any newcomer, so make sure to carefully read this part of the guide and understand it well.
These are Keystones.
They come in two qualities - green Keystone and blue (Greater) Keystone. Now couple of bullet points regarding Keystones:
This should cover it. As for whether it's worth to use a Keystone, I can only give you a couple of tips. It's always a good idea to take an ethereal item to the outside. It is generally not worth it to spend a Keystone on a single level 25 Trinket, but is well worth it for multiple of them or for ones for characters you care about the most. It's always good to use a Keystone to take even a single Banner or Legendary item. You will have to decide your priorities yourself, just keep in mind that if you use your only green Keystone, you will not be able to advance to get the blue Keystone, but will rather need to do a keyless run all over again, so it's a good idea to keep your first green Keystone in your personal stash without using it unless the loot is really good.
___________________________________________________________________________________________________________________________________________________________________
Ethereal items
Ethereal items are unique in two ways:
First, they scale with character level. This is much less relevant in the grand scheme of things, but if you manage to get an ethereal item outside of Blackfire Deep on low level characterl, you will be able to use it from level 1 onwards.
Second, and more important, you can actually save those items (using the Keystones) and then use them inside Blackfire Deep; they do not disappear when you enter into the dungeon. This makes them very useful. The instances where you'd rather use the item dropped from mobs rather than your ethereal are rare, and because they are leveling with you, you can use them either on level 1, 18, 28 or 50; they will always be good.
Example:
Although the function of the ethereal items is being used as best items in Blackfire Deep, it isn’t bad to use them in the outside world either. Aforementioned Ethereal Platebody will be the best armor slot item for tank Hexblades that cannot use Templar's Platebody which is exclusive to the Crusader class. There are more examples of this, but this is one of the more obvious ones.
Every class can use total of 3 ethereals - helmet, armor and their class specific item. If your character has all 3 of those, you will see a big difference between such character and one that has no ethereals. Collect them, and they will help you greatly in reaching further depths of the dungeon and claiming other rewards.
You can only find ethereals from treasure chests and bosses on any floor of the dungeon as early as level 1. They do not drop from regular mobs and you cannot find them in shops.
___________________________________________________________________________________________________________________________________________________________________
Legendary items
Legendary items are the ultimate reward of Blackfire Deep. They are extremely hard to find because they drop only from bosses level 25 or higher. They do not drop from regular mobs, treasure chests, shops or in any other manner. So far it hasn't been reported that you can steal legendary item from level 25+ bosses either.
The odds of getting a random legendary item ranges from 1:16 on level 25 up to 1:8 on level 50. Expect that to get a random legendary item you will have to kill ~12 bosses on average, and then hope it's one for your class. Only the most organized and the most persistent parties will be able to get some of these prizes. They are the best in slot items for most builds out there, but more than anything, they are status symbols.
___________________________________________________________________________________________________________________________________________________________________
Legendary (red) souls
Legendary or red souls are highest quality souls available in Gaia’s Retaliation. There is a total of 28 legendary souls, and they all have fixed stats. The difference between blue and red souls are auras. Red souls, other than the 3 stats that blue souls have, also have a small aura bonus that affects your whole party, or applies a negative debuff to mobs around you.
For a full list of legendary souls and their auras check this link.
As you can see, most of these souls are useful. Some are more versatile than others, and some are easily the best souls available. The problem with red souls is that they are extremely rare. The odds of getting a red soul are 1:400 when you kill level 27 boss or higher (d3 onwards). You can reduce odds to 1:296 by using Soulseeker legendary ring, but theodds for red souls are still horrible. The idea of killing 300 bosses for just one of those can be very off-putting to most players.
Enter Blackfire Deep. One of the first features, before Blackfire even had a drop list, was increased chances of finding legendary souls. First, they can drop only from bosses and treasure chests. The odds of getting a red soul ranges from 1.5% on floor 1, and goes all the way to 33% on floor 50. But let's take a look at a realistic scenario:
You start Blackfire raid using blue Keystone on floor 20. By that time, chances of getting legendary soul from boss kill or treasure chest are anywhere between 8% to 11%. That's roughly 1:10. And as you progress deeper into the dungeon the odds will only increase.
1:10 for Blackfire compared to 1:400 in the outside world. Let that sink in.
It goes without saying that Blackfire Deep is the best place in the game for farming red souls, and you can expect to average one red soul per one good blue Keystone raid. If you want to max out your vault, you will want to visit Blackfire Deep a lot.
___________________________________________________________________________________________________________________________________________________________________
Archives/Collectibles
With the introduction of Blackfire Deep, a new area was added to the right of the Soul Vault. These are Archives. As you can see, Archives contain 12 statues, one for each class, and each statue has two inventory slots. In these slots you can place Collectibles – a special type of items found only in Blackfire Deep. They have level requirement of 15, 25 and 40, and once your character has said levels they become active, inside or outside Blackfire Deep. Once you bring some Collectibles outside of the dungeon by using a Keystone, simply place them in their place inside Archives. Collectibles inside Archives provide you with minor or decent stats, depending on their quality. In a way, you can consider Archives to be additional inventory slots for your character with specific items to be stored there. You can only have one copy of each Collectible in your Archives and they can drop from everything in Blackfire Deep, be it bosses, trash mobs, treasure chests or Summoning Rods, and you can even buy them in shops.
Collectibles come in 3 flavors - Badge, Trinket and Banner.
Badges have required level of 15. They are the weakest, and most of the time simply aren't worth your effort, or your Keystones to bring them out. They usually drop between floors 7 and 14, after which we get additional Collectibles available. Each class has two Badges available.
Trinkets have required level of 25, and drop usually on floors 15 - 25. That means you can get some of them even when doing green Keystone raid. They come in two quality tiers - green and blue. Blue Trinket is higher quality one and they tend to give you very good stats - endgame worthy.
Example Trinket:
Rejuvenating Trinket – Level 25
Type: Druid
Hp: +25
Sp: +3
Int: +3
Banners have high level requirement of 40 and are hardest to get by far. Players can max out on Trinkets relatively easy, but Banners are in their own tier. They drop only from mobs level 40+, which is roughly floor 33 - 34. Not many parties get to such high floors so maxing out on Banners can take a long time. They are the highest quality Collectibles, and when coupled with blue quality level 25 Trinket, they can give you stats worth slightly less than Acessory item slot.
Example Banner:
Shaman's Banner – Level 40
Type: Druid
Hp: +25
Sp: +4
Agi: +4
Int: +4
As you can see, combined blue Trinket and Banner add following stats to your Druid (comparable to ~75% worth of your Accessory):
Hp: +50
Sp: +7
Agi: +4
Int: +7
One thing should be said about Collectibles and Blackfire Deep in general. This content is completely optional and the game won't be balanced around you having full Archives or even pieces of it. They give you extra leeway in building your character, slightly higher dps, tankiness, or healing power. However they do not take up your inventory spaces while they are adding extra stats. Even in future content when Blackfire legendary items become obsolete and weak, Collectibles will always add extra stats and will always be useful. Anyone planning for future endgame and character optimization should keep this in mind.
___________________________________________________________________________________________________________________________________________________________________
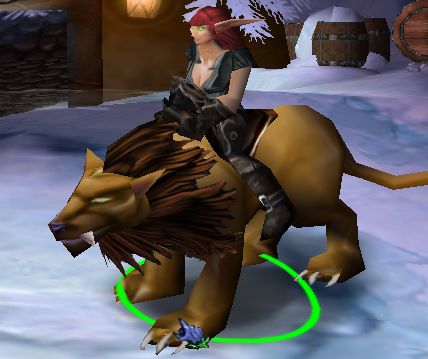
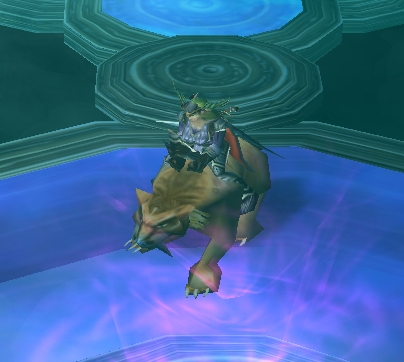
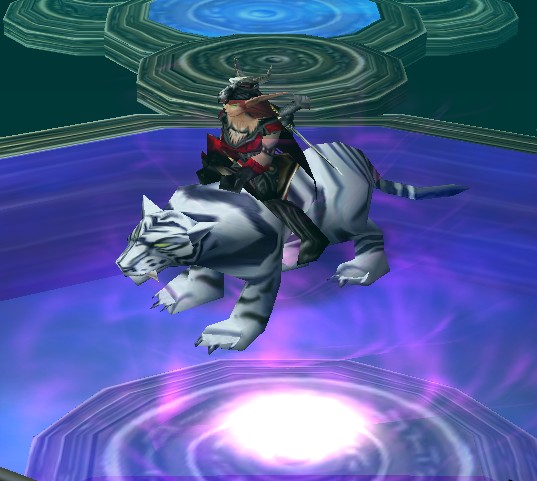
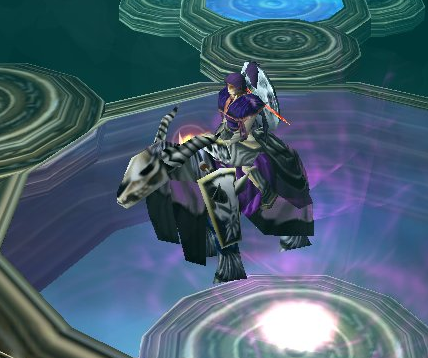
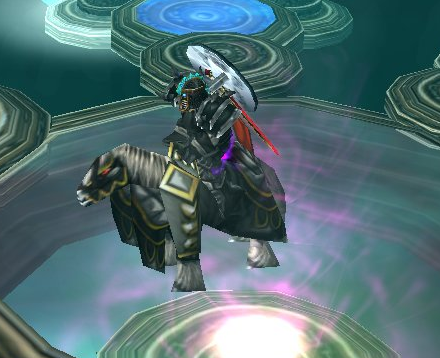
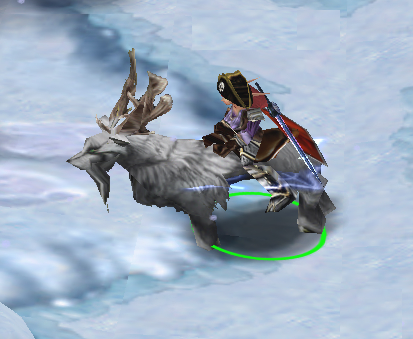
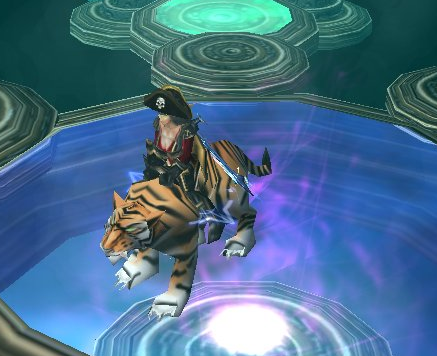
Mounts
Mounts are self-explanatory. You get a cool beast to use as a Mount. Blackfire has a decent selection of those and some of them are really cool. Want to pimp your character? This is how you do it.
___________________________________________________________________________________________________________________________________________________________________
Strategy outlined in this section is something that every member of the team should know; namely, how to use limited resources to best efficiency, how to increase your chances of surviving each and every encounter inside the dungeon, how to act in near-death situations and many more. This is nothing but a short compilation of strategies that Blackfire community found very efficient and beneficial to know and applied liberally and reflexively to great effect. Some strategies are very obvious while others aren't, but even the most simple/obvious ones will increase your odds of getting deeper inside the dungeon and come out with nice prizes.
___________________________________________________________________________________________________________________________________________________________________
Before we get started
Before even entering the game, you should restart Warcraft 3 and join fresh into the game without playing anything beforehand. This is to avoid desynching as well as issues you might have with your WC3 internal memory (more on that later).
For anyone using minions, such as Hunters, Druids, Necromancers or any class using a mercenary, set your minions to offensive style. You can do that by selecting your character, clicking on Game Options (hotkey Z) and adjusting your minions to "offensive" by clicking Toggle Pet Behaviour (hotkey Z as well). Next, you may switch your Auto-Engage on or off. For most characters not having Auto-Engage can be major pain, but every caster - Druid, Bishop, Necromancer or Sorcerer - should have their Auto-Engage set to off every time you enter Blackfire Deep. The reason for this is that once you are resurrected your character will attempt to attack any target in its proximity, and you don't want that for multiple reasons. For one, once you are resurrected you will have 0 mana, and you want to stay out of combat to regain your manapool. Casters are worth nothing without their mana. Autoattacking mobs to accidentally enter combat = bad. This can be especially useful if you die as a character with Resurrection spell (Bishop, Monk or Druid) and a party member resurrects you. You will stay out of combat, and even if your entire party dies, you will be out of combat with your Resurrection spell, bringing the entire team back into play from complete disaster. Every character should do this in theory, but I know how annoying it is to be an autoattacking character and needing to attack every target manually. For casters, however, you have no excuse for forgetting that.
tl;dr, after selecting your character just press Z Z U and you will be fine.
Also make sure that you use proper souls. Importance of those will be discussed in the next section as they can make or break your character.
___________________________________________________________________________________________________________________________________________________________________
Importance of good souls
Other than ethereal items, souls are the only thing that you can take inside Blackfire Deep, and as such they can be a huge game changer, especially on early levels. It's very fortunate that souls which are the best in Blackfire Deep are also very useful in the outside world.
If you look at Alex's Souls Guide you will notice that there are two types of soul bonuses - flat bonus and percentage bonus. We want flat bonuses. When you enter on level 1 with Sorcerer, you have total 6 sp and 5% crit chance. Let's look at example here:
Soul A - int int sp [all 3 with +5 flat modifiers]
Soul B - water dmg water dmg crit chance [all 3 with percentage modifiers]
Soul A - 6 base sp + 15 sp [5 int 5 int 5 sp] = 21 sp 1.05 crit chance (5% base) x 1.5 crit dmg = 22.575 dmg
Soul B - 6 base sp x 1.2 [10% wd + 10% wd] x 1.12 crit chance (5% base + 7% soul) x 1.5 crit dmg = 8.496 dmg
As you can see, using soul with flat bonuses gave us roughly 300% damage output at early levels. On higher levels there isn't as much difference as on level 1, but it's still noticeable. This is especially true for tanks - if you don't have good souls, there is no way you will hold agro away from a caster with good souls, making your entire line collapse as a result.
Same thing applies to defensive souls with one important addition. Spell haste is mandatory for any spellcaster, at least single haste affixon a defensive soul. Spell haste bonuses are very high, especially on a double spell haste soul and will seriously increase your dps/heal for any caster.
As long as you have 2 to 3 affixes on a soul with flat bonuses, you will be doing very well in Blackfire. Clearly, use stats that benefit your class the most.
tl;dr, here are soul affixes that you generally want to use in the dungeon.
Offensive souls: AP, STR, AGI, INT, SP
Defensive souls: Armor, HP, MP, SH, AIIR
___________________________________________________________________________________________________________________________________________________________________
Time limit
Yes, there is a time limit on how long you can play and thus how far you can progress. Warcraft 3 has ~1GB of internal memory. As you progress through the dungeon, new floors and new monsters are generated and it adds to total memory. Once memory goes over ~1GB, game crashes. Blackfire Deep consumes a lot of memory compared to anything else because the game needs to generate every mob, shape and layout of floors etc.
And this crash, which will inevitably get to you, (provided that you don't get wiped in some other manner) ties in everything you do. Essentially you need to be as efficient as possible. Good team composition, meaning high dps of the whole party while still being overall balanced. Don't go afk and expect the game to be waiting with the same memory. Just being in the game increases it bit by bit. As cruel as it is, sometimes it's better to kick a person that is afk a lot, rather than waiting at the end of every floor for him to catch up. It also means you don't need to kill every single mob on every single floor. As long as you are fine with your level, kill only weaker mobs, search for bosses and treasure chests and ignore behemoths with unholy amount of life. Focus on objectives. Such playstyle will come with time, but it will come.
However, you can anticipate crash to some extent and play around it. You can alt-tab and open Task Manager (control + alt + delete). In Processes tab you can find war3.exe, and read its memory. Crash usually happens around 1.100.000 K, and 99% of the time it happens when you progress in floors. That means you can usually clean entire floor without fear of the crash. If a member of your team got something really valuable, let him leave the raid, use his Keystone and take whatever he found to the outside. This is especially true for banners/legendary items.
In practice, crash will usually happen when you finish 13-16 floors or after 2.5 hours of play, depending on your kill speed. If you are extremely slow and afking a lot, you won't even get to Keystone floors. It should also be noted that the 6th person in game, one that isn't in Blackfire with you, leveling, killing mobs on the outside, will also increase your memory, so politely ask him to leave, or kick him. You cannot afford it. When raiding to get Keystones, just get the Keystones and get out. When raiding for high end stuff using the blue Keystone, check your memory on floor 30 or higher, and if any member of your party has something valuable to take out, let him.
Lowest memory upon crash reported is 1.060.000 K
Highest memory upon crash reported is 1.320.000 K
Usually it happens in 1100 - 1200 range.
To both old and new players - there is currently no known method of preventing memory crash, and until you reverse hack Warcraft 3 and find a way to increase its memory, there will probably be no solution.
___________________________________________________________________________________________________________________________________________________________________
Pet pull/merc pull
You perform pet pull by manually sending your pet, summons, minions or mercenary to engage the enemy. You simply use the Attack command [hotkey X], then as your pet moves in to attack quickly use Retreat [hotkey C] to recall them back after monsters react to their attack. This will put both you and your pet in combat.
Pet pull serves multiple purposes.
Your minion that is usually expendable takes the all of the burst damage from mobs, and even if he dies, resummoning is nothing compared to resurrecting a dead party member, especially using Rod of Resurrection
It is used to reposition a mob pack if there are multiple packs in close proximity so that you avoid agroing more than that pack
It is used for scouting nasty skills on scary-looking mobs and bosses
You can always pull mobs out of tight corridors into more open areas where you have more options to avoid their dangerous skills
Pet pull is extremely effective way of dealing with many ugly situations and having one class that can do pet pull is mandatory. You can use mercenary for this, but mercenary has extremely long cooldown in case it dies. Druid/Hunter’s dog is great because he's available all the way from level 1 and he's readily available because of 15 seconds cooldown. Necromancer minions are also great, especially once you reach talent that allows you to resummon them without corpse. Psion slave generally shouldn't be used for this because he's fragile and very hard to replace. Mercenaries aren’t the best for this purpose but they will suffice. You can always preemptively heal them or use things like Divine Protection to give them extra tankiness.
Feel free to use pet pull as liberally as possible, just make sure that the whole party understands that you are doing it on every mob pack. The person in charge of pet pulling should generally lead the party. You can easily get wiped if your tank engages one group while another party member pet pulls a second pack. Just make sure that everyone is on the same page and pet pull will get you a long way. It's a small thing that will make the difference between successful parties and the ones struggling very hard, so the faster you learn this, the better your whole party will fare.
___________________________________________________________________________________________________________________________________________________________________
Minion control
Tied into the pet pull section, characters that use minions and mercenaries should do their best to control them properly. That means you don't attack a target that is sleeping or is frozen. Issue attack command to your minions to attack the same target as you are, and once that target is dead, do it again on the next one. It sounds like a lot of headache at first, but it's a much better alternative to getting wiped because you woke up that nasty Sonic Blade troll that killed you instantly.
___________________________________________________________________________________________________________________________________________________________________
Agroing multiple packs and spatial awareness
Agroing multiple packs is the cause of 90% of wipes in Blackfire Deep. There are multiple ways of dealing with such situations, but the best way to handle it is never allowing it to happen. Of course, we aren't living in ideal world, and no matter how experienced the party is, those situations will always happen and for every party member it's just as important to do his small part to prevent as much of it as possible.
Small things like typing "care" or pinging on a mob pack that is close to the area you are fighting in will help a lot. Checking the area in advance to see what is around you is a very useful habit to have. Don't be completely focused on what's happening on your screen. Check your surroundings and be aware of other mobs around you, the ones lurking behind the corners, the ones in fog of war, etc.
Pet pulling mobs to empty areas where you have complete control of your surroundings is never a bad idea.
It's also very useful to know which situations can get you in most trouble. Double agroing can happen most often when:
As you can see, agroing multiple packs happens more often when using close combat classes, but it can happen to anyone not aware of his surroundings.
Now when it actually happens, there are a couple of ways for dealing with it. First, and usually the best solution is to simply ignore the person that agroed the second pack and simply let him die. The healer shouldn't heal him and support classes shouldn't cast anything on him. Yes, you will instinctively heal a person whose hp drops suddenly, but if you have presence of mind as a group to ignore him and not get involved in his mess, it's by far the best solution. Mobs won't engage your whole party, but just the member that agroed them. They will kill him and go back to their spawning point. If that plan failed and most of your team is in combat, you can try to kill the first agroed pack so that people who didn't (most of the time single target dps like Assassin/Bard) agro the second pack can get out of combat and either salvage the situation by using Rod of Resurrection on healer after your party gets wiped, reset the whole encounter and try once again.
Sometimes your team will be able to deal with multiagro, but if you see that you will likely fail, you should focus on resurrecting the character that can resurrect the whole team, like Druid, Monk or Bishop. Should one of those three fall, make it priority to keep one alive. It's the only way to continue your raid. One very advanced strategy (and I wouldn't recommend it to you unless you have direct way of communicating with your team with voice chat) is to simply autoattack and kill your healer and resurrect him faster. Healers are usually last in threat list for agro and they will fall last so you won't be able to use Resurrection Rod on him. So help him die so you can resurrect him faster. Like I said, only do this if you are sure you can pull it off.
And don't worry, it will happen to you. It will happen to everyone. You will agro multiple packs and get wiped or end up in very big trouble. Avoiding such situations is something that you will simply learn the hard way.
___________________________________________________________________________________________________________________________________________________________________
Communication
If it wasn't obvious already, good communication is the key to success in Blackfire raids. Simple ping or point marker selecting the next mob pack is a good start, but if at all possible, you should join voice chat and give/receive instructions by voice; it's much faster. Typing what you should do takes ages, and puts the entire party into a dangerous situation if you start typing mid-battle. Being able to say or hear simple stuff like "Pet pull those guys" or "Focus the same target" is extremely useful, especially when party leader knows what he's doing. It also adds some fun when there's nothing special to do. It makes the whole experience very personal and much more fun. Don't be scared if your English isn't the best, as native English speakers are very few. Even if you aren't interested in talking to the party, just listening to instruction will help a lot.
___________________________________________________________________________________________________________________________________________________________________
Bosses and treasure chests
Bosses and treasure chests are the main targets of Blackfire raids. Your main objective is to kill as many bosses and open as many treasure chests as possible during a single raid. The odds of the floor having a boss range from 25% on floor 1 and goes all the way to 100% on floor 50. The odds of getting treasure chests depend on map layout more than anything else. Yes, higher floors help but there are map layouts that simply have no spawning points for treasure chests (more about this in Map layout section).
The majority of good Blackfire items drops only from those two sources; ethereal items, legendary items, legendary souls and mounts. Treasure chests are also a very reliable way of getting Collectibles even if they can drop from any mobs.
Bosses can drop only one item but are the only source of Blackfire deep legendary items. They can drop ethereal items, legendary items, legendary souls and Collectibles.
Treasure chests always drop two items. They can drop ethereal items, legendary souls, Collectibles and mounts.
Once you kill the boss and open treasure chests on floor, you should skip all remaining mobs and progress to the next floor. The only exception to this is when mobs are level 40 and you want to get Banners. But other than that, get in, scout for bosses and treasure chests, kill everything on your way to them and go to the next floor. You don't have infinite time so you need to use it well. This will also come with experience.
___________________________________________________________________________________________________________________________________________________________________
Rods of Summoning
Rods of Summoning are unique items that drop only in Blackfire Deep. You cannot take them out even with Keystone and you should use them inside the dungeon. When you use it, several random events can happen;
Quality of drops depends on level of character using Rod of Summoning. The odds for specific drops aren't known, but there are several cases when you want to use those rods.
If you are using a green Keystone to enter the dungeon or going keyless, try using them on level 25. On that level Trinkets are added to their drop list.
If you are using a blue Keystone to enter the dungeon, try using them on level 40. On that level Banners are added to their drop list.
Other than that you can use them when your drops are bad and you need items to help you progress. When you are new to Blackfire raids, it's not the worst idea to use them as they come because they can help you get the first Keystones and their item drops can increase the strength of your party by decent amount.
___________________________________________________________________________________________________________________________________________________________________
Resurrection rods
When you start Blackfire raid using Keytone or keyless, you will get wisp-like shop. In it you will find one Rod of Resurrection rod. It contains one charge of Resurrection spell. As a rule of the thumb, you only want to use it on characters that have Resurrection themselves - Bishop, Monk and Druid. Use them only if your resurrection character died. For all other situations you should leave such character doing all of the resurrecting himself. If he dies, resurrect him and he should stay out of combat to save the situation.
The Rod of Resurrection is your lifeline. Your ress character will die eventually, it will happen. When it happens make sure you know who will use his rod on him. Using two rods at the same time is really sad so it's best that you communicate with your team, but if situation is bad enough, just use it. Better safe than sorry. Also, once you start casting your Resurrection, you can be interrupted and killed, so be careful. Also once you start it, canceling it will also consume your rod so be careful with them. Always try to have at least 50 mana in case something goes bad and you need to use it.
As with Rod of Summoning, you cannot take Rod of Resurrection to the outside world using Keystones.
___________________________________________________________________________________________________________________________________________________________________
Double Resurrection
Double Resurrection is currently the most powerful known strategy for successful Blackfire raids. The idea is to have two characters with combat Resurrection spell - Monk or Bishop; Druid is excluded because she learns Life Infusion only on level 43 which is far too late to base your strategy around it. With two characters having Resurrection, if one of them dies, other uses Resurrection on him, resurrected character stays out of combat, and even if your entire party dies, you have out of combat Resurrection. That character proceeds to resurrect everyone and reset whole raid. Your party should move away from mobs spawn point so they doesn't die in the middle of mobs. With two of them covering for each other, you can have very safe raids even in bad situations.
Of course, it's far from foolproof, but even then you have your other party members with their Rods of Resurrection to save you in case of both of you die at the same time.
There is one more additional benefit to it. Your team can engage a scary mob pack or boss while one of your ress characters stays out of combat completely until it's safe to engage and the boss has been probed for nasty spells.
And on top of it, having two ress characters is rarely a bad idea. With Bishop + Bishop you can go Soulstrike dps build with Burst of Light as emergency heal and second Bishop can go dedicated heal + Confidence aura. Later on, double Mend + double shield is extremely strong. Monk and Bishop can cover tank and healer roles rather nicely, and double Monk is least desirable.
___________________________________________________________________________________________________________________________________________________________________
Because of Basic/Advanced class system, most of the classes share their gameplay early on up to level 25/27 where they get their advanced class spells. For that reason classes will be covered together on early levels as there is very minor difference in gameplay, if any.
Early levels will be keyless and green Keystone raids, and high level strategy will be blue Keystone raids.
Also there will be list of best modifiers on souls for each class.
___________________________________________________________________________________________________________________________________________________________________
Berserker [tank, interrupt, hard dps on higher levels]
Crusader [tank, interrupt]
Low level strategy
Early game, both classes are tanks. Take Shield Slam for interruption and the rest is pretty much up to you. Backhand is only viable if you already have plenty of ethereal items and a double evasion defensive soul, otherwise take Hateful Strike for additional interrupt. As a tank you should lead your team, and your job is to make sure most of the mobs are attacking you. Without high agro generating aoe skills, chances are you won't be able to tank every mob but focus on getting the majority of them to attack you. Don't bother agroing that mob that your Sorcerer is focusing all his spells on, you won't overagro it. Just make sure that you grab as many mobs that your team isn't focusing on and you will be fine. Interrupt as many channeling skills as possible with one or two stuns. Be careful with Shield Slam because it can knockback mobs into another mob pack and it will spell lots of trouble, especially on early levels when you don't have any aoe threat making skills.
High level strategy
Berserker is aoe damage dealer rather than tank. With good ethereal items he can be decent tank, but you should always have another tank in your team, as Berserker isn't meant to be one. Because he is close combat fighter, beware that you don’t overagro the main tank and make sure you hit as many targets as possible with your aoe skills. Teaming with Hexblade as primary tank can be very nice because she can pull all mobs together and together you can dish very good aoe damage while keeping your back lines safe. Hateful Strike is preferred option because of interrupt.
Crusader is main tank. Your main skill should be Taunt and you will focus all your talents there. You can go Backhand if you have high evasion from items and souls, mostly because you will already have Shield Slam for interrupting channeling spells. If you are low on evasion, take Hateful Strike instead. At this point Crusader has more benefit of taking a int/sp soul because lots of his skills will use sp instead of ap.
Low level Berserker souls [AP, STR] [HP, AR, AIIR]
Low level Crusader souls [AP, STR] [HP, AR, AIIR]
High level Berserker souls [AP, STR, CC] [HP, AR, EV, AIIR]
High level Crusader souls [AP, STR, INT SP] [HP, AR, EV, AIIR]
___________________________________________________________________________________________________________________________________________________________________
Druid [healer, pet pull, ooc ressurection]
Hunter [pet pull, interrrupt, dps]
Low level strategy
Funny thing is, despite the traditional difference of Hunter being dps class and Druid being healer, up to level 25 the two of them are identical. The choice of soul can turn Hunter into respectable healer and Druid into decent dps class. It all comes down to soul choice and filling in for what your team is lacking. Need healer? Use int, sp soul and mp, haste soul and your Hunter is suddenly a perfectly capable healer. Same logic applies to dps on Druid. This strategy, however, works only on low levels. Later on both classes should stick to their respectable roles. Take wolf pet for pet pull in both cases. Bird is useless because it cannot be targeted. Rest is self-explanatory. If you are healing, take Remedy. Pet pull mobs, resummon the wolf if he dies and keep up to your role's expectation. There is one major difference. Druid using a green Keystone or the blue one will get a special, Druid-only item - Rod of Revitalization. It gives infinite Resurrection charges to offset high level requirement of her Life infusion (level 43), however, it cannot be used once in combat. Hunter does not get such item so be careful.
High level strategy
As Druid, take your bird, Clawstrike, summon of choice, Remedy and do pretty much what Druids do - heal and pet pull. The pet is the only thing that gives Druid the edge over Bishop as a healer. You can have only one of your Druid-only summons (Nypmh or Efreet) summoned at a same time so if your party needs extra damage use Efreet, and if you have trouble keeping your team alive use Nymph. On level 43, which is very late in game you get access to Life Infusion - resurrection spell which can be extremely valuable.
Hunter will serve as aoe damage dealer, with access to pet pull and interruption spell. Be aware that if your summon dies while pet pulling, you lose access to Beast Fury and Claw Strike which not only reduces your damage output a lot, but also you lose interrupt from Beast Fury. Resummon your minion immediately when he dies. Also take care that your aoe spells don't wake and unfreeze any mobs. It's better to use your aoe spells before they are crowd-controlled than waking them up. Magic Arrow also deserves its own section. Because it drains 1.5 mana per character level, you can use multiple Magic Arrows to deplete mana from majority of the mob pack, especially high hp ones or bosses.
Low level Healer souls [INT, SP] [SH, MP, HP]
Low level dps souls [AP, AGI] [HP, AIIR, anything]
High level Druid souls [INT, SP] [SH, MP, HP]
High level Hunter souls [AP, AGI] [HP, AIIR, anything]
___________________________________________________________________________________________________________________________________________________________________
Assassin [hard dps, dazing trap, interrupt]
Bard [dps, dazing trap, interrupt]
Low level strategy
As Thief class your main contribution to your team is Dazing Trap spell. Yes, I know you cannot take Steal in that case. But Dazing Trap is so powerful that it becomes a spell that you are basing your whole strategy around. Pet pulls into Dazing Traps are commonplace when your team is coordinated enough and it is an extremely strong strategy. 20 seconds (or 30 seconds with talent; which you should take) of mobs sleeping while you pick away at them, one at a time, can deal with almost any situation the game can throw at you. Just make sure you don't wake up mobs by attacking them with minions, or splash damage. Other than that, you will be taking Backstab for interrupting channeling spells and long 4 second stun, Blurred Motions so you can dispel whatever mobs throw at you, including stuns (especially when you have no access to Dispel from mage classes). When you scout Crippling Curse, you can engage mobs first to take the entire first wave of Crippling Curse then simply dispel it with Blurred Motions. Also if you see very dangerous mobs, it's entirely possible for you to stay out of combat entirely and simply reapply Dazing Trap for whole fight. Using Dazing Trap will never put you in combat and you can continuously put everything to sleep. You will need to set Auto-Engage to "off" so your character doesn't accidentally enter combat. Bard is much better suited to this role than Assassin because she still provides useful songs to entire team, where Assassin cannot provide anything, and dps loss will be noticeable.
High level strategy
Both classes should use everything mentioned in the low level section. With additional levels, Assassin gets access to Coup de Grace, which is nice for quickly interrupting channeling spells like Ground Stomp or Water Globes without having to walk behind a target. At level 37 however, game changes drastically for Assassin. You learn Into the Shades - the only skill in game that places you out of combat. This changes the whole world for Assassin. If you go out of combat, you can reuse Dazing Trap. Now you can contribute both in dps, repeatable Dazing Traps, and later, on level 43, you get Explosive Trap that gives you 5 seconds aoe stun on 35 seconds cooldown. There is one additional benefit of Into the Shades - no matter what situation you find yourself in, you can always use it to safely get out of combat and disengage. Even if your team gets wiped, you can always stand aside and use your Rod of Resurrection on your Bishop, Monk or Druid, and get your entire team up and running once again. That's why Assassin should always be the one to purchase and hoard all Rods of Resurrection you find in various shops while in the dungeon.
Bard doesn't provide Assassin’s high dps and she can be allowed to stay out of combat for reapplying Dazing Traps much more. Songs that you provide for team will still count even while you are out of combat. Other than that, all standard Bard strategies apply inside of Blackfire as well. Use Inspire on characters that have mana issues and keep optimal songs up at all times. If your party member walks outside song range, reapply it.
Low level Assassin souls [AP, AGI] [HP, AR, AIIR]
Low level Bard souls [AP, AGI] [HP, AR, AIIR]
High level Assassin souls [AP, AGI, CC, CD] [HP, AIIR]
High level Bard souls [AP, AGI] [HP, AIIR]
___________________________________________________________________________________________________________________________________________________________________
Necromancer [hard dps, dispell, frost cage, pet pull]
Sorcerer [hard dps, dispell, frost cage]
Low level strategy
Water Globes, Dispel and Frost Cage will be your skill set. Combustion vs. Magic Missile is personal preference and both are equally viable options. Combustion is more of a utility skill while Magic Missile is pure dps. Your early gameplay will mostly revolve around dispelling whatever needs dispelling, doing as much dps as possible and freezing whatever is needed. Most often you will dispel Crippling Curse, Feline Reflexes, Spell Mirror or Mark of Chaos, Entangle etc. One thing that should be mentioned is that Dispel doesn't remove all debuffs. It dispels one debuff at a time. So if your tank engaged and 4 mobs used Crippling Curse on him, you will need to use Dispel 4 times to remove all of them. Frost Cage is also very good. While not as powerful as Thief’s Dazing Trap, you can use it while in combat making it much more versatile. It can also serve as interrupt. If your team has no tools to interrupt that Mark of the Vampire, just freeze the mob mid cast. Only instance when you might consider Fireball over Water Globes is if you have heavy aoe team like Hexblade tank, Hunter, two Necromancers and Bishop. Most of the time single target precision spells are superior to aoe because you can mess up Dazing Trap sleep and Frost Cage disables. Usually either of those two gets mercenary (Elyssa Ravencrest) to keep Symbol of Fury buff on them (+30 spell haste) because it makes a lot of difference in their dps.
High level strategy
Necromancer gets access to his minions on level 25/27. That makes him very useful on blue Keystone raids. You should always take level 35 talent that allows you to summon minions without corpse. There are some monsters that don't leave corpses, like Infernals or Water Elementals. It's much better for you to give up on 15% haste than for your team to suddenly find out it has no pet pull available to them. You should always take talent "'Dispel Magic' is now an instant cast area-of-effect spell." It’s very simple to use and very effective. You can dispel Feline Reflexes from a whole pack of mobs with single click.
Sorcerer has the highest dps output out of any character in game and because most tanks don't have their full threat generation skills, you will be overagroing a lot. If your healer is inexperienced you don't want to make problems for him so focus the same target as your tank and keep your agro under 100%. If your healer is experienced enough and he can cover both of you, quickly pick apart and burst lowest hp mob from group unless he's really strong. You have Frost Cage to control him if he becomes too much to handle and have option of taking Combustion for same purpose as well. The choice of going for aoe Dispel and instant Water Globes cast mostly depends on how skilled you are and how fast you can react and dispel stuff without aoe. More often than not it's better to go with aoe Dispel unless you have Necromancer in your team that will take care of that.
Low level Necromancer souls [INT, SP] [SH, HP, MP]
High level Sorcerer souls [INT, SP] [SH, HP, MP]
Low level Necromancer souls [INT, SP] [SH, HP, MP]
High level Sorcerer souls [INT, SP, CC, Light Dmg] [SH, HP, MP]
___________________________________________________________________________________________________________________________________________________________________
Bishop [healer, combat ressurection]
Monk [tank, combat ressurection]
Low level strategy
Much like with Druid/Hunter, souls will make more impact than class itself early on. You have the option to go healer on Monk as well but it’s rarely used. Regardless of your soul choice, getting access to Resurrection as early as level 13 along with possible healing and Confidence aura early on makes one of these two a mandatory addition to every Blackfire party. If you decide for healing, you will want spell haste soul because Heal has very long casting time. If your haste is low, ask your party to give you the sorceress mercenary for +30 spell haste buff for easier healing. If you decide to go for punching Monk, it makes no difference in terms of skill build, only make sure to use the proper soul. If you have another healer in your team, like Druid, you can go Soulstrike dps build. Soulstrike is very powerful against the undead, doing 4.5 x sp damage to each of them, and there's plenty of undead in Blackfire.
High level strategy
With higher levels, Bishops get access to Plane Shift which is much more useful than one might expect. Avoiding nasty random target spells like Heaven's Edge and Debris while keeping close to your team to heal them is very useful. Mend and Divine Protection are crazy, and you can spam them while out of combat on the entire team for no mana cost at all. Divine Protection should go on your fragile party members and Mend in combination with Flash Heal will keep your tanks healthy. If you are playing double Bishop, one can go Soulstrike dps build with Flash of Light for emergency heal while the other will be a dedicated healer with Confidence. On Bishop + Monk you can take Flash of Light while monk takes care of Confidence.
Later in game Monk doesn't have the option to be the healer and should focus on tanking. The standard Monk we all know. Because of your low mana pool, always keep in mind that 50 mana must be saved in case of emergency Ressurection. If you are the only tank on your team, you should go for Sunfire and +50% more threat talent so you can quickly grab majority of the mobs from pack and work your agro from there. Monks don't have any exciting skills to talk about but are very useful in party to have filling both roles of tank and combat resurrection.
Low level Healer souls [INT, SP] [SH, MP, HP]
Low level tank Monk souls [AP, AGI] [HP, AR, AIIR]
High level Bishop souls [INT, SP] [SH, MP, HP]
High level Monk souls [AP, AGI] [HP, AR, EV, AIIR]
___________________________________________________________________________________________________________________________________________________________________
Hexblade [tank, interrupt]
Low level strategy
Hexblade is an amazing tank on lower levels, primarily because she gets her primary agro generating combo on level 7. And it's aoe agro to add on top of it. Your skill build should be Jolting Strikes, Dancing Blades, Distracting Weapons and Imbue Armor. Liquified Arms is a good choice as well, but Imbue can prevent physical burst damage much more reliably; still be wary of heavy spell damage. Your main strategy is to use Distracting Weapons and after that spin using Dancing Blades for maximum agro possible. Dancing Blades is also good as an interruption skill but you'd be better off relying on your team to do that for you as you need to generate agro as much as possible.
High level strategy
On higher levels Hexblade gets access to lots of aoe spells, but on level 33 she gets Binding Chains which is her best spell by far. Pet pull mobs, chain them together, and do your threat combo, while your team uses Dazing Trap, and you pick them apart one by one. One problem with Hexblade is that she has lots of aoe damage skills so you want to pair her with aoe damage dealers as well, rather than with single target precision characters (Sorcerer vs Berserker). She excels when she can use her spells without worries of waking up mobs or breaking Frost Cage. In parties with sleep mines you need to be very precise with your spells not to wake everyone up. Despite her lack of synergy with sleepers, there is one very nice combo they have available to them. Chain pull into sleep mine.
You can also play Hexblade as staff character with Ethereal Chains and Twisting Metal as your main damage skill. It's generally not the best choice because you need another tank in your party to cover for her lack of aoe, but it can be done. You will need to change your soul from ap based to sp based because now your main skill is SP based. Rest of the strategy still applies except that you are much worse as a tank and you have no reliable disable (Twisting is far from reliable even if it does stun). You can also opt for Liquified Arms rather than Imbue Armor and get amazing level 40 Talent for it to apply on Spells rather than only autoattacks.
Low level Hexblade souls [AP, STR] [HP, AR, AIIR]
High level Hexblade souls - Dancing Blades [AP, STR] [HP, AR, EV, AIIR]
High level Hexblade souls - Twisting Metal [INT, SP] [SH, HP, AR, EV, AIIR]
___________________________________________________________________________________________________________________________________________________________________
Psion [?]
Psion is a class that simply wasn't meant to be used in Blackfire. She's full of contradictions that limit her otherwise decent potential in the outside world because of awkward talents and skills and with even weirder level requirements. Rather than, "this is a guide that will make Psion new Bonjwa" section, it's "How do I make her half useful as a class during Blackfire raids".
Low level strategy
On lower levels you can try and impersonate Hexblade by going for tank, but you have a problem - Psion can use only cloth items while tanking. Those items generally give sp/int, and rarely good hp/armor and you want ap/str because your Dancing Blades scales with those stats. Starting to see problems here? To add insult to injury, even if you decide to go Twisting Metal + int/sp based build, you will have lowest priority on items because Emerald Staff is much better used on... pretty much every class that can use staff. You will get the short end of the stick, so use Psion only if your team, especially cloth users, are well geared with ethereals.
High level strategy
High level Psions are a lot more useful, but are still shafted compared to most other classes. Your main game revolves around Psionic Blade spell steal and Enslave. Psionic Blade spell steal is weird. You can steal spell only on level 30+ and you can only choose one type of spell - ones used on ally, enemy, or point cast ones. You cannot take spells from the outside world, which would be useful because of high level requirement of some spells like Divine Protection. That means you will want to steal a spell from one of your party members. Good spells to steal from best to worst would be:
In practice that means you should stick with Resurrection for Double Resurrection strategy. Enslave is a borderline-useless skill. You can’t enslave any mobs in Blackfire Deep as they are counted as Elites (much like Magnataurs in Yeti cave or Overseer Golems). With that, the only way to get some usage out of Enslave is Rod of Summoning, and that's far from a reliable source. First of all, it is rare. Second, sometimes it spawns stuff other than mobs. Third, even if they summon mobs, they can be higher level than you, meaning you can't Enslave them. And when you even get a decent mob, you can just as easily die and your prized mob is useless. Even it can die from some powerful skill that hits summons, like Ground Stomp which is fairly common. And most of the time your mob won't even be useful. You cannot even use him as pet to pull because he will just die from burst damage eventually. Her best spell - Pain Link is available only on level 43 which is far too late to be considered seriously.
Taking Psion is just like being that one white kid in a black neighborhood - nobody will like you.
Low level tank Psion souls [AP, STR] [HP, AR, AIIR]
Low level Psion souls - Twisting Metal [INT, SP] [SH, HP, AR, AIIR]
High level Psion souls - Dancing Blades [INT, SP] [SH, HP, AIIR]
___________________________________________________________________________________________________________________________________________________________________
Conclusion - Proper team composition
Having an overall balanced team is important. If you have a team of 5 tanks that will never die, you will kill mobs slowly, get nowhere and will get rekt by memory bug. If you don't have a healer and Resurrection, you will not get far. If you don't have a capable tank to hold off something like Enrage you won't get far either. In order to progress as much as possible you will want an optimal team composition. Aim for something like this:
All classes fill certain roles. You don't need to have everything mentioned above, and you probably won't have it, but this is something you should aim for. Something like Hexblade, Monk, Assassin, Necromancer and Bishop would include everything that was outlined above. You just have to mix and match to get most out of your available characters.
___________________________________________________________________________________________________________________________________________________________________
This section will cover some of more dangerous abilities Blackfire Deep will throw at you, and how to effectively play around them. Keep in mind that this list doesn't cover list of all dangers in dungeon - it's merely a shortcut to an otherwise steep learning curve of predicting dangers. Keep in mind you can always check mob for its ap/hp values to estimate base mob and link him with potentially dangerous abilities. Threats are presented in more-or-less descending order from highest to lowest threat.
Also keep in mind that Blackfire Deep is still relatively unexplored. There are for sure mobs that can have dangerous abilities that are not on this list. Also combinations of multiple abilities can range from harmless do downright unfair, so staying vigilant is never bad.
___________________________________________________________________________________________________________________________________________________________________
Sonic Blades [found on ranged piercing attack trolls, murlocs, razormanes and skeleton archers]
Other than agroing multiple packs, Sonic Blades is the primary cause of team wipes in Blackfire Deep. Due to high ap modifier, bouncing attack, unreasonably high damage and chance to crit, running blind into Sonic Blades mobs can result in a very sudden end to your expedition. Whenever you encounter some of mobs mentioned above you should probe them with pet pull. Other than that you can align your team so that mobs are facing only tank while rest of the team should be behind mobs backs. Sonic won't bounce to you that way and tank has decent chance of surviving. High ap Sonic Blades bosses can, however, kill the tank instantly with an unlucky crit so be prepared for ugly stuff when facing such bosses. When scouted, it is recommended that you skip those packs if they prove too hard for you. However, it's the only skill in Blackfire that you should be avoiding by skipping packs.
___________________________________________________________________________________________________________________________________________________________________
Skeleton Archers
These guys deserve their own section not only because they have a chance to spawn with Sonic Blades, but also have a myriad of very dangerous skills at their disposal, and can spawn with multiple of those. Flaming Arrow might seem harmless at first sight, but when your tank gets focused by five of them with following autoattacks, your healer will have a hard time keeping up with their damage. Mulitshot is also very dangerous due to the fact it hits the entire team, and if not thinned in numbers, skeletons can kill key member of your team like the healer and cause wipe. Magic Arrow, while not doing much in terms of damage, has ugly 1.5 x monster level manaburn. Level 35 Magic Arrow will burn 52 mana from target it hits. Now multiply this with 5 skeletons, 30 seconds cooldown and you get the full picture. Tanks will not be able to keep their agro without their mana, and if your healers get their mana burned, it will spell a quick end to your raid. You can split as much as possible so it cannot affect the whole team in same way as with Sonic Blades. Feline Reflexes are self-explanatory and as a mage you should make your first priority to dispel those. Needless to say those skeletons in high numbers have to be probed with pet pull/merc pull, especially with high ap/hp values, and from there adjust your strategy of dealing with them accordingly.
___________________________________________________________________________________________________________________________________________________________________
Enrage [found on hellhounds, ghouls, thunder lizards and melee kobolds]
Enrage is one of hardest skill to face, especially unscouted. Common scenario goes like this: you engage a monster pack, Enrage turns on and starts doing serious damage to the tank, healer goes for heal while whole pack isn't agroed properly, pack charges past everyone straight on healer and kills him in half second time, especially true for ranged mobs. Whole team runs around like headless chickens attempting to resurrect the healer and reset the whole fight. It's a common scenario that can be avoided by pet pull, some preparations for proper agro and use of crowd control skills to waste as much Enrage time as possible. Unlike its baby brother - Feline Reflexes, it can’t be dispelled so don't waste time trying to do so. It's very possible to face Enrage multiple times during one mob pack battle so stay on your toes as a healer. This fight ain't over ‘till it's over.
___________________________________________________________________________________________________________________________________________________________________
Heaven's Edge [found on abominations, cursed riders and ghouls]
Fist Flurry [found on abominations and zombies]
Magma Wave [found on infernals, cursed orcs and devil skirmishers]
While on first glance these skills don't have anything in common, their real threat is well hidden - mobs using those skills ignore first-in-agro rule and go for random target, and they hit very hard. It's not exaggerated that because of that and some unlucky crit they can wipe out your back lines. First burst can be controlled by pet pull, but after that you have no way of preventing it going after your casters and healers. Both skills are fairly harmless when they attack high hp/armor tank, but are otherwise dangerous. In case of Heaven's Edge and Magma Wave, you should split so you don't get caught in their aoe. As for Fist Flurry, you can crowd control mobs and delay them landing it. You can run around obstacles and let your team stun, disable and kill them, but sometimes you will have to take it face on and it can be quite bad, especially on crits. It should also be noted that you can greatly reduce threat of Magma Wave by using mid-game fire resist items.
___________________________________________________________________________________________________________________________________________________________________
Earthquake [found on thunder lizards, spiders and melee murlocs]
If you ever thought of Hill Giant Earthquake being annoying, that's because you never faced a pack of five ranged thunder lizards casting five Earthquakes all around the battlefield standing safely within it while playing four melee classes plus healer. Seriously, it would be easy to just relocate far away from it, but most teams aren't that coordinated. In that case at least try not to stand in it on low hp giving your healer all sorts of headache, forcing him to walk over Earthquakes and dying in process. This skill, while low on burst can be a major pain, because it hits so many targets, and if you walk into multiple Earthquake fields it will make short work of you. Just keep cool and get the job done.
___________________________________________________________________________________________________________________________________________________________________
Ground Stomp [found on cursed orcs and wildkins and many others; very common skill]
Flame Nova [found on cursed orcs, infernals and devil skirmishers]
Ground Stomp isn't huge threat by itself because it can be interrupted and sidestepped, but its fast channeling time, low cooldown, high ap modifier and deceptively large aoe is a very good “wake up detector”. All mobs will share same cooldown on it so when a whole bunch of them start casting it and your front line isn't paying attention, they can get wiped easily and back lines will collapse just as quickly. Just keep your heads up when facing it and you will be fine. Flame Nova is very similar to Ground Stomp in way that it hits everyone is aoe, but unlike Ground Stomp it is instant cast so it cannot be interrupted. Multiple Flame Novas can be very ugly if they hit your entire front line so avoid cluttering, use sleep and freeze to prevent them using Nova at the same time. High fire resistance can also help.
___________________________________________________________________________________________________________________________________________________________________
Debris [found on troll spellcasters]
I really hate that I have to write this section, but yes, Debris is a serious issue. It hits extremely hard and stuns for very long time. Most of the time it can oneshot any non-tank class so be super careful when facing it. Magician classes should dispel stun from surviving targets right away. Try not to fight in tight corridors. Pet pull and lure Debris mobs into open area where you have more space to maneuver. You can always practice dodging Debris in Yeti cave, but it cannot prepare you for pack of 5 trolls throwing Debris all over the battlefield. Like in many other occasions, sleep and freeze are your best friends here.
___________________________________________________________________________________________________________________________________________________________________
The cutoff point - from here skills aren't as much of a threat that will wipe your team, but can cause headache in one way or another. Learning how to deal with them will help your sanity, but are otherwise not as high of a threat.
___________________________________________________________________________________________________________________________________________________________________
Mark of the Vampire [found on abominations, ghouls and many melee mobs]
Mark of the Vampire can be nasty if the party doesn't understand how to work around it. High hp vampire mobs can deplete all your mana and slowly pick you away one by one, but solutions are plenty. Pet pull will take care of initial mark. After that you have the option to interrupt it - problem solved. If you aren't able to interrupt because your stun skill is on cooldown, or you are facing masses that cannot be interrupted because of high numbers, your tank should move as far away as possible from mobs and you will have to kite them with slows and disables like Combustion or Ensnare. It's very useful to know that mark lasts only five hits and you can deplete them by autoattacking marked ally. Usually the party isn't coordinated enough to pull it off instantly, but even one player autoattacking can make a difference. But it's rarely needed. Just keep your stuns for interrupt and it will be enough.
___________________________________________________________________________________________________________________________________________________________________
Spell Mirror [found on voidwalkers, troll casters and many caster mobs in general]
Mark of Chaos [N/A]
If a unit with Spell Mirror is hit by a spell it will reflect it back at caster. Due to caster’s high damage output and low hp it will often times instakill Necromancer, Sorcerer or Bishop doing Soulstrike dps. As a mage you can dispel it and be done with it, but dead Bishops can prove to be a much worse scenario with team losing a healer. As a rule of the thumb, mobs having Spell Mirror are usually weak so they won't cause a team wipe, but having to waste Rod of Resurrection can hurt. Remember that its cooldown is only 20 seconds, so it's up quite frequently, and on mixed mob packs just one of them having Spell Shield will make it a threat as it can be cast on targets other than itself. If your mental clock is decent and you can anticipate its cooldown, it becomes zero threat, but it can surprise you due to instant cast. Mark of Chaos is essentially the same thing except your physical hits also get reflected. It's harder to spot but it can be dispelled. Treat it the same way as Spell Mirror.
___________________________________________________________________________________________________________________________________________________________________
Heal, Flash Heal [found on troll spellcasters]
Problem with these two healing spells is that they have a 1 sec cooldown, and big groups of healing mobs will just overheal anything you can throw at them. You can sometimes outdps one healer by crowdcontrolling rest of the pack with sleep/freeze and interrupting his heals with your stuns, but sometimes that will not be possible. In that case don't waste your mana, just autoattack mobs and wait for them to deplete their mana. It's a major waste of time for sure, but there are no ways around it. Bonus points if you can burn their mana with stuff like Distracting Weapon and Magic Arrow.
___________________________________________________________________________________________________________________________________________________________________
___________________________________________________________________________________________________________________________________________________________________
As you have seen, there is plenty to know and learn about Blackfire Deep. As mentioned before, a lot of the information here is hearsay. I never did any data mining to obtain all of these information, so there will be plenty of errors. If you happen to notice some of these errors, dead links or similar, please let me know. Any suggestions, critisicm, questions, all are welcome. You can leave them all in this thread, or join us at Gaia's Retaliation Discord channel and discuss them more directly.
I hope that some of information presented here was useful to you and that it will help you make better Blackfire Deep player, and until we are in a Blackfire party together, good luck and have fun.
___________________________________________________________________________________________________________________________________________________________________
Complete guide to Blackfire Deep
___________________________________________________________________________________________________________________________________________________________________Changelog
18. 2. 2017. - posted original guide
Table of contents
Introduction
Rewards
General strategy
- Before we get started
- Importance of good souls
- Time limit
- Pet pull/merc pull
- Minion control
- Agroing multiple packs and spatial awareness
- Communication
- Bosses and treasure chests
- Rods of Summoning
- Resurrection rods
- Double Resurrection
- Map layouts Currently not available
- Berserker/Crusader
- Druid/Hunter
- Assassin/Bard
- Necromancer/Sorcerer
- Bishop/Monk
- Hexblade
- Psion
- Conclusion - Proper team composition
- Sonic Blades
- Skeleton Archers
- Enrage
- Heaven's Edge, Fist Flurry, Magma Wave
- Earthquake
- Ground Stomp, Flame Nova
- Debris
- Mark of the Vampire
- Spell Mirror, Mark of Chaos
- Heal, Flash Heal
___________________________________________________________________________________________________________________________________________________________________
Introduction
___________________________________________________________________________________________________________________________________________________________________
Disclaimer
Welcome, fellow player! The fact that you are here probably means that you are interested in Blackfire Deep in one way or another. This guide will serve as your stepping stone and information source should you decide to join us in exploring the depths of this dungeon. It is also meant to be the place where you will get all information about Blackfire Deep without any external sources required.
You should understand, however, that this guide is a work in progress, and due to the nature of the dungeon, the difference in experience of multiple players contributing in writing this guide, errors in memory of contributors etc, it will probably remain forever a work in progress. Blackfire Deep is the most difficult part of Gaia's Retaliation and has the most steep learning curve of any content you will find in this RPG. It is impossible to give exception to every rule and prepare you for everything that game can throw at you. It should, however, give you good head start whether you are a part of a small group of players playing on LAN or simply a new player wanting to join a group interested in Blackfire raids. In case you are looking for an active community to play with, consider joining Gaia's Retaliation discord channel Discord.
The amount of wipes required to get this information to you was high, but you don't have to repeat all the mistakes we ever made. We hope that you will find this information useful and have fun while exploring this dungeon. If you are interested in a specific part of the guide you can access it easily via links to those sections through table of contents, but it is recommend that you read the entire thing. With this small disclaimer out of our way...
___________________________________________________________________________________________________________________________________________________________________
What is Blackfire Deep?
Blackfire Deep is a fully randomized dungeon heavily inspired by old school, rouge-like genre. When you enter, your level is reset to 1 and you fight and kill mobs to get experience, items and progress as far as possible. The dungeon has rewards different from anything that can drop in the outside world and has very unique gameplay. Everything is randomized - floors, tilesets, mobs skills, bosses and item drops. Because of its randomness, replay value is very high and no raid will be the same as one before. As you progress through floors in dungeon, mob strength scales as well as yours, making it always challenging. Mobs get assigned randomized hp/ap/sp depending on the floor level, as well as skills from a large pool of skills taken from all outside areas of Gaia’s Retaliation, so you should be familiar with most of them. As you progress deeper and deeper into the dungeon, chances of finding rewards increases exponentially so every additional floor greatly increases the chance of finding your shiny item, but it also increases the chance of getting wiped. Knowing when to call it a day, pick your loot and leave is something you will likely learn the hard way.
___________________________________________________________________________________________________________________________________________________________________
Rules
- When you enter the dungeon your level is reset to 1 and you lose all items (don't worry though, when you exit the dungeon you’ll get everything back)
- When you start as an advanced class you will be level 1 of that advanced class; you won't revert to base class (you stay as level 1 Assassin, you don't become Thief)
- You can use your souls inside the dungeon (more on that later)
- You cannot save while inside the dungeon
- You can find Keystones that serve as pseudo-savepoints and as the mechanic to take your loot to the outside world (more on that later)
- When you enter the dungeon with a green Keystone you will start on floor 10 with level 18 character, and floor 20 with lvl 28 character when using a blue Keystone
- Encounters with mobs and bosses have no reset range inside the dungeon; if you enter combat, you either kill them or you die
- If a party member dies and you have no means of resurrecting him, he's out and cannot take any loot to the outside world
- Party wipe is considered game over
- Only 5 people (+1 mercenary) can be inside Blackfire Deep; you cannot play with 6 player
- In order to progress to the next floor, the entire party needs to stand inside the Circle of Power; if there are people afk or tombstones of dead people on the same floor, you cannot progress
___________________________________________________________________________________________________________________________________________________________________
Why should I play Blackfire Deep?
There are plenty of reasons. When you get thrown into a situation that isn't predictable, you need to improvize a lot with minimum resources available. As a result, players playing Blackfire Deep will greatly improve their understanding of the game and their playing skills. It's not a surprise that the best players of Gaia’s Retaliation have spent many hours in Blackfire Deep. Add in the fact that every run will be different from the previous one, it is fun, non-repetitive content, and you will have lots of reasons to play. Last but not least, there are plenty of rewards that are exclusive to Blackfire Deep, and we will cover them in next section.
___________________________________________________________________________________________________________________________________________________________________
Rewards
___________________________________________________________________________________________________________________________________________________________________The reward section of this guide will focus on items that you can take outside Blackfire Deep and use them in the outside world. Some are exclusive to this dungeon, like Collectibles and new legendary items. Things like legendary souls can be found even in the outside world but inside Blackfire you have much better chances of actually finding them. There are plenty of rewards to anyone's liking.
___________________________________________________________________________________________________________________________________________________________________
Keystones and why they are important
Keystones are possibly the most confusing part of Blackfire Deep for any newcomer, so make sure to carefully read this part of the guide and understand it well.
These are Keystones.
They come in two qualities - green Keystone and blue (Greater) Keystone. Now couple of bullet points regarding Keystones:
- You can find Keystones only in Blackfire Deep
- Green Keystones can be found on floor 10 and higher
- Blue Keystones can be found on floor 20 and higher
- Keystones drop only from regular mobs (with 4-5% chance to drop) ; they don't drop from bosses, chests, shops or Summoning Rods
- Number of Keystones that can drop is equal to the number of players that start the dungeon raid - that means if someone disconnects during the raid, one person can get an additional Keystone as well
- When entering Blackfire Deep with a green Keystone you will start on floor 10 with level 18 character, a shop with basic items to help you and a mercenary shop
- When entering Blackfire Deep with a blue Keystone you will start on floor 20 with level 28 character, a shop with basic items to help you and a mercenary shop
- These shops will contain one Rod of Ressurection, two healing potions and items depending on your class
- The first person to enter the dungeon will determine the starting floor for the whole party
- If one person used Keystone to enter the dungeon, in order for other people to enter they will also need to have a Keystone of equal quality
- You can have your Keystone in your inventory or in your backpack when entering the dungeon
- Keystones can also be used as means to take whatever items you found inside the dungeon to the outside world; to do so, simply click to use the Keystone as you would for a consumable item
- Using a Keystone to take your items to the outside world will destroy every Keystone you have in your character inventory and backpack (Keystones saved inside your personal stash will be fine) so taking multiple Keystones to Blackfire raid makes no sense
- Souls are the only items you can take to the outside world without using Keystones; for all others (regular items, ethereals, legendary items and collectibles) you will have to use your Keystone
- You cannot use the Keystones while in combat to take items to the outside world
- If you want to leave the raid without using your Keystone (because nothing of value was found) you can do so by simply teleporting to the outside, or dying and then resurrecting manually on a gravestone. Do not, and I repeat, DO NOT CLICK ON THE KEYSTONE unless you want to bring some item to the outside. People have done this mistake on more than one occasion and wasted their Keystones.
This should cover it. As for whether it's worth to use a Keystone, I can only give you a couple of tips. It's always a good idea to take an ethereal item to the outside. It is generally not worth it to spend a Keystone on a single level 25 Trinket, but is well worth it for multiple of them or for ones for characters you care about the most. It's always good to use a Keystone to take even a single Banner or Legendary item. You will have to decide your priorities yourself, just keep in mind that if you use your only green Keystone, you will not be able to advance to get the blue Keystone, but will rather need to do a keyless run all over again, so it's a good idea to keep your first green Keystone in your personal stash without using it unless the loot is really good.
___________________________________________________________________________________________________________________________________________________________________
Ethereal items
Ethereal items are unique in two ways:
First, they scale with character level. This is much less relevant in the grand scheme of things, but if you manage to get an ethereal item outside of Blackfire Deep on low level characterl, you will be able to use it from level 1 onwards.
Second, and more important, you can actually save those items (using the Keystones) and then use them inside Blackfire Deep; they do not disappear when you enter into the dungeon. This makes them very useful. The instances where you'd rather use the item dropped from mobs rather than your ethereal are rare, and because they are leveling with you, you can use them either on level 1, 18, 28 or 50; they will always be good.
Example:
Ethereal Platebody
Armor
Type: Mail
HP: +2 *lvl
Ar: +0.7 *lvl
Int: +0.2 *lvl
Str: +0.2 *lvl
Ev: +3%
AIIR: +7%
When you enter dungeon using blue Keystone (level 28) item will have following stats:
HP: +56
Ar: +19,6
Int: +5,6
Str: +5,6
Ev: +3%
AIIR: +7%
These are amazing stats given that most common alternative to Platebody would be Reinforced plate that has following stats:
HP: +50
Ar: +17
Str: +6
Massive difference. Add in the fact that with every increased level your ethereal will scale more and more. I could continue naming examples but in short, ethereal items are balanced to be more or less as powerful as Whitepine tier items in outside world. With scaling like that, you will rarely need to pick anything up from ground, which will leave room for gearing up some of party members with lower quality gear.
Although the function of the ethereal items is being used as best items in Blackfire Deep, it isn’t bad to use them in the outside world either. Aforementioned Ethereal Platebody will be the best armor slot item for tank Hexblades that cannot use Templar's Platebody which is exclusive to the Crusader class. There are more examples of this, but this is one of the more obvious ones.
Every class can use total of 3 ethereals - helmet, armor and their class specific item. If your character has all 3 of those, you will see a big difference between such character and one that has no ethereals. Collect them, and they will help you greatly in reaching further depths of the dungeon and claiming other rewards.
You can only find ethereals from treasure chests and bosses on any floor of the dungeon as early as level 1. They do not drop from regular mobs and you cannot find them in shops.
Ethereal Platebody
Armor
Type: Mail
HP: +2 *lvl
Ar: +0.7 *lvl
Int: +0.2 *lvl
Str: +0.2 *lvl
Ev: +3%
AIIR: +7%
Ethereal Hauberk
Armor
Type: Mail
HP: +1.0 *lvl
Ap: +0.16 *lvl
Ar: +0.5 *lvl
Str: +0.2 *lvl
Agi: +0.2 *lvl
Cr: +3%
Ethereal Visor
Helmet
Type: Mail
HP: +0.7 *lvl
Ar: +0.3 *lvl
Ap: +0.16 *lvl
Str: +0.2 *lvl
Cr: +3%
Ethereal Helmet
Helmet
Type: Mail
HP: +1 *lvl
Ar: +0.4 *lvl
Str: +0.12 *lvl
Int: +0.12 *lvl
Ev: +4%
AIIR: +3%
Armor
Type: Mail
HP: +2 *lvl
Ar: +0.7 *lvl
Int: +0.2 *lvl
Str: +0.2 *lvl
Ev: +3%
AIIR: +7%
Ethereal Hauberk
Armor
Type: Mail
HP: +1.0 *lvl
Ap: +0.16 *lvl
Ar: +0.5 *lvl
Str: +0.2 *lvl
Agi: +0.2 *lvl
Cr: +3%
Ethereal Visor
Helmet
Type: Mail
HP: +0.7 *lvl
Ar: +0.3 *lvl
Ap: +0.16 *lvl
Str: +0.2 *lvl
Cr: +3%
Ethereal Helmet
Helmet
Type: Mail
HP: +1 *lvl
Ar: +0.4 *lvl
Str: +0.12 *lvl
Int: +0.12 *lvl
Ev: +4%
AIIR: +3%
Ethereal Hide
Armor
Type: Leather
HP: +0.6 *lvl
MP: +0.6 *lvl
Ar: +0.4
Agi: +0.1 *lvl
Int: +0.2 *lvl
ArP: +0.3 *lvl
Sp: +0.2 *lvl
Ethereal Mantle
Armor
Type: Leather
HP: +0.8 *lvl
Ap: +0.16
Ar: +0.4
Agi: +0.3 *lvl
ArP: +0.2 *lvl
Cr: +2%
Ethereal Deer Mask
Helmet
Type: Leather
HP: +0.4 *lvl
MP: +0.6 *lvl
Ar: +0.2 *lvl
Sp: +0.3 *lvl
Int: +0.16 *lvl
Hst: +5%
Ethereal Hawk Mask
Helmet
Type: Leather
HP: +0.5 *lvl
Ap: +0.2 *lvl
Ar: +0.2 *lvl
Agi: +0.16 *lvl
Crit: +4%
Armor
Type: Leather
HP: +0.6 *lvl
MP: +0.6 *lvl
Ar: +0.4
Agi: +0.1 *lvl
Int: +0.2 *lvl
ArP: +0.3 *lvl
Sp: +0.2 *lvl
Ethereal Mantle
Armor
Type: Leather
HP: +0.8 *lvl
Ap: +0.16
Ar: +0.4
Agi: +0.3 *lvl
ArP: +0.2 *lvl
Cr: +2%
Ethereal Deer Mask
Helmet
Type: Leather
HP: +0.4 *lvl
MP: +0.6 *lvl
Ar: +0.2 *lvl
Sp: +0.3 *lvl
Int: +0.16 *lvl
Hst: +5%
Ethereal Hawk Mask
Helmet
Type: Leather
HP: +0.5 *lvl
Ap: +0.2 *lvl
Ar: +0.2 *lvl
Agi: +0.16 *lvl
Crit: +4%
Ethereal Vestment
Armor
Type: Cloth
HP: +1.5 *lvl
Ap: +0.5
Ar: +0.6
Int: +0.16 *lvl
Agi: +0.3 *lvl
Ev: +5%
AIIR: +5%
Ethereal Attire
Armor
Type: Cloth
HP: +0.6 *lvl
MP: +0.4 *lvl
Ar: +0.3
Int: +0.3 *lvl
Sp: +0.2 *lvl
Hst: +6%
Cr: +3%
Ethereal Circlet
Helmet
Type: Cloth
HP: +0.4 *lvl
MP: +0.8 *lvl
Ar: +0.12 *lvl
Sp: +0.2 *lvl
Int: +0.16 *lvl
Crit: +3%
Hst: +4%
Ethereal Scarf
Helmet
Type: Cloth
HP: +1.2 *lvl
Ar: +0.3 *lvl
Agi: +0.16 *lvl
Int: +0.1 *lvl
Ev: +4%
Armor
Type: Cloth
HP: +1.5 *lvl
Ap: +0.5
Ar: +0.6
Int: +0.16 *lvl
Agi: +0.3 *lvl
Ev: +5%
AIIR: +5%
Ethereal Attire
Armor
Type: Cloth
HP: +0.6 *lvl
MP: +0.4 *lvl
Ar: +0.3
Int: +0.3 *lvl
Sp: +0.2 *lvl
Hst: +6%
Cr: +3%
Ethereal Circlet
Helmet
Type: Cloth
HP: +0.4 *lvl
MP: +0.8 *lvl
Ar: +0.12 *lvl
Sp: +0.2 *lvl
Int: +0.16 *lvl
Crit: +3%
Hst: +4%
Ethereal Scarf
Helmet
Type: Cloth
HP: +1.2 *lvl
Ar: +0.3 *lvl
Agi: +0.16 *lvl
Int: +0.1 *lvl
Ev: +4%
Ethereal Slicer
Misc
Type: Offhand Weapon
Aspd: +15%
HP: +0.5 *lvl
Ap: +0.3 *lvl
Agi: +0.2 *lvl
ArP: +0.1 *lvl
Ethereal Chain
Misc
Type: Chain
HP: +0.4 *lvl
MP: +0.3 *lvl
Agi: +0.16 *lvl
Str: +0.16 *lvl
Crit: +3%
Ethereal Arrows
Misc
Type: Quiver
HP: +0.6 *lvl
MP: +0.4 *lvl
Ap: +0.16 *lvl
Agi: +0.16 *lvl
ArP: +0.3 *lvl
Ethereal Drums
Misc
Type: Instrument
HP: +0.6 *lvl
Str: +0.16 *lvl
Agi: +0.2 *lvl
Cr: +3%
Aura: Increases Attack Speed by 7%
Ethereal Crystal
Misc
Type: Gem
HP: +0.4 *lvl
MP: +0.4 *lvl
Sp: +0.16 *lvl
Int: +0.1 *lvl
Hst: +7%
Ethereal Bulwark
Misc
Type: Shield
Block: 10%
HP: +1.2 *lvl
Ar: +0.3 *lvl
Str: +0.1 *lvl
Int: +0.1 *lvl
Ev: +4%
AIIR: +3%
Ethereal Manuscript
Misc
Type: Book
HP: +0.3 *lvl
MP: +0.5 *lvl
Sp: +0.16 *lvl
Int: +0.1 *lvl
Hst: +5%
Ethereal Skull
Misc
Type: Skull
HP: +0.6 *lvl
Sp: +0.2 *lvl
Int: +0.1 *lvl
Crit: +4%
Hst: +6%
Ethereal Bead
Misc
Type: Relic
Aspd: +15%
HP: +1.2 *lvl
Ar: +0.3 *lvl
Agi: +0.1 *lvl
Int: +0.1 *lvl
Ev: +4%
AIIR: +3%
Ethereal Stake
Misc
Type: Totem
HP: +0.4 *lvl
MP: +0.6 *lvl
Sp: +0.1 *lvl
Int: +0.2 *lvl
ArP: +0.3 *lvl
Ethereal Trophy
Misc
Type: Trophy
HP: +0.4 *lvl
AP: +0.16 *lvl
Str: +0.1 *lvl
Cr: +4%
Misc
Type: Offhand Weapon
Aspd: +15%
HP: +0.5 *lvl
Ap: +0.3 *lvl
Agi: +0.2 *lvl
ArP: +0.1 *lvl
Ethereal Chain
Misc
Type: Chain
HP: +0.4 *lvl
MP: +0.3 *lvl
Agi: +0.16 *lvl
Str: +0.16 *lvl
Crit: +3%
Ethereal Arrows
Misc
Type: Quiver
HP: +0.6 *lvl
MP: +0.4 *lvl
Ap: +0.16 *lvl
Agi: +0.16 *lvl
ArP: +0.3 *lvl
Ethereal Drums
Misc
Type: Instrument
HP: +0.6 *lvl
Str: +0.16 *lvl
Agi: +0.2 *lvl
Cr: +3%
Aura: Increases Attack Speed by 7%
Ethereal Crystal
Misc
Type: Gem
HP: +0.4 *lvl
MP: +0.4 *lvl
Sp: +0.16 *lvl
Int: +0.1 *lvl
Hst: +7%
Ethereal Bulwark
Misc
Type: Shield
Block: 10%
HP: +1.2 *lvl
Ar: +0.3 *lvl
Str: +0.1 *lvl
Int: +0.1 *lvl
Ev: +4%
AIIR: +3%
Ethereal Manuscript
Misc
Type: Book
HP: +0.3 *lvl
MP: +0.5 *lvl
Sp: +0.16 *lvl
Int: +0.1 *lvl
Hst: +5%
Ethereal Skull
Misc
Type: Skull
HP: +0.6 *lvl
Sp: +0.2 *lvl
Int: +0.1 *lvl
Crit: +4%
Hst: +6%
Ethereal Bead
Misc
Type: Relic
Aspd: +15%
HP: +1.2 *lvl
Ar: +0.3 *lvl
Agi: +0.1 *lvl
Int: +0.1 *lvl
Ev: +4%
AIIR: +3%
Ethereal Stake
Misc
Type: Totem
HP: +0.4 *lvl
MP: +0.6 *lvl
Sp: +0.1 *lvl
Int: +0.2 *lvl
ArP: +0.3 *lvl
Ethereal Trophy
Misc
Type: Trophy
HP: +0.4 *lvl
AP: +0.16 *lvl
Str: +0.1 *lvl
Cr: +4%
___________________________________________________________________________________________________________________________________________________________________
Legendary items
Legendary items are the ultimate reward of Blackfire Deep. They are extremely hard to find because they drop only from bosses level 25 or higher. They do not drop from regular mobs, treasure chests, shops or in any other manner. So far it hasn't been reported that you can steal legendary item from level 25+ bosses either.
The odds of getting a random legendary item ranges from 1:16 on level 25 up to 1:8 on level 50. Expect that to get a random legendary item you will have to kill ~12 bosses on average, and then hope it's one for your class. Only the most organized and the most persistent parties will be able to get some of these prizes. They are the best in slot items for most builds out there, but more than anything, they are status symbols.
Gift of Karath
Misc - Level 50
Type: Offhand Weapon
HP: +35
AP: +17
Aspd: +15%
Agi: +12
Cr: +5%
Use: Shadow Sting
Misc - Level 50
Type: Offhand Weapon
HP: +35
AP: +17
Aspd: +15%
Agi: +12
Cr: +5%
Use: Shadow Sting
Golden Aegis
Misc - Level 50
Type: Shield
Block: 10%
HP: +70
Ar: +25
Ev: +4%
Str: +8
Int: +8
Hst: +10%
ALLR: +7%
Use: Elemental Protection
Misc - Level 50
Type: Shield
Block: 10%
HP: +70
Ar: +25
Ev: +4%
Str: +8
Int: +8
Hst: +10%
ALLR: +7%
Use: Elemental Protection
Soul Reaper
Weapon - Level 50
Type: Weapon
Aspd: -30%
HP: +50
SP: +15
Int: +8
Str: +8
Crit: +4%
Hst: +7%
Shadow Dmg: 55, 50%
Passive: Increases attack speed by 2% with every attack.
Stacks up to 30 times
Weapon - Level 50
Type: Weapon
Aspd: -30%
HP: +50
SP: +15
Int: +8
Str: +8
Crit: +4%
Hst: +7%
Shadow Dmg: 55, 50%
Passive: Increases attack speed by 2% with every attack.
Stacks up to 30 times
The Everlasting Ash
Misc - Level 50
Type: Totem
HP: +50
Ar: +7
MP: +35
Int: +17
Cr: +4%
Hst: +8%
ALLR: +4%
Use: Summon Forest Strider
Misc - Level 50
Type: Totem
HP: +50
Ar: +7
MP: +35
Int: +17
Cr: +4%
Hst: +8%
ALLR: +4%
Use: Summon Forest Strider
The Eye of Nocturna
Weapon - Level 50
Type: Staff
HP: +50
MP: +40
SP: +7
Int: +:22
Hst: +12%
Use: Mass Dispel Magic
Weapon - Level 50
Type: Staff
HP: +50
MP: +40
SP: +7
Int: +:22
Hst: +12%
Use: Mass Dispel Magic
The Siren's Lament
Armor - Level 50
Can only be used by Bards
Type: Leather
HP: +50
MP: +30
Ar: +20
Agi: +15
Ev: +4
Cr: +4%
ALLR: +5%
Use: Moonlight Waltz
Armor - Level 50
Can only be used by Bards
Type: Leather
HP: +50
MP: +30
Ar: +20
Agi: +15
Ev: +4
Cr: +4%
ALLR: +5%
Use: Moonlight Waltz
___________________________________________________________________________________________________________________________________________________________________
Legendary (red) souls
Legendary or red souls are highest quality souls available in Gaia’s Retaliation. There is a total of 28 legendary souls, and they all have fixed stats. The difference between blue and red souls are auras. Red souls, other than the 3 stats that blue souls have, also have a small aura bonus that affects your whole party, or applies a negative debuff to mobs around you.
For a full list of legendary souls and their auras check this link.
As you can see, most of these souls are useful. Some are more versatile than others, and some are easily the best souls available. The problem with red souls is that they are extremely rare. The odds of getting a red soul are 1:400 when you kill level 27 boss or higher (d3 onwards). You can reduce odds to 1:296 by using Soulseeker legendary ring, but theodds for red souls are still horrible. The idea of killing 300 bosses for just one of those can be very off-putting to most players.
Enter Blackfire Deep. One of the first features, before Blackfire even had a drop list, was increased chances of finding legendary souls. First, they can drop only from bosses and treasure chests. The odds of getting a red soul ranges from 1.5% on floor 1, and goes all the way to 33% on floor 50. But let's take a look at a realistic scenario:
You start Blackfire raid using blue Keystone on floor 20. By that time, chances of getting legendary soul from boss kill or treasure chest are anywhere between 8% to 11%. That's roughly 1:10. And as you progress deeper into the dungeon the odds will only increase.
1:10 for Blackfire compared to 1:400 in the outside world. Let that sink in.
It goes without saying that Blackfire Deep is the best place in the game for farming red souls, and you can expect to average one red soul per one good blue Keystone raid. If you want to max out your vault, you will want to visit Blackfire Deep a lot.
___________________________________________________________________________________________________________________________________________________________________
Archives/Collectibles
With the introduction of Blackfire Deep, a new area was added to the right of the Soul Vault. These are Archives. As you can see, Archives contain 12 statues, one for each class, and each statue has two inventory slots. In these slots you can place Collectibles – a special type of items found only in Blackfire Deep. They have level requirement of 15, 25 and 40, and once your character has said levels they become active, inside or outside Blackfire Deep. Once you bring some Collectibles outside of the dungeon by using a Keystone, simply place them in their place inside Archives. Collectibles inside Archives provide you with minor or decent stats, depending on their quality. In a way, you can consider Archives to be additional inventory slots for your character with specific items to be stored there. You can only have one copy of each Collectible in your Archives and they can drop from everything in Blackfire Deep, be it bosses, trash mobs, treasure chests or Summoning Rods, and you can even buy them in shops.
Collectibles come in 3 flavors - Badge, Trinket and Banner.
Badges have required level of 15. They are the weakest, and most of the time simply aren't worth your effort, or your Keystones to bring them out. They usually drop between floors 7 and 14, after which we get additional Collectibles available. Each class has two Badges available.
Trinkets have required level of 25, and drop usually on floors 15 - 25. That means you can get some of them even when doing green Keystone raid. They come in two quality tiers - green and blue. Blue Trinket is higher quality one and they tend to give you very good stats - endgame worthy.
Example Trinket:
Rejuvenating Trinket – Level 25
Type: Druid
Hp: +25
Sp: +3
Int: +3
Banners have high level requirement of 40 and are hardest to get by far. Players can max out on Trinkets relatively easy, but Banners are in their own tier. They drop only from mobs level 40+, which is roughly floor 33 - 34. Not many parties get to such high floors so maxing out on Banners can take a long time. They are the highest quality Collectibles, and when coupled with blue quality level 25 Trinket, they can give you stats worth slightly less than Acessory item slot.
Example Banner:
Shaman's Banner – Level 40
Type: Druid
Hp: +25
Sp: +4
Agi: +4
Int: +4
As you can see, combined blue Trinket and Banner add following stats to your Druid (comparable to ~75% worth of your Accessory):
Hp: +50
Sp: +7
Agi: +4
Int: +7
One thing should be said about Collectibles and Blackfire Deep in general. This content is completely optional and the game won't be balanced around you having full Archives or even pieces of it. They give you extra leeway in building your character, slightly higher dps, tankiness, or healing power. However they do not take up your inventory spaces while they are adding extra stats. Even in future content when Blackfire legendary items become obsolete and weak, Collectibles will always add extra stats and will always be useful. Anyone planning for future endgame and character optimization should keep this in mind.
Feline Badge – Level 15
Type: Hunter
Agi: +3
Moon Badge – Level 15
Type: Hunter
Mp: +15
Precision Trinket – Level 25
Type: Hunter
Ap: +3
Agi: +3
Sniper Trinket – Level 25
Type: Hunter
Ap: +3
Agi: +4
Crit: +2%
Predator Banner – Level 40
Type: Hunter
Mp: +20
Ap: +5
Agi: +4
Crit: +3%
Type: Hunter
Agi: +3
Moon Badge – Level 15
Type: Hunter
Mp: +15
Precision Trinket – Level 25
Type: Hunter
Ap: +3
Agi: +3
Sniper Trinket – Level 25
Type: Hunter
Ap: +3
Agi: +4
Crit: +2%
Predator Banner – Level 40
Type: Hunter
Mp: +20
Ap: +5
Agi: +4
Crit: +3%
Floral Badge – Level 15
Type: Druid
Hp: +15
Nature Badge – Level 15
Type: Druid
Int: +2
Growth Trinket – Level 25
Type: Druid
Sp: +3
Int: +2
Rejuvenating Trinket – Level 25
Type: Druid
Hp: +25
Sp: +3
Int: +3
Shaman's Banner – Level 40
Type: Druid
Hp: +25
Sp: +4
Agi: +4
Int: +4
Type: Druid
Hp: +15
Nature Badge – Level 15
Type: Druid
Int: +2
Growth Trinket – Level 25
Type: Druid
Sp: +3
Int: +2
Rejuvenating Trinket – Level 25
Type: Druid
Hp: +25
Sp: +3
Int: +3
Shaman's Banner – Level 40
Type: Druid
Hp: +25
Sp: +4
Agi: +4
Int: +4
Vigilance Badge – Level 15
Type: Crusader
Int: +3
Soldier’s Badge – Level 15
Type: Crusader
Ev: +2%
Enhancing Trinket – Level 25
Type: Crusader
Ar: +4
Int: +3
Smiting Trinket – Level 25
Type: Crusader
Ar: +4
Str: +4
Int: +4
Heroic Banner – Level 40
Type: Crusader
Hp: +25
Ar: +5
Str: +5
Int: +5
Type: Crusader
Int: +3
Soldier’s Badge – Level 15
Type: Crusader
Ev: +2%
Enhancing Trinket – Level 25
Type: Crusader
Ar: +4
Int: +3
Smiting Trinket – Level 25
Type: Crusader
Ar: +4
Str: +4
Int: +4
Heroic Banner – Level 40
Type: Crusader
Hp: +25
Ar: +5
Str: +5
Int: +5
Powerful Badge – Level 15
Type: Berserker
Ap: +3
Wounding Badge – Level 15
Type: Berserker
Crit: +1%
Raging Trinket – Level 25
Type: Berserker
Ap: +3
Str: +3
Slaughtering Trinket – Level 25
Type: Berserker
Ap: +4
Str: +3
Crit: +2%
Savage Banner – Level 40
Type: Berserker
Ar: +4
Ap: +5
Str: +4
Crit: +3%
Type: Berserker
Ap: +3
Wounding Badge – Level 15
Type: Berserker
Crit: +1%
Raging Trinket – Level 25
Type: Berserker
Ap: +3
Str: +3
Slaughtering Trinket – Level 25
Type: Berserker
Ap: +4
Str: +3
Crit: +2%
Savage Banner – Level 40
Type: Berserker
Ar: +4
Ap: +5
Str: +4
Crit: +3%
Dark Badge – Level 15
Type: Necromancer
Crit: +2%
Bone Badge – Level 15
Type: Necromancer
Int: +2
Black Trinket – Level 25
Type: Necromancer
Int: +3
Crit: +2%
Skeletal Trinket – Level 25
Type: Necromancer
Int: +4
Hst: +3%
Crit: +3%
Undead Banner – Level 40
Type: Necromancer
Hp: +25
Sp: +5
Int: +5
Crit: +4%
Type: Necromancer
Crit: +2%
Bone Badge – Level 15
Type: Necromancer
Int: +2
Black Trinket – Level 25
Type: Necromancer
Int: +3
Crit: +2%
Skeletal Trinket – Level 25
Type: Necromancer
Int: +4
Hst: +3%
Crit: +3%
Undead Banner – Level 40
Type: Necromancer
Hp: +25
Sp: +5
Int: +5
Crit: +4%
Glowing Badge – Level 15
Type: Sorcerer
Mp: +15
Burning Badge – Level 15
Type: Sorcerer
Int: +2
Sparkling Trinket – Level 25
Type: Sorcerer
Int: +3
Hst: +3%
Storming Trinket – Level 25
Type: Sorcerer
Sp: +4
Int: +2
Crit: +2%
Arcane Banner – Level 40
Type: Sorcerer
Sp: +4
Int: +4
Crit: +3%
Hst: +4%
Type: Sorcerer
Mp: +15
Burning Badge – Level 15
Type: Sorcerer
Int: +2
Sparkling Trinket – Level 25
Type: Sorcerer
Int: +3
Hst: +3%
Storming Trinket – Level 25
Type: Sorcerer
Sp: +4
Int: +2
Crit: +2%
Arcane Banner – Level 40
Type: Sorcerer
Sp: +4
Int: +4
Crit: +3%
Hst: +4%
Hardened Badge – Level 15
Type: Monk
Ar: +3
Boxing Badge – Level 15
Type: Monk
Agi: +2
Rockfist Trinket – Level 25
Type: Monk
Ar: +3
Agi :+3
Faithful Trinket – Level 25
Type: Monk
Ar: +4
Agi: +4
Int: +3
Pilgrim’s Banner – Level 40
Type: Monk
Ar: +5
Agi: +4
Int: +4
Ev: +3%
Type: Monk
Ar: +3
Boxing Badge – Level 15
Type: Monk
Agi: +2
Rockfist Trinket – Level 25
Type: Monk
Ar: +3
Agi :+3
Faithful Trinket – Level 25
Type: Monk
Ar: +4
Agi: +4
Int: +3
Pilgrim’s Banner – Level 40
Type: Monk
Ar: +5
Agi: +4
Int: +4
Ev: +3%
Blessed Badge – Level 15
Type: Bishop
Hst: +3%
Holy Badge – Level 15
Type: Bishop
Sp: +3
Mending Trinket – Level 25
Type: Bishop
Int: +3
Sp: +3
Savior’s Trinket – Level 25
Type: Bishop
Mp: +15
Sp: +4
Int: +3
Heavenly Banner – Level 40
Type: Bishop
Mp: +20
Sp: +4
Int: +4
Hst: +4%
Type: Bishop
Hst: +3%
Holy Badge – Level 15
Type: Bishop
Sp: +3
Mending Trinket – Level 25
Type: Bishop
Int: +3
Sp: +3
Savior’s Trinket – Level 25
Type: Bishop
Mp: +15
Sp: +4
Int: +3
Heavenly Banner – Level 40
Type: Bishop
Mp: +20
Sp: +4
Int: +4
Hst: +4%
Dexterous Badge – Level 15
Type: Assassin
Agi: +2
Striking Badge – Level 15
Type: Assassin
Ap: +3
Deadly Trinket – Level 25
Type: Assassin
Ap: +3
Crit: +2%
Murderous Trinket – Level 25
Type: Assassin
Ap: +4
Agi: +3
Crit: +2%
Shadow Banner – Level 40
Type: Assassin
Ap: +4
Agi: +5
ArP: +4
Crit: +3%
Type: Assassin
Agi: +2
Striking Badge – Level 15
Type: Assassin
Ap: +3
Deadly Trinket – Level 25
Type: Assassin
Ap: +3
Crit: +2%
Murderous Trinket – Level 25
Type: Assassin
Ap: +4
Agi: +3
Crit: +2%
Shadow Banner – Level 40
Type: Assassin
Ap: +4
Agi: +5
ArP: +4
Crit: +3%
Stinging Badge – Level 15
Type: Bard
Crit: +2%
Training Badge – Level 15
Type: Bard
Agi: +2
Humming Trinket – Level 25
Type: Bard
Ap: +3
Agi: +3
Gambler Trinket – Level 25
Type: Bard
Ap: +3
Agi: +2
Crit: +4%
Musical Banner – Level 40
Type: Bard
Ap: +5
Agi: +4
ArP: +4
Crit: +3%
Type: Bard
Crit: +2%
Training Badge – Level 15
Type: Bard
Agi: +2
Humming Trinket – Level 25
Type: Bard
Ap: +3
Agi: +3
Gambler Trinket – Level 25
Type: Bard
Ap: +3
Agi: +2
Crit: +4%
Musical Banner – Level 40
Type: Bard
Ap: +5
Agi: +4
ArP: +4
Crit: +3%
Healthy Badge – Level 15
Type: Hexblade
Hp: +25
Metallic Badge – Level 15
Type: Hexblade
Str: +3
Dominating Trinket – Level 25
Type: Hexblade
Str: +3
Int: +3
Momentous Trinket – Level 25
Type: Hexblade
Hp: +25
Str: +4
Int: +4
Bewitching Banner – Level 40
Type: Hexblade
Hp: +25
Ar: +5
Str: +5
Int: +5
Type: Hexblade
Hp: +25
Metallic Badge – Level 15
Type: Hexblade
Str: +3
Dominating Trinket – Level 25
Type: Hexblade
Str: +3
Int: +3
Momentous Trinket – Level 25
Type: Hexblade
Hp: +25
Str: +4
Int: +4
Bewitching Banner – Level 40
Type: Hexblade
Hp: +25
Ar: +5
Str: +5
Int: +5
Shining Badge – Level 15
Type: Psion
Int: +2
Bursting Badge – Level 15
Type: Psion
Crit: +2%
Phasing Trinket – Level 25
Type: Psion
Int: +3
Hp: +25
Manipulative Trinket – Level 25
Type: Psion
Sp: +3
Int: +3
Hst: +4%
Siren’s Banner – Level 40
Type: Psion
Sp: +4
Int: +5
Crit: +3%
Hst: +4%
Type: Psion
Int: +2
Bursting Badge – Level 15
Type: Psion
Crit: +2%
Phasing Trinket – Level 25
Type: Psion
Int: +3
Hp: +25
Manipulative Trinket – Level 25
Type: Psion
Sp: +3
Int: +3
Hst: +4%
Siren’s Banner – Level 40
Type: Psion
Sp: +4
Int: +5
Crit: +3%
Hst: +4%
___________________________________________________________________________________________________________________________________________________________________
Mounts
Mounts are self-explanatory. You get a cool beast to use as a Mount. Blackfire has a decent selection of those and some of them are really cool. Want to pimp your character? This is how you do it.
[N/A]
___________________________________________________________________________________________________________________________________________________________________
General strategy
___________________________________________________________________________________________________________________________________________________________________Strategy outlined in this section is something that every member of the team should know; namely, how to use limited resources to best efficiency, how to increase your chances of surviving each and every encounter inside the dungeon, how to act in near-death situations and many more. This is nothing but a short compilation of strategies that Blackfire community found very efficient and beneficial to know and applied liberally and reflexively to great effect. Some strategies are very obvious while others aren't, but even the most simple/obvious ones will increase your odds of getting deeper inside the dungeon and come out with nice prizes.
___________________________________________________________________________________________________________________________________________________________________
Before we get started
Before even entering the game, you should restart Warcraft 3 and join fresh into the game without playing anything beforehand. This is to avoid desynching as well as issues you might have with your WC3 internal memory (more on that later).
For anyone using minions, such as Hunters, Druids, Necromancers or any class using a mercenary, set your minions to offensive style. You can do that by selecting your character, clicking on Game Options (hotkey Z) and adjusting your minions to "offensive" by clicking Toggle Pet Behaviour (hotkey Z as well). Next, you may switch your Auto-Engage on or off. For most characters not having Auto-Engage can be major pain, but every caster - Druid, Bishop, Necromancer or Sorcerer - should have their Auto-Engage set to off every time you enter Blackfire Deep. The reason for this is that once you are resurrected your character will attempt to attack any target in its proximity, and you don't want that for multiple reasons. For one, once you are resurrected you will have 0 mana, and you want to stay out of combat to regain your manapool. Casters are worth nothing without their mana. Autoattacking mobs to accidentally enter combat = bad. This can be especially useful if you die as a character with Resurrection spell (Bishop, Monk or Druid) and a party member resurrects you. You will stay out of combat, and even if your entire party dies, you will be out of combat with your Resurrection spell, bringing the entire team back into play from complete disaster. Every character should do this in theory, but I know how annoying it is to be an autoattacking character and needing to attack every target manually. For casters, however, you have no excuse for forgetting that.
tl;dr, after selecting your character just press Z Z U and you will be fine.
Also make sure that you use proper souls. Importance of those will be discussed in the next section as they can make or break your character.
___________________________________________________________________________________________________________________________________________________________________
Importance of good souls
Other than ethereal items, souls are the only thing that you can take inside Blackfire Deep, and as such they can be a huge game changer, especially on early levels. It's very fortunate that souls which are the best in Blackfire Deep are also very useful in the outside world.
If you look at Alex's Souls Guide you will notice that there are two types of soul bonuses - flat bonus and percentage bonus. We want flat bonuses. When you enter on level 1 with Sorcerer, you have total 6 sp and 5% crit chance. Let's look at example here:
Soul A - int int sp [all 3 with +5 flat modifiers]
Soul B - water dmg water dmg crit chance [all 3 with percentage modifiers]
Soul A - 6 base sp + 15 sp [5 int 5 int 5 sp] = 21 sp 1.05 crit chance (5% base) x 1.5 crit dmg = 22.575 dmg
Soul B - 6 base sp x 1.2 [10% wd + 10% wd] x 1.12 crit chance (5% base + 7% soul) x 1.5 crit dmg = 8.496 dmg
As you can see, using soul with flat bonuses gave us roughly 300% damage output at early levels. On higher levels there isn't as much difference as on level 1, but it's still noticeable. This is especially true for tanks - if you don't have good souls, there is no way you will hold agro away from a caster with good souls, making your entire line collapse as a result.
Same thing applies to defensive souls with one important addition. Spell haste is mandatory for any spellcaster, at least single haste affixon a defensive soul. Spell haste bonuses are very high, especially on a double spell haste soul and will seriously increase your dps/heal for any caster.
As long as you have 2 to 3 affixes on a soul with flat bonuses, you will be doing very well in Blackfire. Clearly, use stats that benefit your class the most.
tl;dr, here are soul affixes that you generally want to use in the dungeon.
Offensive souls: AP, STR, AGI, INT, SP
Defensive souls: Armor, HP, MP, SH, AIIR
___________________________________________________________________________________________________________________________________________________________________
Time limit
Yes, there is a time limit on how long you can play and thus how far you can progress. Warcraft 3 has ~1GB of internal memory. As you progress through the dungeon, new floors and new monsters are generated and it adds to total memory. Once memory goes over ~1GB, game crashes. Blackfire Deep consumes a lot of memory compared to anything else because the game needs to generate every mob, shape and layout of floors etc.
And this crash, which will inevitably get to you, (provided that you don't get wiped in some other manner) ties in everything you do. Essentially you need to be as efficient as possible. Good team composition, meaning high dps of the whole party while still being overall balanced. Don't go afk and expect the game to be waiting with the same memory. Just being in the game increases it bit by bit. As cruel as it is, sometimes it's better to kick a person that is afk a lot, rather than waiting at the end of every floor for him to catch up. It also means you don't need to kill every single mob on every single floor. As long as you are fine with your level, kill only weaker mobs, search for bosses and treasure chests and ignore behemoths with unholy amount of life. Focus on objectives. Such playstyle will come with time, but it will come.
However, you can anticipate crash to some extent and play around it. You can alt-tab and open Task Manager (control + alt + delete). In Processes tab you can find war3.exe, and read its memory. Crash usually happens around 1.100.000 K, and 99% of the time it happens when you progress in floors. That means you can usually clean entire floor without fear of the crash. If a member of your team got something really valuable, let him leave the raid, use his Keystone and take whatever he found to the outside. This is especially true for banners/legendary items.
In practice, crash will usually happen when you finish 13-16 floors or after 2.5 hours of play, depending on your kill speed. If you are extremely slow and afking a lot, you won't even get to Keystone floors. It should also be noted that the 6th person in game, one that isn't in Blackfire with you, leveling, killing mobs on the outside, will also increase your memory, so politely ask him to leave, or kick him. You cannot afford it. When raiding to get Keystones, just get the Keystones and get out. When raiding for high end stuff using the blue Keystone, check your memory on floor 30 or higher, and if any member of your party has something valuable to take out, let him.
Lowest memory upon crash reported is 1.060.000 K
Highest memory upon crash reported is 1.320.000 K
Usually it happens in 1100 - 1200 range.
To both old and new players - there is currently no known method of preventing memory crash, and until you reverse hack Warcraft 3 and find a way to increase its memory, there will probably be no solution.
___________________________________________________________________________________________________________________________________________________________________
Pet pull/merc pull
You perform pet pull by manually sending your pet, summons, minions or mercenary to engage the enemy. You simply use the Attack command [hotkey X], then as your pet moves in to attack quickly use Retreat [hotkey C] to recall them back after monsters react to their attack. This will put both you and your pet in combat.
Pet pull serves multiple purposes.
Your minion that is usually expendable takes the all of the burst damage from mobs, and even if he dies, resummoning is nothing compared to resurrecting a dead party member, especially using Rod of Resurrection
It is used to reposition a mob pack if there are multiple packs in close proximity so that you avoid agroing more than that pack
It is used for scouting nasty skills on scary-looking mobs and bosses
You can always pull mobs out of tight corridors into more open areas where you have more options to avoid their dangerous skills
Pet pull is extremely effective way of dealing with many ugly situations and having one class that can do pet pull is mandatory. You can use mercenary for this, but mercenary has extremely long cooldown in case it dies. Druid/Hunter’s dog is great because he's available all the way from level 1 and he's readily available because of 15 seconds cooldown. Necromancer minions are also great, especially once you reach talent that allows you to resummon them without corpse. Psion slave generally shouldn't be used for this because he's fragile and very hard to replace. Mercenaries aren’t the best for this purpose but they will suffice. You can always preemptively heal them or use things like Divine Protection to give them extra tankiness.
Feel free to use pet pull as liberally as possible, just make sure that the whole party understands that you are doing it on every mob pack. The person in charge of pet pulling should generally lead the party. You can easily get wiped if your tank engages one group while another party member pet pulls a second pack. Just make sure that everyone is on the same page and pet pull will get you a long way. It's a small thing that will make the difference between successful parties and the ones struggling very hard, so the faster you learn this, the better your whole party will fare.
___________________________________________________________________________________________________________________________________________________________________
Minion control
Tied into the pet pull section, characters that use minions and mercenaries should do their best to control them properly. That means you don't attack a target that is sleeping or is frozen. Issue attack command to your minions to attack the same target as you are, and once that target is dead, do it again on the next one. It sounds like a lot of headache at first, but it's a much better alternative to getting wiped because you woke up that nasty Sonic Blade troll that killed you instantly.
___________________________________________________________________________________________________________________________________________________________________
Agroing multiple packs and spatial awareness
Agroing multiple packs is the cause of 90% of wipes in Blackfire Deep. There are multiple ways of dealing with such situations, but the best way to handle it is never allowing it to happen. Of course, we aren't living in ideal world, and no matter how experienced the party is, those situations will always happen and for every party member it's just as important to do his small part to prevent as much of it as possible.
Small things like typing "care" or pinging on a mob pack that is close to the area you are fighting in will help a lot. Checking the area in advance to see what is around you is a very useful habit to have. Don't be completely focused on what's happening on your screen. Check your surroundings and be aware of other mobs around you, the ones lurking behind the corners, the ones in fog of war, etc.
Pet pulling mobs to empty areas where you have complete control of your surroundings is never a bad idea.
It's also very useful to know which situations can get you in most trouble. Double agroing can happen most often when:
- Psion/Hexblade uses Dancing Blades and her aoe movements enters other mobs agro range
- Bard/Assassin goes to Backstab enemy and walks into another mobs agro range
- Crusader/Warrior merc uses Shield Slam to move mobs closer to other pack of mobs and your team walks into their range
- When mobs are using dangerous skills like Debris or Earthquake, you try to avoid them and walk into other mobs close by
- When a healer that has generally little to do because the mobs are weak walks around in between heals, he can walk into agro range of other mobs
As you can see, agroing multiple packs happens more often when using close combat classes, but it can happen to anyone not aware of his surroundings.
Now when it actually happens, there are a couple of ways for dealing with it. First, and usually the best solution is to simply ignore the person that agroed the second pack and simply let him die. The healer shouldn't heal him and support classes shouldn't cast anything on him. Yes, you will instinctively heal a person whose hp drops suddenly, but if you have presence of mind as a group to ignore him and not get involved in his mess, it's by far the best solution. Mobs won't engage your whole party, but just the member that agroed them. They will kill him and go back to their spawning point. If that plan failed and most of your team is in combat, you can try to kill the first agroed pack so that people who didn't (most of the time single target dps like Assassin/Bard) agro the second pack can get out of combat and either salvage the situation by using Rod of Resurrection on healer after your party gets wiped, reset the whole encounter and try once again.
Sometimes your team will be able to deal with multiagro, but if you see that you will likely fail, you should focus on resurrecting the character that can resurrect the whole team, like Druid, Monk or Bishop. Should one of those three fall, make it priority to keep one alive. It's the only way to continue your raid. One very advanced strategy (and I wouldn't recommend it to you unless you have direct way of communicating with your team with voice chat) is to simply autoattack and kill your healer and resurrect him faster. Healers are usually last in threat list for agro and they will fall last so you won't be able to use Resurrection Rod on him. So help him die so you can resurrect him faster. Like I said, only do this if you are sure you can pull it off.
And don't worry, it will happen to you. It will happen to everyone. You will agro multiple packs and get wiped or end up in very big trouble. Avoiding such situations is something that you will simply learn the hard way.
___________________________________________________________________________________________________________________________________________________________________
Communication
If it wasn't obvious already, good communication is the key to success in Blackfire raids. Simple ping or point marker selecting the next mob pack is a good start, but if at all possible, you should join voice chat and give/receive instructions by voice; it's much faster. Typing what you should do takes ages, and puts the entire party into a dangerous situation if you start typing mid-battle. Being able to say or hear simple stuff like "Pet pull those guys" or "Focus the same target" is extremely useful, especially when party leader knows what he's doing. It also adds some fun when there's nothing special to do. It makes the whole experience very personal and much more fun. Don't be scared if your English isn't the best, as native English speakers are very few. Even if you aren't interested in talking to the party, just listening to instruction will help a lot.
___________________________________________________________________________________________________________________________________________________________________
Bosses and treasure chests
Bosses and treasure chests are the main targets of Blackfire raids. Your main objective is to kill as many bosses and open as many treasure chests as possible during a single raid. The odds of the floor having a boss range from 25% on floor 1 and goes all the way to 100% on floor 50. The odds of getting treasure chests depend on map layout more than anything else. Yes, higher floors help but there are map layouts that simply have no spawning points for treasure chests (more about this in Map layout section).
The majority of good Blackfire items drops only from those two sources; ethereal items, legendary items, legendary souls and mounts. Treasure chests are also a very reliable way of getting Collectibles even if they can drop from any mobs.
Bosses can drop only one item but are the only source of Blackfire deep legendary items. They can drop ethereal items, legendary items, legendary souls and Collectibles.
Treasure chests always drop two items. They can drop ethereal items, legendary souls, Collectibles and mounts.
Once you kill the boss and open treasure chests on floor, you should skip all remaining mobs and progress to the next floor. The only exception to this is when mobs are level 40 and you want to get Banners. But other than that, get in, scout for bosses and treasure chests, kill everything on your way to them and go to the next floor. You don't have infinite time so you need to use it well. This will also come with experience.
___________________________________________________________________________________________________________________________________________________________________
Rods of Summoning
Rods of Summoning are unique items that drop only in Blackfire Deep. You cannot take them out even with Keystone and you should use them inside the dungeon. When you use it, several random events can happen;
- It can summon 1 or 2 mobs from the outside world, close to your character level. They can also drop items in their respective loot tables and Psions can use Enslave to get some of those mobs.
- It can summon a random item
- It can summon a Collectible
- It can summon Lich that allows you to reset your skills and talents - this is only the source of reseting your skills and talents while inside Blackfire Deep
- It can summon a shop with random assortment of items that will help you progress
Quality of drops depends on level of character using Rod of Summoning. The odds for specific drops aren't known, but there are several cases when you want to use those rods.
If you are using a green Keystone to enter the dungeon or going keyless, try using them on level 25. On that level Trinkets are added to their drop list.
If you are using a blue Keystone to enter the dungeon, try using them on level 40. On that level Banners are added to their drop list.
Other than that you can use them when your drops are bad and you need items to help you progress. When you are new to Blackfire raids, it's not the worst idea to use them as they come because they can help you get the first Keystones and their item drops can increase the strength of your party by decent amount.
___________________________________________________________________________________________________________________________________________________________________
Resurrection rods
When you start Blackfire raid using Keytone or keyless, you will get wisp-like shop. In it you will find one Rod of Resurrection rod. It contains one charge of Resurrection spell. As a rule of the thumb, you only want to use it on characters that have Resurrection themselves - Bishop, Monk and Druid. Use them only if your resurrection character died. For all other situations you should leave such character doing all of the resurrecting himself. If he dies, resurrect him and he should stay out of combat to save the situation.
The Rod of Resurrection is your lifeline. Your ress character will die eventually, it will happen. When it happens make sure you know who will use his rod on him. Using two rods at the same time is really sad so it's best that you communicate with your team, but if situation is bad enough, just use it. Better safe than sorry. Also, once you start casting your Resurrection, you can be interrupted and killed, so be careful. Also once you start it, canceling it will also consume your rod so be careful with them. Always try to have at least 50 mana in case something goes bad and you need to use it.
As with Rod of Summoning, you cannot take Rod of Resurrection to the outside world using Keystones.
___________________________________________________________________________________________________________________________________________________________________
Double Resurrection
Double Resurrection is currently the most powerful known strategy for successful Blackfire raids. The idea is to have two characters with combat Resurrection spell - Monk or Bishop; Druid is excluded because she learns Life Infusion only on level 43 which is far too late to base your strategy around it. With two characters having Resurrection, if one of them dies, other uses Resurrection on him, resurrected character stays out of combat, and even if your entire party dies, you have out of combat Resurrection. That character proceeds to resurrect everyone and reset whole raid. Your party should move away from mobs spawn point so they doesn't die in the middle of mobs. With two of them covering for each other, you can have very safe raids even in bad situations.
Of course, it's far from foolproof, but even then you have your other party members with their Rods of Resurrection to save you in case of both of you die at the same time.
There is one more additional benefit to it. Your team can engage a scary mob pack or boss while one of your ress characters stays out of combat completely until it's safe to engage and the boss has been probed for nasty spells.
And on top of it, having two ress characters is rarely a bad idea. With Bishop + Bishop you can go Soulstrike dps build with Burst of Light as emergency heal and second Bishop can go dedicated heal + Confidence aura. Later on, double Mend + double shield is extremely strong. Monk and Bishop can cover tank and healer roles rather nicely, and double Monk is least desirable.
___________________________________________________________________________________________________________________________________________________________________
Class specific strategy
___________________________________________________________________________________________________________________________________________________________________Because of Basic/Advanced class system, most of the classes share their gameplay early on up to level 25/27 where they get their advanced class spells. For that reason classes will be covered together on early levels as there is very minor difference in gameplay, if any.
Early levels will be keyless and green Keystone raids, and high level strategy will be blue Keystone raids.
Also there will be list of best modifiers on souls for each class.
___________________________________________________________________________________________________________________________________________________________________
Berserker [tank, interrupt, hard dps on higher levels]
Crusader [tank, interrupt]
Low level strategy
Early game, both classes are tanks. Take Shield Slam for interruption and the rest is pretty much up to you. Backhand is only viable if you already have plenty of ethereal items and a double evasion defensive soul, otherwise take Hateful Strike for additional interrupt. As a tank you should lead your team, and your job is to make sure most of the mobs are attacking you. Without high agro generating aoe skills, chances are you won't be able to tank every mob but focus on getting the majority of them to attack you. Don't bother agroing that mob that your Sorcerer is focusing all his spells on, you won't overagro it. Just make sure that you grab as many mobs that your team isn't focusing on and you will be fine. Interrupt as many channeling skills as possible with one or two stuns. Be careful with Shield Slam because it can knockback mobs into another mob pack and it will spell lots of trouble, especially on early levels when you don't have any aoe threat making skills.
High level strategy
Berserker is aoe damage dealer rather than tank. With good ethereal items he can be decent tank, but you should always have another tank in your team, as Berserker isn't meant to be one. Because he is close combat fighter, beware that you don’t overagro the main tank and make sure you hit as many targets as possible with your aoe skills. Teaming with Hexblade as primary tank can be very nice because she can pull all mobs together and together you can dish very good aoe damage while keeping your back lines safe. Hateful Strike is preferred option because of interrupt.
Crusader is main tank. Your main skill should be Taunt and you will focus all your talents there. You can go Backhand if you have high evasion from items and souls, mostly because you will already have Shield Slam for interrupting channeling spells. If you are low on evasion, take Hateful Strike instead. At this point Crusader has more benefit of taking a int/sp soul because lots of his skills will use sp instead of ap.
Low level Berserker souls [AP, STR] [HP, AR, AIIR]
Low level Crusader souls [AP, STR] [HP, AR, AIIR]
High level Berserker souls [AP, STR, CC] [HP, AR, EV, AIIR]
High level Crusader souls [AP, STR, INT SP] [HP, AR, EV, AIIR]
___________________________________________________________________________________________________________________________________________________________________
Druid [healer, pet pull, ooc ressurection]
Hunter [pet pull, interrrupt, dps]
Low level strategy
Funny thing is, despite the traditional difference of Hunter being dps class and Druid being healer, up to level 25 the two of them are identical. The choice of soul can turn Hunter into respectable healer and Druid into decent dps class. It all comes down to soul choice and filling in for what your team is lacking. Need healer? Use int, sp soul and mp, haste soul and your Hunter is suddenly a perfectly capable healer. Same logic applies to dps on Druid. This strategy, however, works only on low levels. Later on both classes should stick to their respectable roles. Take wolf pet for pet pull in both cases. Bird is useless because it cannot be targeted. Rest is self-explanatory. If you are healing, take Remedy. Pet pull mobs, resummon the wolf if he dies and keep up to your role's expectation. There is one major difference. Druid using a green Keystone or the blue one will get a special, Druid-only item - Rod of Revitalization. It gives infinite Resurrection charges to offset high level requirement of her Life infusion (level 43), however, it cannot be used once in combat. Hunter does not get such item so be careful.
High level strategy
As Druid, take your bird, Clawstrike, summon of choice, Remedy and do pretty much what Druids do - heal and pet pull. The pet is the only thing that gives Druid the edge over Bishop as a healer. You can have only one of your Druid-only summons (Nypmh or Efreet) summoned at a same time so if your party needs extra damage use Efreet, and if you have trouble keeping your team alive use Nymph. On level 43, which is very late in game you get access to Life Infusion - resurrection spell which can be extremely valuable.
Hunter will serve as aoe damage dealer, with access to pet pull and interruption spell. Be aware that if your summon dies while pet pulling, you lose access to Beast Fury and Claw Strike which not only reduces your damage output a lot, but also you lose interrupt from Beast Fury. Resummon your minion immediately when he dies. Also take care that your aoe spells don't wake and unfreeze any mobs. It's better to use your aoe spells before they are crowd-controlled than waking them up. Magic Arrow also deserves its own section. Because it drains 1.5 mana per character level, you can use multiple Magic Arrows to deplete mana from majority of the mob pack, especially high hp ones or bosses.
Low level Healer souls [INT, SP] [SH, MP, HP]
Low level dps souls [AP, AGI] [HP, AIIR, anything]
High level Druid souls [INT, SP] [SH, MP, HP]
High level Hunter souls [AP, AGI] [HP, AIIR, anything]
___________________________________________________________________________________________________________________________________________________________________
Assassin [hard dps, dazing trap, interrupt]
Bard [dps, dazing trap, interrupt]
Low level strategy
As Thief class your main contribution to your team is Dazing Trap spell. Yes, I know you cannot take Steal in that case. But Dazing Trap is so powerful that it becomes a spell that you are basing your whole strategy around. Pet pulls into Dazing Traps are commonplace when your team is coordinated enough and it is an extremely strong strategy. 20 seconds (or 30 seconds with talent; which you should take) of mobs sleeping while you pick away at them, one at a time, can deal with almost any situation the game can throw at you. Just make sure you don't wake up mobs by attacking them with minions, or splash damage. Other than that, you will be taking Backstab for interrupting channeling spells and long 4 second stun, Blurred Motions so you can dispel whatever mobs throw at you, including stuns (especially when you have no access to Dispel from mage classes). When you scout Crippling Curse, you can engage mobs first to take the entire first wave of Crippling Curse then simply dispel it with Blurred Motions. Also if you see very dangerous mobs, it's entirely possible for you to stay out of combat entirely and simply reapply Dazing Trap for whole fight. Using Dazing Trap will never put you in combat and you can continuously put everything to sleep. You will need to set Auto-Engage to "off" so your character doesn't accidentally enter combat. Bard is much better suited to this role than Assassin because she still provides useful songs to entire team, where Assassin cannot provide anything, and dps loss will be noticeable.
High level strategy
Both classes should use everything mentioned in the low level section. With additional levels, Assassin gets access to Coup de Grace, which is nice for quickly interrupting channeling spells like Ground Stomp or Water Globes without having to walk behind a target. At level 37 however, game changes drastically for Assassin. You learn Into the Shades - the only skill in game that places you out of combat. This changes the whole world for Assassin. If you go out of combat, you can reuse Dazing Trap. Now you can contribute both in dps, repeatable Dazing Traps, and later, on level 43, you get Explosive Trap that gives you 5 seconds aoe stun on 35 seconds cooldown. There is one additional benefit of Into the Shades - no matter what situation you find yourself in, you can always use it to safely get out of combat and disengage. Even if your team gets wiped, you can always stand aside and use your Rod of Resurrection on your Bishop, Monk or Druid, and get your entire team up and running once again. That's why Assassin should always be the one to purchase and hoard all Rods of Resurrection you find in various shops while in the dungeon.
Bard doesn't provide Assassin’s high dps and she can be allowed to stay out of combat for reapplying Dazing Traps much more. Songs that you provide for team will still count even while you are out of combat. Other than that, all standard Bard strategies apply inside of Blackfire as well. Use Inspire on characters that have mana issues and keep optimal songs up at all times. If your party member walks outside song range, reapply it.
Low level Assassin souls [AP, AGI] [HP, AR, AIIR]
Low level Bard souls [AP, AGI] [HP, AR, AIIR]
High level Assassin souls [AP, AGI, CC, CD] [HP, AIIR]
High level Bard souls [AP, AGI] [HP, AIIR]
___________________________________________________________________________________________________________________________________________________________________
Necromancer [hard dps, dispell, frost cage, pet pull]
Sorcerer [hard dps, dispell, frost cage]
Low level strategy
Water Globes, Dispel and Frost Cage will be your skill set. Combustion vs. Magic Missile is personal preference and both are equally viable options. Combustion is more of a utility skill while Magic Missile is pure dps. Your early gameplay will mostly revolve around dispelling whatever needs dispelling, doing as much dps as possible and freezing whatever is needed. Most often you will dispel Crippling Curse, Feline Reflexes, Spell Mirror or Mark of Chaos, Entangle etc. One thing that should be mentioned is that Dispel doesn't remove all debuffs. It dispels one debuff at a time. So if your tank engaged and 4 mobs used Crippling Curse on him, you will need to use Dispel 4 times to remove all of them. Frost Cage is also very good. While not as powerful as Thief’s Dazing Trap, you can use it while in combat making it much more versatile. It can also serve as interrupt. If your team has no tools to interrupt that Mark of the Vampire, just freeze the mob mid cast. Only instance when you might consider Fireball over Water Globes is if you have heavy aoe team like Hexblade tank, Hunter, two Necromancers and Bishop. Most of the time single target precision spells are superior to aoe because you can mess up Dazing Trap sleep and Frost Cage disables. Usually either of those two gets mercenary (Elyssa Ravencrest) to keep Symbol of Fury buff on them (+30 spell haste) because it makes a lot of difference in their dps.
High level strategy
Necromancer gets access to his minions on level 25/27. That makes him very useful on blue Keystone raids. You should always take level 35 talent that allows you to summon minions without corpse. There are some monsters that don't leave corpses, like Infernals or Water Elementals. It's much better for you to give up on 15% haste than for your team to suddenly find out it has no pet pull available to them. You should always take talent "'Dispel Magic' is now an instant cast area-of-effect spell." It’s very simple to use and very effective. You can dispel Feline Reflexes from a whole pack of mobs with single click.
Sorcerer has the highest dps output out of any character in game and because most tanks don't have their full threat generation skills, you will be overagroing a lot. If your healer is inexperienced you don't want to make problems for him so focus the same target as your tank and keep your agro under 100%. If your healer is experienced enough and he can cover both of you, quickly pick apart and burst lowest hp mob from group unless he's really strong. You have Frost Cage to control him if he becomes too much to handle and have option of taking Combustion for same purpose as well. The choice of going for aoe Dispel and instant Water Globes cast mostly depends on how skilled you are and how fast you can react and dispel stuff without aoe. More often than not it's better to go with aoe Dispel unless you have Necromancer in your team that will take care of that.
Low level Necromancer souls [INT, SP] [SH, HP, MP]
High level Sorcerer souls [INT, SP] [SH, HP, MP]
Low level Necromancer souls [INT, SP] [SH, HP, MP]
High level Sorcerer souls [INT, SP, CC, Light Dmg] [SH, HP, MP]
___________________________________________________________________________________________________________________________________________________________________
Bishop [healer, combat ressurection]
Monk [tank, combat ressurection]
Low level strategy
Much like with Druid/Hunter, souls will make more impact than class itself early on. You have the option to go healer on Monk as well but it’s rarely used. Regardless of your soul choice, getting access to Resurrection as early as level 13 along with possible healing and Confidence aura early on makes one of these two a mandatory addition to every Blackfire party. If you decide for healing, you will want spell haste soul because Heal has very long casting time. If your haste is low, ask your party to give you the sorceress mercenary for +30 spell haste buff for easier healing. If you decide to go for punching Monk, it makes no difference in terms of skill build, only make sure to use the proper soul. If you have another healer in your team, like Druid, you can go Soulstrike dps build. Soulstrike is very powerful against the undead, doing 4.5 x sp damage to each of them, and there's plenty of undead in Blackfire.
High level strategy
With higher levels, Bishops get access to Plane Shift which is much more useful than one might expect. Avoiding nasty random target spells like Heaven's Edge and Debris while keeping close to your team to heal them is very useful. Mend and Divine Protection are crazy, and you can spam them while out of combat on the entire team for no mana cost at all. Divine Protection should go on your fragile party members and Mend in combination with Flash Heal will keep your tanks healthy. If you are playing double Bishop, one can go Soulstrike dps build with Flash of Light for emergency heal while the other will be a dedicated healer with Confidence. On Bishop + Monk you can take Flash of Light while monk takes care of Confidence.
Later in game Monk doesn't have the option to be the healer and should focus on tanking. The standard Monk we all know. Because of your low mana pool, always keep in mind that 50 mana must be saved in case of emergency Ressurection. If you are the only tank on your team, you should go for Sunfire and +50% more threat talent so you can quickly grab majority of the mobs from pack and work your agro from there. Monks don't have any exciting skills to talk about but are very useful in party to have filling both roles of tank and combat resurrection.
Low level Healer souls [INT, SP] [SH, MP, HP]
Low level tank Monk souls [AP, AGI] [HP, AR, AIIR]
High level Bishop souls [INT, SP] [SH, MP, HP]
High level Monk souls [AP, AGI] [HP, AR, EV, AIIR]
___________________________________________________________________________________________________________________________________________________________________
Hexblade [tank, interrupt]
Low level strategy
Hexblade is an amazing tank on lower levels, primarily because she gets her primary agro generating combo on level 7. And it's aoe agro to add on top of it. Your skill build should be Jolting Strikes, Dancing Blades, Distracting Weapons and Imbue Armor. Liquified Arms is a good choice as well, but Imbue can prevent physical burst damage much more reliably; still be wary of heavy spell damage. Your main strategy is to use Distracting Weapons and after that spin using Dancing Blades for maximum agro possible. Dancing Blades is also good as an interruption skill but you'd be better off relying on your team to do that for you as you need to generate agro as much as possible.
High level strategy
On higher levels Hexblade gets access to lots of aoe spells, but on level 33 she gets Binding Chains which is her best spell by far. Pet pull mobs, chain them together, and do your threat combo, while your team uses Dazing Trap, and you pick them apart one by one. One problem with Hexblade is that she has lots of aoe damage skills so you want to pair her with aoe damage dealers as well, rather than with single target precision characters (Sorcerer vs Berserker). She excels when she can use her spells without worries of waking up mobs or breaking Frost Cage. In parties with sleep mines you need to be very precise with your spells not to wake everyone up. Despite her lack of synergy with sleepers, there is one very nice combo they have available to them. Chain pull into sleep mine.
You can also play Hexblade as staff character with Ethereal Chains and Twisting Metal as your main damage skill. It's generally not the best choice because you need another tank in your party to cover for her lack of aoe, but it can be done. You will need to change your soul from ap based to sp based because now your main skill is SP based. Rest of the strategy still applies except that you are much worse as a tank and you have no reliable disable (Twisting is far from reliable even if it does stun). You can also opt for Liquified Arms rather than Imbue Armor and get amazing level 40 Talent for it to apply on Spells rather than only autoattacks.
Low level Hexblade souls [AP, STR] [HP, AR, AIIR]
High level Hexblade souls - Dancing Blades [AP, STR] [HP, AR, EV, AIIR]
High level Hexblade souls - Twisting Metal [INT, SP] [SH, HP, AR, EV, AIIR]
___________________________________________________________________________________________________________________________________________________________________
Psion [?]
Psion is a class that simply wasn't meant to be used in Blackfire. She's full of contradictions that limit her otherwise decent potential in the outside world because of awkward talents and skills and with even weirder level requirements. Rather than, "this is a guide that will make Psion new Bonjwa" section, it's "How do I make her half useful as a class during Blackfire raids".
Low level strategy
On lower levels you can try and impersonate Hexblade by going for tank, but you have a problem - Psion can use only cloth items while tanking. Those items generally give sp/int, and rarely good hp/armor and you want ap/str because your Dancing Blades scales with those stats. Starting to see problems here? To add insult to injury, even if you decide to go Twisting Metal + int/sp based build, you will have lowest priority on items because Emerald Staff is much better used on... pretty much every class that can use staff. You will get the short end of the stick, so use Psion only if your team, especially cloth users, are well geared with ethereals.
High level strategy
High level Psions are a lot more useful, but are still shafted compared to most other classes. Your main game revolves around Psionic Blade spell steal and Enslave. Psionic Blade spell steal is weird. You can steal spell only on level 30+ and you can only choose one type of spell - ones used on ally, enemy, or point cast ones. You cannot take spells from the outside world, which would be useful because of high level requirement of some spells like Divine Protection. That means you will want to steal a spell from one of your party members. Good spells to steal from best to worst would be:
- Resurrection - obvious
- Frost Cage - can be used in combat, much better than Dazing Trap
- Divine Protection - you are SP based character so it will be decent
- Dazing Trap - inferior to Frost Cage, but still decent crowd control
- Crippling Curse - best spell to steal in terms of dps, but otherwise not recommendable
- Remedy - your low mana is an issue but it's still the best healing spell you can have
In practice that means you should stick with Resurrection for Double Resurrection strategy. Enslave is a borderline-useless skill. You can’t enslave any mobs in Blackfire Deep as they are counted as Elites (much like Magnataurs in Yeti cave or Overseer Golems). With that, the only way to get some usage out of Enslave is Rod of Summoning, and that's far from a reliable source. First of all, it is rare. Second, sometimes it spawns stuff other than mobs. Third, even if they summon mobs, they can be higher level than you, meaning you can't Enslave them. And when you even get a decent mob, you can just as easily die and your prized mob is useless. Even it can die from some powerful skill that hits summons, like Ground Stomp which is fairly common. And most of the time your mob won't even be useful. You cannot even use him as pet to pull because he will just die from burst damage eventually. Her best spell - Pain Link is available only on level 43 which is far too late to be considered seriously.
Taking Psion is just like being that one white kid in a black neighborhood - nobody will like you.
Low level tank Psion souls [AP, STR] [HP, AR, AIIR]
Low level Psion souls - Twisting Metal [INT, SP] [SH, HP, AR, AIIR]
High level Psion souls - Dancing Blades [INT, SP] [SH, HP, AIIR]
___________________________________________________________________________________________________________________________________________________________________
Conclusion - Proper team composition
Having an overall balanced team is important. If you have a team of 5 tanks that will never die, you will kill mobs slowly, get nowhere and will get rekt by memory bug. If you don't have a healer and Resurrection, you will not get far. If you don't have a capable tank to hold off something like Enrage you won't get far either. In order to progress as much as possible you will want an optimal team composition. Aim for something like this:
- Minimum of one combat Resurrection spell (preferably two for Double Resurrection strategy)
- One class that has Dispel and Frost Cage
- One tank, one healer, one hard dps class
- One Dazing Trap user
- At least two classes with interruption spell
- One class with pet/summons that can pet pull
All classes fill certain roles. You don't need to have everything mentioned above, and you probably won't have it, but this is something you should aim for. Something like Hexblade, Monk, Assassin, Necromancer and Bishop would include everything that was outlined above. You just have to mix and match to get most out of your available characters.
___________________________________________________________________________________________________________________________________________________________________
Threat list
___________________________________________________________________________________________________________________________________________________________________This section will cover some of more dangerous abilities Blackfire Deep will throw at you, and how to effectively play around them. Keep in mind that this list doesn't cover list of all dangers in dungeon - it's merely a shortcut to an otherwise steep learning curve of predicting dangers. Keep in mind you can always check mob for its ap/hp values to estimate base mob and link him with potentially dangerous abilities. Threats are presented in more-or-less descending order from highest to lowest threat.
Also keep in mind that Blackfire Deep is still relatively unexplored. There are for sure mobs that can have dangerous abilities that are not on this list. Also combinations of multiple abilities can range from harmless do downright unfair, so staying vigilant is never bad.
___________________________________________________________________________________________________________________________________________________________________
Sonic Blades [found on ranged piercing attack trolls, murlocs, razormanes and skeleton archers]
Other than agroing multiple packs, Sonic Blades is the primary cause of team wipes in Blackfire Deep. Due to high ap modifier, bouncing attack, unreasonably high damage and chance to crit, running blind into Sonic Blades mobs can result in a very sudden end to your expedition. Whenever you encounter some of mobs mentioned above you should probe them with pet pull. Other than that you can align your team so that mobs are facing only tank while rest of the team should be behind mobs backs. Sonic won't bounce to you that way and tank has decent chance of surviving. High ap Sonic Blades bosses can, however, kill the tank instantly with an unlucky crit so be prepared for ugly stuff when facing such bosses. When scouted, it is recommended that you skip those packs if they prove too hard for you. However, it's the only skill in Blackfire that you should be avoiding by skipping packs.
___________________________________________________________________________________________________________________________________________________________________
Skeleton Archers
These guys deserve their own section not only because they have a chance to spawn with Sonic Blades, but also have a myriad of very dangerous skills at their disposal, and can spawn with multiple of those. Flaming Arrow might seem harmless at first sight, but when your tank gets focused by five of them with following autoattacks, your healer will have a hard time keeping up with their damage. Mulitshot is also very dangerous due to the fact it hits the entire team, and if not thinned in numbers, skeletons can kill key member of your team like the healer and cause wipe. Magic Arrow, while not doing much in terms of damage, has ugly 1.5 x monster level manaburn. Level 35 Magic Arrow will burn 52 mana from target it hits. Now multiply this with 5 skeletons, 30 seconds cooldown and you get the full picture. Tanks will not be able to keep their agro without their mana, and if your healers get their mana burned, it will spell a quick end to your raid. You can split as much as possible so it cannot affect the whole team in same way as with Sonic Blades. Feline Reflexes are self-explanatory and as a mage you should make your first priority to dispel those. Needless to say those skeletons in high numbers have to be probed with pet pull/merc pull, especially with high ap/hp values, and from there adjust your strategy of dealing with them accordingly.
___________________________________________________________________________________________________________________________________________________________________
Enrage [found on hellhounds, ghouls, thunder lizards and melee kobolds]
Enrage is one of hardest skill to face, especially unscouted. Common scenario goes like this: you engage a monster pack, Enrage turns on and starts doing serious damage to the tank, healer goes for heal while whole pack isn't agroed properly, pack charges past everyone straight on healer and kills him in half second time, especially true for ranged mobs. Whole team runs around like headless chickens attempting to resurrect the healer and reset the whole fight. It's a common scenario that can be avoided by pet pull, some preparations for proper agro and use of crowd control skills to waste as much Enrage time as possible. Unlike its baby brother - Feline Reflexes, it can’t be dispelled so don't waste time trying to do so. It's very possible to face Enrage multiple times during one mob pack battle so stay on your toes as a healer. This fight ain't over ‘till it's over.
___________________________________________________________________________________________________________________________________________________________________
Heaven's Edge [found on abominations, cursed riders and ghouls]
Fist Flurry [found on abominations and zombies]
Magma Wave [found on infernals, cursed orcs and devil skirmishers]
While on first glance these skills don't have anything in common, their real threat is well hidden - mobs using those skills ignore first-in-agro rule and go for random target, and they hit very hard. It's not exaggerated that because of that and some unlucky crit they can wipe out your back lines. First burst can be controlled by pet pull, but after that you have no way of preventing it going after your casters and healers. Both skills are fairly harmless when they attack high hp/armor tank, but are otherwise dangerous. In case of Heaven's Edge and Magma Wave, you should split so you don't get caught in their aoe. As for Fist Flurry, you can crowd control mobs and delay them landing it. You can run around obstacles and let your team stun, disable and kill them, but sometimes you will have to take it face on and it can be quite bad, especially on crits. It should also be noted that you can greatly reduce threat of Magma Wave by using mid-game fire resist items.
___________________________________________________________________________________________________________________________________________________________________
Earthquake [found on thunder lizards, spiders and melee murlocs]
If you ever thought of Hill Giant Earthquake being annoying, that's because you never faced a pack of five ranged thunder lizards casting five Earthquakes all around the battlefield standing safely within it while playing four melee classes plus healer. Seriously, it would be easy to just relocate far away from it, but most teams aren't that coordinated. In that case at least try not to stand in it on low hp giving your healer all sorts of headache, forcing him to walk over Earthquakes and dying in process. This skill, while low on burst can be a major pain, because it hits so many targets, and if you walk into multiple Earthquake fields it will make short work of you. Just keep cool and get the job done.
___________________________________________________________________________________________________________________________________________________________________
Ground Stomp [found on cursed orcs and wildkins and many others; very common skill]
Flame Nova [found on cursed orcs, infernals and devil skirmishers]
Ground Stomp isn't huge threat by itself because it can be interrupted and sidestepped, but its fast channeling time, low cooldown, high ap modifier and deceptively large aoe is a very good “wake up detector”. All mobs will share same cooldown on it so when a whole bunch of them start casting it and your front line isn't paying attention, they can get wiped easily and back lines will collapse just as quickly. Just keep your heads up when facing it and you will be fine. Flame Nova is very similar to Ground Stomp in way that it hits everyone is aoe, but unlike Ground Stomp it is instant cast so it cannot be interrupted. Multiple Flame Novas can be very ugly if they hit your entire front line so avoid cluttering, use sleep and freeze to prevent them using Nova at the same time. High fire resistance can also help.
___________________________________________________________________________________________________________________________________________________________________
Debris [found on troll spellcasters]
I really hate that I have to write this section, but yes, Debris is a serious issue. It hits extremely hard and stuns for very long time. Most of the time it can oneshot any non-tank class so be super careful when facing it. Magician classes should dispel stun from surviving targets right away. Try not to fight in tight corridors. Pet pull and lure Debris mobs into open area where you have more space to maneuver. You can always practice dodging Debris in Yeti cave, but it cannot prepare you for pack of 5 trolls throwing Debris all over the battlefield. Like in many other occasions, sleep and freeze are your best friends here.
___________________________________________________________________________________________________________________________________________________________________
The cutoff point - from here skills aren't as much of a threat that will wipe your team, but can cause headache in one way or another. Learning how to deal with them will help your sanity, but are otherwise not as high of a threat.
___________________________________________________________________________________________________________________________________________________________________
Mark of the Vampire [found on abominations, ghouls and many melee mobs]
Mark of the Vampire can be nasty if the party doesn't understand how to work around it. High hp vampire mobs can deplete all your mana and slowly pick you away one by one, but solutions are plenty. Pet pull will take care of initial mark. After that you have the option to interrupt it - problem solved. If you aren't able to interrupt because your stun skill is on cooldown, or you are facing masses that cannot be interrupted because of high numbers, your tank should move as far away as possible from mobs and you will have to kite them with slows and disables like Combustion or Ensnare. It's very useful to know that mark lasts only five hits and you can deplete them by autoattacking marked ally. Usually the party isn't coordinated enough to pull it off instantly, but even one player autoattacking can make a difference. But it's rarely needed. Just keep your stuns for interrupt and it will be enough.
___________________________________________________________________________________________________________________________________________________________________
Spell Mirror [found on voidwalkers, troll casters and many caster mobs in general]
Mark of Chaos [N/A]
If a unit with Spell Mirror is hit by a spell it will reflect it back at caster. Due to caster’s high damage output and low hp it will often times instakill Necromancer, Sorcerer or Bishop doing Soulstrike dps. As a mage you can dispel it and be done with it, but dead Bishops can prove to be a much worse scenario with team losing a healer. As a rule of the thumb, mobs having Spell Mirror are usually weak so they won't cause a team wipe, but having to waste Rod of Resurrection can hurt. Remember that its cooldown is only 20 seconds, so it's up quite frequently, and on mixed mob packs just one of them having Spell Shield will make it a threat as it can be cast on targets other than itself. If your mental clock is decent and you can anticipate its cooldown, it becomes zero threat, but it can surprise you due to instant cast. Mark of Chaos is essentially the same thing except your physical hits also get reflected. It's harder to spot but it can be dispelled. Treat it the same way as Spell Mirror.
___________________________________________________________________________________________________________________________________________________________________
Heal, Flash Heal [found on troll spellcasters]
Problem with these two healing spells is that they have a 1 sec cooldown, and big groups of healing mobs will just overheal anything you can throw at them. You can sometimes outdps one healer by crowdcontrolling rest of the pack with sleep/freeze and interrupting his heals with your stuns, but sometimes that will not be possible. In that case don't waste your mana, just autoattack mobs and wait for them to deplete their mana. It's a major waste of time for sure, but there are no ways around it. Bonus points if you can burn their mana with stuff like Distracting Weapon and Magic Arrow.
___________________________________________________________________________________________________________________________________________________________________
Final words
___________________________________________________________________________________________________________________________________________________________________
As you have seen, there is plenty to know and learn about Blackfire Deep. As mentioned before, a lot of the information here is hearsay. I never did any data mining to obtain all of these information, so there will be plenty of errors. If you happen to notice some of these errors, dead links or similar, please let me know. Any suggestions, critisicm, questions, all are welcome. You can leave them all in this thread, or join us at Gaia's Retaliation Discord channel and discuss them more directly.
I hope that some of information presented here was useful to you and that it will help you make better Blackfire Deep player, and until we are in a Blackfire party together, good luck and have fun.
___________________________________________________________________________________________________________________________________________________________________
Last edited:
")