- Joined
- Sep 22, 2007
- Messages
- 2,772
This tutorial will teach you how to camouflage any unit using Microsoft Picture It! Photo Standard 9.
Pros and Cons I've experienced:
Pros
• It's easy
• Keeps the WarCrafty feeling
• It doesn't require much skill
Cons
• You often go over edges and paint normally black things
• It removes team colour
Tools Needed
• Microsoft Picture It! Photo Standard 9
• WarCraft 3 Viewer
Step One - Extracting & Preparing
We're going to be using a rifleman.
Firstly, open up WarCraft 3 Viewer, then in the Treeview, find Rifleman.blp under Units/Human/Rifleman, like this:

After you have him, go into Current File and press "Extract and Convert"
 .
.
Then, save him in a folder where you can find him;

Then, open him up and go to Freehand Painting;

Go into Customize Paint Settings,
 and then change the brush to this and the transparency to 75.

Then go back and change the brush size and colour to the following:
O.K., you're good to paint.
Step Two - Camouflaging
Start off painting in his face, I did a sort of pattern around his eye -
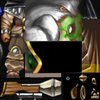
Then change colours, to Orange and then brown - the 2nd darkest.

Then, keep painting the face. It might be easier to use a smaller brush, but you should be fine. Remember not to paint IN the eye, just around it and the blanks.
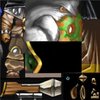
I chose to paint the beard too, but this is optional.
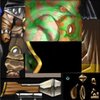
After this, I did the naked arm and the cloak. For the arm, a way smaller brush is required. For the cloak, and this is why these two, be careful not go over the edge, as I did a bit. The gold on the bottom is optional to be camouflaged - I made it black.
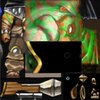
After this, proceed onto the rest of the body and the top right corner - I think it's his hood. Here's what I came up with, using random patterns and at times changing the size of the brush. I never changed the colours or transparency though.
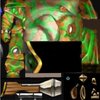
I camouflaged the rifle - just to camouflage him completely, which is usually unnecessary, but in this I want to. Simply change to a medium-small brush, start off with green and finish with brown.
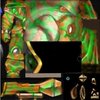
You're done with painting!
Step Three - Converting & Viewing
After saving your project, open up WarCraft 3 Viewer again. Go to Convert, and press BMP, TGA, JPG -> BLP.
 If any messages pop up, simply press OK. Remember to save him somewhere findable.
Then, open up your WE, make a new map, import the BLP file, rename it to Units\Human\Rifleman\Rifleman.blp and save and reopen the map. This is what I got:

I hope this tutorial helped you.
~Belgarath.
Pros and Cons I've experienced:
Pros
• It's easy
• Keeps the WarCrafty feeling
• It doesn't require much skill
Cons
• You often go over edges and paint normally black things
• It removes team colour
Tools Needed
• Microsoft Picture It! Photo Standard 9
• WarCraft 3 Viewer
Step One - Extracting & Preparing
We're going to be using a rifleman.
Firstly, open up WarCraft 3 Viewer, then in the Treeview, find Rifleman.blp under Units/Human/Rifleman, like this:

After you have him, go into Current File and press "Extract and Convert"
 .
.Then, save him in a folder where you can find him;

Then, open him up and go to Freehand Painting;
Go into Customize Paint Settings,
Then go back and change the brush size and colour to the following:
O.K., you're good to paint.
Step Two - Camouflaging
Start off painting in his face, I did a sort of pattern around his eye -

Then change colours, to Orange and then brown - the 2nd darkest.
Then, keep painting the face. It might be easier to use a smaller brush, but you should be fine. Remember not to paint IN the eye, just around it and the blanks.

I chose to paint the beard too, but this is optional.

After this, I did the naked arm and the cloak. For the arm, a way smaller brush is required. For the cloak, and this is why these two, be careful not go over the edge, as I did a bit. The gold on the bottom is optional to be camouflaged - I made it black.

After this, proceed onto the rest of the body and the top right corner - I think it's his hood. Here's what I came up with, using random patterns and at times changing the size of the brush. I never changed the colours or transparency though.

I camouflaged the rifle - just to camouflage him completely, which is usually unnecessary, but in this I want to. Simply change to a medium-small brush, start off with green and finish with brown.

You're done with painting!
Step Three - Converting & Viewing
After saving your project, open up WarCraft 3 Viewer again. Go to Convert, and press BMP, TGA, JPG -> BLP.
 If any messages pop up, simply press OK. Remember to save him somewhere findable.
Then, open up your WE, make a new map, import the BLP file, rename it to Units\Human\Rifleman\Rifleman.blp and save and reopen the map. This is what I got:

I hope this tutorial helped you.
~Belgarath.


