• 🏆 Texturing Contest #33 is OPEN! Contestants must re-texture a SD unit model found in-game (Warcraft 3 Classic), recreating the unit into a peaceful NPC version. 🔗Click here to enter!
  • 🏆 Hive's 6th HD Modeling Contest: Mechanical is now open! Design and model a mechanical creature, mechanized animal, a futuristic robotic being, or anything else your imagination can tinker with! 📅 Submissions close on June 30, 2024. Don't miss this opportunity to let your creativity shine! Enter now and show us your mechanical masterpiece! 🔗 Click here to enter!

UI Idea

Status
Not open for further replies.
Level 26
Joined
Oct 2, 2011
Messages
2,482
Hi!
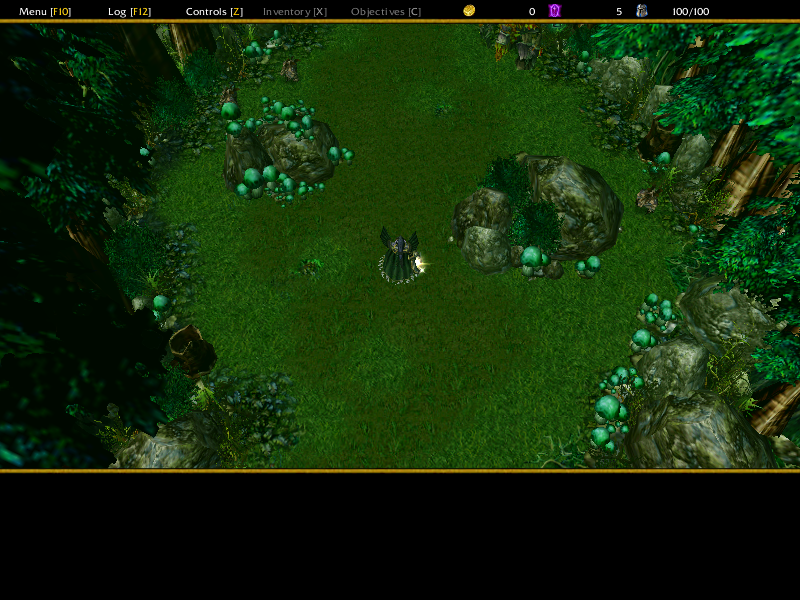
In the picture below I replaced the clock MODEL in "Game Interface" with the Human expansion victory screen.
What is unique with this is that it positions itself on top of all other UI layers.

The Human expansion victory screen is 512x512, so I was wondering if it perhaps was possible if a 1024x1024 picture would cover the entire screen?
In that case, you could be making UI extremely easy, by just editing an 1024x1024 image, and, in my case, get rid of that darn clock in the top center (I have been struggling a lot with it today).

I have been in the Model Editor and figured out that you need to edit the Geoset in order to place the picture in different places of the screen. But here I got lost. I have no idea what the things in there mean, and therefore I'm asking here for help.

The attached "UIBaseCover" picture (Formats: png, tga, blp) is the one which I would like to have on top of the screen, serving as a special UI.

Any takers? :grin:

EDIT:
I SOLVED IT!
This took a looooooooooong time to fix.
If someone is interested in the answer, post below and I'll tell you as soon as possible.
 

Attachments

  • Namnlös.png
    Namnlös.png
    809.4 KB · Views: 144
  • UICoverBase.png
    UICoverBase.png
    13.4 KB · Views: 127
  • UICoverBase.tga
    4 MB · Views: 58
  • UICoverBase.blp
    107.6 KB · Views: 58
Last edited:
Level 26
Joined
Oct 2, 2011
Messages
2,482
Damn.
I hoped that no one would ask... :D

Just for you GhostHunter123 <3

Before you start making an UI you can check how the standard (not HD) version looks in game here.

NewUIPreview.jpg

In short:
Basically what you want to do is this:
1. Create a 1600x1600 (the size of all UI-tiles width) picture that looks like a put together.
2. HD: Split the picture in 4 pieces (top-right, top-left, bot-right, bot-left)
Standard: (Not recommendable for standrad UIs) Resize the picture to 512x512.
In my own map (Solen's Sanctuary) I used the standard version as it requires less work and loks good ingame due to its simplicity, but I created a method for hd aswell.

Standard UI:
3. Convert the picture to BLP and import it to your map Along with the NewUI.mdx (attached in bottom of this post)
4. Change the custom path for your imported picture to "NewUI.blp".
5. Enter the "Game Interface..." and find "Model - Time Indicator", and replace it with "war3imported\NewUI.mdl"

HD:
You'll need War3ModelEditor for this.
3. Convert each of the four UI cornors into BLP.
4. Open model editor and open the MPQ Browser.
5. Locate in the War3.mpq: UI\Glues\Loading\Multiplayer\Load-Multiplayer-Human.mdx
6. Open it and then open material manager and apply the following change to all materials:
6. - 1. Open the only item in the list (MaterialLayer)
6. - 2. Open the list in the box named "Filter Mode" and select transparent.
7. Save the file and import it to the world editor along with your 4 UI pieces.
8. Change the path for your imported pieces to the following:
Top-left Piece: "UI\Glues\Loading\Multiplayer\Loading-TopLeft.blp"
Top-right Piece: "UI\Glues\Loading\Multiplayer\Loading-Human-TopRight.blp"
Bot-left Piece: "UI\Glues\Loading\Multiplayer\Loading-BotLeft.blp"
Bot-right piece: "UI\Glues\Loading\Multiplayer\Loading-Human-BotRight.blp
9. Enter the "Game Interface..." and find "Model - Time Indicator", and replace it with your imported model you made.

Your UI is now imported to the map and lies on top of the maps base UI which we know need to remove.

Find the following Items in the "Game Interface...":

Image - Console Inventory
Image - Console Inventory None
Image - Console Texture 1
Image - Console Texture 2
Image - Console Texture 3
Image - Console Texture 4

...and replace them with this path:
"UI\Widgets\EscMenu\Human\human-options-button-border-up.blp"

This will cause the UI to turn black (transparent) and minimize in size, revealing your imported UI.

Note that the HD version is not 100% complete as the pieces needs certain resizing that I have not yet exacted.
 
Last edited:

Ardenian

A

Ardenian

Wow, you might want to think about converting this into an official tutorial, the UI style looks decent!
 
Level 12
Joined
Mar 13, 2012
Messages
1,121
Does this work for different resolutions now? Will it work in the future if 1920*1080 resolution is changed to true 16:9, so to a different aspect ratio?
 
Status
Not open for further replies.
Top