Barorque
HD Model Reviewer
- Joined
- Sep 8, 2008
- Messages
- 629
Note
My method works but is partially inefficient for file size, @Prometheus3375 suggests the following:
Introduction
As with many things, Reforged has changed some aspects of icons, so an updated guide is necessary.
I'd like this guide to be useful for both veteran and new icon-creators alike. Provided are .psd template
files with all icon borders as well as a .dds plugin for Photoshop. Additionally I will explain how icons are
to be saved and imported properly for Reforged (which does differentiate quite a lot compared to Classic).
The correct saving technique has been reviewed and will work for items as well as all graphics settings.

Icon Types
If you're really new to WC3 the TLDR is:
Icons are the buttons for all sorts of things in game, some of them can be pressed, such as abilities or
actions like attacking or moving via console. Others might be passive (non-clickable) abilities. And then
there are the attribute icons for attack-type, hero-stats etc.
Lastly it is important to note that some icons appear disabled when the game is stopped, what actually
happens is that they get replaced by a DIS version of themselves... but let's just show it all instead:
__________________________________________________________________________________
__________________________________________________________________________________
__________________________________________________________________________________
__________________________________________________________________________________

What has Changed?
First of all, Reforged icons (except scorescreen) are now at 256x256 resolution, which is great news,
since you no longer need to be making pixel-art! Of course they won't be showing at this resolution for
2k users, but will keep scaling up to 4k.
Another good bit of news is their new format, which is a .dds file. Using the attached .dds plugin for
Photoshop you simply have to save it, instead of needing to convert and what not. Also noteworthy is
that .dds has a superior compression to that abomination called .blp, so despite the icons having 16
times the detai... ehm pixels, their file-size will be only about 42 KB.
(Same applies to skins, but that another topic...)
They need to be saved in a particular way for them to work on items and all graphics settings, that will
be further explained in the Making the Icon section. World Editor doesn't fully support .dds, which is
the format that Blizzard actually uses, so you'll have to manually copy the icon's path in the Object-
Editor... sigh Reforged fun things.
Finally SSC or mini icons for end screen no longer exist in Reforged.
That's pretty much it when it comes to changes. There still is an alpha channel for UPG, ATT and score-
screen. And all the things for importing are the same as they were before.

Getting Ready
Before we start, make sure you have Photoshop (yes it's free, you know how and where...).
If you simply refuse to use it, I'm sure there might be a working .dds plugin for other options, but I
cannot assure that it will get the job done, so your choice.
If you have Photoshop, download one of the two .dds plugins attached below, and follow this guide:
Now that you have a .dds plugin, download my Icon Template - Reforged and scorescreen-hero
.psd files, and we can get started!
And lastly, get CascView so you can extract WC3 files and icons you might want to edit.

Making the Icon
I can't teach you how to draw here, I myself didn't bring my tablet when I moved, so I'm just editing
existing icons for now. However I can show how to make your art/edit into working icons for Reforged!
__________________________________________________________________________________
__________________________________________________________________________________
__________________________________________________________________________________
__________________________________________________________________________________
__________________________________________________________________________________

Importing
Finally got to the last part! Now the only thing remaining is importing the icon to World Editor and using
it for something.
�
__________________________________________________________________________________

I would also like to pay respects to the original Icons tutorial, where I learns much of the things
mentioned here: Complete Icon Tutorial - All About Icons
UPDATE: Corrected Scorescreen's name and path to the one Hive uses as SSC.
This is a text in tutorial only update, the layers
uploaded are still correct![/stable]
My method works but is partially inefficient for file size, @Prometheus3375 suggests the following:
Well, this is not correct at all. All prefixes expept DIS are useless. And only DIS icons must be imported inReplaceableTextures\CommandButtonsDisabled. It is a shame to see that such outdated info was written in 2020.
If you have active, passive, autocast icons for the same spell, you can create and import only one DIS icon for them all. Let the spell have name Ashes.
So, you import:
active icon by pathliterally-any-path\Aches.dds
passive icon by pathany-other-path\Aches.dds
autocast icon by pathanother-path\Aches.dds
Now you need to import DIS icon by pathReplaceableTextures\CommandButtonsDisabled\DISAshes.dds
This is it. Now three different icons use only one DIS icon.
This way also allow to use only one DIS icon for all icons. You can import icons via next patternany-path\real-icon-name\Icon.dds. ThenReplaceableTextures\CommandButtonsDisabled\DISIcon.ddswill be used for all icons imported via described method.
Now with increased map size this makes little sense, but even the original guide of year 2007 did not describe this. This is very unfortunate, because the method I described was found in 2005.
I use such structure in one my map.
View attachment 383798
View attachment 383800
Introduction
As with many things, Reforged has changed some aspects of icons, so an updated guide is necessary.
I'd like this guide to be useful for both veteran and new icon-creators alike. Provided are .psd template
files with all icon borders as well as a .dds plugin for Photoshop. Additionally I will explain how icons are
to be saved and imported properly for Reforged (which does differentiate quite a lot compared to Classic).
The correct saving technique has been reviewed and will work for items as well as all graphics settings.
Icon Types
If you're really new to WC3 the TLDR is:
Icons are the buttons for all sorts of things in game, some of them can be pressed, such as abilities or
actions like attacking or moving via console. Others might be passive (non-clickable) abilities. And then
there are the attribute icons for attack-type, hero-stats etc.
Lastly it is important to note that some icons appear disabled when the game is stopped, what actually
happens is that they get replaced by a DIS version of themselves... but let's just show it all instead:
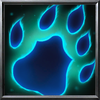
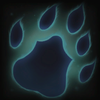
  | PAS is a passive ability icon that requires no interaction (clicking), example would be dodge. It also requires a disabled version to work properly. DISPAS is the disabled version of PAS. |
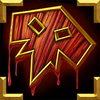 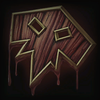 | ATC stands for Auto-Cast, it's used for icons such as Bloodlust. It also requires a disabled version to work properly. DISATC is the disabled version of ATC. |
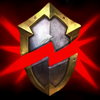
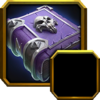 | UPG is an icon for upgradable attack/defence-type and caster unit upgrades, such as this example with Necromancer training. It has NO disabled version. |
 | ATT is used for attack/defence without upgrades and hero attributes (Intelligence, Strength, Agility). It also has NO disabled version. |
What has Changed?
First of all, Reforged icons (except scorescreen) are now at 256x256 resolution, which is great news,
since you no longer need to be making pixel-art! Of course they won't be showing at this resolution for
2k users, but will keep scaling up to 4k.
Another good bit of news is their new format, which is a .dds file. Using the attached .dds plugin for
Photoshop you simply have to save it, instead of needing to convert and what not. Also noteworthy is
that .dds has a superior compression to that abomination called .blp, so despite the icons having 16
times the detai... ehm pixels, their file-size will be only about 42 KB.
(Same applies to skins, but that another topic...)
They need to be saved in a particular way for them to work on items and all graphics settings, that will
be further explained in the Making the Icon section. World Editor doesn't fully support .dds, which is
the format that Blizzard actually uses, so you'll have to manually copy the icon's path in the Object-
Editor... sigh Reforged fun things.
Finally SSC or mini icons for end screen no longer exist in Reforged.
That's pretty much it when it comes to changes. There still is an alpha channel for UPG, ATT and score-
screen. And all the things for importing are the same as they were before.
Getting Ready
Before we start, make sure you have Photoshop (yes it's free, you know how and where...).
If you simply refuse to use it, I'm sure there might be a working .dds plugin for other options, but I
cannot assure that it will get the job done, so your choice.
If you have Photoshop, download one of the two .dds plugins attached below, and follow this guide:
Now that you have a .dds plugin, download my Icon Template - Reforged and scorescreen-hero
.psd files, and we can get started!
And lastly, get CascView so you can extract WC3 files and icons you might want to edit.
Making the Icon
I can't teach you how to draw here, I myself didn't bring my tablet when I moved, so I'm just editing
existing icons for now. However I can show how to make your art/edit into working icons for Reforged!
__________________________________________________________________________________
 | ATT and UPG are both saved WITH an alpha channel, so pick this highlighted option. I'll naming my saved ATT icon like this: ATTShieldBreaker.dds (Same applies to saving of Scorescreen of course) |
Importing
Finally got to the last part! Now the only thing remaining is importing the icon to World Editor and using
it for something.
First of all go to Asset Manager and click Import File (Ctrl+I) and get your icons. Your icons will have this path: war3mapImported/... replaced it with a corresponding one from the table below: | |
| BTN, ATC, UPG, ATT | ReplaceableTextures\CommandButtons |
PAS | ReplaceableTextures\PassiveButtons |
DIS of any type | ReplaceableTextures\CommandButtonsDisabled |
Once you renamed the path correctly, go to Object Editor and insert the FULL path into ¨Custom¨ section of ability, unit or whatever... and that's it, you're done! | |
I would also like to pay respects to the original Icons tutorial, where I learns much of the things
mentioned here: Complete Icon Tutorial - All About Icons
UPDATE: Corrected Scorescreen's name and path to the one Hive uses as SSC.
This is a text in tutorial only update, the layers
uploaded are still correct![/stable]
Attachments
Last edited:


