- Joined
- Aug 1, 2009
- Messages
- 963
What Are Mods?
Mods are files that contain data and imported files to be used in other maps. These can be published to Battle.net, allowing for mapmakers to access these mods and use them in their maps. This is useful because each mod/map is seperate, so if multiple maps use the same mod, players need to DL that mod once. Additionally, since mods can contain imported files, mapmakers can use mods to store large files, such as models, high-resolution textures, or soundtracks allowing them to use these files without making their maps extremely large.
Creating a Mod
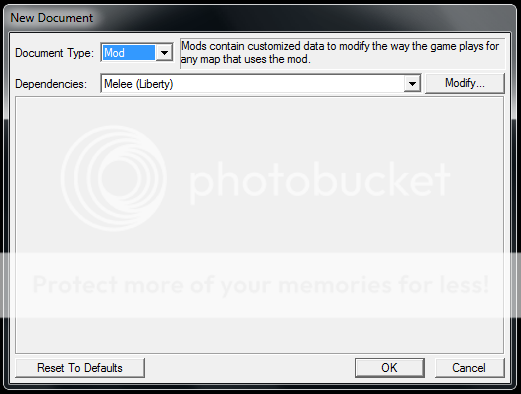
To begin, simply open the Galaxy Editor and create a new document. Then, change the document type to "Mod".
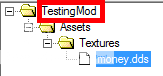
You can import files into a mod the same way you would import files into a map. However, to prevent files in multiple mods from having the same name/filepath and normal files being overwritten, I recommend that you import your files to a path that begins with the name of your mod, as shown below.
Ensure that you save after importing.
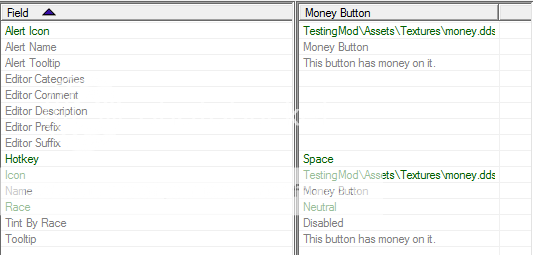
You can also create objects in the Data Editor for your mod. For example, this is a custom Button that I created for my mod, using the imported file from above.
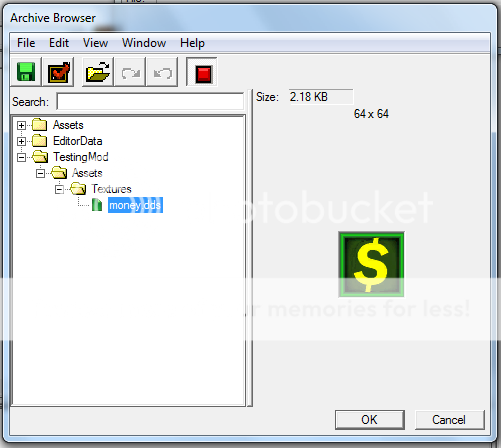
Note that because I prefixed my imported files, I can easily access them in the Archive Browser, and should I have multiple mods each one would have its own folder.
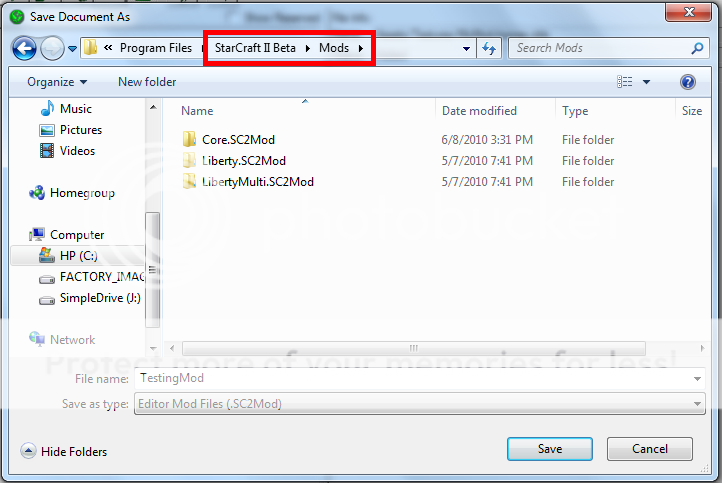
Lastly, you need to save your mod. It is important that you save your mod in the mods folder, which is located in your Starcraft II Beta folder (otherwise you will not be able to access it).
Using a Mod in your Map
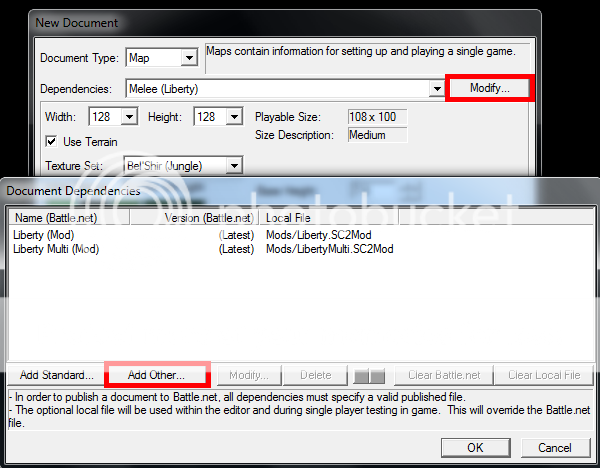
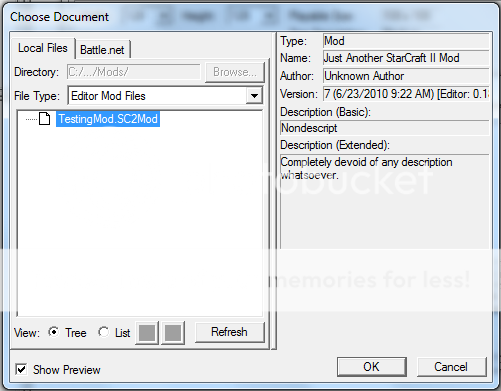
Now, if you want to use the mod you just created for a new map, you must change the Dependencies of your new map while creating it. This is done by clicking the "Modify Button" and then "Add Other". Then, select the mod(s) that you want to include in your map.
Note: Because the name and description are created only when publishing your mod on Battle.net, you cannot give your mod a specific name/description yet.
Now, you should be able to access your mod files within the map. For example, here is the button I created in my mod in an ingame screenshot.

One thing you should notice, however, is that you cannot directly access assets like .dds/.m3 files in mods (for now). For example, I cannot create a new button and use my imported file. However, I can duplicate the other button and change all the other values to what I want them to be. This means that when creating a mod, you must create models/buttons/sounds associated with your assets or people will not be able to use them at all.
Note: I plan on adding sections on how to publish mods on Battle.net and how to access mods from Battle.net when the beta returns. Because of this, I consider this tutorial to be unfinished for the time being.
Mods are files that contain data and imported files to be used in other maps. These can be published to Battle.net, allowing for mapmakers to access these mods and use them in their maps. This is useful because each mod/map is seperate, so if multiple maps use the same mod, players need to DL that mod once. Additionally, since mods can contain imported files, mapmakers can use mods to store large files, such as models, high-resolution textures, or soundtracks allowing them to use these files without making their maps extremely large.
Creating a Mod
To begin, simply open the Galaxy Editor and create a new document. Then, change the document type to "Mod".
You can import files into a mod the same way you would import files into a map. However, to prevent files in multiple mods from having the same name/filepath and normal files being overwritten, I recommend that you import your files to a path that begins with the name of your mod, as shown below.
Ensure that you save after importing.
You can also create objects in the Data Editor for your mod. For example, this is a custom Button that I created for my mod, using the imported file from above.
Note that because I prefixed my imported files, I can easily access them in the Archive Browser, and should I have multiple mods each one would have its own folder.
Lastly, you need to save your mod. It is important that you save your mod in the mods folder, which is located in your Starcraft II Beta folder (otherwise you will not be able to access it).
Using a Mod in your Map
Now, if you want to use the mod you just created for a new map, you must change the Dependencies of your new map while creating it. This is done by clicking the "Modify Button" and then "Add Other". Then, select the mod(s) that you want to include in your map.
Note: Because the name and description are created only when publishing your mod on Battle.net, you cannot give your mod a specific name/description yet.
Now, you should be able to access your mod files within the map. For example, here is the button I created in my mod in an ingame screenshot.
One thing you should notice, however, is that you cannot directly access assets like .dds/.m3 files in mods (for now). For example, I cannot create a new button and use my imported file. However, I can duplicate the other button and change all the other values to what I want them to be. This means that when creating a mod, you must create models/buttons/sounds associated with your assets or people will not be able to use them at all.
Note: I plan on adding sections on how to publish mods on Battle.net and how to access mods from Battle.net when the beta returns. Because of this, I consider this tutorial to be unfinished for the time being.
Last edited:


