
- Joined
- Mar 27, 2009
- Messages
- 311
Ah yes, I joined recently, thank you.

 Approved
 Custom Script: LibraryName.Initialize()
This is the menu bar. It contains categories like File, Edit, View, Insert and Info. Clicking on any of them will open the submenu.
File menu
Edit menu
View menu
Insert menu

- Button: clicking on it creates a Custom Button. Clicking on the dropdown thing will open the dropdown menu.
- Custom Button: This button can have custom texture.
- Script Dialog Button and Browser Button: premade ready-to-use button templates that can have a custom text inside.
- Invis Button: An invisible button that can be clicked. This has a lot of interesting applications, such as putting an Invis button over a backdrop.
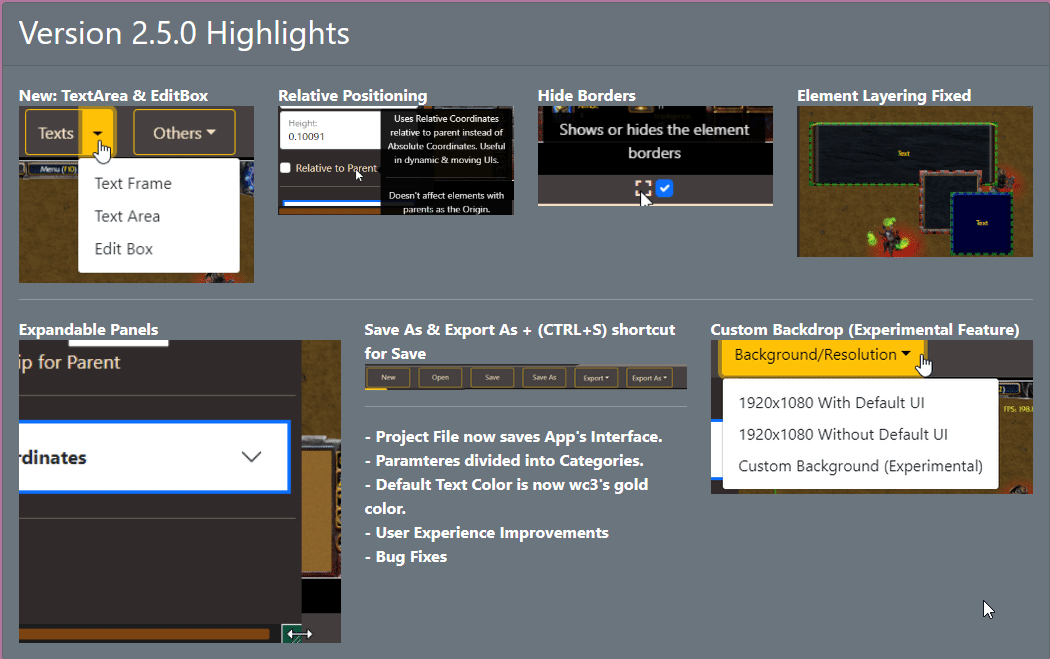
- Backdrop: (What is a Backdrop? A backdrop is basically an image that can't be interacted with) clicking on it creates a Custom Backdrop. Clicking on the dropdown thing will open the dropdown menu.
- Custom Button: This backdrop can have custom texture.
- All others: premade ready-to-use backdrop templates.
- Text: clicking on it creates a Text Frame. Text Frames are basically just texts, that can be put above anything or anywhere.
- Others: Includes special types of frames. This will contain more things later on.
Info menu
The panel on the left is called Element Panel. It contains all the features to modify and edit the elements.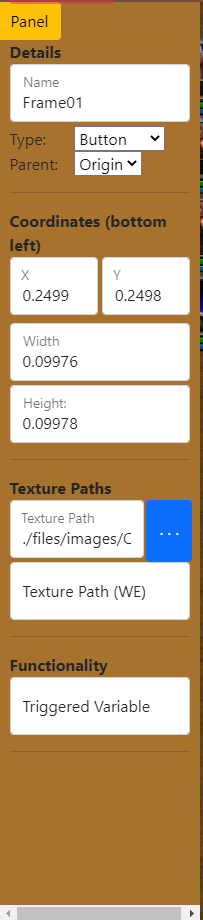
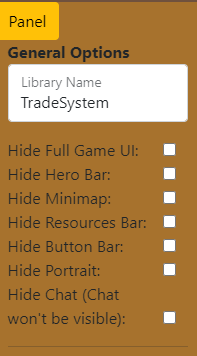
- General Options: If nothing is selected (or Origin is selected), these options will be available.
- Library Name: This allows you to set the name of the project. If more than 1 project is used in the same map, they must have different Library Names.
- Hide Full Game UI: This hides all the default game UI.
- Hide Chat: This will make players' messages not visible. Basically no one will be able to see other players' messages.
- Universal Fields: These fields are available in most frames.
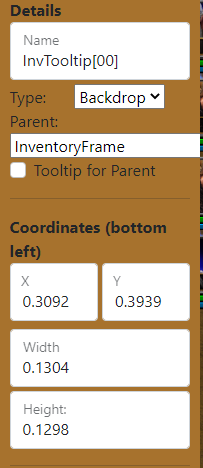
- Name: Specifies the name of this frame. This name can be used to get that frame when coding. Special characters and spaces are NOT allowed. Array naming however is allowed. You can turn the frame into an array by giving it an index. This is only useful for manual coding. Example: Frame[00]. Index 00 must exist in order to write other indices.
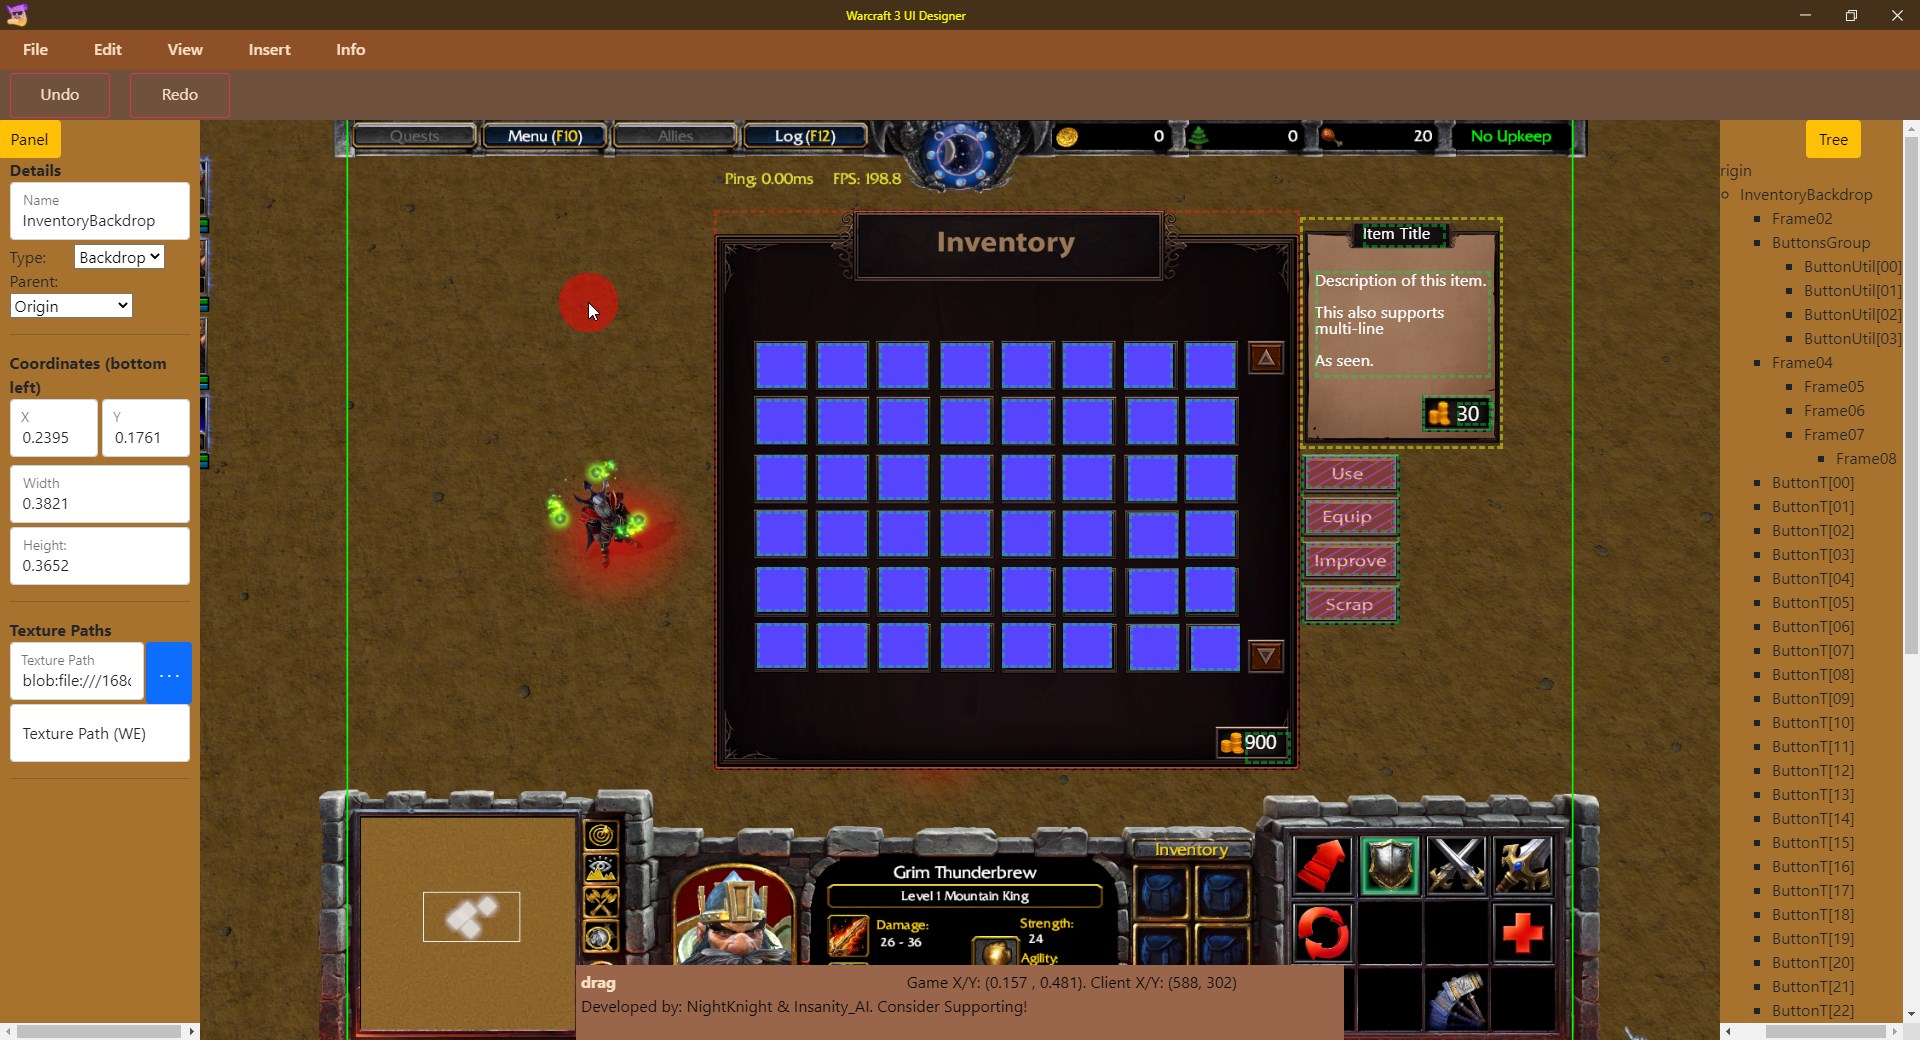
- Parent: The element will be a "child" to the selected element. PARENT-CHILD Relation: The concept is like putting an image inside another. The child will always be above the parent (although this behavior is not made inside the app. You may need to save and re-open the file for the correct order to be displayed), and if the parent is hidden (by manual code or through Tooltip), all its children are hidden with it. Basically if you have a background and want a button and text inside it, then the button and text both should be children to the background. Another note: When creating elements, they are made as children to the currently selected element.
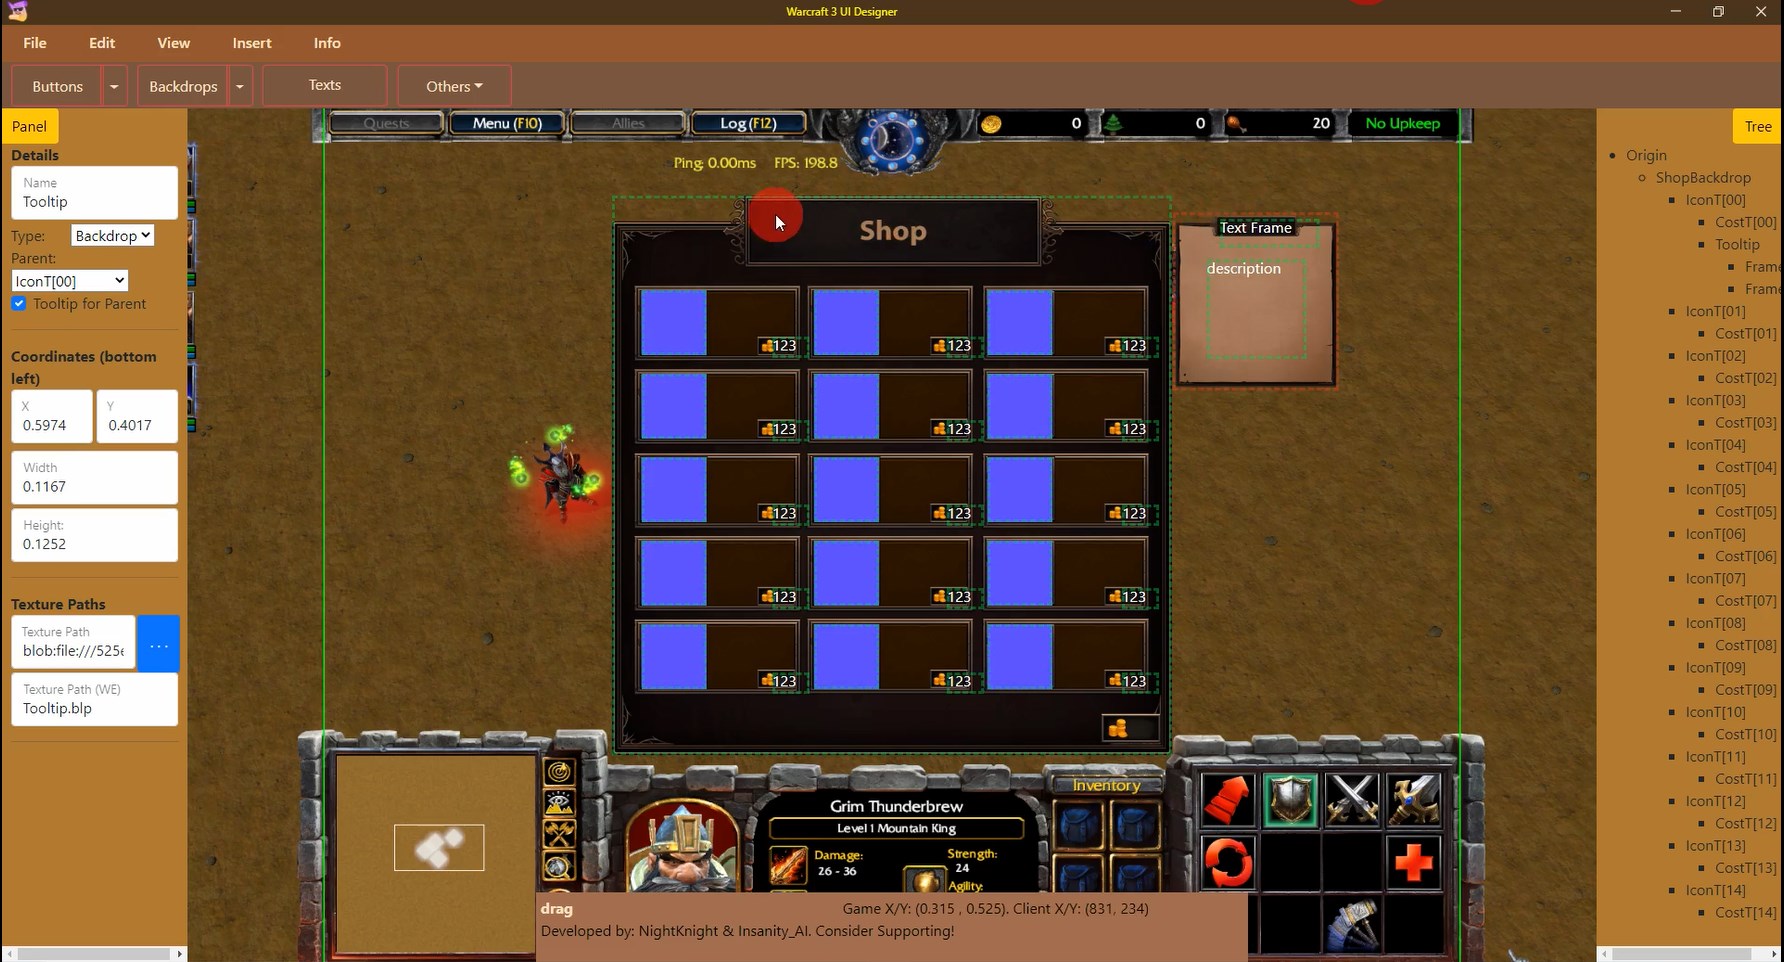
- Tooltip: This functionality makes the element as a tooltip to the PARENT. Basically, the element will be default hidden ingame, and will only appear when the user's mouse hover over the Parent frame. Buttons can NOT be tooltips. Elements with Origin as Parent can not also be tooltips. A Parent can have only ONE tooltip. A tooltip can NOT itself have a tooltip.
- X/Y: specifies the location of the element.
- Width/Height: specifies the dimensions of the element. Minimum is 0.01, although buttons' may not be compatible with extremely small sizes (they will look wierd).
- Buttons Fields:
- Text: For some buttons, this field is available. This will change the text displayed inside the button.
- Triggered Variable:
- This functionality allowes for GUI-triggers to be attached to buttons and run on button clicks. It uses a (type: real) variable that can be detected by th event ("Game - Value of Real Variable") in order to run the GUI trigger.
- First step is, make a GUI variable of type Real inside world editor, then put the it's name inside the field with the prefix "udg_". For example, a variable with name "testVar" should be put inside the field as "udg_testVar".
- Second step is, make a GUI trigger with the event ("Game - Value of Real Variable") and put in the variable.
- Third step is, put the actions you want. Note: when the trigger runs, this variable will hold the NUMBER of the clicking player. Basically, if blue clicked the button, the variable's value will be 2 (his number). If red clicks the button, it will be 1 (his number). You can detect the clicking player with this.
- Fourth step, after putting in your actions, make a line that SETS the value of the variable to 0, so that it can detect the next click.
- P.S.: You can leave this field empty if you dont want the functionality.
- Text Fields:
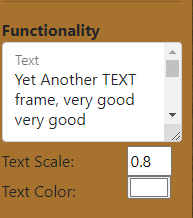
- Text: Allows for much more text as well as multi-line texts. The behavior of this functionality is very close to the ingame behavior, including the line breaks and overflows.
- Scale: Controls the scale of the text. Note: the scale of the text is close but NOT identical to the text insice WC3. It will be a little different. In WC3, changing the scale also affects the position of the frame, so you may need to test and adjust scale and position for best results.
- Text Color: Changes the color of the text.
- Buttons/Custom Backdrops fields:
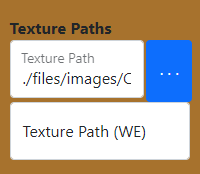
- Texture Path (the first field): This is responsible for the appearance of the element INSIDE the application. It does NOT accept BLP files. This is fully for you to see what you're doing.
- Texture Path WE (the second field): This is responsible for the appearance of the element INGAME. You put the path of the texture you want in this field. You get the path from the Import Editor just like how you choose path for icons and stuff. Note: If the path contains single slashes "/" it will not work. You need to replace it with double slashes "//". Example: If the path is "images/icon.blp" then in the field it should be put as "images//icon.blp"
- Context Menu (Right-Click Menu):
- Delete: Deletes the selected element.
- Duplicate: Makes a copy of the selected element with the same data and properties.
- CircularArray: Makes multiple copies of the selected element in a circular path around the selected element. It can also create elements in the same position by having Radius equal to zero. Helpful for making inventory tooltips.
- TableArray: Makes multiple copies of the selected element in a table shape. X-Gap and Y-Gap are the lengths of the distances between the elements.
- For both Array options, the elements are created as an array (notice their names). If the selected element to be Array-Duplicated has an array Parent, the option Array Parent will be unlocked. This option automatically assigns each element of the created array to the element of the parent array with the same index.
Note: Sometimes fields may not be automatically refreshed when doing certain actions. Clicking on the frame will refresh it and it's fields.
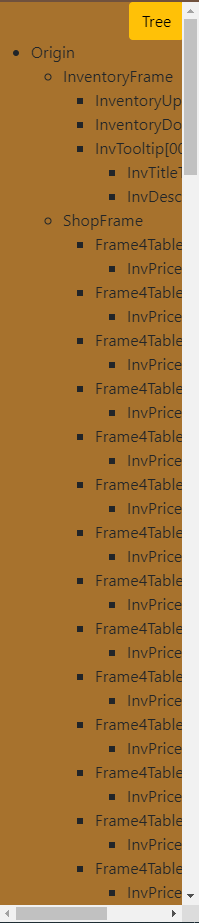
The panel on the right is the Tree Panel. It shows the hierarchy of your project and the relations between frames.
Tip: Clicking on a name will select that frame.

This bar gives you alot of feedback while you're working.
- Most actions will give you a feedback or errors here. You can also know what was done through it.
- This displays the WC3 coordinates of your mouse cursor. You can use this to measure distances between points or determine a certain location. Point (0,0) lies bottom left, while point (0.8,0.6) is on top right. Width of the creation area is 0.8, and the height is 0.6.
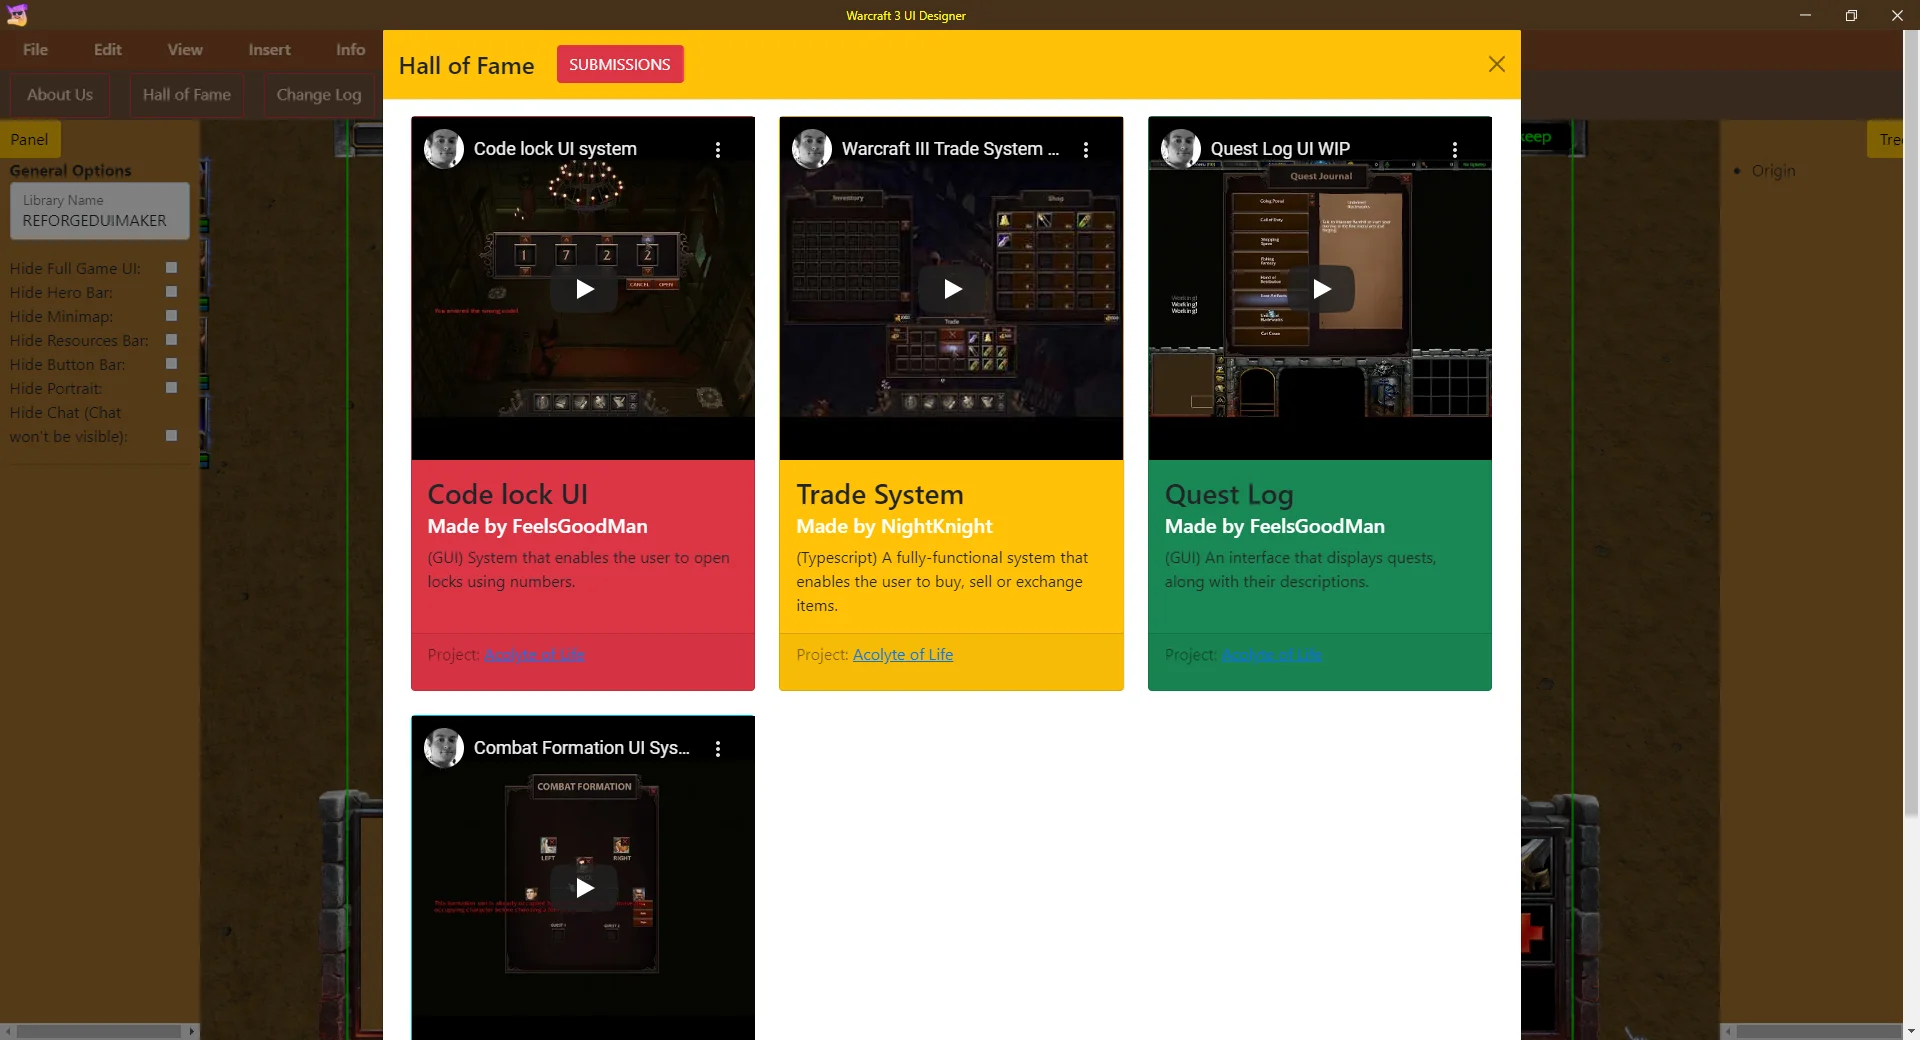
In the Info tab, there's the Hall of Fame page. This page is dynamically updated and will always be up-to-date. It will be used to showcase the greatest designs and ideas made with the app, along with details about the maker and the project. This is great for users to showcase their creativity and get their projects to be known.