- Joined
- Jul 28, 2021
- Messages
- 931
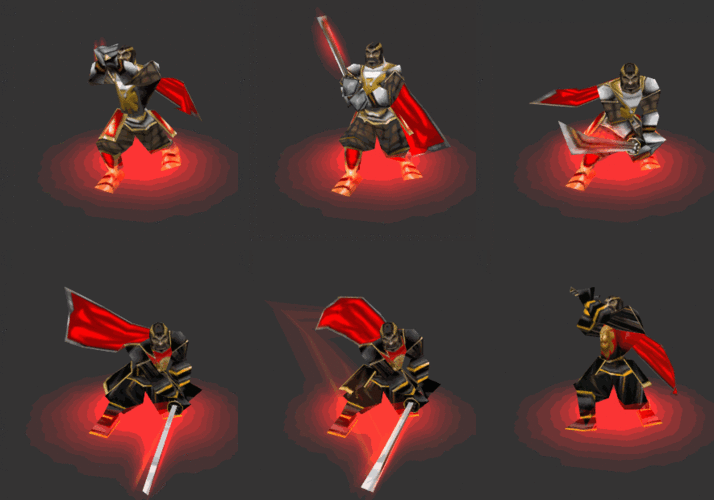
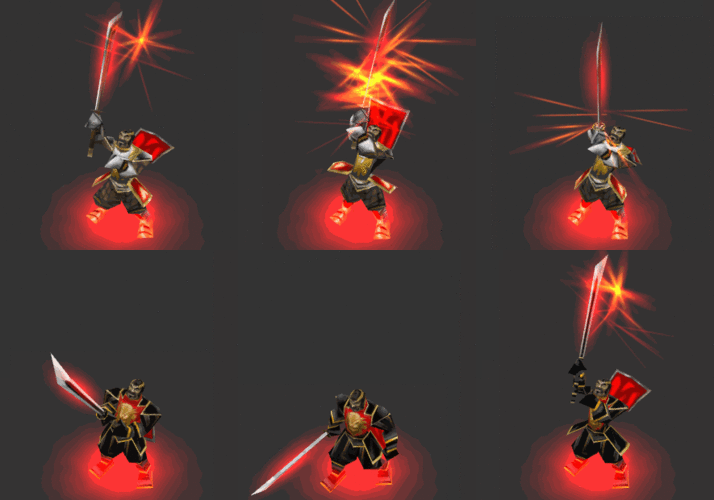
Hello there, long time no see, guys! I'm glad to say I had time to make a model.


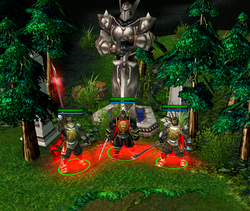
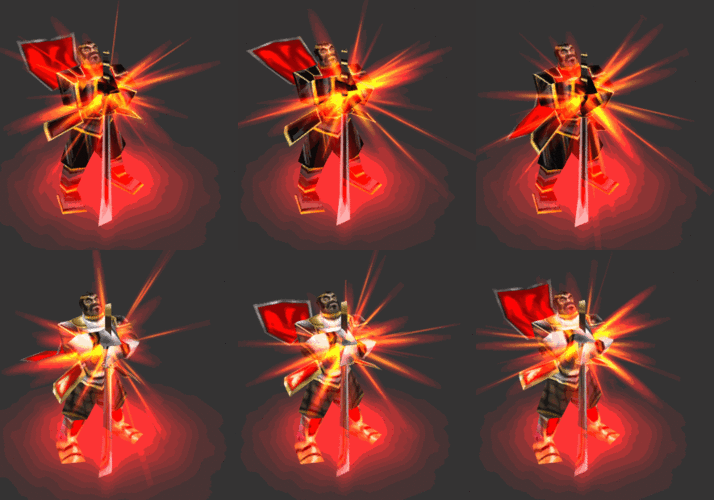
I want to share with you a hero that includes a custom portrait, animation and thoughtful re-wrapping, all done in the classic style of Warcraft.
If you want to know more about my attempt to create a fitting two-handed fencing master for the Alliance (without going too much into technical details) you can open this spoiler below. Hope you find it useful and interesting to read!
Stage 1 - Blademaster Swordmaster
To speed up the process we should find another model that will be the basis for future work because it contains mesh and animations and, sometimes, even a portrait. We already said this somewhere, right?
And here is our hero! (Literally and figuratively.)

Good. Ujimasa Hojo definitely knows what to do with re-wrapping, but we are also not so bad ourselves.
Stage 2 - Image
We need to visualize an image of an Alliance hero that contains some iconic traits... Ideally.
A fact number one: while Orcs love to wear stupid holey rags, our brave knights and paladins wear freshly ironed cloaks with fancy crests.

Ok. Now the back has some Alliance fashion.
As you can see, we took the banner with its bones and transformed it into a cloak, quite artfully. Despite the fact that the animation of the cloak is far from ideal, we already have a chain of working bones connected with mesh. Let's save this handy thing for later.
Stage 3 - Dressing room
It's not easy to deftly swing a huge two-handed sword in heavy plate armor, isn't it?
Our hero is a grand fencing master, so it would be nice to provide him with lighter armor on his legs and arms to increase his mobility (lore-wise):


Good! This Paladin's leather texture helps us keep the heroic style familiar to our eyes. In addition, the new solid chest plate looks lighter and more fitting. We should admit that the golden stripes alternate well with the armor patterns.
To further support this color scheme we can offer our hero a sword with a fancy blade edge that also has a nice gold line:

We stole this texture from Admiral Proudmoore to make the sword look more heroic. Not bad!
It woudn't hurt if we also put on a cloak with gold edges and a shiny crest:

Great! The cloak now looks complete and visually enhances the hero. We additionally re-wrapped the boots so that they are gold, and the soles no longer flicker while moving (because we have a thing about it).
Let's pause and take a look at our renewed armor from afar to appreciate its integrity and, of course, to praise ourselves:

The whole picture can help us summarize the result and see if we can improve or change something. So, let's take our time here.
The flexible and hard armor pieces logically work well, for example, iron gloves protect hands without shields, and leather parts of the armor allow the hero to perform a more graceful battle dance. The team-colored parts are clearly visible and do not oversaturate the picture. The color scheme is well respected in a variety of gold and silver details. The hero does not wear a helmet because, according to the lore, he is not afraid to open his head before any enemy in the same way as paladins and other commanders. However, we added a specific armor piece to protect the neck. The last two changes will help us to put more emphasis on the portrait and thus make our hero more unique. Darn, what a huge block of text.
Stage 4 - Face
It's time for some plastic surgery.
How about turning this orc into a human? Easy. At first, we cut off the ears, kek. Then, we try to shape the skull...

Here we removed some orcish traits and prepared the face for a skin graft. Let's try the Knight texture.
Good! When applying the skin, we see that the face of our hero is not much like the faces of other heroes from Warcraft:


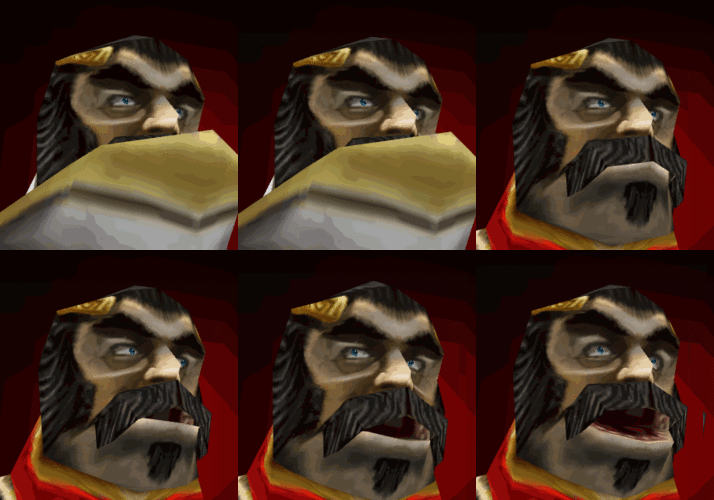
The face has a sharp human nose now, deep eye sockets and expressive eyebrows. The shaded parts repeat some facial folds, which is quite important for facial expressions.
Here we took the jaw from a Knight because its model has a mustache and fitting texture pieces:


Great! It looks like the hero's wide cheekbones and a massive jaw add a lot to his stern look. The golden circlet fits well with our color scheme and, as a status item, gives more meaning to the face. In addition, his strong armored neck goes well with his massive shoulders and a broad back.
Let's apply all texture layers and find some good camera angles:

Fine! Now we can confirm the completion of the head.
Stage 5 - Animation
Or may the gods of Lordaeron help us, if there are any.
It’s not that we are afraid to do this, it’s just that the work ahead is quite complex.


Here we'll have to get rid of glitching through the armor, animate the portrait, re-animate the cloak, add new fitting animations in Blizzard-style and fix many other issues such as the disappearing sword, shaky body parts and so on.
Ok. A few moments later we successfully removed the glitches, "reinstalled" the cloak and improved the geoset visibility.


Now the existing animations look smoother, the cloak obeys the laws of physics and the Ribbon Emitter with the sword are at place.
Here we reconnected some of the old facial bones to make the eyebrows, mustache and cheeks move:

Looks good, but to create a really living face we should put more effort.
Here we created and implemented more bones to move the eyelids and pupils under the eyebrows:


Excellent! The face looks live now and, what is more important, it has unique expressions in Blizzard-style.
Stage 6 - Special moves
We have to admit that any self-respecting Warcraft hero should have Spell and Stand Channel animations, right?
Let's see:

This is our Spell animation taken from Stand-4 but it doesn't look special.
A little bit of magic and we can see really good changes:

But what did we do? We took the thigh armor pads, the cloak and worked with them: we made them move up and and shake, as if a powerful air current was coming from below. We also stole a Paladin's spell Particle Emitter, made it move up the blade of the sword, thus emphasizing the role of the sword and supporting the Alliance spirit of our hero.
And what about a new Stand Channel sequence?


Here we can see a posture full of pathos: the hero stands just like a classic Alliance statue from Warcraft. Then we animated the thigh armor pads and the cloak again. And in the end we turned to the spell Particle Emitter again to increase the expression of the animation.
Oh, take a closer look at these:


Here we can observe the unity of colors. It is based on the Blizzard color scheme we took from the Attack-Walk-Spin-Whatever animation. We also applied lavalamp.blp texture for the particle emitter: it is bright in the center and has smooth red edges outside. Pretty satisfying, isn't it?
Thus, our hero has original "flavor" in terms of colors: not only do they resemble the light of a paladin, but they are also juicy and reddish enough to indicate the hero's dangerous and aggressive special moves.
Stage 7 - Final round
Fight!

Whoops! A bit of work here obviously wouldn't hurt.
Hm. The Overhead attachment point doesn't seem to be at place... Generally speaking, for us it's always best to remember to double-check the positions and timings of objects, no matter how great we think the template model is. We should also remove the unused objects, for example, the unit version of our model shouldn't have a Dissipate sound (because it doesn't have a Dissipate animation, right?).
A few moments later we streamlined the list of animations so it will be easier for us and some other guys to change things in the future:

After that we want to change the Blood Splatter to human and the Death sounds accordingly. We want all our sequences to have the proper opening frames, so the model has smooth switching between the animations. We also want the Sanity Checker to be problem-free and have the model optimized for size. We finally want our model to work flawlessly and become a decent template for the future modelers.
That's all! Thanks a lot for reading and I sincerely hope you enjoyed it!
I look forward to seeing you in the next issue of my modelling magazine, whether you are an Orc, an Elf or a Troll
Many thanks to @Ujimasa Hojo for the template.
Time spent on the models: 8 days (8 hours total).
To speed up the process we should find another model that will be the basis for future work because it contains mesh and animations and, sometimes, even a portrait. We already said this somewhere, right?
And here is our hero! (Literally and figuratively.)
Good. Ujimasa Hojo definitely knows what to do with re-wrapping, but we are also not so bad ourselves.
Stage 2 - Image
We need to visualize an image of an Alliance hero that contains some iconic traits... Ideally.
A fact number one: while Orcs love to wear stupid holey rags, our brave knights and paladins wear freshly ironed cloaks with fancy crests.
Ok. Now the back has some Alliance fashion.
As you can see, we took the banner with its bones and transformed it into a cloak, quite artfully. Despite the fact that the animation of the cloak is far from ideal, we already have a chain of working bones connected with mesh. Let's save this handy thing for later.
Stage 3 - Dressing room
It's not easy to deftly swing a huge two-handed sword in heavy plate armor, isn't it?
Our hero is a grand fencing master, so it would be nice to provide him with lighter armor on his legs and arms to increase his mobility (lore-wise):
Good! This Paladin's leather texture helps us keep the heroic style familiar to our eyes. In addition, the new solid chest plate looks lighter and more fitting. We should admit that the golden stripes alternate well with the armor patterns.
To further support this color scheme we can offer our hero a sword with a fancy blade edge that also has a nice gold line:
We stole this texture from Admiral Proudmoore to make the sword look more heroic. Not bad!
It woudn't hurt if we also put on a cloak with gold edges and a shiny crest:
Great! The cloak now looks complete and visually enhances the hero. We additionally re-wrapped the boots so that they are gold, and the soles no longer flicker while moving (because we have a thing about it).
Let's pause and take a look at our renewed armor from afar to appreciate its integrity and, of course, to praise ourselves:
The whole picture can help us summarize the result and see if we can improve or change something. So, let's take our time here.
The flexible and hard armor pieces logically work well, for example, iron gloves protect hands without shields, and leather parts of the armor allow the hero to perform a more graceful battle dance. The team-colored parts are clearly visible and do not oversaturate the picture. The color scheme is well respected in a variety of gold and silver details. The hero does not wear a helmet because, according to the lore, he is not afraid to open his head before any enemy in the same way as paladins and other commanders. However, we added a specific armor piece to protect the neck. The last two changes will help us to put more emphasis on the portrait and thus make our hero more unique. Darn, what a huge block of text.
Stage 4 - Face
It's time for some plastic surgery.
How about turning this orc into a human? Easy. At first, we cut off the ears, kek. Then, we try to shape the skull...
Here we removed some orcish traits and prepared the face for a skin graft. Let's try the Knight texture.
Good! When applying the skin, we see that the face of our hero is not much like the faces of other heroes from Warcraft:
The face has a sharp human nose now, deep eye sockets and expressive eyebrows. The shaded parts repeat some facial folds, which is quite important for facial expressions.
Here we took the jaw from a Knight because its model has a mustache and fitting texture pieces:
Great! It looks like the hero's wide cheekbones and a massive jaw add a lot to his stern look. The golden circlet fits well with our color scheme and, as a status item, gives more meaning to the face. In addition, his strong armored neck goes well with his massive shoulders and a broad back.
Let's apply all texture layers and find some good camera angles:
Fine! Now we can confirm the completion of the head.
Stage 5 - Animation
Or may the gods of Lordaeron help us, if there are any.
It’s not that we are afraid to do this, it’s just that the work ahead is quite complex.
Here we'll have to get rid of glitching through the armor, animate the portrait, re-animate the cloak, add new fitting animations in Blizzard-style and fix many other issues such as the disappearing sword, shaky body parts and so on.
Ok. A few moments later we successfully removed the glitches, "reinstalled" the cloak and improved the geoset visibility.
Now the existing animations look smoother, the cloak obeys the laws of physics and the Ribbon Emitter with the sword are at place.
Here we reconnected some of the old facial bones to make the eyebrows, mustache and cheeks move:
Looks good, but to create a really living face we should put more effort.
Here we created and implemented more bones to move the eyelids and pupils under the eyebrows:
Excellent! The face looks live now and, what is more important, it has unique expressions in Blizzard-style.
Stage 6 - Special moves
We have to admit that any self-respecting Warcraft hero should have Spell and Stand Channel animations, right?
Let's see:
This is our Spell animation taken from Stand-4 but it doesn't look special.
A little bit of magic and we can see really good changes:
But what did we do? We took the thigh armor pads, the cloak and worked with them: we made them move up and and shake, as if a powerful air current was coming from below. We also stole a Paladin's spell Particle Emitter, made it move up the blade of the sword, thus emphasizing the role of the sword and supporting the Alliance spirit of our hero.
And what about a new Stand Channel sequence?
Here we can see a posture full of pathos: the hero stands just like a classic Alliance statue from Warcraft. Then we animated the thigh armor pads and the cloak again. And in the end we turned to the spell Particle Emitter again to increase the expression of the animation.
Oh, take a closer look at these:
Here we can observe the unity of colors. It is based on the Blizzard color scheme we took from the Attack-Walk-Spin-Whatever animation. We also applied lavalamp.blp texture for the particle emitter: it is bright in the center and has smooth red edges outside. Pretty satisfying, isn't it?
Thus, our hero has original "flavor" in terms of colors: not only do they resemble the light of a paladin, but they are also juicy and reddish enough to indicate the hero's dangerous and aggressive special moves.
Stage 7 - Final round
Fight!
Whoops! A bit of work here obviously wouldn't hurt.
Hm. The Overhead attachment point doesn't seem to be at place... Generally speaking, for us it's always best to remember to double-check the positions and timings of objects, no matter how great we think the template model is. We should also remove the unused objects, for example, the unit version of our model shouldn't have a Dissipate sound (because it doesn't have a Dissipate animation, right?).
A few moments later we streamlined the list of animations so it will be easier for us and some other guys to change things in the future:
After that we want to change the Blood Splatter to human and the Death sounds accordingly. We want all our sequences to have the proper opening frames, so the model has smooth switching between the animations. We also want the Sanity Checker to be problem-free and have the model optimized for size. We finally want our model to work flawlessly and become a decent template for the future modelers.
That's all! Thanks a lot for reading and I sincerely hope you enjoyed it!
I look forward to seeing you in the next issue of my modelling magazine, whether you are an Orc, an Elf or a Troll
Many thanks to @Ujimasa Hojo for the template.
Time spent on the models: 8 days (8 hours total).
Last edited:

 Approved

