- Joined
- Nov 11, 2004
- Messages
- 1,986
So I have been playing around with the NeoDex Importer and I got pretty good results out of it. The best was that actualy updating each model took around 1 to 2 hours. If I had some extra tools it would have been way faster.
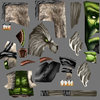
For experimenting I picked up two models from the hive. Supa's Abomination Hero and Jirael/Tarrasque's Lord of Darkness. The process was simple, first I made the diffuse, normal, specular and mask maps for each model (explaination at the end), then I imported the model to 3dsmax 2011 using NeoDex's importer, finaly I formatted everything to Sc2's Art Tools and remade Particle Emitters. The final results were too astonishing to be true.
Note: Sc2 models were rendered in medium quality, they should look better with higher quality settings.
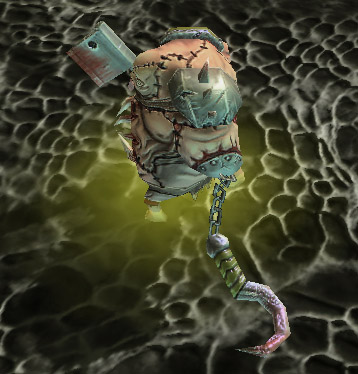
Supa's Abomination:
Wc3 Look:
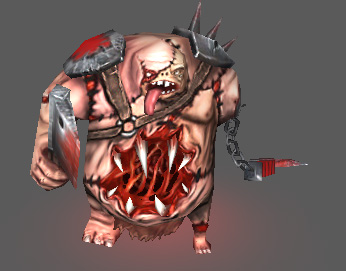
Sc2 only diffuse:
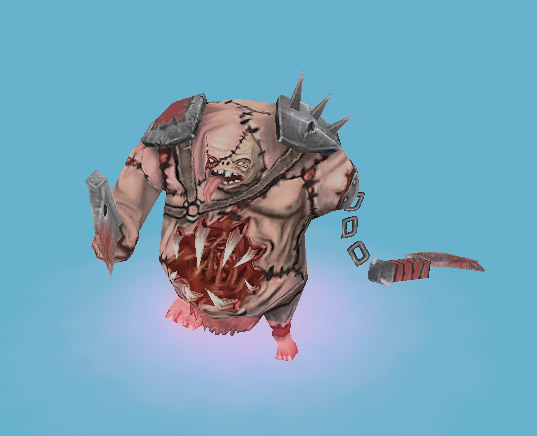
Sc2 with Normlas map:
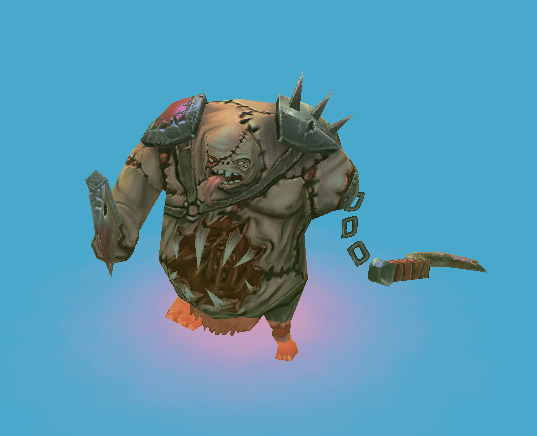
Sc2 with all the maps on enviroment:
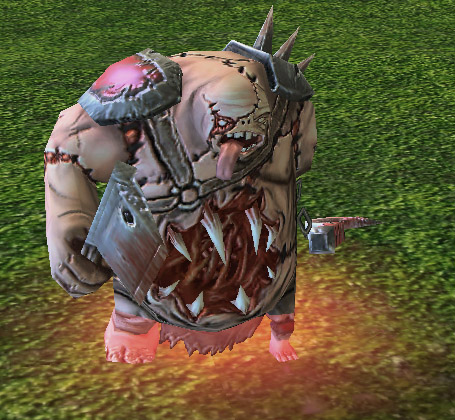
Sample 1:
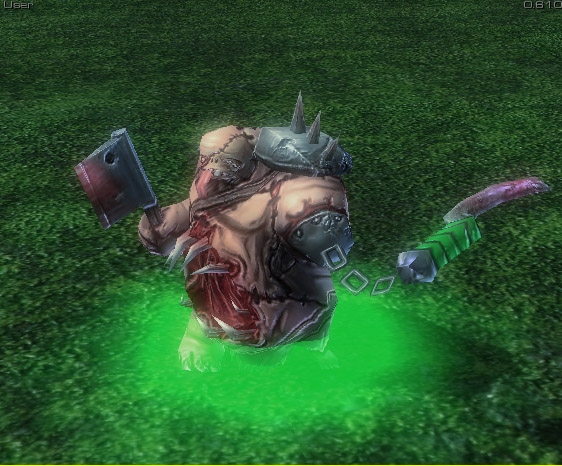
Sample 2:
Tarrasque's Lord of Darkness:
Wc3 Look:
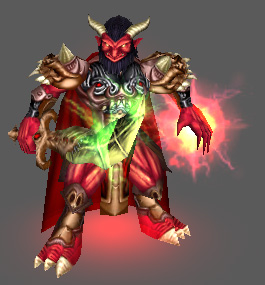
Sc2 Look only diffuse:
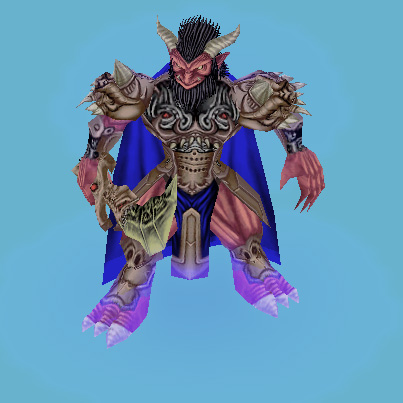
Sc2 Look with other maps:
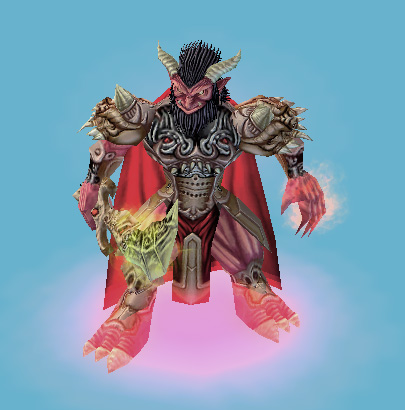
Sample 1:
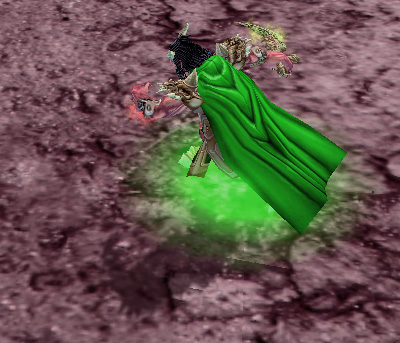
Sample 2:
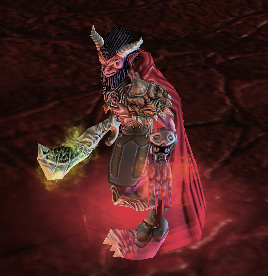
So how were they made?
Obviously first I downloaded the models and converted the Blps to TGAs.
The next step was make the maps.
First I opened the tga, selected the team colored areas in the alpha channel, inversed their colors and pasted them in the RGB Channel. Saved it as a sepparate texture which I would use for generating the Normal and Specular map.
Now I have two basic textures the original texture and the shape texture.
To make the diffuse map, I opened the original texture, removed the alpha which wasn't team color, desaturated the texture a bit and reduced contrast to make it look more Sc2 like. Then saved it as a .dds
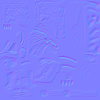
To make the Normal Map, I opened the shape texture and used Nvidia's Texture Tools' Normal Map Filter to generate the normal Map, then I copy pasted the background in multiple layers and apply them as overlay, the areas which I wanted more bump got seppartaed from others in different layers and I applied different opacities to the layers to increase bump. Finaly merged all and saved the layers as a DTX5 NRM DDS (not according to some tutorial around there which doesn't make correct Normal Maps).
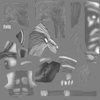
To make the Specular Map, I used Crazy bump and Photoshop. I first opened the Shape texture in Photoshop and desaturated it, then reduce it's brightness down, later I opened Crazy Bump and created a noisy specular map with high contrast and metallic color. I copy pasted the generated specular map from Crazy Bump into my other image as a new layer and erased the non metallic areas. I then addapted saturation and set my over layer as an overlay which I affected by opacity until I felt the merge of both layers was fit. Finaly saved my DDS.
For the Mask Map, I just opened the original texture, set the RGB channel to black and removed the team colored alpha, then saved it as a .dds
All this took around 30 minutes to 1 hour for each model.
Now that I had finished my maps. All what was left was import the model to 3dsmax and update it to sc2 art tools.
This was almost a piece of cake since all I had to do was reset Rarity and movespeed in Sc2's art tools anim floater and, later, remake the materials for Sc2. In the sace of team color, I made my own Glow Texture and set it on diffuse and as an specular Add material with no shadows and no lights affection.
Finaly, export and fix a bit (add particle emitters, fix visibility anims, etc).
Conclussions from the Experiment:
Future Work:
I would release the generated models, but I require permission from both authors. so stay tuned.
For experimenting I picked up two models from the hive. Supa's Abomination Hero and Jirael/Tarrasque's Lord of Darkness. The process was simple, first I made the diffuse, normal, specular and mask maps for each model (explaination at the end), then I imported the model to 3dsmax 2011 using NeoDex's importer, finaly I formatted everything to Sc2's Art Tools and remade Particle Emitters. The final results were too astonishing to be true.
Note: Sc2 models were rendered in medium quality, they should look better with higher quality settings.
Supa's Abomination:
Wc3 Look:
Sc2 only diffuse:
Sc2 with Normlas map:
Sc2 with all the maps on enviroment:
Sample 1:
Sample 2:
Tarrasque's Lord of Darkness:
Wc3 Look:
Sc2 Look only diffuse:
Sc2 Look with other maps:
Sample 1:
Sample 2:
So how were they made?
Obviously first I downloaded the models and converted the Blps to TGAs.
The next step was make the maps.
First I opened the tga, selected the team colored areas in the alpha channel, inversed their colors and pasted them in the RGB Channel. Saved it as a sepparate texture which I would use for generating the Normal and Specular map.
Now I have two basic textures the original texture and the shape texture.
To make the diffuse map, I opened the original texture, removed the alpha which wasn't team color, desaturated the texture a bit and reduced contrast to make it look more Sc2 like. Then saved it as a .dds
To make the Normal Map, I opened the shape texture and used Nvidia's Texture Tools' Normal Map Filter to generate the normal Map, then I copy pasted the background in multiple layers and apply them as overlay, the areas which I wanted more bump got seppartaed from others in different layers and I applied different opacities to the layers to increase bump. Finaly merged all and saved the layers as a DTX5 NRM DDS (not according to some tutorial around there which doesn't make correct Normal Maps).
To make the Specular Map, I used Crazy bump and Photoshop. I first opened the Shape texture in Photoshop and desaturated it, then reduce it's brightness down, later I opened Crazy Bump and created a noisy specular map with high contrast and metallic color. I copy pasted the generated specular map from Crazy Bump into my other image as a new layer and erased the non metallic areas. I then addapted saturation and set my over layer as an overlay which I affected by opacity until I felt the merge of both layers was fit. Finaly saved my DDS.
For the Mask Map, I just opened the original texture, set the RGB channel to black and removed the team colored alpha, then saved it as a .dds
All this took around 30 minutes to 1 hour for each model.
Now that I had finished my maps. All what was left was import the model to 3dsmax and update it to sc2 art tools.
This was almost a piece of cake since all I had to do was reset Rarity and movespeed in Sc2's art tools anim floater and, later, remake the materials for Sc2. In the sace of team color, I made my own Glow Texture and set it on diffuse and as an specular Add material with no shadows and no lights affection.
Finaly, export and fix a bit (add particle emitters, fix visibility anims, etc).
Conclussions from the Experiment:
- Transforming Wc3 models to Sc2 is quite simple and could be done in an small time once one has expertize with both formats.
- Resulting conversions with these techniques produce good/decent results, further investigation could improve it further.
- Converting models which use a lot of in-game textures can be a big pain in the ass, specialy if you want to optimize them.
- It's better to use Sc2's Particle Emitter Textures instead of Wc3's.
Future Work:
- Study emissive and enviroment maps to produce extra and better results.
- Study better ways for generating specular maps.
- Find better techniques for making diffuse maps look more serious and less cartoony.
- Work on an easy NeoDex Scene to Sc2 Art Tools Scene converter to save up a lot of time for non-experimental conversions.
I would release the generated models, but I require permission from both authors. so stay tuned.
Attachments
-
 Wc3LookAbom.jpg54 KB · Views: 1,294
 -
 LilFella.jpg55.3 KB · Views: 608
 -
 LilFella2.jpg52.4 KB · Views: 617
 -
 LilFella3.jpg119.6 KB · Views: 593
 -
 Sample1.jpg121.9 KB · Views: 543
 -
 SampleLoD2.jpg88.6 KB · Views: 574
 -
 SampleLoD1.jpg75.5 KB · Views: 593
 -
 SampleLoDpnlyDiffuse.jpg71.5 KB · Views: 653
 -
 Wc3LookLoD.jpg56.9 KB · Views: 557
 -
 Sample2.jpg70.1 KB · Views: 591
 -
 SampleLoD3.jpg57.3 KB · Views: 589


