- Joined
- Apr 12, 2018
- Messages
- 494
Not a Tutorial
Tools: Blender 2.8x 2.80 — blender.org
This plugin: MDL Exporter for Blender3D!
This plugin: GitHub - SC2Mapster/m3addon: Blender Addon to import and export m3 files
This tool: Retera's Model Studio
Any CASC tool such as CASC View or CASC Explorer
Optional: for Classic porting
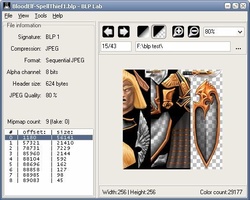
BLP Lab
 www.hiveworkshop.com
Your favorite modern digital painting tool
www.hiveworkshop.com
Your favorite modern digital painting tool
==================
CASC
1. Open Heroes of the Storm CASC
2. Every asset is in folder mods\heroes.stormmod\base.stormassets\Assets
3. Models are in .m3 format. Animations are in .m3a format (which is functionally the same as .m3). Textures are in .dds format (same as in Reforged)
Blender
For .m3 models
1. Make sure Blender's scene is devoid of anything in it (especially default materials)
2. Import .m3 model with m3addon
3. Make sure every geoset has its own texture (the exporter has a quirk where it will merge everything with the same texture and you dont want that).
4. Export model as .mdl with mdl-exporter (by default it will export at 60% size... LEAVE THIS ALONE; the models are HUGE and you want everything a consistent size)
5. Change texture path in the model to what you are going to use
For .m3a animations
1. Make sure Blender's scene is devoid of anything in it (especially default materials)
2. Import .m3a model with m3addon
3. Find an animation you want to export (it will be listed in m3addons own menu items, not blender's) and set Markers to define their bounds (for mdl-exporter, see documentation for addon)
4. Export model as .mdl with mdl-exporter one animation at a time
5. Repeat from 3 for as many animations you want as separate files
===============
(OPTIONAL) BLP converting
1. Convert .dds textures to BLP1 if you are planning to use in Classic
2. If you need to resize, do so (use .tga as a transitional state as it will preserve any existing alpha fields, although most .dds textures will not have this)
(OPTIONAL) Baking a texture
I use Photoshop for this purpose (layer styles may differ in other paint programs).
There are usually four textures for a given layer: Diffuse, Normal, Specular, Emissive. Discard Normal because it is not used for this purpose.
Copy and paste these textures into one file and arrange the layers as such:
Emissive (Layer Style- Screen)
Specular (Layer Style- Color Dodge)
Diffuse (Layer Style- Normal)
You may need to adjust the Specular layer if it turns out too bright (transparency percentage 50-75% helps if it is too bright).
Save as .tga and then convert to .blp1 format in BLP Lab.
===============
Retera Model Studio
1. Open your ported .m3 model
2. Go to Add Single Animation and add one of your ported .m3a animation files
3. Repeat until all desired animations are imported
4. Save as .mdx
You now have a basic model. Now you can fix it up however you please.
I have no idea how to use Blender save for a transitional state tool and 90% of any fixing is done in Retera Modeling Studio.
Tools: Blender 2.8x 2.80 — blender.org
This plugin: MDL Exporter for Blender3D!
This plugin: GitHub - SC2Mapster/m3addon: Blender Addon to import and export m3 files
This tool: Retera's Model Studio
Any CASC tool such as CASC View or CASC Explorer
Optional: for Classic porting
BLP Lab
BLP Lab v0.5.0
This tool originates from here BLP Laboratory (short name is BLP Lab) is the application for viewing and converting image files. Current version is 0.5.0 build 500 Features: - Supports following file formats: BMP, JPG, TGA, PNG, BLP (supports BLP2 textures), DDS (supports non-complex...
www.hiveworkshop.com
==================
CASC
1. Open Heroes of the Storm CASC
2. Every asset is in folder mods\heroes.stormmod\base.stormassets\Assets
3. Models are in .m3 format. Animations are in .m3a format (which is functionally the same as .m3). Textures are in .dds format (same as in Reforged)
Blender
For .m3 models
1. Make sure Blender's scene is devoid of anything in it (especially default materials)
2. Import .m3 model with m3addon
3. Make sure every geoset has its own texture (the exporter has a quirk where it will merge everything with the same texture and you dont want that).
4. Export model as .mdl with mdl-exporter (by default it will export at 60% size... LEAVE THIS ALONE; the models are HUGE and you want everything a consistent size)
5. Change texture path in the model to what you are going to use
For .m3a animations
1. Make sure Blender's scene is devoid of anything in it (especially default materials)
2. Import .m3a model with m3addon
3. Find an animation you want to export (it will be listed in m3addons own menu items, not blender's) and set Markers to define their bounds (for mdl-exporter, see documentation for addon)
4. Export model as .mdl with mdl-exporter one animation at a time
5. Repeat from 3 for as many animations you want as separate files
===============
(OPTIONAL) BLP converting
1. Convert .dds textures to BLP1 if you are planning to use in Classic
2. If you need to resize, do so (use .tga as a transitional state as it will preserve any existing alpha fields, although most .dds textures will not have this)
(OPTIONAL) Baking a texture
I use Photoshop for this purpose (layer styles may differ in other paint programs).
There are usually four textures for a given layer: Diffuse, Normal, Specular, Emissive. Discard Normal because it is not used for this purpose.
Copy and paste these textures into one file and arrange the layers as such:
Emissive (Layer Style- Screen)
Specular (Layer Style- Color Dodge)
Diffuse (Layer Style- Normal)
You may need to adjust the Specular layer if it turns out too bright (transparency percentage 50-75% helps if it is too bright).
Save as .tga and then convert to .blp1 format in BLP Lab.
===============
Retera Model Studio
1. Open your ported .m3 model
2. Go to Add Single Animation and add one of your ported .m3a animation files
3. Repeat until all desired animations are imported
4. Save as .mdx
You now have a basic model. Now you can fix it up however you please.
I have no idea how to use Blender save for a transitional state tool and 90% of any fixing is done in Retera Modeling Studio.