As requested by @wrath bringer here is my guide on how to solo Nightmare difficulty in Dragon Age: Origins. First of all what does soloing nightmare mean? In Dragon Age: Origins you can pick an in-game difficulty ranging from easy to nightmare, the later is unexpectedly really difficult. Through out the duration of the game you can have up to 3 companions assisting you in any and all battles, but if you're an absolute mad man like me (and appearantly wrath bringer) you can say screw you to the companions and go through the entire adventure with one quarter of the intended firepower. This is, not surprisingly really F-ING difficult.
1. Game Version:
Something that you may not have considered is what version your game is currently running on, but trust me this makes a massive difference. If you downloaded the game via a disk and never connected your game to Origins then you will get the launch version of the game, this version will make your life a living nightmare. In the first version there are a few differences from the current build but the one you want to know about is the difference between a spider boss in Caridins Cross. If you play on the launch version this boss will rip you a new a-hole, the damage output this guy has is absolutly absurd so do yourself a service, download Origins and download Dragon Age: Origins through that platform, not from your disk. (I have never tried the steam version so I do not wish to comment on how that plays, nor have I played on any console.)
2. Class:
So the first thing you do when you start up the game is picking your role, and while Dragon Age: Origins is my favourite game it didn't believe in something called balance. And one class is absurdly overpowered compared to the others, the mage. So pick between either the Amell or Surana origin if you want the easiest way to solo nightmare, if you are interested the second hardest class is warrior and the hardest is rogue. One thing that makes mages really good is that they get Herbalism for free, which is an absolutly essential skill to have for this run, they also, unlike warriors and rogues do not have to invest 4 skill points in combat training, so you can use those points for something which is actually useful. As for your skills you should probably aim to get the highest rank of Coercion first, this will allow you to skip some rather nasty fights if you would rather not engage, it will also open up more options for you in terms of story which is always nice for enjoying the game. As for what to pick afterwards, it's not massicely important. You could either go for something that allows you to enjoy the story or something which grants you a bit of a stat bonus.
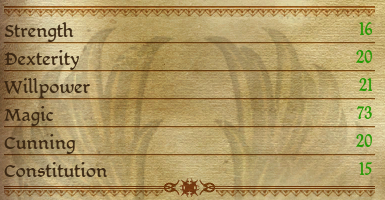
Second is your stats, which is really easy, basically you just want to spend as many points as you can in magic, the only exception to this rule are points that you need to spend to get your hands on good skills such as Coercion. Preferably when you hit a higher level you want your stat chart to look like mine:
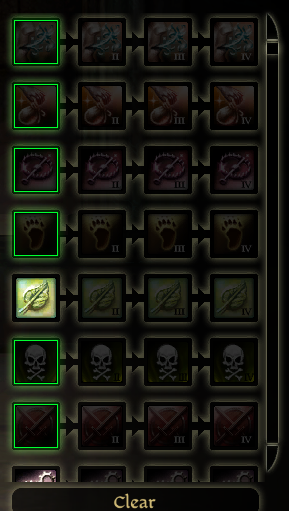
Finally we have your spells, which will be massively important, when starting the game I would recommend you pick Winter's Grasp and Heal, this is because before you escape the Circle tower and during the events of Ostagar potions won't be in infinite supply and therefore Heal will save quite a few consumables. Second is Winter's Grasp which you should pick as it is by far the most powerful of the rank one damage abilities, it will also bring you closer to Cone of Cold and Blizzard which are two abilities you will need later on. (Not to mention that you encounter a rage demon early on which is weak to ice spells.)
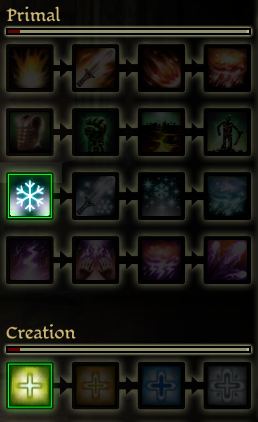
As for what to do past the start I would recommend going straight for fireball as it's by far the best in-game ability for kiting, and trust me you will be doing A LOT of kiting. Following Fireball your desired target will be Cone of Cold, which is the second absolutly divine kiting spell that you will need. Once you got Fireball and Cone of cold you want to finish those two branches and get your hands on Inferno first and then Blizzard, these two combined will tare through massive hordes of hostiles. After this we will run into the last reccomended spell, Mana Clash, which can be found in the Spirit Tree. This spell would be a bonus to have in the Circle Tower, once you return but is primarily necissary for a proud solo of Father Kolgrim. What is a proud solo you might ask?
3. Starting Your Game:
Now that you've started the game we need to talk about two different types of solo you can get, I personally call them Cheesy Solo and Proud Solo. The difference is that a Cheesy Solo is aquired by exploiting flaws in the game to make boss fights remarkably easy in comparison to how they were designed. (Don't worry I will share all of the ways I've found later.) A proud Solo however requires you to hold the enemies to a fair standard (even though they often do not hold you to one.) I will get more into what qualifies as Proud and Cheesy Solos soon but first there is one more thing we need to talk about.
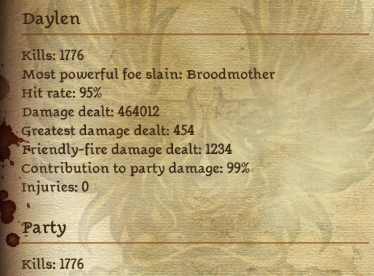
If you want a run where you deal 100% of the damage there are a few things you need to do, first is to not recruit Lelliana, this is because when you first encounter her a brawl will break out and she will come to your aid but not be in your party. This will make it so that you can not tell her to not attack the enemy or unequip her weapon which means she will deal damage and your character will be forever stuck at 99% party damage dealt, like mine:
So if you care about your statistics page saying 100% you need to not recruit Lelliana, in fact here's an even better tip, recruit as few companions as possible. Fortunatly there are only two characters whom you can not kick out, Allistair and Oghren. This means, do not cure the mabari and as soon as you get the chance tell Morrigan to sod off. And also unequip all the gear that your companions are using, in some places you can not avoid to have them engage in combat and when that happens you want them to all die as soon as possible.
So back to the two different solo types, Proud an Chessy solos, and the best way to exploit game mechanics if that is your thing is to abuse placement.
4. Boss Fights and Placement:
Alright so maybe you just want some practice before you try to get your hands on Proud Solos like me or maybe you just don't care about proud solos, that's fine. So now that you want to cheese your way through all the bosses, what are the best ways to do so? The best way is to place yourself in the right spot, where the AI for whatever reason can not reach you. This most often is because the boss model is simply too large to fit in such a small spot, but your characters model can fit.
Ostagar:
Ostagar Ogre:
The first boss you'll run into is located at Ostagar, and this is a frequently used boss, the Ogre boss, and may I just say something, FU*! this boss type. The reason why I dislike this boss fight so much is because it all in the end comes down to luck. Ogres have a few abilities that knocks the player back and unfortunatly for us, those abilities, at least some of them, specifically Ram does not have a coldown. Which means that the Ogres can use Ram until you die and there's nothing you can do to survive. And if that happens, I am sorry but you will have to restart, not even the most skilled player in the world could have survived that. As I told you in the class section, balance is not the strong suit of this game.
Unfortunatly if you were hoping to cheese this specific fight I can't really help you, as this is one of the few fights where I've never gotten a Cheesy Solo, half because I was stuborn and didn't want to cheese on the first boss and half because it's the first boss and as a result is a fairly easy, although at times luck based fight.
One thing to keep in mind on this boss fight is that you can't get rid of your companions, if you're playing a mage you only need to unequip their weapons. However if you're playing a warrior or rogue you will have to also go into the tactics menu of your mage companion and tell him not to use any spells.
Redcliffe:
Desire Demon:
Your first boss encounter in the Redcliffe story line is the Desire Demon which if you're encountering it in the fade is really easy to beat as it was built for 1 v 1 combat. If you're fighting it on the second floor then sadly I can not help you as I don't generally try to kill kids. Sorry @WhiteFang I know I've dissapointed you.
Father Kolgrim:
This d!ck, so basically this fight is horrible if you're trying to get a Proud Solo, no way around it. As said earlier you will need Mana Clash for this fight, use it on the two mages and if it misses one of them reload because your attempt has failed. But lets say you get all the minions down, you still have to deal with Father Kolgrim who hits like a truck and if you get unlucky and miss your spells at the wrong time due to the random nature of the game, try again.
Fortunatly however this fight is REALLY easy to get a Cheesy Solo on, so if you want to skip this one I've got you covered. In the boss room where you fight Father Kolgrim there is a threshold and just behind that threshold is a corridor.
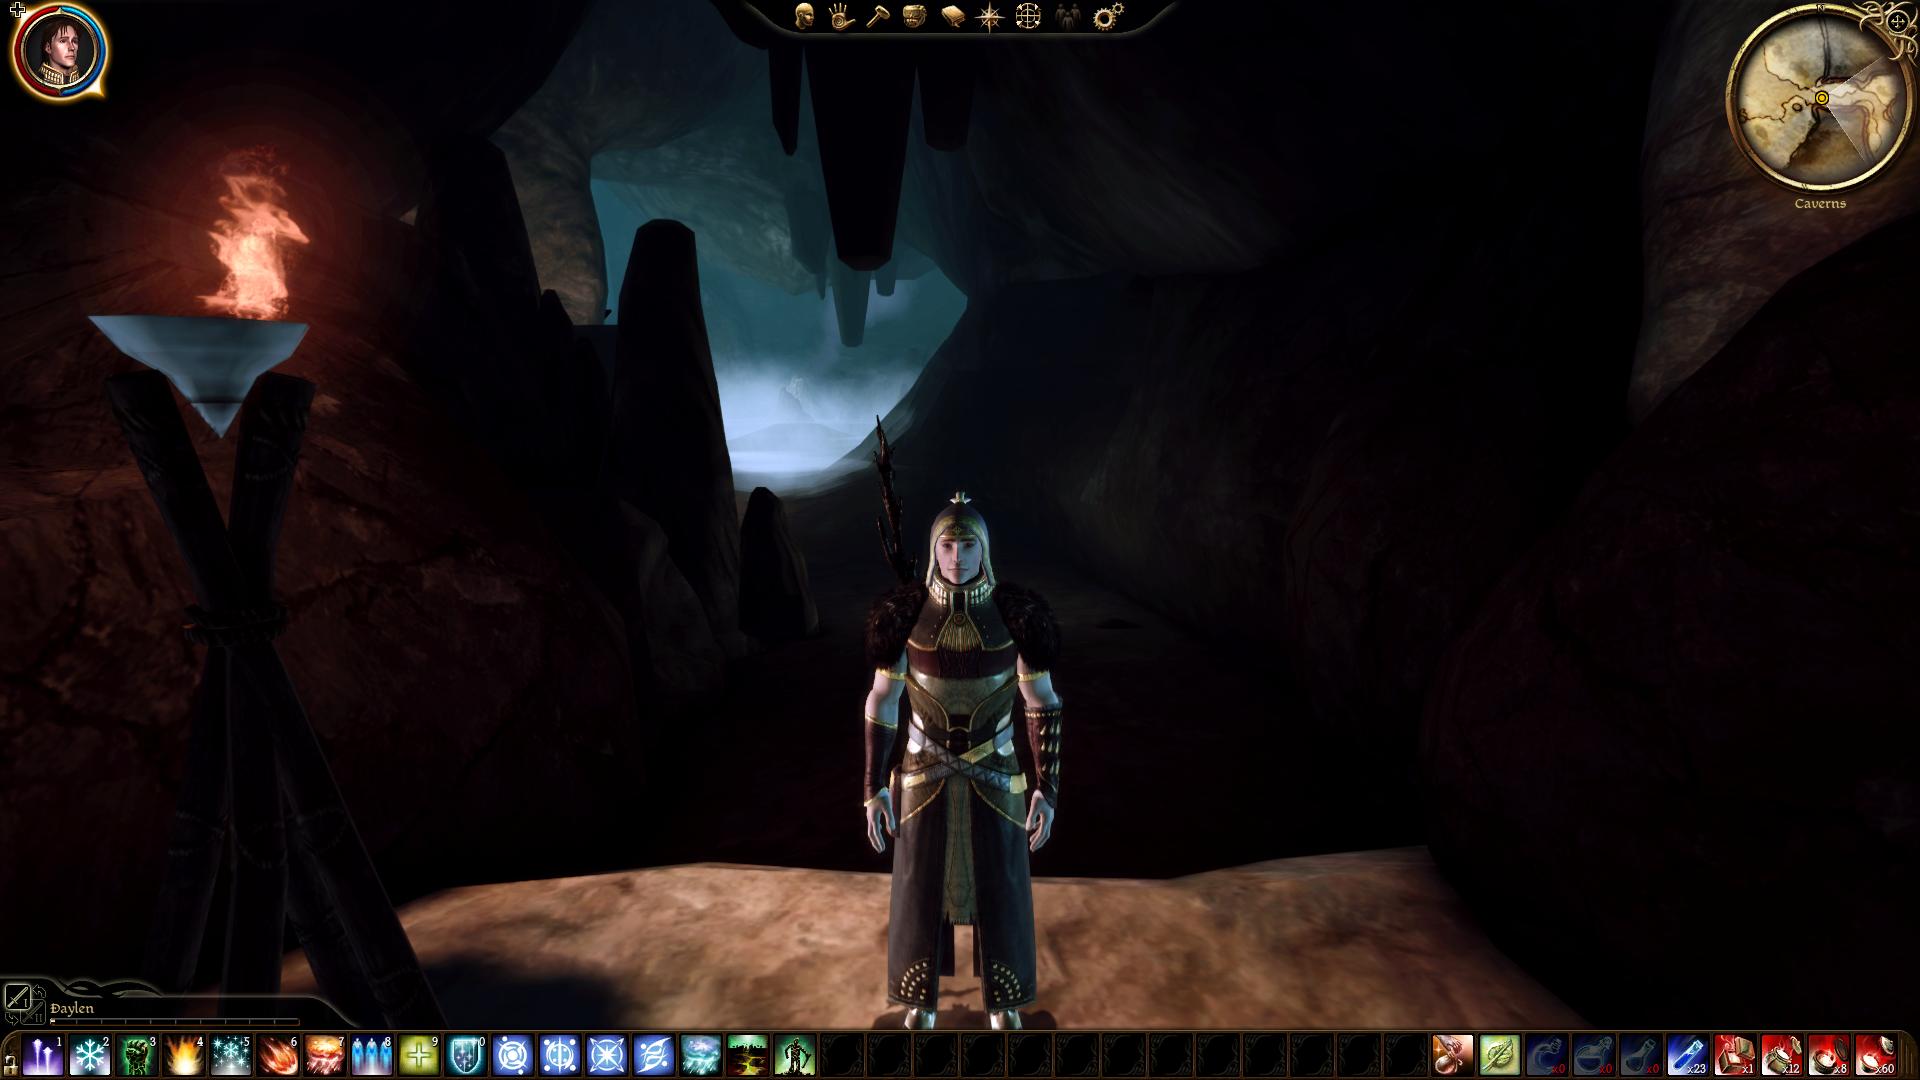
As you might see the corridor looks really dark, that's because anything in that corridor is unobservable from the boss room so if you just run over threshold, cast a spell on Father Kolgrim and run back out again and the boss will disengage, but he will still be wounded from your spell. Do this over and over again until Father Kolgrim is dead and BOOM you have cleared this boss fight.
High Dragon:
Yeah... I have no bloody clue, fortunatly this is an optional boss so just run past it, unless you think you can beat it and give me a major middle finger in the proccess.
Circle Tower:
Sloth Demon:
Now we are at the Circle Tower once again and this fight is really simple, but once again one of the boss phases is an ogre, so once again Ram can really screw you over. For this fight you will be able to transform into three different forms, but the only one we care about is the Golem Form which will be the primary mode in which you do battle for all phases, aside from the Rage Demon phase as it is really weak to ice spells, so go ham with your Winter's Grasp on that phase.
As for a Cheesy Solo, it is quite simple, all you need to do is to shift out and in of golem form to make the fight a lot easier. If you change out of golem form, which will replenish your health and it does not cost anything.
Uldred:
Uldred can not be cheesed sadly which means that any time you beat him it's a Proud Solo. The reason for this is that he has a spell that automatically 1 shots you, fortunatlly there is a way to avoid this spell as Uldred will not cast it on anyone in melee range. This is obviously really clever as it means that he never uses that ability on the tank whom would easily survive it, but if you're playing a solo game this is really useful because by staying within melee range you've gauranteed that Uldred will never use it.
Sadly without using this method there's just no way of beating Uldred so even if you use this method it is a Proud Solo.
Brecillian Forest:
Drake:
The Drake is a bit of a challange as it can easily beat you if your kitting isn't up to speed or even if you're just unlucky and miss one too many spells, fortunatly you'll be able to use the entire floor to fight him in so you have more than enough room to kite around on for a Proud Solo.
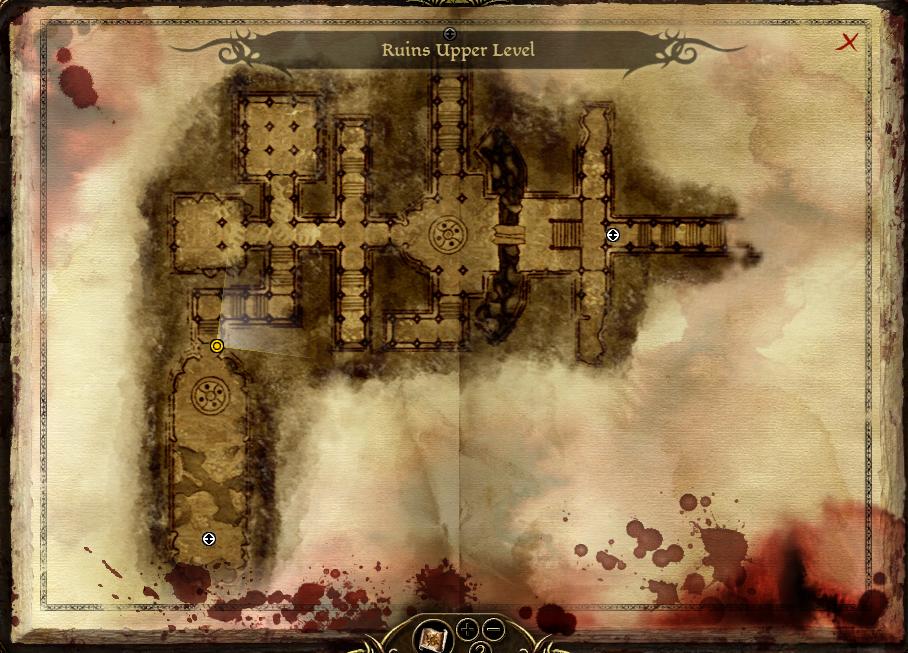
If you want a Cheesy Solo all you need to do is to find the urn at the entrance of the boss room and place yourself behind it as the Drake can't reach you in there, his model is simply too big. On the map down below you'll see the spot to hide in.
Arcane Horror:
For a Proud Solo this is pretty simple, all you need to do is simply to place an Inferno and a Blizzard at the entrance from where the mobs spawn and then go to town on the Arcane Horror, although this will require a lot of pots.
A Cheesy run is somehow even simpler by the way as all required to do is simply stand up the stairs far away from the boss as it can't move, and is therefore not a threat. Proceed to use a lot of Inferno and Mana Clash spells as these do not require you to be within line of sight and the boss will die without ever being able to touch you.
Zathrian or Witherfang:
Don't try taking down Witherfang, just don't she's accompanied by a large quantity of wearwolves which are just the worst. As for the boss fight, this is the only boss fight prior to the landsmeet that I have yet to get a Proud Solo on. The way I got my cheesy solo was that I ran as fast I could to the corridor here.
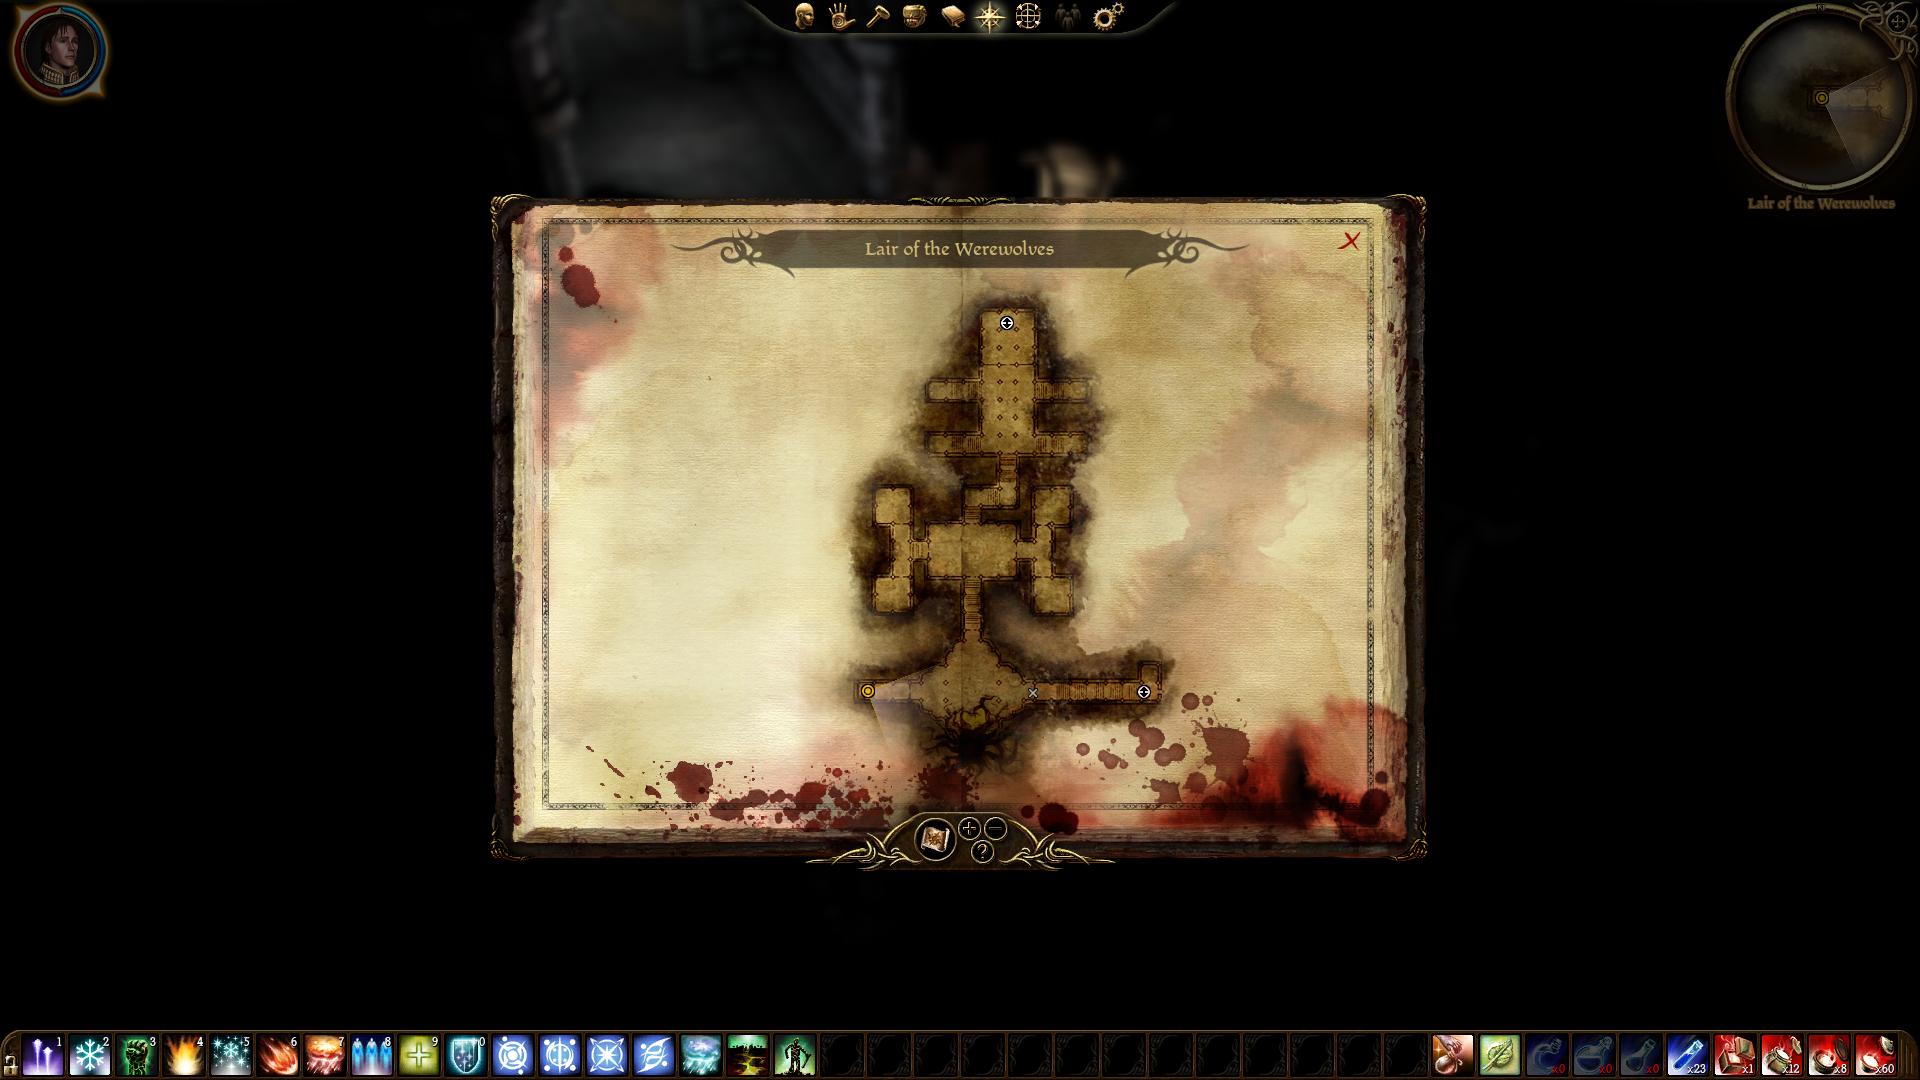
If you did not drop a single attack on Zathrian he will keep attacking Witherfang instead which will leave you free to take down the adds first, before dealing with Zathrian. Once you reach this corridor drop every slowing and stunning spell you got, Blizzard, Earthquake, Stone Fist, Winter's Grasp, Glyph of Paralysis, Fireball, Cone of Cold. All of them, and don't be afraid to chug mana potions like there's no tommorow on this fight you'll need them.
The Deep Roads:
Spider Queen:
First of we have the Spider Queen boss who is really simple, assuming that you have the latest patch, if you don't, have fun dying. All you need to keep in mind is that first of all she spawns adds so save your fireball for them, it will be useful and second is that she has a venomous base attack so keep a close eye on your health as it will drop during the encounter, even when she's not attacking you.
Broodmother:
The Broodmother was surprisingly fairly simple in solo, both Proud and Cheesy as you can just run away from her tentacles, the one rough bit is the mobs that she spawns but they too are quite easy to kite around. But if you want to do this the Cheesy way then here's the location for you to stand on.
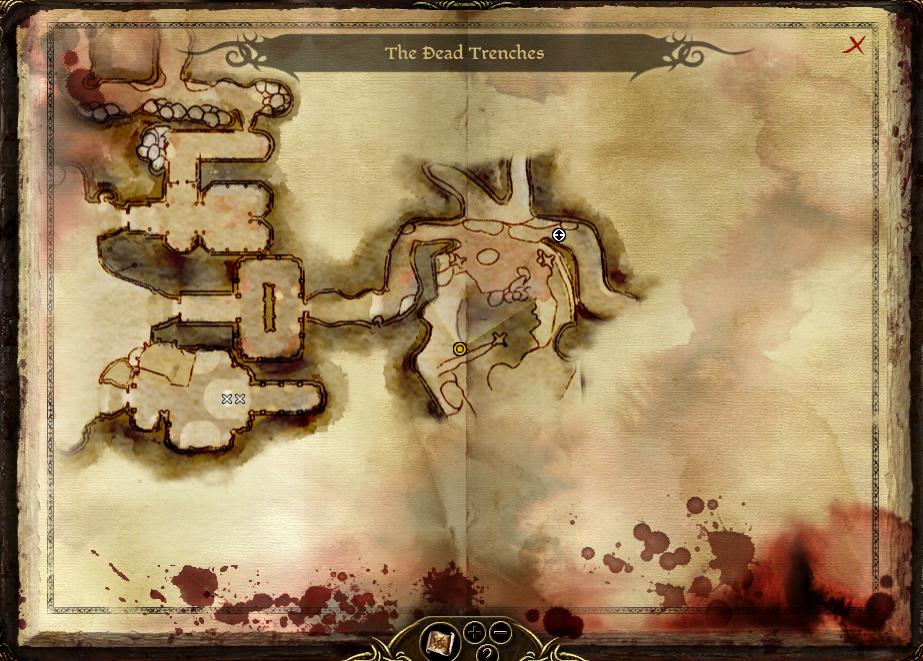
This location will make it so that you can have the enemies come at you in a straight line, and it significantly reduces the difficulty of the fight. Not to mention that the Broodmother was named Gamings sexiest woman by WhiteFang.
Branka or Caridin:
Finally, the last fight, if you want to do this the proud way I recommend Branka, the reason why is because she's way squishier than Caridin and can easily be stunned or knocked down, Stonefist is great for this fight. The problem is that this is likely the most luck based boss fight I've ever done. If Branka hits you with one of her knock down or stun abilities (of which she has pleanty) then the game is lost. If she resists the wrong ability you will have to reload. So for a Proud Solo you will just have to clear out her four golems as soon as possible and then pray to Fortuna.
The Cheesy option is way simpler, all you need to do is just side with Branka against Caridin and then hide behind this pillar right here:
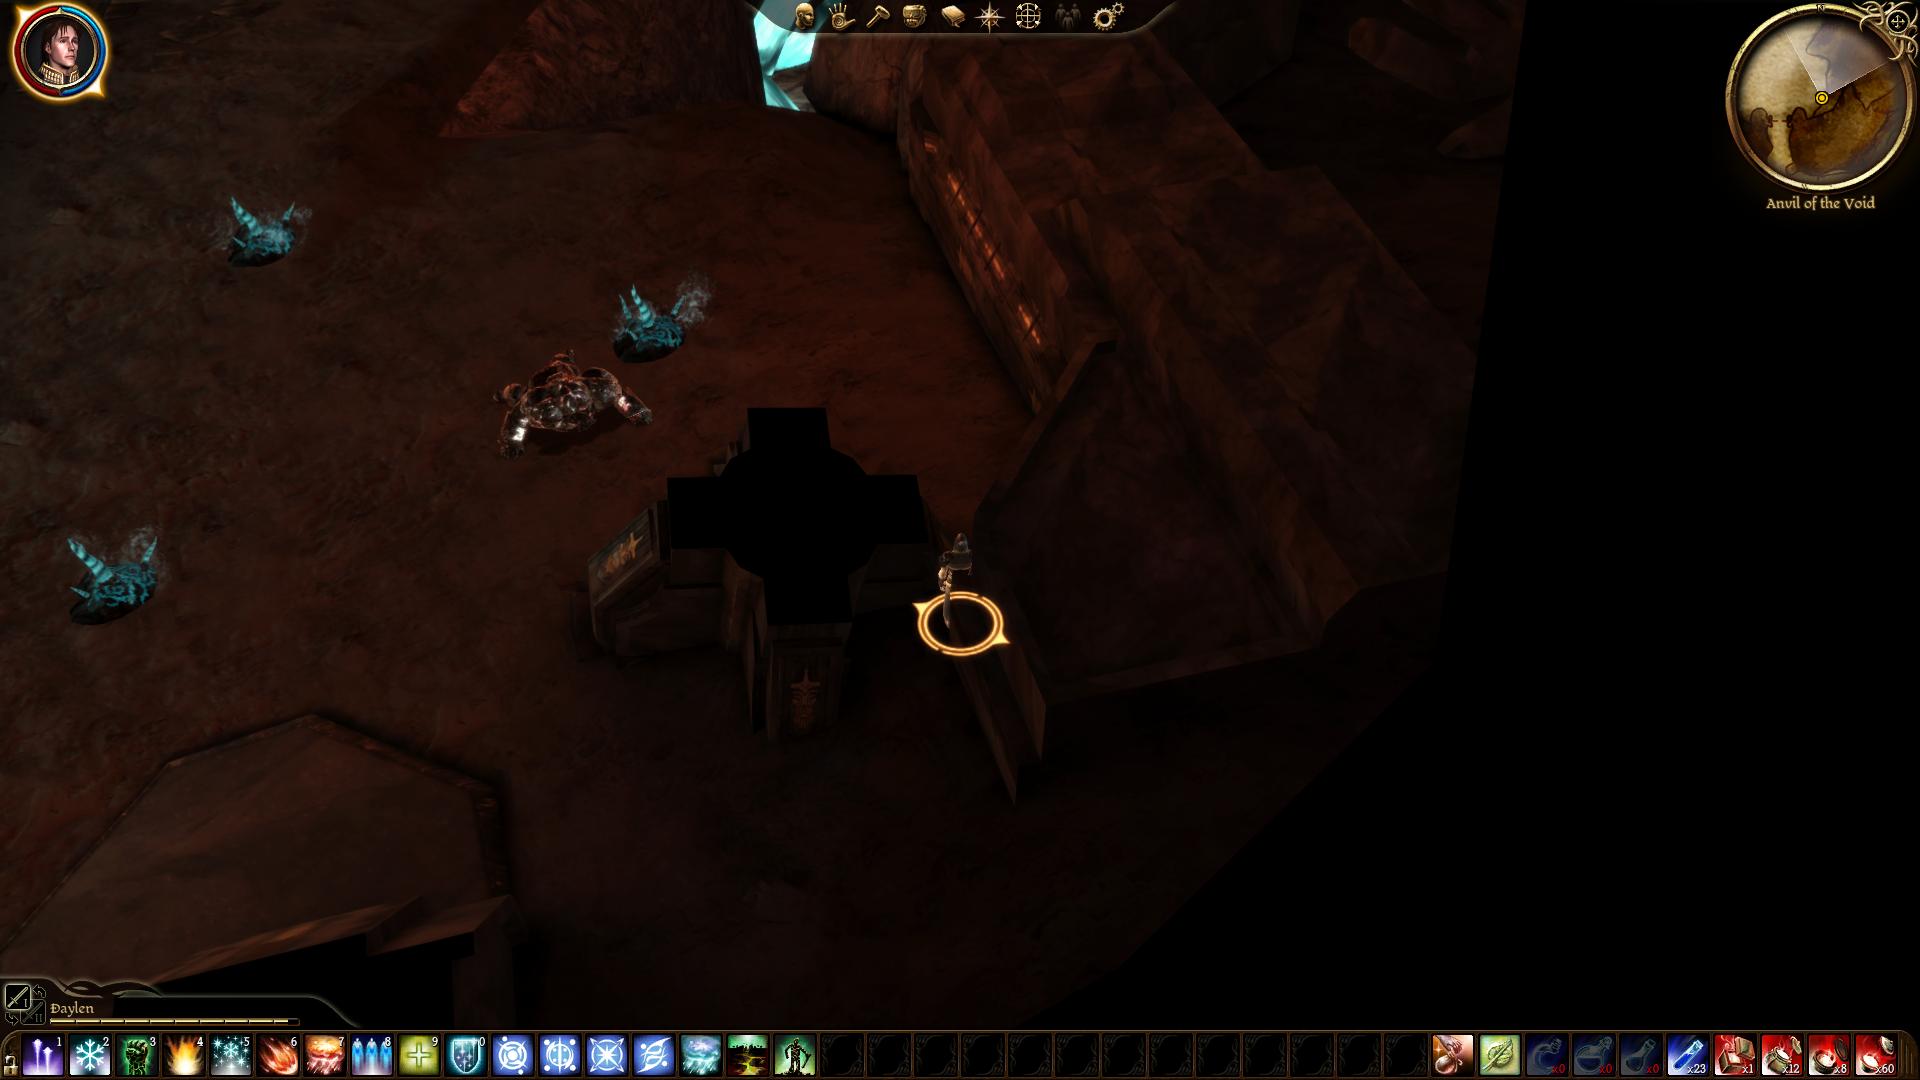
This will make Caridin unable to attack you and will make the entire encounter really easy.
5. Spending Money:
When it comes to spending money you always want to use it for reagents, primarily flasks, lyrium dust and elfroots. These are the ingredients requiered to make mana and health potions so you don't want to be cheap here. The two other things you want to buy for gold is skill books and bag space which will make your life even easier.
What you don't want to do is use your gold on new equipment, EVER, it's not worth it.
If you have any questions, please ask.
1. Game Version:
Something that you may not have considered is what version your game is currently running on, but trust me this makes a massive difference. If you downloaded the game via a disk and never connected your game to Origins then you will get the launch version of the game, this version will make your life a living nightmare. In the first version there are a few differences from the current build but the one you want to know about is the difference between a spider boss in Caridins Cross. If you play on the launch version this boss will rip you a new a-hole, the damage output this guy has is absolutly absurd so do yourself a service, download Origins and download Dragon Age: Origins through that platform, not from your disk. (I have never tried the steam version so I do not wish to comment on how that plays, nor have I played on any console.)
2. Class:
So the first thing you do when you start up the game is picking your role, and while Dragon Age: Origins is my favourite game it didn't believe in something called balance. And one class is absurdly overpowered compared to the others, the mage. So pick between either the Amell or Surana origin if you want the easiest way to solo nightmare, if you are interested the second hardest class is warrior and the hardest is rogue. One thing that makes mages really good is that they get Herbalism for free, which is an absolutly essential skill to have for this run, they also, unlike warriors and rogues do not have to invest 4 skill points in combat training, so you can use those points for something which is actually useful. As for your skills you should probably aim to get the highest rank of Coercion first, this will allow you to skip some rather nasty fights if you would rather not engage, it will also open up more options for you in terms of story which is always nice for enjoying the game. As for what to pick afterwards, it's not massicely important. You could either go for something that allows you to enjoy the story or something which grants you a bit of a stat bonus.
Second is your stats, which is really easy, basically you just want to spend as many points as you can in magic, the only exception to this rule are points that you need to spend to get your hands on good skills such as Coercion. Preferably when you hit a higher level you want your stat chart to look like mine:
Finally we have your spells, which will be massively important, when starting the game I would recommend you pick Winter's Grasp and Heal, this is because before you escape the Circle tower and during the events of Ostagar potions won't be in infinite supply and therefore Heal will save quite a few consumables. Second is Winter's Grasp which you should pick as it is by far the most powerful of the rank one damage abilities, it will also bring you closer to Cone of Cold and Blizzard which are two abilities you will need later on. (Not to mention that you encounter a rage demon early on which is weak to ice spells.)
As for what to do past the start I would recommend going straight for fireball as it's by far the best in-game ability for kiting, and trust me you will be doing A LOT of kiting. Following Fireball your desired target will be Cone of Cold, which is the second absolutly divine kiting spell that you will need. Once you got Fireball and Cone of cold you want to finish those two branches and get your hands on Inferno first and then Blizzard, these two combined will tare through massive hordes of hostiles. After this we will run into the last reccomended spell, Mana Clash, which can be found in the Spirit Tree. This spell would be a bonus to have in the Circle Tower, once you return but is primarily necissary for a proud solo of Father Kolgrim. What is a proud solo you might ask?
3. Starting Your Game:
Now that you've started the game we need to talk about two different types of solo you can get, I personally call them Cheesy Solo and Proud Solo. The difference is that a Cheesy Solo is aquired by exploiting flaws in the game to make boss fights remarkably easy in comparison to how they were designed. (Don't worry I will share all of the ways I've found later.) A proud Solo however requires you to hold the enemies to a fair standard (even though they often do not hold you to one.) I will get more into what qualifies as Proud and Cheesy Solos soon but first there is one more thing we need to talk about.
If you want a run where you deal 100% of the damage there are a few things you need to do, first is to not recruit Lelliana, this is because when you first encounter her a brawl will break out and she will come to your aid but not be in your party. This will make it so that you can not tell her to not attack the enemy or unequip her weapon which means she will deal damage and your character will be forever stuck at 99% party damage dealt, like mine:
So if you care about your statistics page saying 100% you need to not recruit Lelliana, in fact here's an even better tip, recruit as few companions as possible. Fortunatly there are only two characters whom you can not kick out, Allistair and Oghren. This means, do not cure the mabari and as soon as you get the chance tell Morrigan to sod off. And also unequip all the gear that your companions are using, in some places you can not avoid to have them engage in combat and when that happens you want them to all die as soon as possible.
So back to the two different solo types, Proud an Chessy solos, and the best way to exploit game mechanics if that is your thing is to abuse placement.
4. Boss Fights and Placement:
Alright so maybe you just want some practice before you try to get your hands on Proud Solos like me or maybe you just don't care about proud solos, that's fine. So now that you want to cheese your way through all the bosses, what are the best ways to do so? The best way is to place yourself in the right spot, where the AI for whatever reason can not reach you. This most often is because the boss model is simply too large to fit in such a small spot, but your characters model can fit.
Ostagar:
Ostagar Ogre:
The first boss you'll run into is located at Ostagar, and this is a frequently used boss, the Ogre boss, and may I just say something, FU*! this boss type. The reason why I dislike this boss fight so much is because it all in the end comes down to luck. Ogres have a few abilities that knocks the player back and unfortunatly for us, those abilities, at least some of them, specifically Ram does not have a coldown. Which means that the Ogres can use Ram until you die and there's nothing you can do to survive. And if that happens, I am sorry but you will have to restart, not even the most skilled player in the world could have survived that. As I told you in the class section, balance is not the strong suit of this game.
Unfortunatly if you were hoping to cheese this specific fight I can't really help you, as this is one of the few fights where I've never gotten a Cheesy Solo, half because I was stuborn and didn't want to cheese on the first boss and half because it's the first boss and as a result is a fairly easy, although at times luck based fight.
One thing to keep in mind on this boss fight is that you can't get rid of your companions, if you're playing a mage you only need to unequip their weapons. However if you're playing a warrior or rogue you will have to also go into the tactics menu of your mage companion and tell him not to use any spells.
Redcliffe:
Desire Demon:
Your first boss encounter in the Redcliffe story line is the Desire Demon which if you're encountering it in the fade is really easy to beat as it was built for 1 v 1 combat. If you're fighting it on the second floor then sadly I can not help you as I don't generally try to kill kids. Sorry @WhiteFang I know I've dissapointed you.
Father Kolgrim:
This d!ck, so basically this fight is horrible if you're trying to get a Proud Solo, no way around it. As said earlier you will need Mana Clash for this fight, use it on the two mages and if it misses one of them reload because your attempt has failed. But lets say you get all the minions down, you still have to deal with Father Kolgrim who hits like a truck and if you get unlucky and miss your spells at the wrong time due to the random nature of the game, try again.
Fortunatly however this fight is REALLY easy to get a Cheesy Solo on, so if you want to skip this one I've got you covered. In the boss room where you fight Father Kolgrim there is a threshold and just behind that threshold is a corridor.
As you might see the corridor looks really dark, that's because anything in that corridor is unobservable from the boss room so if you just run over threshold, cast a spell on Father Kolgrim and run back out again and the boss will disengage, but he will still be wounded from your spell. Do this over and over again until Father Kolgrim is dead and BOOM you have cleared this boss fight.
High Dragon:
Yeah... I have no bloody clue, fortunatly this is an optional boss so just run past it, unless you think you can beat it and give me a major middle finger in the proccess.
Circle Tower:
Sloth Demon:
Now we are at the Circle Tower once again and this fight is really simple, but once again one of the boss phases is an ogre, so once again Ram can really screw you over. For this fight you will be able to transform into three different forms, but the only one we care about is the Golem Form which will be the primary mode in which you do battle for all phases, aside from the Rage Demon phase as it is really weak to ice spells, so go ham with your Winter's Grasp on that phase.
As for a Cheesy Solo, it is quite simple, all you need to do is to shift out and in of golem form to make the fight a lot easier. If you change out of golem form, which will replenish your health and it does not cost anything.
Uldred:
Uldred can not be cheesed sadly which means that any time you beat him it's a Proud Solo. The reason for this is that he has a spell that automatically 1 shots you, fortunatlly there is a way to avoid this spell as Uldred will not cast it on anyone in melee range. This is obviously really clever as it means that he never uses that ability on the tank whom would easily survive it, but if you're playing a solo game this is really useful because by staying within melee range you've gauranteed that Uldred will never use it.
Sadly without using this method there's just no way of beating Uldred so even if you use this method it is a Proud Solo.
Brecillian Forest:
Drake:
The Drake is a bit of a challange as it can easily beat you if your kitting isn't up to speed or even if you're just unlucky and miss one too many spells, fortunatly you'll be able to use the entire floor to fight him in so you have more than enough room to kite around on for a Proud Solo.
If you want a Cheesy Solo all you need to do is to find the urn at the entrance of the boss room and place yourself behind it as the Drake can't reach you in there, his model is simply too big. On the map down below you'll see the spot to hide in.
Arcane Horror:
For a Proud Solo this is pretty simple, all you need to do is simply to place an Inferno and a Blizzard at the entrance from where the mobs spawn and then go to town on the Arcane Horror, although this will require a lot of pots.
A Cheesy run is somehow even simpler by the way as all required to do is simply stand up the stairs far away from the boss as it can't move, and is therefore not a threat. Proceed to use a lot of Inferno and Mana Clash spells as these do not require you to be within line of sight and the boss will die without ever being able to touch you.
Zathrian or Witherfang:
Don't try taking down Witherfang, just don't she's accompanied by a large quantity of wearwolves which are just the worst. As for the boss fight, this is the only boss fight prior to the landsmeet that I have yet to get a Proud Solo on. The way I got my cheesy solo was that I ran as fast I could to the corridor here.
If you did not drop a single attack on Zathrian he will keep attacking Witherfang instead which will leave you free to take down the adds first, before dealing with Zathrian. Once you reach this corridor drop every slowing and stunning spell you got, Blizzard, Earthquake, Stone Fist, Winter's Grasp, Glyph of Paralysis, Fireball, Cone of Cold. All of them, and don't be afraid to chug mana potions like there's no tommorow on this fight you'll need them.
The Deep Roads:
Spider Queen:
First of we have the Spider Queen boss who is really simple, assuming that you have the latest patch, if you don't, have fun dying. All you need to keep in mind is that first of all she spawns adds so save your fireball for them, it will be useful and second is that she has a venomous base attack so keep a close eye on your health as it will drop during the encounter, even when she's not attacking you.
Broodmother:
The Broodmother was surprisingly fairly simple in solo, both Proud and Cheesy as you can just run away from her tentacles, the one rough bit is the mobs that she spawns but they too are quite easy to kite around. But if you want to do this the Cheesy way then here's the location for you to stand on.
This location will make it so that you can have the enemies come at you in a straight line, and it significantly reduces the difficulty of the fight. Not to mention that the Broodmother was named Gamings sexiest woman by WhiteFang.
Branka or Caridin:
Finally, the last fight, if you want to do this the proud way I recommend Branka, the reason why is because she's way squishier than Caridin and can easily be stunned or knocked down, Stonefist is great for this fight. The problem is that this is likely the most luck based boss fight I've ever done. If Branka hits you with one of her knock down or stun abilities (of which she has pleanty) then the game is lost. If she resists the wrong ability you will have to reload. So for a Proud Solo you will just have to clear out her four golems as soon as possible and then pray to Fortuna.
The Cheesy option is way simpler, all you need to do is just side with Branka against Caridin and then hide behind this pillar right here:
This will make Caridin unable to attack you and will make the entire encounter really easy.
5. Spending Money:
When it comes to spending money you always want to use it for reagents, primarily flasks, lyrium dust and elfroots. These are the ingredients requiered to make mana and health potions so you don't want to be cheap here. The two other things you want to buy for gold is skill books and bag space which will make your life even easier.
What you don't want to do is use your gold on new equipment, EVER, it's not worth it.
If you have any questions, please ask.