• Listen to a special audio message from Bill Roper to the Hive Workshop community (Bill is a former Vice President of Blizzard Entertainment, Producer, Designer, Musician, Voice Actor) 🔗Click here to hear his message!
  • Read Evilhog's interview with Gregory Alper, the original composer of the music for WarCraft: Orcs & Humans 🔗Click here to read the full interview.
  • 💡 We're thrilled to announce that our upcoming texturing contest is in the works, and we're eager to hear your suggestions! Please take this opportunity to share your ideas in this theme discussion thread for the Texturing Contest #34!
  • 🏆 Hive's 7th HD Modeling Contest: Icecrown Creature is now open! The frozen wastes of Icecrown are home to some of Azeroth’s most terrifying and resilient creatures. For this contest, your challenge is to design and model a HD 3D monster that embodies the cold, undead, and sinister essence of Icecrown! 📅 Submissions close on April 13, 2025. Don't miss this opportunity to let your creativity shine! Enter now and show us your frozen masterpiece! 🔗 Click here to enter!

Making tileset smoother and better. Help

Status
Not open for further replies.
Level 8
Joined
May 15, 2008
Messages
492
Well, looking at one of Nasurdin's tilesets, I wanted to recreate it but I can't get the effect. Here's what I've done:
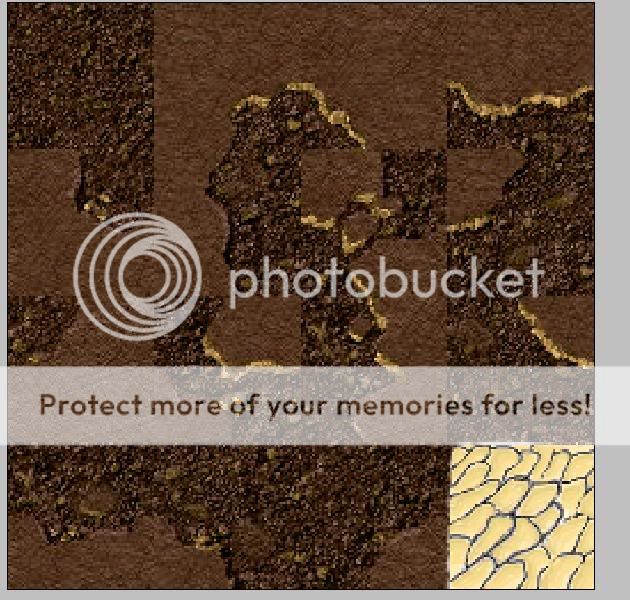
Untitled-129.jpg


How do I make it kinda smoother and not as cartoony as that? Make it look something like this:

http://www.wc3c.net/attachment.php?attachmentid=7703&d=1150307832

Any help?
 
First off, yours looks way better than that, even in its current form. That one is cartoonish, yours can be not. Apart from that, in-game textures tend to get covered by a blur effect, rendering them either more realistic or less qualified. Yours just needs some color instead of that yellow-like one and instead of those black gaps of the dirt, have dark brown.
 
Level 8
Joined
May 15, 2008
Messages
492
I'll try and the line isn't thick but shaded. Cause having the line just there was kinda boring.
 
Level 8
Joined
May 15, 2008
Messages
492
Well, I made it into this. Just one question, how should I make the sides? Im really lost in making sides since I don't know how if it will match.

Untitled-131.jpg
 
Level 38
Joined
Jan 10, 2009
Messages
854
Just divide the tile you made into 4 pieces (set the selection tool to a set size, and set it to 32 by 32 pixels) and then move each piece individually so that the four line up on the seams. Because you already freehanded the tile you now know all the seams will line up, and you can edit the tile you created so that everything lines up in the center :D

|A|B| - so your tile looks like this
|C|D|

|D|C| - then swap the pieces like so
|B|A|

Once you feel your finished you should change up the pieces again just to make sure they all fit. This is what I do anyways :)
 
Status
Not open for further replies.
Top