- Joined
- Oct 23, 2007
- Messages
- 565

Diffiuclty: 5/10
Quick Links:
[click on a area of the list to skip to that point of the page]Introduction
-Elevator Necessities-
1] About Pathing
2] About Elevator Levels
3] About Locating Elevator Doodads
4] About Elevator Walls
-A Simple Elevator-
1] Making the Terrain
2] Adding the Elevator
3] Placing Elevator Walls
4] Making the Elevator Rise
5] Making the Elevator Lower
6] Finishing off
Introduction:
I read a tutorial on making elevators quite a while back, and dnt understand it at all.So recently, i was playing around, and got it to work, as i knew more about triggers now then when i was younger.
And i decided to help other people make elevators, as they are a wicked addition to any dungeon, as a trap, or just to make it look cool.

This is a step by step tutorial on how to do this.
You can skip part 1 -Elevator Necessities- if you are good with the editor.
How to do it:
-Elevator Necessities-
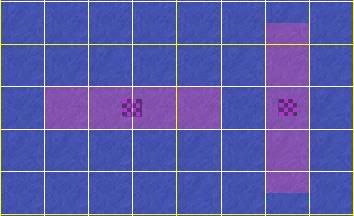
1] The most important thing to do, is press P once the editor is opened up, this allows you to see pathing
[Pathing allows you to see where units can, and cannot walk:


2] Now, you gota know about elevator levels.
There are 3 levels:
Level 1 -
Level 2 -
Level 3 -
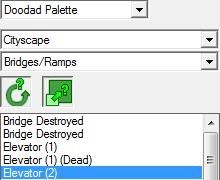
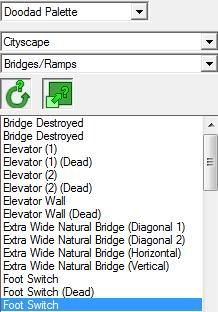
3] Heres how/where to find the elevator:
Doodads > Bridges and Ramps > Elevator(1/2)
And here is where the elevator switch is:
[the thing that a unit steps on, to activate the elevator]
Doodads > Bridges and Ramps > Foot Switch
4] Elevator Walls.
These are like path blockers.
[they are invisible, and just block units from entering that area]
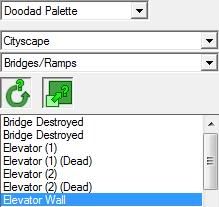
There are two ways it can be placed:
-A Simple Elevator-
Note: If you dont know what some of the stuff here is,please read part 1 -Elevator Necessities-
The simple elevator lifts unit that step on it, up and down.
There are no switches involved.
1] Now on to the more complex stuff
")
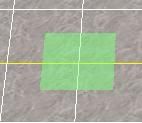
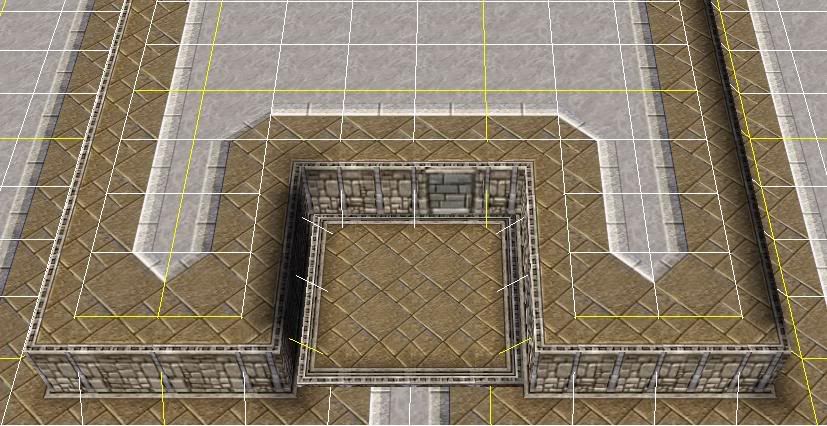
Make the terrain you want, this should be suitable:

2] Ok, now you must add the elevator:
Place it here, in the middle:
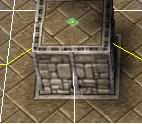
3] For a really simple elevator, you dont need foot switches, this works too.
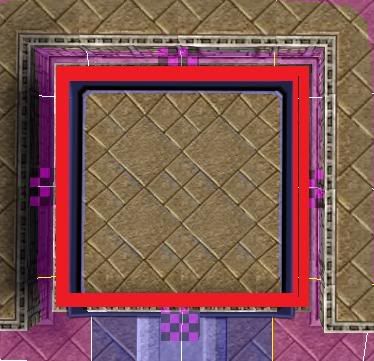
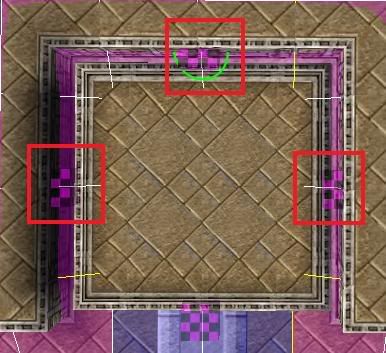
Though you still have to add elevator walls.
Place therm here:
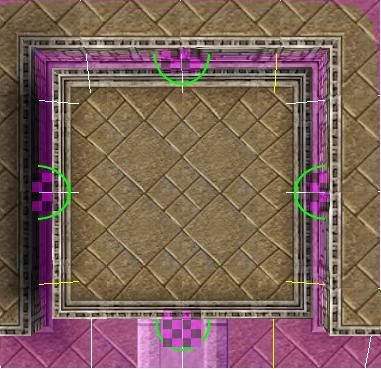
You MUST make sure they are facing the right angle,
they should be like this, and should block off every entrance to the elevator:
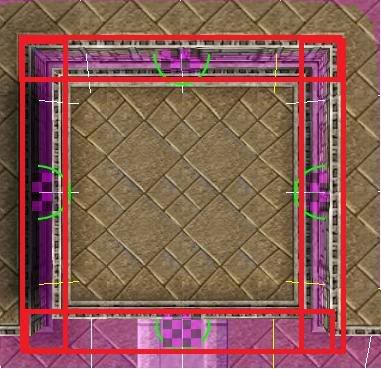
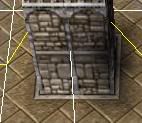
If the elevator blockers cannot be placed, hold shift, then place it.
[when you hold shift, it reduces the pathing size of the selected doodad]
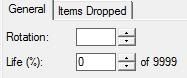
Then double click on the bottom elevator wall, and reduce its health to 0
[if its 0, the doodad is dead, if its dead, units can walk though it allowing them to walk onto the elevator]
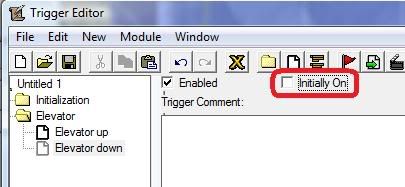
4] Now we make the triggers.
Press the

Right click under Initialization, and make a new folder, lets name this Elevator.
Click on the folder, right click, new trigger, name this Elevator up.
Right click Events and make a new Event
[this is the thing that starts the action]
Heres how to do it:
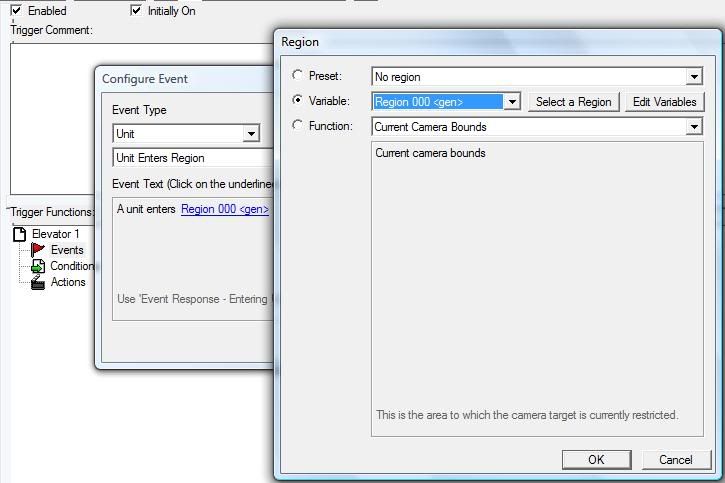
Click Select a region, make a new region in this area:
Press space and drag over the area you want the region over.
[when you press space, it allows you to place things [units, regions, etc]]
Press space and click on the region to select it.
Then accept, the trigger should look like this:
-
 Unit - A unit enters Region 000 <gen>
Like this:
It should look like this:
-
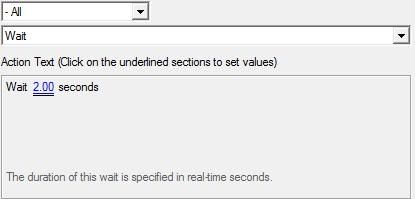
 Wait 2.00 seconds
-when a unit enters the selected region
-wait 2 seconds before carrying out the next action
Make another action,
revives a doodad:
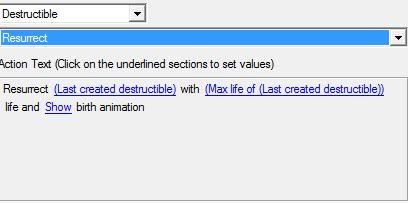
make sure to revive the doodad that you "killed" earlier on.
Another action,
Raise the elevator:
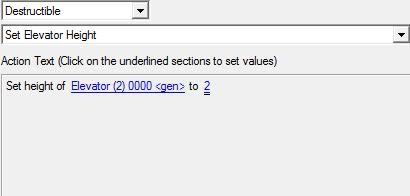
Select the elevator for this trigger.
raise it to 2 [see part 1 -Elevator Necessities- ]
now add another wait 1s to the trigger list.
then kill, these doodads:
[killing these doodads allow units to walk on them, allowing them to leave the elevator]
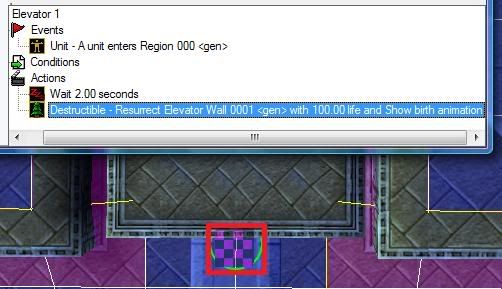
it should look like this:

The trigger so far:
-when a unit enters the selected region
-wait 2 seconds [before carrying out the next action]
-revive elevator wall
-raise the elevator to the 1st floor
-wait 1 second [gives time for the elevator to get to the floor you want]
-kill 3 elevator walls
-
 Elevator up
-

 Events
-

 Unit - A unit enters Region 000 <gen>
-
-

 Conditions
-

 Actions
-
 Wait 2.00 seconds
-
 Destructible - Resurrect Elevator Wall 0001 <gen> with 100.00 life and Show birth animation
-
Destructible - Set height of Elevator (2) 0000 <gen> to 2
-
Wait 1.00 seconds
-
Destructible - Kill Elevator Wall 0002 <gen>
-
Destructible - Kill Elevator Wall 0004 <gen>
-
Destructible - Kill Elevator Wall 0003 <gen>
-
-
4.5] Not necessary, but you can remove these triggers in Initialization to make your custom map run smoother.
-
 Melee Game - Enforce victory/defeat conditions (for all players)
-
Melee Game - Create starting units (for all players)
[5 Pesants + a Townhall [for humans]]
5] Now to lower it.
create a new trigger, lets call it, elevator down.
Make the same event as last time. [unit enters region]
For the actions, it is similar to last time as well
so you use the same technique:
-wait 2s
-revive these doodads:
-set height of elevator to 1
-wait 1s
-kill this doodad:

-
Elevator down
-
Events
-
Unit - A unit enters Region 000 <gen>
-
-
Conditions
-
Actions
-
Wait 2.00 seconds
-
Destructible - Resurrect Elevator Wall 0003 <gen> with 100.00 life and Show birth animation
-
Destructible - Resurrect Elevator Wall 0002 <gen> with 100.00 life and Show birth animation
-
Destructible - Resurrect Elevator Wall 0004 <gen> with 100.00 life and Show birth animation
-
Destructible - Set height of Elevator (2) 0000 <gen> to 1
-
Wait 1.00 seconds
-
Destructible - Kill Elevator Wall 0001 <gen>
-
-
6] The final step.
Add another action to the trigger: Elevator up
The trigger should look like this:
and another trigger, it should look like this:

then add these actions to Elevator Down, but reversed.
-
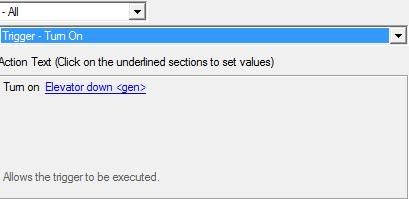
 Trigger - Turn on Elevator up <gen>
-
Trigger - Turn off (This trigger)
These triggers basically do this:
after the elevator goes up, turn this trigger off, [because it cant to up twice], and turn on Elevator down, so that the next unit to step on the elevator, will make it go down.
And thats it folks, wer done
I hope this helps someone,
and i will be adding more to this, about different elevators [including switches] and things like that.
Also take a look at the attached map

Cheers
Attachments
Last edited:


