- Joined
- Apr 19, 2008
- Messages
- 2,585


How to Add Gold/Lumber Animations to Any MDX
In this tutorial, we will describe how to add Gold/Lumber animations to any MDX file. Throughout the tutorial, let us try to do two models at once so that we can compare and contrast how this process may differ for a model that is a humanoid and a model that is not. For example, we can try to add these carry animations to both the Skeleton Warrior and also to the Makrura Prawn.
Requirements
For starters, get a copy of the source model files we want to edit.
Step 3: Adding Conditionally Visible/Invisible 3D Mesh for Gold and Lumber
In this tutorial, we will describe how to add Gold/Lumber animations to any MDX file. Throughout the tutorial, let us try to do two models at once so that we can compare and contrast how this process may differ for a model that is a humanoid and a model that is not. For example, we can try to add these carry animations to both the Skeleton Warrior and also to the Makrura Prawn.
Requirements
- Retera Model Studio
- Warcraft III
For starters, get a copy of the source model files we want to edit.
- The base character models (Skeleton Warrior/Makrura Prawn)
- For humanoid workers: Check left/right handedness
- When making a humanoid worker, I like to use as much of the original model's unique animation as possible and only do an animation transfer of the left or right arm. For left-handed workers we can take animations from the Human Peasant, and for right-handed workers we can take animations from the Orc Peon. For the case of the Skeleton Warrior, this character is holding a sword in his right hand. So, let us use the Orc Peon as the source of the gold/lumber carry animations. Because the weapon is right-handed in this case, we will do an animation transfer of the opposite left arm because this will be the arm of our humanoid who holds the bag of gold or lumber.
- When making a nonhumanoid worker, there is not as much precedent so you could stylize this however you want. I am thinking that for the Makrura Prawn, I can try to use a pile of lumber from the Human Lumber Mill as the source of a 3d mesh of lumber to sit on the Makrura's back, and I will use a pile of gold from the Neutral Gold Mine as the source of gold sitting on the Makrura's back. These are decisions you can make however you want. Below are some screenshots where I will circle the parts I am referring to here.
- For this part, it is good to understand the goal we are trying to achieve. To understand this, I suggest flipping through the animations of the Orc Peon or Human Peasant in an animation previewer program such as Retera Model Studio. We can see that these models have several copies of their animations with the "Gold" and "Lumber" suffix. In those copies, the one difference in animations named "Gold" is that the character holds a bag of gold, and the one difference in animations named "Lumber" is that the character holds a bag of lumber.
- For example, compare the list of animation sequences for the Orc Peon and the Skeleton Warrior.
- Animations of the Skeleton Warrior:
- Stand
- Stand - 2
- Stand - 3
- Stand Victory
- Attack - 1
- Attack - 2
- Walk
- Death
- Stand Ready
- Birth
- Animations of the Orc Peon:
- Stand
- Walk
- Attack
- Stand Work
- attack gold
- stand work gold
- Attack Lumber
- Stand Work Lumber
- Attack - 2
- Stand Ready
- Stand Ready Gold
- Stand Ready Lumber
- Stand - itch head
- Stand - Talk gesture
- Stand - Stretch
- Death
- Walk Lumber
- Walk Gold
- Stand Gold
- Stand Lumber
- Decay Flesh
- Decay Bone
- Animations of the Skeleton Warrior:
- Surely the primary difference between these lists is that the Orc Peon has copies of his animations. So we know that we are going to need to make copies of most of the Skeleton's animations, with the added suffix "Gold" and "Lumber" on the end of these skeleton animations.
- If we look carefully, the peon also has two decay animations and the skeleton does not (because the skeleton unit uses the "Does not decay" world editor setting). Similarly, the skeleton has a "birth" animation and the peon does not, because the Skeleton is expected to be used as a summoned unit. The peon also has a "Stand Work" animation for constructing structures. I will assume all of these other differences are outside the scope of this tutorial. But obviously if you wanted to make a perfect skeleton worker unit, I suggest starting from a base model of a skeleton who has a "Stand Work" animation and probably no "Birth" animation.
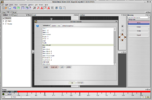
- So, we have now done some analysis and we know that we need a way to copy animations and use a new name for the copy. It turns out, the Retera Model Studio has a tool to do exactly this. Navigate to our Skeleton Warrior model and then click on the "Edit" tab. Use the "F" key on your keyboard or click the "Select Nodes and Animate" toolbar icon () to open the animation edit mode.
- Now that we are in the animation edit mode, let's open the animation chooser popup which also contains a convenient Duplicate button for animations. You may have to expand the size of the program window on your monitor in order to see this button. Sometimes it is squashed and hidden when the program has first opened if you did not fullscreen the application.
- This will present us with a popup containing a list of Skeleton Warrior animations. Select each of the animations that is named Stand, Work, or Attack and press Duplicate. Each time that you press Duplicate you will be asked to enter a new name for the animation. The new name suggestion will be "<original name> Second". Instead of this suggested value, select where it suggests the phrase Second and change this to use the name Gold instead. Also note, for animations with a hyphen or number suffix, such as when the Retera Model Studio will suggest the new name "Stand - 2 Second", you should not use this suggested name. Due to a bug/quirk in Warcraft III, the name for these animations needs to have the hyphen and number at the end of the name. So, when we Duplicate the animation originally named "Stand - 2", be sure to name the new animation "Stand Gold - 2" and not anything else. For example, do not use the name "Stand - 2 Gold". (As I recall, what happens if you do this incorrectly is that the game basically forgets about the Gold suffix and will periodically play "Stand - 2 Gold" when we expect a unit to play its normal default "Stand" animation and related variations. I have no idea if this was fixed in Reforged but I really, really doubt that it was changed. If you are curious, try doing it incorrectly intentionally and following the rest of the tutorial and then testing in-game. If you do that for the sake of science, feel free to comment back on this tutorial and let me know if you can confirm/deny my expectation in this case.)
- You should now have a list of animations in front of you that matches the following screenshot: (as a sidenote, if you make a typo while using the Duplicate button, the "Edit" button to fix your typo does not work in this menu because Retera Model Studio was never finished. The quickest way to fix an animation if you accidentally make a typo on its name while duplicating is probably for you to press Delete from this menu to get rid of the typo animation and then press Duplicate again to create it again with the correct name.)
- Now that we have created a list of "Gold" animations, go ahead and copy the original animations to create "Lumber" animations as well.
- Feel free to take a quick break at this point and save a copy of your progress and double check in the View tab that the new animations exist on the model and will play OK. Since we did not modify them at all, "Stand Gold" and "Stand" should look the same on our skeleton for example.
- If you are making a non-humanoid worker model, the steps until this point are the same. Further on in this tutorial we can use the Makrura Prawn as a simpler example to learn about how we will transfer data to the Skeleton Warrior, so if you are following along with the tutorial then now is a good time to copy the Makrura Prawn animations as well (see screenshot below).
- Save the Makrura Prawn also. (NOTE: If you find that it feels more efficient to copy these animations in a different order, it is fine to do so. The order of animations inside the model file does not matter -- it is their name text that defines which animations will be chosen by Warcraft III visually in-game.)
Step 3: Adding Conditionally Visible/Invisible 3D Mesh for Gold and Lumber
- Let us start with the Makrura Prawn example model first for this part. The reason is that for the Skeleton Warrior, we want to do an animation transfer of one arm but not the other and create an animation where he holds a gold bag in one hand, and can chop with his skeleton sword in his other hand. That is slightly complex. For the Makrura Prawn we can decide to do something much simpler and I believe it will still look pretty good: we can simply put some gold or lumber on the Makrura Prawn's back that appears during the correct animations. By doing this, it means that we do not have to actually change any of the animation movements in the models that we created -- we will simply add 3D mesh to those animations that is hidden for the original animations.
- Go now to the Neutral Gold Mine model. Go to the Edit tab. Use the selection and delete tools to isolate a wooden box of gold from the mine and delete everything else. There are a lot of hotkeys to make this operation faster, but I recorded a GIF below that shows this process by using menu options while using no hotkeys. The general idea is to select a box of gold, deselect anything else that was selected accidentally, invert the selection so that the box of gold is the only thing not selected, and then do a delete operation to all of the selected mesh.
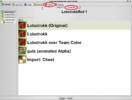
- Now that we created a simple model of a box of gold, we want to import this box of gold into the Makrura Prawn and make it display conditionally on his back during the "Gold" animations. Open the Makrura Prawn model and then choose "File -> Import" and select our modified Neutral Gold Mine model as the file to import.
- Now you should see a new window that has appeared titled Importing Goldmine into LobstrokkRed. This window contains many advanced controls. In particular, the first view that we see contains a list of texture assets. If you click on the list, you will corrupt your model file, because the current selection of the list is used to determine the texture of the current geoset in this menu. If that happens you can fix it by clicking on whichever list item is labelled " (Original)" at the end. We do not want to do anything with textures, as that is outside the scope of today's tutorial, so please do not unexpectedly break your model by clicking around the texture list. If you do click on something, just click back where it says " (Original)" which will effectively reset it.
- From this menu, the default behavior is to import everything from the Goldmine model into our Makrura. We do not want that, however. In particular, we want to change:
- Not to import any attachment points or other metadata from the gold mine that we do not want
- To import the goldmine's box of gold to be attached to the makrura's back rather than being animationless
- To only show the goldmine's box in the animations named "Gold"
- So, for these three goals, the first one is easy. Click on the tab labelled Objects and then click the button Leave All.
- For our next goal, we want the gold box to animate based on the Makrura's back. To do this, click on the Bones tab. Note that it contains three bones from the Gold Mine that are shown on the left. These define the animation data contained in the Gold Mine model, and are here so that we can choose which animation movements to import. It is OK to click through the list of bones. Unlike the list of textures on the first page, selecting items in the list of bones does not edit the model -- it simply changes which bone we are currently investigating.
- Notice in the list of the three bones shown above how the "MineExtra" has an icon graphic where the model is totally red. This red highlight is a guideline for us that indicates the part of the model that follows this bone's movement during animations. Although this highlighter is not foolproof and will sometimes show incorrect or useless information on very complex model files, in this case it is very helpful for us. We can see that the whole 3D gold box we cut out in this model is following the movement of bone named "MineExtra" . So, we can go ahead and import "MineExtra" and skip importing everything else. To do this, click on Bone "MineBirth" and Helper "Dummy02" and then choose "Do not import" in the dropdown menu shown after you select each of those two.
- Now that the only bone getting imported will be the one that the box of gold actually uses, go ahead and change this bone so that it is attached to the Makrura's back. To do this, click on Bone "MineExtra" and have a look at the widget on the right-hand side of the screen under the title "Parent: (Old Parent: {no parent})". This is telling us that after the import is completed, this gold mine part will be attached to nothing. It will float frozen in place in the Makrura model, animationless. We do not want that. Instead, scroll down the list of bones until you see LobstrokkRed: Helper "Bone_Abdomen". Click on this list item. The act of clicking it will change the current setting for "MineExtra", so that now its animations will be attached to, and relative to, the Abdomen of the Lobstrokk.
- Now it is time to achieve our third goal for this import operation. We want the box of gold to hide in all of the Makrura Prawn animations except for the animations named "Gold". To do this, we need to configure a combination of settings in the Animation tab and also in the Visibility tab. The Visibility tab is highly automated and offers possibilities based on what we decide to do with the Animation tab.
- Let's start with the Animation tab. For this menu, we want to establish a simple pairing telling the computer that we will play the "Stand" animation of the gold mine (in this case a motionless animation sequence where nothing happens) in all of the "Gold" animations that we created on the Makrura Prawn. The default behavior without this pairing would be for the gold mine to do nothing as well. So, at first it may seem pointless to import "Stand" from the Gold Mine into "Gold" animations of the Makrura. But it is not pointless! The Visibility tab allows us to pick separate settings to hide the Gold Mine 3D mesh during "existing" animations, and show the Gold Mine 3D mesh during "imported" animations including animations that are being blended into pre-existing sequences. (For anybody who used the official War3ArtTools from Blizzard that were originally used to create all of the Reign of Chaos and Frozen Throne art assets, you are probably familiar with the idea that this highly automated process described here is not how they did things. Instead, after putting the Gold Mine mesh into the Makrura, the War3ArtTools allow us to create a new Visibiliity Track for the Gold Mine mesh and we could go to each "Stand Gold" and "Walk Gold" and "Attack Gold" animation individually and add a keyframe at the start of each animation defining that the mesh would be visible within this Visibility Track. Then, we would need to go to all other animations such as "Stand Lumber" or "Stand" and add a keyframe declaring that the Gold Mine mesh would not be visible during those animation sequences. My aspiration with the Import subsystem in the Retera Model Studio is that user time will be saved by not having to add all of those keyframes. What I offer is more of a model merging script with complicated inputs, rather than a general case data editor. For users familiar with the open source MDX community, Magos and those who followed after him like Ghostwolf did not follow the original naming that appeared in War3ArtTools and 3DSMax and chose to refer to a "Visibility Track" as a "Visibility Animation", and chose to refer to "Visibility KeyFrame" as "Visibility Track" in their code. This is incredibly confusing, so I apologize if the terminology that I have used here is not consistent with whatever you as the reader may be familiar with. In the source code of Retera Model Studio, generally I refer to a "Visibility Track"/"Visibility Animation" instead with the name "AnimFlag", and I refer to a KeyFrame instead with the name "Entry". So I am guilty of inconsistency as well. My apologies.)
- So to establish this linking, first click the "Leave all" button in the animation tab. Then, click on "Stand" and check the box labeled "Import this sequence".
- Now, rather than creating a new "Stand" sequence in the Makrura Prawn (it already has one!), click on the "Import as-is" dropdown option and change it to the dropdown option labeled "Time-scale into pre-existing". This will cause a new list of animations to appear. This time, the new list that appears will be a list of Makrura Prawn animations. Hold SHIFT or CTRL and select all of the "Gold" animations of the Makrura Prawn. This tells the import automation script that the gold mine animation will be time-scaled and merged into the existing, blank "Gold" animations that we created on the Makrura.
- Now that we have created a relationship pairing the animations, it is time for us to open the Visibility tab. Because of our Animation settings, anywhere that Visibility refers to "imported" animations this will mean the ones with "Gold" in their name, and anywhere that it refers to "existing" animations then that will be mean the ones without "Gold" in their name.
- In this Visibility tab, click on Goldmine: Geoset 1. Change the menu option "Imported animation visibility from" to the setting "Always visible" and change "Existing animation visibility from" to the setting "Not visible".
- Now that we have configured all of our import settings, click on Finish to run the automation and generate the model based on our parameters! You should immediately see a Makrura with a box of gold to his side:
- But there is a problem! Our box of gold is not located on the Makrura's back how we want! Use the select tool to select the box. Then choose "Move" and then drag this box so that it is located on the back of the Makrura Prawn. To drag an object using the move tool, you can either click on the 2d editor widget, or right-click anywhere in the viewport.
- Now it is time to save our work! Save a backup file of your Makrura Prawn so that you can keep all of your progress to this point, and then click on the View tab and check if the model looks how we wanted. If everything has gone well, your model should match the following animated GIF preview. You can look at "Stand" animation which looks normal, or use the "Stand Gold" animation where the Makrura has a box of gold on his back!
- The main focus of this tutorial is how to do the animation and geometry transfer. But in my personal opinion the box of gold should probably be larger especially because the Makrura Prawn default unit in the Unit Editor is scaled down, so our box of gold would be hard to see. For that reason, I suggest that you play around with the "Select and Rotate" or "Select and Scale" tools to get this box of gold sized and rotated to exactly where you feel it fits best on the back of the Makrura.
- Challenge Time: Repeat steps 2-20 using the Human Lumber Mill and the pile of lumber that is on the back of it. Wherever the tutorial says "Gold" animations, use the "Lumber" animations of the Makrura Prawn instead.
- Congratulations! Now you have a model of a Makrura who can be used as a worker.
- Now that you are becoming more familiar with the tool, it is time for us to try something slightly more challenging. Let us try importing the Peon left arm "gold holding" animation into the Skeleton Warrior. We are able to anticipate an obvious problem: the skeleton's left arm is already being used to hold his shield. A wise man once said, "When in doubt, just delete it." We can apply this same philosophy to our Skeleton Warrior worker. Open the Edit tab and select the shield of the Skeleton Warrior, then press DEL on the keyboard or use "Edit > Delete" from the menu. There will be two copies of the skeleton's shield and it is good to delete both of them. One of them is hidden and only appears in the death animation, so that it can have different animation properties.
- Now our skeleton is ready to become a worker. Go to the "File > Import" and choose the Orc Peon.
- If you look at the Orc Peon model, you can see that Geoset 3 and Geoset 4 are the bag of gold and bundle of lumber, respectively.
- Knowing this, in our first Geosets tab in the Import that we are doing, we need to uncheck the "Import this Geoset" box for Geoset 1, Geoset 2, and Geoset 5 which contain the geometry of the Peon himself that we do not want to import.
- This means that when we are finished, the Skeleton Warrior will have the new 3D mesh of the gold bag and lumber bundle in his model. This is a great step forward. However, like the Makrura, we need to remember our three goals again:
- Not to import any attachment points or other metadata from the peon that we do not want
- To import the peons bag of gold to be attached to the skeleton's back rather than being animationless
- To only show the peon bag of gold in the animations named "Gold"
- Unfortunately, our list of goals for this import configuration has increased. Now, along with the first three, we have a fourth goal: To import the movement data of the peon's left arm into the Skeleton's left arm, but only for these new animations.
- Lucky for us, the Import feature is able to do exactly what we want!
- Our first step towards these goals isthe same. Again, we should:
- Enter Objects tab and click Leave All button.
- In the Bones tab, we encounter our first difference. There are two bones Bone "GoldBag Root" and Bone "Lumber" that we must import. These are very similar to the bone we imported from the Gold Mine! However, unlike the gold mine, they already had their own animation inside the Peon model file. Because of this, we will see "Parent: (Old Parent: Bone_Chest)" listed for these two bones. They are already selected to be attached to peon: Helper "Bone_Chest" ! This points out two problems -- the Import menu is confused about what we want. It is acting as though we wanted to import the Peon body animations into new nodes and new data in our model. We did not want that, we only want to import the Gold and Lumber that is being carried. So, it should not be possible to attach that gold and lumber to the peon anymore, only to the skeleton! To fix this, click on Leave All here in the Bones tab. Then, click on our gold and lumber bones and change their "Do not import" dropdown setting back to say "Import this bone".
- Now that we did this, you will notice that the right-hand menu listing the parent to attach Bone "GoldBag Root" and Bone "Lumber" to is empty. The peon item is gone from the list! This is because we are no longer importing the peon: Helper "Bone_Chest" of the peon to be a part of our new model, so it would not make any sense for us to link to it. So, instead, find Skeleton: Helper "Bone_Chest" on the menu for both the gold and lumber, and link to that.
- Now we have a new problem. The name Bone "GoldBag Root" is actually a reminder to us that there are multiple parts to the animation of the gold bag. And we want all of them!
- So, scroll down the list to find the rest of the gold bag. You should find Bone "GoldBag2", Bone "Mesh06", and Bone "Mesh12".
- For each of these three additional parts of the gold bag, click on them and then change "Do not import" to "Import this bone". However, we have another problem! For the same reason that the import wizard automatically removed the peon: Helper "Bone_Chest" from our list of possible parents, the relationship between these parts of the gold bag was damaged and unset when we used the "Leave All" option. As soon as they were left out and no longer going to be a part of our new merged model, the UI unselected their parent nodes because those nodes technically would have no longer existed! So, we need to assign each of their "Parent" settings as well, even though we are simply putting them back to being as-they-were inside of the Peon.
- Set Bone "GoldBag2" to have Bone "GoldBag Root" as its parent
- Set Bone "Mesh06" to have Bone "GoldBag Root" as its parent
- Set Bone "Mesh12" to have Bone "GoldBag2" as its parent
- My program will hint the above to you as we make the above decisions, because the line Parent: (Old Parent: "GoldBag Root") will always contain the original value from the Peon model regardless of your work-in-progress specifications in this menu.
- With regards to bones, now we have gone as far as we did on the Makrura -- to introduce a new piece of floating motion data that for the new 3D mesh is attached to the character model's back. However, we want more. We also want to move the Skeleton's left arm corresponding to how the peon's left arm was moving. This is slightly fancy, but totally doable.
- Scroll through the left-hand list of bones until you find Helper "Bone_Arm1_L". It should be in order with Helper "Bone_Arm2_L" and Helper "Bone_Hand_L" below it.
- For each of these three, select them and change the dropdown menu "Do not import" now instead to the setting "Import motion to pre-existing". When you change this, a new list will appear with a third list of bones!
- In that new list of bones that appeared, you can choose what Skeleton Warrior bone we will overwrite data for during the selected animations. In this case, for each of the three peon arm bones, you need to find the corresponding Skeleton Warrior bone with the exact same name.
- For "Bone_Arm1_L" and "Bone_Arm2_L" on the new list the corresponding items will be automatically selected for you, so you don't have to do anything! That's great. But we have a problem: There is no item on the list named "Bone_Hand_L"! The skeleton does not have anything by that name! So, instead, we can try choosing "ArmLowL" and hope that it should be a good replacement.
- Now for the next step, it is time for us to setup Animations and Visibility.
- First, start with the Animation tab. I suggest that we begin by clicking the Time-scale all then Leave all buttons.
- Now we can go to each of the "Gold" and "Lumber" animations one-by-one and configure them how we want.
- For each animation with "Gold" or "Lumber" in its name, check the box for "Import this sequence". This will enable the list of Skeleton Warrior animations that we can transfer the Peon animation into. Try to transfer the Peon animations into multiple Skeleton Warrior animations where it will fit. I suggest:
- peon "attack gold": Select both Skeleton "Attack Gold - 1" and Skeleton "Attack Gold - 2"
- peon "Attack Lumber": Select both Skeleton "Attack Lumber - 1" and Skeleton "Attack Lumber - 2"
- peon "Stand Ready Gold": Select Skeleton "Stand Ready Gold" (This should be selected already by default once you check the "Import this Sequence" box)
- peon "Stand Ready Lumber": Select Skeleton "Stand Ready Lumber" (This should be selected already by default once you check the "Import this Sequence" box)
- peon "Walk Lumber": Select Skeleton "Walk Lumber" (This should be selected already by default once you check the "Import this Sequence" box)
- peon "Walk Gold": Select Skeleton "Walk Gold" (This should be selected already by default once you check the "Import this Sequence" box)
- peon "Stand Gold": Select Skeleton "Stand Gold", Skeleton "Stand Gold - 2", Skeleton "Stand Gold - 3", and Skeleton "Stand Victory Gold"
- peon "Stand Lumber": Select Skeleton "Stand Lumber", Skeleton "Stand Lumber - 2", Skeleton "Stand Lumber - 3", and Skeleton "Stand Victory Lumber"
- Below is a sample GIF showing how I would perform these configurations:
- For the Visibility tab, there is much less work to do. Click on Peon: Geoset 3 and Peon: Geoset 4 and set "Existing animation visibility from" dropdown to say "Not visible". That way, the gold and lumber are hidden in the Skeleton Warrior's original animations. Similar to what we did with the Makrura.
- Time to click "Finish" and see if our model is generated successfully! If you get a popup saying that there is a new bone named MatrixEaterDummy getting generated, this means that you made a mistake in the configuration and you should go back to your backup of the Skeleton Warrior with no shield and blank "Gold"/"Lumber" animations and follow the import tutorial again.
- Assuming you do not get an error popup like that, you should now be very close to finished. However, the gold back and lumber wood are probably in the wrong location in 3D space. Similar to the Makrura, we need to move them to fit. This is slightly hard to do because their original location relative to the peon was floating out in a space somewhat, and we want them to be floating out in space with the same offset relative to the Skeleton Warrior.
- Select the gold bag and lumber bundle using the Select and Move tool and then position it where you would like!
- Congratulations! Now we have a Skeleton Warrior and a Makrura Prawn worker unit model who can carry gold or lumber. If you would like to tweak the Skeleton and try again, one possibility that can make a lot of difference with his left arm is how we deal with the missing node that does not line up named "Bone_Hand_L". You could try omitting that third node entirely and see if it gives better results.