- Joined
- May 7, 2010
- Messages
- 9,278
Seamless Texturing from tiled textures to complex UV's

Tutorial, courtesy of the talended late TDR.
Tutorial, courtesy of the talended late TDR.
This was originally posted by the late TDR, years ago on wc3c.net, detailing a pretty insightful step by step tutorial at making seamless textures using Photoshop and 3ds max(nowadays, the versions may depend from case to case).
The first part includes the making of perfectly repeatable tiles, with a satisfying end result using Photoshop.
The second part is detailing how to make seamless textures on models using 3ds max and Photoshop/whatnot image manipulation software.
It contains various tips and guiding pictures on the overall process.
This is what a texture with seams looks like. Notice the rough edges that look dislodged next to each-other, resulting in an uneven result.
- Making seamless repeatable textures(tiles)
TDR said:Tools you'll need: Photoshop
Textures that tile over a surface are like square repeatable patterns, so any 2 opposite edges of the texture must blend in perfectly.
Let's talk about this on an example. You can have anything from a photo of a wall to some hand painted stuff. I'll work on some hand painted guts or something that I made:
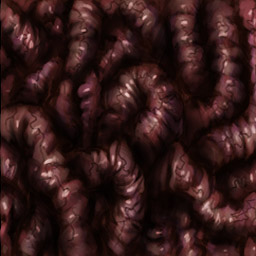
When you have complex things going on in a texture you want to tile, things may look daunting. But it's actually very, very simple.
Open your texture in Photoshop and from the Filter menu go to Other -> Offset...
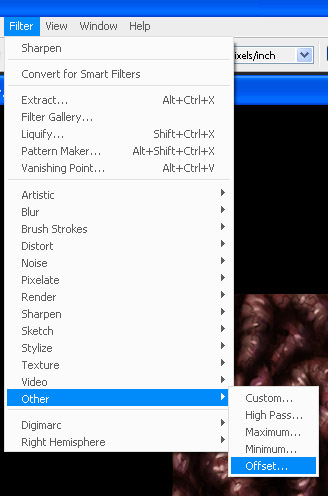
And this little dialog box will pop up:
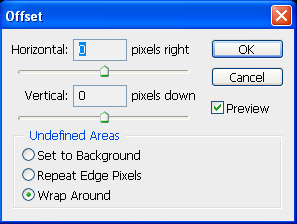
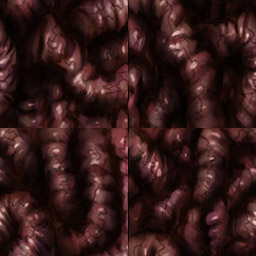
In Horizontal pixels right and Vertical pixels down type in half of the width/length of your texture. My texture is 256x256 px so I'll type in 128. What I get is this:
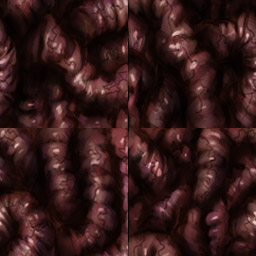
It's kinda nasty. That's what you would get if you were to tile this texture as it is. So now you fix it. It's really easy: just paint over those seams. Here's the final result (place your cursor over the picture to see the original offseted one):
>
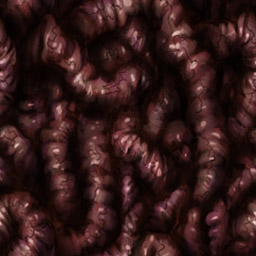
And now you got yourself a seamless texture. You don't need to offset it back, it's exactly the same thing. Here's the tiled result:
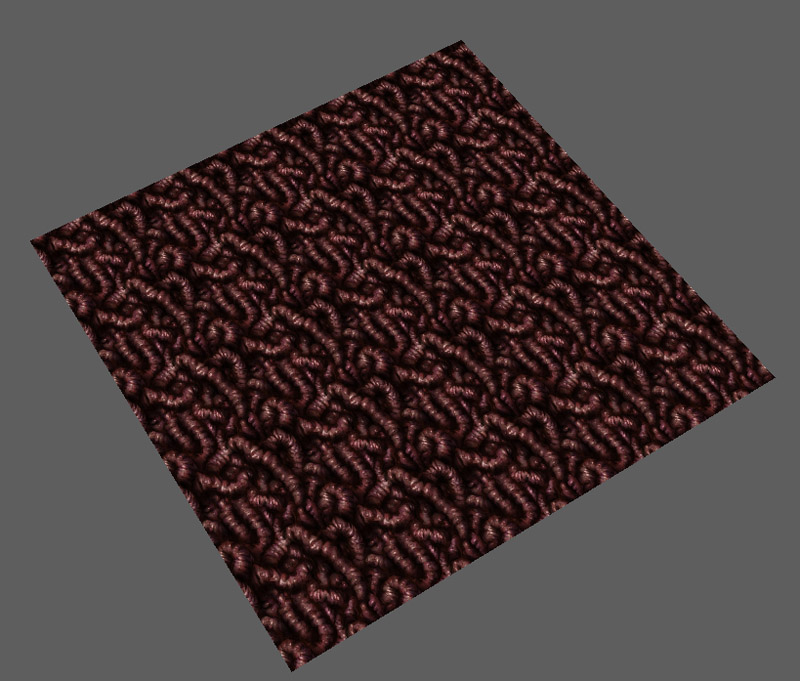
One thing to have in mind when making tiled textures though is to have as few distinctive marks in the texture as possible and to make as much variation as possible so the repetition doesn't seem that obvious, like in this case.
If you want to make a texture from a photo, then use the clone stamp tool to fix the seams.
This method may be applied in other applications that support this offset thing, but I don't know about others so that's why I exemplified in Photoshop.
- Making seamless textures on UVW unwrapped models
TDR said:ATTENTION: this part of the tutorial is dedicated to intermediate/advanced users. If you are a beginner in 3ds max, then first learn to use from the tons of tutorials on the net and from max's tutorials.
Tools you'll need: 3ds max, Photoshop (or any other painting application of your choice really, it doesn't matter in this case; 3ds max is the main tool here)
Now here's where things get a bit tricky. When you unwrap a model, in order to get a perfect UV layout you can't keep all parts attached so you'll most oftenly find yourself with, say, the arms and legs separated from the chest. Also the arm/leg is basically a cylinder so it's unwrap will have a break somewhere along it's length that will result in a seam. These kind of seams can be a pain in the ass to fix if you don't know the right method. But I'll show you a method that will save you time and effort and that's fairly easy to do.
First things first, fire up 3ds max (I'll use version 9, but this can be done in any versions as far as I know...I hope so...though I'm not that sure if 5 can do it, but I think so...right now my version 5 is a little screwed up so I can't check at the moment) and open your model. Again, I won't show you how to unwrapp it, check Whitehorn's tutorial for that. This model that I'll illustrate this method on already has it's UV's layed down:
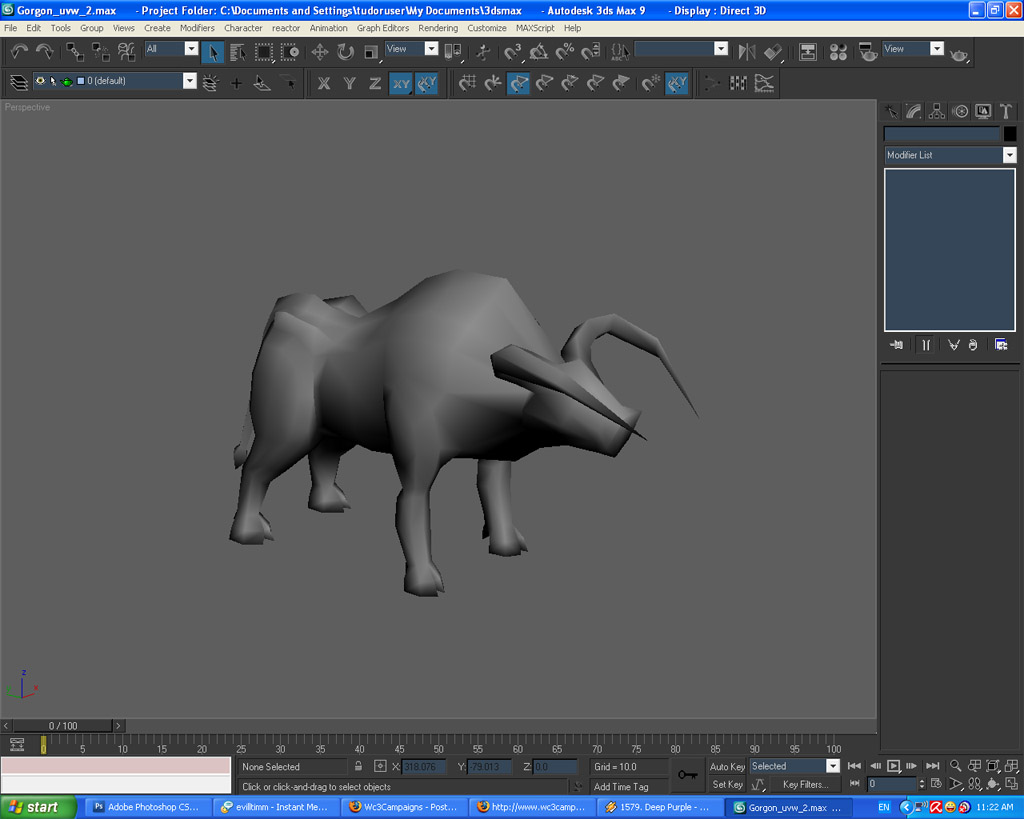
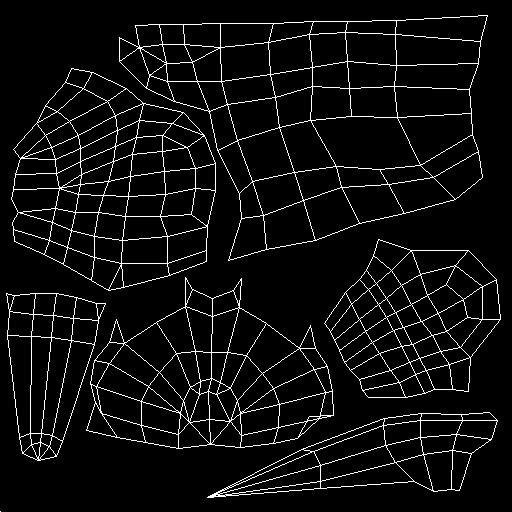
One thing to note about the UV's: try to keep your uv's as consistent as possible. By that I mean that at least the parts that need to be connected must be the same scale. To do that, apply a checker pattern texture on your model and try to make the squares approximately the same size all over your mesh:
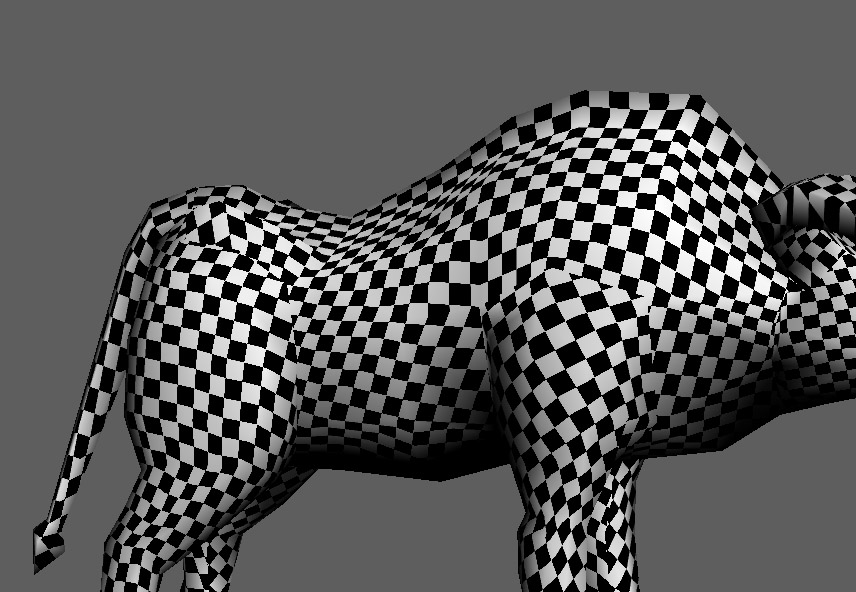
This is necessary so you have the same ammount of resolution all over your texture. You wouldn't want the leg to be more pixelated than the body.
Ok, now let's start working on this thing. I won't make a serious texture for this, in order to illustrate the method let's make him a tattoo or something. So I go in photoshop and draw something on this dude:
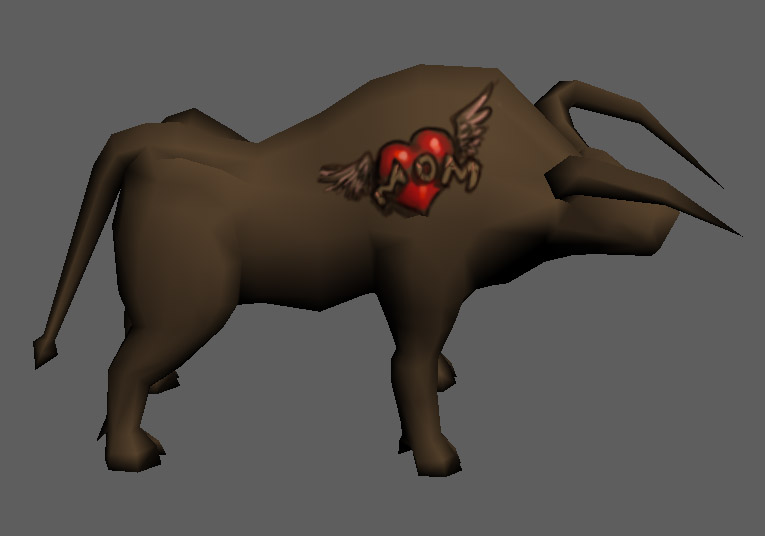
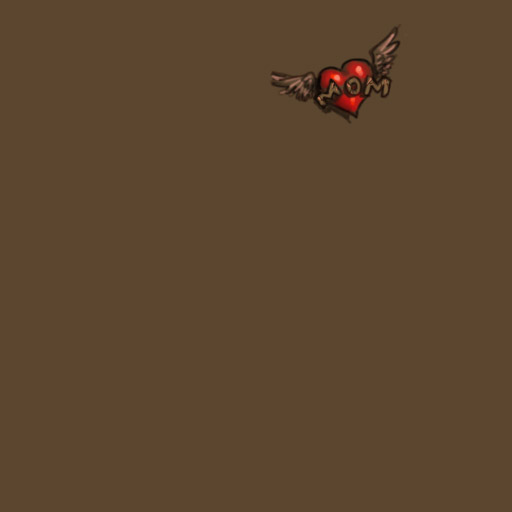
Hmm...ok, but I want some thorns or something extending down on it's leg. But the leg is detached from the body and at a different angle than it actually is. So how do I do that? With a sort of projection painting. This is where the tricky but cool part starts.
Make sure that in the moifier stack you have a Unwrap UVW modifier applied to your mesh that holds the current UV's. Also make sure the map channel is set to 1:
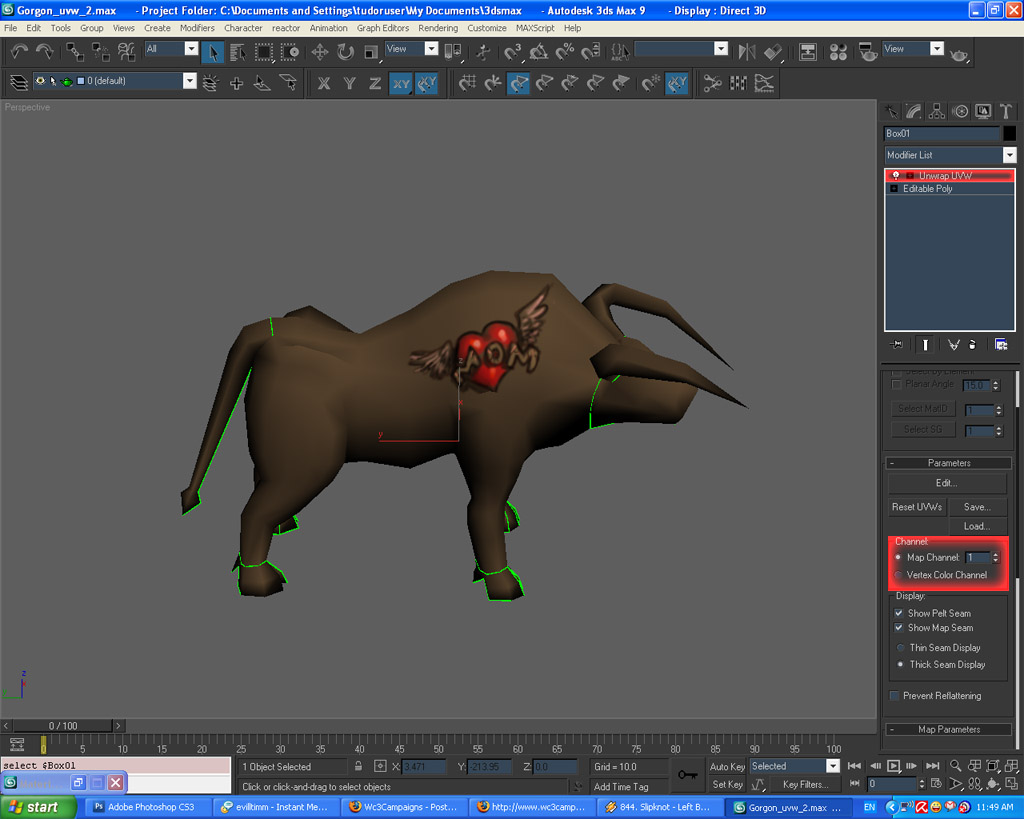
Now set your view so that you have a clear view on the part you want to paint on. After that, apply another Unwrap UVW modifier on top of the one you already have. Assign this modifier a map channel of 2 (or any other number you fancy as long as it's not 1, so it won't override with the original unwrap); a dialog box will appear saying some mumbo jumbo, just accept:
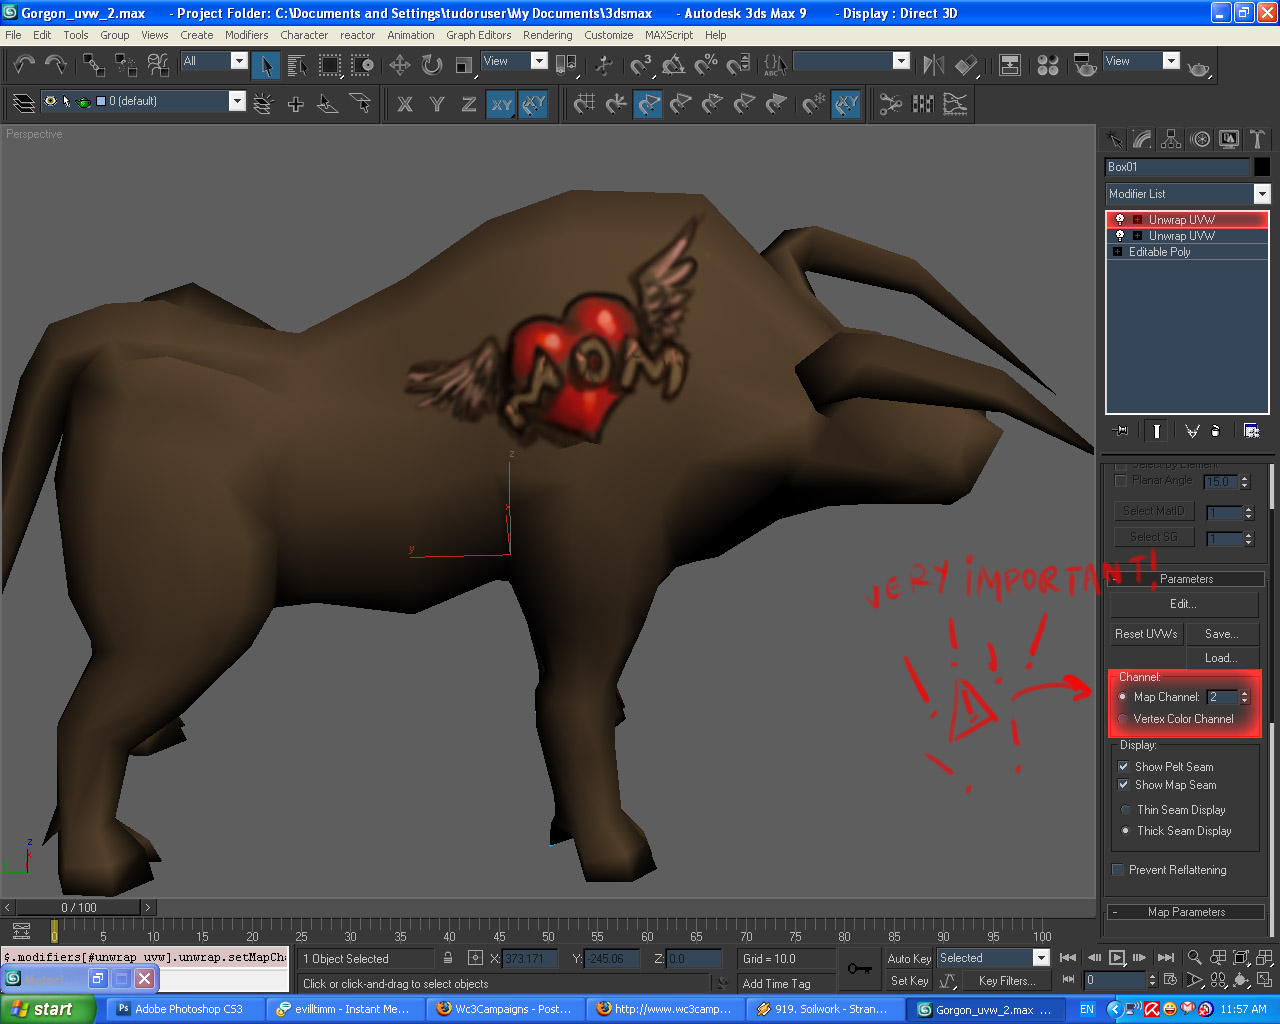
Ok, now remember I said to set your view so you have a clear view on the part you want to fix. This is also extremely important. I already did so, as seen in the previous screenshot. So now, while in the top Unwrap UVW modifier, select all the faces of your mesh (DON'T change your view; just press ctrl+A in while in face selection mode) and from the Map Parameters rollout chose Planar and then click Align To View. That's why the view was so important.
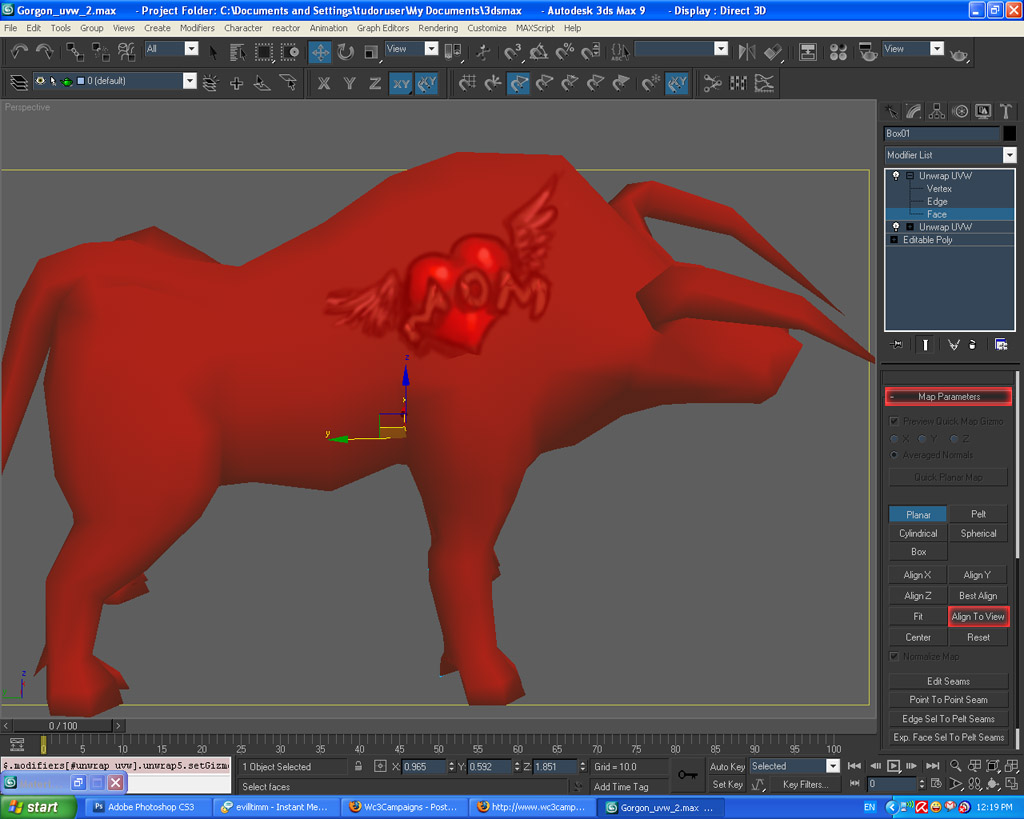
When you view the uv's, this is what you get:
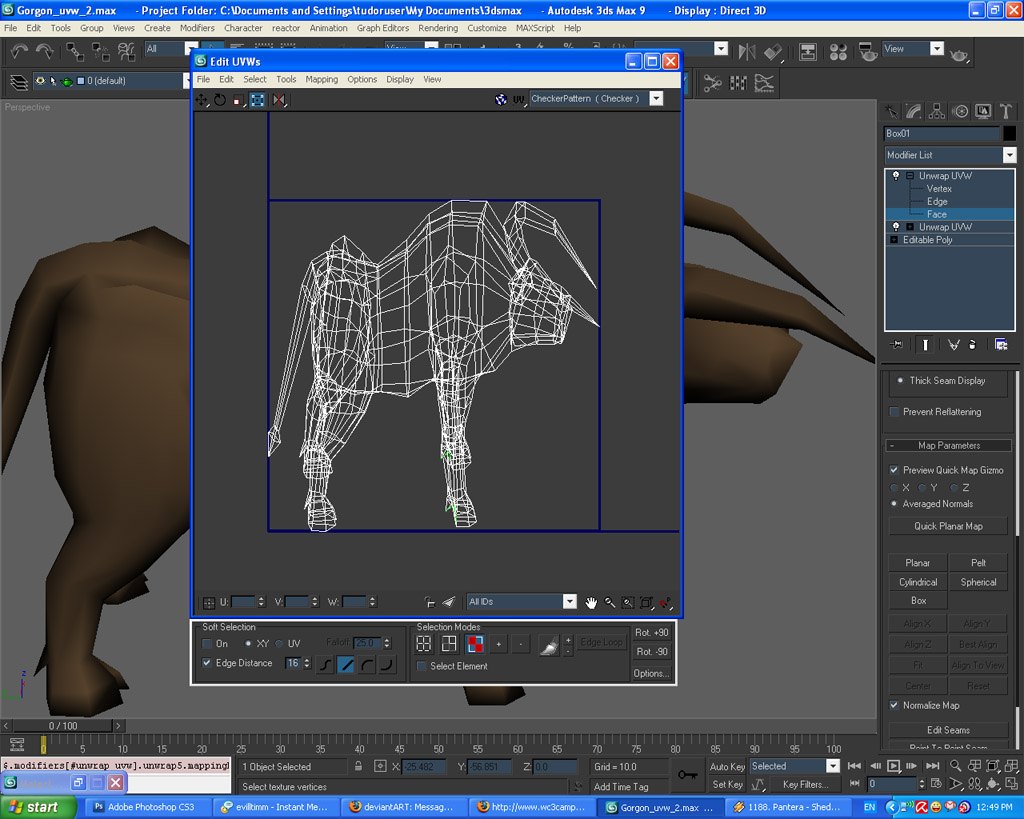
It's basically like a wireframe view of your model seen from that angle. But it's distorted so it fits that bloody square. No problem, just stretch it out so it resembles the actual model as close as possible and then scale it down so it's within the square:
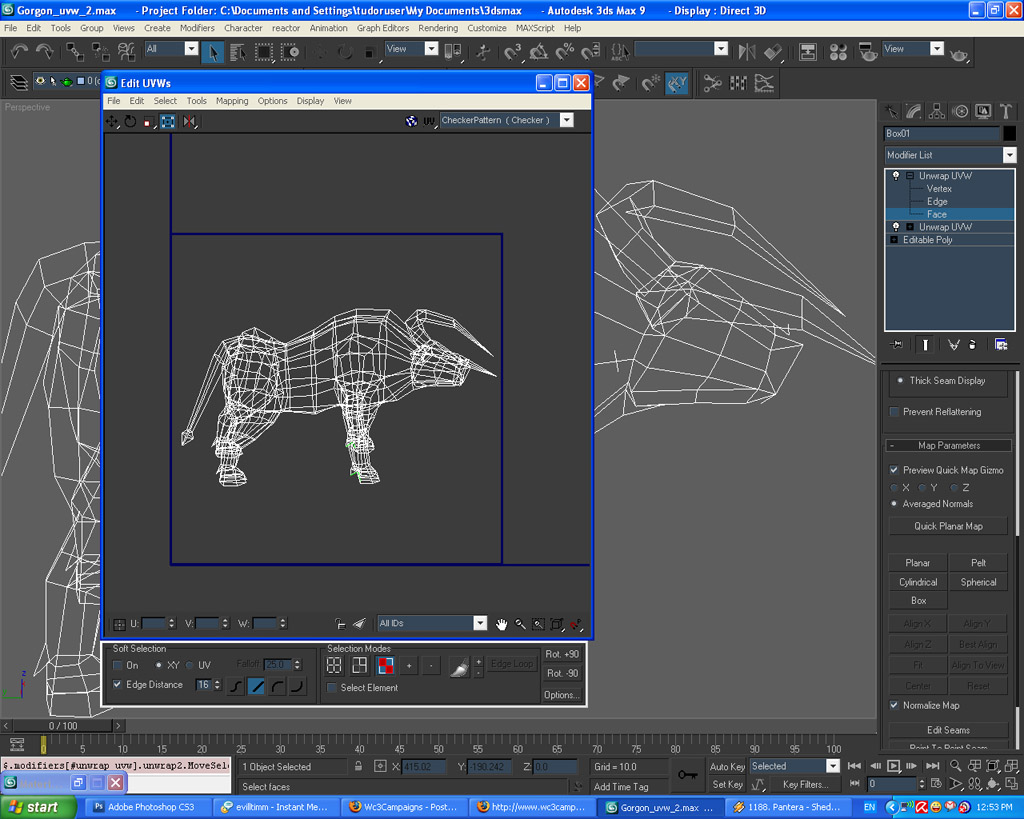
This is basically ready to paint on, but it ain't of much use if you can't see where the tatto is now, is it. So let's do that now.
What we basically want to do is to take the texture from the map channel 1 (the original unwrap) and view it on this new unwrap (channel 2). We do that with the neat Render To Texture tool.
So first of all select your mesh. Then open the Render To Texture dialog by either going to the Rendering menu -> Render To Texture or by pressing 0 on your keyboard. Then this nice little dialog box pops up:
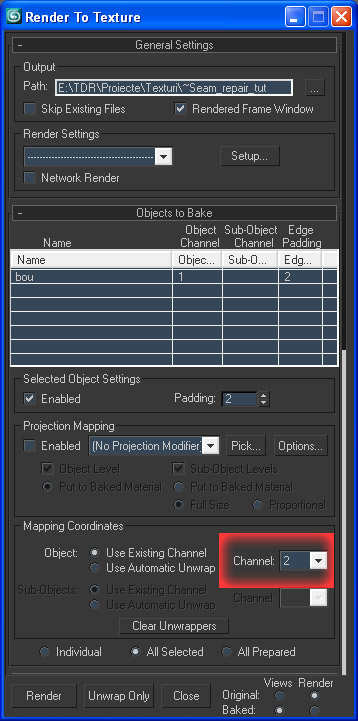
First of all chose a folder where you want the texture to be saved. Then make sure that the map channel is set to 2, so it takes the information from channel 1 and projects it into the current channel, 2.
Next scroll down a little until you reach the Output rollout. There click on Add and from the little pop up that appears select DiffuseMap and confirm by clicking Add Elements:
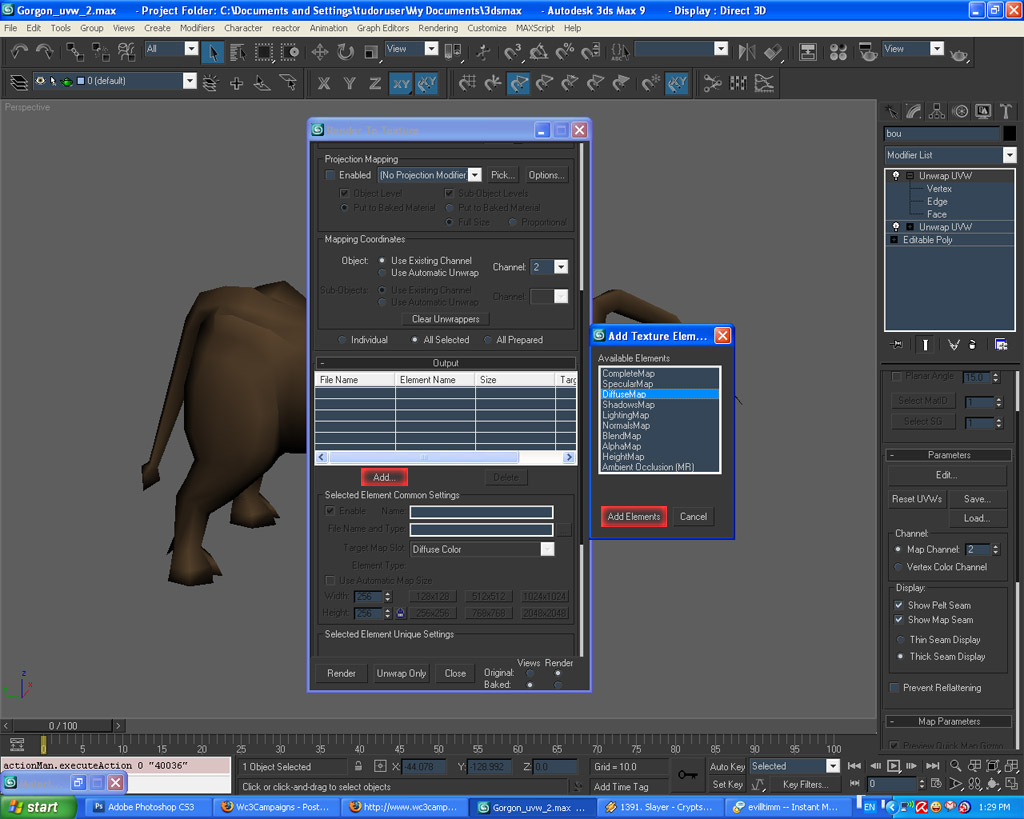
Change the name and type of file to whatever you like and the resolution preferably to something high, like 1024x1024. Then hit Render, wait a little, and then it's ready. Here's what I got:
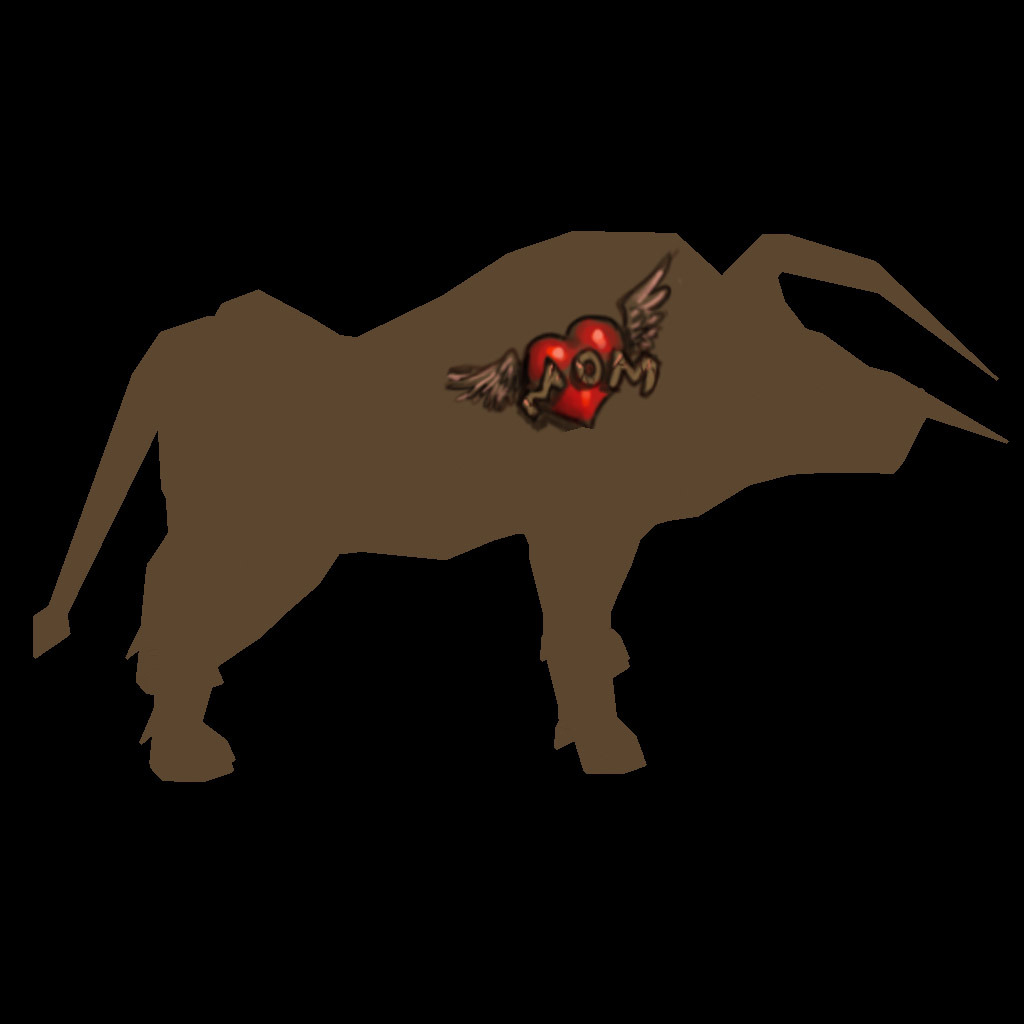
It's basically the same thing you had in the viewport, but now you can paint over it and fix things. So I now take this into Photoshop and start adding some thorns & stuff:
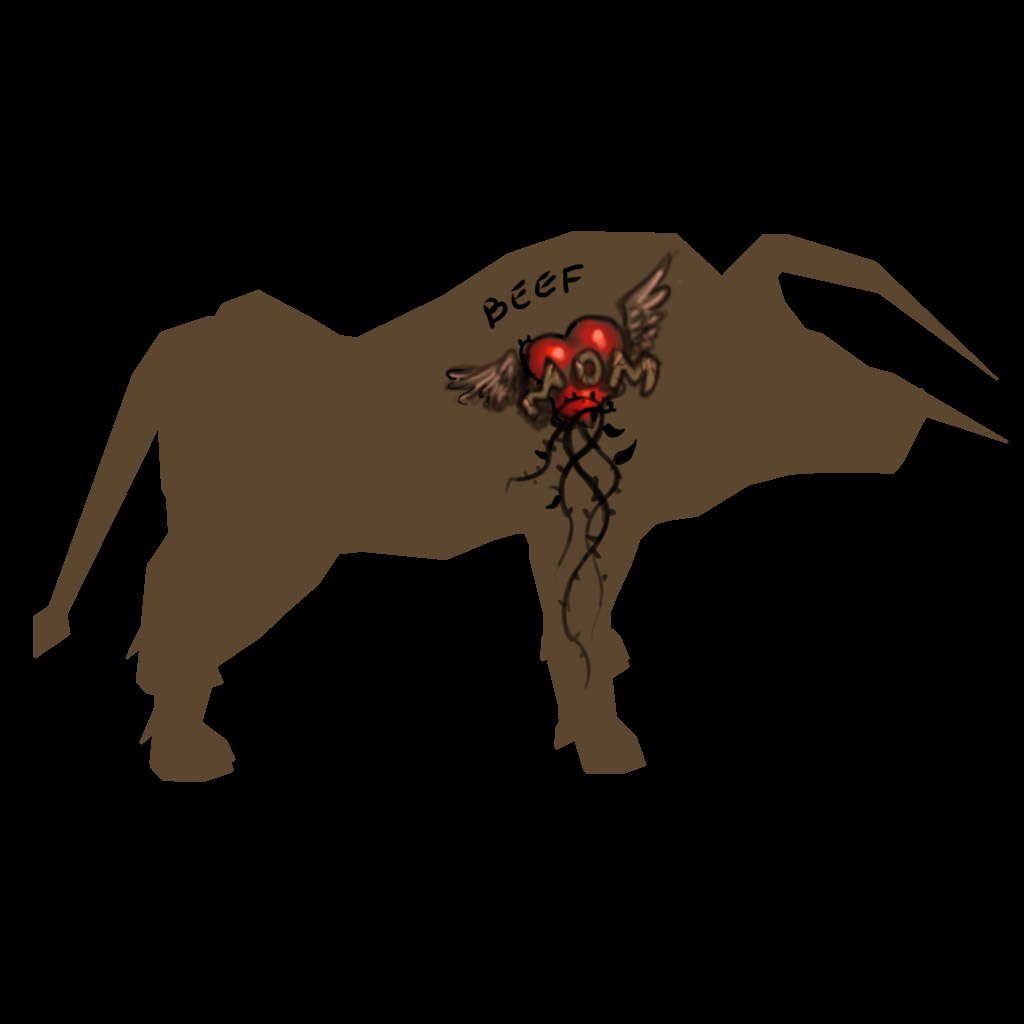
Much better. Now all we have to do is to reverse the render to texture process. We have to render this texture information back on the first UV layout.
So, first you have to assign this new texture to your model. Go to your material, change the texture to this one and also change the map channel to 2:
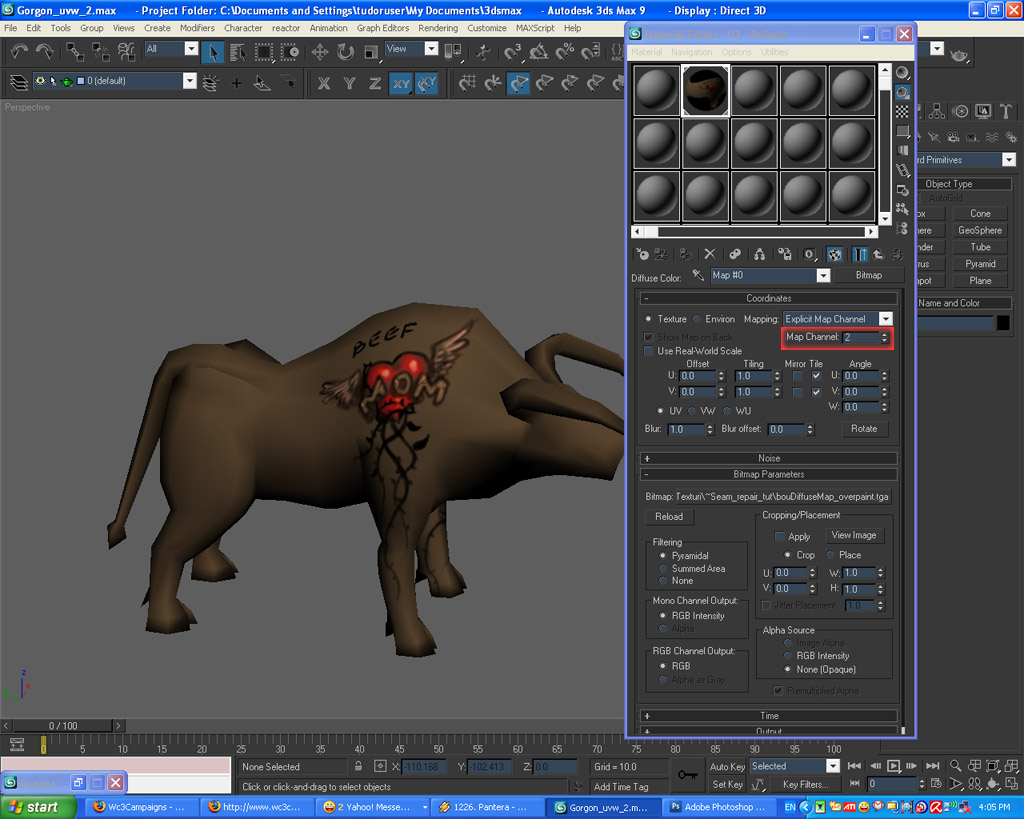
Now open the Render To Texture dialog again and change the map channel to 1 and change the resolution to the original one of the texture (mine was 512x512). Also don't forget to assign a different name for the texture. Now hit render. This is what I got:
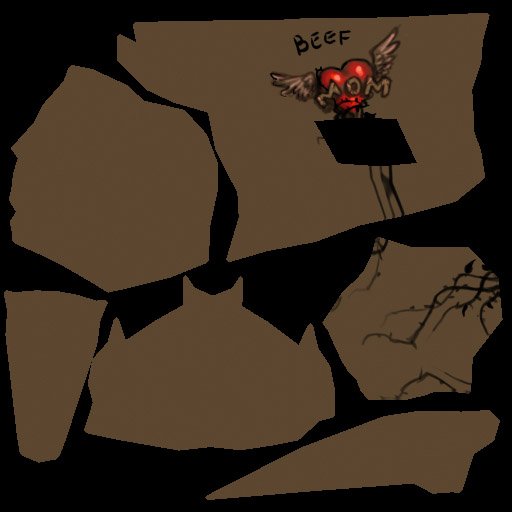
Notice that it projected the texture all the way through the entire model, so you have that texture stretched over the underside and on the back side of the leg too. But just go ahead and erase what you don't need and you're done:
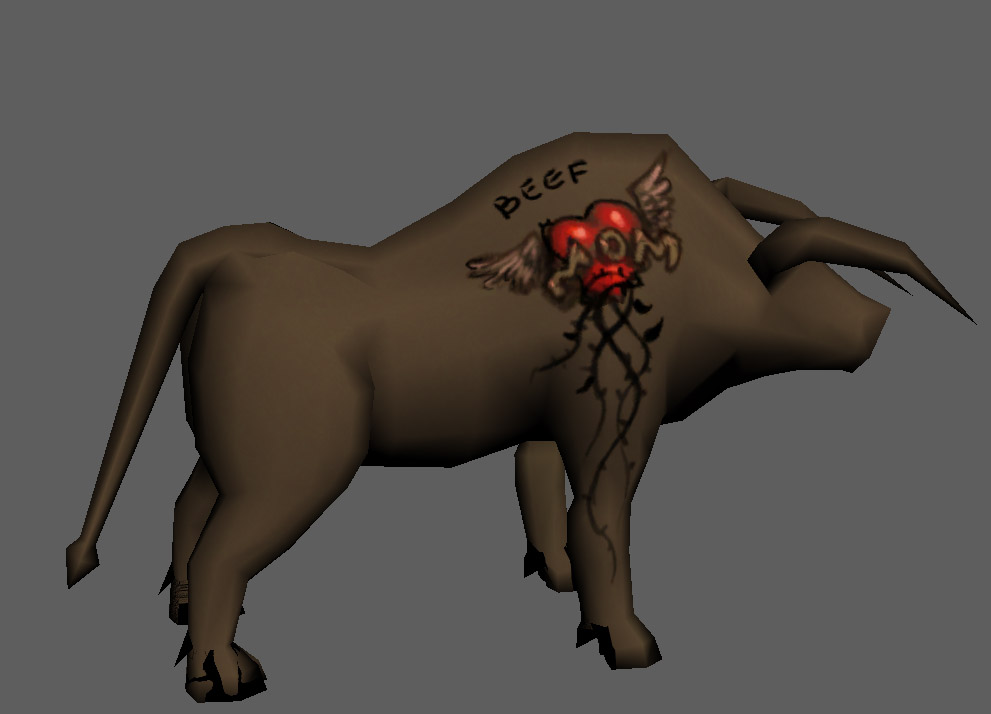
The hoofs aren't unwrapped, that's why they're such a mess.
You can now go ahead and delete the unwrap modifier you used to project the texture, if you don't need it anymore. And don't forget to change the map channel to 1 again in the material.
You can repeat this technique as many times as you need on a model. For example now I want to add an individual that licks that heart tattoo. So I'll do it directly on the projection unwrap instead of starting first on the original unwrap:
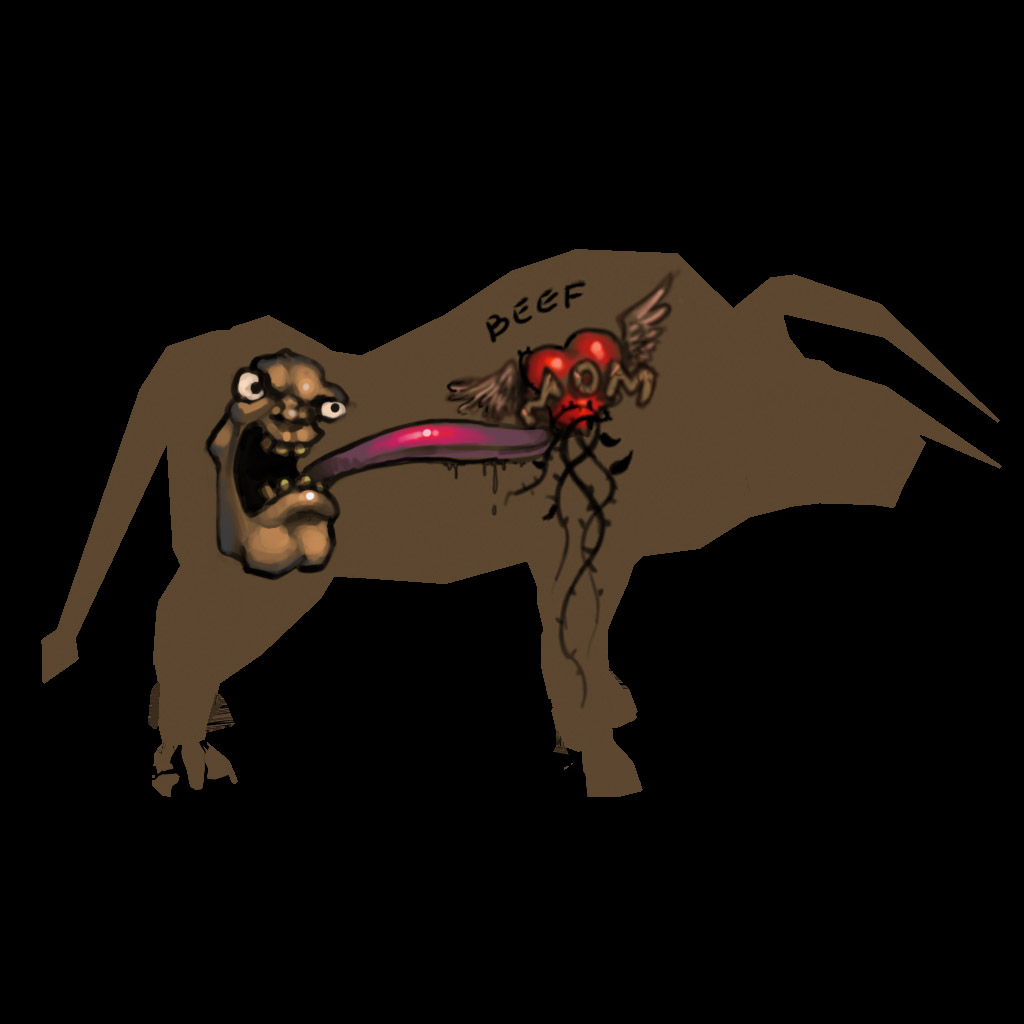
And here's the final result:
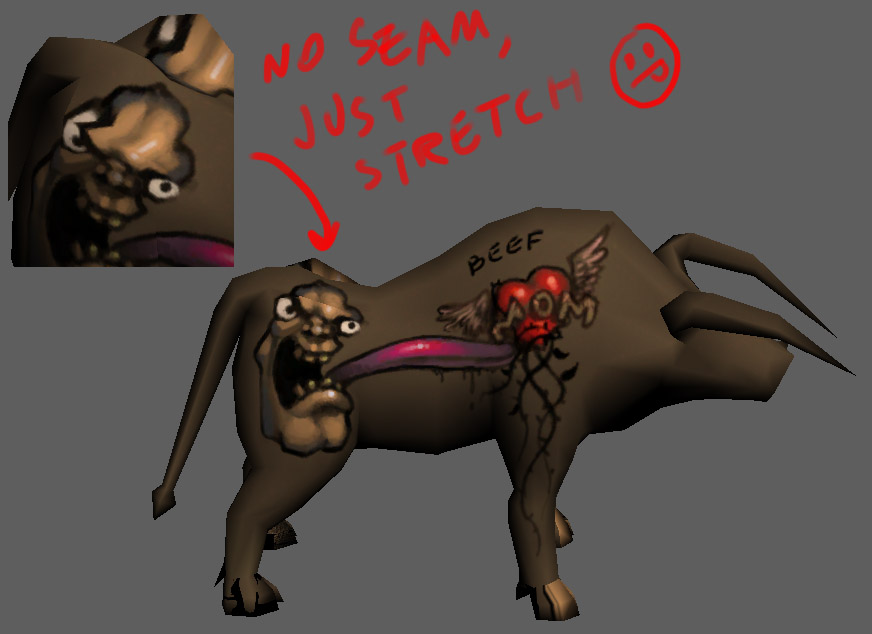
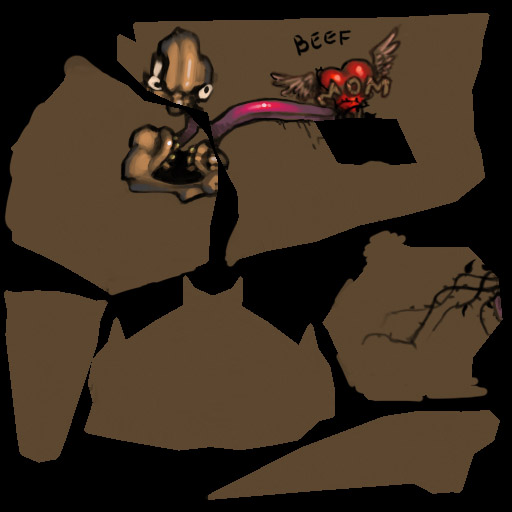
All credits belong to TDR. A 2007 tutorial aimed at understanding the basics of seamless texturing.
~ Enjoy ~


