- Joined
- May 22, 2009
- Messages
- 491
This is a tutorial on how to use WinMPQ to add textures into Warcraft 3 RoC and it will appear in any map.
First I would like to say it took me forever to find this and I actually never found it I just found it out myself . So here are the things you will need...
1. WinMPQ
2. Warcraft 3 RoC
3. Gimp (Optional)
Gimp stands for GNU Image Manipulation Program and is basically photoshop for free and it is great with editing textures.
1. Ok, first download your texture and un-zip it.
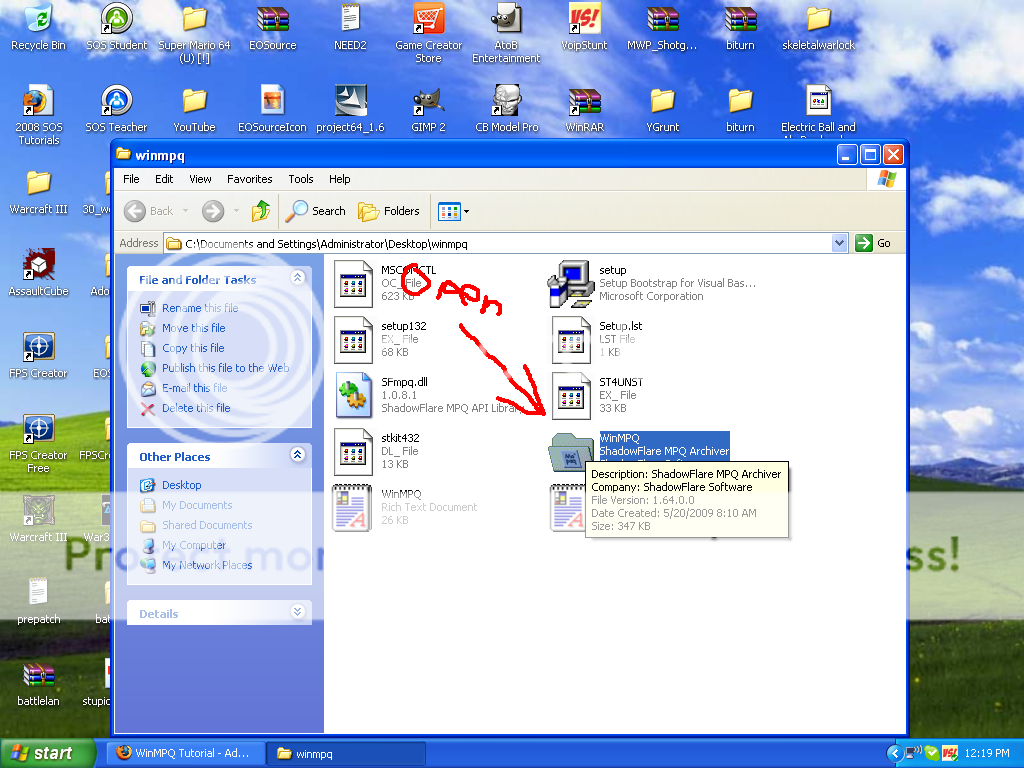
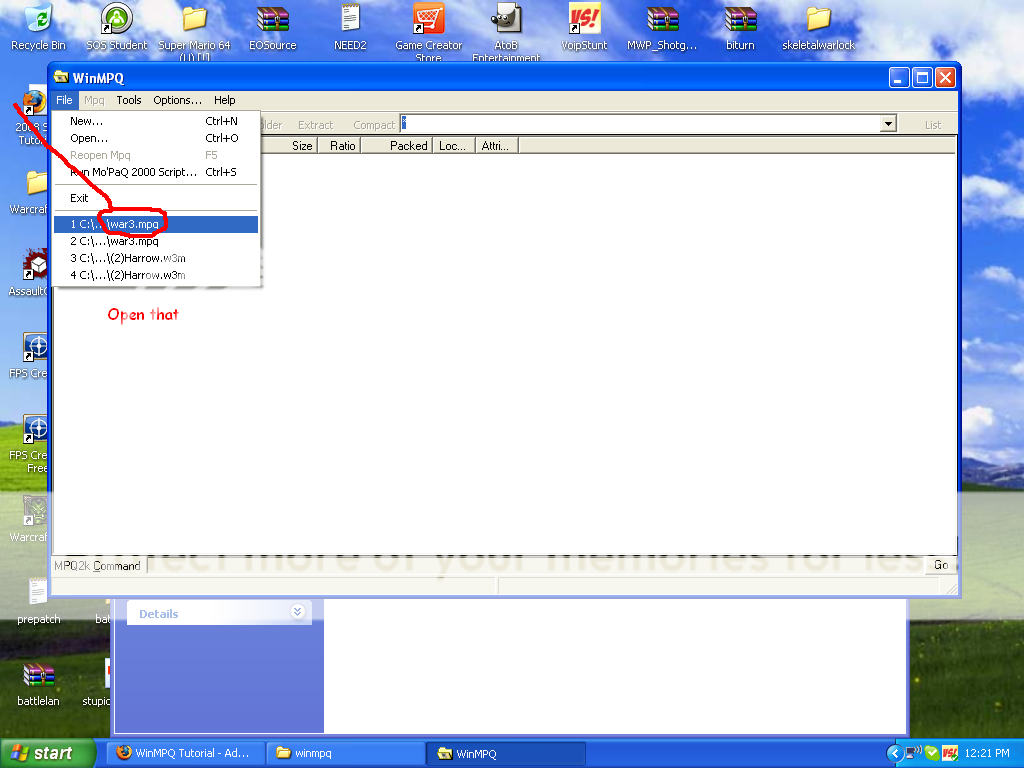
2. Next, open WinMPQ and open in the program war3.mpq.
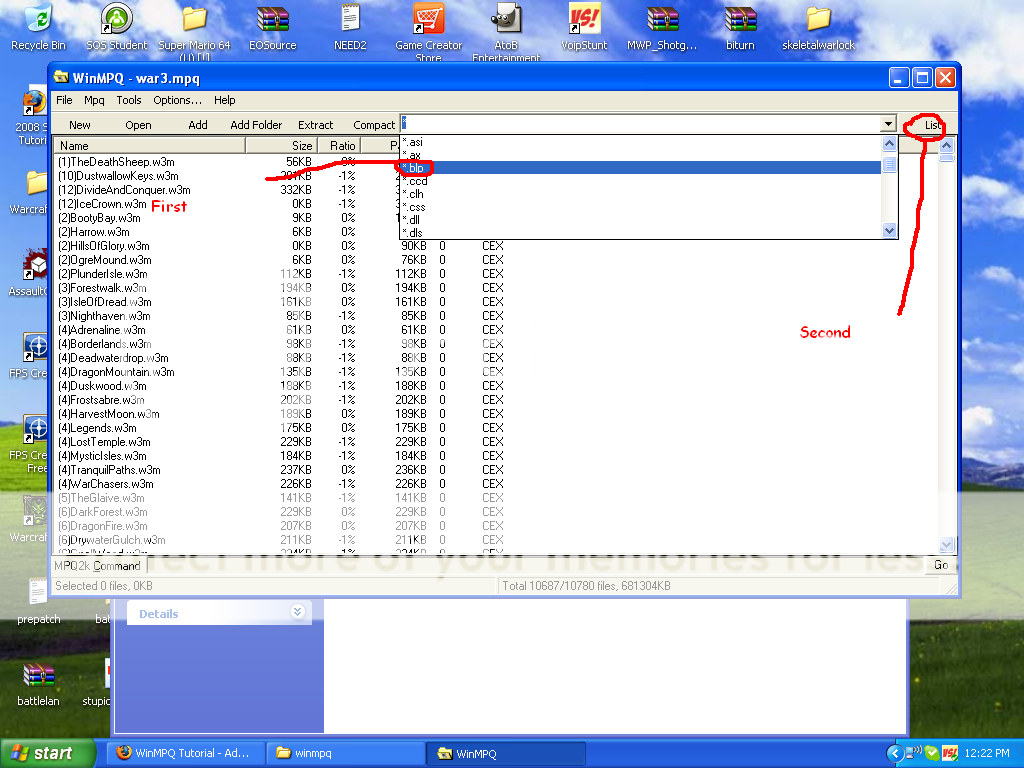
3. Next, Scroll through everything till you get to units section. Or use the .BLP search.
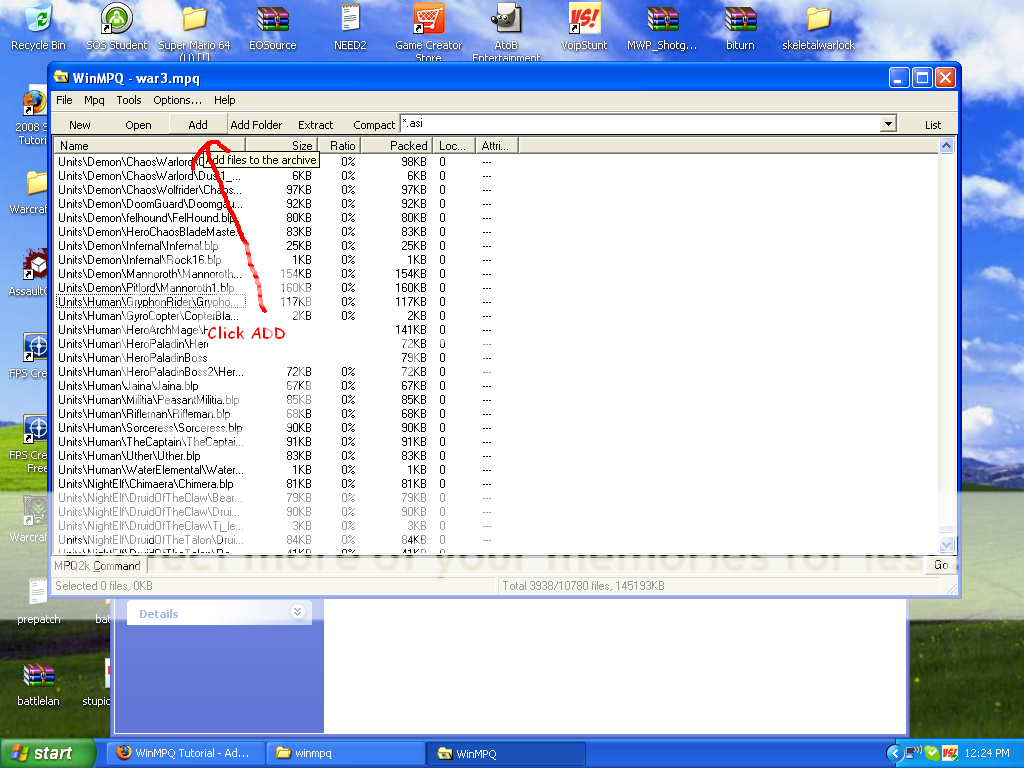
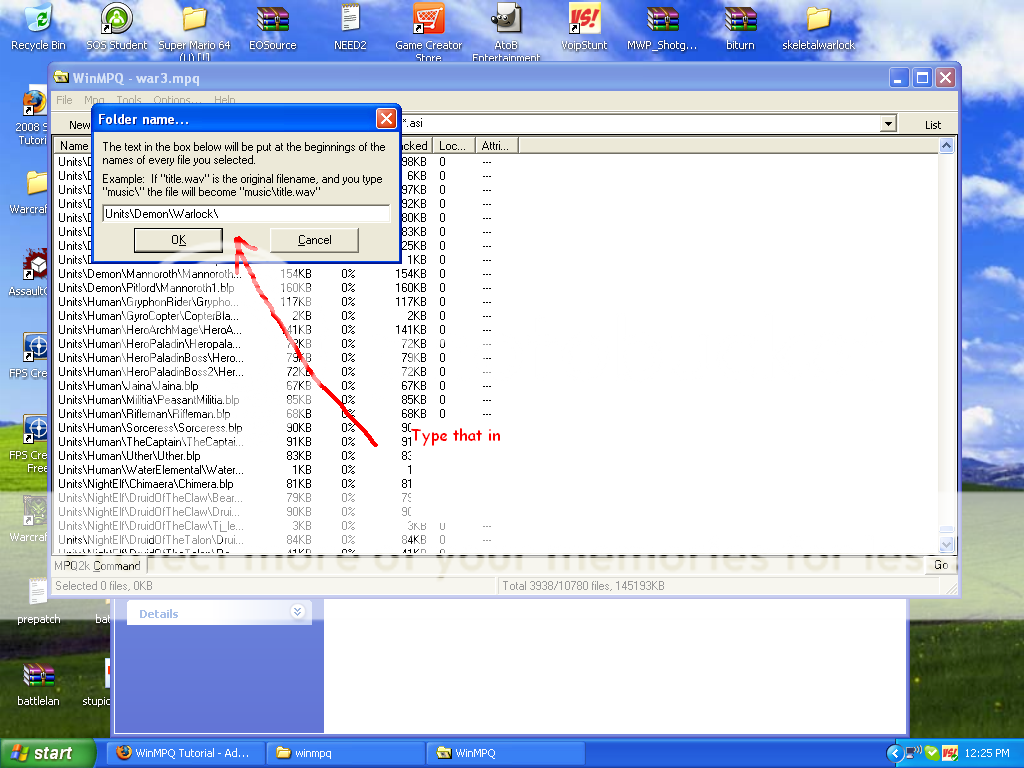
4. Then, write down the file placement (for me it is Units\Demon\Warlock\)

5. Next, press Add then find your texture.blp (for me its Archimonde.blp)
6. Then, for the custom placement type in what you wrote down (4)
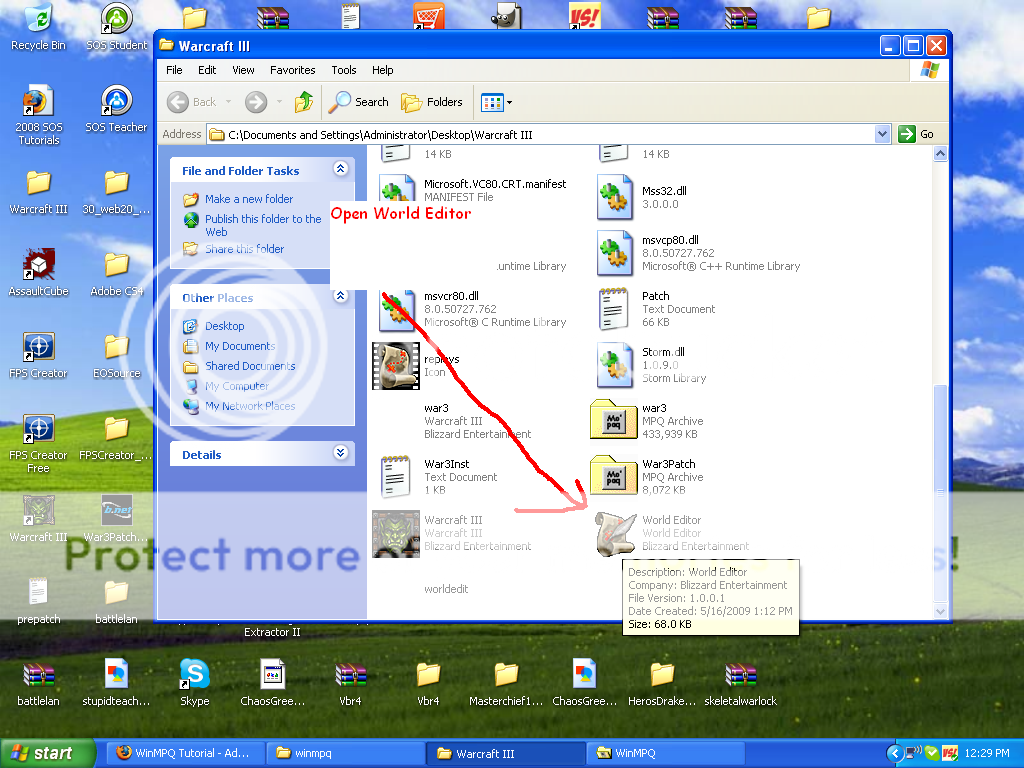
7. Next, press ok and open the Map Editor
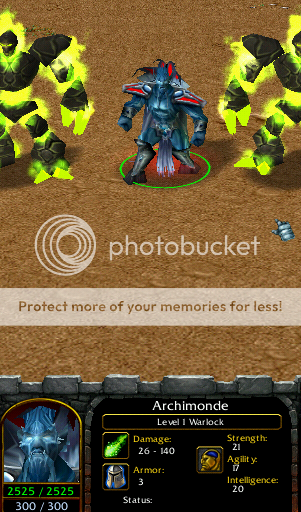
8. And put down the unit you edited!
There you go this works with any skin on this site! Thank you for reading this and i will post pictures and or video link on here.
PS: Dont write inappropriate stuff down because Im only 13 and I really dont want to have to read that kind of stuff thanks!
Battle.Net ID - Bwathke
First I would like to say it took me forever to find this and I actually never found it I just found it out myself
. So here are the things you will need...1. WinMPQ
2. Warcraft 3 RoC
3. Gimp (Optional)
Gimp stands for GNU Image Manipulation Program and is basically photoshop for free and it is great with editing textures.
1. Ok, first download your texture and un-zip it.
2. Next, open WinMPQ and open in the program war3.mpq.
3. Next, Scroll through everything till you get to units section. Or use the .BLP search.
4. Then, write down the file placement (for me it is Units\Demon\Warlock\)
5. Next, press Add then find your texture.blp (for me its Archimonde.blp)
6. Then, for the custom placement type in what you wrote down (4)
7. Next, press ok and open the Map Editor
8. And put down the unit you edited!
There you go this works with any skin on this site! Thank you for reading this and i will post pictures and or video link on here.
PS: Dont write inappropriate stuff down because Im only 13 and I really dont want to have to read that kind of stuff thanks!
Battle.Net ID - Bwathke
Last edited:

