- Joined
- Jul 27, 2008
- Messages
- 1,702
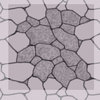
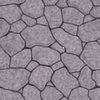
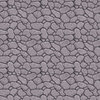
This tutorial explains how to create a texture, that will merge to itself when placed at four directions (top, bottom, left, right). You may find it useful in drawing tiles or background textures. Lets get started with example of coblestone.
Preperation
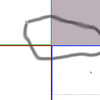
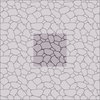
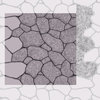
Image must be 3 times biger than texture's original size. Texture bounds in center and rest of space for 8 more textures around for checking on smooth merging. I made 300x300 as original texture size and added 300 more pixels to each size (total 900x900 pixels image). Keep outside area white.
1.Corners
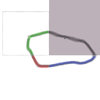
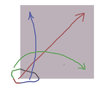
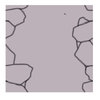
Because this is coblestone texture, it is made of random pieces/areas, that represent each rock. Draw the first one in a corner, so it will be on all 4 planes of surface. I marked surfaces. You will be moving pieces of outline in corners inside texture area like on image (hold shift in Photoshop for horizontal/vertical/diagonal movement). As you progress, notice that you broke rock outline in four lines, each touches 2 texture borders.
2.Sides
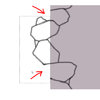
Draw a few outlines for rocks, that will intersect a side on a new level. As you see, rocks that should be near corner rock, are missing outline from outside. If you will make whole shape for those, mostly those will intersect corner rock outline and this is a problem. Finish those rocks after moving inside shapes in white area. Be careful when moving things around. Pixel or two of misplacement may cause noticeable difference and texture will be not so nice. Repeat the same for rock outlines on top/bottom in a new layer. Whe you are done, copy the texture and place it all around 8 times to fill all background. You will see if your texture is merging from sides.
3.Insides and Texturing
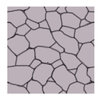
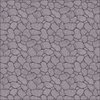
Now when you have done with sides and corners, fill the area inside with rocks. Create a new layer for that. Try to avoid acute angles or weird shapes. At the end it will be something like a net. You can make lines thicker or thiner in some places for variation.
What I call here a texture actually is a bunch of transparent white and black brushes one top to an other. It is messy, but you can blur it for smoothness, or smudge color around, or even sharpen it more. When you are done with texture, move whatever is out of borders inside to oposide border. Check for smooth looping as well.
4.Shadows and Lights
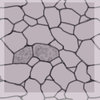
Every artist see things different and mostly like your image by now is very different from mine. I drew sharp light from top on a new overlay layer. While shading, texture on rocks may inspire you to shade in many ways. Randomness in texturing is good. Add details like scratches, holes. I was in haste, so I may made not enough. And yes, you will need to move shading just like you did before.
Thank you for your time.
Last edited by a moderator:


