- Joined
- Jul 1, 2007
- Messages
- 6,677
Polished Iron
This is more of a snippet than a tutorial, but hell if I know where else to put it. So here goes.
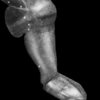
This tutorial will teach you a texturing technique that will allow you to make things like this:
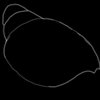
First, start with an outline of what you're going to draw. I'm going to make some kind of shoulderpad thingy just for the sake of simplicity, however this technique can be used for anything from swords and helmets to scalemail or even chain.
The outline itself won't be part of the drawing, but it is just there for reference.
Next, make a new layer (this is the one you will be doing most of the stuff on), and fill it in with a medium gray color. Then, create a custom brush. The brush should be based off a basic, hard, circular brush. Enable Scattering (500%, count 7, jitter 30%), texture, other dynamics (opacity jitter 6%, flow jitter 6%) and smoothing. This is your texture brush, and it is godlike.
Take a size 6 of this brush and apply black all over the metal with opacity 25%, try not to coat it too thickly that the texture is hardly visible. It doesn't matter where the dark and light spots are because you're going to be shading/highlighting anyways.
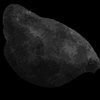
The next step is virtually the same, except with a size 3 brush. Pretty simple. It won't look much like metal now, more like stone, but you'll get there.
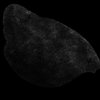
Now, you can do this with dodge and burn in this example since it's black and white and it won't screw up the colors, but if you want to be an art nazi that's ok with me too. Either way, use a large smooth brush at first and then smaller smooth brushes for the detailed highlights and shadows. Remember that metal is shiny and will reflect a lot of light, the highlights will be in patches and the overall lightness of the piece should increase quite a bit.
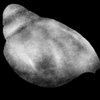
And there we have it. That is my metal texture that I do love so much. Of course the shoulder pad isn't done, but this is just to tell you how to do the texture, not the whole damn thing!
This is more of a snippet than a tutorial, but hell if I know where else to put it. So here goes.
This tutorial will teach you a texturing technique that will allow you to make things like this:

First, start with an outline of what you're going to draw. I'm going to make some kind of shoulderpad thingy just for the sake of simplicity, however this technique can be used for anything from swords and helmets to scalemail or even chain.
The outline itself won't be part of the drawing, but it is just there for reference.

Next, make a new layer (this is the one you will be doing most of the stuff on), and fill it in with a medium gray color. Then, create a custom brush. The brush should be based off a basic, hard, circular brush. Enable Scattering (500%, count 7, jitter 30%), texture, other dynamics (opacity jitter 6%, flow jitter 6%) and smoothing. This is your texture brush, and it is godlike.
Take a size 6 of this brush and apply black all over the metal with opacity 25%, try not to coat it too thickly that the texture is hardly visible. It doesn't matter where the dark and light spots are because you're going to be shading/highlighting anyways.

The next step is virtually the same, except with a size 3 brush. Pretty simple. It won't look much like metal now, more like stone, but you'll get there.

Now, you can do this with dodge and burn in this example since it's black and white and it won't screw up the colors, but if you want to be an art nazi that's ok with me too. Either way, use a large smooth brush at first and then smaller smooth brushes for the detailed highlights and shadows. Remember that metal is shiny and will reflect a lot of light, the highlights will be in patches and the overall lightness of the piece should increase quite a bit.

And there we have it. That is my metal texture that I do love so much. Of course the shoulder pad isn't done, but this is just to tell you how to do the texture, not the whole damn thing!
Attachments
Last edited:


