- Joined
- Jun 8, 2011
- Messages
- 472
Hi all, after trial and error I found how XY Quad option works and since there wasn't a tutorial I decided to make one.
First of all, what is XY Quad?
When you create a particle emitter, you'll see something like this:
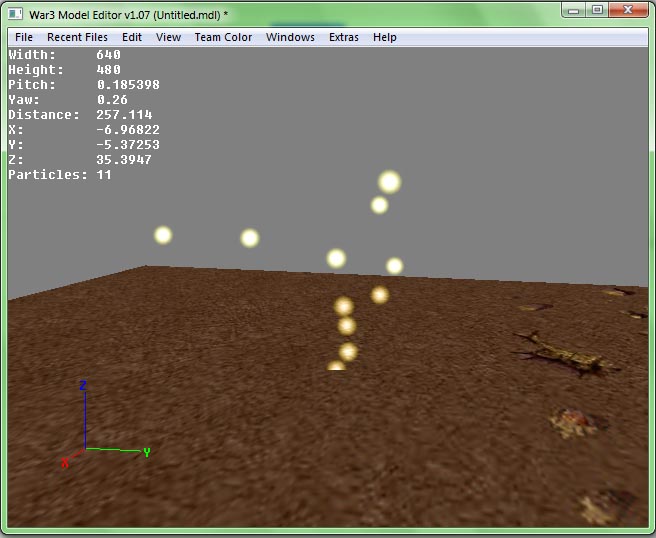
If you check the XY Quad option, this will make the particles appear only in the x/y axis ( like a flat texture ), you get this:
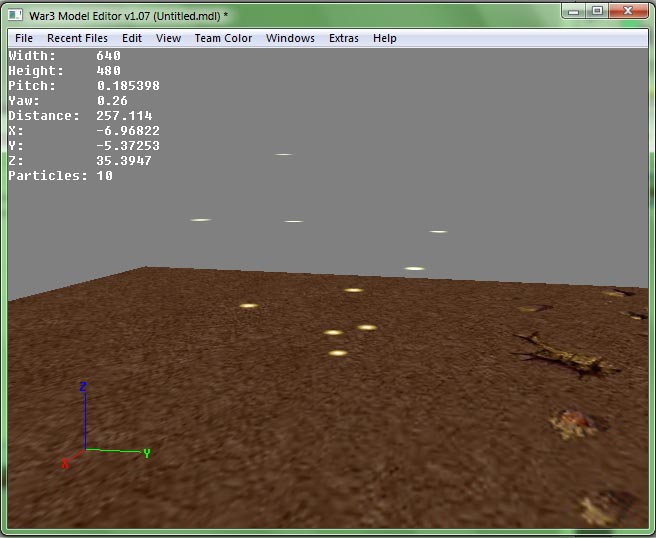
Also the particles don't stay facing the camera ( Billboarded ), like shorelines in blizzard's waterfalls and other models.
Important Values in XY Quad Particles are 2 ( to appear in the editor and in game ):
Speed and Latitude
Speed: The value can not be 0, the minimum possible value is 0.002 but in the game you can see the particles are slow and choppy, so I recommend a value from 0.5 to 1 or above. (You can use negative speed)
Latitud: The value can not be 0, the minimum possible value is 0.06, from 0.08 to 0.06 like with the speed, in the game the particles are slow and choppy, recommended values from 0.5 to 1 or above. (You can use negative latitud)
Things that you need to follow the tutorial:
War 3 Model Editor by Magos / Download here
1) Open the program, go to File/New.
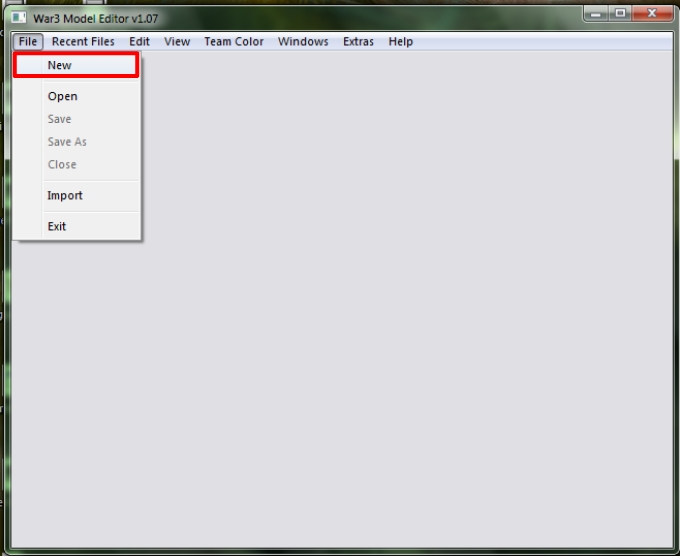
2) Now, you need the texture to make the rain drops so, go to Windows/MPQ Browser.
In the popup window click File and then press the war3.mpq or war3x.mpq file.
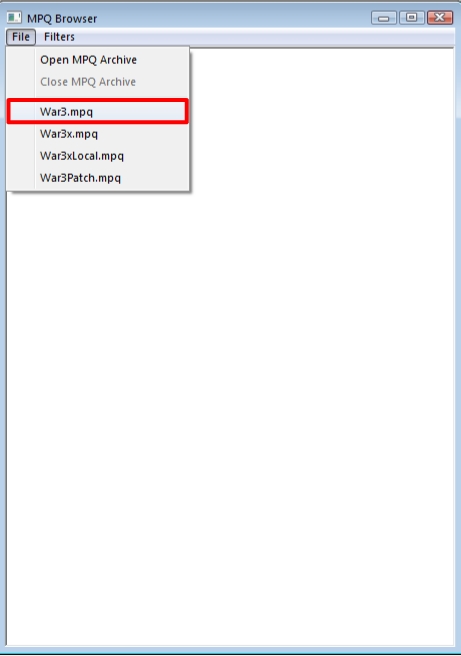
Note: If you don't have the program in the same directory that you have instaled warcraft III you will get an error. The solution, put the program in the same directory or
open the .mpq file using File/Open MPQ Archive, find the .mpq file in the game directory.
3) When you open the .mpq file you will see some folders inside, open war3.mpq go to the textures folder and find this file:
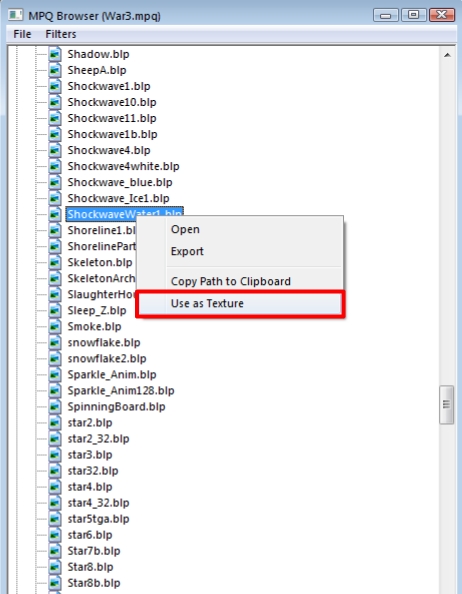
Right-click on the texture, another popup window appear on the screen, click "Use as texture". Close this window.
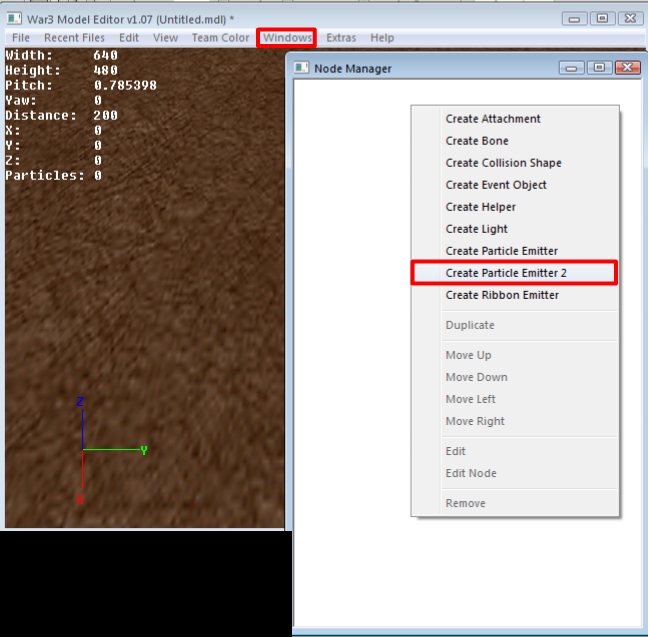
4) How to make a particle emitter, go to Windows/Node Manager in a blank area in the new window Right-click and then "Create particle emitter 2"
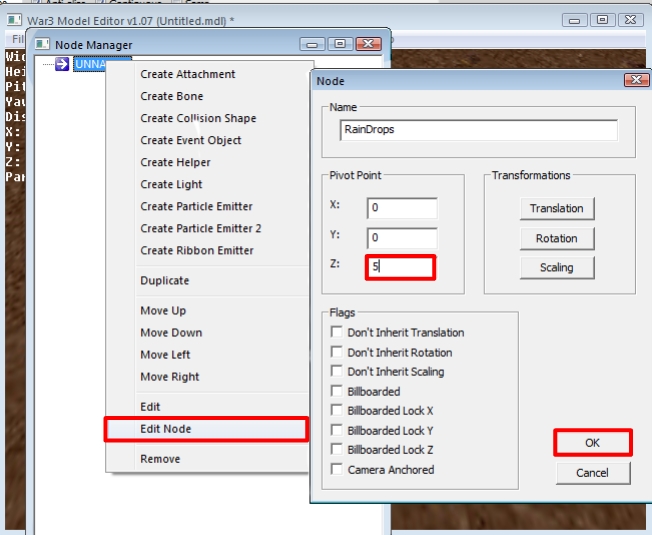
5) Now, right click in the particle emitter that you created, select edit node. Here you need to put a "Z" value, because if you left 0, the particles collide with the floor and this has an ugly look. Put the value like 5. Close this window.
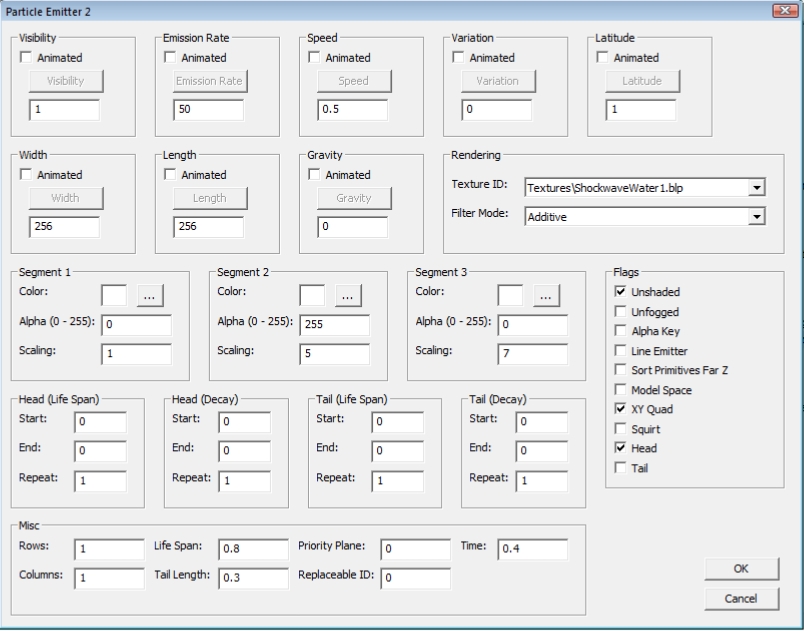
6) After edit the particle emitter, make double-click in the particle emitter or right-click / edit to edit the particles properties.
Fill the values like me, remember the obligatories values for make a XY Quad emitter are speed and latitude, this values can't be minor than 0.002 and 0.06.
7) When you finish with this, close the node manager window, go to Windows/Sequence Manager, Right-click in a blank area in the new window and select "Create New"
Fill the values like me:
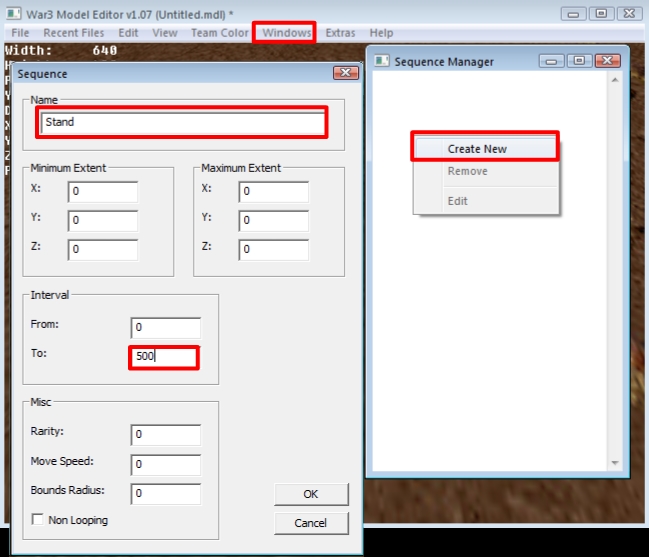
8) When you done, close the sequence manager, go to File/Save As, and save your model.
The only thing you need now is import it in to the map.
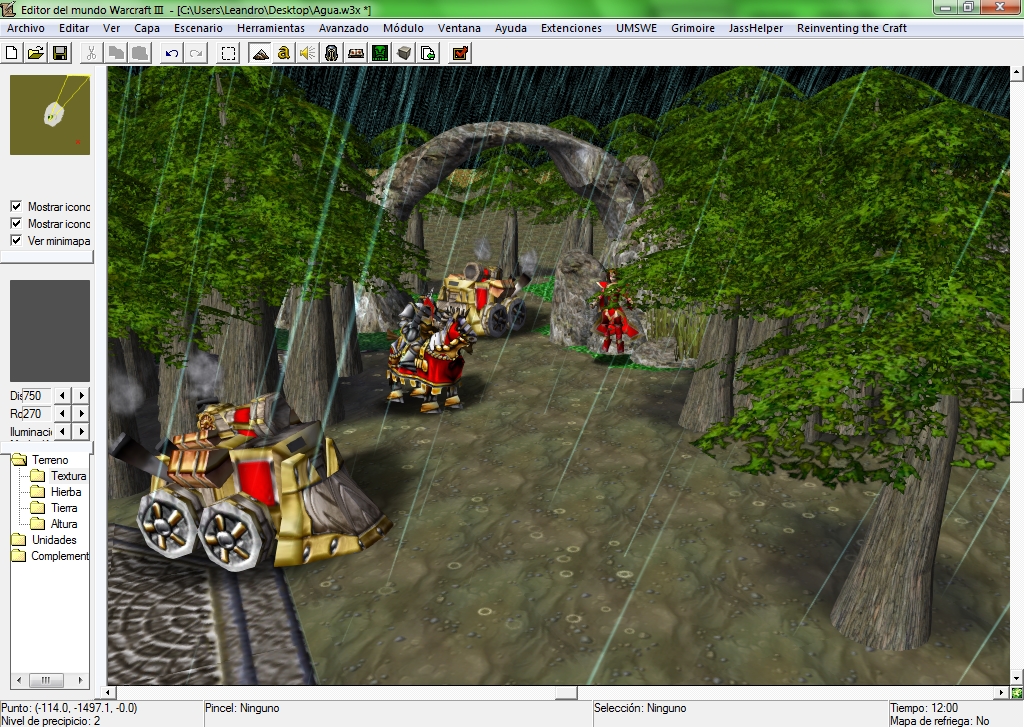
Credits to Magos for War 3 Model Editor.
I attached the file I created and used for this tutorial.
Sorry for my grammar, English is not my first language.
I hope this tutorial helps someone.
First of all, what is XY Quad?
When you create a particle emitter, you'll see something like this:
If you check the XY Quad option, this will make the particles appear only in the x/y axis ( like a flat texture ), you get this:
Also the particles don't stay facing the camera ( Billboarded ), like shorelines in blizzard's waterfalls and other models.
Important Values in XY Quad Particles are 2 ( to appear in the editor and in game ):
Speed and Latitude
Speed: The value can not be 0, the minimum possible value is 0.002 but in the game you can see the particles are slow and choppy, so I recommend a value from 0.5 to 1 or above. (You can use negative speed)
Latitud: The value can not be 0, the minimum possible value is 0.06, from 0.08 to 0.06 like with the speed, in the game the particles are slow and choppy, recommended values from 0.5 to 1 or above. (You can use negative latitud)
Things that you need to follow the tutorial:
War 3 Model Editor by Magos / Download here
1) Open the program, go to File/New.
2) Now, you need the texture to make the rain drops so, go to Windows/MPQ Browser.
In the popup window click File and then press the war3.mpq or war3x.mpq file.
Note: If you don't have the program in the same directory that you have instaled warcraft III you will get an error. The solution, put the program in the same directory or
open the .mpq file using File/Open MPQ Archive, find the .mpq file in the game directory.
3) When you open the .mpq file you will see some folders inside, open war3.mpq go to the textures folder and find this file:
Right-click on the texture, another popup window appear on the screen, click "Use as texture". Close this window.
4) How to make a particle emitter, go to Windows/Node Manager in a blank area in the new window Right-click and then "Create particle emitter 2"
5) Now, right click in the particle emitter that you created, select edit node. Here you need to put a "Z" value, because if you left 0, the particles collide with the floor and this has an ugly look. Put the value like 5. Close this window.
6) After edit the particle emitter, make double-click in the particle emitter or right-click / edit to edit the particles properties.
Fill the values like me, remember the obligatories values for make a XY Quad emitter are speed and latitude, this values can't be minor than 0.002 and 0.06.
7) When you finish with this, close the node manager window, go to Windows/Sequence Manager, Right-click in a blank area in the new window and select "Create New"
Fill the values like me:
8) When you done, close the sequence manager, go to File/Save As, and save your model.
The only thing you need now is import it in to the map.
Credits to Magos for War 3 Model Editor.
I attached the file I created and used for this tutorial.
Sorry for my grammar, English is not my first language.
I hope this tutorial helps someone.
Attachments
-
 01.jpg56.8 KB · Views: 1,606
 -
 03.jpg44.2 KB · Views: 1,577
 -
 04.jpg127 KB · Views: 1,573
 -
 05.jpg167.1 KB · Views: 1,722
 -
 06.jpg158.2 KB · Views: 1,578
 -
 07.jpg207.4 KB · Views: 1,531
 -
 08.jpg127.9 KB · Views: 1,564
 -
 09.jpg698.8 KB · Views: 1,855
 -
RainDropsTest.mdx1.1 KB · Views: 265
-
 particles00.jpg59.4 KB · Views: 1,453
 -
 particles01.jpg57.5 KB · Views: 1,500
Last edited:


