- Joined
- Jul 13, 2020
- Messages
- 33
Intro:
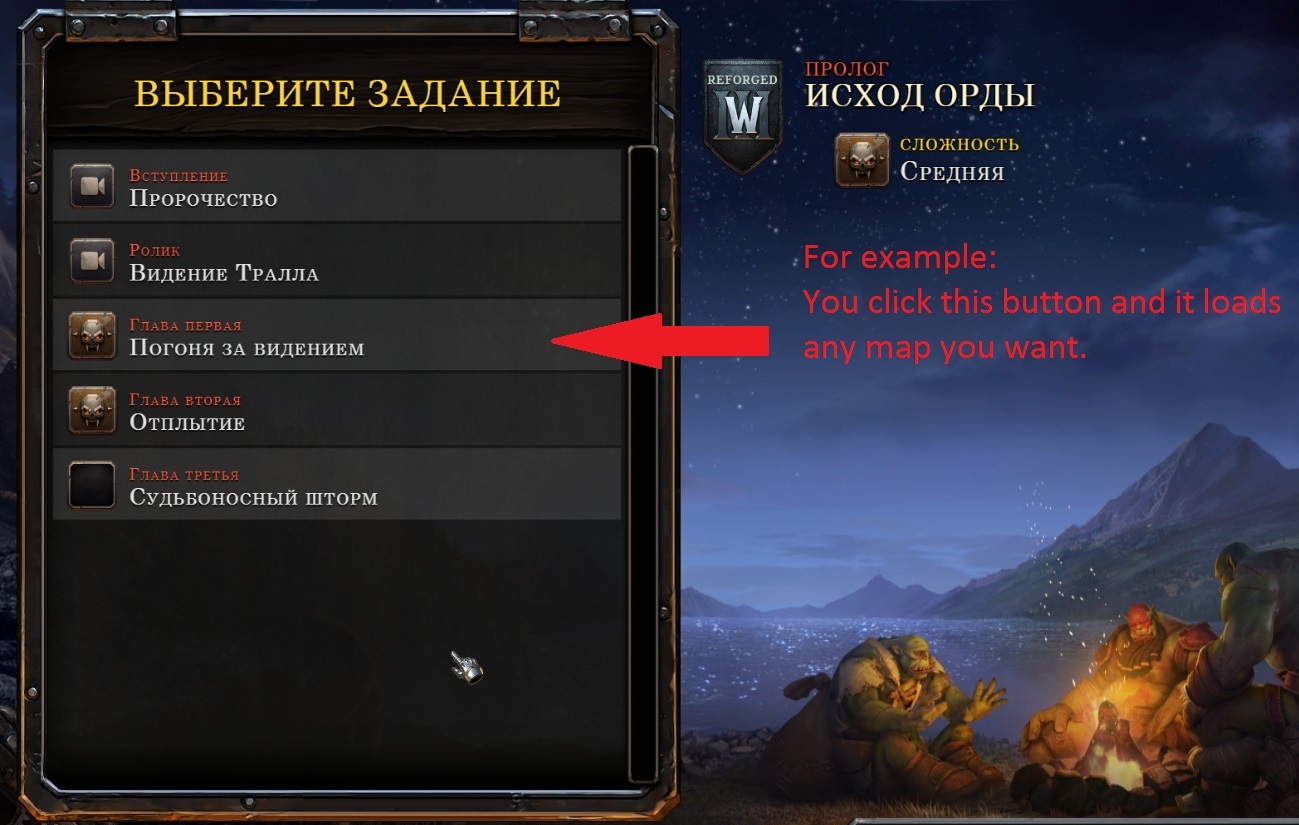
Here I will tell you how to make WC Reforged use your maps instead of the vanilla ones when you click the mission button in the menu of the game and how to keep the hero progress through multiple maps.
Chapter I - Getting Ready.
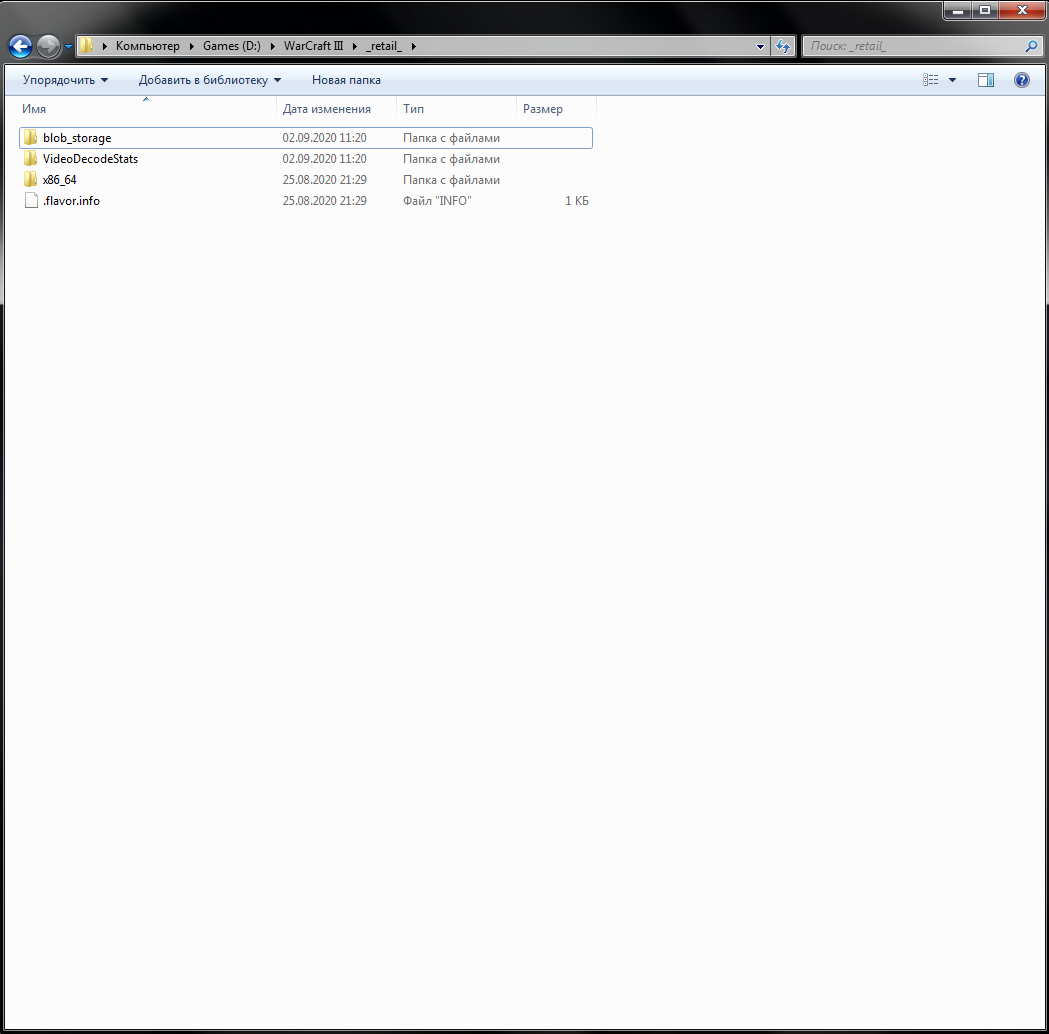
1. The first step you need to do - is to enable the local files for Warcraft 3.
To do this - download, extract and run the .reg file in the archive attached to this post.
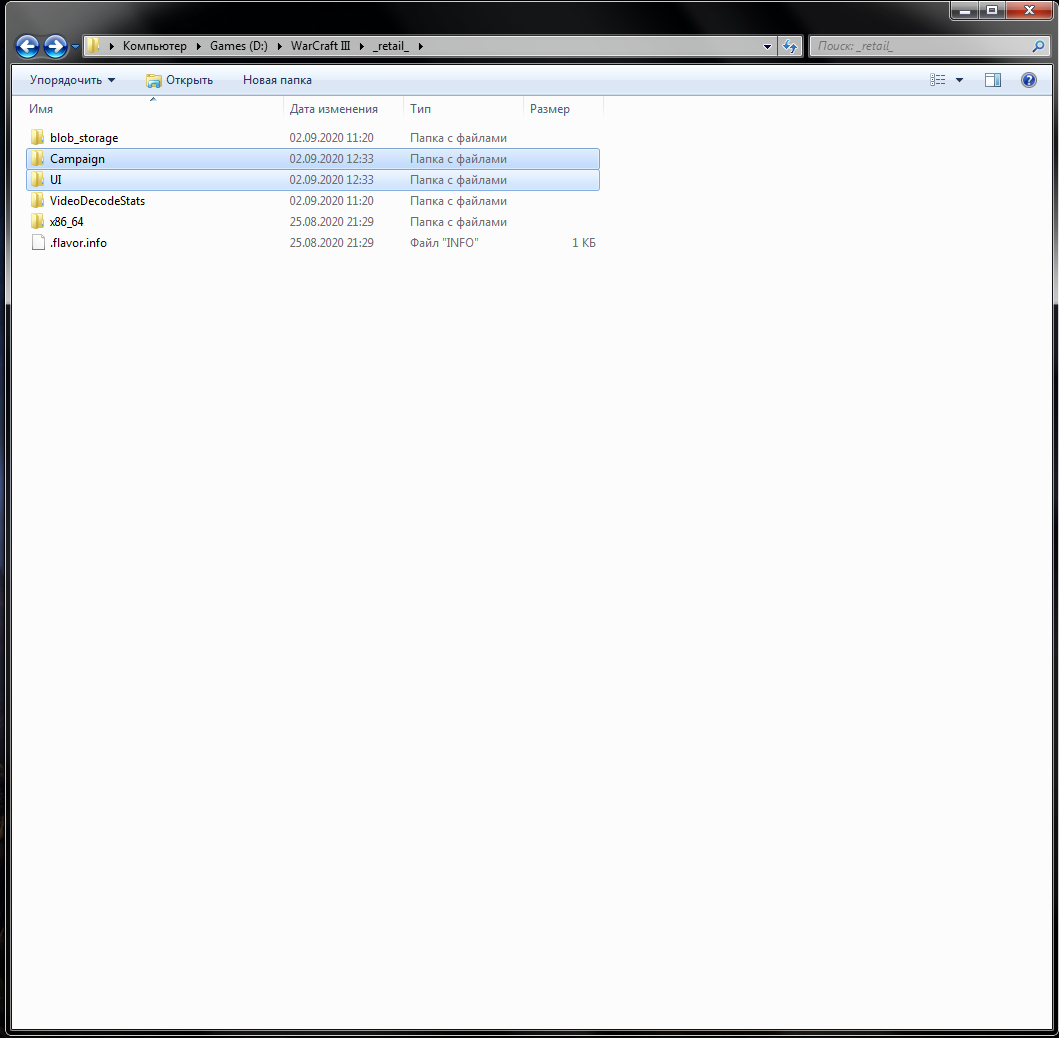
After doing this - the game will be able to be modded with any files which you can put into the _retail_ folder of the game. Vanilla folder looks like this:
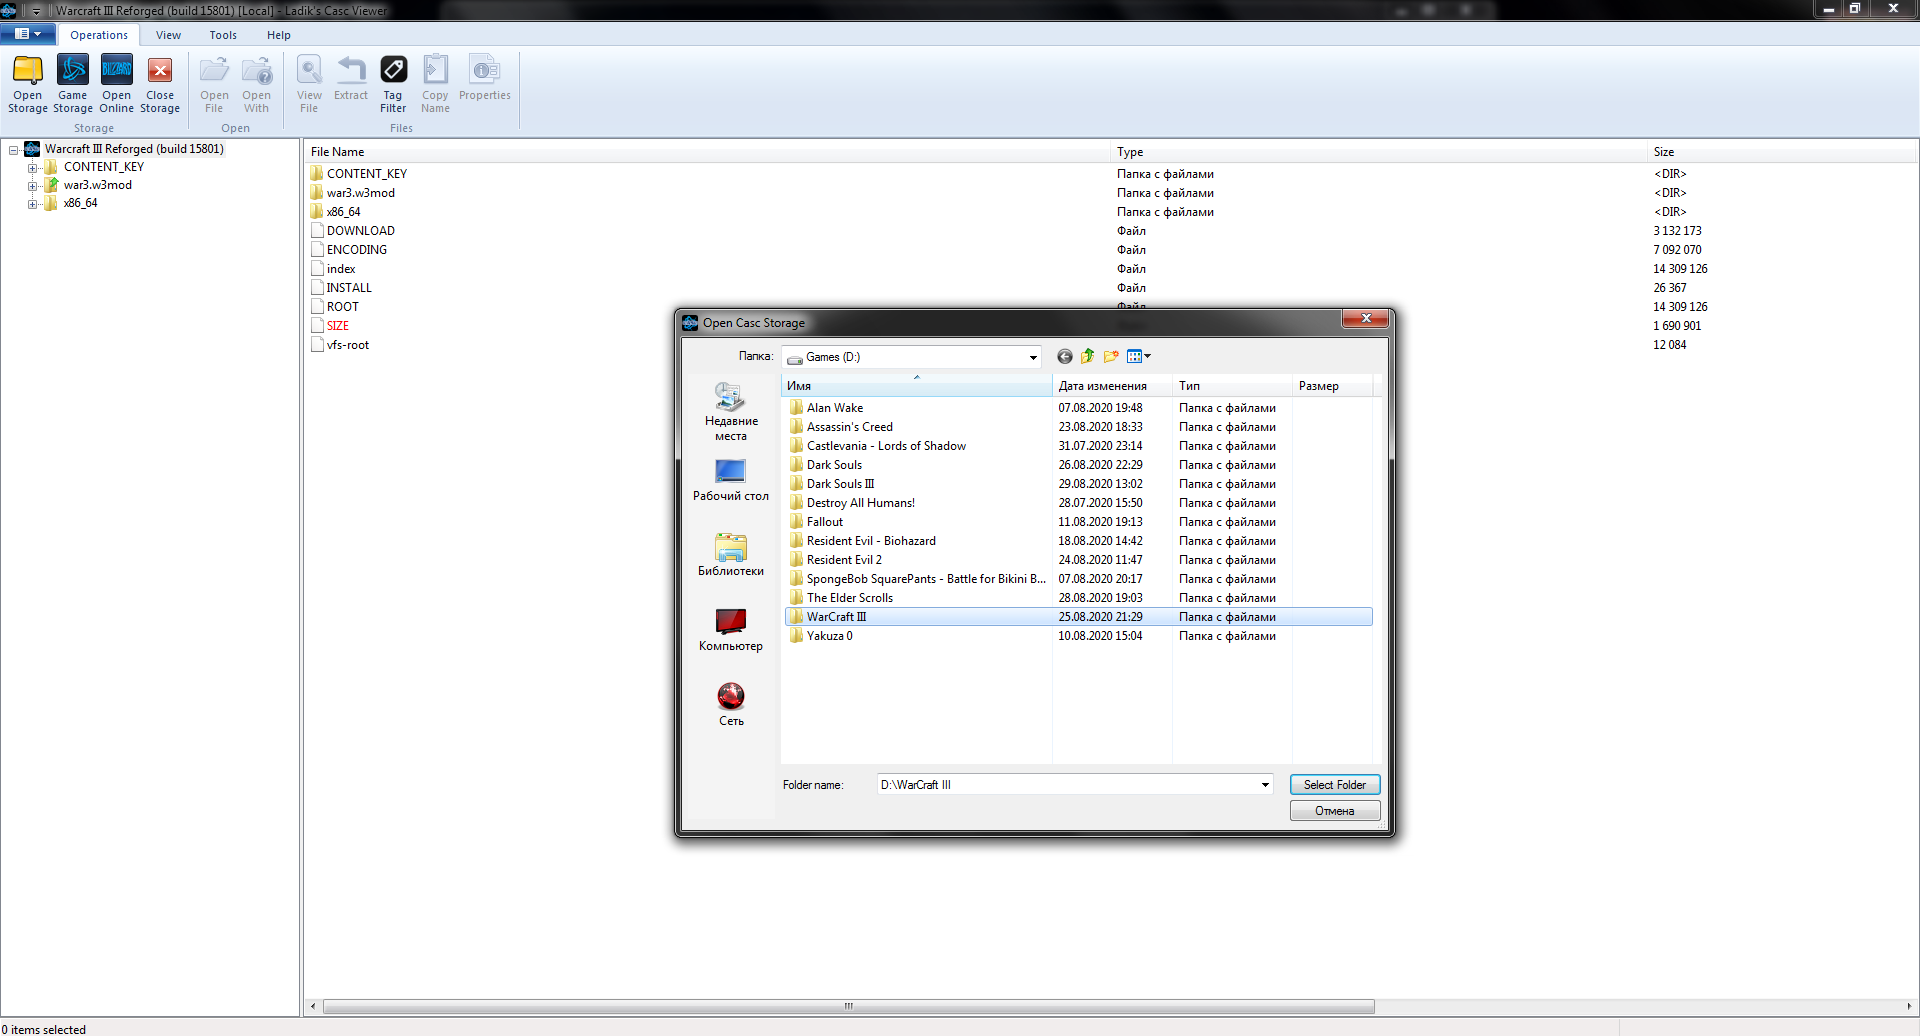
2. Now, to get the standart campaign maps, we must download and launch CascView - it's a software created to open encrypted Warcraft's data files.
Run the CascView.exe -> click Open storage and choose your Warcraft 3 game folder like this.
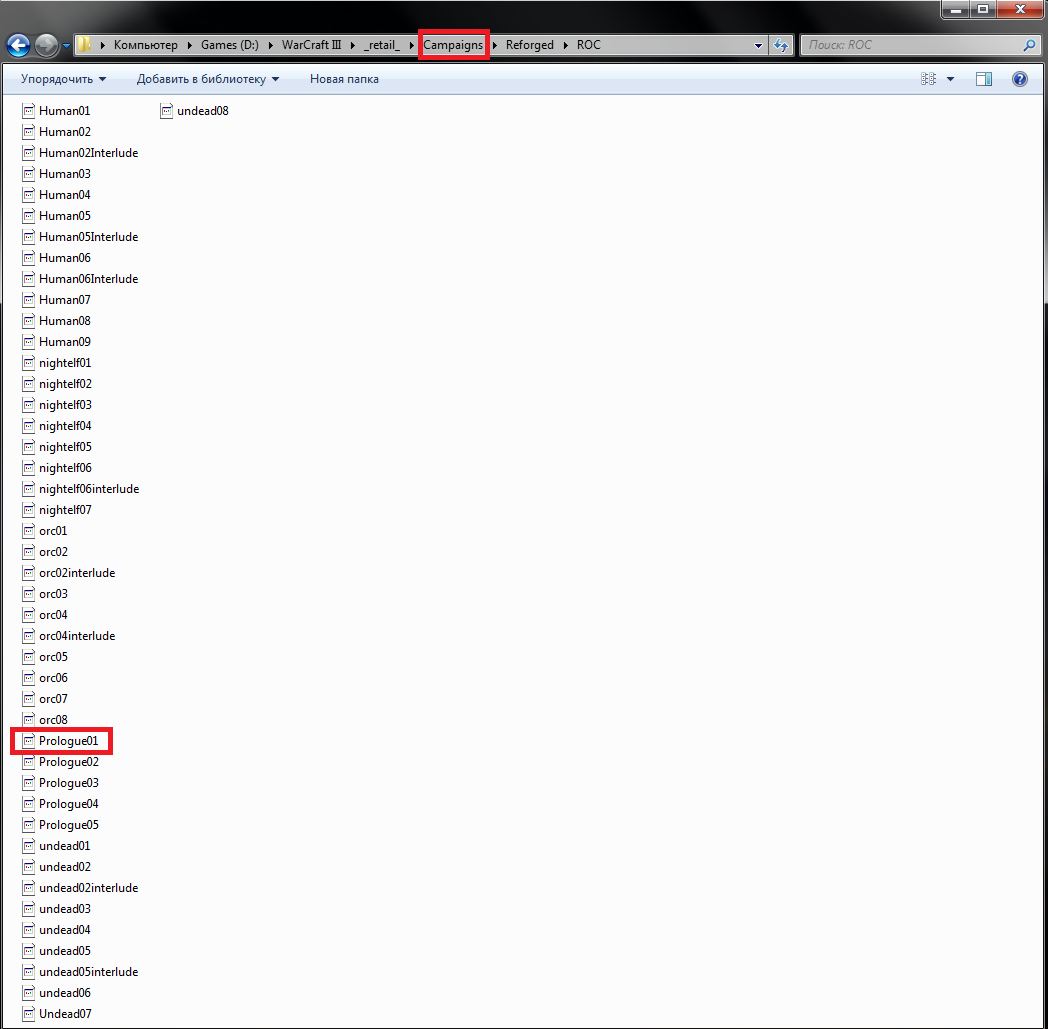
Then expand the war3.w3mod section and export the campaign folder to your desktop.
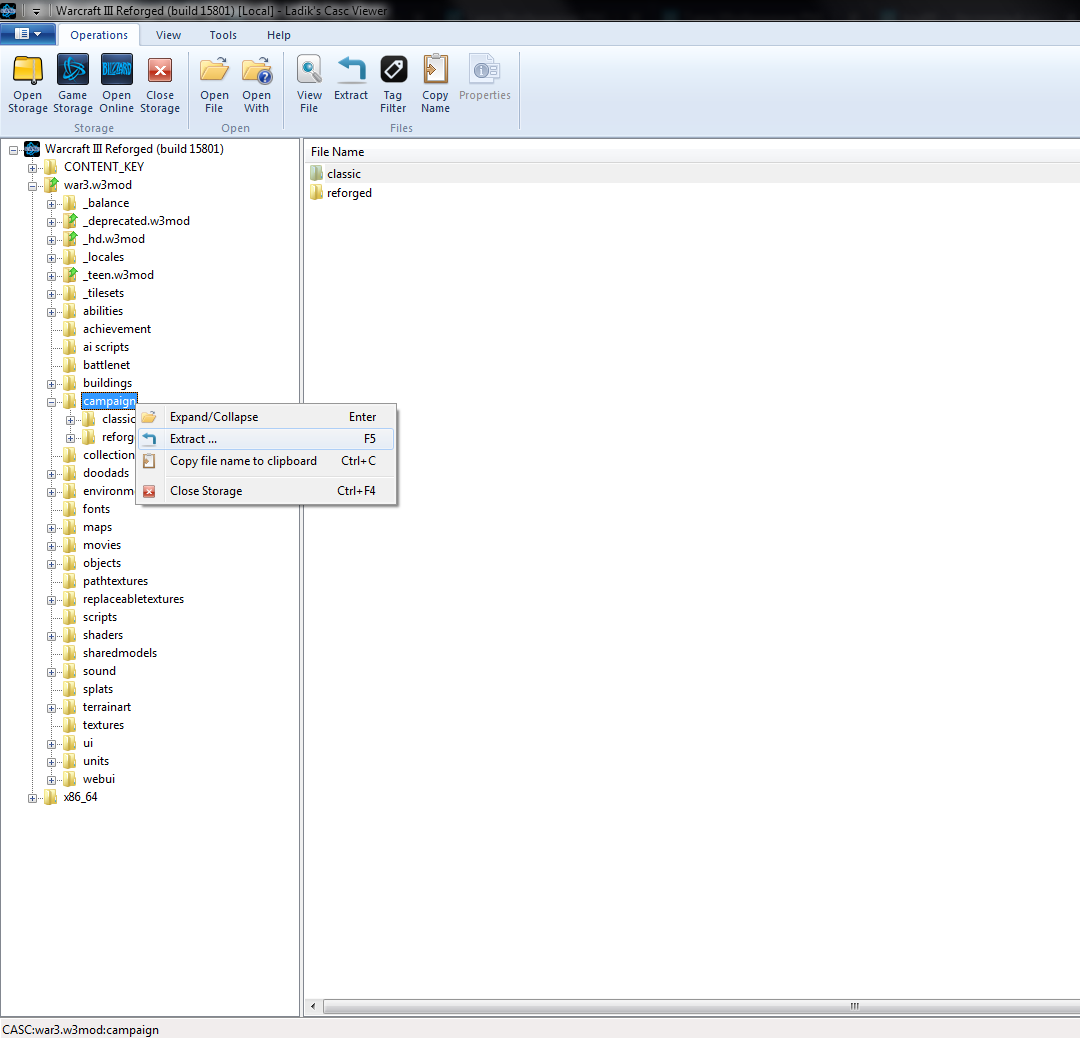
It contains the vanilla campaign maps which can be edited in any way.
3. Now extract the campaigninforeforged.txt with ui folder
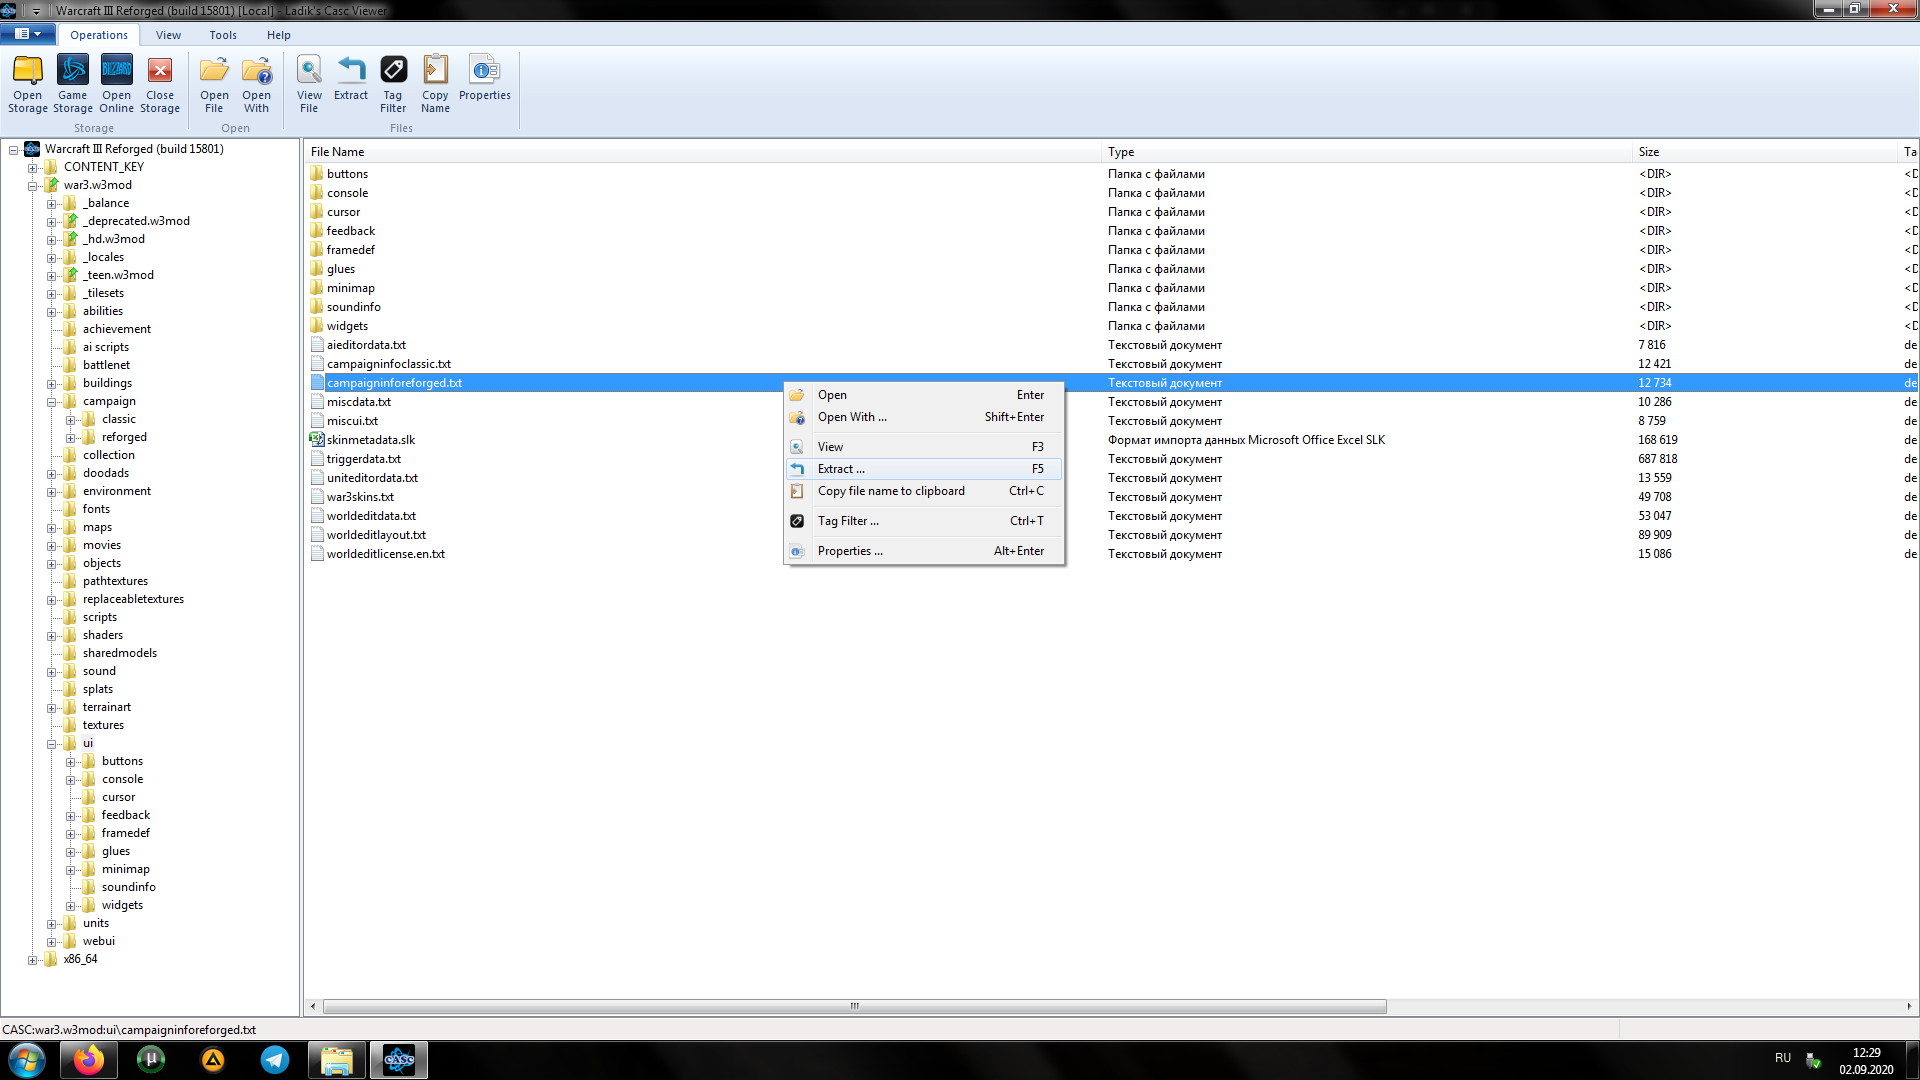
Changing the txt file will allow us to make WC use our campaign maps instead of vanilla ones.
Close the CascView.
4. Now put extracted campaign and ui folders (along withe the files inside it) into the _retail_ folder to make it look like this. Rename the campaign folder into campaigns.
Chapter 2 - Making it work.
1. Now for example you want to change the prologue campaign to be more reforged, add new cutscenes, quests etc.
Open the extracted prologue map and edit it using WC Editor, then save it.
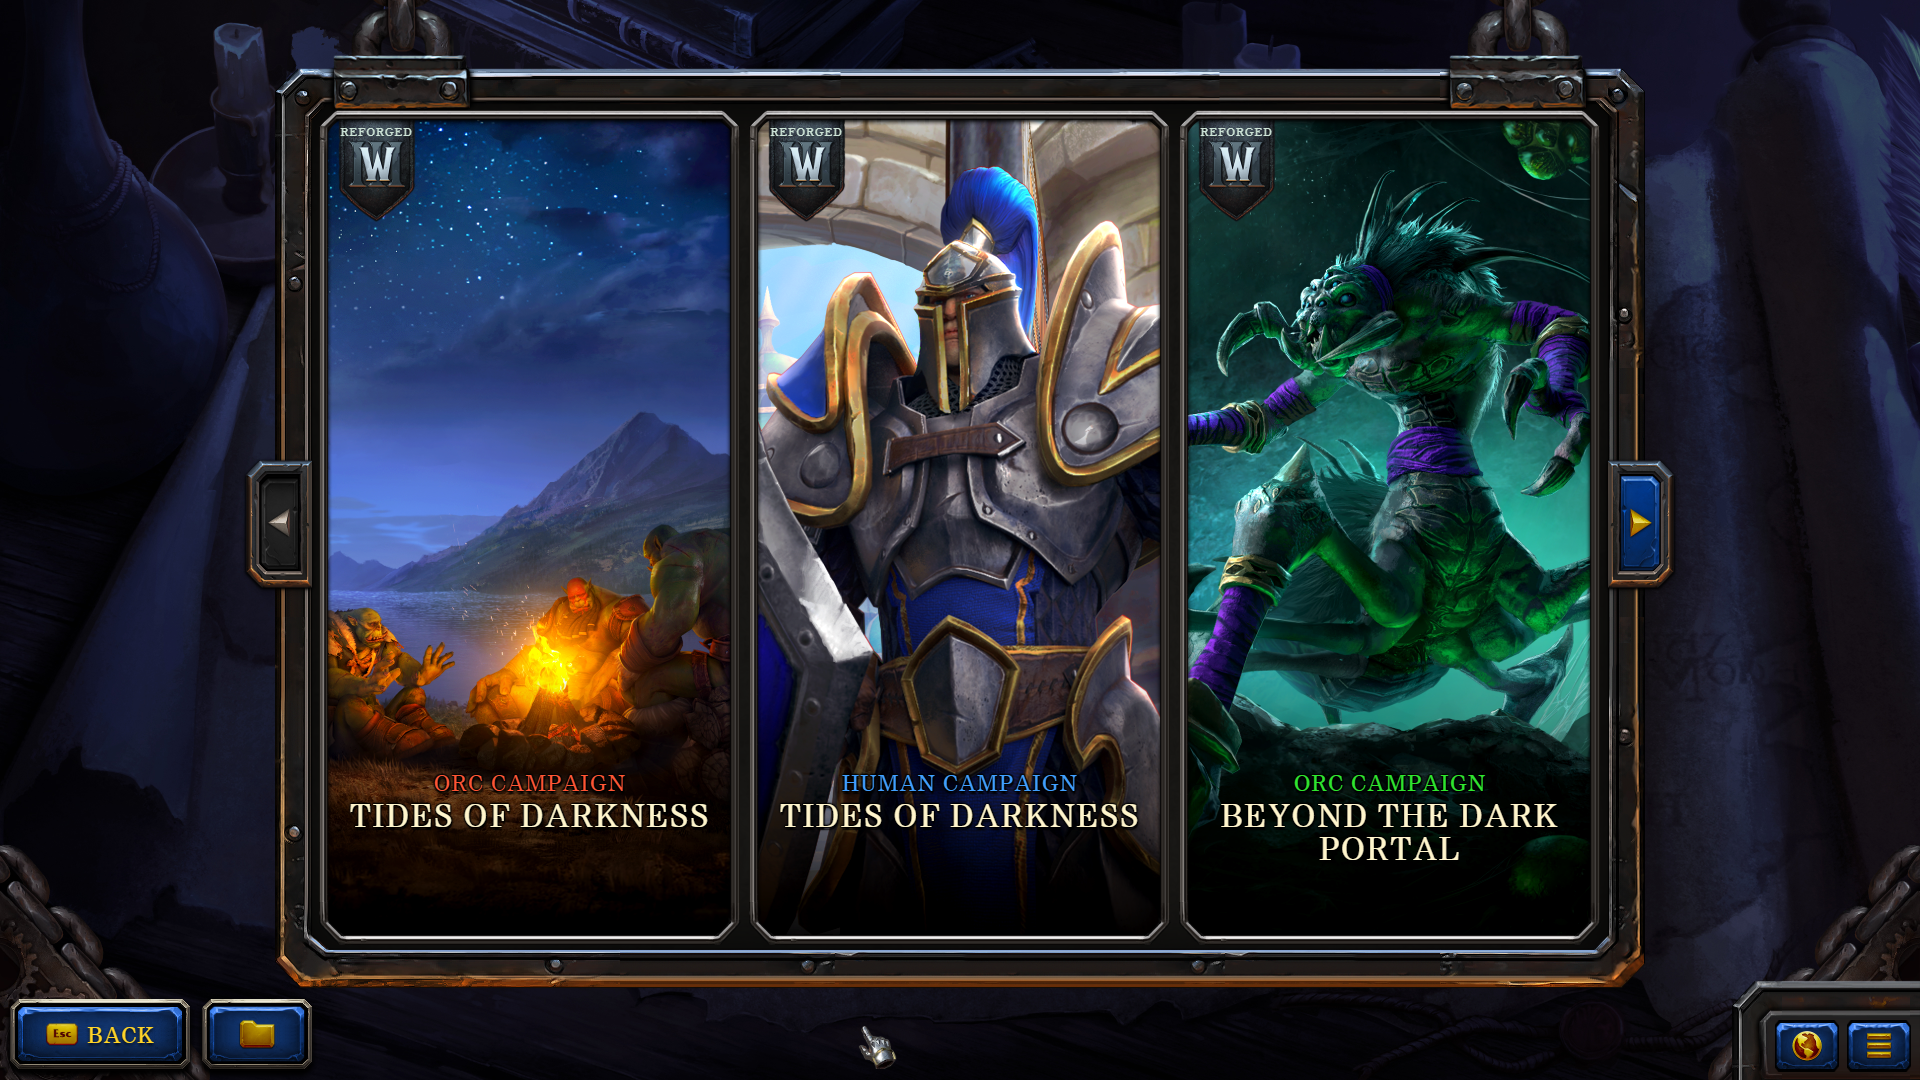
2. Now, how to make a standart campaign button in the menu of the game use your edited map instead of the standart one?
Go into UI folder and open campaignreforged.txt file.
The unchanged file wil look like this.
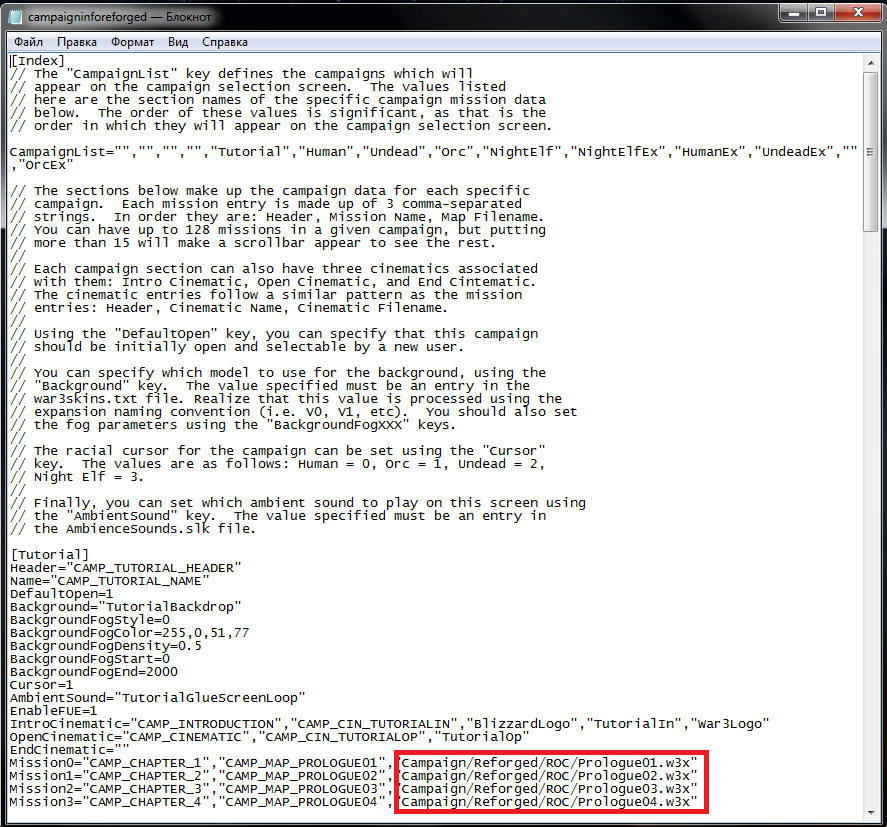
It has campaign folder in it's path and makes the game load vanilla campaign maps.
You only have to add the s ending letter to make it look like this
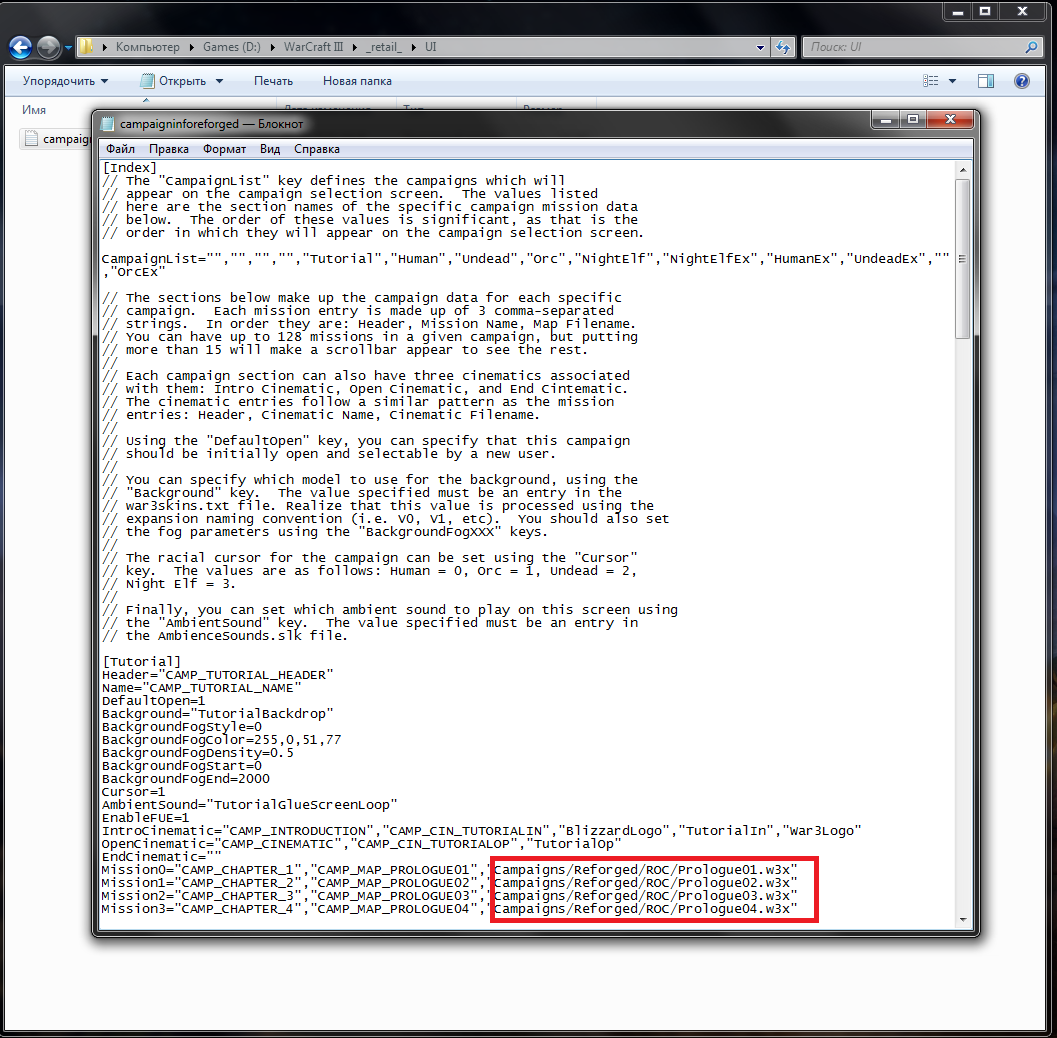
Each line is responsible for different menu buttons which start campaign missions.
Now you made the game use your maps instead of the maps it has within its encrypted archive.
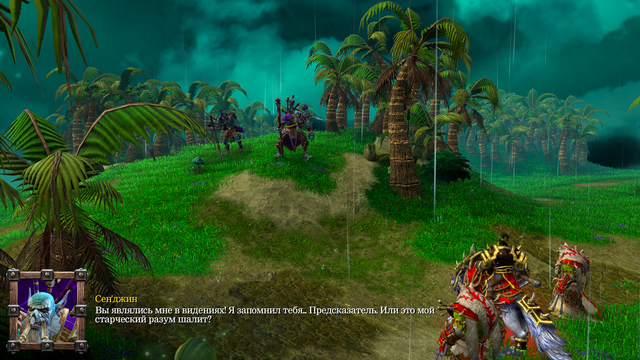
For example I edited the Prologue03.w3x file - it's the name for Riders on the Storm mission. I changed the map's tileset and added a custom model to Sen'jin. When I start a mission from the main menu - I play my edited map.
But that's not all.
Chapter 3 - Keeping progress.
And now the last part - I will tell you how to keep the progress of your heroes through your edited campaign. Without doing this - The abilities and items of your heroes will be reset to default in every mission.
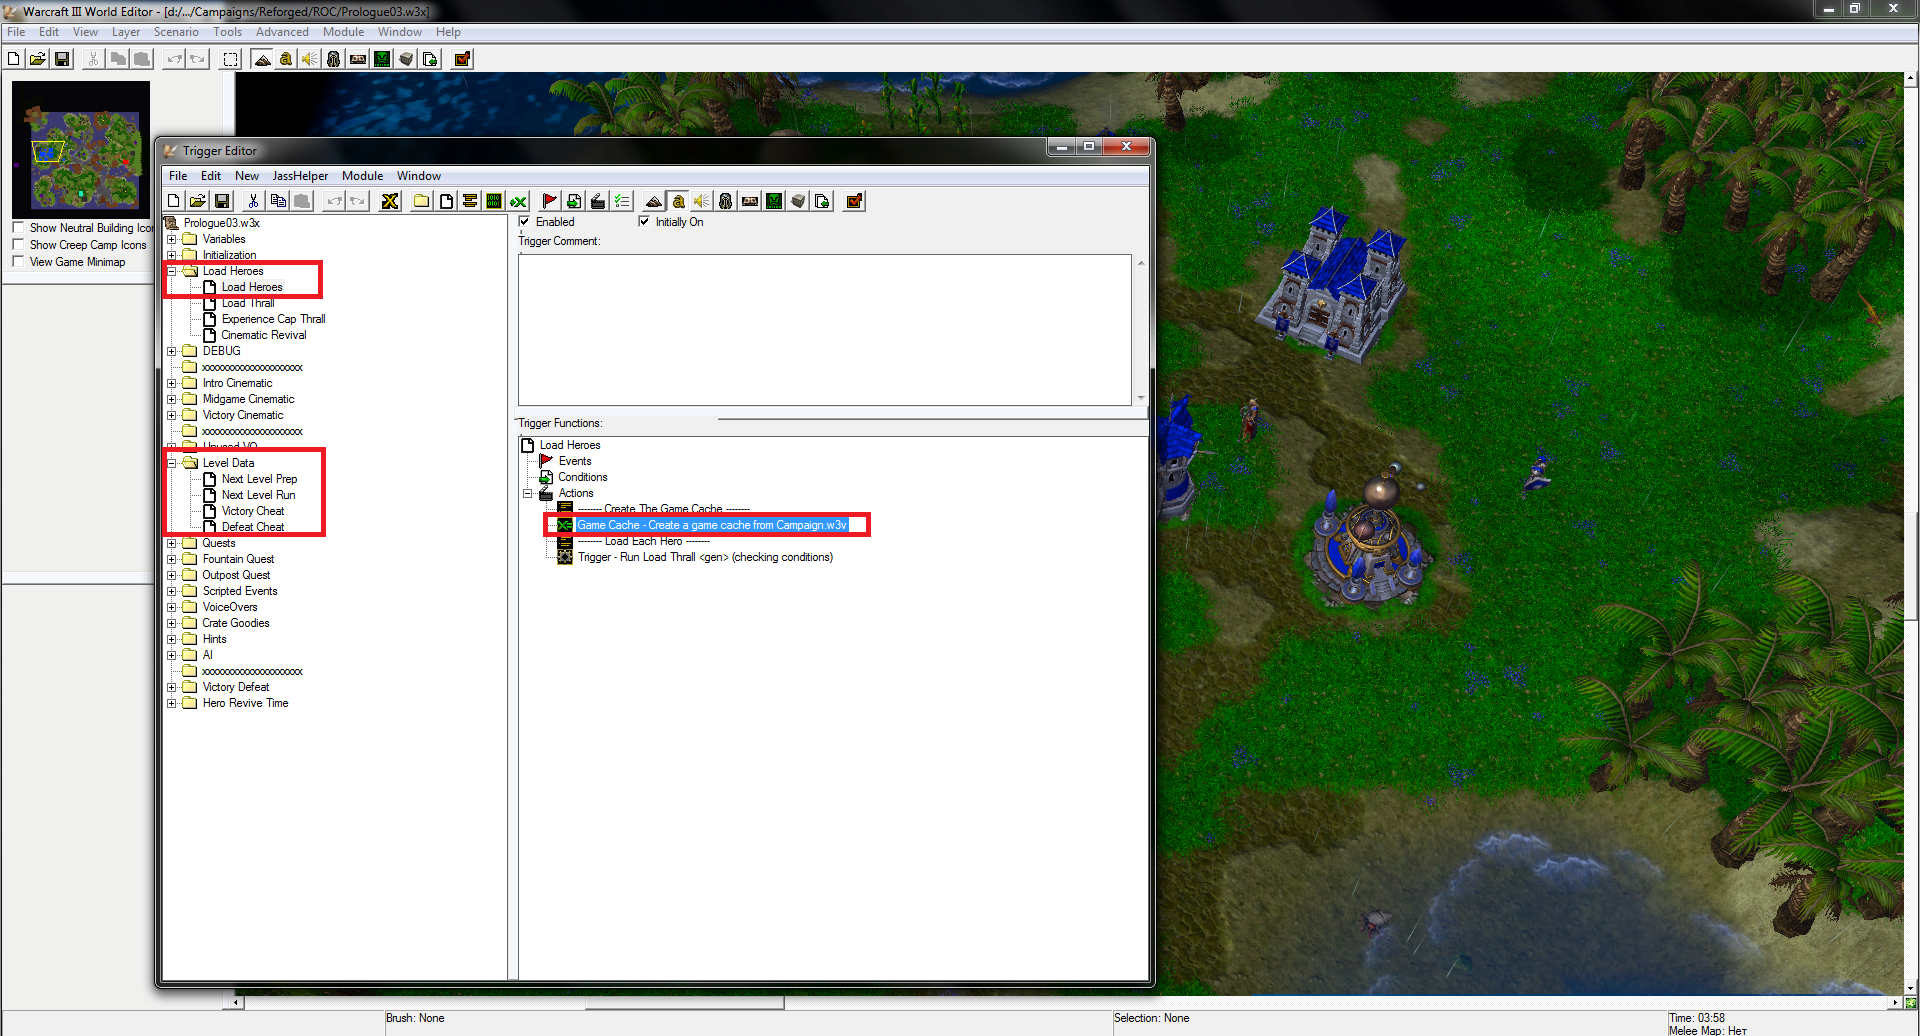
1. Now, while editing your map - you have to change the name of the cache your map is using. To do this - go to the trigger editor and find a section (or two) responsible for creating and loading cache. Usually it's Level Data or Load Heroes etc.
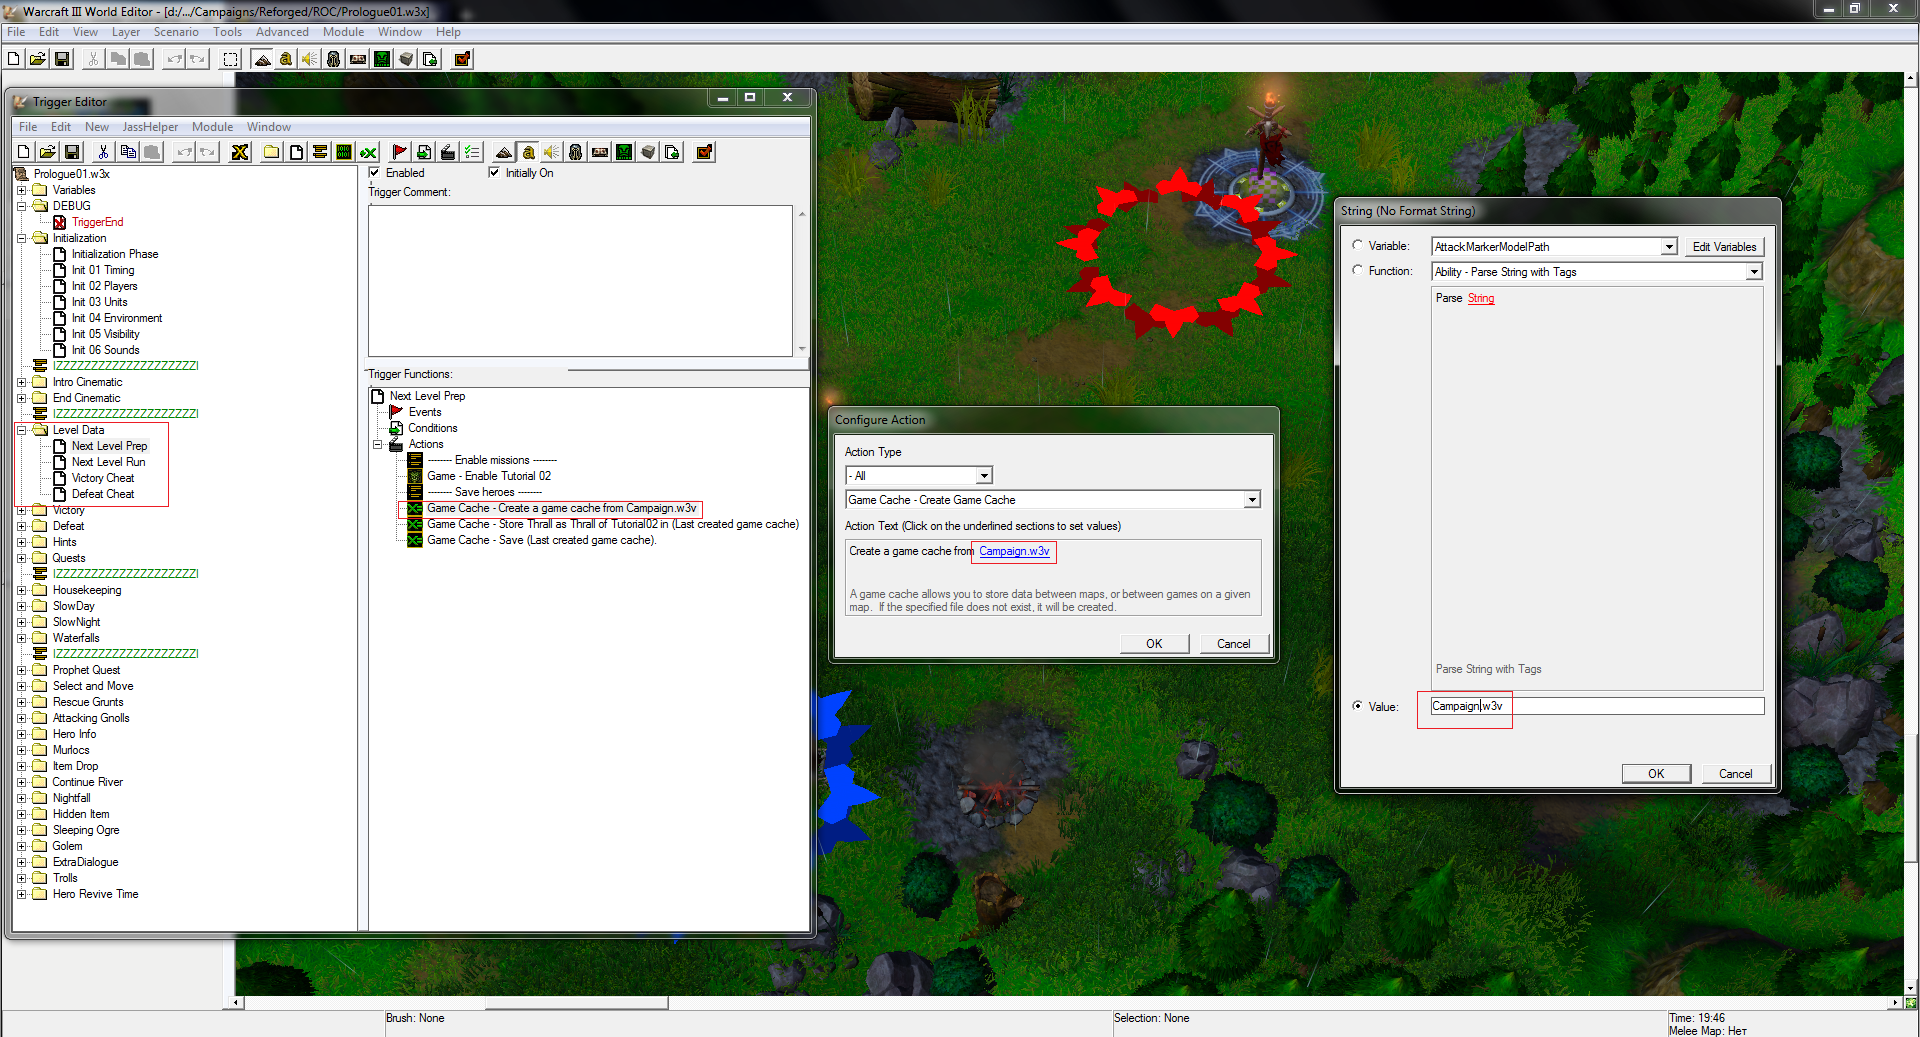
Then change the name of the cache from Campaign to Campaigns or any name you want to use for your campaign cache. I prefer Campaigns. You have to do this in each map. The name of the chache must be the same.
Always check if the map has two cache sections - one for loading cache and one for creating it.
Always give them the same name.
2. Now we have to make the game load our custom maps instead of vanilla ones after completing the mission.
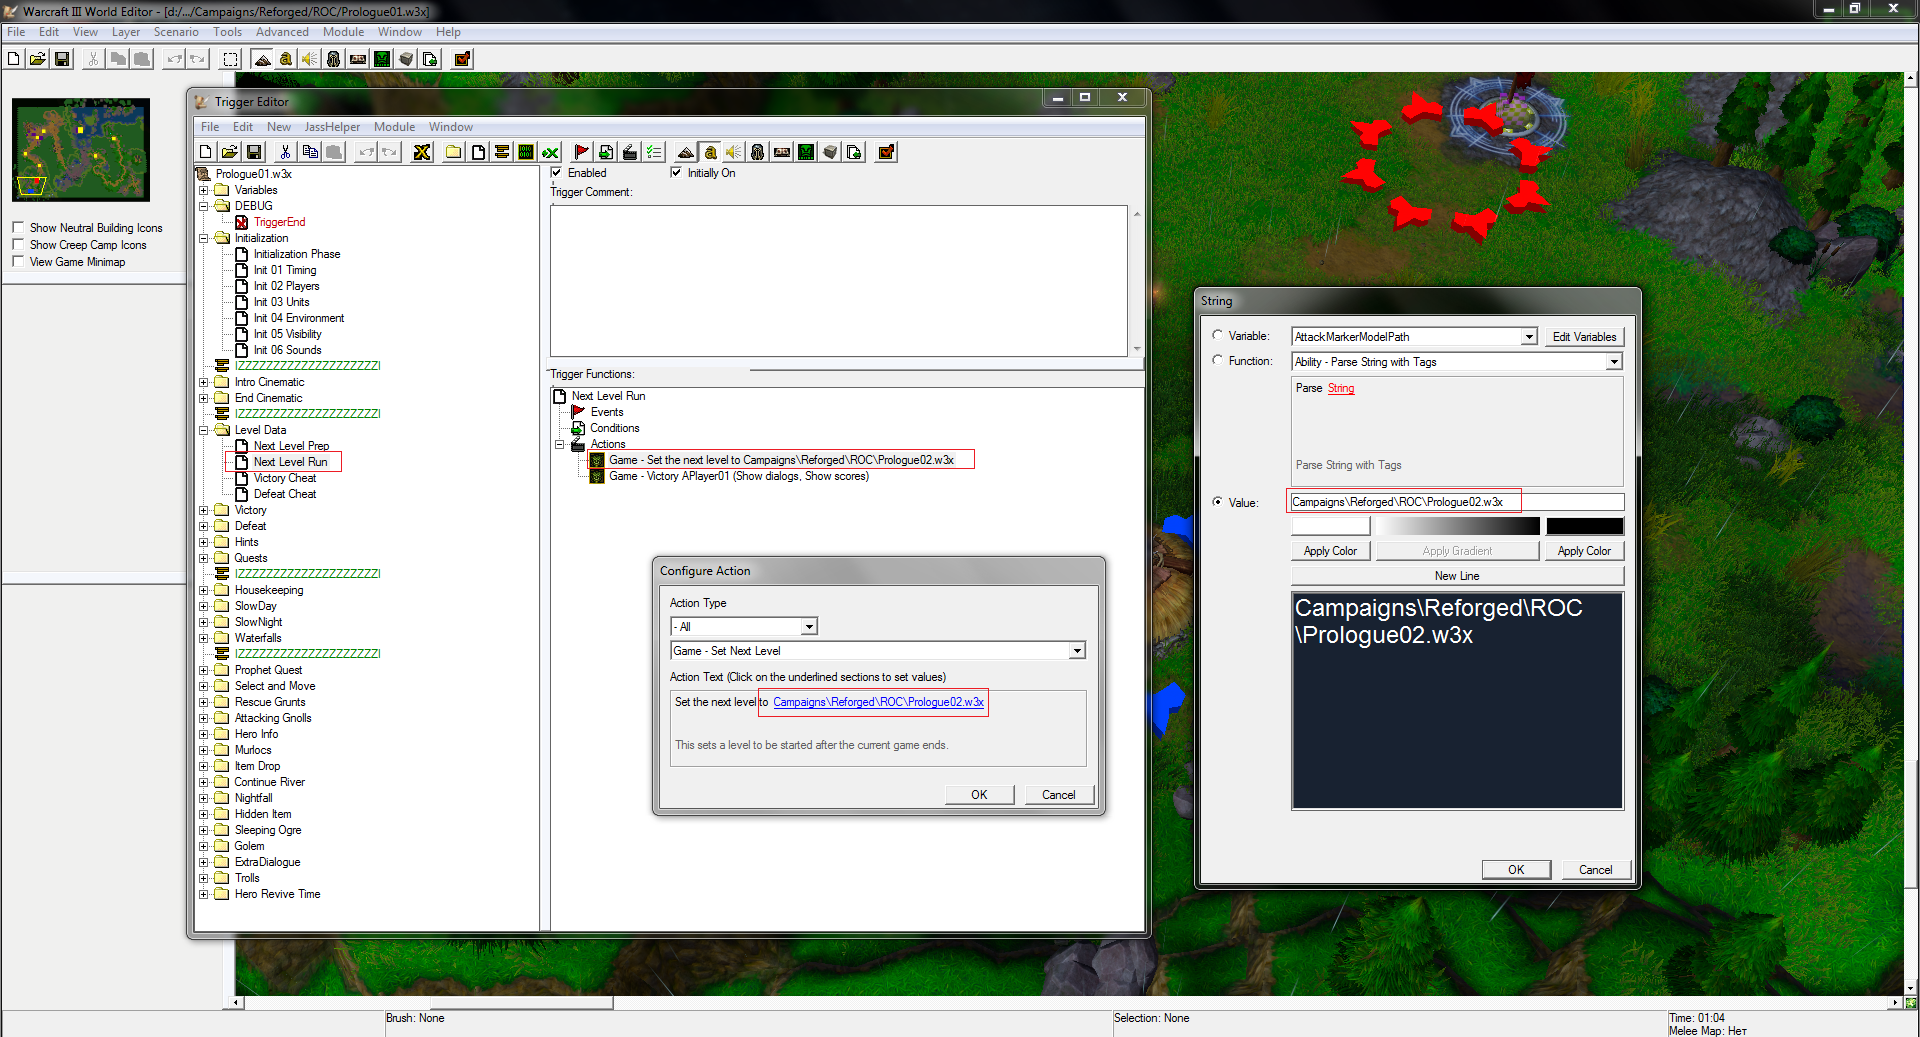
To do this - go to the trigger editor and find the Next Level Run line. Change the map path to campaigns folder instead of campaign so it loads our extracted and edited map.
It should look like this in the end.
And that is it.
Now you can create your own custom campaigns and play them trough the main menu of the game and even keep the hero progress and inventory from one mission to another. Just change the paths and the map names in the campaignreforged.txt file to the paths\names of your maps.
Chapter 4 - Changing names
If you want to use this method for playing custom campaigns and use your map files, then you can change the mission names in the campaign menu.
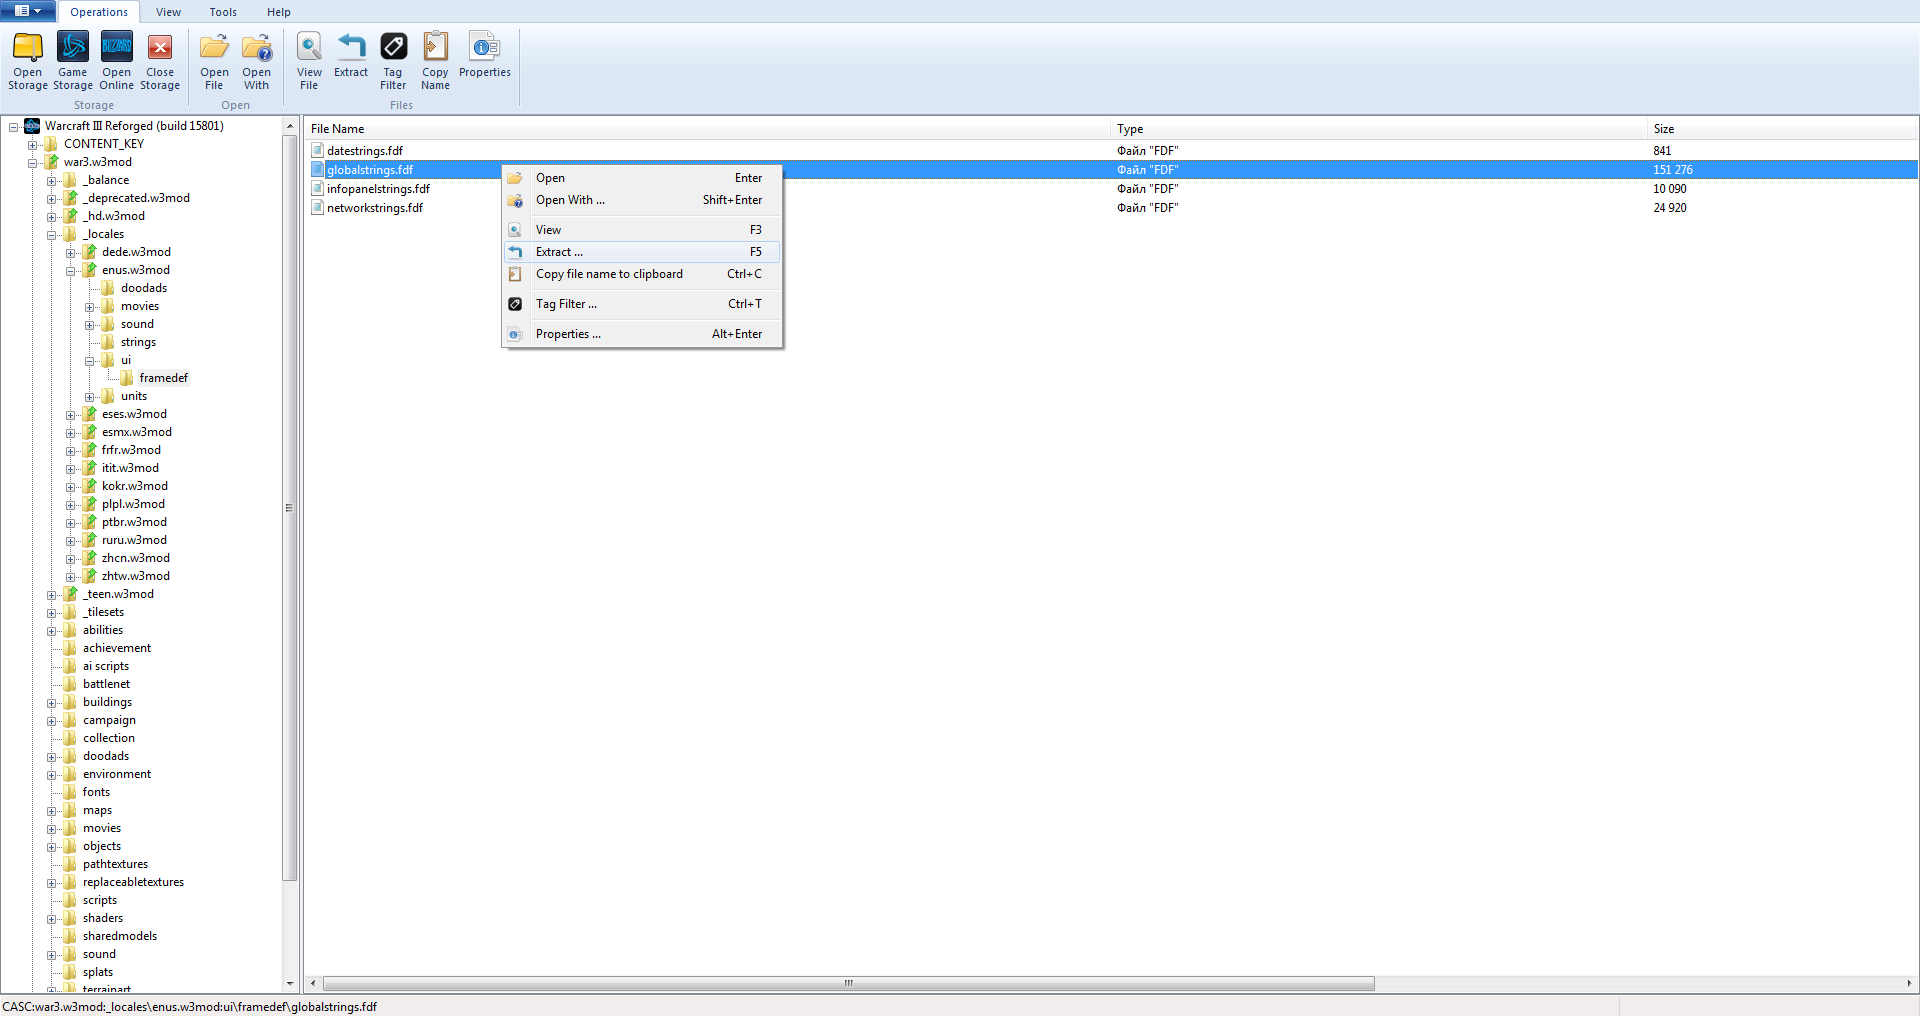
To do this you have to run the CascView and export the globalstrings.fdf file located in war3.w3mod:_locales\enus.w3mod:ui\framedef folder.
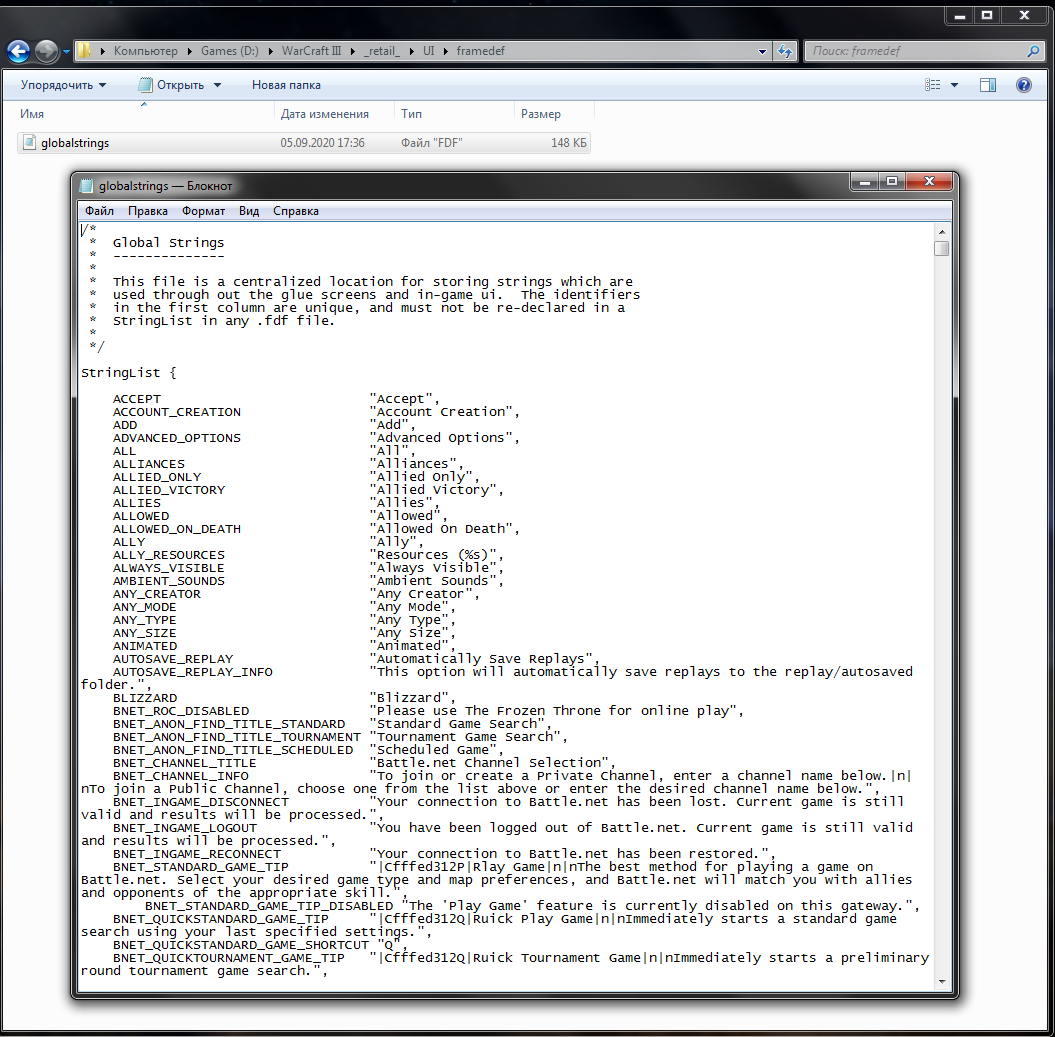
Export it along with the folders it is located at and put them in _retail_ folder as you did before.
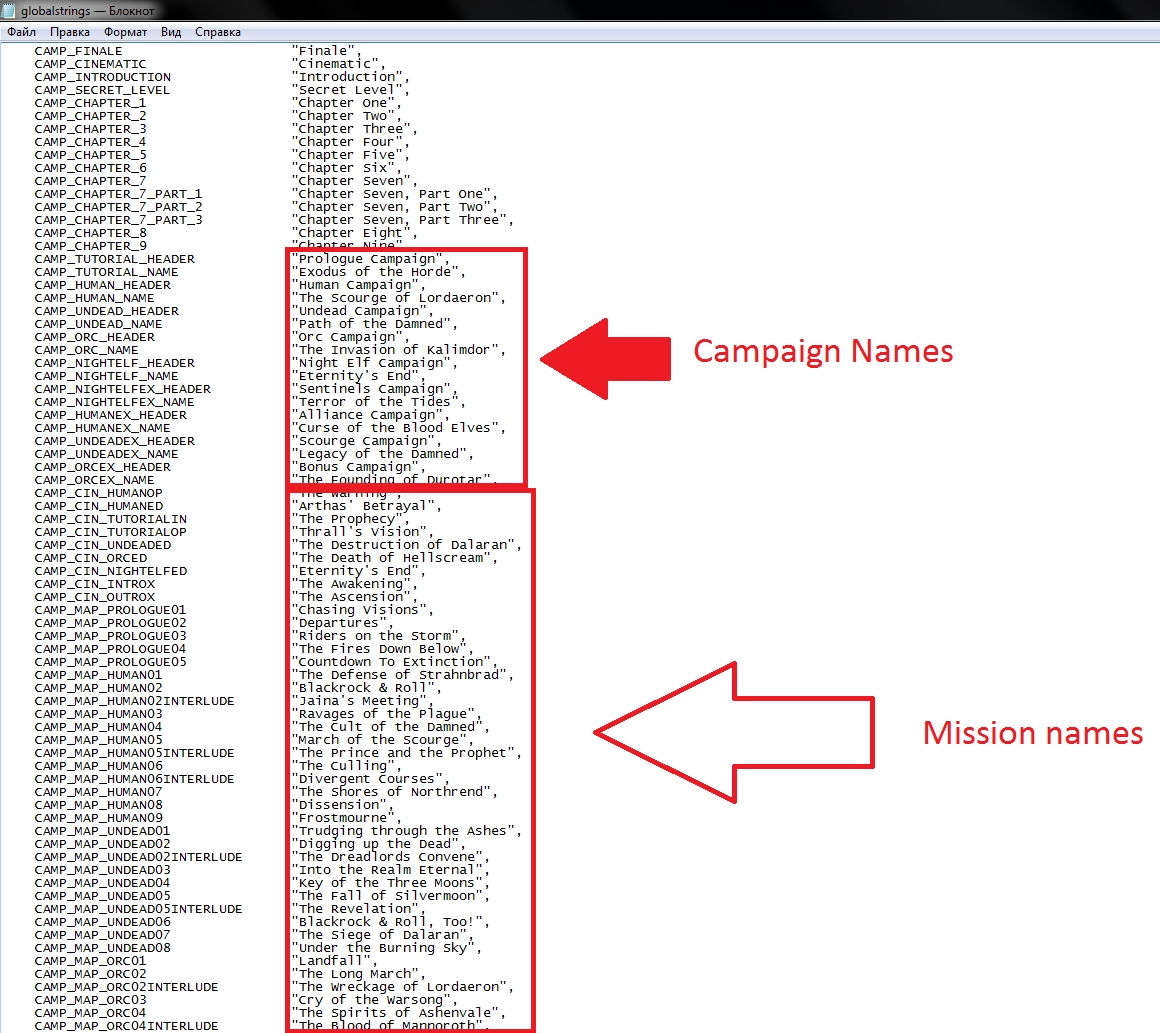
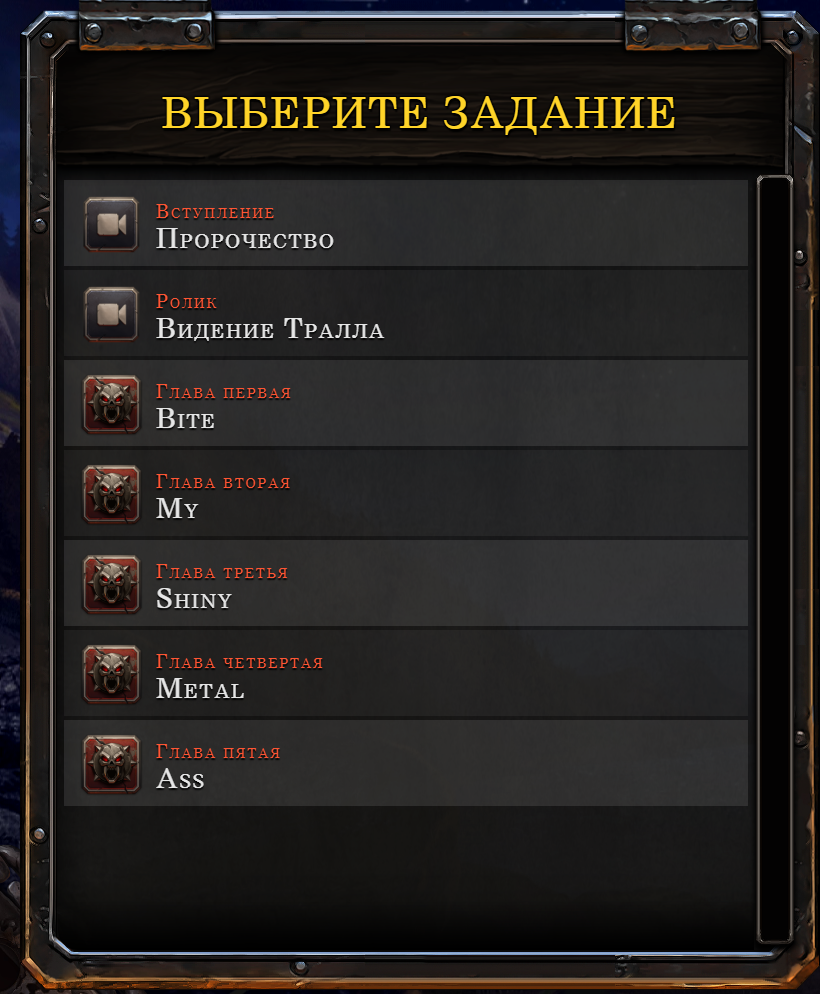
Then scroll down until you find the Campaign names and Mission names the game uses in its campaign menu. Here you can rename standart campaigns and missions.
The Rusult will look like this depending on your actions.
Same goes with the missions.
Althogh I think we are limited to the standart number of missions. At least I don't know how to add more buttons to the mission lists.
Fin.
Here I will tell you how to make WC Reforged use your maps instead of the vanilla ones when you click the mission button in the menu of the game and how to keep the hero progress through multiple maps.
Chapter I - Getting Ready.
1. The first step you need to do - is to enable the local files for Warcraft 3.
To do this - download, extract and run the .reg file in the archive attached to this post.
After doing this - the game will be able to be modded with any files which you can put into the _retail_ folder of the game. Vanilla folder looks like this:
2. Now, to get the standart campaign maps, we must download and launch CascView - it's a software created to open encrypted Warcraft's data files.
Run the CascView.exe -> click Open storage and choose your Warcraft 3 game folder like this.
Then expand the war3.w3mod section and export the campaign folder to your desktop.
It contains the vanilla campaign maps which can be edited in any way.
3. Now extract the campaigninforeforged.txt with ui folder
Changing the txt file will allow us to make WC use our campaign maps instead of vanilla ones.
Close the CascView.
4. Now put extracted campaign and ui folders (along withe the files inside it) into the _retail_ folder to make it look like this. Rename the campaign folder into campaigns.
Chapter 2 - Making it work.
1. Now for example you want to change the prologue campaign to be more reforged, add new cutscenes, quests etc.
Open the extracted prologue map and edit it using WC Editor, then save it.
2. Now, how to make a standart campaign button in the menu of the game use your edited map instead of the standart one?
Go into UI folder and open campaignreforged.txt file.
The unchanged file wil look like this.
It has campaign folder in it's path and makes the game load vanilla campaign maps.
You only have to add the s ending letter to make it look like this
Each line is responsible for different menu buttons which start campaign missions.
Now you made the game use your maps instead of the maps it has within its encrypted archive.
For example I edited the Prologue03.w3x file - it's the name for Riders on the Storm mission. I changed the map's tileset and added a custom model to Sen'jin. When I start a mission from the main menu - I play my edited map.
But that's not all.
Chapter 3 - Keeping progress.
And now the last part - I will tell you how to keep the progress of your heroes through your edited campaign. Without doing this - The abilities and items of your heroes will be reset to default in every mission.
1. Now, while editing your map - you have to change the name of the cache your map is using. To do this - go to the trigger editor and find a section (or two) responsible for creating and loading cache. Usually it's Level Data or Load Heroes etc.
Then change the name of the cache from Campaign to Campaigns or any name you want to use for your campaign cache. I prefer Campaigns. You have to do this in each map. The name of the chache must be the same.
Always check if the map has two cache sections - one for loading cache and one for creating it.
Always give them the same name.
2. Now we have to make the game load our custom maps instead of vanilla ones after completing the mission.
To do this - go to the trigger editor and find the Next Level Run line. Change the map path to campaigns folder instead of campaign so it loads our extracted and edited map.
It should look like this in the end.
And that is it.
Now you can create your own custom campaigns and play them trough the main menu of the game and even keep the hero progress and inventory from one mission to another. Just change the paths and the map names in the campaignreforged.txt file to the paths\names of your maps.
Chapter 4 - Changing names
If you want to use this method for playing custom campaigns and use your map files, then you can change the mission names in the campaign menu.
To do this you have to run the CascView and export the globalstrings.fdf file located in war3.w3mod:_locales\enus.w3mod:ui\framedef folder.
Export it along with the folders it is located at and put them in _retail_ folder as you did before.
Then scroll down until you find the Campaign names and Mission names the game uses in its campaign menu. Here you can rename standart campaigns and missions.
The Rusult will look like this depending on your actions.
Same goes with the missions.
Althogh I think we are limited to the standart number of missions. At least I don't know how to add more buttons to the mission lists.
Fin.
Attachments
Last edited:

