- Joined
- Dec 21, 2006
- Messages
- 438
Level
Difficulty-Low 2/10
Applicability-Moderately High 8/10
Application Heavy?- 8/10
Noob Friendly?- YES
Programs Used
Discription
The Images In this tutorial correspond to the text below them.
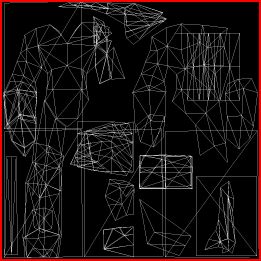
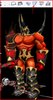
This tutorial will teach you how to make UV Maps from existing WC3 models for use in skinning, these UV maps are useful, because you can see the faces of the model you are working on and how the model wraps. Also it prevents blizzard skins from interfering with your creative process. The end result is pictured above.
1...
Step 1: Choosing and Exporting a Model
This Part of the tutorial uses: Wc3 Viewer
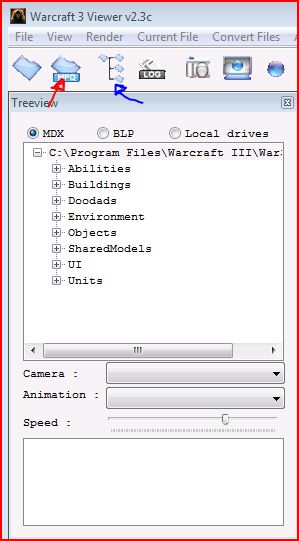
To start things up you will want to fire up Wc3 Viewer and choose a model that you wish to skin by selecting it on the tree view (blue arrow) of Wc3 Viewer. If this is your first time using Wc3 Viewer then you will need to select an MPQ from your wc3 directory by using the MPQ finder (red arrow); RoC files are in:War3.mpq TFT files are in:War3x.mpq.
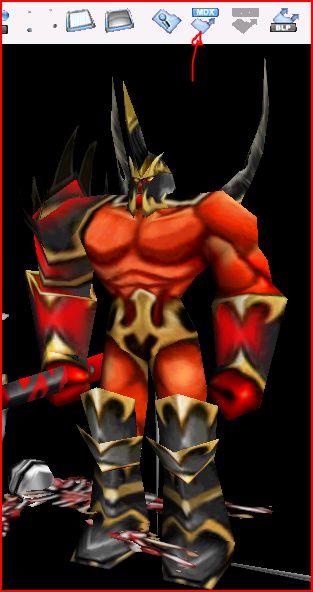
Once you have selected a model go ahead and click the export mpq button in Wc3 Viewer (red arrow) to export the model to an easily retrievable place (I use my desktop). For the purposes of this tutorial I will be using the Felgaurd model, but you can use any model you like. Once you have completed exporting the model you can close Wc3 Viewer
Step 2: Converting Your .mdx Export
This Part of the tutorial uses Biturn
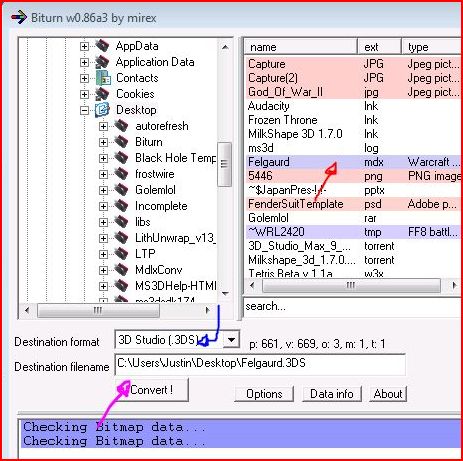
Now that you have exported your model you should have a .mdx file in the location that you saved it. This file should be named corresponding to your model(ex: felgaurd.mdx). Keeping that in mind, open Biturn, and find your file, in its browser. It will be highlighted in purple (red arrow). After selecting it you are going to want to save it as a 3ds file in the file type dropdown menu (blue arrow). After doing this click [Convert!] (fuchsia arrow (lol!)). Your file should now be saved in the same folder as you saved the .mdx file. After verifying that your .3ds file is there, close biturn.
Step 3: Creating Your Texture Map
This part of the tutorial uses LithUnwrap
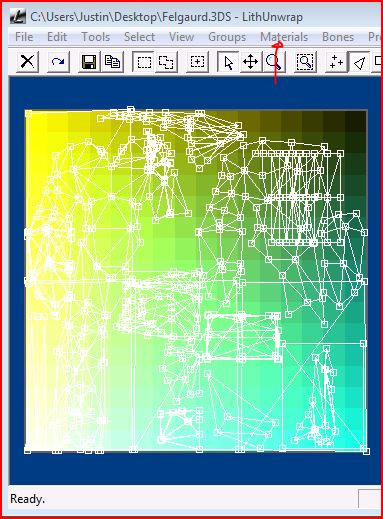
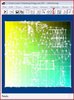
Open LithUnwrap and click on the File Tab and then click the Model submenu and finally click open (sorry I count take a screeny) your completed selection path should be File>Model>Open. Select and open your .3ds file that was created in step 2. Your file should look like the above screeny. Once your file is opened click the materials tab (red arrow) and then click modify. Find the only material on the list and select maps.
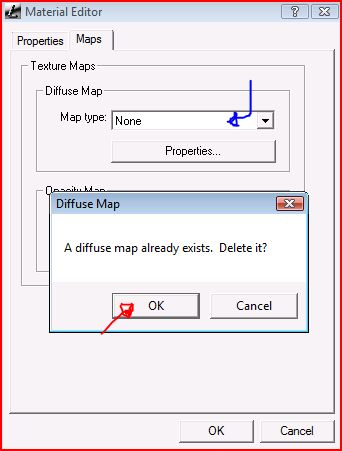
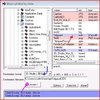
On the maps tab click on the dropdown menu titled "Map Type" and choose "none" (blue arrow). An error message will pop up... click ok (red arrow). The result should have changed the image from a funky rainbow to what appears to be blueprints. We are almost done. Now you are ready to save your finished UV-map click on the file tab an d then the UV Map sub menu, lastly click on save. Your completed path should look like File>UV Map>Save (sorry I counldn't take a screeny).
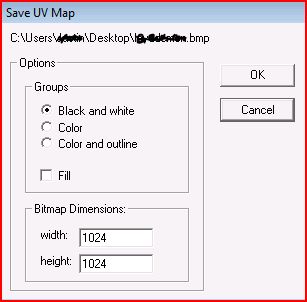
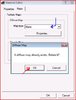
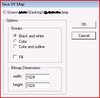
A dialog box will appear. Use the same options as the one in the screen shot the dimensions can be edited, if you change the .bmp dimensions use the following sizes 256x256 or 512x512. Save your UV Map and open up your image editing software... you are ready to skin.
Don't forget to thank me and comment on this tutorial if it helped you... Id like to know my time went to good use.
Attachments

Last edited by a moderator:


 look at what my custom models looks Like