- Joined
- Jan 18, 2007
- Messages
- 180
Here I'm going to show you how to make Minimaps, sigs, avatars, loading screens, ect. (Not skins). This is mainly pointed to newbies.
Requirements:
-Photoshop (I'm using CS3 Extended)
Backgrounds:
Top
Using Brushes
1. Go to http://www.deviantart.com and type in "photoshop brushes" in the search bar. Find a pattern you like and make sure it says " in Photoshop Brushes" underneath it. If it does, click it.
2. Once the page has loaded, click download and save the file to your desktop.

3. Open Photoshop. Click on the brush tool, click the little arrow near the top toolbar, and a new window should pop up. Click the arrow in the top right corner of the window and go down to "Load Brushes." Find the file you just downloaded and hit OK.

4. That was the hardest part of this section. Now if you click that first arrow again and scroll all the way down, you should have some new brushes.

5. Pick a brush. Pick a color. Create a new layer, and dab away. Make sure to use multiple brushes and colors. You might even want to fill in the background with a solid color. Here's what I came up with:
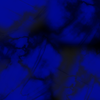
If you like what you've come up with, skip the next step. If your having trouble with something or hate your creation (*Looks up and pukes*), try the next part.
Clouds
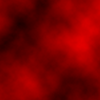
1. Using Clouds is much easier than using brushes, and sometimes can look cooler. Just pick 2 colors and go to Filter > Render > Clouds and there you go!

Filters
1. Now it's time to juice up your image. Go to Filter > Filter Gallery and pick any effect you want. Play with the scroller things on the right on the left until you get the effect you like. Once your finished hit OK.
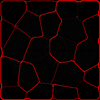
2. You can use more than 1 Filter, too. This is what I did using "Stained Glass" and "Glowing Edges":
Images:
Top
The Image
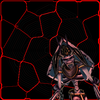
1. Find the picture you want to add to your image and Copy it. I'm using this:

2. Go into Photoshop, click the Selection Tool, and Paste it.
3. Right click anywhere on the image and hit "Free Transform" and move it where ever you want.
4. Erase everything around the image using the Eraser tool (Or possibly the Magic Eraser).
Recoloring
1. Another simple step. Make sure your on the layer you want to recolor and it Control+B. Press OK when your done.
'Blending Options'
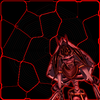
1. Go to Layer > Layer Style > Blending Options. There will be some useful effects like glows, shadows, outlines (AKA Stroke), ect. Play around with them until you get a nice effect.
Text:
Top
Downloading Fonts
1. Go to http://www.dafont.com and download a font you like to your desktop.
2. Move the downloaded file to C:\WINDOWS\Fonts . In order to use it, you'll need to restart Photoshop.
'Blending Options' (Same as Images)
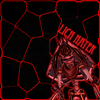
1. Go to Layer > Layer Style > Blending Options. There will be some useful effects like glows, shadows, outlines (AKA Stroke), ect. Play around with them until you get a nice effect.
Filters (Same as Backgrounds)
1. Go to Filter > Filter Gallery and pick any effect you want. Play with the scroller things on the right on the left until you get the effect you like. Once your finished hit OK. You can use more than 1 Filter, too.
Borders:
Top
Drawing the Border
1. Using the Selection Tool, draw a box around most of the image, leaving a small border.
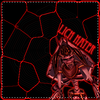
2. Right click and go down to "Select Inverse."
3. Use the Paint Bucket and full up the selection. There's your extremely basic border.
'Blending Options' (Same as Images)
1. Go to Layer > Layer Style > Blending Options. There will be some useful effects like glows, shadows, outlines (AKA Stroke), ect. Play around with them until you get a nice effect.
Filters (Same as Backgrounds)
1. Go to Filter > Filter Gallery and pick any effect you want. Play with the scroller things on the right on the left until you get the effect you like. Once your finished hit OK. You can use more than 1 Filter, too.
I know some sections were repeated, but you might need to actually repeat them
I really hope this helps... It took me awhile
Top
Requirements:
-Photoshop (I'm using CS3 Extended)
ContentBackgrounds
-Using Brushes
-Clouds
-Filters
Images
-The Image
-Recoloring
-'Blending Options'
Text
-Downloading Fonts
-'Blending Options'
-Filters
Borders
-Drawing the Border
-'Blending Options'
-Filters
Top
Using Brushes
1. Go to http://www.deviantart.com and type in "photoshop brushes" in the search bar. Find a pattern you like and make sure it says " in Photoshop Brushes" underneath it. If it does, click it.
2. Once the page has loaded, click download and save the file to your desktop.

3. Open Photoshop. Click on the brush tool, click the little arrow near the top toolbar, and a new window should pop up. Click the arrow in the top right corner of the window and go down to "Load Brushes." Find the file you just downloaded and hit OK.

4. That was the hardest part of this section. Now if you click that first arrow again and scroll all the way down, you should have some new brushes.

5. Pick a brush. Pick a color. Create a new layer, and dab away. Make sure to use multiple brushes and colors. You might even want to fill in the background with a solid color. Here's what I came up with:

If you like what you've come up with, skip the next step. If your having trouble with something or hate your creation (*Looks up and pukes*), try the next part.
Clouds
1. Using Clouds is much easier than using brushes, and sometimes can look cooler. Just pick 2 colors and go to Filter > Render > Clouds and there you go!

Filters
1. Now it's time to juice up your image. Go to Filter > Filter Gallery and pick any effect you want. Play with the scroller things on the right on the left until you get the effect you like. Once your finished hit OK.
2. You can use more than 1 Filter, too. This is what I did using "Stained Glass" and "Glowing Edges":

Images:
Top
The Image
1. Find the picture you want to add to your image and Copy it. I'm using this:

2. Go into Photoshop, click the Selection Tool, and Paste it.
3. Right click anywhere on the image and hit "Free Transform" and move it where ever you want.
4. Erase everything around the image using the Eraser tool (Or possibly the Magic Eraser).

Recoloring
1. Another simple step. Make sure your on the layer you want to recolor and it Control+B. Press OK when your done.
'Blending Options'
1. Go to Layer > Layer Style > Blending Options. There will be some useful effects like glows, shadows, outlines (AKA Stroke), ect. Play around with them until you get a nice effect.

Text:
Top
Downloading Fonts
1. Go to http://www.dafont.com and download a font you like to your desktop.
2. Move the downloaded file to C:\WINDOWS\Fonts . In order to use it, you'll need to restart Photoshop.
'Blending Options' (Same as Images)
1. Go to Layer > Layer Style > Blending Options. There will be some useful effects like glows, shadows, outlines (AKA Stroke), ect. Play around with them until you get a nice effect.

Filters (Same as Backgrounds)
1. Go to Filter > Filter Gallery and pick any effect you want. Play with the scroller things on the right on the left until you get the effect you like. Once your finished hit OK. You can use more than 1 Filter, too.
Borders:
Top
Drawing the Border
1. Using the Selection Tool, draw a box around most of the image, leaving a small border.

2. Right click and go down to "Select Inverse."
3. Use the Paint Bucket and full up the selection. There's your extremely basic border.
'Blending Options' (Same as Images)
1. Go to Layer > Layer Style > Blending Options. There will be some useful effects like glows, shadows, outlines (AKA Stroke), ect. Play around with them until you get a nice effect.
Filters (Same as Backgrounds)
1. Go to Filter > Filter Gallery and pick any effect you want. Play with the scroller things on the right on the left until you get the effect you like. Once your finished hit OK. You can use more than 1 Filter, too.
------------------------------
I know some sections were repeated, but you might need to actually repeat them
I really hope this helps... It took me awhile

Top
Last edited:


