- Joined
- Jun 21, 2009
- Messages
- 325
Links:
> EU: starcraft://map/2/164152
> NA: starcraft://map/1/235689
> KR: starcraft://map/3/83651
> SEA: starcraft://map/6/21771
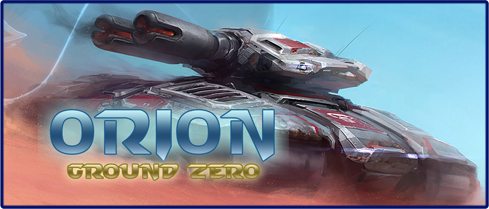
Orion: Ground Zero is a 2-player coop altered melee map featuring 6 unique subfactions to choose from to go up against 6 Zerg Broods, each with their own techtree and specialties.
The objective of the map is to gather an amount of Crimson Minerals and destroy sufficient enemy Broods. In order to do this, you have to keep a balance between offense and defense, take advantage of control points, and secure strategic areas in the map to hold off the enemy more efficiently.
The map lasts, on average, for 30-60 minutes. It varies depending on the selected difficulty however.
Features
|
Lore Summary
(full lore can be read ingame in the help menu)After Kerrigan's victory and the fall of the New Overmind, a number of Broods, defiant of the Queen of Blades, have fled to a distant uncharted planet. There they began to recover, attempting to form a new Swarm to overthrow Kerrigan and restore the Overmind's glory to the Swarm. Only one of these Broods still had a surviving Cerebrate, Baelrog Brood, and as such they attempted to subjugate the other Broods.
The Broods were quick to discover a new resource on the planet with grand psionic capabilities, however, situated in parts of the planet's surface. They used this resource to create leaders of their own and defied Baelrog. After a long, brutal civil war, Baelrog had either devoured, destroyed or enslaved the Broods.
Months after that incident, numerous Terran groups and Protoss expedition parties have located this new planet, and the resource as well. Mining operations had been organized and escorted with military forces, to ensure their safety. They did not anticipate to encounter some old foes, however.
Gameplay
Subfactions
Once the game begins, you will be presented with a selection screen where you will be able to choose one of the subfactions. Thesubfactions are as follows:
Terran subfactions:
- The Prospectors' Syndicate, specialized in defensive tactics and the preservation of units. They can easily fortify perimeters and slowly yet steadily secure locations.
- The Odysseus Company, adept dealing high damage in short periods of time and using aggressive tactics to push and conquer enemy areas.
- The Omega Division, excelling in long-ranged warfare and territorial control, while maximizing the efficiency of their bases and forces.
Protoss subfactions:
- The Crusader Caste, making use of brute force and physical strength to defeat their enemies.
- The Templar Conclave, boasting the most potent spellcasters, allowing them to control the battlefield and easily disrupt their foes.
- The Marked of the Xel'naga, the most versatile of subfactions that is equally efficient in defense and offense. They use highly destructive robotic units to prove victorious.
Events, Nydus Worms and Control Points
As previously mentioned, random events will occur, Nydus Worms (and Dragons) will spawn and Control Points will influence the outcome of battles.There are 3 events in total; Lava Surge, Thick Fog and Drop Pods. Lava Surges will cover the lower ground of the map, where the Crimson Minerals are located, incinerating any ground unit that passes through, Thick Fogs will limit your units' vision while it's active, and Drop Pods will reinforce the enemy with a number of squads that will be sent after your forces and/or bases.
On higher difficulties, for every 3 sets of Worms that spawn, a Nydus Dragon will instead emerge. Nydus Dragons are enormous monsters that lob fireballs at you from extremely long ranges and can tunnel around their surrounding area. However, they take some time to spawn, unlike Nydus Worms, giving you a window where you can inflict as much damage as you can with no retaliation.
The Control Points activate after 5 minutes into the game and randomize every 3 minutes. Some points are preset to always have a negative effect (such as the one in your home base), while others are preset to always have a positive effect (such as the three points in Baelrog's bases), the rest are neutral and have both types of effects. There is also a chance that a Control Point will be deactivated until the next randomization.
Zerg Broods
There are 6 Broods in total; Jormungand, Surtur, Tiamat, Garm, Fenris, and the most powerful of them, Baelrog.Jormungand relies purely on quantity over quality, and will send the largest attack waves at you. Surtur is the opposite, making use of fewer, yet more durable, powerful and heavier units.
Tiamat specializes in aerial combat and will rarely attack you with ground forces (apart from early in the game). Garm plays more sneakily, relying on burrowing units and suspressing detection.
On the other hand, Fenris excells at using spellcasters and supporting their allies. Lastly, Baelrog is the "perfect" Brood, excelling in nearly every department and using elite units. They will rarely attack compared to other Broods, however. Take caution when engaging them.
Also, on top of each Brood using their own exclusive units, as the game goes on they will make use of elite strains; these strains are enhanced versions of normal units and are very dangerous. Initially, they will act as captains in assault waves, but the longer a Brood survives, the more frequent these strains will become.
Screenshots
Here's some gameplay screenshots, showing the subfactions on the offense and defense: http://imgur.com/a/QrmqrCredits
- GhostNova91 (Arclite Siege Tank, Vindicator and portrait, Nullifier)- Thrikodias (Drakken Siege Burner portrait, BW Dark Archon, Defiler Mound, Psi Emitter, Shield Battery, Avenger, Magister and portrait, Shard Cannon, Titan Strider, Banelisk, Zeg Hulk)
- SoulFilcher (Defiler, Ship Ion Cannon, icons and/or wireframes for Gas Turret, Grand Cannon, APC, Assault APC, Devourer, Matriarch and Overcharged Yamato Cannon)
- Buhhy (Dragoon)
- Salirth and AegisRuneStone (Psionic Hydralisk)
- Sound emitted by Psionic Obliterators extracted from the game Command & Conquer: Red Alert 2
- Loading screen artwork from Mr--Jack
Special thanks to Rohirrim for helping test the map and for his suggestions, and Beider along with various others for their tutorials, which helped me learn the editor.

")