

- Joined
- May 13, 2017
- Messages
- 181
Defenders of the Light
31st August 2025
Addressing Game ver 1.27 & 1.29's Item Description Issue
I learned version 1.27 & 1.29 of the game can only bear 473 character counts in an item description. Therefore all items that has description more than 473 character counts need to be cut off and modified just for this version.
Current afffect item is Shield of the Lion. I'll provide the description to the cutoff point.
|cffff8c00Artifact|r|n|cffffdeadOnce a fierce warrior, King Terenas of Edenvale wielded the lion as a symbol of the kingdom's strength and ambition. In his youth, he led his people with the boldness of a conqueror. However, the tragic loss of his queen transformed him. No longer driven by the fires of conquest, Terenas embraced a path of compassion, guiding Edenvale with wisdom and benevolence, leaving behind the mantle of the warrior for that of the protector.|r|n|cff
And this one is from the description of Rahandir Axe
|cffff8c00Artifact|r|n|cffffdeadThis jagged, blood-rusted axe was wielded by Rahandir Drakeskull in his unholy quest for vengeance. Forged in the fires of betrayal, it drinks deep from the life force of its victims, feeding its wielder's strength with each brutal strike. Imbued with dark magic, Rahandir’s Executioner grants immense power but fills the wielder with an insatiable lust for revenge, whispering tales of treachery and broken o
Interestingly Rahandir Axe description got cut off at 499 character counts (including the color code symbols), not 473??
This one is for Bloodfeather's Heart
|cffff8c00Legendary|r|n|cffffdeadAn undead archery champion, resurrected with a burning purpose, vowed to eradicate humanity as if this destiny had been etched into her very being upon reincarnation. Having suffered the devastating losses of her mentor, her disciple, and her shade companion, she has spent years wandering, tirelessly seeking new ways to overthrow humanity and establish undead supremacy with unyielding determination.|n|r|cff
This is ChatGPT's report on the character counts on those 3 item description in the attempt to figure out why they are not the same. I still don't have an answer.
Anyhow, I decided to just shorten the long item descriptions specifically just for DOT127 & DOT129
Reworked the old Rotating Statues Puzzle
First, let's start with keeping record of what the old minigame looks like. In fact, it looks so ugly with the lack of color harmony so let's hide it in the Spoiler tab.
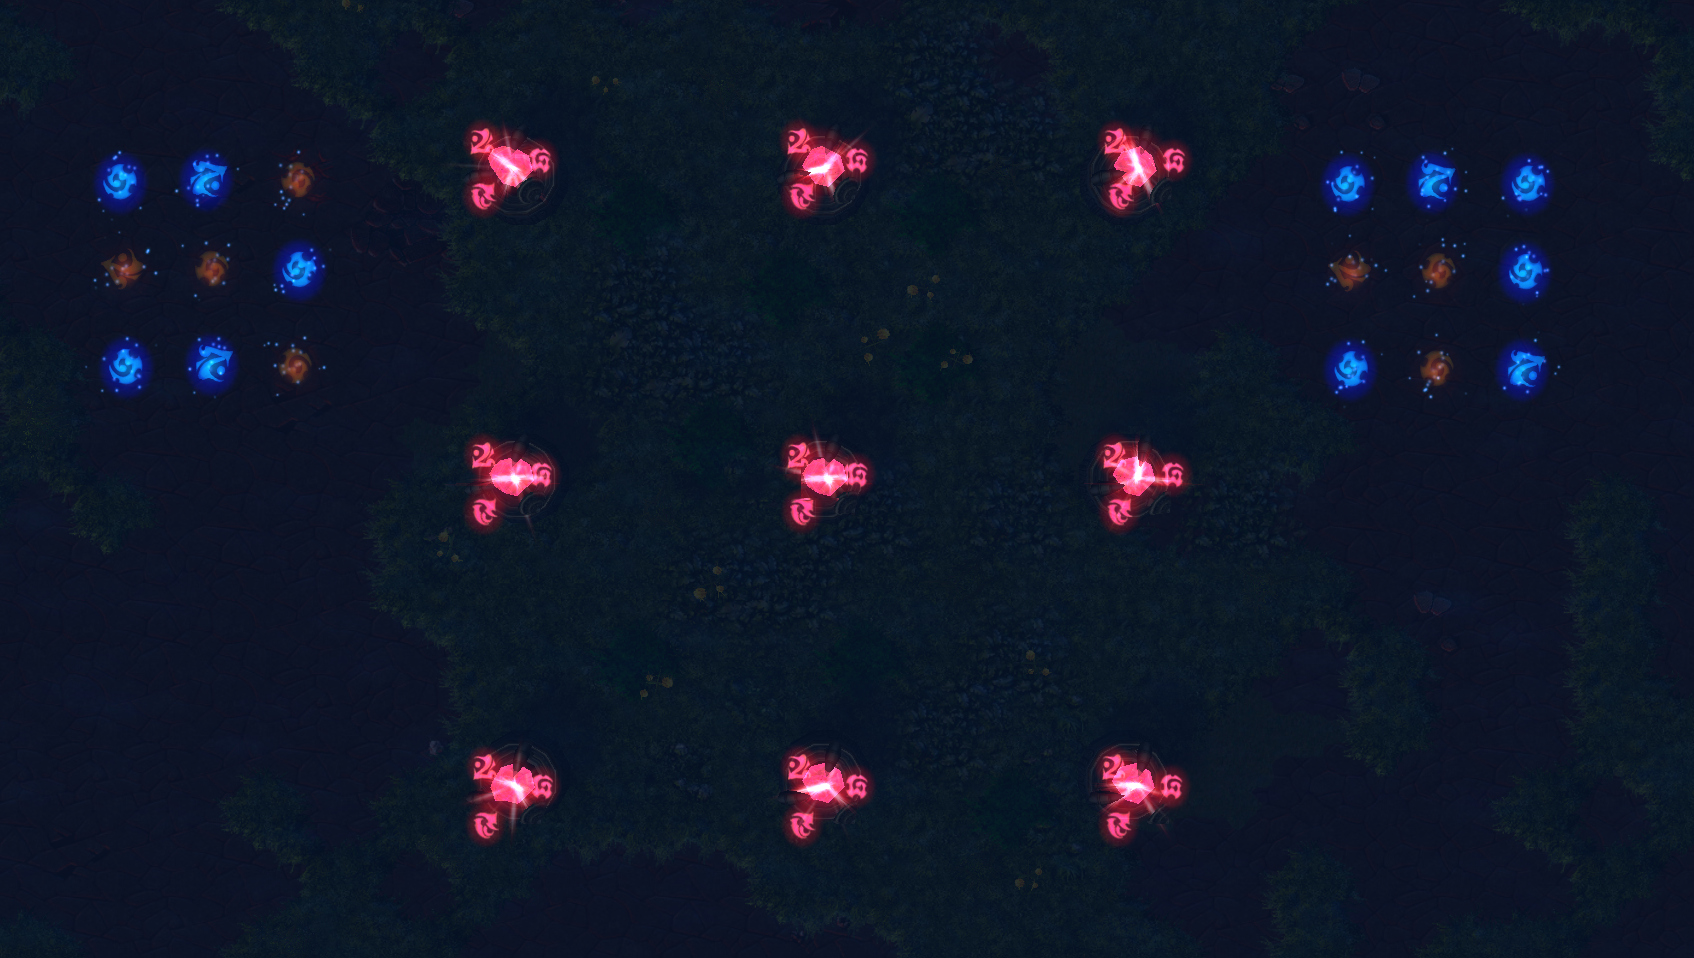
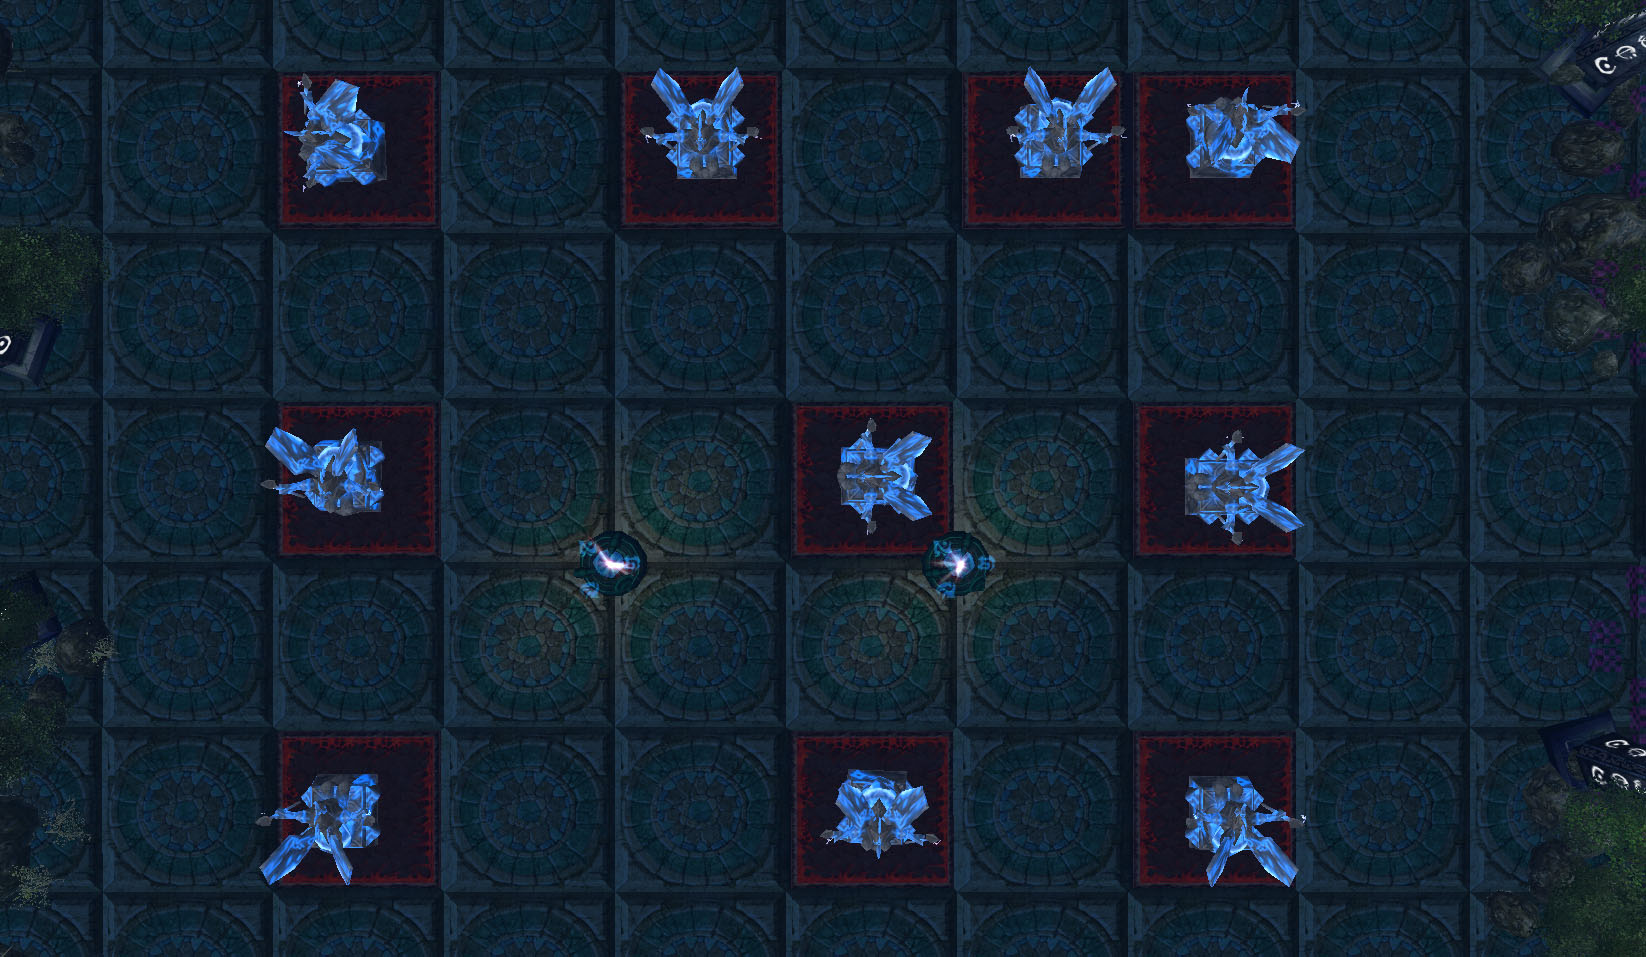 The old Rotating Statues Puzzle has been replaced with a Lights Out Puzzle—more challenging and less prone to players stumbling onto the solution by accident. I was never satisfied with the original puzzle: it was overly complicated, often solved unintentionally, and visually inconsistent. Worse, the engine’s limitations prevented it from clearly conveying its intended design. The new Lights Out Puzzle addresses these issues with cleaner mechanics and a more engaging challenge. Thanks to AI assistance, you’ll also find the full solutions provided below—for both doors.
New Trivia Area
This update introduces the new Trivia section, where players can explore insights and behind-the-scenes thoughts about the bosses and characters in the campaign. Each character was crafted with care and passion, and this section offers players a glimpse into the creative process that brought them to life.
 All trivia information is provided below for future reference. If you’ve already played the campaign and simply want to read through the trivia without replaying, you can find it here.
To the Next Update 0.59
Addressing Game ver 1.27 & 1.29's Item Description Issue
I learned version 1.27 & 1.29 of the game can only bear 473 character counts in an item description. Therefore all items that has description more than 473 character counts need to be cut off and modified just for this version.
Current afffect item is Shield of the Lion. I'll provide the description to the cutoff point.
|cffff8c00Artifact|r|n|cffffdeadOnce a fierce warrior, King Terenas of Edenvale wielded the lion as a symbol of the kingdom's strength and ambition. In his youth, he led his people with the boldness of a conqueror. However, the tragic loss of his queen transformed him. No longer driven by the fires of conquest, Terenas embraced a path of compassion, guiding Edenvale with wisdom and benevolence, leaving behind the mantle of the warrior for that of the protector.|r|n|cff
And this one is from the description of Rahandir Axe
|cffff8c00Artifact|r|n|cffffdeadThis jagged, blood-rusted axe was wielded by Rahandir Drakeskull in his unholy quest for vengeance. Forged in the fires of betrayal, it drinks deep from the life force of its victims, feeding its wielder's strength with each brutal strike. Imbued with dark magic, Rahandir’s Executioner grants immense power but fills the wielder with an insatiable lust for revenge, whispering tales of treachery and broken o
Interestingly Rahandir Axe description got cut off at 499 character counts (including the color code symbols), not 473??
This one is for Bloodfeather's Heart
|cffff8c00Legendary|r|n|cffffdeadAn undead archery champion, resurrected with a burning purpose, vowed to eradicate humanity as if this destiny had been etched into her very being upon reincarnation. Having suffered the devastating losses of her mentor, her disciple, and her shade companion, she has spent years wandering, tirelessly seeking new ways to overthrow humanity and establish undead supremacy with unyielding determination.|n|r|cff
This is ChatGPT's report on the character counts on those 3 item description in the attempt to figure out why they are not the same. I still don't have an answer.
| Stripped the Warcraft 3 color/newline codes and counted the visible characters for each string you gave. Results (freshly measured from the exact texts you posted): Rahandir Axe • Visible (no color codes): 418 characters • Original (with codes): 441 characters Undead Archer (Legendary) • Visible (no color codes): 413 characters • Original (with codes): 443 characters Terenas backstory • Visible (no color codes): 443 characters • Original (with codes): 472 characters Notes on the differences / why counts may not match what you expected I converted |n to actual newline characters (so those count as a single character in the visible text). I removed |cXXXXXXXX color starts, |r resets, and any leftover |-style tokens. Some of the strings you pasted appear truncated (e.g., the Rahandir text ends with ...broken o), which affects visible length. Color codes add extra characters to the raw string; different items used different code sequences (so raw lengths vary). If I reported different totals earlier, that was my mistake — the numbers above are re-counted from the exact strings you supplied here. If you want, I can: Give word counts for the visible text, Return the visible text with \n shown as ⏎ so you can see where newlines are, or Re-run the counts after normalizing newlines to spaces (one-line counts). |
Anyhow, I decided to just shorten the long item descriptions specifically just for DOT127 & DOT129
| New Item | Old Description | New Description |
|
Shield of the Lion 
| Once a fierce warrior, King Terenas of Edenvale wielded the lion as a symbol of the kingdom's strength and ambition. In his youth, he led his people with the boldness of a conqueror. However, the tragic loss of his queen transformed him. No longer driven by the fires of conquest, Terenas embraced a path of compassion, guiding Edenvale with wisdom and benevolence, leaving behind the mantle of the warrior for that of the protector. | Once a fierce conqueror, King Terenas of Edenvale bore the lion as a symbol of strength and ambition. After the tragic loss of his queen, he set aside conquest, guiding his people with wisdom and compassion as a protector instead of a warrior. |
|
Rahandir Axe 
| This jagged, blood-rusted axe was wielded by Rahandir Drakeskull in his unholy quest for vengeance. Forged in the fires of betrayal, it drinks deep from the life force of its victims, feeding its wielder's strength with each brutal strike. Imbued with dark magic, Rahandir’s Executioner grants immense power but fills the wielder with an insatiable lust for revenge, whispering tales of treachery and broken oaths with every swing. | This blood-rusted axe, once wielded by Rahandir Drakeskull, was forged in betrayal and feeds on the life force of victims. Imbued with dark magic, it grants immense strength but fills its wielder with an insatiable lust for vengeance. |
|
Kaleo’s Magic Shield 
| The Shield of Kaleo the Guardian, a mysterious relic imbued with ancient magic. Legend has it that Kaleo was once a humble beggar in Aetheria City before its transformation into the ominous Dark Wood. Official records depict him as a beggar, yet rumors persist of his secret life as a formidable gang leader, wielding influence from the shadows of the city. | The Shield of Kaleo the Guardian is a relic of ancient magic. Once a beggar in Aetheria City, some say he secretly ruled as a gang leader, shaping the city’s fate from the shadows. |
|
Bloodfeather's Heart 
| An undead archery champion, resurrected with a burning purpose, vowed to eradicate humanity as if this destiny had been etched into her very being upon reincarnation. Having suffered the devastating losses of her mentor, her disciple, and her shade companion, she has spent years wandering, tirelessly seeking new ways to overthrow humanity and establish undead supremacy with unyielding determination. | An undead archery champion, reborn with a burning purpose, vowed to eradicate humanity. Haunted by the loss of her mentor, disciple, and shade companion, she wanders tirelessly, seeking ways to overthrow mankind and claim undead supremacy. |
|
Scepter of Eternal Flow 
| Years ago, Duskwatch village was attacked by the undead and saved by a courageous young paladin. An archer champion, captivated by his bravery, fell deeply in love with him and vowed to improve her skills to earn his recognition. Yet, the paladin married someone else, unaware of her feelings. She followed him through every battle, silently carrying her unspoken love to the grave. | Years ago, Duskwatch village was saved by a young paladin. An archer, inspired by his bravery, fell in love and trained to earn his recognition. But he wed another, leaving her to carry unspoken love to her grave. |
|
Soul Redemption 
| Whispers tell of an undead archer roaming the land, seeking answers to the mystery of her identity before her resurrection. Despite years of searching, even with the support of her closest allies, her quest proved fruitless. Despair took hold, and the hope that once guided her began to fade, driving her to turn against the very humans she once trusted. | Legends tell of an undead archer seeking the truth of her identity before resurrection. Despite years of searching with her allies, hope faded into despair, driving her to turn against the humans she once trusted. |
|
Arcanite Armor 
| Armor forged from the enchanted cores of Arcanite Golems, Gavin Ironwright stood among the pioneering humans who harnessed golemic technologies for warfare against the Legion. His profound wisdom and expertise were meticulously recorded in tomes, ensuring his legacy endured through the ages, eventually becoming absorbed by Zion. | Forged from Arcanite Golem cores, this armor honors Gavin Ironwright, a pioneer in golemic warfare. His wisdom, preserved in tomes, lives on through Zion’s legacy. |
|
Soul of the Damned 
| Discovered within the Abyssal Swarm, this potent talisman bears a striking resemblance to the one wielded by Serego the Guardian. Originally, Serego was not blind; his sight was sacrificed in an act of selflessness when he took the punishment meant for his sister, who had stolen from the wealthy. | Discovered in the Abyssal Swarm, this talisman resembles the one borne by Serego the Guardian. Once sighted, Serego sacrificed his vision in an act of selflessness, taking the punishment meant for his sister. |
Reworked the old Rotating Statues Puzzle
First, let's start with keeping record of what the old minigame looks like. In fact, it looks so ugly with the lack of color harmony so let's hide it in the Spoiler tab.
| Left Solution | Right Solution |
One solution (press once each):
| The target is reachable from an all-red start. One valid set of presses (order doesn’t matter) is:
0 0 1 1 0 0 1 1 0 |
New Trivia Area
This update introduces the new Trivia section, where players can explore insights and behind-the-scenes thoughts about the bosses and characters in the campaign. Each character was crafted with care and passion, and this section offers players a glimpse into the creative process that brought them to life.
| Character | Trivia |
| Sylvie | Sylvie was the first boss with custom AI, marking a milestone in the campaign’s design. Using triggers, she could net Adias to keep him away and even retreat to maintain distance, preventing him from striking her. While players may not have realized the programming behind her actions, Sylvie was an important miniboss that set the stage for more advanced encounters to come. There were plans to bring Sylvie back in future optional quests to expand her story, similar to what was done with Karim. However, these ideas never moved beyond the planning stage. |
| Elmrom | Elmrom was the second boss programmed for the campaign. His gimmick involved teleporting Adias around the battlefield whenever attacked, forcing players to dodge or escape the surrounding flames. While a simple encounter and not the most memorable, Elmrom fulfilled his role and added variety to the early boss lineup. |
| Karim | Originally a nearly forgettable miniboss in Act I, Karim was reintroduced in Act II with multiple appearances and a deeper backstory. This expansion transformed him into one of the campaign’s most well-written and memorable characters. The developer takes particular pride in Karim’s evolution. |
| Chen Stormstout | Chen is a playable hero throughout all three acts of The Founding of Durotar, but his story and quests are confined to Act I, with little development afterward. Wanting to give him greater depth, I brought Chen into Defenders of the Light. Though borrowed from the original game, my intent was to expand his character far beyond what Blizzard had done. |
| Buri Fortman | Buri was not part of the original campaign but was later introduced as a support hero for Adias. His addition made the gameplay more enjoyable, as relying on only one hero felt restrictive. Designed to be weaker and more complementary, Buri’s abilities were built to highlight teamwork and enhance Adias rather than compete with him. Though his role in the narrative was brief, Buri made a strong impression on players. His presence added emotional weight and variety to the story, with his short-lived journey leaving a memorable mark on those who played through the campaign. Buri went through several design iterations before reaching his final form. The creator wanted him to embody the idea of a weaker, supportive ally who nonetheless felt important to the player. The end result matched this vision, showing how thoughtful design choices can elevate both gameplay and storytelling. |
| Akiba | Final bosses are often characters introduced earlier, but sometimes a story reveals someone entirely new at the end. Akiba falls into the latter. His battle reuses mechanics players had already learned, turning familiar skills into the key to victory. This design choice made the fight both surprising and brilliantly executed. Akiba is the largest unit in the entire campaign. His design is heavily inspired by Nebula Gray, the monstrous final boss from MegaMan Battle Network 5. That game featured one of the most extensive and challenging post-game contents ever created, most of which I completed—though I never finished it entirely. |
| Arthas | Arthas was the first major boss to reflect my vision of creating fights inspired by Dark Souls, one of my favorite games. Players often need multiple attempts, learning through trial and error to succeed. While developing Arthas, I was already imagining the mechanics of the final bosses of Act II and how future encounters could build on this challenging, immersive design. Arthas’s fight was the first in Defenders of the Light to feature serious custom music. The track, “Laurence, the First Vicar” from Bloodborne, adds a sad and painful undertone, reflecting Arthas’s loss of his father and the heavy burden of assuming the king’s responsibilities. The music helped convey the emotional weight of his story during the battle. |
| Kaleo | Among the four major bosses in Act I, Kaleo is considered one of the best-designed fights, if not the very best. His creation was inspired while I was watching Logan and listening to “Way Down We Go” by the band Kaleo. The boss’s name was taken directly from the artist, tying the fight to that moment of inspiration. Kaleo is a tough but fair boss, provided players avoid his shockwave attacks. After extensive testing, he was balanced so that level 18 and above is ideal for victory, making him well-suited as post-game content. Since most players finish Act I around levels 18–22, the fight offers a challenging yet achievable test of skill and preparation. |
| Sunken Monster | Because of the unique top-down gameplay in this section, the boss was positioned to create the illusion of an enormous creature, without ever revealing its true size. The design was heavily inspired by the Kraken, emphasizing mystery and scale over direct confrontation. |
| Character | Trivia |
| Fire Demon | Introduced as a major villain in Act I, the Fire Demon seemed destined to be Act II’s final boss. Instead, I subverted expectations by making him the very first boss of the act, catching players completely off guard. This twist was inspired by the shocking early appearance of the Colossal Titan in Attack on Titan. |
| Serpent Knight | Serpent Knight boasts one of the most creative and visually striking ultimate attacks among all bosses. His fight is fun and dynamic, though he was originally too easy to defeat due to low health. A recent update patched this, making him much tougher and more resilient in battle. Consistency in color design is important, as colors tell a story and create visual harmony. All of Serpent Knight’s attacks were designed in shades of purple, matching his team color. This design philosophy extends to other bosses in the campaign, giving each one a distinct and cohesive visual identity. |
| Greater Thunder Phoenix | After several quests centered on finding the Thunder Phoenix, it needed a proper appearance in the campaign. The Greater Thunder Phoenix was introduced as a miniboss to provide closure for the questline, giving players a satisfying payoff to their journey. |
| Maleet | Maleet’s design was inspired by the Shahriyar boss fight from Nier Replicant, where players must strike specific weak points. Though adapted differently in Warcraft III, the mechanics created a unique encounter that fit perfectly with Sira’s playstyle. Without using Sira’s ability hotkeys, this fight can become one of the toughest challenges in the campaign. |
| Sira | Sira was designed to subvert expectations, evolving from a comic relief support into a powerful playable character capable of handling challenges on her own. This shift not only surprised players but also raised deeper questions about her true identity and role in the story. Sira’s section experimented with turning Warcraft III into a Dark Souls-style experience, where mana functions like stamina and her blink acts as a dodge. With careful dodging and resource management, players can avoid all enemy attacks, mirroring Souls gameplay. This style of combat was fully replicated later in my other campaign, Bows and Arrows. |
| Mammoth Hurler | The Mammoth Hurler is the caster counterpart to the Mammoth Ravager, normally requiring all three heroes to defeat. Facing it with only one hero makes it boss-level difficulty. The fight features “Arceus Battle Theme Remix” by Luigigigas, creating a sense of awe at encountering such a powerful enemy and rewarding players for progressing far into this optional quest. |
| Giant Magnataur | Giant Magnataur may not be the most memorable boss, but it serves as a checkpoint to the next area, testing all the skills players have learned. Its unique net ability pulls in enemies, dealing damage and stunning them. While challenging and fun, the boss doesn’t have a major narrative role, existing primarily to provide a skill-based obstacle for players. |
| Reika | Reika, Thrall’s spirit wolf, is a unique boss who remains invisible until attacking. He was directly inspired by Aava, the King’s Pet from Dark Souls 2. The campaign also features Lud and Zallen as a double-boss encounter, drawing from the same Dark Souls 2 fight and using mechanics similar to Reika’s, emphasizing stealthy and surprising attacks. The Dust of Appearance, sold in a prior map, can trivialize the fight with Reika by revealing her invisibility. However, the game is designed so players wouldn’t expect invisible units to appear. Knowing this, players can choose to buy the item in future playthroughs to make the encounter much easier if they wish. |
| Spider Monster | Besides the final bosses, the Spider Monster is one of the most challenging fights, recommended for heroes at level 40. Beyond its difficulty, the boss is tied to the campaign’s best-written optional quest, representing the pinnacle of what Defenders of the Light aims to achieve. Crafting this encounter and quest was a source of great pride for the developer. The Spider Monster’s backstory connects not only to Karim and the creature itself but also to Adias and his daughter, Talia. The story creates suspense, leaving players unsure if the monster might actually be Talia. Regardless of the truth, Adias feels the emotional impact of hearing his daughter’s name spoken by Karim, the monster hunter. |
| Sira Moonwarden | Sira Moonwarden’s design represents the peak of my vision for Defenders of the Light. Every attack is clearly telegraphed, dodgeable, and balanced—simple to read, not overloaded with effects or colors, yet still threatening enough to demand precision. Players must learn to dodge while striking back at the right moments. This encounter stands as the best boss fight in the entire campaign. Narratively, Sira’s final boss fight ties together her entire journey. She begins as a guide, later becomes a playable hero, and ultimately stands as the last foe. This progression reflects her deep connection to the heroes’ story while still leaving many mysteries about her past and motives. Her betrayal at the end raises lingering questions, adding weight to both her character and the Act’s conclusion. Sira was written to be down-to-earth and likable throughout the Act, with The_Messenger’s dialogue making her even more endearing. By the end, those positive feelings were abruptly taken away without explanation, leaving players confused and conflicted. This was intentional, meant to challenge expectations and emotions. Whether it was effective or not remains uncertain, but the impact was undeniable. |
| Terenas | The revelation of Terenas as a boss is one of the story’s greatest surprises. After the “final boss” fight with Sira Moonwarden, players wouldn’t expect another battle. Instead of simply meeting the Oracle, the twist of the Fire Demon killing him—and forcing Adias to fight Terenas—creates a shocking and memorable conclusion. In earlier versions of Act II, the story ended with the heroes meeting the Oracle for guidance on their journey. Terenas wasn’t part of that plan, but he was later added to provide closure to his “missing” presence throughout the campaign. This change elevated the ending, creating a new climax while giving long-awaited resolution to a character players had heard about since the beginning. Terenas’s boss fight was inspired by Artorias, the Abyss Walker from Dark Souls. His AI is the most complex in the campaign, even more advanced than Sira’s. It reacts dynamically to Adias’s position—using close-range attacks when nearby and ranged abilities when farther away. As Terenas weakens, his chances of unleashing deadlier attacks increase, making the fight progressively more dangerous and intense. The fight’s colors were designed to mirror the campaign’s main logo: purple and yellow. Purple, seen in the unique terrain, represents the Dark, while yellow, used for all of Terenas’s attacks, represents the Light. Visually, this creates a striking battle between Light and Dark. Although Terenas is controlled by the Dark, his attacks still carry the brilliance of Light. |
Last edited:


