- Joined
- Jul 28, 2021
- Messages
- 858
I was asked to make this model and didn't have to recreate the reference. However, I cannot apply half measures to what I do, not my style! So I decided to dive deeper into the process and this is how it happened:

Due to being busy with a big project and lack of time (yes, around 4 months ago I picked up modeling with the only purpose - to help myself with my own map) I can't take requests for models, because I don’t have enough time to create models for my own pleasure, to create what I can offer people on Hive. But for once, I tried to find time for this model because I could not refuse the call of a staff member for they help run this great place.
Stage 1, the Rifleman.
To speed up the process we should find another model that will be the basis for future work because it contains mesh and animations and, sometimes, even a portrait.
It is unlikely that anyone will argue with the above, but for a start it is worth looking for Hoodwink on the Internet to get a better understanding of the character.
Some proportions (like puffy legs) and animations (like knockbacks while shooting) may remind us of a Rifleman. In addition, a Rifleman has a nice hood with a sharp tip and a well animated cloak, the bones of which can be perfectly used to make Hoodwink's tail move. Sounds like a plan! Then let's take one Rifleman by Ujimasa, remove the rifle, a part of the cloak and change the geometry while looking at the reference:
 My life is for Ner'zhul, it fits! The Rifleman, moreover, can nicely hold a crossbow. Good, good...
Stage 2,the Squirrel the Raccoon.
I need your squirrel, your mesh and your textures.
Wait, but there's no such a model as well as its texture. What about a raccoon? Let's hope it has enough polygons to look well in the Portrait sequence. So, here we pin the Raccoon's head and tail to the Rifleman's body and start re-wrapping.
Inside the Rifleman's texture we see a green pattern with a golden stripe that we successfully use to re-wrap the hood. After that, we re-wrap the rest of the body in such a way that we can easily perceive the hero as an animal, simply by adding a couple of furry spots (on biceps). Then we move the bones of the cloak and connect them to the vertices of the tail. Look at the result:
 Good! The hero now has 3 big pieces of cloth and fur that beautifully alternate with each other, and a nicely moving tail! Let's send this to Alexen and ask if he's okay with this raccoon, so we can faster get rid of the project, lol.
Stage 3, the appearance.
It’s not good for a cute squirrel to walk in rags of an old smelly Dwarf.
Here we need to complete the costume. To do this, we take the texture of Sylvanas, which beautifully connects with the Rifleman's torso near a white fluffy stripe. The pants and boots also go well together. After that, we animate the Raccoon's geoset by adding a layer of orange. We also make a copy of the teeth, so they remain white, and change some facial proportions:

 Hmm, now it's almost a squirrel. But "almost" doesn't count, right?
Stage 4, the Portrait.
Step aside, Michelangelo, we are the sculptors here.
From National Geographics broadcasts, we recall that the shape of the squirrel's muzzle is rather long and narrow, resembling a rat's nose and jaws: in other words, it has the shape of a cone. We also need to make the teeth sharper and bigger and therefore more expressive.
But what else makes a squirrel a squirrel? Perhaps these little ear tassels:
 See? Sometimes only the smallest but distinctive details create the exact image! Just imagine how adorably they will bounce when the hero shoots or runs, but let's put this aside for now.
Remember that we still have facial bones that were used to animate the Dwarven face? We can try to use them to create a living muzzle with an illusion of speaking. Here we move the cheek and lip bones back and forth, use the beard bone for the tip of the nose, connect them... Now let's see what we have there:
 Looks good! By the way, we should make the camera face the muzzle to hide some imperfections.
Stage 5, the weapon.
Wait a minute, the reference crossbow is a complex automatic weapon with lots of details?
But we shouldn't get frustrated! To save time and energy, we'd better follow the art style of Warcraft and rely on Hive's resources. This is the way, otherwise we risk falling out of the atmosphere (winks).
Some time later, we dug up Radagast's fancy crossbow, which suits a hero unit. This crossbow looks quite expressive: it has golden parts, a lovely texture and a beautiful eagle-shaped tip.
Here we re-wrap the crossbow to create a dark socket for the arrow in the middle and copy-paste a bowstring from an Elven Archer. Then we place the bowstring into the crossbow's geoset so that it acquires the appropriate rope texture:
 Done! Now we need to work with some other mesh and bones to make the hero hold the crossbow properly.
Stage 6, the animations.
After changing the geometry of the model to look more like a reference, we move on to animations or so-called sequences, which many modelers dislike or even HATE.
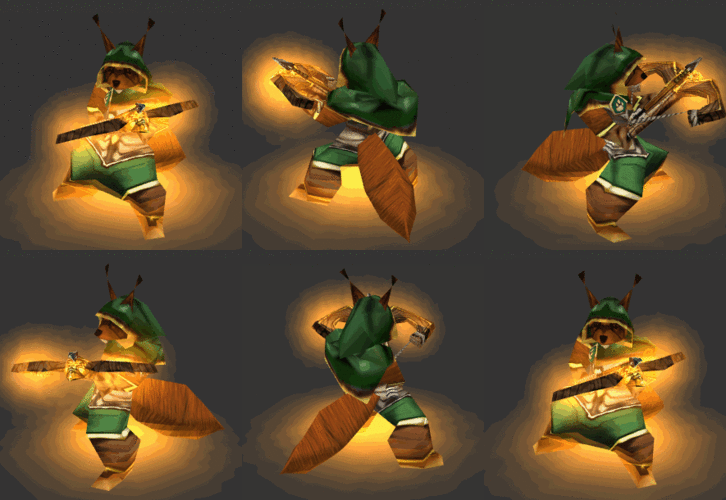
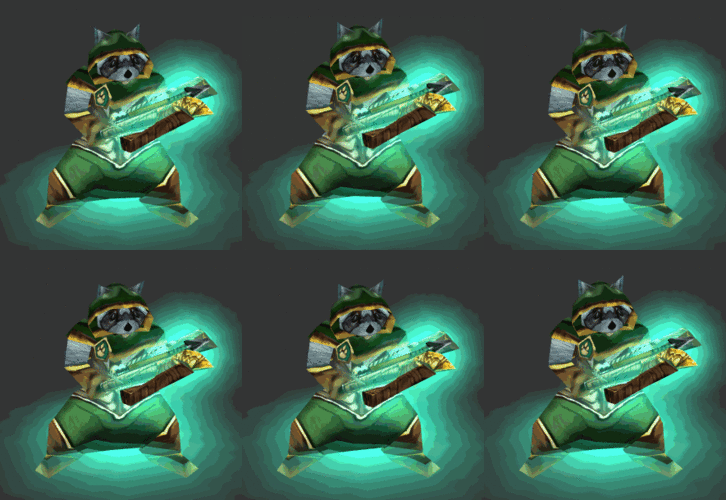
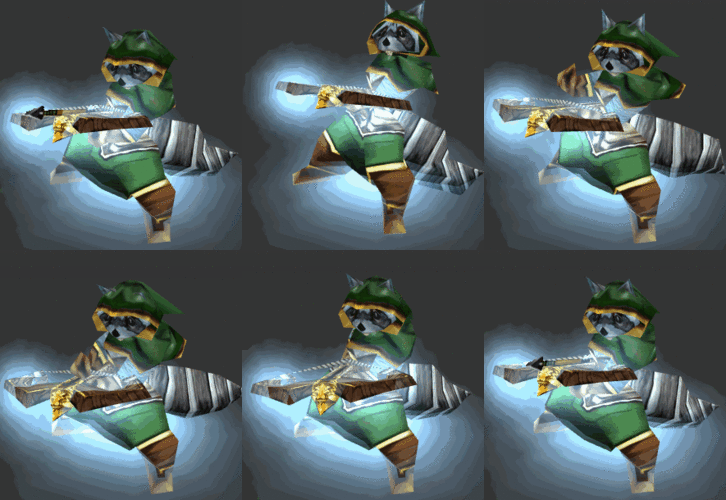
Putting our hatred aside, we think about the animations that get our model even closer to Hoodwink. So, we'd like to have a Spell sequence (which, by the way, is quite versatile) and a Spell Throw one:

For the Spell Sequence we want something like a big spark that can highlight a super-shot of this hero. While looking for a canonic spell effects we decide to use this one:

 The effect is bright, fits the color scheme, and we can also copy the particle emitter, which is nice too.
After a few adjustments we get almost the same effect on our hero:
 But we shouldn't forget to test it in the sanity tester instead of looking at it in our model editor!
And what about the Spell Throw sequence? Not a problem. We move the right hand with the weapon aside, while our torso moves backwards, head to the left, then after a few frames we move the left leg and the left arm and... Listen, we just need to repeat the same things we do in real life when we want to throw something with our left hand to make the animation look natural, that easy! (NO.)
 It is very important that the hero faces the starting direction of the Stand sequence. But we always knew it, right?
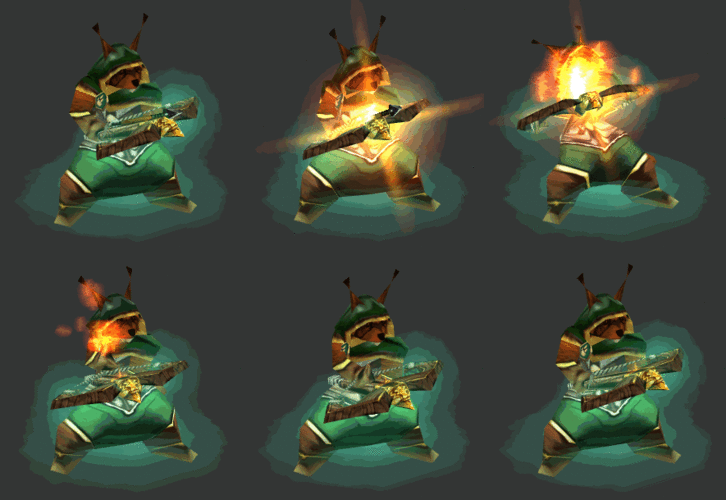
However, we are still far from the finish line! We need to fix old animations, remove the unused ones, add a Dissipate sequence, add hero glow and animate the little fluffy ears in each sequence, just like here:

Stage 7, the optimization.
You're not a good modeler if you don't optimize your models.
In other words, to avoid crashes and have a smoothly working light-weight model we have to deal with this:
Besided fixing those issues, we need to add such objects like footprints, bloodsplatters and sounds; adjust attachment points, collision, linearize animations, get more coffee and so on.
When we're finished with the optimization we should make a pause. It is very important to stop from time to time and look at our creation from afar in order to restore the freshness of vision:
 Hmm, it looks like the cape is too simple and needs more love.
Then how about adding a cute little pawprint badge in Warcraft-style to emphasize the animal spirit of the hero? In addition, there is a necklace on the reference, which supports our idea as well. Let's have a look:
 Fits well, doesn't it?
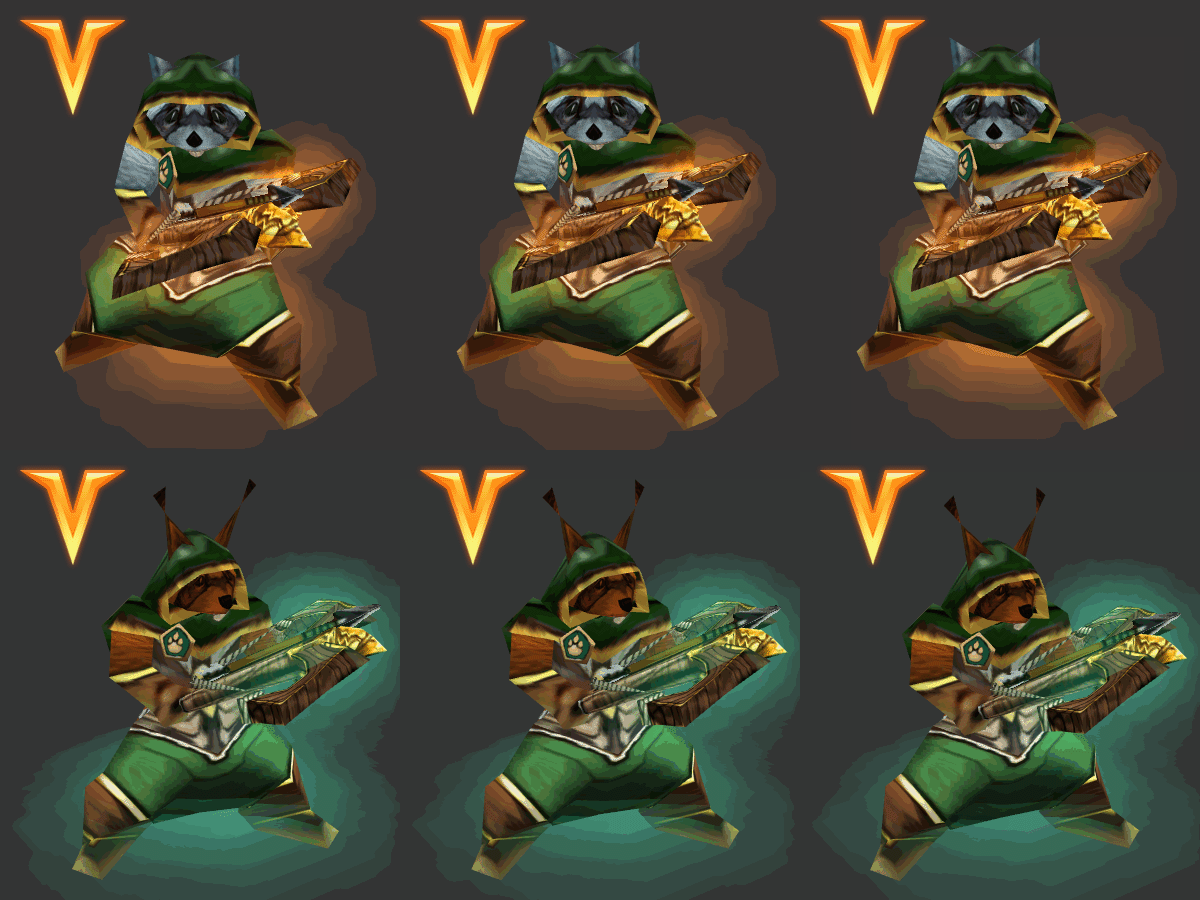
Oh, we can also make a raccoon model that can be used as an additional skin for the hero. Let's call it Robincoon! Either way, two heroes are better than one:
 Another little brother is ready and now we can finally call it a day or... wait. We still need to re-wrap our arrow so it has white feathers and visually corresponds to projectiles from the game. Sheesh, we almost forgot!
Once again it turns out that it takes real effort to make even a small model look alive and be a worthy embodiment of the reference. But, one thing's for sure: if you enjoy the creative process, you will always have more energy to bring your ideas to life.
For now, I sincerely hope you guys enjoyed reading the post and learned something interesting for yourselves!
Hope to see you in the next issue of my modeling magazine, kek.
Many thanks to @Ujimasa Hojo and @Radagast!
Time spent on the model: 2 days (8 hours total).
To speed up the process we should find another model that will be the basis for future work because it contains mesh and animations and, sometimes, even a portrait.
It is unlikely that anyone will argue with the above, but for a start it is worth looking for Hoodwink on the Internet to get a better understanding of the character.
Some proportions (like puffy legs) and animations (like knockbacks while shooting) may remind us of a Rifleman. In addition, a Rifleman has a nice hood with a sharp tip and a well animated cloak, the bones of which can be perfectly used to make Hoodwink's tail move. Sounds like a plan! Then let's take one Rifleman by Ujimasa, remove the rifle, a part of the cloak and change the geometry while looking at the reference:
Stage 2,
I need your squirrel, your mesh and your textures.
Wait, but there's no such a model as well as its texture. What about a raccoon? Let's hope it has enough polygons to look well in the Portrait sequence. So, here we pin the Raccoon's head and tail to the Rifleman's body and start re-wrapping.
Inside the Rifleman's texture we see a green pattern with a golden stripe that we successfully use to re-wrap the hood. After that, we re-wrap the rest of the body in such a way that we can easily perceive the hero as an animal, simply by adding a couple of furry spots (on biceps). Then we move the bones of the cloak and connect them to the vertices of the tail. Look at the result:
Stage 3, the appearance.
It’s not good for a cute squirrel to walk in rags of an old smelly Dwarf.
Here we need to complete the costume. To do this, we take the texture of Sylvanas, which beautifully connects with the Rifleman's torso near a white fluffy stripe. The pants and boots also go well together. After that, we animate the Raccoon's geoset by adding a layer of orange. We also make a copy of the teeth, so they remain white, and change some facial proportions:
Stage 4, the Portrait.
Step aside, Michelangelo, we are the sculptors here.
From National Geographics broadcasts, we recall that the shape of the squirrel's muzzle is rather long and narrow, resembling a rat's nose and jaws: in other words, it has the shape of a cone. We also need to make the teeth sharper and bigger and therefore more expressive.
But what else makes a squirrel a squirrel? Perhaps these little ear tassels:
Remember that we still have facial bones that were used to animate the Dwarven face? We can try to use them to create a living muzzle with an illusion of speaking. Here we move the cheek and lip bones back and forth, use the beard bone for the tip of the nose, connect them... Now let's see what we have there:
Stage 5, the weapon.
Wait a minute, the reference crossbow is a complex automatic weapon with lots of details?
But we shouldn't get frustrated! To save time and energy, we'd better follow the art style of Warcraft and rely on Hive's resources. This is the way, otherwise we risk falling out of the atmosphere (winks).
Some time later, we dug up Radagast's fancy crossbow, which suits a hero unit. This crossbow looks quite expressive: it has golden parts, a lovely texture and a beautiful eagle-shaped tip.
Here we re-wrap the crossbow to create a dark socket for the arrow in the middle and copy-paste a bowstring from an Elven Archer. Then we place the bowstring into the crossbow's geoset so that it acquires the appropriate rope texture:
Stage 6, the animations.
After changing the geometry of the model to look more like a reference, we move on to animations or so-called sequences, which many modelers dislike or even HATE.
Putting our hatred aside, we think about the animations that get our model even closer to Hoodwink. So, we'd like to have a Spell sequence (which, by the way, is quite versatile) and a Spell Throw one:
For the Spell Sequence we want something like a big spark that can highlight a super-shot of this hero. While looking for a canonic spell effects we decide to use this one:
After a few adjustments we get almost the same effect on our hero:
And what about the Spell Throw sequence? Not a problem. We move the right hand with the weapon aside, while our torso moves backwards, head to the left, then after a few frames we move the left leg and the left arm and... Listen, we just need to repeat the same things we do in real life when we want to throw something with our left hand to make the animation look natural, that easy! (NO.)
However, we are still far from the finish line! We need to fix old animations, remove the unused ones, add a Dissipate sequence, add hero glow and animate the little fluffy ears in each sequence, just like here:
Stage 7, the optimization.
You're not a good modeler if you don't optimize your models.
In other words, to avoid crashes and have a smoothly working light-weight model we have to deal with this:
When we're finished with the optimization we should make a pause. It is very important to stop from time to time and look at our creation from afar in order to restore the freshness of vision:
Then how about adding a cute little pawprint badge in Warcraft-style to emphasize the animal spirit of the hero? In addition, there is a necklace on the reference, which supports our idea as well. Let's have a look:
Oh, we can also make a raccoon model that can be used as an additional skin for the hero. Let's call it Robincoon! Either way, two heroes are better than one:
Once again it turns out that it takes real effort to make even a small model look alive and be a worthy embodiment of the reference. But, one thing's for sure: if you enjoy the creative process, you will always have more energy to bring your ideas to life.
For now, I sincerely hope you guys enjoyed reading the post and learned something interesting for yourselves!
Hope to see you in the next issue of my modeling magazine, kek.
Many thanks to @Ujimasa Hojo and @Radagast!
Time spent on the model: 2 days (8 hours total).
Due to being busy with a big project and lack of time (yes, around 4 months ago I picked up modeling with the only purpose - to help myself with my own map) I can't take requests for models, because I don’t have enough time to create models for my own pleasure, to create what I can offer people on Hive. But for once, I tried to find time for this model because I could not refuse the call of a staff member for they help run this great place.
Last edited:

 Approved




 :
: