• Listen to a special audio message from Bill Roper to the Hive Workshop community (Bill is a former Vice President of Blizzard Entertainment, Producer, Designer, Musician, Voice Actor) 🔗Click here to hear his message!
  • Read Evilhog's interview with Gregory Alper, the original composer of the music for WarCraft: Orcs & Humans 🔗Click here to read the full interview.
  • The Hive's 22nd Icon Contest: Creep Abilities is now concluded, time to vote for your favourite set of icons! Click here to vote!
  • ✅ The POLL for Hive's Texturing Contest #34 is OPEN! Vote for the TOP 3 SKINS! 🔗Click here to cast your vote!
  • ✅ The POLL for Hive's Techtree Contest #20 is OPEN! Vote for the TOP 3 FACTIONS! 🔗Click here to cast your vote!

Awesome Skin, but no Icon.

Status
Not open for further replies.
Creating Icons

The easiest way for mapmakers to create their own custom icons is to capture a screenshot of the model and then convert the image into a .blp file.
  1. Apply that WARDENSKELETON to the warden model.
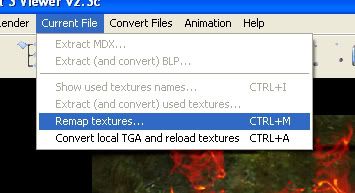
  2. Open the model using Warcraft III Viewer.
  3. Focus the view to best advantage.
  4. Capture the screen shot and paste it into your image editing software.
  5. Edit the image to create a standard 64X64 war3 icon (with borders).
  6. Create the disabled version using W3IR or icon layer for Photoshop.
  7. Convert the images into .blp icons using Warcraft III Viewer.
  8. Test your new icons in Warcraft III.
DO NOT upload screenshot icons to THW. Refer to the icon rules preview.
 
change.jpg


and apply the skin by selecting the main path and change and apply the custom skin.
 
Status
Not open for further replies.
Back
Top