Community
Maps
Tutorials
Gallery
Support Us
Install the app
-
Listen to a special audio message from Bill Roper to the Hive Workshop community (Bill is a former Vice President of Blizzard Entertainment, Producer, Designer, Musician, Voice Actor) 🔗Click here to hear his message!
-
Read Evilhog's interview with Gregory Alper, the original composer of the music for WarCraft: Orcs & Humans 🔗Click here to read the full interview.
-
Create a faction for Warcraft 3 and enter Hive's 19th Techtree Contest: Co-Op Commanders! Click here to enter!
-
Create a void inspired texture for Warcraft 3 and enter Hive's 34th Texturing Contest: Void! Click here to enter!
-
The Hive's 21st Texturing Contest: Upgrade is now concluded, time to vote for your favourite set of icons! Click here to vote!
You are using an out of date browser. It may not display this or other websites correctly.
You should upgrade or use an alternative browser.
You should upgrade or use an alternative browser.
Need Recolors + Icons
- Status
- Not open for further replies.
- Joined
- Jan 28, 2016
- Messages
- 486
I could have a go at the icons if you want but you'd have to find someone else for models/skins. :/
Btw are the icons for the units meant to be 'corrupted' like this?

Btw are the icons for the units meant to be 'corrupted' like this?

- Joined
- Feb 8, 2013
- Messages
- 1,479
- Joined
- Feb 8, 2013
- Messages
- 1,479
How to recolor a skin.
Recommended tools:
BLP Lab
http://www.hiveworkshop.com/forums/tools-560/warcraft-iii-viewer-62878/
Step 1:
Use one of many tools to extract your skin. I recommend, Image Extractor or Model Viewer. These tools are available in the hive's tool forum. Also, MPQ Extractor works. You may also be able to find them online sometimes.
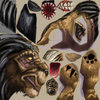
Here, now we have the skin:

Step 2:
Go to http://pixlr.com and import the skin as a jpeg or png. If the skin requires transparency, you will want to extract the skin as a blp and convert it to png with BLP Lab. That's another tool from the Hive's tool forum. Now load the skin into pixlr.
Step 3:
Use the select tools to section off the areas that you want to re-color or as I did here, the areas you don't want to recolor. If you did like I did, you will need to go to edit and click "invert selection." Now everything will be selected EXCEPT the areas that we don't want to change. Selected areas - Tools

Step 4:
Now go to adjustments and click "hue and saturation." This will let you adjust the hue and "re-color." I moved the saturation up a touch too and added a slight bit of contrast. It just seemed like it made things look smoother.

Step 5:
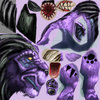
Now invert one more time a touch up the areas we left. I didn't want to turn the eye, mouth and teeth purple here. I figure if you wanted that you could adjust in it OE. Now I touch them up so the will blend with the rest of the skin. I use de-saturate to remove brown from the edges and adjust contrast for increasing the shadows and brights. Now your re-color is done and you are ready to convert it back to BLP format.

Of course, you can adjust the color of as many different sections as you want. Feel free to use the paint tool as well. You will realize it's pretty easy after you do a few and you might even want to submit them to the simple edits thread.
To get this skin, click the thumbnail and then right-click on the larger image. Then select "save image" and download it. The convert it to TGA or BLP and import it to World Editor and use Pathname: units\Creeps\GrizzlyBear\BrownBear.blp.
Recommended tools:
BLP Lab
http://www.hiveworkshop.com/forums/tools-560/warcraft-iii-viewer-62878/
Step 1:
Use one of many tools to extract your skin. I recommend, Image Extractor or Model Viewer. These tools are available in the hive's tool forum. Also, MPQ Extractor works. You may also be able to find them online sometimes.
Here, now we have the skin:

Step 2:
Go to http://pixlr.com and import the skin as a jpeg or png. If the skin requires transparency, you will want to extract the skin as a blp and convert it to png with BLP Lab. That's another tool from the Hive's tool forum. Now load the skin into pixlr.
Step 3:
Use the select tools to section off the areas that you want to re-color or as I did here, the areas you don't want to recolor. If you did like I did, you will need to go to edit and click "invert selection." Now everything will be selected EXCEPT the areas that we don't want to change. Selected areas - Tools

Step 4:
Now go to adjustments and click "hue and saturation." This will let you adjust the hue and "re-color." I moved the saturation up a touch too and added a slight bit of contrast. It just seemed like it made things look smoother.

Step 5:
Now invert one more time a touch up the areas we left. I didn't want to turn the eye, mouth and teeth purple here. I figure if you wanted that you could adjust in it OE. Now I touch them up so the will blend with the rest of the skin. I use de-saturate to remove brown from the edges and adjust contrast for increasing the shadows and brights. Now your re-color is done and you are ready to convert it back to BLP format.

Of course, you can adjust the color of as many different sections as you want. Feel free to use the paint tool as well. You will realize it's pretty easy after you do a few and you might even want to submit them to the simple edits thread.
To get this skin, click the thumbnail and then right-click on the larger image. Then select "save image" and download it. The convert it to TGA or BLP and import it to World Editor and use Pathname: units\Creeps\GrizzlyBear\BrownBear.blp.
- Joined
- Jan 28, 2016
- Messages
- 486
Well, looks like I'm no longer needed...
**slowly backs out of the room**
**slowly backs out of the room**
Ardenian
A
Ardenian
Please post the texture
Ardenian
A
Ardenian
It is the alpha channel, there is none. If you use GIMP, don't color alpha channel black after you added alpha channel to a layer, but just remove all color. Use TGA and then convert to blp.
The attached one should work. You can reduce the quality and file size with blplab
The attached one should work. You can reduce the quality and file size with blplab
Last edited by a moderator:
- Joined
- Feb 8, 2013
- Messages
- 1,479
If you extract the skin as a BLP and convert to PNG without changes to the alpha, then you should have exactly what the game uses in an editable form. Once you are done then save it back to BLP.
Yeah but, i didn't use GIMP, i used instead the page legal ease told me about, and just changed colors, i think i touched something in blplab about the alpha channel. I will need someone to tell me how to not change any alpha channels, just the color.
- Joined
- Feb 8, 2013
- Messages
- 1,479
Go to "save as" in BLP Lab and click "Alpha Channel" and then make sure that "Leave with no changes" is selected otherwise it may add or remove an alpha channel.
- Joined
- Feb 8, 2013
- Messages
- 1,479
I doesn't work, black textures still there.
Do they appear in your PNG file? If so then you are not extracting it properly. Are you extracting it as a BLP? Then converting to PNG? If so then the alpha layers should remain unchanged.
The other option is to create the transparency in pixlr. You can 'select all' & copy and then create a new image under "file" then 'new.' Make sure to check 'create from clipboard' and 'transparent background.' Then use the wand tool to select the black area and clear it. Now you should see the grey and white checkerboard background that indicates transparency. Now save. Convert to BLP (no alpha changes). And you should have it.
- Status
- Not open for further replies.


