• 🏆 Texturing Contest #33 is OPEN! Contestants must re-texture a SD unit model found in-game (Warcraft 3 Classic), recreating the unit into a peaceful NPC version. 🔗Click here to enter!
  • 🏆 Hive's 6th HD Modeling Contest: Mechanical is now open! Design and model a mechanical creature, mechanized animal, a futuristic robotic being, or anything else your imagination can tinker with! 📅 Submissions close on June 30, 2024. Don't miss this opportunity to let your creativity shine! Enter now and show us your mechanical masterpiece! 🔗 Click here to enter!

3ds max 5 animation problem

Status
Not open for further replies.
Level 1
Joined
Apr 18, 2011
Messages
3
Hello guys, I encounter this weird problem.
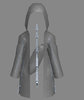
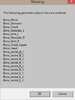
every time I use 3dsmax 5 art tool (preview model) the bone geometry is always showing. and also the bone is not link to the mesh even the mesh is "skinned"
I attached a screenshots of my problems.

thank you for reading this.
 

Attachments

  • 1.jpg
    1.jpg
    30.9 KB · Views: 141
  • 2.jpg
    2.jpg
    47.2 KB · Views: 83
  • 3.jpg
    3.jpg
    81 KB · Views: 123
Generally you don't need to use max bones, unless you are doing IK (which are with certain tool later converted to ordinary mesh). You can animate whole part of geosets, but it's not recommended. Usually I make bones from small boxes, positioned at pivot points, then marked as 'bone'. I didn't see how you rigged it, but for 3dsmax5 the usual procedure is to break the mesh (detach) into various parts you want to move, each part linked to the bone. There may be holes at first, but select all parts you want to be connected and mark them as connected in user property editor.
 
Level 1
Joined
Apr 18, 2011
Messages
3
Generally you don't need to use max bones, unless you are doing IK (which are with certain tool later converted to ordinary mesh). You can animate whole part of geosets, but it's not recommended. Usually I make bones from small boxes, positioned at pivot points, then marked as 'bone'. I didn't see how you rigged it, but for 3dsmax5 the usual procedure is to break the mesh (detach) into various parts you want to move, each part linked to the bone. There may be holes at first, but select all parts you want to be connected and mark them as connected in user property editor.


wow! thank you again for your response, I solve all the problems by getting ideas from you replies.
this thread can be close now.

Thank you very much!.
 
Status
Not open for further replies.
Top