- Joined
- Apr 24, 2012
- Messages
- 9,813


Hi, people! This is my first ever tutorial, so please be gentle. This is all about making Pathing Blockers larger than the two defaults.
1. What is Pathing?
This tutorial is not going discuss what is pathing in great detail, as there are many other tutorials that do so. Pathing tutorials can be found here and here.
Basically, pathing determines what kind of units can go through a certain area in a map, be it air-blockers, ground-blockers, or Pathing Blockers ('Both').
This tutorial is going to focus on ground pathing blockers as they are the most widely used for terraining purposes, such as creating custom cliffs. Tutorial about that here.
2. Why Upsize?
Why create larger pathing blockers, when small blockers can block everything eventually? Well, first, it's a waste of effort if you're blocking huge areas. Yes, there are larger placement brushes, but it somehow feels less messy when you use large blockers.
Also, there are Destructible limits for non-JNGP editors, so if your map is huge, large blockers might be handy.
3. Renaming
First, we're going to name the regular one-block pathing blocker 'Tiny'.

It doesn't really matter if you name it tiny or not, it just adds clarity later on when you choose pathing blockers from the terrain editor.
Second, rename the default 'Large' pathing blocker into something around 'Small'. Yes, it is indeed small.
4. Creating New Blockers
Click the create Destructible button:
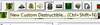
Base it off the Pathing Blocker (Small). Now, modify its pathing texture field to the corresponding size you want:
(Size; String Path)
Medium: PathTextures\6x6SimpleSolid.tga
Large: PathTextures\8x8Default.tga
Huge: PathTextures\10x10SimpleSolid.tga
Gargantuan: PathTextures\12x12Default.tga
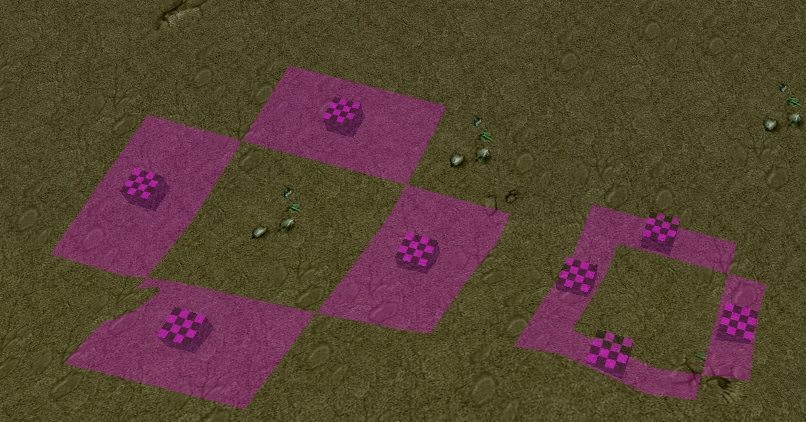
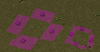
5. Using Blockers
They look like these in the terrain editor if you press 'P' after placing them.

==========
Yeah the tutorial is /so/ simple, but I wanted to share it with multiple people and thought that sending away links to the tutorial is easier than actually copy-pasting the message.
It's mostly for beginners anyways. I remember the time when I didn't know how to create custom objects... </3
1. What is Pathing?
This tutorial is not going discuss what is pathing in great detail, as there are many other tutorials that do so. Pathing tutorials can be found here and here.
Basically, pathing determines what kind of units can go through a certain area in a map, be it air-blockers, ground-blockers, or Pathing Blockers ('Both').
This tutorial is going to focus on ground pathing blockers as they are the most widely used for terraining purposes, such as creating custom cliffs. Tutorial about that here.
2. Why Upsize?
Why create larger pathing blockers, when small blockers can block everything eventually? Well, first, it's a waste of effort if you're blocking huge areas. Yes, there are larger placement brushes, but it somehow feels less messy when you use large blockers.
Also, there are Destructible limits for non-JNGP editors, so if your map is huge, large blockers might be handy.
3. Renaming
First, we're going to name the regular one-block pathing blocker 'Tiny'.
It doesn't really matter if you name it tiny or not, it just adds clarity later on when you choose pathing blockers from the terrain editor.
Second, rename the default 'Large' pathing blocker into something around 'Small'. Yes, it is indeed small.
4. Creating New Blockers
Click the create Destructible button:
Base it off the Pathing Blocker (Small). Now, modify its pathing texture field to the corresponding size you want:
(Size; String Path)
Medium: PathTextures\6x6SimpleSolid.tga
Large: PathTextures\8x8Default.tga
Huge: PathTextures\10x10SimpleSolid.tga
Gargantuan: PathTextures\12x12Default.tga
5. Using Blockers
They look like these in the terrain editor if you press 'P' after placing them.
6. Unused Ground Blockers
In the Object Editor you can find many ground blockers, some are rectangular just like the Windmill texture:
PathTextures\6x8Default.tga
There are a few cases where though the texture is not used by default, they're still usable. Most of them are under the size of 12, such as:
PathTextures\8x10Default.tga
PathTextures\6x10Default.tga
PathTextures\2x8Default.tga
7. Custom Blockers
I won't explain this myself as it's already explained here and I would just probably copy paste what he wrote and be flamed upon. Anyways, I think Photoshop is used for this 90% of the time.
==========
Yeah the tutorial is /so/ simple, but I wanted to share it with multiple people and thought that sending away links to the tutorial is easier than actually copy-pasting the message.
It's mostly for beginners anyways. I remember the time when I didn't know how to create custom objects... </3
Attachments
Last edited: