- Joined
- Mar 29, 2011
- Messages
- 3,765
WeaponsCreationCreating Attachment Weapon in Gmax using SPLines
Some modelers rely on creating objects from the standard primitives which made the smoothing not as good as expected. Creating a complex geoset can be created using splines, but I am not really sure if many of us, the modelers, know about this. Here's some kind of starting point in creating geoset using splines. From this, you will be able to create a very superb unit with complex features. Yes, complex thing really starts from simple ones. Here, we will just create a simple attachment that if done nicely will be a very useful model.Introduction
1. What you needContents
2. Note
3. The Tutorial
4. Note From the Author
1. GMaxWhat You Need
I will not be covering exporting geosets and texturing in this tutorial. there are tutorials of these kind here.Note
The Tutorial
So, let us begin working.
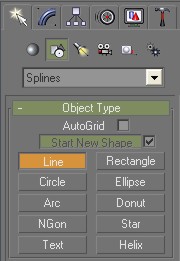
1. On the Create panel > Shapes > Object Type rollout, turn on Line.
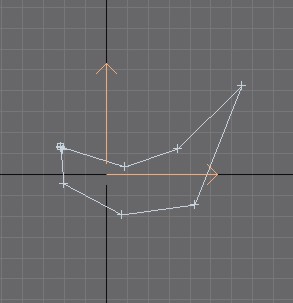
2. Using the Illustration below, draw to create it for our blade. Finish creating the drawing to where you have started. A window should pop up telling you to close spline. Click OK.
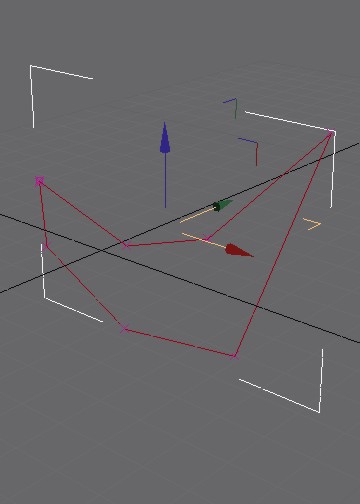
3. Now, click the perspective view port and maximize it. In the modify panel>Selection turn on spline. Lines should turn red just like the illustration below when you click the drawing/object.
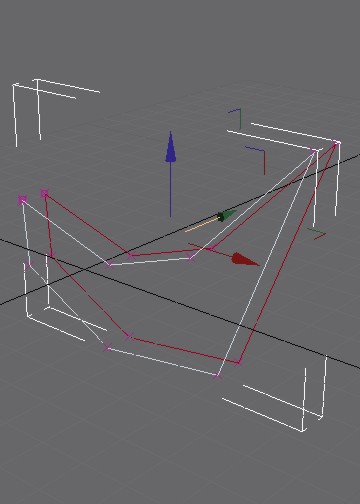
4. Hold shift. Select-hold Y-axis and pull it to the right to copy the selected object/drawing. the result should be like the illustration below.
5.In the modify panel>Selection turn on vertex . In the geometry roll out, turn on Create Line.
 Turn on 3d snap toggle, right click it, check mark vertex. Connect all vertices with a line. End the command by right clicking the mouse. The result should be like the illustration below.
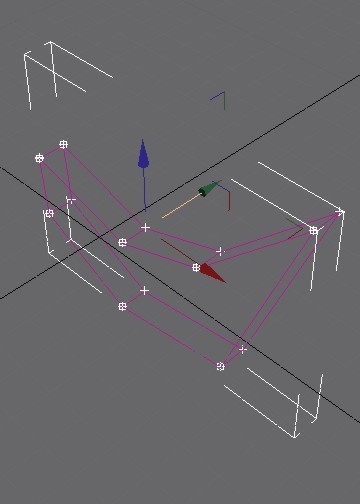
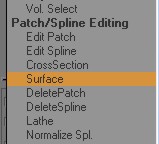
6.In the modify panel>Modifier>Patch SPline Editing select surface . the effect should be like the illustration below; If it isn't, there might be some vertices that isn't connected. In the Path Topology>Steps: type 0. Convert the geoset to editable poly for easy editing.
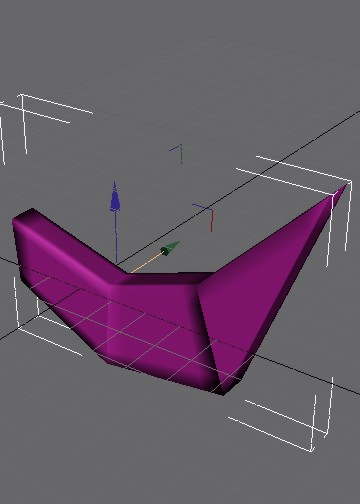
7. Our weapon doesn't have an edge to cut an enemy so we need to create it. In the Modify Panel>Selection Roll Out turn on vertex. In the same panel>edit geometry roll out>weld turn on target. Select some verteces to weld so that the resulting figure/object should be like the image shown below.
Note: The resulting geoset might be awkward, so what you will do is to align some vertices which are miss aligned due to the weld command.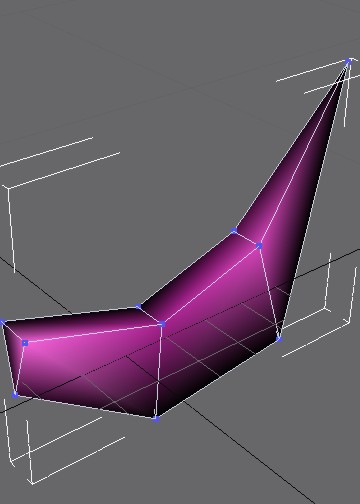
8. Now, we will create the handle to finish our work. Draw another object using the illustration shown.
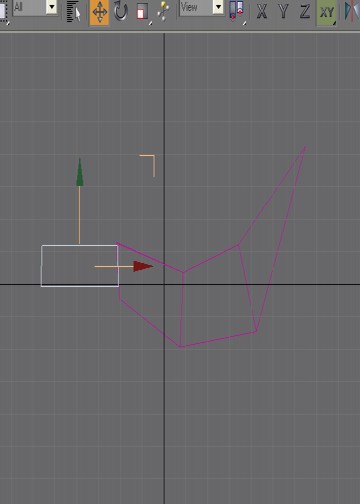
9. Follow step 2 to 6 to create a editable poly from the object drawn. The resulting object with the blade and the handle should be like the illustration below. Sometimes there is a need for you to flip normals if needed. Also, you need to adjust the location of the weapon so that the middle of its handle is exactly positioned at Y=0, x=0, and z=0.
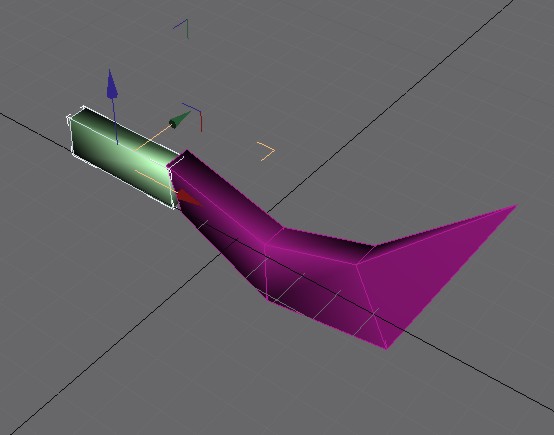
You now have your attachment weapon created from splines. If you like this to be converted into the .mdx format and be used in WC3, you will need to read another tutorials. There are many tutorials regarding unwrapping UVs here so that the weapon you have created will have textures. There is also one tutorial on how to export models from gmax. NeoDex is the best exporter for gmax I guess. The model shown below is the textured model of our project. It has no been converted to editable mesh.Note from the Author
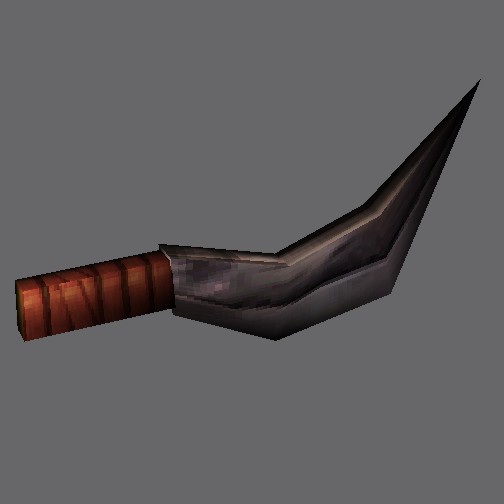
Attachments
-
 vertex.jpg1.3 KB · Views: 3,384
 -
 3dsnaptoggle.jpg1,019 bytes · Views: 3,388
 -
 Step1.jpg14.7 KB · Views: 2,177
 -
 Step2.jpg14.1 KB · Views: 2,205
 -
 Step3.jpg20.3 KB · Views: 2,236
 -
 Step4.jpg25.5 KB · Views: 2,175
 -
 Step5.jpg23.5 KB · Views: 2,171
 -
 Step6.jpg24.6 KB · Views: 2,184
 -
 Step7.jpg26 KB · Views: 2,145
 -
 Step8.jpg21.3 KB · Views: 2,137
 -
 Step9.jpg26.3 KB · Views: 2,152
 -
 modify panel.jpg1.1 KB · Views: 3,386
 -
 patchSPLine Editing.jpg7.3 KB · Views: 2,132
 -
 Final Model.jpg15.8 KB · Views: 2,257
 -
 spline.jpg1.2 KB · Views: 1,423
Last edited:


