• Listen to a special audio message from Bill Roper to the Hive Workshop community (Bill is a former Vice President of Blizzard Entertainment, Producer, Designer, Musician, Voice Actor) 🔗Click here to hear his message!
  • Read Evilhog's interview with Gregory Alper, the original composer of the music for WarCraft: Orcs & Humans 🔗Click here to read the full interview.

Frost Blademaster>>Under Development<<

Status
Not open for further replies.
Level 6
Joined
Jul 23, 2007
Messages
54
Here's my Frost Blademaster (Not Finished):
FrostBlademaster1.jpg

HeroBladeMaster.jpg

And how do you remove the thing on the head? :confused:
FrostBlademasterHead1.jpg

If you help, thnx. (Sry for the HUGE pics)
Edit:p.S. It's all freehand, no CnP at ALL
 
Last edited:
Level 7
Joined
Dec 29, 2006
Messages
365
i really like the necklace, the pants and sword look more aqua than frozen, try making it look more crystal like. right now it looks too much like the water elemental texture. so my suggestions would be to improve it more and make it look "icy". add a little more depth and shade. other than that you are off to a pretty good start, good luck.
 
Level 16
Joined
Mar 26, 2004
Messages
569
First of all i'd suggest using attachments.
And for the head thing, it seems to be using a part of the skin on the pants so you'd have to remove that part of the model. (NOT SURE.)

As inferno said, more icy. Try using "sharpen" filter if you use photoshop. And a little more chilly tint to the skin wouldn't hurt.

Good idea and beginning. /cheer!
 
Level 18
Joined
Oct 7, 2006
Messages
2,077
You also need to put some variation into that ice
Right now its very plain when speaking of ice
Need some dark blues in there
And add some shading to the ice..and yes I know that sounds either
A. impossible
Or B. stupid
But it needs shading
 
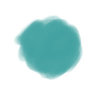
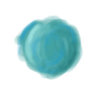
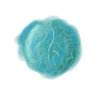
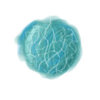
I did this in about 5 mins so it isnt great but it should give you some idea about what he means with ice shading. Heres a VERY quick tutorial to ice.

1. Throw down your base color.

2. Add in some shading of that color and a little blue or purple to give some variation.

3. Put in some smallish white cracks in a new layer, bigger ones with smaller ones branching off.

4. Change the opacity of the layer, then add some darker cracks and thicker white cracks on another new layer.

5. Merge layers.

6. Practice.


EDIT: Oh and since I just happened to make this tutorial on a circular piece of color you cold definitely do something more refined like this for the balls around his neck.
 

Attachments

  • Base color.jpg
    Base color.jpg
    4.5 KB · Views: 140
  • Shading.jpg
    Shading.jpg
    5.4 KB · Views: 194
  • Firstcracks.jpg
    Firstcracks.jpg
    6.8 KB · Views: 138
  • Final Cracks.jpg
    Final Cracks.jpg
    7.5 KB · Views: 145
Status
Not open for further replies.
Top