- Joined
- Sep 9, 2009
- Messages
- 658
Hi, I would just like to share something I find nifty. Some people may already know this but for those who don't, you're in luck because you'll learn something today...hopefully.
Before we start, you'll need to download Magos' Model Editor found here http://www.hiveworkshop.com/forums/tools-560/war3-model-editor-62876/. Now, on with the actual tutorial.
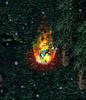
I'll be showing how to customize in-game SFX. What's the purpose of this? Well, there are times when an sfx would be perfect for a spell if it weren't for its colors or some other things. First, take a look at this. This the is the Doomtarget model and this is what we'll be using. Of course, you can choose a model you like.
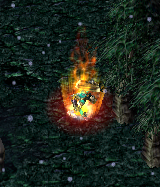
It looks nice doesn't it? However, let's say you want an unholy or ice themed DoT spell. Making a spell like that would be aesthetically challenging as there aren't a lot of sfx options to choose from either in the models section or in the game itself. So we'll have to make our own using DoomTarget. Let's go over this step by step.
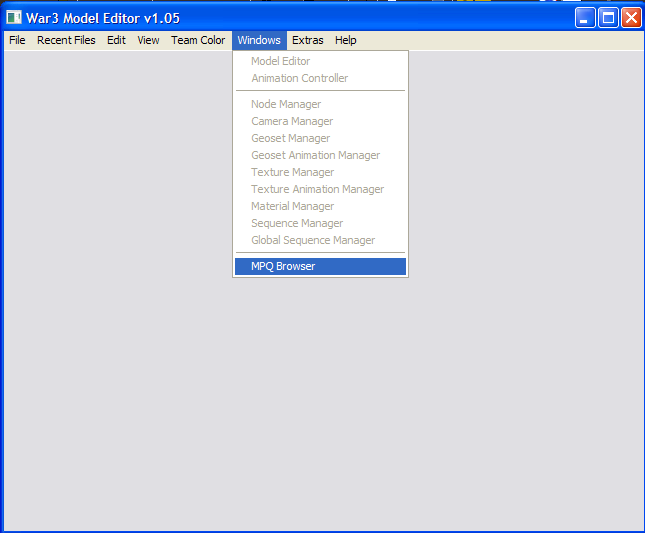
Step 1:
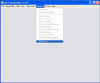
Open Magos, click the Windows tab and click MPQ Browser.
Step 2:
Find the path of your desire model. In our case it's DoomTarget. If you don't know how to find the path, then go to object editor, go to any ability or unit, double click the Art - Model File field and select whatever sfx you want to edit then press OK. Then double click again and look at the custom path.
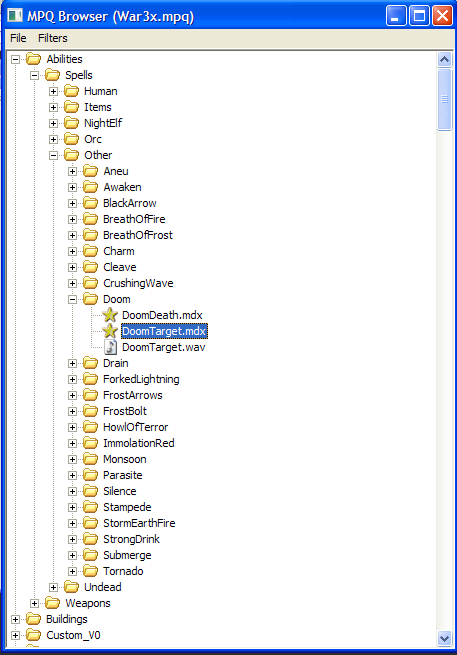
Step 3:
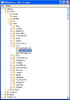
Double click DoomTarget.mdx, then go to Windows -> Node Manager. You'll see small boxes with arrows. They're particle emitters and we'll be editing those.

Step 4:
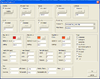
Click on one of them, and you'll see this.
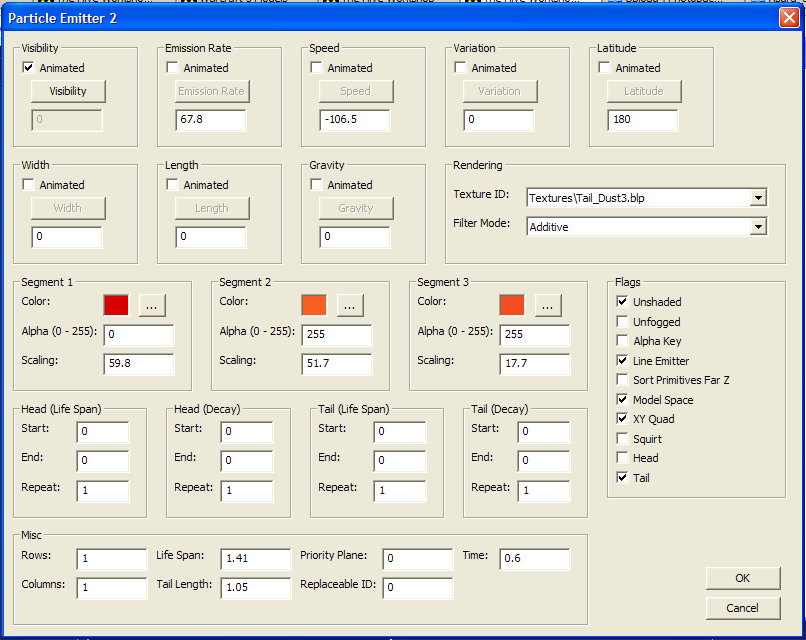
Click the "..." under segment 1. You'll be shown a color selection window. Choose any color which you think will suit your needs. Since I'm editing it with an unholy theme in mind, I'll choose green.
Now, take note here. It's best to match the shade of the new color with the shade of the original. In other words, for segment 1, the color is red, thus it's the darkest shade of color there is. Be sure to pick a color that's also dark in shading to match it.
Do this step for each segment of every particle emitter while keeping in mind to match the shading.
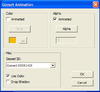
Step 5: Once you're done with editing the particle emitters, we'll now go to the geoset animation manager. It's also under the Windows tab. Doomtarget has two geoset animations. Double click on any one of them. You'll see this.

Click on the "..." again and edit it while keeping in mind shading. Sometimes, you'll see the color is just white. In that case, choose what you think is the best color as you'll really have no way of knowing how it'll turn out until you test your new model ingame. You can always edit your model after you test it ingame.
IMPORTANT TIP: Make sure you have use color checked. Otherwise, your edit won't show properly.
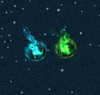
If you're done with the edits, you'll have something like these...

Now you have a pair of sfx which you can use for frost DoT or unholy and fel DoTs. I'll also attach the two models so you can further study them.
FINAL NOTE: For some models, like the AncientExplode model, you'll have to remove either particle emitters or textures. That's because models like the AncientExplode show leaves when they explode and that could get in the way of whatever theme you have in mind.
And that wraps up this tutorial. I hope it was helpful.
EDIT: How do you show attached pictures? I don't know how to do that which is why I'm currently linking the pictures to my photobucket account.
EDIT: Now uses the attachments as pictures instead of linking to another site.
Before we start, you'll need to download Magos' Model Editor found here http://www.hiveworkshop.com/forums/tools-560/war3-model-editor-62876/. Now, on with the actual tutorial.
I'll be showing how to customize in-game SFX. What's the purpose of this? Well, there are times when an sfx would be perfect for a spell if it weren't for its colors or some other things. First, take a look at this. This the is the Doomtarget model and this is what we'll be using. Of course, you can choose a model you like.
It looks nice doesn't it? However, let's say you want an unholy or ice themed DoT spell. Making a spell like that would be aesthetically challenging as there aren't a lot of sfx options to choose from either in the models section or in the game itself. So we'll have to make our own using DoomTarget. Let's go over this step by step.
Step 1:
Open Magos, click the Windows tab and click MPQ Browser.
Step 2:
Find the path of your desire model. In our case it's DoomTarget. If you don't know how to find the path, then go to object editor, go to any ability or unit, double click the Art - Model File field and select whatever sfx you want to edit then press OK. Then double click again and look at the custom path.
Step 3:
Double click DoomTarget.mdx, then go to Windows -> Node Manager. You'll see small boxes with arrows. They're particle emitters and we'll be editing those.
Step 4:
Click on one of them, and you'll see this.
Click the "..." under segment 1. You'll be shown a color selection window. Choose any color which you think will suit your needs. Since I'm editing it with an unholy theme in mind, I'll choose green.
Now, take note here. It's best to match the shade of the new color with the shade of the original. In other words, for segment 1, the color is red, thus it's the darkest shade of color there is. Be sure to pick a color that's also dark in shading to match it.
Do this step for each segment of every particle emitter while keeping in mind to match the shading.
No picture here, as it's up to you what color you like to pick.
Step 5: Once you're done with editing the particle emitters, we'll now go to the geoset animation manager. It's also under the Windows tab. Doomtarget has two geoset animations. Double click on any one of them. You'll see this.
Click on the "..." again and edit it while keeping in mind shading. Sometimes, you'll see the color is just white. In that case, choose what you think is the best color as you'll really have no way of knowing how it'll turn out until you test your new model ingame. You can always edit your model after you test it ingame.
IMPORTANT TIP: Make sure you have use color checked. Otherwise, your edit won't show properly.
If you're done with the edits, you'll have something like these...
Now you have a pair of sfx which you can use for frost DoT or unholy and fel DoTs. I'll also attach the two models so you can further study them.
FINAL NOTE: For some models, like the AncientExplode model, you'll have to remove either particle emitters or textures. That's because models like the AncientExplode show leaves when they explode and that could get in the way of whatever theme you have in mind.
And that wraps up this tutorial. I hope it was helpful.
EDIT: How do you show attached pictures? I don't know how to do that which is why I'm currently linking the pictures to my photobucket account.
EDIT: Now uses the attachments as pictures instead of linking to another site.
Attachments
-
DoomTargetBlue.mdx5.8 KB · Views: 131
-
DoomTargetGreen.mdx5.8 KB · Views: 124
-
 Doom.png71.2 KB · Views: 1,075
 -
 Doom Path.png29.8 KB · Views: 985
 -
 MPQ Browser.png22.9 KB · Views: 1,043
 -
 Geoset Animation.png12.1 KB · Views: 1,004
 -
 Node Manager.png95.8 KB · Views: 1,061
 -
 DoomTargets.png117.8 KB · Views: 1,016
 -
 Particle Emitter.png42.5 KB · Views: 1,047
Last edited:


