- Joined
- May 5, 2011
- Messages
- 132
On this thread I will both share with you some models which will make making attachments for the villager easier and I will show you how to make the dummy models yourself for ANY model you want to make an attachment for!
First let me explain the point of these models.
These models (which I am calling attachment Ref Models for now) are simple models that have been moved to make one of its attachment points move to the pivot point of the whole model.
This allows you to both size a model around the attachment ref model’s geoset and at the same time correctly place it EXACTLY how you want it to be in game on the model.
You will not have to continually upload your attachment to see if it sits right anymore on the model, which can save you time and will allow you more accuracy in your placement of the attachment.
Now I can easily share how to make one yourself for any models you want to make attachments for!
(all you will need is Magos War3 Model Editor and a little bit of basic knowledge about it)
http://www.hiveworkshop.com/forums/tools-560/war3-model-editor-62876/
Now, start by opening up the model you wish to make an attachment ref dummy model of.
(this step is not required at all): if you like you can delete any excess geosets on the model that might be annoying and take up space such as a corpse. For example I have removed the corpse and mining pick from the villager models I have made.
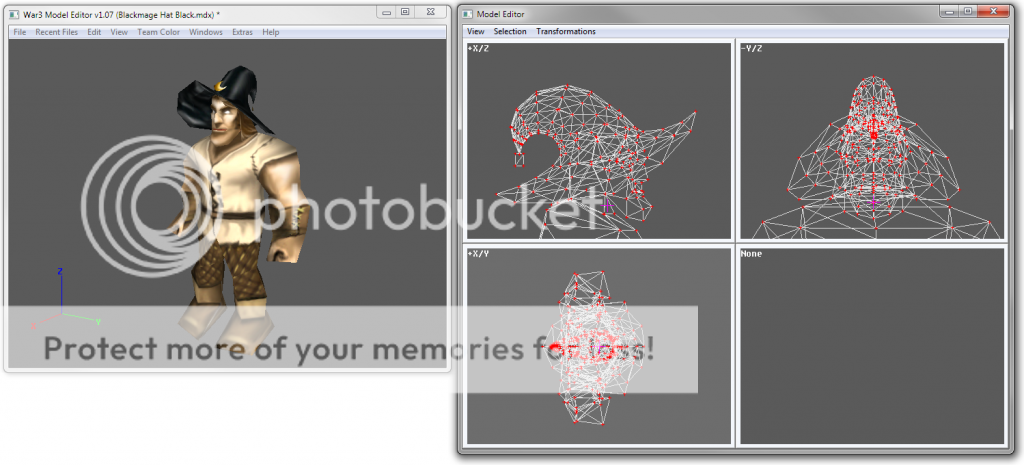
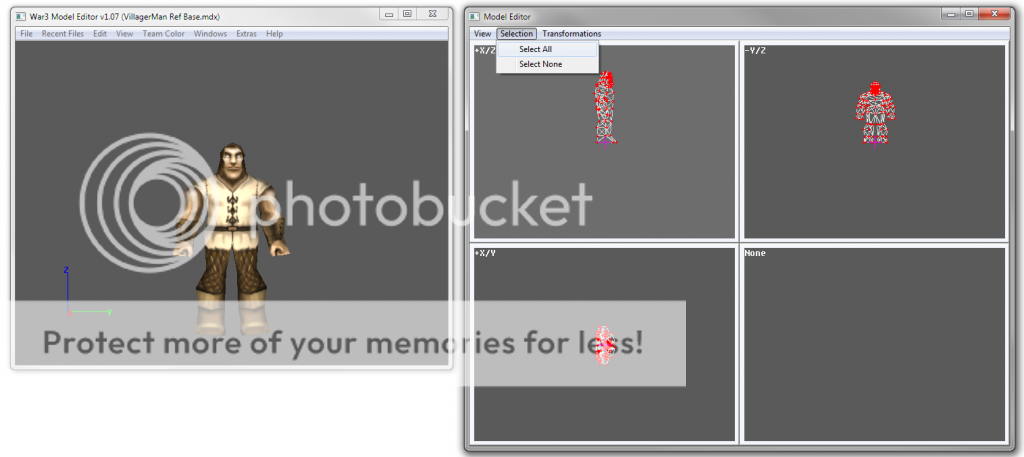
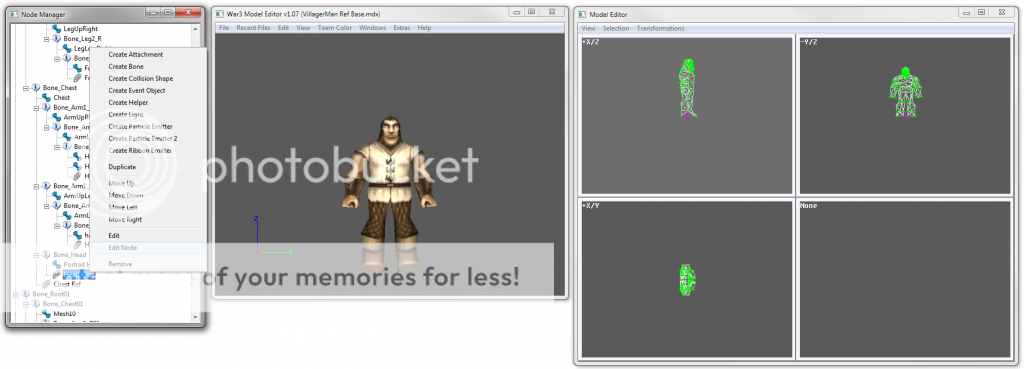
Stap 1: select the entire model in the model editor window
Step 2: Open the node manager and find the attachment point you would like to make an attachment for (it will be called something like Name – Ref). Right click on it and hit edit node to open a new window (edit and edit node are not the same).
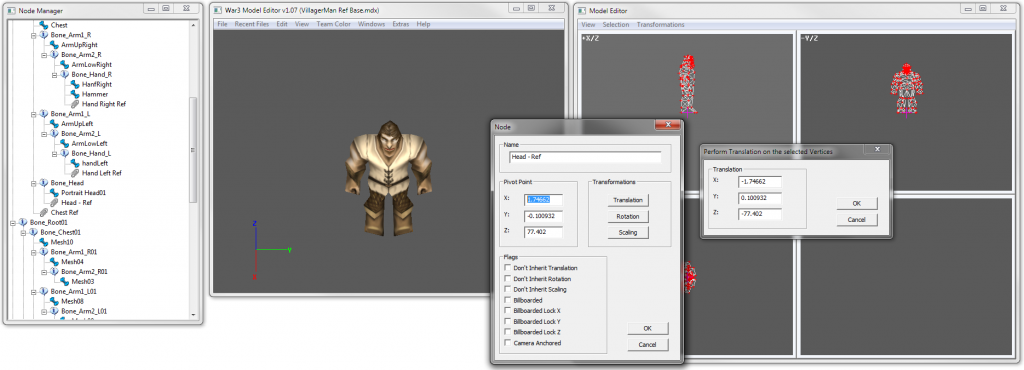
Step 3: In the new window will be some fields as well as some strings of numbers with X: Y: and Z: next to them. These are the attachment point’s translation from the pivot point of the model.
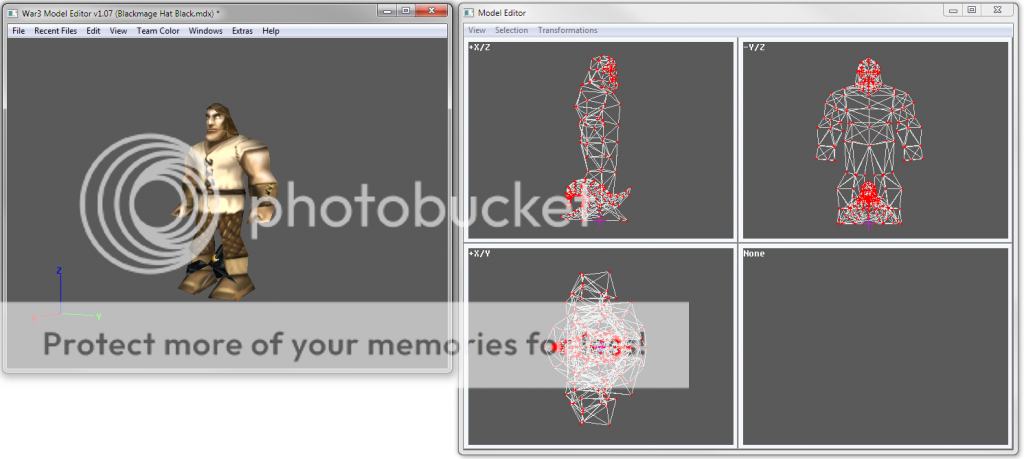
With this window open click transformations on the top left of the model editor window and select Translation. Enter the fields into the new window and then be sure to add a – in front of the fields that don’t have one and remove the – from any fields that does have it. This is so we reverse the translation the attachment point has from the pivot point of the model hence moving the model to were the attachment point is now directly on the pivot point.
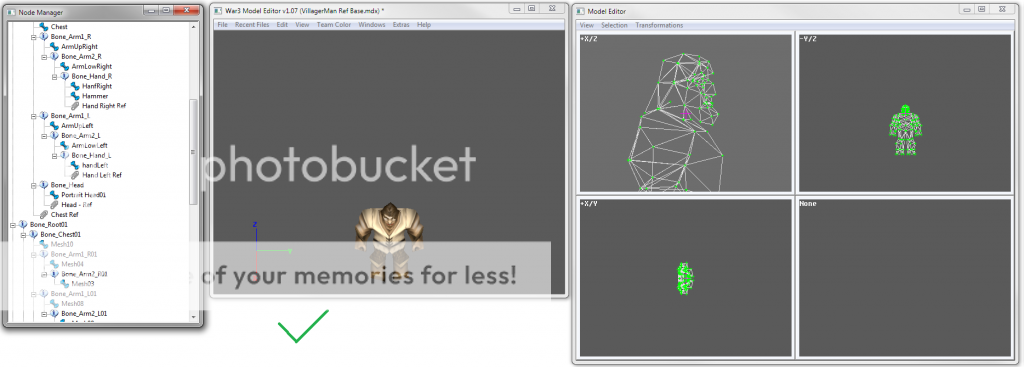
Step 4: Hit apply and close the Edit Node window. You are now ready to save and use your model to make attachments around!!!
I hope people will find both the models and the tutorial helpful. : )
First let me explain the point of these models.
These models (which I am calling attachment Ref Models for now) are simple models that have been moved to make one of its attachment points move to the pivot point of the whole model.
This allows you to both size a model around the attachment ref model’s geoset and at the same time correctly place it EXACTLY how you want it to be in game on the model.
You will not have to continually upload your attachment to see if it sits right anymore on the model, which can save you time and will allow you more accuracy in your placement of the attachment.
Now I can easily share how to make one yourself for any models you want to make attachments for!
(all you will need is Magos War3 Model Editor and a little bit of basic knowledge about it)
http://www.hiveworkshop.com/forums/tools-560/war3-model-editor-62876/
Now, start by opening up the model you wish to make an attachment ref dummy model of.
(this step is not required at all): if you like you can delete any excess geosets on the model that might be annoying and take up space such as a corpse. For example I have removed the corpse and mining pick from the villager models I have made.
Stap 1: select the entire model in the model editor window
Step 2: Open the node manager and find the attachment point you would like to make an attachment for (it will be called something like Name – Ref). Right click on it and hit edit node to open a new window (edit and edit node are not the same).
Step 3: In the new window will be some fields as well as some strings of numbers with X: Y: and Z: next to them. These are the attachment point’s translation from the pivot point of the model.
With this window open click transformations on the top left of the model editor window and select Translation. Enter the fields into the new window and then be sure to add a – in front of the fields that don’t have one and remove the – from any fields that does have it. This is so we reverse the translation the attachment point has from the pivot point of the model hence moving the model to were the attachment point is now directly on the pivot point.
Step 4: Hit apply and close the Edit Node window. You are now ready to save and use your model to make attachments around!!!
I hope people will find both the models and the tutorial helpful. : )
Attachments
-
VillagerMan Chest Ref.mdx163.5 KB · Views: 285
-
VillagerMan Foot Left Ref.mdx163.5 KB · Views: 248
-
VillagerMan Foot Right Ref.mdx163.5 KB · Views: 258
-
VillagerMan Hand Right Ref.mdx163.5 KB · Views: 244
-
VillagerMan Hand Left Ref.mdx163.5 KB · Views: 251
-
VillagerMan Head Ref.mdx163.5 KB · Views: 266
Last edited:


")