• 🏆 Texturing Contest #33 is OPEN! Contestants must re-texture a SD unit model found in-game (Warcraft 3 Classic), recreating the unit into a peaceful NPC version. 🔗Click here to enter!
  • It's time for the first HD Modeling Contest of 2024. Join the theme discussion for Hive's HD Modeling Contest #6! Click here to post your idea!

ICONS by Crazyrussian

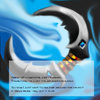
I got lots of requests from people to show them how I make my icons, so here, I took lots of time to make this just for you guys, hope this is useful and instructional.

I use photoshop and a wacom tablet. However I did a tutorial using a mouse to show couple tricks.

Of course you can paint icons by hand, scan them in and make icons that was, but it takes too long, working with mouse is long but it works, working with a wacom tablet is 5 seconds.

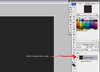
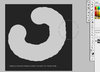
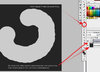
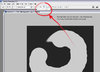
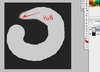
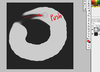
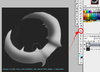
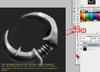
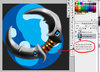
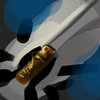
first Example is how to make an icon Using a mouse.
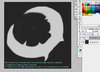
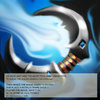
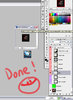
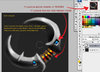
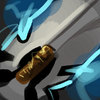
The second example is how I paint an icon with tablet.


UPDATE - (Jan 2012)
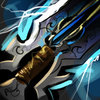
New video made, using wacom tablet, photoshop, and wc3 image converter.
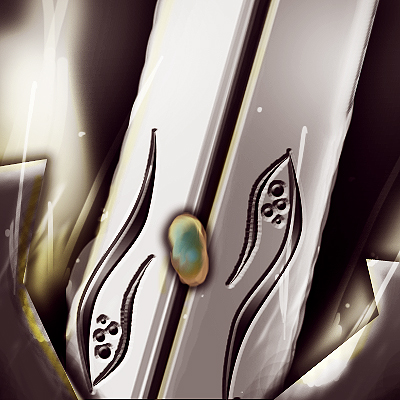
New tutorial video for http://www.hiveworkshop.com/forums/icons-541/btncrflamez-209982/


Uploaded with ImageShack.us
http://www.youtube.com/watch?v=4RfpvK8OCa4
 
Last edited:
Using a mouse

Using a mouse.

Just remember this, paint image bigger, downsize it later, and it will looks very good.
 

Attachments

  • BTN_CR_TEST_ICON copy.jpg
    BTN_CR_TEST_ICON copy.jpg
    15.5 KB · Views: 8,235
  • 1.jpg
    1.jpg
    112.9 KB · Views: 2,670
  • 2.jpg
    2.jpg
    88 KB · Views: 2,996
  • 3.jpg
    3.jpg
    71 KB · Views: 2,962
  • 4.jpg
    4.jpg
    91.4 KB · Views: 2,892
  • 5.jpg
    5.jpg
    82.8 KB · Views: 2,972
You also need some training with value and light, and drawing will be easier.
 

Attachments

  • 7.jpg
    7.jpg
    70.3 KB · Views: 1,900
  • 8.jpg
    8.jpg
    68.5 KB · Views: 1,982
  • 9.jpg
    9.jpg
    96.7 KB · Views: 2,126
  • 10.jpg
    10.jpg
    91.9 KB · Views: 2,180
  • 11.jpg
    11.jpg
    110.4 KB · Views: 2,143
  • 16.jpg
    16.jpg
    74.5 KB · Views: 2,302
  • 17.jpg
    17.jpg
    136.1 KB · Views: 2,235
  • 15.jpg
    15.jpg
    79.3 KB · Views: 2,009
  • 13.jpg
    13.jpg
    120.8 KB · Views: 2,096
  • 12.jpg
    12.jpg
    126.1 KB · Views: 2,111
Icon using tablet

Now I'm using the tablet to paint.
 

Attachments

  • 1.jpg
    1.jpg
    27 KB · Views: 1,375
  • 2.jpg
    2.jpg
    35.8 KB · Views: 1,368
  • 3.jpg
    3.jpg
    42.9 KB · Views: 1,328
  • 4.jpg
    4.jpg
    49.2 KB · Views: 1,412
  • 5.jpg
    5.jpg
    51.5 KB · Views: 1,369
  • 6.jpg
    6.jpg
    65.6 KB · Views: 1,365
  • 7.jpg
    7.jpg
    84.1 KB · Views: 1,247
  • 8.jpg
    8.jpg
    98.3 KB · Views: 1,263
  • 9.jpg
    9.jpg
    104.1 KB · Views: 1,361
  • 10.jpg
    10.jpg
    110.8 KB · Views: 2,002
Last edited by a moderator:
The results are nice but the lack of detailed explaination makes this hard. Also, it would be nice if you could merge these into one post and write the steps in your post versus on the image. To put the attached images in the location you want use the [attach][/attach] tags. In between the tags enter the ID of the image. Right click on the image and press properties. Look at the URL. The ID of your first image in the second post is "34841". Everything after the "/" and before the "d" is the ID of the image.
 
Jack_Sparrow93 - my friend, those tutorials are already done, search for them. I dont have free time to do that.

Creating and Importing Custom Icons


I'll give advice for something specific no problem, but I just dont have time to make a whole tutorial, I fell back by making this one already.

Thanks! I forgot that side, now when I use hive more!
 
Level 30
Joined
Sep 2, 2007
Messages
3,723
Hahaha now that he finally gave out his secret il be the most wonderfull Icon Creator EVER! great that you show how you work ... however you work with dodge and burn ... wich is totaly rejected by the professionals. The secret is just to start big and resize ...
Great i could have comen up with that

maybe you could merge those posts into one big tutorial.

anyway +rep

I vote for instant approving :p
 
Last edited:
The results are nice but the lack of detailed explaination makes this hard. Also, it would be nice if you could merge these into one post and write the steps in your post versus on the image. To put the attached images in the location you want use the [attach][/attach] tags. In between the tags enter the ID of the image. Right click on the image and press properties. Look at the URL. The ID of your first image in the second post is "34841". Everything after the "/" and before the "d" is the ID of the image.

Just say "thank for your precious time"
Because for people who are using the programs it is detailed enough.

- "... however you work with dodge and burn ... wich is totaly rejected by the professionals."

What professionals? I'll tell you that a professional use anything when the professional is using a MOUSE to paint. So you can say that if a person doesn't have the wacom tablet, then that person is not professional.
 
Ugh, this is hard, my drawings end up too messy, you can barely make out what it is. (Got a wacom bamboo, might be overusing it :p)
How many tries it take before you settle with a "drawing"?

Usually I don't do the drawing, I just start painting the light and the shadows, then refine the drawing.

If Drawing...
Just One. If the drawing doesn't work out then I start over a new image.

But for 10 years art is my profession, and 12 years of education. So you can start with the drawing or as many drawings as you want to make everything EASIER for your self.
 
I wont approve this if it stays how it is. Right now it's really unclear as to what you're supposed to do and what exactly you're trying to accomplish. Also, you aren't really teaching how to make icons, you're teaching them how to draw metal weaponry in photoshop.

Tell us how to use tools within the program properly, not how to make your image look like a blade and whatnot, the majority of the tutorial is like this.
 
Could you tell me at which image size do you start creating your images? I mean what's the pixel size of your images before you reduce it to whatever it is for wc3 icons.

btw

How am I doing so far? I'm at ... let's say 5-6th step at the moment.

I'm taking 512*512px and it works great..^^
 
Level 27
Joined
Feb 22, 2006
Messages
3,052
I make icons 500x500 :p
according to his video, CR makes icons 6x6 inches

oh and serbianbeast,
i really like the handle on that sword. the rest needs a tad more detail.
500 is a weird number. Use 64, 128, 256, or 512, since those can evenly reduce to 64, and PS wont have to interpolate as much messy blurring due to reduced pixels.
--donut3.5--
 
I used 512 for the sword you see since it's related to standard computer numbers...

here's the progress:


Hello, sorry I wasn't here to answer on time.

All thank you for for replies, thanks you moderator for approving, I am honored to be in aid.


Serbianbeast - Another thing, Now you know how to use photoshop tools, but you need to know the visual rules in order to make fast and right decisions.

Here are couple things to keep in mind.

1 Because the image is so small, try to make more contrast, bright colors, and shiny glows. And most of ,Magic the gathering cards, for example, are very colorful just because the image is so small.

2 Also, If the object is dark, then make the background light! And if the object is light, then make the background dark! It is simple concept that can be proven by placing an object on the table and moving the light source around to FRONT, BACK, SIDE of the object, and record the relationships between the object and the background at 3 different scenarios.

3 And when glow is added, make sure it fades in or out slowly. Because it the glow stops sharply, then it is not a glow anymore.


Looks good. Keep working. Everybody else, Good Luck.
 
Level 8
Joined
Mar 21, 2008
Messages
239
Hey, sorry for posting here on this old thread, but i really need help.

I want to watch the video from CR but the dumb FileFactory says :

"Sorry, there are currently no free download slots available on this server.

Please try again later, or you can upgrade to FileFactory Premium below for instant access."


If anyone could upload this video on rapidshare or somewhere else i would be so happy!

Thanks in advance.
 
Top